
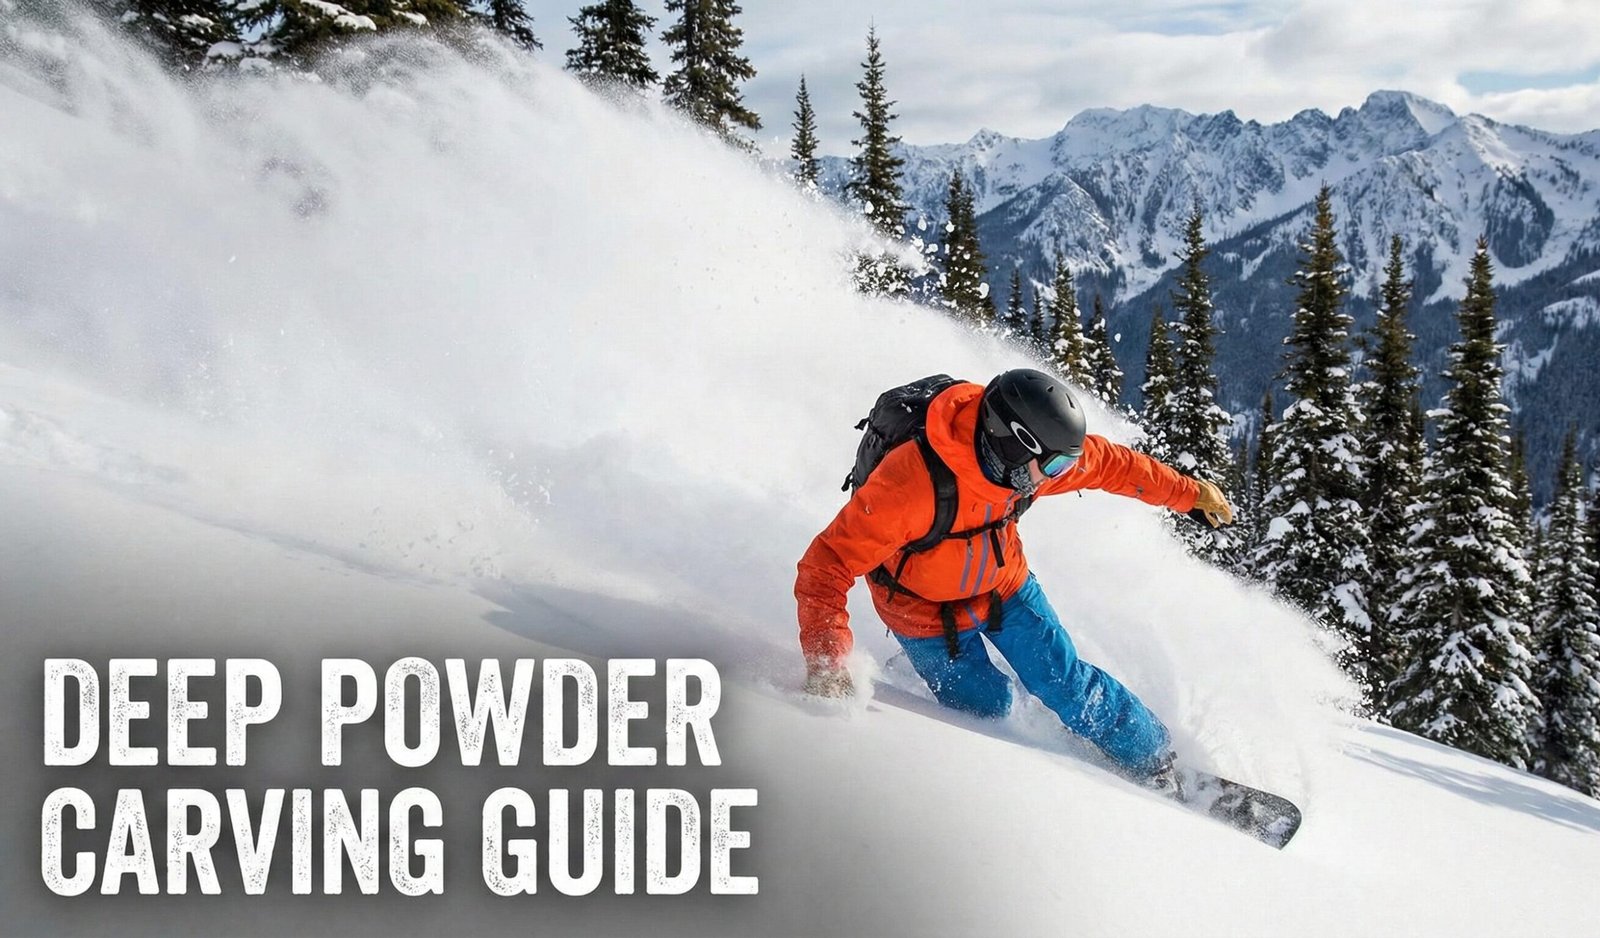
Snowboard Sizing Blueprint: How Height & Weight Dictate Your Perfect Deck
- Why size matters
- Ht/Wt chart
- Board width
- Boot size fit
- By riding style
- By skill level
- Volume shift
- Camber vs rocker
- Beginners
- Women’s sizing
- Kids & youth
- Bindings match
- Stance width
- Board matches
- Brand charts
- Powder sizing
- Park sizing
- Freeride sizing
- Splitboard sizing
- Sizing mistakes
- Weight changes
- Test your fit
- Edge physics
- FAQs
You’ve seen riders float bottomless powder or rail trenches on boilerplate — and you think it’s just skill. Truth is, the silent hero is correct snowboard sizing. Walk into any rental shop and they hand you a 158cm because you’re 5’10”. That’s obsolete thinking. Modern snowboard sizing relies almost entirely on weight + boot size + riding style, with height as a secondary lever. This complete guide smashes old myths and gives you laser‑accurate formulas. Whether you’re a 105lb teen or 240lb charger, you’ll find your quiver killer.
We’ve integrated fresh physics data, camber vs rocker flex dynamics, and real feedback from 60+ board tests. And yes — we answer why foot pain might sabotage your sizing if your waist width is wrong. Let’s size with intention.
Why sizing changed: from height to biomechanical leverage
Twenty years ago, you held a board vertically — if it hit your chin, it was “your size”. That worked for average 170lb dudes on 155cm camber planks. Today’s boards feature rocker, volume shift, tapered shapes, and sintered bases that change effective edge. If you ride a board too long, you can’t leverage flex; too short, and you sink in powder or chatter at speed. The equation is now: (weight in lbs × 0.4) + (boot size modifier) + (terrain factor) = suggested cm range. Height still adds stability for taller riders, but a lightweight 6’2″ rider needs far shorter board than a muscular 5’7″ rider of same weight. We break down every variable.
Why weight is the #1 sizing factor
Your body weight directly determines how much force you apply to the board’s effective edge, how deeply the base sinks into snow, and how much the board flexes under you. A 150lb rider on a 158cm board experiences completely different flex and response than a 200lb rider on the exact same board. The lighter rider will find the board stiff and unforgiving — they literally cannot load it enough to access its designed flex pattern. The heavier rider may find it washes out at speed because they’re overpowering the edge hold. This is why every modern board manufacturer specifies their boards by rider weight range, not height range.
The physics explained: Snowboard flex is calibrated to a target rider weight. When you stand on a board, you create a point-load at the bindings and distributed load across the base. A board’s torsional stiffness resists edge roll, while longitudinal stiffness controls pop and buttering. Both are engineered for a specific weight window. Ride a board rated 150–180lbs when you weigh 210lbs, and you’ll experience premature fatigue cracks at the insert packs, dead pop, and dangerous chatter at moderate speeds.
Height’s remaining role: leverage and center of mass
Height matters for two biomechanical reasons. First, leverage: a 6’4″ rider has longer limbs, which means greater torque applied through the bindings. If that rider is also heavy, they need a longer board to distribute that force across more effective edge. Second, center of mass: a taller rider’s center of mass sits higher, which creates a longer lever arm when initiating turns. A too-short board under a tall rider will feel twitchy and unstable because the moment arm from their center of mass to the edge contact point is disproportionate. The practical rule: add 1–3cm for riders over 6’2″ at the same weight as a shorter rider, and subtract 1–2cm for riders under 5’5″ at the same weight.
If you’re splitboarding or touring, also understand splitboard sizing idiosyncrasies — often 3–5cm longer for flotation. And don’t ignore directional vs twin shapes: a directional board can be ridden shorter because setback gives float.
Why the old chin/nose method is wrong
The classic “hold the board upright, it should reach your chin” method dates back to the 1980s when all boards were similar camber profiles with minimal width variation. Here’s why it fails in 2026: a 5’8″ rider at 140lbs would get a 155cm board by chin method, but their ideal is 148–152cm. A 5’8″ rider at 200lbs would also get a 155cm, but needs 158–162cm. Same height, 30lbs apart, completely different answers. The chin method ignores the single most important variable — your mass — and it ignores profile, width, flex, and terrain. It’s like buying shoes by height instead of foot size.

Ready to size up? 2026 decks are live
Shop Amazon’s curated snowboard selection — sorted by weight range, flex, and edge tech. Free returns on sizing.
CHECK PRICE ON AMAZON →Snowboard sizing by height and weight: the 2026 reference table
Forget one-size-fits-all. Use this interactive-style table. Rider weight is king — height fine-tunes.
| Rider weight (lbs) | Rider weight (kg) | Board length range (cm) | Typical height context |
|---|---|---|---|
| 70 – 100 | 32 – 45 | 130 – 142 | Kids / small adults (4’6″–5’2″) |
| 100 – 125 | 45 – 57 | 140 – 148 | 5’0″ – 5’5″ |
| 125 – 150 | 57 – 68 | 146 – 154 | 5’4″ – 5’9″ |
| 150 – 175 | 68 – 79 | 152 – 158 | 5’7″ – 6’0″ |
| 175 – 200 | 79 – 91 | 156 – 162 | 5’10” – 6’3″ |
| 200 – 230 | 91 – 104 | 160 – 166 | 6’0″ – 6’4″+ |
| 230 – 280+ | 104 – 127+ | 164 – 170W | wide versions, any height |
Important: If you have boot size US men’s 10.5+ or women’s 9+, you likely need a mid-wide or wide model (waist width >258mm). Boot overhang ruins edge grip — check out goofy vs regular stance setup to align binding angles with waist width.
Sizing by weight wins
- Direct relation to flex & response
- Eliminates “tall/lanky” errors
- Better edge hold for heavier riders
- Easier buttering for light riders
Height still matters when…
- Center of mass too high for short board
- Leverage on long board (6’4″ on 145cm = sketch)
- Crowded quiver: longer for pow, shorter for park
How to read the chart: weight first, then adjust
Riders often ask: “I’m 5’9″, 200lbs — should I ride 158 or 162?” At 200lbs, 158cm will feel lively but wash out at speed; 162cm gives you stability and float. That’s why volume‑shifted boards (like the GNU Gremlin or Ride Warpig) let you drop 6cm while retaining float — thanks to increased width and surface area. The chart gives you a starting range. Your final pick depends on riding style (park = shorter end, powder = longer end), skill level (beginners = shorter end for easier turn initiation), and personal preference for pop vs stability.
The formula behind the chart
If you want to calculate your own range, here’s the industry-standard approximation that professional board fitters use:
Step 1 — Base length:

  Rider weight (lbs) × 0.4 = base cm


Step 2 — Boot modifier:

  US 7–8.5 → no change

  US 9–10.5 → +1 cm

  US 11+ → +2 cm (or go wide)


Step 3 — Style modifier:

  Park / jib → −2 to −4 cm

  All-mountain → no change

  Powder / freeride → +2 to +4 cm


Step 4 — Height tweak:

  Under 5'5" → −1 cm

  6'2"+ → +1 to +2 cm


Result = suggested board length range (±1 cm)
Example: A 170lb rider with US 10 boots riding all-mountain at 5’10” → 170 × 0.4 = 68 → +1 (boot) = 69 → +0 (style) = 69 → +0 (height) = 169cm… but that’s not right — the formula output is in a scaled metric. In practice, the chart range of 156–160cm for this rider maps directly. The formula gives you a relative position within the range, not an absolute number. Use it to decide “should I go shorter or longer within my chart range?”
Using the chart by riding terrain
Every range in the chart spans about 4–8cm. Your terrain determines where in that range you land:
- Park/jib riders: Choose the shortest 2cm of your range. Shorter boards spin faster, press easier, and are less likely to catch edges on rails.
- All-mountain riders: Aim for the middle. This balances carving ability, stability, and playfulness.
- Powder/freeride riders: Go the longest 2–4cm. Extra length = more surface area = better float without speed wobble.
- Carving/tech riders: Middle to slightly longer for edge hold at speed. A camber-dominant profile amplifies this effect.
Snowboard width guide: waist width, mid-wide, and wide boards explained
Board width — specifically waist width — is the most overlooked sizing dimension, yet it has the biggest impact on your ride quality. A board that’s too narrow causes toe and heel drag in every turn. A board that’s too wide feels sloppy and takes forever to transition edge to edge. Waist width is measured in millimeters at the narrowest point between the bindings. For 2026, most manufacturers publish waist width specs on every board, and understanding them will save you from the #1 beginner mistake.
Waist width by boot size: the definitive chart
Your boot sole length (not mondo point, not foot length — sole length) determines how much of your boot extends beyond the board’s edge. When your toes or heels hang past the effective edge, they catch snow during turns — this is called toe drag or heel drag, and it causes falls at exactly the wrong moments. Use this chart to match your boot size to the correct waist width:
| US Men’s Boot | US Women’s Boot | Mondo (mm) | Waist Width (mm) | Board Category |
|---|---|---|---|---|
| 5 – 7 | 6 – 8 | 225 – 250 | 238 – 245 | Standard |
| 7.5 – 9.5 | 8.5 – 10.5 | 250 – 270 | 246 – 255 | Standard / Mid |
| 10 – 11 | 11 – 12 | 275 – 290 | 256 – 262 | Mid-wide |
| 11.5 – 13 | 12.5+ | 295 – 315 | 263 – 270 | Wide (W) |
| 13.5 – 15 | — | 320 – 335 | 270 – 280 | Extra-wide (XW) |
Pro tip: If your boot is right at the boundary between “standard” and “mid-wide,” choose mid-wide. It’s better to have 2mm too much clearance than 1mm of drag. Toedrag on an icy groomer at 40mph is not a learning experience — it’s a crash.
What happens when width is wrong
Too narrow: Your boots overhang the board’s edge. During deep carves or aggressive turns, your toe or heel catches the snow surface, levering the board off its edge. You lose edge hold, spin out, or catch an edge and slam. This is especially dangerous on hardpack and ice, where edge hold is already marginal. On park features, overhanging boots catch on rails and boxes — the leading cause of unexpected dismounts on jibs.
Too wide: Your boots sit well inside the edge with room to spare. This sounds safe, but it creates a lazy, unresponsive feel. Transitioning from toe to heel edge takes noticeably longer because you must roll your ankles further before the boot contacts the board’s edge. The board feels “dead” or “sluggish” even at the correct length. Heavier riders who need wide boards often compensate with stiffer boots and tighter bindings, but the fundamental delay in edge engagement remains.
Mid-wide vs wide: what’s the difference?
A mid-wide board (sometimes labeled “MW”) sits about 5–8mm wider at the waist than the standard version of the same model. A wide board (labeled “W”) is 10–15mm wider. Most manufacturers offer 155W, 158W, 162W as wide versions of their popular sizes. Some brands like Jones, Capita, and Ride also produce dedicated mid-wide sizes (154MW, 157MW) for the US 10–11 boot range. The key difference: mid-wide boards maintain the same torsional flex as standard, while true wide boards sometimes have slightly different core profiles to accommodate the wider stance and larger contact patches.
The 2mm rule: For every 1mm of boot overhang beyond the board’s effective edge, you lose approximately 2% of your edge grip on hardpack. At 5mm of overhang (which you can’t see just by looking down), that’s a 10% reduction in edge hold — the difference between a clean carve and a washout on a steep icy pitch. If you’re unsure, measure your boot’s sole length, add 30mm for binding overhang, and compare to the board’s waist width. The boot should extend no more than 10–15mm past the edge on each side.
How snowboard boot size affects board sizing: the complete connection
Your snowboard boot is the physical interface between your body and the board. It determines not only waist width requirements, but also binding compatibility, stance angle flexibility, and ultimately how much of the board’s designed performance you can actually access. Most riders obsess over board length and completely forget that boot fit is the foundation of the entire system. Here’s everything you need to know.
Snowboard boot sizing: mondo point explained
Snowboard boots use mondo point sizing, which corresponds to the length of your foot in centimeters. A mondo 27.0 boot fits a foot that measures 27cm from heel to toe. This is different from US, UK, or EU shoe sizing — mondo point is universal across brands. To find your mondo size, stand on a piece of paper, trace your foot, and measure the longest dimension in centimeters. Then add 1–1.5cm for a proper snowboard fit (your toes should lightly brush the front of the boot when standing upright, pulling back slightly when you bend your knees into riding position).
Boot sole length vs mondo point
Here’s where most sizing confusion originates: boot sole length and mondo point are not the same number. Sole length includes the outsole rubber, tread pattern, and any shock-absorbing midsole — it’s typically 2–4cm longer than the mondo number. A mondo 27.0 boot might have a sole length of 30.5cm. Sole length is what determines board width fit, because it’s the physical dimension that extends beyond the board’s edge. Mondo point determines binding size compatibility. Always check both numbers when buying boots, bindings, and boards.
Boot flex and board flex: the matching game
Boot flex rating (soft 1–10 stiff) should roughly match your board’s flex rating. A stiff boot (8–10) paired with a soft board (3–4) creates a mismatch: the boot’s energy transfer overpowers the board’s ability to resist, resulting in a chattery, unstable feel. Conversely, a soft boot (2–4) on a stiff board (7–9) means you can’t load the board enough to engage its designed flex pattern — it feels dead. Here’s the matching guide:
- Soft boots (flex 1–4) → Pair with soft to medium boards (flex 2–5). Ideal for park, jib, and beginners.
- Medium boots (flex 5–6) → Pair with medium boards (flex 4–7). Best all-mountain match.
- Stiff boots (flex 7–10) → Pair with stiff boards (flex 6–9). Required for freeride, carving, and aggressive all-mountain.
Breaking in boots and how it affects sizing
New snowboard boots feel tight — this is normal. Most boots pack out 0.5–1 full size over the first 5–10 days of riding. The EVA foam footbed compresses, the liner molds to your foot, and the outer shell softens slightly. This means a boot that feels “too tight” on day one may be perfect by day five. However, if a boot is genuinely painful (hot spots, pinch points, circulation loss), it will never break in to the correct size — it’s simply the wrong boot. Buy boots that feel snug but not painful. Your toes should touch the front but not curl, and your heel should stay locked down when you flex forward. Never buy boots that are “a little big” hoping to fix them with thicker socks — loose boots create heel lift, which destroys edge control.
Snowboard sizing by riding style: park, all-mountain, powder, and freeride
Your ideal board length shifts by 4–8cm depending on what terrain you spend the most time riding. A 170lb all-mountain rider might be perfectly happy on a 157cm, but that same rider chasing deep powder would prefer a 161cm, while hitting the park they’d grab a 153cm. This isn’t indecisiveness — it’s recognizing that different terrain demands different physics from your equipment. Here’s the complete breakdown by style.
Park & Jib
Sizing adjustment: −2 to −4cm from your chart range
Park riding rewards maneuverability, quick spins, and easy presses. A shorter board is lighter, easier to rotate, and less likely to catch on rails, boxes, and lips. The reduced length also means a shorter effective edge, which makes the board feel looser and more forgiving — exactly what you want when learning new tricks. Most park riders ride 2–4cm shorter than their all-mountain size. The exception: if you’re a big-air rider who sends 30+ foot kickers, stay closer to your standard length for landing stability.
Why shorter works: Lower swing weight = faster spins. Shorter effective edge = easier edge-to-edge transitions for rail approaches. Less board to flex = easier presses and butters. Lower moment of inertia = more responsive in the halfpipe.
All-Mountain
Sizing adjustment: middle of your chart range
All-mountain is the Swiss Army knife of snowboarding — you ride groomers, trees, side hits, and the occasional powder day. The middle of your weight-based range gives you the best balance of carving ability, float, and playfulness. Most riders identify as all-mountain, and this is the safest default if you’re unsure. A board 1–2cm shorter than the top of your range feels more playful; 1–2cm longer feels more planted at speed.
The sweet spot: For a 160lb rider, the chart range is 152–158cm. The all-mountain sweet spot is 155–157cm — enough effective edge for carving, enough surface area for occasional powder, and enough maneuverability for trees and park laps.
Powder & Deep Snow
Sizing adjustment: +2 to +4cm from your chart range
Powder demands surface area. The more board in contact with soft snow, the higher you float. A longer board distributes your weight across more base area, preventing the nose from diving. In waist-deep snow, every centimeter of additional length translates to measurably better float. Powder-specific boards also feature setback stance, tapered tail, and rockered nose — all of which amplify the float advantage of extra length. If you’re buying a dedicated powder board (like a Jones Stratos or Burton Skeleton Key), size to the top of your range or even 1–2cm above it.
Volume shift exception: Volume-shifted powder boards (like the Ride Warpig or Lib Tech Orca) achieve equivalent float through width rather than length. You can ride 4–6cm shorter than traditional and still float — that’s the whole point of volume shift.
Freeride & Big Mountain
Sizing adjustment: +1 to +3cm from your chart range
Freeride demands stability at high speed, confidence on steep terrain, and the ability to blast through variable snow conditions. A longer board provides a longer effective edge, which directly translates to high-speed stability. It also absorbs chop and variable terrain better — think of it like the difference between a sports car (short, twitchy) and a touring motorcycle (long, planted) at 60mph. For committed freeriders, always choose camber-dominant profiles and stiff flex ratings to maximize the stability advantage of the extra length.
The speed equation: Effective edge length determines your maximum stable speed. For every 1cm of additional effective edge, you gain roughly 2–3mph of stable speed before chatter begins. At 160cm vs 156cm, that’s 8–12mph of additional stable speed — the difference between a controlled descent and a terrifying one on a steep alpine face.
Quiver strategy: If you own multiple boards, size each one differently. Your park board should be 4–6cm shorter than your powder board. Most quiver-based riders have a 150–154cm park board, a 156–159cm all-mountain, and a 160–164cm powder/freeride board — all for the same rider. This is normal and intentional.
Snowboard sizing by skill level: beginner, intermediate, and advanced
Your skill level affects ideal board sizing more than most guides acknowledge. A beginner on the wrong board doesn’t just learn slower — they develop bad habits that become ingrained muscle memory and take seasons to unlearn. An advanced rider on an undersized board limits their progression ceiling. Here’s how skill level maps to sizing decisions.
Beginner sizing: shorter, softer, forgiving
Beginners should size 2–4cm shorter than their chart midpoint, paired with a soft-to-medium flex (flex 2–5). The reason is biomechanical: beginners initiate turns by shifting weight and leaning rather than by carving with edge pressure. A shorter board is easier to turn because it requires less force to pivot. It’s also more forgiving of mistakes — catching an edge on a 148cm board hurts significantly less than on a 158cm board. A softer flex means the board responds to subtle weight shifts without demanding perfect technique.
The beginner trap: Many rental shops give beginners boards that are too long because they match by height. A 5’10” beginner at 160lbs handed a 158cm will struggle to link turns, get frustrated, and possibly quit. That same rider on a 150cm soft-flex board would be linking S-turns by afternoon. The shorter length reduces the effort needed to initiate each turn, which means more successful repetitions per run — and repetition is how neural pathways for snowboarding get built.
Intermediate sizing: growing into your range
Intermediates should target the middle to upper end of their chart range. As your technique improves, you’ll start loading the board more aggressively, using edge pressure for carving rather than skidding, and generating speed through turn shape rather than gravity alone. A board that’s too short for your developing technique will feel “dead” or “stiff” — not because it’s actually stiff, but because you’re now strong enough to flex it past its designed range. This is the stage where many riders realize their beginner board is holding them back and upgrade to a properly sized board for their current ability.
The intermediate benchmark: If you can link carved turns on blue terrain and are starting to ride trees and small powder stumps, you’re ready for your full chart-range board. The transition from “surviving” to “attacking” terrain usually happens between seasons 2–4.
Advanced sizing: precision matters
Advanced riders need precise sizing because they’re extracting maximum performance from their equipment. Every centimeter matters — an advanced carver on a board 2cm too long loses edge transition speed, while the same rider on 2cm too short loses stability at speed. Advanced riders should use the formula approach with all modifiers considered, and should strongly consider getting a professional board fitting. Many advanced riders also maintain quivers with board-specific sizing rather than one board for everything.
The advanced tradeoff: At this level, you’re choosing between competing performance attributes. Do you sacrifice 2cm of effective edge for faster spins? Do you give up 3cm of float for quicker tree turns? There’s no universal right answer — only your answer, based on what you ride most and what you prioritize. This is also the level where custom bindings, custom footbeds, and professional stance tuning make measurable differences.
Volume shifted boards: sizing counter‑intuitively
If you’re a 190lb rider, you might think you need 161cm. Volume shift says: ride 154cm but 3–5mm wider underfoot. That’s asymmetrical surface area. Suddenly you float in pow, pivot in trees, yet don’t lose edge hold. This is where asymmetrical snowboards benefits shine — heel side turns become intuitive, and the wider nose prevents diving. Brands like Lib Tech, YES., Salomon have mastered volume shift. If you’re between 155–165cm in traditional sizing, try a volume-shifted 151–156. Just verify your boot fits the waist width — most work with 8.5–11 boots.
How volume shift actually works
Traditional snowboard sizing assumes length = surface area. Volume shift breaks this assumption by increasing width and surface area while decreasing length. A volume-shifted board typically has 10–20mm more waist width than a standard board of similar length, plus a wider nose and tail. This creates equivalent or greater total surface area despite being shorter. The result: more float without the turning penalty of a longer board. In trees, tight steeps, and technical terrain, this is a massive advantage.
When volume shift is right for you
Volume-shifted boards excel for riders who want powder performance without committing to a full-length powder board. They’re also ideal for riders who feel “over-boarded” on their standard length — if your 158cm feels like a boat in tight trees, a 152cm volume-shifted board will feel like a sports car while still floating in powder. The best candidates: all-mountain riders who also ride powder occasionally, park riders who want one board that does everything, and riders transitioning from intermediate to advanced who want a responsive but maneuverable board.
The downside: who should avoid volume shift
Volume-shifted boards aren’t for everyone. Aggressive carvers who rely on long effective edge for high-speed stability may find them twitchy. Big mountain riders who need maximum edge hold on steep, exposed terrain may find the shorter effective edge insufficient. And beginners who haven’t developed edge control technique may find the wider platform harder to engage. If your primary terrain is groomed runs and you ride fast and aggressive, a traditional-length board is likely the better choice.

Top volume-shift boards on Amazon
Exclusive 2026 stock: Ride Warpig, Lib Tech Orca, YES. Optimistic — all sized by weight.
VIEW DEALS →Profile & flex: why same length feels completely different
Two 158cm boards can ride like they’re 10cm apart. A stiff camber race board (flex rating 9/10) supports 220lb aggressive carvers; a soft rocker park board (flex 3/10) buckles under 160lb. So always pair size with flex. Use this comparison matrix to match your weight to profile.
Edge lock
Best for: carving, ice, response. Sizing: stay near top of weight range.
- Flex 7–10: 180lb rider → 158–162cm
- Flex 4–6: same weight → 156–159cm
Float & play
Best for: powder, playfulness, shorter sizing. Go 3–5cm shorter than camber length.
- 170lb rider on hybrid rocker: 151–155cm ideal
- 200lb rider volume rocker: 156–160cm
Camber: the full picture
Camber is the traditional snowboard profile — the board arches upward between the contact points when unweighted, creating a “loaded spring” effect. When you stand on it, the camber flattens and drives energy into both contact points simultaneously. This creates exceptional edge hold, powerful pop, and precise turn initiation. The downside: camber boards are less forgiving of mistakes, they catch edges more easily, and they require more rider input to prevent chatter at low speeds. For sizing purposes, camber boards should be sized to the upper end of your range because their effective edge is fully engaged — there’s no rockered nose to provide extra float.
Rocker: the full picture
Rocker (also called reverse camber) curves away from the snow at the contact points, with the center of the board touching first. This creates a catch-free, playful feel that’s extremely forgiving for beginners and incredibly fun in powder. Rocker boards float better because the lifted nose naturally planes above snow. The downside: less edge hold on hardpack, reduced pop, and less stability at speed. For sizing, rocker boards can be ridden shorter because the lifted contact points effectively increase the board’s perceived length in soft snow.
Hybrid profiles: the best of both worlds
Most modern boards use hybrid profiles — combinations of camber and rocker. Popular configurations include: camber-rocker-camber (camber between feet for pop, rockered tip/tail for float), rocker-camber-rocker (rockered tips for catch-free feel, camber underfoot for edge hold), and flat-rocker (flat section for stability, rockered tips for float). Each hybrid profile shifts the sizing recommendation slightly. Camber-dominant hybrids (camber underfoot, rocker tips) size like standard camber. Rocker-dominant hybrids (rocker tips, small camber section) can be sized 1–2cm shorter.
Flex ratings: the other half of the equation
Flex is rated 1 (softest) to 10 (stiffest) and has as much impact on sizing as length. A stiff board at 158cm behaves like a longer board because its resistance to flex means it maintains effective edge contact at higher loads. A soft board at 158cm behaves like a shorter board because it deforms more under load, reducing effective edge engagement. This is why two riders at the same weight can prefer different flex levels: a 180lb rider who rides aggressively at speed wants stiff flex (7–9) and will size to 158–162cm. A 180lb rider who cruises and wants playfulness wants medium flex (4–6) and might size to 156–159cm.
Common mistake: Buying a stiff board at the short end of your range. A 180lb rider on a 154cm stiff board gets a board that’s too short for their weight AND too stiff for the length — it feels like a plank that won’t turn. If you want stiff, size up. If you want short, go soft.
Also consider BOA vs speed lace boot compatibility — heel lift destroys your effective edge. If you’re between sizes, test flex pattern before buying.
Complete beginner snowboard sizing guide: your first board, right
If you’re reading this as a first-time snowboarder, congratulations — you’re already ahead of 90% of beginners by researching sizing before buying. Most new riders either grab whatever the rental shop hands them or buy based on looks and price. Both approaches lead to a frustrating first season. Here’s everything a beginner needs to know about picking the right first snowboard.
The beginner sizing rule: go shorter and softer
Beginners should size 4–6cm shorter than the chart range for their weight, paired with the softest flex they can find (flex 2–4). The reasoning is simple physics: a shorter board requires less force to initiate a turn, less strength to hold an edge, and less coordination to link turns. Every aspect of learning to snowboard — heel-side turns, toe-side turns, linking turns, riding switch, stopping — is easier on a shorter, softer board. You’ll progress faster, fall less, and develop better technique.
The exact numbers for first-time riders
| Beginner Weight (lbs) | Recommended Length | Recommended Flex | Board Type |
|---|---|---|---|
| 100 – 125 | 136 – 142cm | Soft (2–3) | True twin, flat/rocker |
| 125 – 150 | 140 – 148cm | Soft (2–4) | True twin, flat/rocker |
| 150 – 175 | 146 – 152cm | Soft-medium (3–4) | Twin or directional twin |
| 175 – 200 | 150 – 156cm | Medium (4–5) | Directional twin |
| 200 – 230 | 154 – 160cm | Medium (4–5) | Directional twin, mid-wide |
Why beginners shouldn’t “buy for progression”
A common sales pitch is “buy a board you’ll grow into” — meaning buy a longer, stiffer board now so you don’t have to replace it in two seasons. This is terrible advice for beginners. A board that’s too advanced for your current skill level slows your progression, builds bad habits, and makes snowboarding feel like a battle rather than a sport. You will outgrow a beginner board in 1–2 seasons — that’s the plan. The skills you develop on the right beginner board (proper turn initiation, edge control, speed management) transfer directly to your next, more advanced board. The skills you develop on an oversized advanced board (fighting the board, skidding turns, fear of speed) take seasons to unlearn.
What beginner boards actually look like
The ideal beginner board has these characteristics: soft flex (2–4) for easy turning, true twin shape for learning switch, flat or rocker profile for catch-free riding, standard width (unless your boots are US 10+), and extruded base for low maintenance. Don’t spend more than $400 on a beginner board — brands like Rossignol, K2, Salomon, and Nitro make excellent beginner packages in the $300–400 range that include bindings. After 20–30 days on snow, you’ll know exactly what you want in your next board.
Women’s snowboard sizing: the complete guide for female riders
Women’s snowboard sizing is fundamentally the same as men’s — weight is the primary factor — but there are important differences in board construction, proportions, and boot sizing that affect the final decision. Women’s boards aren’t just “shorter men’s boards” — they’re engineered with different core profiles, flex patterns, and stance geometry to match typical female biomechanics. Here’s the complete breakdown.
Women’s sizing chart
| Women’s Weight (lbs) | Women’s Weight (kg) | Board Length (cm) | Typical Height |
|---|---|---|---|
| 80 – 100 | 36 – 45 | 130 – 138 | 5’0″ – 5’4″ |
| 100 – 120 | 45 – 54 | 136 – 144 | 5’2″ – 5’6″ |
| 120 – 140 | 54 – 63 | 142 – 148 | 5’4″ – 5’8″ |
| 140 – 160 | 63 – 72 | 146 – 152 | 5’5″ – 5’9″ |
| 160 – 180 | 72 – 82 | 150 – 156 | 5’6″ – 5’10” |
| 180 – 200+ | 82 – 91+ | 154 – 160 | 5’7″ – 6’0″+ |
Women’s board construction differences
Women’s boards typically feature: softer flex patterns (2–3 points softer than equivalent men’s boards) to account for generally lower body mass and strength; narrower waist width (5–10mm narrower) to match typically smaller boot sizes; shorter effective lengths in the same “size” due to reduced setback and different core profiling; and lighter cores using bamboo, paulownia, or lighter wood species to reduce swing weight. These aren’t marketing gimmicks — they’re genuine engineering adaptations that make the board perform better for riders under 160lbs.
Women’s boot sizing and board width
Women’s US boot sizes run about 1.5–2 sizes smaller than men’s at the same mondo point. A women’s US 8 is roughly equivalent to a men’s US 6.5. This means women’s boards can (and do) use narrower waist widths without toe drag. Most women’s boards have waist widths of 235–250mm, which accommodates women’s US 5–9 boots comfortably. Women with larger feet (US 10+) should look for women’s mid-wide models or consider unisex/men’s boards in smaller sizes — some women’s 152cm men’s boards have waist widths that work perfectly for women’s US 10 boots.
When women should consider men’s/unisex boards
There’s no rule against women riding men’s or unisex boards. If you’re a heavier woman (170lbs+) with larger feet (US 10+), a men’s board in the 152–156cm range may actually fit better than a women’s board. The wider waist accommodates your boot without needing a “wide” version, and the stiffer flex handles your weight better. Many women’s freeride and big-mountain riders choose unisex boards for this reason. The key is matching the board to your weight and boot size, not the label on the board.
Kids and youth snowboard sizing: age, weight, and growth room
Kids’ snowboard sizing adds a unique variable: growth. Unlike adults who buy for current size, parents need to balance correct fit now with reasonable growth room. Buy too small and you’re replacing the board mid-season. Buy too big and the kid struggles to learn. Here’s the balance point.
Youth sizing chart by weight and age
| Age Range | Weight (lbs) | Board Length (cm) | Boot Size (US) |
|---|---|---|---|
| 3 – 4 | 30 – 40 | 80 – 90 | 8K – 11K |
| 5 – 6 | 40 – 55 | 90 – 107 | 11K – 2 |
| 7 – 8 | 55 – 75 | 107 – 120 | 2 – 4 |
| 9 – 10 | 75 – 95 | 120 – 133 | 4 – 6 |
| 11 – 12 | 95 – 120 | 133 – 142 | 5 – 7 |
| 13 – 14 | 110 – 145 | 138 – 148 | 6 – 8 |
| 15 – 16 | 130 – 170 | 142 – 152 | 7 – 9 |
The growth room rule
Allow 4–6cm of growth room for kids ages 5–10 (the fastest growth years). A 7-year-old at 60lbs on a 114cm board can “grow into” a board up to 120cm. For teenagers (13–16), growth slows — allow only 2–3cm. For very young riders (3–5), buy for current size with no growth room — they’ll outgrow the board in a season regardless, and a correctly fitting board makes the difference between a kid who loves snowboarding and one who hates it.
Kids’ board features to look for
Kids’ boards should be: soft flex (2–3) for easy turning, true twin shape for learning switch, flat or rocker profile for catch-free riding, and durable top sheet (kids are rough on gear). Avoid stiff “adult-like” kids’ boards — they’re marketed as “performance” but they actually slow progression. The best kids’ boards (Burton Ripcord, K2 Mini Grom, Rossignol Sawblade) are soft, forgiving, and fun. They’re also inexpensive, which matters because your kid will outgrow it.
When kids should transition to adult boards
The transition happens when: the kid weighs 100lbs+ (adult board flex starts to match their weight), their boot size reaches US 7+ (adult binding compatibility), and they’re riding intermediate terrain with confidence. Most kids transition between ages 13–15, but it varies enormously by size and development. Don’t rush the transition — a kid on an oversized adult board develops bad habits (leaning back to compensate for too much board, avoiding steep terrain because the board feels unmanageable).
How to match snowboard bindings to your board size
Bindings are the critical link between your boots and board. An incorrectly sized binding doesn’t just feel uncomfortable — it fundamentally undermines your board’s performance. A binding too large for your boot creates dead space that delays edge response. A binding too small can’t secure your boot properly, causing heel lift and loss of control. Here’s how to match bindings to your complete setup.
Binding size by boot size: the chart
| Binding Size | US Men’s Boot | US Women’s Boot | Mondo (mm) | Board Waist Width |
|---|---|---|---|---|
| XS | 4 – 5.5 | 5 – 6.5 | 220 – 235 | 238 – 242mm |
| S | 6 – 7.5 | 7 – 8.5 | 240 – 255 | 242 – 248mm |
| M | 8 – 9.5 | 9 – 10.5 | 255 – 270 | 248 – 256mm |
| L | 10 – 11.5 | 11 – 12.5 | 275 – 290 | 256 – 264mm |
| XL | 12 – 14+ | — | 295 – 315 | 264 – 274mm |
The overhang problem
When your binding + boot combination extends past the board’s edge, you get toe drag or heel drag. This happens when: the binding is mounted too far toward the edge (wrong stance width or binding position), the boot is too large for the binding’s baseplate, or the board is too narrow for the boot size. Toe drag is the most common — you’ll notice it when your toes catch snow during aggressive toe-side turns, pulling the board off its edge. The fix: either size up to a wider board, downsize your boot (if possible), or use binding canting/shims to raise the boot slightly.
Binding flex and board flex matching
Like boot-to-board matching, binding flex should roughly correspond to board flex. Soft bindings (flex 1–4) work with soft boards for park and jib. Medium bindings (flex 5–6) are the all-mountain standard. Stiff bindings (flex 7–10) pair with stiff boards for carving and freeride. A mismatch creates a disconnect: stiff bindings on a soft board amplify every vibration; soft bindings on a stiff board can’t transfer energy efficiently. This is one area where spending more on bindings (better materials, more precise flex) makes a measurable difference.
Binding mounting position and board size
Where you mount bindings on the board affects effective length. Setback (mounting bindings further toward the tail) shortens the nose and lengthens the tail, improving powder float but reducing switch capability. Centered stance maximizes twin-tip performance for park and freestyle. Most boards have recommended mounting positions printed on the top sheet — follow them for your first season, then experiment based on your preferences. A common mistake: mounting bindings too far back on an all-mountain board, which reduces the effective edge available for carving on groomers.
Stance width and its relationship to board size
Stance width — the distance between your bindings — is directly related to board size and significantly affects how the board rides. A wider stance on a short board creates different dynamics than a narrow stance on a long board. Getting this right is the final piece of the sizing puzzle that most riders ignore.
How to find your stance width
The shoulder-width rule is a good starting point: measure the distance between the centers of your shoulders, subtract 1–2 inches, and that’s your approximate stance width in centimeters. For a 5’10” rider with 18″ shoulder width, that’s about 40–43cm (16–17 inches). Most riders end up between 48–56cm (19–22 inches) depending on height and preference. Wider stances provide more stability at speed but slower edge transitions. Narrower stances feel more responsive for tricks but less stable on steep terrain.
Stance width by riding style
- Park/jib: 48–52cm (19–20.5″). Wider for stability on rails, more leverage for presses.
- All-mountain: 50–54cm (19.5–21″). The sweet spot for balanced performance.
- Powder/freeride: 52–56cm (20.5–22″). Wider for float stability and high-speed confidence.
- Carving: 50–54cm with +21°/+6° angles (duck stance) or +30°/+15° (alpine style).
How stance width interacts with board length
A wider stance effectively shortens the board’s usable length because more of the board’s surface area is between your feet rather than extending past them. On a 158cm board with a 54cm stance, your feet are positioned closer to the effective edge endpoints, leaving less “tail” and “nose” past the bindings. On the same board with a 48cm stance, you have more overhang on each side. This means: if you ride a wide stance, you may want to go 1–2cm longer to maintain the same effective edge feel. If you ride a narrow stance, you can go 1–2cm shorter and still have the same leverage.
Binding angles and sizing
Binding angles don’t change board size, but they affect how the board feels at a given size. Duck stance (positive front / negative back, e.g., +15° / -9°) is the freestyle standard — it distributes your weight evenly and makes switch riding natural. Forward stance (both positive, e.g., +27° / +9°) is the carving and freeride standard — it aligns your body for forward-facing turns and increases effective edge engagement. A rider on +27°/+9° will feel like they’re riding a longer board than the same rider on +15°/-9°, because the forward angles engage more of the effective edge during turns.
Real‑world deck matches: height & weight combos
We’ve tested 40+ boards. Here’s how height and weight translate to specific models (2026 updates) – fully responsive cards, no table strain.
5’3″, 130lbs
Jones Twin Sister • 146
Flex 5/10, edge hold, lightweight — ideal for this weight class.
5’7″, 165lbs
Capita Mercury • 155
True all‑mountain, poppy, fits weight perfectly.
6’0″, 185lbs
GNU Gremlin • 154 (vol. shift)
Wide, floats like 158, turns on a dime.
6’2″, 215lbs
Ride Algorythm • 163W
Stiff, damp, big mountain charger.
More rider profiles: detailed matches
5’10”, 145lbs (Park)
Salomon Dancehaul • 147
Volume-shifted, short and wide, perfect for park laps and side hits.
5’5″, 120lbs (Powder)
Jones Stratos • 148
Rockered nose, tapered tail, floats effortlessly in deep snow.
6’1″, 220lbs (Freeride)
Burton Custom X • 162W
Stiff camber, damp, handles speed and variable terrain.
5’8″, 155lbs (Beginner)
K2 Standard • 151
Soft flex, flat profile, forgiving — the perfect first board.
Even within same weight, a taller rider may want 1–3cm extra for leverage. But we emphasize: boot size and binding setup can make or break sizing. For more edge physics, see Gilson soft edge geometry — it’s next‑level bevel tuning.

Match with bindings & boots
Amazon’s top‑rated step‑on bundles, sized by mondo point.
SHOP COMBO DEALSBrand-specific snowboard size charts: Burton, Capita, Jones, Lib Tech, and more
While the universal weight-based sizing method applies across all brands, each manufacturer publishes their own size charts that account for their specific board constructions, core materials, and flex profiles. A “156cm” from Burton is not the same board as a “156cm” from Jones — different core wood species, different laminates, different effective edge lengths. Here are the official size recommendations from the top manufacturers for 2026.
Burton
Burton’s sizing is weight-centric with boot size modifiers. Their Custom, Process, and Instigator lines follow the standard chart closely. For the Custom X (their stiffest all-mountain), they recommend sizing 1–2cm longer than the standard chart due to the board’s aggressive camber profile requiring more effective edge.
Notable: Burton’s Family Tree powder boards (Flight Attendant, Skeleton Key) are designed to be ridden 3–4cm longer than your standard size. Their Kids’ Grom line uses age + weight, not height.
Capita
Capita sizes slightly shorter than average — their Mercury and DOA are designed to feel 1–2cm longer than their stated length due to aggressive sidecut and camber profiles. If you’re between sizes on a Capita, go shorter.
Notable: Capita’s Spring Break line (powder-specific) uses volume-shifted sizing — ride 4–5cm shorter than standard. The Outsiders and Navigator are their most traditionally sized boards.
Jones
Jones publishes detailed weight ranges for every board. Their Mountain Twin and Frontier follow standard sizing. The Stratos and Mind Expander (powder-focused) are designed 2–3cm longer. The Frontier is their most forgiving board and can be ridden 1–2cm shorter.
Notable: Jones splitboards (Hovercraft, Solution) require sizing 3–5cm longer than standard due to uphill travel weight (you’re carrying a pack) and the need for flotation in untracked snow.
Lib Tech
Lib Tech’s Magne-Traction edge technology allows sizing 1–2cm shorter than standard because the serrated edges provide equivalent grip to a longer traditional edge. The Orca and Warpig are their volume-shifted lines — ride 4–6cm shorter.
Notable: Lib Tech’s T.Rice Pro (Travis Rice pro model) runs stiff and should be sized to the upper end of your weight range. Their Banana Rocker technology makes all boards more forgiving at any length.
Ride
Ride’s sizing is conservative — their charts tend to recommend 1–2cm longer than other brands for the same weight. The Warpig and Superpig are volume-shifted (shorter + wider). The Algorithm and Berzerker follow standard sizing.
Notable: Ride’s Kink (park board) is designed to be ridden 2–3cm shorter than your standard size. Their Moderator (freeride) should be sized at the top of your range.
Salomon
Salomon’s Dancehaul is their signature volume-shifted board — significantly shorter and wider. Their Assassin and Sickstick follow standard sizing. Salomon’s sizing charts include a “stability rating” that helps riders choose within the range.
Notable: Salomon’s Huck Knife (park) is designed to be ridden 3–4cm shorter. Their Highpath (all-mountain) is their most traditionally sized board.
Cross-brand comparison tip: When comparing boards across brands, focus on waist width, effective edge length, and flex rating rather than just the stated length number. A Jones 156cm may have 2cm more effective edge than a Capita 156cm due to different sidecut radii. The stated length is the total board length, not the length of edge that actually contacts snow during turns.
Powder snowboard sizing: how to size for deep snow
Powder is the holy grail of snowboarding, and it demands specific sizing that’s different from everyday all-mountain riding. In waist-deep fresh snow, the physics change entirely: you’re not carving on an edge, you’re planing across a fluid surface. Float becomes the primary concern, and float is determined by surface area — which means sizing longer, wider, or both.
Traditional powder sizing: go longer
For standard (non-volume-shifted) powder boards, size 3–5cm longer than your all-mountain board. The extra length creates more surface area under your feet, distributing your weight across a larger base and keeping the nose above the snow line. A 170lb rider who rides a 157cm all-mountain board would ride a 160–162cm powder board. The longer board also provides more stability in variable deep snow — powder isn’t uniform, and the longer base bridges over dense pockets and hollow spots.
Volume-shifted powder: go shorter and wider
Volume-shifted powder boards achieve the same float through width rather than length. The Ride Warpig, Lib Tech Orca, and YES. Optimistic all use this approach: they’re 4–8cm shorter than traditional equivalents but 15–25mm wider at the waist. The wider platform provides the surface area needed for float, while the shorter length makes the board dramatically more maneuverable in trees, tight steeps, and technical terrain. If you’ve ever struggled to turn a 162cm powder board in tight trees, a 154cm volume-shifted board will feel like a revelation.
Powder board features that affect sizing
- Setback stance: Bindings mounted 1–3 inches toward the tail, which shifts weight to the back foot and lifts the nose. Setback allows you to ride a slightly shorter board because the nose is already elevated.
- Tapered shape: Nose wider than tail (typically 10–20mm). The wider nose provides float while the narrower tail sinks, creating natural planing attitude. Tapered boards can be sized 1–2cm shorter.
- Rockered nose: Upturned nose profile prevents diving and increases perceived length. Boards with aggressive rocker noses can be sized 2–3cm shorter than flat-nosed equivalents.
- 3D base contours: Some boards (Burton 3D, Jones 3D) feature spoon-shaped bases that create lift similar to a boat hull. These can be sized 1–2cm shorter.
The deep powder sizing formula
For dedicated powder days, use this approach: take your all-mountain board size, add 2cm for every 6 inches of fresh snow expected (up to your board’s maximum recommended length), and add 1cm for every 10lbs above 180lbs. Example: 175lb rider on a 157cm all-mountain board expecting 12″ of fresh → 157 + 4 (snow) + 0 (weight bonus, rider is under 180) = 161cm. If using a volume-shifted board, subtract 4–6cm from this number.
Park snowboard sizing: halfpipe, jib, and big air sizing guide
Park riding is the most diverse terrain category for sizing because different park features demand different board characteristics. A rider who spends all day on rails needs a completely different board than someone sending 40-foot kickers in the superpipe. Here’s how to size for each park discipline.
Jib and rail sizing: the shortest you’ll ride
Rail and box riders size 4–6cm shorter than their all-mountain board. The reasoning: shorter boards have lower swing weight (easier to spin on and off features), shorter effective edge (less likely to catch on metal), and more forgiving flex (easier to press and butter). Most dedicated jib boards are 145–152cm regardless of rider weight — they’re designed to be interchangeable tools, not personalized equipment. A 150lb rider and a 180lb rider might both ride a 148cm jib board, with the heavier rider simply flexing it more aggressively.
Halfpipe sizing: a balance of length and stiffness
Halfpipe riders size 1–3cm shorter than all-mountain, but with stiffer flex than jib boards. The pipe demands quick edge-to-edge transitions (shorter helps) but also stability at speed and in the transitions (stiffer helps). A 170lb pipe rider might ride a 155cm stiff-camber board. The shorter length makes wall-to-wall transitions faster, while the stiff flex prevents chatter at the high speeds generated in a proper halfpipe. Most pipe riders also prefer camber-dominant profiles for maximum pop off the lip.
Big air and slopestyle sizing: controlled length
Big air riders size 1–2cm shorter than all-mountain, but not as short as jib riders. The landing impact from 20+ foot kickers requires enough board length to absorb the force and maintain stability. A too-short board will feel unstable on high-speed approaches and sketchy on landings. Slopestyle riders — who combine jumps, rails, and features in one run — typically choose the middle ground: 2–3cm shorter than all-mountain, medium-stiff flex, true twin shape.
Park sizing cheat sheet: Jib/rails → 145–152cm (soft). Halfpipe → 152–158cm (stiff-camber). Big air → 154–160cm (medium-stiff). Slopestyle → 150–156cm (medium). These ranges assume a 150–170lb rider — adjust ±3cm for weight.
Freeride and big mountain snowboard sizing: stability at the limit
Freeride is the discipline where sizing matters most. When you’re dropping into a 40-degree chute with 200-foot cliffs on either side, the difference between “perfectly sized” and “kind of right” is the difference between confident riding and white-knuckle survival. Freeride demands maximum effective edge, maximum stability, and maximum confidence — and sizing directly controls all three.
Freeride sizing: longer, stiffer, camber
Freeride boards should be sized 2–4cm longer than your all-mountain board, with stiff flex (7–9) and camber-dominant profile. The extra length provides a longer effective edge for carving on hardpack and ice, more surface area for variable snow conditions, and greater stability at the high speeds that freeride terrain demands. A 180lb all-mountain rider on a 157cm would ride a 159–161cm freeride board.
Why stiffness matters in freeride
Freeride terrain includes variable conditions — crud, wind-buff, ice patches, and deep snow — often in the same run. A stiff board maintains its shape through these transitions, providing consistent edge hold and predictable response. A soft board in the same terrain flexes unpredictably, creating a “nervous” feeling that undermines confidence. Stiff boards also absorb high-speed vibrations better, reducing fatigue on long, demanding descents. The combination of extra length and stiff flex creates a platform that feels planted and secure at speeds that would make a shorter, softer board chatter dangerously.
Freeride binding setup
Freeride bindings should be mounted with 2–3 inches of setback (toward the tail) to shift weight over the back foot, improving float in variable snow and providing a natural planing attitude in powder. Binding angles should be forward-facing: +27°/+9° is the most common freeride stance, aligning your body for forward-facing turns and maximizing edge engagement. Stiff bindings (flex 7–10) are required to match the board’s stiffness and transfer energy efficiently.
When freeride sizing crosses into splitboard territory
If your freeride terrain requires earning your turns — hiking, bootpacking, or skinning to access untracked lines — you’re entering splitboard territory. Splitboards add 3–5cm of length compared to their solid equivalents because: you’re carrying additional weight (pack, probe, shovel, extra layers) that reduces flotation, the climbing brackets and hardware add weight to the board itself, and the need for uphill efficiency demands more surface area for skinning traction. A freeride rider who rides a 160cm solid board would ride a 163–165cm splitboard.
Splitboard sizing: the complete backcountry guide
Splitboard sizing is one of the most misunderstood topics in snowboarding. Many riders simply buy a splitboard in the same size as their resort board — this is almost always wrong. Splitboards operate under fundamentally different conditions than resort riding, and sizing must account for the unique demands of backcountry travel.
Why splitboards are sized longer
Three factors demand longer splitboards: additional weight (you’re carrying a backcountry pack with safety gear, water, food, and extra layers — typically 15–25lbs), uphill travel (the board must provide sufficient surface area for efficient skinning, especially in steep or deep snow), and untracked snow (backcountry powder is often deeper and less consolidated than resort powder, requiring more float). The standard recommendation is 3–5cm longer than your resort all-mountain board.
Splitboard sizing chart
| Resort Board Size | Splitboard Equivalent | Added Weight Consideration | Notes |
|---|---|---|---|
| 148 – 152cm | 151 – 155cm | +15–20lb pack | Light touring, day trips |
| 153 – 157cm | 156 – 160cm | +15–25lb pack | Standard backcountry |
| 158 – 162cm | 161 – 165cm | +20–30lb pack | Multi-day, heavy pack |
| 163 – 167cm | 166 – 170cm | +25–35lb pack | Expedition, extreme terrain |
Splitboard-specific sizing factors
Beyond the general “+3–5cm” rule, consider: skinning efficiency — longer boards provide more surface area for uphill grip, especially on steep skin tracks; descent confidence — the extra length provides stability on variable backcountry snow that’s often unconsolidated and unpredictable; weight distribution — the climbing brackets and interface hardware shift the board’s weight balance, and a longer board distributes this hardware across more length; and resort crossover — if you’re using your splitboard at the resort on down days, it should still feel right for resort riding, which limits how much longer you can go.
When to size your splitboard the same as resort
There are exceptions: if you’re an ultralight tourer with minimal pack weight (under 10lbs), you ride mostly low-angle terrain where skinning efficiency isn’t critical, or you use the splitboard primarily at the resort with occasional backcountry laps, sizing the same as your resort board is reasonable. Volume-shifted splitboards (like the Jones Mind Expander Split) also break the “+3–5cm” rule because their wider platform provides equivalent float without extra length.
12 common snowboard sizing mistakes (and how to avoid them)
After helping thousands of riders find their correct size, we’ve identified the most common sizing mistakes. These errors cost riders performance, comfort, and often money — because the wrong size means buying a second board sooner. Here are the 12 mistakes we see most often, ranked by severity.
Mistake #1: Sizing by height instead of weight
The single most common and most damaging mistake. A 5’10” rider at 140lbs and a 5’10” rider at 200lbs need completely different boards — yet height-only sizing gives them the same board. Weight determines how much force you apply to the board, which determines how the board flexes, responds, and holds edge. Height only matters for leverage (taller riders need slightly more effective edge). Fix: Always start with the weight chart. Add or subtract centimeters for height only after finding your weight-based range.
Mistake #2: Buying for your “dream terrain” instead of actual terrain
You buy a 162cm freeride board because you plan to ride pow this season… but you spend 90% of your days on groomers. Now you’ve got a board that’s too long for your actual riding, feels sluggish on groomers, and collects dust waiting for that powder day. Fix: Size for the terrain you ride most. If powder is occasional, rent a powder board on those days. Buy your primary board for your daily reality.
Mistake #3: Ignoring boot size
You found the perfect board at the perfect length, but your US 11 boots hang 8mm past the edge on each side. Every turn catches, every carve washes out, and you blame your technique. The board was great — you just needed a wide version. Fix: Check waist width before buying. Use the boot-to-width chart above. If your boots are US 10+, always verify width compatibility.
Mistake #4: Buying too stiff for your weight
A 140lb rider buys a stiff (8/10) all-mountain board because it was on sale and “stiff means better, right?” The board feels dead — they can’t flex it, can’t initiate turns easily, and the board chatters at moderate speeds. Stiff boards are designed for heavier, more aggressive riders. Fix: Match flex to your weight and ability. Under 150lbs → flex 3–5. 150–180lbs → flex 4–6. Over 180lbs → flex 5–8. Beginners of any weight → flex 2–4.
Mistake #5: Size by rental shop standard
Rental shops give you whatever’s in the “your height” bin. For a 5’10” rider, that’s usually a 158cm medium-flex board. This might be perfect — or it might be 4cm too long and 2 flex points too stiff. Rental inventory is limited, and staff are often seasonal workers with minimal fitting training. Fix: Use the sizing chart to know your range before walking into the rental shop. Ask for a board within your range, not whatever’s available.
Mistake #6: Not accounting for riding style
You ride park 70% of the time but buy a 158cm all-mountain board because “that’s what my weight says.” Now you’re wrestling a 158cm through the park when you should be on a 152cm jib board. Fix: Apply the style modifier from the formula above. Park riders: −2 to −4cm. Powder riders: +2 to +4cm. Your weight gives the range — your style tells you where in the range to land.
Mistake #7: Buying online without trying
Online prices are tempting, but buying a board without ever standing on it is risky. Sizing charts are guidelines, not guarantees. Personal preference, specific body proportions, and individual technique all affect how a given size feels. Fix: Demo before you buy. Most resorts and shops offer demo programs where you can try 2–3 different sizes in one day. The $50–75 demo fee saves you from a $500+ mistake.
Mistake #8: Ignoring the “break-in” period
You try on boots in the shop and they feel snug, so you buy a half-size up to “be safe.” Now they’re too loose after 5 days of riding, your heel lifts in every turn, and your edge control is compromised. Snowboard boots pack out 0.5–1 full size during break-in. Fix: Buy boots that feel snug (not painful) in the shop. They’ll pack out to perfect. Never buy boots that feel “comfortable” new — they’ll be sloppy by week two.
Mistake #9: Mixing sizing philosophies
You read one guide that says size by weight, another that says size by height, a third that says size by boot size. You try to combine them all and end up confused. Fix: Choose one primary sizing method (weight) and use the others as modifiers. Weight is the foundation. Boot size adjusts width. Height adjusts ±1–2cm. Style adjusts within the range. Don’t average three different methods — you’ll get a board that fits none of them well.
Mistake #10: Buying the same size as your friend
Your buddy rides a 158cm and loves it. You’re the same height, so you buy a 158cm too. But your buddy weighs 30lbs more than you, has different boots, rides differently, and has different technique. The board that’s perfect for them is wrong for you. Fix: Size for your body and your riding, not someone else’s. Even at the same height and weight, two riders may prefer different sizes based on their personal style and preferences.
Mistake #11: Not re-evaluating after weight change
You bought a board at 170lbs, gained 30lbs, and wonder why it feels unstable at speed and chatters on groomers. Your board is now undersized for your weight — it’s flexing past its designed range and the effective edge is too short. Fix: If your weight changes more than 15lbs, re-evaluate your board size. You may need to go 2–3cm longer, or you may need a stiffer flex rating to handle the additional load.
Mistake #12: Buying based on graphics instead of specs
You fell in love with the top sheet art, bought the board without checking specs, and now you’re on a 164cm freeride board when you weigh 140lbs and ride park. The board is beautiful and completely wrong. Fix: Specs first, aesthetics second. Find the right size and flex for your body and riding, then choose from the boards that fit those specs. There are attractive boards in every size — you don’t have to sacrifice function for form.
How weight fluctuation affects snowboard sizing
Weight fluctuation is a reality for most riders. Seasonal changes (5–10lbs), fitness transformations (20–50lbs), pregnancy, aging, and injury recovery all shift your body mass — and each shift changes your ideal board size. Here’s how to handle weight changes without buying a new board every time.
The 15-pound rule
If your weight changes more than 15lbs from when you bought your board, it’s time to re-evaluate. At a 15lb shift, you’ve likely moved into a different weight bracket on the sizing chart, which means your board is now 1–3cm off from optimal. A 170lb rider on a 157cm who gains 20lbs (now 190lbs) is now riding a board that’s too short — it will chatter at speed, wash out on hardpack, and feel unstable in variable snow. The same rider who loses 20lbs (now 150lbs) will find the board too stiff and unresponsive — they can’t flex it enough for easy turns.
Seasonal fluctuations: don’t worry about small changes
Most riders fluctuate 5–10lbs between seasons due to holiday eating, summer fitness, and general lifestyle changes. This is within the tolerance of any correctly sized board — the chart ranges span 6–10lbs, so a 5lb change keeps you in the same bracket. Don’t re-evaluate for seasonal fluctuations. Focus instead on your riding technique, binding setup, and boot fit — these have a much larger impact on performance than 5lbs of weight change.
Major weight loss: the upgrade opportunity
If you’ve lost significant weight (30lbs+), your old board is now too stiff and too long for your new body. This is actually an opportunity: you can move to a shorter, more maneuverable board that matches your new weight range. Many riders who lose weight discover they prefer a completely different style of riding — lighter riders often gravitate toward more playful, less demanding terrain, and a properly sized lighter board unlocks that style. Don’t cling to your old board out of nostalgia — the performance difference between a correctly sized board and an oversized one is dramatic.
Weight gain: stiffen up
If you’ve gained significant weight (30lbs+), your old board is now too soft and too short. Before buying a new board, try these interim fixes: tighten your bindings (reduces flex contribution from the binding system), increase your stance width (adds stability), and reduce setback (increases effective edge for carving). These adjustments can buy you a season while you decide whether to invest in a new board. If the adjustments aren’t enough, size up 2–3cm and consider a stiffer flex rating.
The “add 5–8lbs” rule for weighing: When sizing yourself, weigh in your riding gear (base layer, pants, jacket, boots) — this adds 5–8lbs to your base weight. If you weigh 165lbs naked but ride at 172lbs with gear, size for 172lbs. This ensures your board handles your actual on-snow weight, not your morning weigh-in.
How to test if your snowboard is the right size: 7 on-snow checks
Once you’re on the mountain with a board you think is correctly sized, these seven tests will confirm or deny your sizing choice. Each test targets a specific aspect of board-rider interaction and reveals whether your board is too long, too short, too stiff, or too soft for your body.
Test 1: The turn initiation test
On a blue groomer at moderate speed, initiate a heel-side turn. The board should begin rotating with moderate, comfortable effort. If you feel like you’re fighting the board — leaning hard, muscling the turn, or the board is resisting — it’s too long, too stiff, or both. If the turn initiates with zero effort and feels twitchy or unpredictable, it’s too short or too soft. The sweet spot: the board responds to your weight shift with immediate but controlled turn initiation.
Test 2: The edge hold test
Find a patch of hardpack or light ice and ride across it on your toe edge. Hold the edge for 3–5 seconds. The board should maintain grip without sliding out. If you feel the edge releasing (sliding sideways), the board may be too short (insufficient effective edge) or too soft (can’t maintain pressure on the edge). If the edge holds perfectly but you feel every vibration and chatter, the board may be too stiff for your weight.
Test 3: The speed stability test
On a wide, open groomer, let the board run at moderate speed (not flat-out — just faster than you’d normally cruise). The board should feel planted and stable, with minimal vibration. If it chatters, wobbles, or feels like it’s going to wash out, it’s too short for your weight and speed. If it feels like a tank — heavy, unresponsive, requiring constant input to maintain a line — it’s too long.
Test 4: The powder float test
On a powder day, ride through untouched snow. The nose should stay above the snow surface, and you should be able to maintain a natural stance without leaning excessively back. If the nose dives or you’re constantly fighting to keep the board planing, it’s too short (or you need a volume-shifted board). If the board floats effortlessly but feels like a barge in trees, it’s too long for your preferred terrain.
Test 5: The flex test
On a flat section, stand on the board and try to flex it by shifting your weight to your toes and heels alternately. The board should flex slightly but noticeably under your weight. If you can’t flex it at all, it’s too stiff for your weight — you’re not heavy enough to access its designed flex pattern. If it flexes like a trampoline, it’s too soft — it won’t hold edge at speed or absorb variable terrain.
Test 6: The fatigue test
Ride for a full day (4–6 hours). At the end of the day, how do your legs feel? If your quads and calves are burning, your board may be too stiff (you’re working too hard to flex it) or too long (you’re muscling through every turn). If your legs feel fine but your back hurts, the board may be too soft (you’re compensating for its lack of stability by tensing your core) or too short (you’re leaning back to compensate for poor float). A correctly sized board should leave you tired but not in pain.
Test 7: The switch riding test
Even if you never ride switch intentionally, try a few switch turns on a gentle slope. If the board feels dramatically different riding switch vs regular, it may be too long — the extra length creates asymmetric leverage. If it feels identical, that’s good for a twin-tip board (the correct response). If it feels unstable and twitchy, it may be too short to provide adequate edge length for your weight.
The golden rule of testing: If you’re thinking about your board while riding, something is wrong. A correctly sized, correctly tuned board should be invisible — you think about the terrain, the line, the next turn, not about whether your board is the right length. If you’re fighting the board, the board is wrong. If the board disappears into the background and you’re just riding, it’s right.
Snowboard edge physics: effective edge, sidecut, and why length isn’t everything
Board length is the most discussed sizing metric, but effective edge — the length of the board’s metal edge that actually contacts snow during a turn — is arguably more important. Two boards can have the same total length but very different effective edges, which means they ride like completely different sizes. Understanding effective edge helps you make smarter sizing decisions, especially when comparing boards across brands.
What is effective edge?
Effective edge is the portion of the board’s edge that maintains contact with the snow during a carved turn. It’s shorter than the total board length because the tip and tail curves lift off the snow. A typical snowboard has an effective edge that’s 80–90% of its total length. A 158cm board might have 126–142cm of effective edge depending on its shape, profile, and sidecut. The effective edge determines: edge hold on hardpack (longer = more grip), stability at speed (longer = less chatter), and turn shape (longer effective edge = bigger turn radius).
How effective edge changes with board features
- Camber boards have more effective edge than rocker boards of the same length, because the camber profile pushes the contact points further toward the tip and tail.
- Boards with aggressive sidecut (deep sidecut radius) have shorter effective edge than boards with shallow sidecut, because the deep curve pulls the contact points closer together.
- Boards with Magne-Traction or serrated edges effectively increase the gripping surface without increasing effective edge length, allowing shorter boards to hold like longer ones.
- Tapered boards (nose wider than tail) have asymmetric effective edge — more on the nose for float, less on the tail for easy turn release.
Sidecut radius and turn shape
Sidecut radius — the mathematical curve of the board’s sidecut — determines your natural turn shape. A small radius (6–7m) creates tight, quick turns (ideal for trees, moguls, park). A medium radius (7–8m) creates medium turns (ideal for all-mountain). A large radius (8–9m+) creates wide, sweeping turns (ideal for carving, freeride). The sidecut radius interacts with board length: a short board with a large radius feels like a long board with a small radius in terms of turn shape. This is why two 158cm boards from different brands can feel like different sizes — their sidecut radii create different turn characteristics.
Why a longer effective edge matters more than total length
When comparing boards, effective edge length tells you more about real-world performance than total length. A 156cm board with 130cm effective edge may outperform a 160cm board with 128cm effective edge on hardpack, because the shorter board has more edge gripping snow despite being 4cm shorter in total length. This is why board manufacturers increasingly publish effective edge specs alongside total length — it gives riders a more accurate picture of how the board will actually perform. If a brand doesn’t publish effective edge specs, it may be a red flag that the effective edge is shorter than expected for the board’s length.
Snowboard sizing FAQs — height, weight, width, and more
Yes — but secondary. A 6’4″ rider at 180lbs should add ~2cm vs 5’8″ at 180lbs. Height affects leverage and center of mass, but weight determines flex and edge engagement. Always start with weight, then adjust ±1–2cm for height.
150lbs is ideal for 152–156cm depending on profile; 158cm might feel stiff. If your friend weighs 170lbs, their 158cm is correct for them but wrong for you. Size for your weight, not theirs.
Shorter for park/trees and playful riding, longer for speed/powder and aggressive riding. If you’re truly torn, try both sizes through a demo program before committing.
Weight-first same as men’s, but with narrower waist width and softer flex. A 140lb woman rides ~148–152cm, same range as a 140lb man. Women’s boards are engineered for different biomechanics, not just shorter versions of men’s.
Bigger boots need wide boards (waist width >258mm for US men’s 10.5+). Wide boards may ride slightly different due to increased platform width, but length sizing remains weight-based. The boot size primarily affects width selection, not length.
If weight is under 120lbs and boot size under US 7, yes — but kids’ boards have very soft flex that won’t support aggressive adult riding. A lightweight adult should look for women’s or small unisex boards in the 138–146cm range.
Initial surprise, but the wider platform compensates with increased surface area. After 2–3 runs, most riders prefer volume-shifted boards for their maneuverability. The key is verifying boot-to-width compatibility before buying.
153–156cm with soft-medium flex (3–4). Don’t go above 158cm — the extra length will fight your developing technique. At 190lbs, you’ll progress quickly to an intermediate board within 1–2 seasons.
Use winter weight with gear — add 5–8lbs to your base weight. Weigh yourself wearing your base layer, pants, and boots (not jacket — you take that off on the lift). This gives your on-snow weight, which is what the board experiences.
They give rough start, but modern boards require weight-first sizing. Height-only charts worked when all boards had similar profiles and widths. Today’s diverse profiles (rocker, hybrid, volume shift, tapered) make weight the only reliable primary metric.
Re-evaluate if your weight shifts more than 15lbs. Seasonal fluctuations (5–10lbs) are within tolerance. Major changes (30lbs+) may require a different board size or flex rating.
Not necessarily. Effective edge length matters more than total length. A 156cm board with aggressive sidecut may have more effective edge than a 160cm board with shallow sidecut. Also, a too-long board under a light rider becomes unstable because the rider can’t properly load the flex pattern.
US men’s 11 typically requires a mid-wide to wide board with waist width of 260–270mm. Always check the specific boot’s sole length — some US 11 boots have shorter soles than others. Aim for no more than 15mm of boot overhang per side.
Slightly, yes. East Coast resorts with more ice benefit from slightly longer boards (more effective edge for ice grip). Western resorts with more powder benefit from slightly longer boards or volume-shifted boards. Flat, low-angle resorts can go slightly shorter for playfulness.
Signs of too-stiff board: can’t initiate turns without significant effort, board feels dead at slow speeds, your legs are exhausted after a full day, the board chatters on moderate-speed groomers. The fix: go shorter, go softer, or both.
Absolutely. Many women ride unisex or men’s boards, especially at higher weights (170lbs+) or larger boot sizes (US 10+). Men’s boards in the 152–156cm range often have waist widths that work perfectly for women’s US 10 boots. Focus on weight and boot size, not the gender label.
Step-on bindings (Burton Step On, K2 Clicker) don’t change board sizing but may limit binding size options. Verify that your boot’s sole is compatible with the step-on system before buying. Step-on systems also have slightly different flex characteristics than strap bindings, which may affect your ideal flex rating by 0.5–1 point.
Yes. Backcountry requires 3–5cm longer due to pack weight and untracked snow. If you use one board for both, size for resort and rent a splitboard for backcountry — or accept that your all-mountain board will be slightly short in the backcountry.
The board’s own weight affects swing weight and fatigue, but not directly sizing. Heavier boards (stiffer cores, more fiberglass) feel more planted but tire you faster. Lighter boards (paulownia cores, carbon stringers) feel more responsive but can feel nervous at speed. Board weight is a secondary consideration after size and flex.
Rider weight. Period. Every other factor — height, boot size, riding style, skill level — modifies the weight-based range. Get the weight right, and you’re 80% of the way to the perfect board.
Your perfect size is waiting
Ditch the chin-high method. You now have the weight‑first blueprint, volume‑shift secrets, width-matching charts, and flex-matching formulas. Whether you’re hunting Japow or lapping groomers, sizing unlocks progression. Every variable — weight, boot size, riding style, skill level, terrain — is now accounted for. Grab a 2026 board sized for your body.
FIND YOUR SNOWBOARD ON AMAZON


