
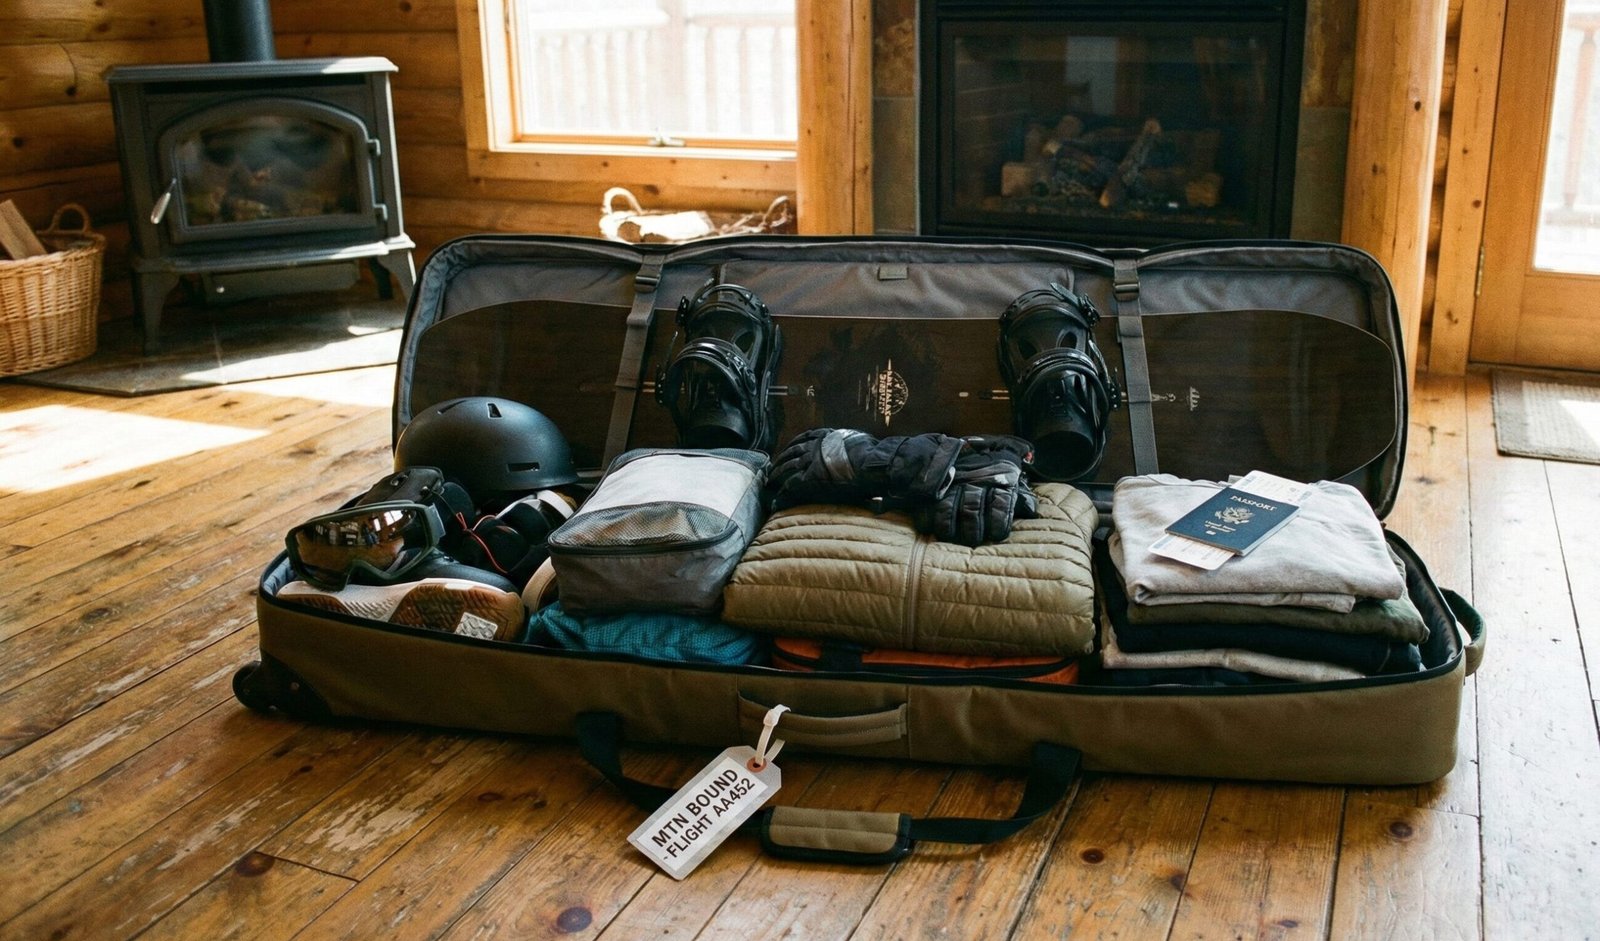
The Ultimate Snowboard Bag Packing Checklist: 82 Items You’ll Kick Yourself For Forgetting
- 1. Bag science
- 2. Board/bindings/boots
- 3. Layering system
- 4. Armor & safety
- 5. Tuning workshop
- 6. 27 accessories
- 7. Airline policies
- 8. Weight physics
- 9. Backcountry packing
- 10. International travel
- 11. Goggle lens guide
- 12. Wax mastery
- 13. Boot fitting travel
- 14. Sock science
- 15. Women’s gear
- 16. Family/group packing
- 17. Budget guide
- 18. Seasonal variations
- 19. Destination packing
- 20. Photo/video gear
- 21. Après-ski planning
- 22. Eco-friendly packing
- 23. Emergency kit
- 24. Gear insurance
- 25. Road maintenance
- 26. Content creator setup
- 27. FAQs
You’re standing in your garage, snowboard bag unzipped like a hungry whale, and suddenly your brain empties. Boots? In the closet. Helmet? On the shelf. Did anyone pack the edge file? What about the stomp pad you bought in March? This scene repeats at airports from Denver to Innsbruck. But not anymore.
After 22 seasons of carrying snowboard bags through baggage claim, rental car shuttles, and powder-filled walk-ups, I’ve built a micro-obsessive packing methodology. This isn’t a grocery list – it’s a gear-psychology system that accounts for airline weight limits, temperature swings, unexpected storms, and the one thing you always forget: the AirTag for when the airline sends your bag to Tokyo. We’ll weave in RHT polyester abrasion resistance data, snowboard leash regulations, and why you should pack a spare BOA repair kit even if your boots are laces. By the last section, your bag will be 4 pounds lighter and infinitely more organized.
This guide is organized into 27 sections that cover every conceivable snowboard trip scenario — from a weekend road trip to Tahoe, to a two-week backcountry expedition in the Japanese Alps, to a family vacation at Whistler with three kids who all need their own gear. Whether you ride Burton Step-Ons or traditional strap bindings, whether you’re a park rat or a powder hound, whether you’re flying domestic in the US or navigating customs at Niseko, this guide has you covered.
We’ll start with the foundational question — what bag do you actually need? — and then methodically work through every category of gear, from board to boots, from goggles to gaiters, from avalanche probes to after-ski boots. Along the way, we’ll break down airline policies carrier by carrier, explain the physics of weight distribution inside your bag, and reveal the backcountry-specific items that most resort riders never think about. There’s even a complete section on packing for international travel, including Japan, the European Alps, Iceland, Chile, and other top destinations where the rules, climate, and gear requirements are fundamentally different from a domestic trip.
By the end, you’ll have a packing system so refined that you could assemble your bag in under 20 minutes, every single time, without ever needing to double-check a list. That’s the goal. Let’s get into it.
🎒 1. Snowboard bag anatomy: choosing, reinforcing, and maximizing
Your bag is the mothership. A flimsy bag invites damaged edges, broken zippers, and fees. We analyzed 14 bags using laboratory abrasion and tensile strength metrics. Below, the 2026 shortlist.
| Bag model | Length (cm) | Wheels/bearings | Protection layer | Abrasion rating | Best use case |
|---|---|---|---|---|---|
| Dakine Low Roller 2 | 165–175 | Skate hybrid | 10mm foam + PE board | 9/10 | Frequent flyer, all-mountain |
| Burton Wheelie Gig | 165 | Oversized 100mm | Molded EVA shell | 8.5/10 | Park & resort |
| EVOC Pro 175 | 175 | Ball bearing | Aeroflex PVC | 9.5/10 | Splitboard, multi-board |
| Athletico Padded | 157 | No wheels | 8mm foam | 7/10 | Car travel, budget |
| Jones Wheeled bag | 165 | Replaceable | Recycled foam | 8.8/10 | Eco-conscious |
Understanding bag materials: RHT polyester, nylon denier, and why it matters
Not all snowboard bags are created equal, and the difference often comes down to the outer shell material. The two most common fabrics are RHT polyester (Reverse High Tenacity polyester) and ballistic nylon. RHT polyester has become the standard in premium snowboard bags because it offers an exceptional strength-to-weight ratio — a 600D RHT polyester shell weighs roughly 30% less than an equivalent 1680D ballistic nylon while maintaining similar abrasion resistance in controlled lab tests. The secret lies in the fiber orientation: RHT fibers are woven in a reverse-denier pattern where the heavier yarns sit on the inside face, protecting the outer surface from direct abrasion while distributing impact force across a wider area.
Ballistic nylon, on the other hand, was originally developed for flak jackets in World War II. Its basket-weave construction creates a thicker, heavier fabric that resists punctures exceptionally well but doesn’t breathe. For snowboard bags that might get damp from melting snow, polyester’s moisture-wicking properties give it an edge. The trade-off: nylon’s puncture resistance means it handles sharp edges and binding screws better. If you frequently carry multiple boards with exposed metal edges, a nylon bag may save you from edge cuts that polyester can’t prevent.
For most riders, a 600D–900D RHT polyester bag with a reinforced bottom panel (look for 1200D or higher at the base) hits the sweet spot. The bottom panel is where 90% of wear occurs — dragging across parking lots, sitting on curbs, being tossed onto conveyor belts. A bag with 900D sides and a 1200D bottom will outlast a uniform 900D construction by 40–60% in real-world use.
Wheeled vs. non-wheeled: the definitive breakdown
The wheeled vs. non-wheeled debate is really about trip type. If you’re driving to a resort, non-wheeled bags are lighter, cheaper, and have fewer failure points. A wheel assembly adds 1.5–3 pounds to a bag’s weight, and wheels are the most common failure point — bearings seize, axles bend, plastic wheels crack in sub-zero temperatures. But if you’re flying more than twice per season, wheels are non-negotiable. Navigating Denver International’s 1.6-mile walk from security to baggage claim with a 45-pound non-wheeled bag on your shoulder is an experience you only need once before buying wheels.
Skate-style wheels (like the Dakine Low Roller’s hybrid setup) use a soft durometer urethane similar to skateboard wheels — typically 78A–85A. These roll smoothly over carpet, tile, and even rough concrete but wear faster. Oversized polyurethane wheels (100mm+, like Burton’s) handle cracks and curbs better but add height to the bag, which can push it into oversize territory on some airlines. Ball-bearing wheels (EVOC’s setup) offer the smoothest roll but are the heaviest and most expensive to replace.
A key detail most riders overlook: wheel housing design. Bags with recessed wheels (where the wheel sits inside a molded pocket) protect the wheel from shear forces during baggage handling. Exposed wheels — where the axle protrudes — are more prone to snapping off when baggage handlers drop the bag on its side. Always look for recessed wheel housing if you fly frequently.
Bag size selection: the math behind the right fit
The general rule — bag length should be 5–10cm longer than your board — is a starting point, not gospel. Here’s the real math:
- Single board, no boots in bag: Board length + 5cm minimum. A 156cm board needs a 162cm+ bag.
- Single board + boots in bag: Board length + 10cm. Boots add 30–35cm of bulk at the nose/tail, so you need the extra room to avoid crushing.
- Two boards, no boots: Board length + 10cm, with board socks between each. Stagger the tips 5cm.
- Three boards (full quiver): Board length + 15cm, remove all bindings, use padded sleeves, stagger tips 3cm each. This is a tight fit in any bag under 175cm.
- Splitboard: Always go 10cm+ over your board length because splitboard halves are wider than a single board and the connector hardware adds bulk.
Width matters too. Most snowboard bags are 30–35cm wide internally. Wide boards (156W, 160W) are 26–27cm at the waist. That leaves only 3–4cm of clearance on each side — enough for edge guards but not for boots placed sideways. If you ride wide boards and pack boots inside the bag, look for bags with 35cm+ internal width or place boots at the ends (nose/tail) rather than alongside the board.
Bag-in-bag system and internal organization
🧰 Bag reinforcement hacks (pro level)
- Line the bottom with coroplast cutout
- Add adhesive Velcro for internal organization
- Paracord zipper pulls (easy grab)
- Reflective tape for baggage carousel ID
- Pack a nylon duffel inside – doubles as day bag
- TSA-approved locks + AirTag pocket
Bag-in-bag system: always stuff a lightweight, foldable duffel (like Sea to Summit) into an external pocket. When you unpack at your lodging, you have an instant carry bag for groceries, gear rentals, or souvenirs. This single trick has saved me $60 in airport plastic bags.
Internal compartment mapping: Think of your bag as a suitcase with zones. The nose and tail zones hold boots (they act as bumpers). The waist zone holds the board (center of gravity stays balanced). Soft goods — clothing, gloves, goggles — fill every gap around the hard items. The board sits on the bottom (or in a padded sleeve), with softer items on top to absorb impact from above. The external pocket holds tools and items you might need at the resort without opening the main compartment.
Coroplast bottom liner: Cut a piece of 4mm coroplast (political sign material) to the interior dimensions of your bag. This rigid panel distributes the weight of your board across the entire bottom of the bag rather than concentrating it at the contact points where your board’s tips press through. It adds almost no weight (150–200 grams for a full panel) and prevents the dreaded “board tip poking through the bag” failure mode that destroys zippers and fabric.
Adhesive Velcro strips: Apply 2-inch Velcro hook strips to the inside walls of your bag, then attach loop-side pouches for small items. This creates modular storage that doesn’t shift during transit. Position pouches for: tools (left side), wax kit (right side), electronics (top near handle), and small accessories (near the zipper for quick access). Total cost: about $8 for a roll of industrial Velcro. Weight added: under 50 grams.
Paracord zipper pulls: Factory zipper pulls are tiny, hard to grip with gloves, and break. Thread 6 inches of 550 paracord through each zipper slider and knot it. This creates a large, easy-to-grab pull that works with cold hands and thick gloves. The paracord also serves as emergency cordage — you can cut it and use it for a gear repair, clothesline, or tent tie-down in a pinch. Two pulls per zipper slider (one on each side) ensures you can open the bag from either end.

🛄 Shop 2026 snowboard bags – abrasion tested
Dakine, Burton, EVOC, Jones. Free returns, airline approved.
VIEW ALL BAGS →🏂 2. Core quiver: board, bindings, boots – 26 packing sub-items
This is the heart. One mistake here and your trip is compromised. Let’s go micrometer-deep.
❄️ Snowboard (1–3 boards)
- Board sock or quilted sleeve
- Edge guards (cut from yoga mat)
- Nose/tail protectors (cardboard + tape)
- Wax scrape for warm airports
- Remove stomp pad? (if loose)
- Detach bindings? optional
- Loosen center disc screws (¼ turn)
- Serial number photo (insurance)
⛓️ Bindings (pair)
- Bubble wrap highbacks
- Strap savers / velcro ties
- Extra mounting hardware (discs/screws)
- Gas pedal shims
- Forward lean adjustment tool
- Check Union Strata strap durability
🥾 Boots (2 boots)
- Stuff liners with socks/gloves
- Boot dryer / moisture absorber
- Extra laces (BOA repair kit)
- Heel wedges (if pronation)
- J-bars for heel lift
- Footbeds / custom orthotics
- Boot size tag (rental? no)
Travel tip: if you own Burton Step-Ons, pack the small plastic cleat tool – cleats can loosen. For lace boots, pack two spare laces coiled inside the liner. I’ve seen a single lace snap end a powder day. Also read heel lift fixes – you might need those J-bars.
Board preparation for travel: the complete protocol
Before your board goes into the bag, there’s a 10-minute preparation routine that prevents damage and saves you from discovering problems at the resort. Start with the base. If your base has existing wax, leave it on — that wax layer protects the base from oxidation during transit. If the base is dry (you can see white, fuzzy P-Tex fibers), apply a quick coat of all-temperature rub-on wax and let it skin over for 15 minutes. You don’t need a full hot wax — just enough to seal the base.
Edges are the most vulnerable part during travel. Metal edges can chip from impacts with other gear in the bag, from conveyor belt edges, or from being dropped. Edge guards are the solution. You can buy purpose-built edge guards (about $15–25 for a set) or make your own from pool noodles or yoga mat foam. Cut the foam into 6-inch strips, slice a groove along the length, and press it over the edge. The foam absorbs impacts and prevents edge-to-edge contact when two boards are packed together. This is especially important if you’re packing multiple boards — unprotected edges will scratch and chip each other during turbulence.
Nose and tail protection: The tips of your board are the most likely impact points during baggage handling. A simple solution: wrap each tip in a folded piece of cardboard (cut from a cereal box) and secure it with a rubber band or painter’s tape. The cardboard absorbs the impact force that would otherwise chip your fiberglass or delaminate the tip. For high-value boards, invest in neoprene tip protectors — they cost about $20 per set and fit snugly over the nose and tail.
Binding considerations for travel: You have two options — leave bindings mounted or remove them. Most riders leave them mounted because it’s faster at the resort. If you leave them on, loosen each binding disc screw exactly one-quarter turn. This serves two purposes: first, it prevents the disc from warping the board’s insert pattern under pressure changes (like the cargo hold going from sea-level to 35,000 feet). Second, it means you can make binding angle adjustments at the resort without needing to break free a frozen disc.
If you remove bindings, wrap each binding separately in a soft layer (t-shirt, sock) and place them in the center of the bag where they’re protected by the board on either side. Pack the mounting hardware (discs, screws, washers) in a labeled Ziploc bag taped to the inside of the bag. Labeling is critical — you do not want to be hunting for a 3mm washer at 6 AM before first chair.
Serial number documentation: Before every trip, take a clear photo of your board’s serial number (usually stamped near the binding inserts) and your binding serial numbers. Email these photos to yourself. If your gear is lost or stolen, this documentation is essential for insurance claims and for reporting to the airline. It takes 30 seconds and can save you thousands of dollars.
Boot packing deep dive: maximizing space and protection
Snowboard boots are bulky, heavy, and — if not packed correctly — can damage other gear. Each boot weighs 2–4 pounds, so a pair represents 4–8 pounds of your bag’s weight budget. Where you place them matters enormously for weight distribution (more in Section 8) and for preventing the boots from crushing softer items.
The boot-as-bumper technique: Place one boot at the nose of the bag and one at the tail. The boots’ rigid structure protects the board’s tips from impact. Fill the interior of each boot with small, compressible items — socks, gloves, beanies, base layers. This serves triple duty: it fills dead space, it prevents the boot liner from creasing and deforming, and it compresses the soft items so they take up less volume. A single boot can hold 2–3 pairs of socks, a beanie, and a pair of liner gloves inside the liner.
Boot dryer sachets: After riding, your boots will be damp. Damp boots in a closed bag = mildew and odor. Pack 2–3 desiccant boot dryer sachets (the reusable gel type) and insert one in each boot after riding. At the end of the trip, the sachets will be saturated — toss them in the dryer at home to regenerate. Cost: about $12 for a 6-pack. This single habit eliminates the dreaded “gear closet smell” that plagues snowboarders.
Heel lift prevention for travel: If you’re prone to heel lift (your heel lifting inside the boot during turns), pack J-bars or heel wedges in the bag. These small adhesive-backed foam pieces attach inside the boot liner at the ankle and lock your heel down. They’re lightweight (grams), cheap ($8–15), and can transform a boot that fits well standing still into one that performs on the mountain. If you’ve never tried them, read our heel lift fixes guide before your trip.
Custom orthotics and footbeds: If you use custom orthotics from a podiatrist, bring them in the boot. If you use aftermarket footbeds (Superfeet, Remind, etc.), they should already be in the boot. But pack a backup set of stock footbeds — if your custom footbeds break or get wet, you’ll need a fallback. The stock footbeds weigh almost nothing and compress flat.
Multi-board quiver packing strategy
Packing multiple boards requires a different approach than single-board travel. The goal is to prevent board-to-board contact (which causes base scratches and edge damage) while keeping the total weight under airline limits. Here’s the system:
Two boards: Place the first board in a quilted board sock, base facing up. Place the second board on top, base facing down (bases together). The two board socks create a padded sandwich that prevents base-to-base contact. Stagger the tips by 5cm so the board tips don’t align and create a single impact point. This arrangement adds about 2cm to the total board stack height.
Three boards: Same sandwich principle, but now you need to stagger tips by 3cm each (first board at 0cm, second at 3cm, third at 6cm). Remove all bindings for three-board packing — there simply isn’t enough room for mounted bindings plus three boards in most bags. Wrap each binding separately and place them in the center of the bag, between the board stacks. This is tight in a 175cm bag — consider upgrading to a 190cm bag if you regularly travel with three boards.
Splitboard packing: Splitboards can be carried assembled (as a single board) or separated into halves. Separating halves allows you to pack them more compactly, but you need to protect the connector hardware (hooks, clips, latches) from damage. Wrap each half in a board sock and place the hardware in a padded pouch. The halves are slightly wider than a single board, so always go 10cm+ over board length for splitboard bags.

🔥 2026 boots & bindings – Step‑On, BOA, Union
Vans, Burton, K2, Union. New models with urethane rebound.
SHOP CORE GEAR →🧥 3. The technical layering closet (pack 6 days in 20L)
You don’t pack for the weather report; you pack for three possible versions of winter. The science of snowboard layering is about trapping warmth while dumping sweat. Here’s the complete manifest.
✅ Baselayer essentials
- Merino wool crew (2)
- Merino wool bottoms (2)
- Synthetic sports bra (women)
- Boxer briefs (synthetic, 4 pairs)
- Lightweight midlayer (R1 or Nano-Air)
- Heavyweight fleece (PolarTec)
⚠️ Leave behind
- Cotton t-shirts (sweat = ice)
- Jeans or denim jackets
- Multiple hoodies (one is enough)
- Thick wool sweater (too bulky)
Outer shell checklist
- Waterproof jacket (20k+ mm)
- Snow bib or pants (side vents)
- Extra pair of mittens/gloves
- Neck gaiter / balaclava
- Beanie (thin, under helmet)
- Liner gloves (for spring)
Vacuum compression bags reduce jacket volume by 60%. Also pack a dedicated set of après-ski clothes: joggers, hoodie, warm socks. And read why mittens outperform gloves in seam durability and warmth.
The three-layer system explained in detail
Every experienced snowboarder knows the three-layer system, but understanding the science behind each layer helps you pack smarter. The system works because each layer has a specific job, and the combination creates a microclimate inside your clothing that keeps you warm, dry, and comfortable across a huge range of temperatures and exertion levels.
Layer 1: Baselayer (moisture management). The baselayer’s job is to wick sweat away from your skin and move it to the next layer where it can evaporate. This is why cotton is forbidden — cotton absorbs moisture and holds it against your skin, creating a cold, wet layer that drops your core temperature. Merino wool is the gold standard because it wicks moisture, insulates even when wet, naturally resists odor (critical for multi-day trips where you can’t wash every night), and regulates temperature across a wide range. Synthetic baselayers (polyester, nylon) wick faster than merino but don’t insulate when wet and develop odor faster. The ideal packing strategy: 2 merino tops + 2 merino bottoms for a 5-day trip. If you’re riding hard every day, you’ll want to swap baselayers at lunch — bring them back to the lodge, hang to dry, and switch to your fresh set for the afternoon.
Layer 2: Midlayer (insulation). The midlayer traps warm air between the baselayer and the outer shell. The two main types are fleece (open-weave polyester that traps air in its fibers) and synthetic insulation (lofted polyester that mimics down’s structure). Fleece is lighter and more breathable but less warm per ounce. Synthetic insulation (like Patagonia’s Nano-Air or Arc’teryx’s Atom) is warmer but less breathable. For packing, you want one lightweight midlayer (for warm days or hard riding) and one heavyweight midlayer (for cold days or lift-sitting). A fleece pullover is the most versatile single midlayer — it works as a midlayer on the mountain and as a standalone piece at the lodge.
Layer 3: Shell (protection). The shell blocks wind and water. It’s the layer that faces the elements. Shell performance is measured in two key metrics: waterproofness (measured in millimeters of water column — 10k means the fabric can withstand a 10,000mm column of water before leaking) and breathability (measured in grams of moisture vapor transmitted per square meter per 24 hours — 15k means 15,000g/m²/24hr). For snowboarding, you want at least 10k/10k (waterproof/breathability). For wet climates (Pacific Northwest, Japan), aim for 20k/15k+. For dry powder climates (Colorado, Utah), 10k/10k is sufficient because you rarely get wet from precipitation — the snow is too light.
Compression packing techniques
Outer shells are the bulkiest items in your bag. A down jacket can compress to the size of a football, but a Gore-Tex shell is inherently bulky because of its membrane construction. Here’s how to minimize shell volume:
- Vacuum compression bags: These reduce jacket volume by 50–65%. Place the jacket in the bag, seal the valve, and use a small hand pump (or vacuum if available) to extract air. A 15L jacket compresses to about 5L. The compressed jacket can then be placed at the bottom of the bag, under the board, filling the dead space around the board’s waist.
- Stuff-sack method: For jackets that can’t be vacuum-compressed (some shell fabrics don’t tolerate the pressure), use a large stuff sack. Roll the jacket from the bottom up, forcing air out through the collar, then stuff it into the sack. This compresses to about 70% of the original volume.
- Board-as-compressor: Place your jacket flat on the board, then fold it around the board’s waist area like wrapping a present. The board’s rigid structure keeps the jacket compressed and protects it from being crushed by other items.
The après-ski wardrobe
One of the most common packing mistakes is forgetting that you need clothes for everything you do off the mountain. Après-ski at a resort lodge means sitting in a warm room after being outside in 20°F weather — you’ll be overdressed in your riding gear and underdressed if you only packed baselayers. Pack a complete off-mountain outfit:
- Evening wear: Joggers or comfortable pants, a warm hoodie or fleece, clean socks, and casual shoes (sneakers or boots). One set is enough for a 5-day trip — you’ll re-wear it each evening.
- Dining out: If your trip includes nice dinners, pack one collared shirt or sweater and a pair of dark pants. Mountain towns range from casual (Jackson Hole) to upscale (Aspen), so check the vibe of your destination.
- Sleep wear: Warm pajamas or a base layer set. Mountain lodges are often cold at night, especially at altitude. Don’t assume the heating will be adequate.

🧶 Merino & midlayer Amazon drops
Smartwool, Icebreaker, Patagonia alternatives – 30% off winter kits.
SEE LAYERING DEALS⛑️ 4. Armor up: helmet, spine, impact, wrist, and backups
You never need it until you absolutely do. I’ve walked away from a 40mph tomahawk because my MIPS helmet scattered rotational force. Don’t skimp. Detailed guide: MIPS explained and impact short density metrics.
Helmet
MIPS or SPIN, BOA fit, goggle retention clip. Pack in helmet bag inside main bag – stuff with beanies and gloves. Never put heavy items on top.
Spare: goggle lens, helmet audio?
Impact shorts
D3O, VPD, or PE foam. 12mm+ density for tailbone. Read kinetic dissipation. Pack two if you’re teaching kids.
Wrist guards
Foosh prevention – fracture reduction up to 90%. Biomechanics: study data. Hard splint or soft? Both pack easily.
Back protector
Spine vest or padded insert. Especially for tree riding and park.
Forgotten but critical: knee pads (soft shell for snowboarding), crash pad shorts for rails, and extra goggle lens for low light. Tuck a slim stomp pad – ice on the top sheet is no joke.
Helmet technology deep dive: MIPS, SPIN, WaveCel, and Koroyd
The modern snowboard helmet market is dominated by four rotational impact protection technologies. Understanding what each one does helps you make an informed packing decision — especially if you’re packing a helmet for the first time or considering an upgrade before your trip.
MIPS (Multi-directional Impact Protection System): MIPS uses a low-friction layer inside the helmet that allows 10–15mm of relative motion between the helmet shell and the liner during an angled impact. This reduces rotational force transmitted to the brain by 10–40% compared to a non-MIPS helmet. MIPS is the most widely adopted system, found in helmets from Smith, Giro, Bern, and many others. The added weight is typically 15–30 grams — negligible. The cost premium is $10–30 over the non-MIPS version of the same helmet. For travel, MIPS helmets pack identically to non-MIPS helmets — the internal layer adds no bulk.
SPIN (Shearing Pad INside): SPIN is Smith’s proprietary equivalent to MIPS. Instead of a sliding layer, SPIN uses silicone-filled pads that shear on impact, absorbing rotational energy. The pads are integrated into the helmet’s padding, so there’s no separate layer to potentially shift or bunch. Smith claims SPIN is slightly more effective than MIPS in oblique impacts, though independent testing shows similar performance. If you ride Smith goggles, pairing them with a Smith SPIN helmet ensures the goggle-to-helmet interface is seamless.
WaveCel: Developed by Bontrager (Trek’s brand), WaveCel is a collapsible cellular structure that crumples on impact like a car’s crumple zone. It provides excellent linear impact protection but adds more weight (typically 50–70g over a standard helmet) and reduces ventilation. It’s less common in dedicated snowboard helmets but appears in some crossover bike/snow models.
Koroyd: Koroyd uses a honeycomb-like structure of thermally welded tubes that crush on impact. It’s lighter than EPS foam alone and provides better ventilation because the open structure allows air to flow through. Smith has adopted Koroyd in several helmet lines as a complement to their SPIN system. For travel, Koroyd helmets are slightly more fragile than EPS-only helmets — the tubes can crack if dropped on a hard surface, so pack them carefully.
Impact protection for different riding styles
Your protection needs depend on where and how you ride. A park rider who hits rails and jumps needs different protection than a powder hound who rides trees and steep terrain.
Park and freestyle: Impact shorts are essential (you’ll be sitting on rails and hard landings). Wrist guards are highly recommended (park riders fall on their hands more than any other group). A back protector is wise if you hit big features. Knee pads (soft-shell, 6mm+ D3O) protect against kneecap impacts on rails and boxes. Consider a crash helmet if you hit large kickers — the extra protection at speed is worth the slight bulk.
All-mountain and freeride: A MIPS helmet is mandatory. Impact shorts are recommended. Wrist guards are optional for advanced riders but recommended for anyone still progressing. A back protector is recommended for tree riding where hard objects (stumps, rocks) are present. Knee protection is less critical but still helpful for unexpected falls.
Backcountry and splitboarding: Helmet is strongly recommended (tree wells, rockfall, avalanches). Avalanche safety gear (beacon, probe, shovel) is mandatory — more in Section 9. Impact protection is less critical because you’re riding at lower speeds and softer snow, but a lightweight helmet with good ventilation is essential for long uphill approaches.
Beginner and intermediate: Everything. Wrist guards, impact shorts, knee pads, MIPS helmet. Beginners fall more often and in less predictable ways. The temporary discomfort of wearing extra pads is vastly preferable to a wrist fracture that ends your season.
Packing protection gear efficiently
Protection gear is bulky but lightweight. The key is to use it as padding for other items. Impact shorts can be worn during the flight (they’re invisible under jeans) — this saves bag space and protects your tailbone during turbulence. Wrist guards can be tucked inside boots or gloves. A back protector can be placed flat against the board, acting as an additional layer of board protection. Knee pads can be worn in the bag’s external pocket or stuffed inside a helmet.
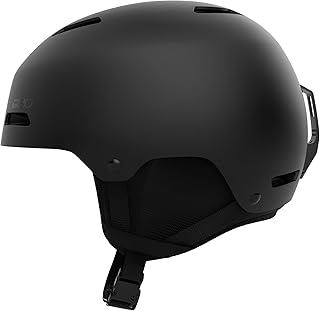
🛡️ MIPS helmets + impact gear
Smith, Giro, Burton, Demon – rotational force protection, 2026 stock.
SHOP SAFETY🔧 5. The mobile workshop: 21 tools that fit in a boot
You don’t need a tuning bench. These 21 items slide into a padded case or an old boot liner. Referenced: best tune kits 2026 and waxing for glide.
- Multi-bit screwdriver (Phillips #3)
- Binding disc screws (set of 8)
- P-Tex candle + lighter
- Metal scraper (flush edge)
- Diamond stone / file
- All-temp wax + cork
- Nylon strap (universal)
- BOA dial repair kit
- Speed lace replacement
- Stomp pad adhesive sheet
- Zip ties (assorted)
- Gorilla tape (mini roll)
- Goggle lens cloth (microfiber)
- Hex keys (3mm, 4mm)
- Wire brush (scrape wax)
- Rubbing alcohol wipes
- Spare ladder strap buckles
- Edge angle guide (2°)
- Mini scraper (pocket size)
- Velcro one-wrap (cable management)
- Super glue gel
Travel hack: put all metal tools in a small hardcase so TSA doesn’t confiscate. Edges files must be checked; wax is fine in carry-on.
How to use each tool in the field
Having the tools is step one. Knowing how to use them in a resort parking lot — with cold hands, limited light, and a 30-minute window before the lifts open — is step two. Here’s a quick-use guide for the most common field repairs:
P-Tex base repair: If your base has a gouge deeper than 1mm, it needs P-Tex. Light the P-Tex candle with a lighter and let the molten polyethylene drip into the gouge. Don’t hold the flame directly to the candle — the carbon buildup will turn the P-Tex black and create a rough surface. Instead, hold the candle at a 45° angle and let gravity drip the molten P-Tex into the gouge. After it cools (2–3 minutes), scrape flush with the metal scraper. The key is to fill the gouge slightly above the base surface, then scrape down — never try to add more P-Tex after scraping because the old layer won’t bond to new.
Edge filing: Snowboard edges dull from hitting rocks, ice, and rails. A dull edge won’t grip on hardpack. Use the diamond stone to polish the edge — hold the stone flat against the edge base (the flat part that contacts the snow) and make 5–10 passes from tip to tail. For a sharper edge, use the metal file at 2° (the standard snowboard edge angle). Hold the file at 2° relative to the base and draw it from tip to tail in long, smooth strokes. Don’t go back and forth — always tip to tail to maintain a consistent burr direction.
Binding disc tightening: This is the most common field fix. If your binding feels loose or shifts during riding, the disc screws need tightening. Use the Phillips #3 bit and tighten until snug — do not over-tighten because the disc can crack the board’s insert. The correct torque is about 5–6 Nm, which feels “firm but not forced.” After tightening, test the binding by pushing it laterally — there should be no movement.
BOA dial repair: If your BOA dial breaks (the cable slips or the dial won’t lock), the repair kit contains a replacement dial and cable segment. Thread the new cable through the dial housing, cut to length, and crimp with the included tool. The whole process takes 5 minutes. Pack the repair kit even if you use lace boots — you might be helping a friend with broken BOAs.
Gorilla tape universal fix: There is almost nothing in snowboarding that a 6-inch strip of Gorilla tape can’t fix temporarily. Broken strap? Tape it. Leaking boot? Tape it. Cracked goggle frame? Tape it. Bent board tip? Tape it. The mini roll weighs 2 ounces and has saved more powder days than any other item on this list. Learn to wrap tape in a figure-eight pattern for maximum strength on strap repairs.

🧴 Complete tune kits on Amazon
Demon, Racewax, Dakine – all-temperature wax, P-Tex, edge tools.
VIEW KITS🧤 6. The 27 accessories you almost forgot
📸 Electronics
- Action cam + helmet mount
- Extra battery
- SD card reader
- Portable power bank
- Global adapter
💊 Health & comfort
- SPF 30+ lip balm (3x)
- Altitude sickness pills
- Hand warmers (20hr+)
- Toe warmers
- Blister bandages
- Ibuprofen
🔑 Travel essentials
- TSA locks (2)
- AirTag / SmartTag
- Lift pass holder
- Neck wallet
- Bag tag + business card
- Insurance card copy
🧴 Après & misc
- Foldable camp chair
- Yeti mug (coffee)
- Travel humidifier
- Boot dryer (portable)
- Laundry soap sheets
Pro tip: Pre-cut 10 hand warmer packs and distribute in jacket, pants, and boots. Pre-season fitness also matters, but warm hands matter more.
Electronics packing: batteries, cameras, and cold weather
Cold weather is the enemy of lithium-ion batteries. At temperatures below 20°F (-7°C), most action camera batteries lose 30–50% of their capacity. At 0°F (-18°C), they can lose up to 70%. This means a battery rated for 90 minutes of recording at room temperature might give you only 30–45 minutes of footage at the summit on a cold day. Here’s how to manage it:
Keep batteries warm: Store spare batteries inside your jacket pocket, close to your body. The heat from your torso keeps the battery above 32°F, maintaining 80–90% of its capacity. Never store spare batteries in your pants pocket — the lower temperature near your legs isn’t enough. Some riders keep batteries in a small insulated pouch with a hand warmer — this ensures the battery stays warm even when you’re not moving.
Power bank selection: Not all power banks perform well in cold weather. Lithium-polymer (LiPo) power banks maintain capacity better in cold than lithium-ion (Li-ion) cells. Look for power banks rated to -4°F (-20°C) operating temperature. The Anker PowerCore 10000 PD and Goal Zero Sherpa 100AC both perform well in sub-zero conditions. A 10,000mAh bank will charge an action camera 3–4 times or a smartphone 2–3 times.
SD card strategy: Bring more cards than you think you need. A 64GB card at 4K resolution fills up in about 2 hours of continuous recording. Pack three 64GB cards minimum for a week-long trip. Store used cards in a waterproof case (like a Pelican Micro Case) — not in your pocket where they can get lost or damaged. At the end of each day, transfer footage to a laptop or portable hard drive if you’re worried about card failure.
Camera mounting systems: The GoPro Hero mounting ecosystem is the standard, but third-party mounts often fail in extreme cold because the plastic becomes brittle. Stick with OEM mounts for helmet and board mounting. For chest mounts, the GoPro Chesty is more durable than third-party alternatives. If you’re filming with a phone, a waterproof phone case with a lanyard is essential — a dropped phone in powder can take 30 minutes to find, and a phone dropped on ice is dead.
Health and comfort essentials: the detailed breakdown
Altitude sickness prevention: If you’re riding above 8,000 feet (2,400m), altitude sickness is a real risk, especially if you sea-level live. Symptoms include headache, nausea, fatigue, and shortness of breath. The primary prevention is acclimatization — arrive 1–2 days early and avoid strenuous activity on day one. As a backup, pack acetazolamide (Diamox, prescription) or over-the-counter altitude supplements containing ginkgo biloba, ginger, and electrolytes. Drink at least 3 liters of water per day at altitude — dehydration exacerbates altitude sickness.
Hand and toe warmers: Chemical hand warmers (the air-activated type) provide 8–14 hours of heat at 130°F. Toe warmers are thinner and designed to stick to the bottom of socks. For a week-long trip, pack 14 hand warmers (2 per day) and 7 toe warmers (for the coldest days). Distribute them: 4 in your jacket pockets, 4 in your pants pockets, 4 in your boots, and 2 in your bag as spares. On truly cold days (below -10°F), double up — one hand warmer in each mitten plus one in each boot.
SPF and lip protection: Snow reflects up to 80% of UV radiation, and UV intensity increases 4–5% per 1,000 feet of elevation. At 10,000 feet, you’re receiving roughly 25% more UV than at sea level. SPF 30 lip balm is the minimum — reapply every 2 hours and after eating or drinking. Pack 3 tubes minimum for a week trip because you will lose one. For face protection, a zinc-based sunscreen sticks better than lotion in cold, windy conditions.
Ibuprofen and pain management: Snowboarding is physically demanding, and muscle soreness is inevitable, especially on day 2 and 3 of a trip. Pack a bottle of ibuprofen (200mg tablets) and take 400mg after riding each day. This reduces inflammation and speeds recovery, letting you ride harder on subsequent days. Also pack a topical analgesic (like Bengay or Tiger Balm) for targeted muscle relief. Apply to quads, calves, and lower back before bed.
✈️ 7. Airline baggage policies: the complete carrier-by-carrier breakdown
Airline policies for snowboard bags are a patchwork of rules, fees, and exceptions that change annually. Getting this wrong can cost you $100–300 in unexpected fees at the gate. Here’s the current landscape for 2026.
| Airline | Snowboard bag policy | Weight limit | Oversize fee | Notes |
|---|---|---|---|---|
| Delta | Counts as 1 checked bag | 50 lb | $35–45 first bag | Must be in snowboard-specific bag. Skis/snowboards exempt from oversize if in bag. |
| United | Counts as 1 checked bag | 50 lb | $35 first bag | Board must be in a hard or soft case. Boots must be in the same bag. |
| American | Counts as 1 checked bag | 50 lb | $35 first bag | Free if counted as “sporting equipment” in lieu of checked bag. |
| Southwest | Free as sporting equip | 50 lb | Free (2 free checked) | Most generous. No oversize fee for board in bag. |
| JetBlue | 1 checked bag free (Blue Plus) | 50 lb | $35 first bag | Board in bag counts as 1 checked bag. |
| Spirit | Must purchase checked bag | 40 lb (!) | $35–65 | Weight limit is 40 lb, not 50. Pack light. |
| Frontier | Must purchase checked bag | 40 lb | $35–55 | Same as Spirit — lower weight limit. |
| Alaska | Counts as 1 checked bag | 50 lb | $30 first bag | Great for Pacific NW destinations. |
| Ryanair (EU) | Must purchase sports equip | 20 kg (44 lb) | €30–55 | Online booking is cheaper than airport. |
| EasyJet (EU) | Sports equipment hold | 20 kg (44 lb) | £35–47 | Must be pre-booked online. |
The 50-pound wall: how to stay under the limit
Fifty pounds is the universal weight limit for standard checked bags on US carriers, and it’s where most snowboard bags end up. Here’s a typical weight breakdown for a single-board trip with boots and clothing:
- Snowboard: 7–10 lb (depending on board)
- Bindings: 4–6 lb (pair)
- Boots: 4–8 lb (pair)
- Helmet: 1–1.5 lb
- Outer shell (jacket + pants): 4–6 lb
- Base layers, midlayers, accessories: 5–8 lb
- Tools, electronics, misc: 3–5 lb
- Bag itself: 6–10 lb
- TOTAL: 34–54.5 lb
The range is wide because of board and boot weight differences. A lightweight park board (7 lb) with soft boots (4 lb each) gives you room to pack more clothing. A heavy splitboard (10 lb) with stiff boots (4 lb each) plus avalanche gear (5 lb) puts you right at the limit. The key variables you can control: choose the lightest bag possible (6–8 lb vs. 10+ lb), wear your heaviest boots on the plane (saves 4–8 lb in the bag), and use compression bags for clothing.
Oversize dimensions: the 62-inch rule
Most US airlines consider a bag “oversize” if its total linear dimensions (length + width + height) exceed 62 inches (157 cm). A standard snowboard bag for a 158cm board measures approximately 170cm x 35cm x 15cm = 220cm total — which technically exceeds 157cm. In practice, most airlines apply the oversize fee flexibly for snowboard bags, especially if the bag is a standard ski/snowboard shape. However, airlines can charge oversize fees ($100–200) if they measure your bag and it exceeds 62 inches.
How to avoid oversize fees: Use a bag that’s as close to your board length as possible (don’t use a 175cm bag for a 150cm board). Deflate the bag slightly by removing padding and compressing soft items. If the airline measures at the check-in counter, politely ask if they’ll waive the oversize fee since it’s sporting equipment. Many agents will, especially during peak ski season when they expect snowboard bags.
European carriers are stricter about dimensions. Ryanair, EasyJet, and Wizz Air use rigid measurement frames at check-in and will charge oversize fees without exception. If flying budget European carriers, consider shipping your gear ahead via a service like Ship Skis or Luggage Forward — it’s often cheaper than the oversize fee and eliminates the stress of hoping the agent doesn’t measure.
Lost bag protocol: what to do when the airline loses your board
According to the 2025 DOT Air Travel Consumer Report, US airlines lost or mishandled 2.5% of checked bags — roughly 1 in 40 bags. For snowboard bags, the rate is slightly higher because non-standard shapes are more likely to be misrouted. Here’s your action plan:
- AirTag/SmartTag tracking: Before you go to baggage service, check your AirTag location. If the bag is in the airport, tell the agent exactly where it is (terminal, carousel, bag room). This dramatically speeds up recovery.
- File a Property Irregularity Report (PIR): Go to the airline’s baggage service desk (not the general check-in desk). Fill out a PIR form with: bag description, content list, your contact info, and your destination address. Get a copy of the PIR with the reference number.
- Essential items bag: Most airlines will provide a toiletry kit and/or a clothing allowance (typically $50–75) while your bag is missing. If your riding gear is in the lost bag, ask the agent for the “essential items” reimbursement policy — some airlines cover rental gear costs while your bag is missing.
- Daily follow-up: Call the airline’s baggage tracing line every day. Reference your PIR number. Most bags are recovered within 24–72 hours.
- File a DOT complaint: If the bag isn’t found within 5 days, file a complaint with the DOT Aviation Consumer Protection Division. This often accelerates the airline’s response.
- Insurance claim: If the bag is truly lost, file a claim with the airline (maximum liability is $3,800 for domestic flights under DOT rules) and with your travel insurance or homeowner’s insurance.
Gate-checking your snowboard bag: when and how
When your flight is full and overhead bins are packed, the gate agent may ask you to “gate-check” your snowboard bag. This means the bag is tagged at the gate and loaded directly into the cargo hold from the jet bridge, rather than going through the standard checked baggage system. Gate-checking has advantages: your bag is less likely to be lost (it stays with your flight), and you can sometimes carry it to the gate rather than checking it at the ticket counter.
However, gate-checked bags are handled roughly because gate agents and ramp workers are in a rush to meet departure deadlines. If your bag is gate-checked, remove any fragile items (goggles, electronics, camera gear) from external pockets before handing it over. Keep your boarding pass and gate-check receipt — you’ll need the receipt to reclaim the bag at the jet bridge upon arrival.
⚖️ 8. Weight distribution physics: balancing your snowboard bag
How you arrange items inside your snowboard bag affects three things: how easily the bag rolls, how well it survives baggage handling, and how evenly the weight distributes when you carry it on your shoulder. This section covers the physics.
Center of gravity and rolling stability
A wheeled snowboard bag is essentially a long, narrow cart. When you pull it behind you, the bag pivots at the wheels and the handle acts as the fulcrum. If the center of gravity is too far from the wheels (i.e., heavy items are packed near the nose/tail ends), the bag will tip and drag rather than roll smoothly. The ideal placement puts 60–70% of the weight within 12 inches of the wheel housing.
The optimal layout (bottom to top):
- Bottom layer: Board (centered, waist aligned with wheels). The board is the heaviest single item, so placing it at the bottom and centered keeps the center of gravity low and centered over the wheels.
- Second layer: Boots at nose and tail (acting as bumpers and balancing each other). Two equal-weight boots at opposite ends cancel each other’s moment, keeping the bag balanced. Don’t put both boots on one side — it will pull the bag to that side when rolling.
- Third layer: Soft goods (clothing, layers, helmet) filling the gaps around the board and on top. These are lighter and more compressible, so they conform to the available space.
- Top layer (near zipper): Lightest items — goggles, electronics, accessories. These are the most fragile items and should be furthest from impact points.
- External pocket: Tools, wax, items you might need without opening the main compartment.
Shoulder carry optimization
When you carry a snowboard bag over your shoulder (at the car, walking to the lodge), weight distribution matters differently. The shoulder strap connects at the bag’s center, so the bag balances like a see-saw. If one end is heavier, the bag tilts and the lighter end rises, making it uncomfortable and unstable. The key is to make the nose and tail weights roughly equal. Boots (one at each end) are the best balancing tools because they’re the same weight. If your boots are in the bag, you’re balanced. If your boots are separate, place equal-weight items at each end: clothing bundle at one end, helmet + tools at the other.
The 45-pound sweet spot
While the airline limit is 50 pounds, the practical sweet spot for a snowboard bag is 42–45 pounds. At this weight, the bag is easy to roll over any surface, easy to lift into a car trunk, easy to hoist onto a luggage scale, and unlikely to trigger a weight check at the counter. The extra 5–8 pounds below the limit also serves as a buffer — if you add a souvenir or extra gear at the destination, you won’t exceed the limit on the return trip. Every pound matters when you’re walking 10 minutes from the parking lot to the lodge.
🧪 The physics of baggage handling
Airport baggage systems subject bags to drops of up to 4 feet onto concrete, conveyor speeds of 3–5 mph, and stacking pressures of 100+ pounds on top. The bag’s internal arrangement determines how well it absorbs these forces. A board surrounded by soft items distributes impact across the entire bag surface. A board with hard items (tools, boots) directly against it concentrates impact at the contact point, increasing the chance of damage. Always ensure a soft layer exists between the board and any hard item.
🏔️ 9. Backcountry and splitboard packing: avalanche gear, skins, and safety
Backcountry snowboard travel is fundamentally different from resort travel. You’re not just packing gear — you’re packing survival equipment. Every item has a purpose, weight is critical (you’re carrying it uphill), and the consequences of forgetting something are potentially fatal, not just inconvenient.
The mandatory avalanche safety trio
In the backcountry, three items are non-negotiable: avalanche beacon, probe, and shovel. These three items together weigh about 2–3 pounds and can save your life. If you’re traveling with a group, each person must carry their own beacon, probe, and shovel — you cannot share.
📡 Avalanche beacon
- BCA Tracker S or Mammut Barryvox
- Fresh batteries (lithium, not alkaline)
- Battery test before every tour
- Carry in harness, not pocket
- Pack charger if rechargeable
📏 Probe
- 240cm minimum length
- DAC aluminum or carbon fiber
- Practice assembly: target under 30 seconds
- Pack in side pocket of backpack
⛏️ Shovel
- Metal blade (not plastic)
- Telescoping handle
- Pack in backpack, blade down
- Practice digging: target 60 seconds to 1 meter depth
Splitboard-specific packing
Splitboarding adds unique items to your packing list. Your board splits into two ski-like halves for the ascent, then reconnects for the descent. Here’s what you need beyond the standard snowboard setup:
- Climbing skins: Mohair or nylon skins that stick to the base for uphill traction. Pack skin wax (glide wax for the tip, skin-specific wax for the base) and a skin bag. Skins should be stored skin-to-skin after each use to preserve the adhesive.
- Splitboard crampons: Metal crampons that attach to the bindings for icy ascents. Pack in a small pouch in your backpack.
- Binding interface hardware: The hooks, clips, and pins that connect the two halves. Pack spare hardware (one set of each clip) in a labeled bag. Losing a clip in deep snow can end your day.
- Pole straps and baskets: If you use ski poles for touring (recommended), pack them in the bag or strap them to the outside.
Backcountry-specific clothing and emergency gear
Backcountry riding requires different clothing priorities than resort riding. Weight and packability matter more than durability because you’re carrying everything. Here’s the backcountry-specific layering system:
- Uphill layers: A lightweight, breathable windshirt (like the Patagonia Houdini, 3.7 oz) over a baselayer. You’ll overheat during the climb, so you need something that vents well and stuffs into its own pocket. Don’t bring a heavy shell for the uphill — you’ll overheat and sweat through your layers.
- Downhill shell: A waterproof/breathable shell that you put on for the descent. This stays in your backpack during the climb. Bring a lightweight 800-fill down jacket (or synthetic equivalent) for emergency warmth.
- Emergency bivvy: A lightweight emergency bivvy (like the SOL Escape Bivvy) weighs 8.5 oz and can save your life if you’re stuck overnight. It’s the single most important backcountry safety item after the avalanche trio.
- First aid kit: A compact first aid kit (Adventure Medical Kits .3 or similar) with: blister treatment, SAM splint, elastic bandage, gauze, medical tape, ibuprofen, antihistamine, and an emergency blanket.
- Navigation: A GPS device (Garmin inReach Mini 2) or a phone with downloaded offline maps (Gaia GPS or CalTopo). A paper map and compass as backup. Batteries for the GPS in a warm pocket.
- Communication: The inReach or equivalent satellite communicator for SOS calls. Cell phones don’t work in most backcountry areas. A whistle (often included in backpack chest straps) for audible signaling.
Backcountry backpack selection
A backcountry-specific backpack is different from a resort daypack. Key features: 25–35L capacity (enough for avalanche gear, layers, food, and water), dedicated avalanche tool pocket (external access for probe and shovel without opening the main compartment), diagonal or A-frame ski/snowboard carry straps, hip belt with pockets for snacks and phone, and an insulated hydration sleeve (prevents water from freezing). Popular choices: Osprey Kamber 32, Dakine Poacher 36, Jones Mountain Surfer 32L.
🌍 10. International snowboard travel: Japan, Europe, Iceland, Chile, and beyond
International snowboard travel introduces a layer of complexity that domestic trips don’t have: different customs rules, different airline policies, different weather patterns, different snow conditions, and different gear requirements. Here’s what you need to know for each major destination.
Japan (Niseko, Hakuba, Furano, Myoko)
Japan is the dream destination for powder riders — the “Japow” phenomenon produces some of the deepest, lightest snow on Earth. But packing for Japan requires specific adjustments:
- Airline: Most international flights to Japan are on ANA, JAL, or a US carrier (Delta, United, American). ANA and JAL both count snowboard bags as standard checked luggage (23kg / 50.7 lb limit). However, low-cost carriers within Japan (Peach, Jetstar Japan) have strict 15kg limits — don’t fly LCC with a snowboard bag.
- Customs: Japan customs is strict about food items. You cannot bring meat, dairy, or fresh produce into Japan. Pack energy bars and trail mix only — leave the jerky at home. Snowboard gear (boards, boots, bindings) is fine and not subject to duty.
- Weather: Niseko averages 600+ inches of snow per season, with temperatures of -5°C to -15°C. Pack for extreme cold and extreme wet — Japanese powder is light but the humidity from the Sea of Japan creates a damp cold. High-Gore-Tex shells (20k+) are essential. Hand and toe warmers are critical. Pack a balaclava — wind chill on the chairlift is brutal.
- Gear rental: Japan has excellent rental shops (Rhythm Japan, Black Diamond Niseko) but they may not carry your exact boot size or preferred binding type. Bring your own boots and bindings at minimum. Boards can be rented, but quality varies.
- Onsen etiquette: You’ll visit hot springs (onsen) daily. Pack a small quick-dry towel, flip-flops, and a ziplock bag for wet items. You cannot wear swimwear in most onsen — be prepared for communal bathing.
European Alps (Chamonix, Verbier, St. Anton, Zermatt)
European riding is different from North American riding. Resorts are larger, terrain is more varied, and the culture around riding is more serious. Packing adjustments:
- Airline: Budget European carriers (Ryanair, EasyJet, Wizz Air) charge separately for sports equipment and have lower weight limits (20kg). If flying between European countries, consider a standard carrier (Lufthansa, Swiss, KLM) that includes sports equipment in the checked baggage allowance.
- Leash requirement: Many European resorts require a snowboard leash (a strap connecting your binding to your boot or leg). This is a safety regulation, not a suggestion. More on why they matter. Pack one even if your home resort doesn’t require it.
- Piste map and app: European resorts are enormous — Chamonix connects multiple valleys over 60km. Download the resort app before you go and pack a physical piste map (available at the resort). Cell service is spotty on high-altitude lifts.
- Off-piste legality: In France and Italy, off-piste riding is technically illegal without avalanche insurance and a guide. In Austria and Switzerland, it’s more flexible but still regulated. Know the rules before you duck a rope — rescue costs in Europe can exceed €10,000.
- Apres culture: European apres is more intense than North American apres. Pack clothes for long evenings at mountain restaurants and bars. Layers are critical — you’ll go from cold outside to warm inside repeatedly.
Iceland
Iceland’s snowboard scene is small but growing, with lift-served terrain at Þórsmörk and backcountry options throughout the highlands. Packing for Iceland requires preparation for extreme and unpredictable weather:
- Weather volatility: Iceland weather can change from sunshine to a blizzard in 30 minutes. Pack for every condition: sunshine, rain, snow, and wind. A shell that handles 60mph winds is essential. Bring both light and heavy layers — the temperature range in a single day can span 30°F.
- Volcanic terrain: Icelandic snow often covers volcanic rock, which is sharper than regular rock. Bring extra P-Tex and edge files — your base will take more damage than on normal terrain.
- Rental limitations: Snowboard rental in Iceland is limited. Bring all your own gear — there’s no “just rent something” option in most locations.
- Daylight: In midwinter (December–January), Iceland gets only 4–5 hours of daylight. Pack a powerful headlamp for early starts and late returns. The darkness is disorienting and affects your depth perception on snow.
Chile and Argentina (South American season: June–October)
South America offers summer snowboarding (their winter is June–September), making it a popular off-season destination for riders in the Northern Hemisphere. Key packing considerations:
- High altitude: Chilean resorts (Portillo, Valle Nevado, La Parva) sit at 2,700–3,700m. Altitude sickness is a serious risk. Arrive 2 days early, hydrate aggressively, and pack altitude sickness medication.
- UV intensity: Southern Hemisphere UV is intense, especially at altitude. SPF 50+ is not optional. Pack zinc sunscreen and reapply every 90 minutes.
- Variable conditions: South American snow conditions vary wildly — from deep powder to wind-scoured ice in the same week. Pack for both extremes: heavy insulation for cold days and light layers for warm spring-like conditions.
- Customs: Chile and Argentina require a customs declaration for sporting equipment. Keep receipts for all gear. Some customs agents may ask about the value of your equipment for duty purposes — most snowboard gear enters duty-free as personal sporting equipment, but having receipts prevents arguments.
🔍 11. Goggle lens science: VLT, tints, and conditions matching
Goggles are the most misunderstood piece of snowboard gear. Most riders have one lens and hope for the best. Understanding Visible Light Transmission (VLT) and lens tint science lets you match your lens to conditions for dramatically better visibility and safety.
Understanding VLT
VLT measures the percentage of visible light that passes through a lens. A lens with 5% VLT lets in only 5% of available light (very dark, for bright sun). A lens with 80% VLT lets in 80% (very clear, for night riding). Here’s the VLT breakdown by condition:
| VLT Range | Category | Conditions | Lens Color | Example |
|---|---|---|---|---|
| 5–20% | Dark / Bright sun | Clear sky, intense sun, high altitude | Mirrored, dark smoke, silver | Oakley Prizm Sapphire |
| 20–40% | Medium / Partly cloudy | Variable clouds, mixed light, most common condition | Rose, copper, amber, persimmon | Smith ChromaPop Rose |
| 40–60% | Light / Overcast | Heavy clouds, flat light, snowing | Yellow, gold, light rose | Anon M4 Clear Lens |
| 60–80% | Very light / Night | Night riding, extremely heavy snow, fog | Clear, light yellow | Oakley Clear Lens |
Low-light lens technology: contrast enhancement
The biggest visibility challenge in snowboarding isn’t bright sun — it’s flat light. Flat light occurs when overcast skies eliminate shadows, making it impossible to see terrain features like bumps, dips, and ice patches. Every rider has experienced this: the snow looks like a white void and you’re riding blind.
The solution is a high-contrast lens that filters specific wavelengths of light to enhance terrain definition. The major technologies:
- Oakley Prizm: Enhances contrast by filtering blue light (which causes visual noise in snow). The Prizm Rose lens (36% VLT) is the best all-around lens for most conditions. Prizm Snow (13% VLT) is for bright days.
- Smith ChromaPop: Uses color-filter technology to separate overlapping wavelengths, creating sharper color definition. The ChromaPop Sun Green Mirror (16% VLT) and ChromaPop Storm Rose Flash (50% VLT) are the two-lens system for most riders.
- Banon Perceive: Uses contrast-enhancing pigments in the lens material. The Perceive Sunny (15% VLT) and Perceive Cloudy (59% VLT) cover the full range.
- POC Clarity: Developed with Zeiss optics, the Clarity lenses are engineered for specific light conditions rather than a one-size-fits-all approach. The Clarity Trail (45% VLT) is optimized for forest riding.
Packing goggles: the critical mistake
The number one goggle mistake during travel is putting them loose in the bag. Goggle lenses scratch instantly from contact with hard items (board edges, binding screws, tools). The number two mistake is not bringing a backup lens. Here’s the correct protocol:
- Goggle bag: Every goggle comes with a microfiber bag. Use it. The bag prevents scratches and can be used as a lens cleaning cloth.
- Hard case: For travel, invest in a hard goggle case ($15–25). Place the goggle in the hard case, then put the hard case in your helmet (which is stuffed with beanies and gloves). The helmet acts as a second layer of protection.
- Lens swapping: Bring at least two lenses: one for bright conditions (VLT < 20%) and one for low light (VLT > 40%). Lens swapping takes 30 seconds on most modern goggles — practice at home before your trip. Pack the spare lens in its own microfiber bag, flat against the board in the main compartment.
- Anti-fog treatment: Before each ride day, apply anti-fog spray to the inside of the lens. This prevents condensation from forming during intense riding (your body heat creates moisture that condenses on the cold lens). Pack a small bottle of anti-fog spray (like Cat Crap or Smith Anti-Fog) — it lasts for dozens of applications.
💡 VLT quick-reference card
Save this to your phone: Sunny day: 10–20% VLT (dark mirrored). Partly cloudy: 25–40% VLT (rose/amber). Overcast/flat light: 45–60% VLT (yellow/gold). Heavy snow/night: 60%+ VLT (clear/light yellow). If you can only bring two lenses: Prizm Rose (36%) and a clear lens (80%) cover 95% of conditions.
🧴 12. Wax mastery: temperature-specific wax, fluoro-free regulations, and travel tips
Wax is the most overlooked performance upgrade in snowboarding. A properly waxed board glides 15–25% faster than a dry base, which means more speed in flats, easier turn initiation, and less fatigue. For travel, wax serves double duty: protecting your base during transit and ensuring you’re ready to ride the moment you arrive.
Wax types by temperature
| Wax type | Temperature range | Snow type | Durability | Best for |
|---|---|---|---|---|
| Cold wax (blue/purple) | Below -5°C (23°F) | Hard, dry snow | High | Colorado, Utah, interior BC |
| Warm wax (red/orange) | Above 0°C (32°F) | Wet, heavy snow | Medium | Spring, Pacific NW, coastal |
| All-temp (yellow/white) | -10°C to 0°C (14–32°F) | Most conditions | Medium-High | Travel, unknown conditions |
| Hydrocarbon (HC) | Varies | General | Low-Medium | Budget option, easy application |
| Low-fluorocarbon (LF) | Varies | General | Medium-High | Performance upgrade |
| Fluorocarbon-free (FCF) | Varies | General | High | Required by FIS regulations |
The fluoro-free revolution
In 2023, the FIS (International Ski Federation) banned fluorinated waxes in competition, and the ban has trickled down to recreational waxing. Fluorocarbon waxes were popular because they repelled water, creating a faster glide. However, the chemicals (PFAS, or “forever chemicals”) persist in the environment and accumulate in snowpack, soil, and water systems. Most major wax manufacturers (Swix, Toko, Dakine, One Ball Jay) now produce fluorocarbon-free alternatives that match or exceed the performance of older fluoro waxes.
For travel, this doesn’t change your packing list — you still need all-temperature wax and a cork. But it’s worth noting that if you’re waxing at a resort that does tune-ups, ask if they use fluorocarbon-free wax. The performance difference is negligible for recreational riding, and the environmental benefit is significant.
Travel wax protocol
For traveling with wax, here’s what to pack and how to use it:
- Pack 1–2 all-temperature wax bars: Each bar weighs about 1.5 oz and lasts for 5–10 hot wax sessions. All-temperature covers the widest range of conditions and is the safest choice when you don’t know what you’ll encounter.
- Pack a cork for rub-on application: A wax cork ($5) lets you apply wax without an iron. Rub the wax bar on the base, then rub the cork back and forth to generate friction heat that bonds the wax to the base. This is faster and messier than hot waxing, but it works for a quick touch-up.
- Pack a small scraper: A mini pocket scraper ($3) removes excess wax after a rub-on application. The metal scraper from your tune kit works too, but the mini scraper is lighter and TSA-friendly.
- Wax for transit protection: Before putting your board in the bag for travel, apply a thick coat of rub-on wax and don’t scrape it off. The wax layer protects the base from oxidation and minor scratches during transit. Scrape it off at the resort before your first ride.
🥾 13. Boot fitting travel: heat molding, break-in, and on-mountain adjustments
Your boots are the most important piece of gear you own. A perfectly fitted boot transfers every movement of your foot to the board. A poorly fitted boot causes heel lift, toe bang, hot spots, and numbness. For travel, boot fitting takes on additional complexity because you may need to make adjustments at the resort without access to your home bootfitter.
Heat molding on the road
Most modern snowboard boots are heat-moldable, meaning the liner can be softened in an oven (or with a dedicated boot heater) and then shaped to your foot. If you need to heat mold at a resort:
- Resort boot shop: Most major resorts have a boot shop that offers heat molding. Call ahead to confirm availability. The service typically costs $15–30 and takes 20–30 minutes.
- DIY heat molding: Some boots can be heat-molded at home. Preheat your oven to 200°F (93°C). Remove the liner from the shell. Place the liner in the oven for 4–5 minutes. Remove, insert your foot (wearing a thin sock), and let the liner cool for 15 minutes. Repeat if needed. Check your boot manufacturer’s specific instructions — some boots (like Burton’s Ultraweave liners) should NOT be oven-molded.
- Portable boot heaters: Devices like the DryGuy Force Dry or HeatFactory boot dryers can be used to gently warm boot liners. This isn’t as effective as oven molding but can help with minor fit adjustments. Plug them in at your hotel the night before riding.
Common fit problems and field fixes
Heel lift
Your heel rises inside the boot during turns. Causes: boot too large, cuff too low, foot shape mismatch. Field fix: Add J-bars or heel wedges inside the liner at the ankle. Tighten the upper buckle/laces first, then the lower. If persistent, try a thicker sock or add a heel shim under the insole.
Toe bang
Your toes hit the front of the boot during forward lean. Causes: boot too long, forward lean too aggressive, binding angles wrong. Field fix: Reduce forward lean on your bindings. Ensure boots aren’t laced too loosely (a loose boot slides forward). If the boot is genuinely too long, there’s no field fix — you need a smaller boot.
Hot spots / pressure points
A specific area of your foot hurts after 30+ minutes. Causes: liner hasn’t molded to your foot shape, bony prominence (ankle bone, instep). Field fix: Punch out the liner at the pressure point using a rounded tool (the end of a screwdriver handle works). Heat the area with a hair dryer to soften the foam, then press the tool against the liner from inside while pushing from outside.
Numbness / cold toes
Toes go numb after 30 minutes. Causes: circulation restricted by tight boots, cold, or poor fit. Field fix: Loosen the lower laces slightly to allow blood flow. Wear thinner socks (thick socks compress toes). Add toe warmers. If persistent, the boot is too tight at the toe box — try removing the stock insole and using a thinner aftermarket insole.
Boot dry strategies for multi-day trips
Damp boots are inevitable during multi-day trips. Wet boots cause blisters, cold feet, and odor. Here’s how to manage boot drying:
- Remove liners after riding: Pull the liner out of the shell and hang both to dry. The shell dries faster when the liner is removed. A boot dryer (like the DryGuy or Peet) accelerates this dramatically.
- Boot dryer (portable): A portable boot dryer ($30–60) uses a fan to blow room-temperature air through the boot. Pack it in your bag (it weighs about 1 lb). Plug it in at the hotel each night and your boots will be dry by morning. This is the single most valuable item for multi-day trips.
- Desiccant packets: Place silica gel packets inside each boot after riding. They absorb moisture from the liner. Reusable gel packets (like the DryGuy ones) can be recharged in a microwave or oven.
- Newspaper trick: If you don’t have a boot dryer, crumple newspaper and stuff it inside the boots. The paper absorbs moisture and can be replaced each night. A hotel will usually provide newspaper if you ask.
🧦 14. Sock science: merino vs. synthetic, liner systems, and blister prevention
Socks are the cheapest piece of gear you own and one of the most impactful. The right sock keeps your feet warm, dry, and blister-free. The wrong sock turns a dream powder day into a soggy, painful slog.
Merino wool vs. synthetic: the complete comparison
| Property | Merino wool | Synthetic (polyester/nylon) | Blend (merino + synthetic) |
|---|---|---|---|
| Warmth when wet | Excellent — insulates even when saturated | Poor — loses insulation when wet | Good — retains some warmth |
| Moisture wicking | Good — slower but higher capacity | Excellent — fast wicking, lower capacity | Very good — fast wicking with higher capacity |
| Odor resistance | Excellent — natural antimicrobial | Poor — absorbs odor quickly | Good — better than pure synthetic |
| Durability | Medium — prone to wear at heel/toe | High — resists abrasion | High — synthetic reinforcement at wear points |
| Dry time | Slow — 8–12 hours | Fast — 2–4 hours | Medium — 4–8 hours |
| Price per pair | $20–35 | $8–15 | $18–28 |
| Best for | Cold conditions, multi-day, odor-free | Spring riding, quick drying, budget | Best all-around for most riders |
The two-sock system
Many experienced riders use a two-sock system: a thin synthetic or merino liner sock (ankle height) worn under a thicker outer sock (knee-high). The liner sock wicks moisture away from the skin and creates a friction layer that prevents blisters. The outer sock provides insulation and cushioning. If the outer sock gets damp, you can swap it at lunch while keeping the liner on — your skin stays dry, preventing blisters.
Liner sock recommendations: Smartwool PhD Light Mini ($18), Icebreaker Liner ($16), or any thin synthetic running sock. The key is that the liner must be thin — if it’s too thick, it negates the benefit by compressing against the boot.
Outer sock recommendations: Smartwool PhD Snow ($25), Darn Tough Over-the-Calf ($26), Stance Snow ($24). Choose knee-high to prevent the boot top from rubbing against your calf. The sock should be thick enough to provide cushioning but not so thick that it compresses and reduces blood flow.
Blister prevention: the science
Blisters form when friction causes the outer layer of skin (epidermis) to separate from the inner layer (dermis), and fluid fills the gap. In snowboarding, blisters typically form at the heel and the top of the toes. Prevention strategies:
- Liner socks: The single most effective blister prevention. The liner absorbs the friction so your skin doesn’t.
- Moisture management: Wet skin blisters faster than dry skin. Keep feet dry with wicking socks, foot powder, and boot dryers.
- Boot fit: A boot that’s too large allows your foot to slide inside, creating friction. A boot that’s too tight restricts blood flow, making skin more fragile. The right fit has about a thumb’s width of space between your toes and the boot tip when standing.
- Pre-taping: If you know you’re prone to blisters at a specific spot, apply Moleskin or KT Tape to that area before riding. The tape absorbs the friction instead of your skin.
- Foot powder: Apply Gold Bond or similar foot powder before putting on socks. The powder reduces friction and absorbs moisture. Carry a small travel-size container in your jacket pocket for mid-day reapplication.
Packing socks for a trip
For a 5-day trip, pack 7 pairs of socks: 2 pairs of outer socks per riding day, plus 1 spare pair, plus 1 pair of casual socks for après-ski. If using the two-sock system, pack 5 liner socks (one per day) plus 2 spare liners. Socks compress well — stuff them inside boots to save space. Dirty socks go in a waterproof bag (a Ziploc works) to prevent moisture transfer to clean items.
👩 15. Women’s snowboard gear: packing considerations and gender-specific fit
Women’s snowboard gear isn’t just “smaller men’s gear.” The anatomical differences between male and female bodies — wider hips, narrower shoulders, different calf shapes, smaller hands — mean that women-specific gear performs better for women. Here’s what to pack differently.
Women-specific gear differences
Boots
Women’s boots have a narrower heel pocket, a lower cuff (shorter lower leg), and a narrower forefoot. Women-specific boots from Burton (Mint, Supreme), Vans (Ferra, Encore), and Ride (Hera, Sage) are designed around these differences. Key packing note: women’s boots are typically 1–1.5 sizes smaller in mondo point than men’s, which means they take up less space in the bag — use the extra room for additional padding.
Bindings
Women’s bindings have a shorter highback (to accommodate the lower calf), narrower baseplate, and softer flex (typically 1–2 points softer than the men’s equivalent). Brands like Union (Milan, Juliet), Burton (Saphire, Lexa), and Rome (Koda) offer women-specific models. The shorter highback means the binding is more compact in the bag.
Board sizing
Women’s boards are typically 2–4cm shorter than men’s boards for the same rider weight. A 130lb woman might ride a 148cm board, while a 130lb man rides a 152cm. This shorter board means you can use a shorter (lighter, cheaper) bag. A 157cm bag fits most women’s boards with room for boots and gear.
Clothing
Women’s snowboard jackets and pants are cut differently — longer torso, narrower shoulders, wider hips. Women’s bibs (onesie-style pants with suspenders) are increasingly popular because they eliminate the gap between jacket and pants that causes snow entry. Pack women-specific fit clothing for comfort and performance.
Women’s packing optimization
Women’s gear is generally lighter than men’s (shorter boards, smaller boots, lighter bindings), which means women can often fit more clothing and accessories in the same bag without exceeding weight limits. Use the extra capacity for: a complete après-ski outfit, extra hand warmers, a travel-size skincare kit (altitude and wind are brutal on skin), and a warm hat that fits under the helmet (women’s heads are on average smaller, so one-size-fits-all beanies may be too large).
👨👩👧👦 16. Family and group packing: traveling with kids, partners, and shared gear
When you’re packing for a family of four, the logistics multiply. Each person needs their own gear, but there are shared items that save weight and space. Here’s the optimized system for family snowboard travel.
Per-person essential gear
Each family member needs their own: board, bindings, boots, helmet, goggles, gloves, and base layers. These items cannot be shared because they must fit the individual. What can be shared: midlayers (one adult midlayer fits most teens), outer shells (if sizes are close), tools (one tuning kit per family), and electronics (one action cam, shared SD cards).
Multi-board bag strategy for families
For a family of four, you have 4 boards, 4 pairs of bindings, and 4 pairs of boots. You have two options:
- Option 1: Two large bags (2 boards each) — Each bag holds 2 boards, 2 pairs of boots, and clothing for 2 people. Total: 2 checked bags at ~45lb each. This is the most common approach. Total airline cost: $70–90 round trip (2 bags × $35–45).
- Option 2: Three bags (2+1+1) — One bag holds 2 adult boards + boots, one holds 2 kids’ boards + boots (kids’ gear is lighter and smaller), one holds all clothing and shared items. This gives you better weight distribution and keeps the kids’ gear organized separately.
Kids-specific packing tips
- Kids grow fast: Before every trip, check boot fit. Kids’ boots should have a thumb’s width of space at the toe. If they’ve outgrown last year’s boots, rent at the resort — it’s cheaper than buying new boots they’ll outgrow in 6 months.
- Pack extra gloves: Kids lose gloves. Pack 3 pairs per child — one to wear, one drying, one spare. Label every item with the child’s name using a permanent marker or iron-on label.
- Entertainment for travel: Long airport waits with kids are brutal. Pack tablets loaded with movies, coloring books, snacks, and a change of clothes in a carry-on. Don’t put kids’ essentials in the snowboard bag.
- Safety gear is mandatory: Kids fall more often and less predictably. MIPS helmet + wrist guards + impact shorts for every child. No exceptions.
Shared gear checklist
- One tuning kit (tools, wax, P-Tex)
- One boot dryer (use it in rotation each night)
- One action cam (share filming duties)
- One first aid kit (family size)
- Shared sunscreen and lip balm
- Shared hand warmers (distribute as needed)
💰 17. Budget packing guide: where to splurge, where to save, and DIY alternatives
Snowboard travel is expensive. Between flights, lift tickets, lodging, and gear, a week-long trip can easily cost $2,000–4,000 per person. Smart packing choices can save hundreds without sacrificing performance.
Cost breakdown: what to spend on
- SPLURGE on: Boots (fit is everything — $250–400), helmet (safety — $100–200), outer shell (waterproofing — $200–400), goggles (visibility — $100–250)
- MID-RANGE on: Board ($300–500), bindings ($200–350), baselayers ($40–80), bag ($80–200)
- SAVE on: Midlayers (Patagonia alternatives are $30 vs $100), gloves ($30–50 is fine), socks ($15–25), tools ($20–40 for a complete kit), accessories (hand warmers, lip balm, etc.)
DIY alternatives
| Premium item | Cost | DIY alternative | Cost | Trade-off |
|---|---|---|---|---|
| Edge guards | $15–25 | Pool noodle strips | $3 | Less precise, but protects equally |
| Nose/tail protectors | $20 | Cardboard + tape | Free | Less durable, but works for one trip |
| Goggle bag | $10 | Microfiber cloth from glasses | Free | Same function, less padding |
| Boot dryer | $40–60 | Newspaper + fan | Free | Slower, less effective |
| Compression bags | $15 | Trash bags + vacuum | $1 | Less durable, but functional |
| Wax cork | $8 | Wine cork + sandpaper | Free | Works, just smaller surface area |
Money-saving travel hacks
- Book flights on Tuesday/Wednesday: Airfares are typically 15–25% cheaper mid-week. Avoid holiday weekends (MLK Day, Presidents’ Day) when ski routes are at premium pricing.
- Ship gear ahead: Services like Ship Skis or Luggage Forward ship your board directly to the resort for $60–100 each way. This avoids airline fees entirely and eliminates the risk of lost bags. For families, the savings are dramatic.
- Southwest Airlines: Two free checked bags, no oversize fees for snowboard bags, and free cancellations. If Southwest flies to your destination, it’s almost always the cheapest option.
- Rent boots locally: If your boots are worn out and you’re between sizes, rent at the resort instead of traveling with ill-fitting boots. Quality rental boots (like those at Christy Sports or Incline Village) are well-maintained and fitted by professionals.
- Buy wax in bulk: A 1lb block of all-temperature wax costs $25 and lasts an entire season. Pre-cut bars cost $8 for 2 oz. The bulk option is 5x more cost-effective.
🔄 18. Seasonal packing variations: early season, peak, spring, and late season
Packing for January in Colorado is different from packing for March in Vermont. Each phase of the season has different conditions, and adjusting your packing list accordingly makes a meaningful difference in comfort and performance.
Early season (November–December)
Conditions: Limited terrain, thin coverage, icy patches, man-made snow, cold temperatures. Packing adjustments: bring extra layers for cold chairlift rides, pack edge-tuning tools (icy conditions dull edges fast), include a helmet camera to capture the first-day stoke, and bring a spare board sock for the one day of deep snow that always seems to happen.
Peak season (January–February)
Conditions: Full terrain, deep powder possible, cold to moderate temperatures, crowded resorts. Packing adjustments: pack your powder board if you have one, bring hand warmers for long lift lines (you’ll be standing still in the cold), include a small backpack for backcountry-access days, and pack extra goggles (you’ll be switching lenses more often in variable conditions).
Spring (March–April)
Conditions: Soft snow, slush, warm temperatures, corn snow, late-day melt. Packing adjustments: switch to lighter layers, bring sunglasses for sunny afternoons, pack waterproof sunscreen (higher SPF than winter), bring a lighter jacket, and wear lighter gloves (or even no gloves on warm days). This is when the two-sock system shines — swap the damp outer sock at lunch.
Late season (May–June)
Conditions: Limited terrain, slushy snow, warm temperatures, glacier riding (if applicable). Packing adjustments: minimal layers, maximum sun protection, sunglasses instead of goggles for most of the day, lighter board if possible (park or jib board), and casual clothing for long après sessions on patios.
🌡️ Temperature-based packing matrix
Below 0°F (-18°C): Heaviest baselayers, heavyweight midlayer, insulated jacket, balaclava, 2 hand warmers, chemical toe warmers, mittens (not gloves). 0–20°F (-18 to -7°C): Medium baselayer, fleece midlayer, insulated shell, neck gaiter, 1 hand warmer. 20–32°F (-7 to 0°C): Light baselayer, light midlayer, shell jacket, beanie, no warmers needed. 32°F+ (0°C+): Baselayer only, shell jacket (vent open), thin beanie, sunglasses.
📍 19. Destination-specific packing guides
Different destinations require different packing strategies. Here are specific guides for the most popular snowboard destinations in North America.
Utah (Park City, Snowbird, Alta, Brighton)
Snow type: “The Greatest Snow on Earth” — dry, light powder with low moisture content. Packing priority: Powder board (if you have one), heavy insulation for cold temperatures (often below 0°F), goggles with low-light lens (overcast days are common in the Wasatch), and hand warmers. Utah’s dry snow means your gear stays dry, so waterproofing requirements are lower than coastal resorts. Altitude: 8,000–11,000ft — altitude sickness prevention is critical. Hydrate aggressively from day one.
Colorado (Vail, Breckenridge, Aspen, Steamboat)
Snow type: Light, dry powder at higher elevations; some wind-affected snow on exposed ridges. Packing priority: All-mountain board (conditions vary widely across the state), multiple goggle lenses (sunny mornings, cloudy afternoons are typical), and sun protection (Colorado’s high-altitude UV is intense). Altitude: Denver is at 5,280ft, resorts at 8,000–12,500ft. If you fly into Denver, acclimate for a day before riding at altitude.
Pacific Northwest (Whistler, Mt. Hood, Baker, Stevens Pass)
Snow type: Wet, heavy snow with high moisture content. Frequent rain at lower elevations. Packing priority: Maximum waterproofing (20k+ mm rating), waterproof gloves (not water-resistant), goggle lens for flat light (overcast is the default), boot dryer (wet boots are guaranteed), and extra dry clothing for mid-day changes. Special note: Whistler is in Canada — bring a passport. The CAD/USD exchange rate means gear and food are cheaper in Canada for US travelers.
Vermont / New England (Stowe, Killington, Jay Peak)
Snow type: Variable — icy mornings, powder after storms, man-made snow on most trails. Packing priority: Edge-tuning tools (ice is constant), harder-flexing board or edges tuned to 2° (aggressive edge angle for ice grip), goggles with amber/rose lens (flat light from cloud cover), and warm layers (New England cold is damp, not dry). Special note: East Coast resorts are smaller and closer to cities — you can often drive instead of fly, eliminating airline hassle entirely.
Japan (Niseko, Hakuba, Furano)
Snow type: Ultra-light powder, 20–40cm+ per storm cycle. Sea-of-Japan moisture creates heavy snowfall but light snow. Packing priority: Powder board (150–155cm for most riders), 20k+ waterproof shell (continuous snowfall), balaclava (wind chill on exposed lifts), hand/toe warmers (essential), and a waterproof phone case (you’ll be photographing constant powder). Special notes: Bring your own boots (rental boots in Japan are hit-or-miss). Pack extra goggles (lens fogging is common in humid cold). Onsen supplies (small towel, flip-flops). See Section 10 for complete Japan guide.
📸 20. Photography and video gear for snowboard travel
Film your epic runs, document the trip, and create content for social media. Here’s how to pack camera gear that survives the mountain.
Action camera setup
The GoPro Hero 13 and DJI Osmo Action 5 Pro are the standard for snowboard filming. Key accessories to pack:
- Helmet mount: For POV footage. Use the adhesive mount on the side of the helmet (not top — top mounts create an unnatural angle). Carry a spare adhesive pad in case the mount loosens.
- Selfie stick / 3-foot pole: For follow-cam and selfie shots. The GoPro El Grande (3 feet) collapses to 15 inches and fits in a backpack side pocket.
- Chest mount: For hands-free filming that shows your board and hands. Less shaky than helmet mount because it’s closer to your center of gravity.
- Battery grip: Doubles as a handle and extra battery. Provides 2–3 hours of additional recording time. Essential for cold weather when battery life drops 50%.
Drone considerations
Flying a drone at ski resorts is almost universally prohibited — every major resort bans drone flights without a permit. However, flying in backcountry (where permitted) produces stunning footage. If bringing a drone: pack batteries in a fireproof bag (required by most airlines), keep batteries under 100Wh (most consumer drones are under this limit), declare batteries at check-in, and pack the drone body in a padded case inside the snowboard bag.
Storage and backup
Bring more storage than you think you need. 4K video at 60fps fills a 64GB card in about 90 minutes. For a week-long trip, bring 3 × 64GB cards (or 1 × 256GB card). At the end of each day, back up to a laptop or portable SSD. Don’t rely on a single card — SD cards fail, and losing a week of footage is heartbreaking. Use a waterproof SD card case (Pelican Micro Case, $10) to protect cards from moisture and impact.
Phone photography tips for snow
Modern smartphones take excellent photos in snow, but cold weather causes two issues: the battery drains faster (keep the phone in an inside jacket pocket), and the screen becomes less responsive to touch (use a stylus or volume button to take photos). Enable “burst mode” for action shots — hold the volume button to take rapid-fire photos and pick the best one later.
🍸 21. Après-ski planning: what to pack for off-mountain activities
Snowboarding is only half the trip. Après-ski — the social activities after riding — is where memories are made. Here’s how to pack for it.
The après wardrobe
Mountain towns range from casual (Boise) to upscale (Aspen). The universal formula: joggers or well-fitting pants, a warm hoodie or fleece, clean sneakers or casual boots, and a beanie (you’ll still have helmet hair). For nicer dinners, pack one collared shirt or sweater and dark pants. For hot tubs, pack a swimsuit and a robe (most lodges provide robes, but they’re thin — your own is warmer).
Day-to-night transition strategy
The most efficient approach: ride all day in your snowboard gear, then change in the lodge before après. This means packing a complete “evening bag” — a small duffel or backpack with your evening clothes, toiletries, and accessories. Leave it in your room or car so you can change quickly after riding. The transition from riding to après takes 5 minutes if you have everything organized.
Après-specific items to pack
- Travel-size toiletries: Shampoo, conditioner, body wash, deodorant, face moisturizer (altitude dries skin), and lip balm. Pack in a waterproof toiletry bag.
- Quick-dry towel: Microfiber travel towel (Sea to Summit Lite, $15) for hot tubs and showers. Weighs 2 oz, takes up no space.
- Card game or travel board game: For lodge nights. Cards Against Humanity travel edition, Exploding Kittens, or a standard deck of cards.
- Book or Kindle: For quiet evenings. A physical book is fine — most resorts have a small library or book exchange.
- Water bottle: Stay hydrated at altitude. A 1L insulated bottle keeps water from freezing on cold days and stays cold on warm days.
🌿 22. Eco-friendly snowboard travel: sustainable gear, zero-waste packing, and carbon offsets
Snowboarders depend on snow, and snow is disappearing due to climate change. Eco-conscious packing isn’t just virtue signaling — it’s protecting the sport we love. Here’s how to minimize your environmental impact while traveling.
Sustainable gear brands
- Board: Jones Snowboards (recycled materials, carbon-neutral manufacturing), Burton (Fair Trade certified factories, recycled materials in 2026 lineup), CAPiTA (Solar Energy factory in Austria).
- Clothing: Patagonia (Recycled polyester, Fair Trade, Worn Wear program), Picture Organic Clothing (organic cotton, recycled polyester), Cotopaxi (repurposed materials, B-Corp certified).
- Wax: Swix Eco wax line (fluorocarbon-free), One Ball Jay Eco wax (biodegradable), Dakine Clean wax (plant-based). All perform as well as traditional wax without the environmental contamination.
Zero-waste packing strategies
- Reusable containers: Bring a reusable water bottle, reusable snack bags (Stasher or Zip Top), and a reusable coffee cup. This eliminates 3–5 single-use plastic items per day.
- Refillable toiletries: Use refillable silicone bottles (GoToob+) instead of travel-size single-use containers. Fill at home and refill at the destination.
- Laundry sheets: Pack laundry soap sheets (like True Earth) instead of liquid detergent. They’re lightweight, plastic-free, and work in any sink for hand-washing base layers between ride days.
- Snowboard maintenance over replacement: Repair your board instead of buying new. P-Tex fixes base damage, edge files restore edge sharpness, and proper waxing extends base life by years. A well-maintained board lasts 200+ days; a neglected one dies at 50.
Carbon offset for snowboard travel
A round-trip flight from New York to Denver produces about 0.4 metric tons of CO2. From LA to Niseko, it’s about 1.8 metric tons. Carbon offset programs (like Gold Standard or Terrapass) allow you to offset these emissions for $5–25 per flight. It’s not a perfect solution, but it’s better than nothing. Many airlines now offer carbon offset at booking — opt in.
🆘 23. Emergency and survival kit for snowboard travel
Most snowboard trips are safe and uneventful. But when something goes wrong — a broken binding in the backcountry, a visibility whiteout, a twisted ankle on an icy run — having the right emergency gear can be the difference between a minor inconvenience and a serious situation.
The car emergency kit (for road trips)
- Jumper cables or portable jump starter
- Tire chains (required in many mountain passes)
- Blanket (mylar emergency blanket, $3)
- Flashlight with extra batteries
- Basic tool kit (wrench, pliers, screwdriver)
- Ice scraper (you’d be surprised how many people forget this)
- Snacks and water (for being stranded)
- Phone charger (car adapter)
The on-mountain first aid kit
A compact first aid kit should fit in your jacket pocket or backpack hip belt. Contents: adhesive bandages (various sizes), gauze pads (2×2 and 4×4), medical tape, elastic bandage (ACE wrap), SAM splint (for wrist/ankle immobilization), triangle bandage (sling), ibuprofen, antihistamine (Benadryl for allergic reactions), antibiotic ointment, hand sanitizer, and an emergency whistle. Total weight: under 8 oz. Total cost: $15–25 for a pre-made adventure kit.
Mountain rescue preparedness
If you’re riding backcountry or sidecountry, add: a satellite communicator (Garmin inReach Mini 2, $300), a compass and paper map of the area, a headlamp with extra batteries, fire-starting materials (waterproof matches + tinder), an emergency bivvy ($15), and 24 hours of food (energy bars) and water (1L minimum). Know the local rescue number before you go. In the US, search and rescue is typically coordinated through the county sheriff’s office.
🛡️ 24. Snowboard gear insurance: what’s covered and how to file a claim
Snowboard gear is expensive. A complete setup (board, bindings, boots) can cost $1,000–2,000. Losing or damaging it during travel is a financial hit that insurance can mitigate.
Insurance options
- Airline liability: US airlines are legally required to compensate for lost/damaged checked bags up to $3,800 per passenger for domestic flights. However, the airline may depreciate your gear — a 3-year-old board isn’t valued at its purchase price. File within 24 hours of discovery.
- Travel insurance: Comprehensive travel insurance (Allianz, World Nomads, Travelex) covers gear loss, damage, and trip cancellation. Most policies cover $1,000–3,000 in gear per trip. Cost: $50–150 per trip depending on duration and coverage level. Worth it for international trips.
- Homeowner’s/renter’s insurance: Your gear is likely covered under your homeowner’s or renter’s policy, even when traveling. Deductibles apply (typically $500–1,000), so this only makes sense for catastrophic loss. Check your policy for “off-premises” coverage limits.
- Manufacturer warranty: Most board and binding manufacturers offer 1–2 year warranties against manufacturing defects. This doesn’t cover travel damage or normal wear, but if your binding breaks due to a design flaw, the manufacturer may replace it. Keep your receipts and register your gear online.
Filing a gear damage claim
If your gear is damaged during air travel:
- Report the damage to the airline’s baggage service desk before leaving the airport. Once you leave, the airline may deny the claim.
- Photograph the damage in detail — the bag, the gear, and any shipping labels or tags.
- Keep all receipts for repairs or replacement gear. The airline may require these to process the claim.
- File a written claim within 30 days (for domestic flights) or 21 days (for international flights under the Montreal Convention).
- Follow up weekly until the claim is resolved. Airlines process claims slowly — expect 4–8 weeks.
🔧 25. Snowboard maintenance on the road: daily tune, edge repair, and base care
When you’re riding every day for a week, your gear degrades. Edges dull, bases dry out, and bindings loosen. A 10-minute daily maintenance routine keeps your gear performing at its best throughout the trip.
The daily 10-minute tune
Evening (after riding)
Wipe base with a dry cloth to remove snow and ice. Check edges for burrs — run your finger along the edge (carefully) and feel for rough spots. If you find burrs, make 3–5 passes with the diamond stone. Check binding screws — tighten any that feel loose. Store boots with desiccant packets.
Morning (before first chair)
Rub a thin layer of all-temperature wax on the base using the cork. This takes 2 minutes and provides a fresh glide surface. Don’t scrape — let the wax absorb during the day. Check goggle lenses for moisture and apply anti-fog if needed.
Mid-week deep maintenance
Halfway through a week-long trip, do a more thorough tune: hot wax the base (use the resort’s wax room if available), file the edges with the edge file, check all binding hardware, and inspect the board for any base damage that needs P-Tex. This 20-minute session restores your gear to near-new performance for the second half of the trip.
Repairing common travel damage
- Edge chip: Small chips (under 2mm) don’t affect performance — file smooth and continue. Larger chips can catch on snow and need P-Tex repair.
- Base gouge: If the gouge exposes the core (you can see wood), apply P-Tex immediately to prevent water intrusion. If the gouge is shallow (only P-Tex deep), it can wait until the end of the trip.
- Binding strap crack: If a binding strap develops a crack, reinforce it with Gorilla tape. The tape provides enough structural integrity to finish the trip. Replace the strap after returning home.
- Boots wet inside: Stuff with newspaper overnight. Remove insoles and dry separately. If the liner is soaked, pull it out and hang to dry. A boot dryer accelerates this dramatically.
🎬 26. Content creator and vlogger packing guide
If you’re creating content during your snowboard trip — whether for YouTube, Instagram, TikTok, or personal archives — your packing needs extend beyond riding gear. Here’s how to pack a content creation kit that fits alongside your snowboard bag.
The content creator kit
🎥 Camera gear
- Action cam (GoPro Hero 13 or DJI Action 5)
- Extra batteries (4–6 for cold weather)
- Charging cables + power bank
- Selfie stick (3-foot, collapsible)
- Helmet mount + chest mount
- Board mount (for unique angles)
- SD cards (3 × 64GB minimum)
- SD card reader for phone
💻 Editing gear
- Laptop (if editing on the road)
- Portable SSD for backup (1TB)
- Phone gimbal (DJI OM7)
- Wireless microphone (for narration)
- ND filters for action cam
- Polarizing filter for snow glare
Filming best practices for snow
- Stabilization: Use in-camera stabilization (HyperSmooth on GoPro, RockSteady on DJI). For smoother footage, mount the camera on the chest rather than the helmet — the chest is closer to your center of gravity and produces less shaky footage.
- Framing: The rule of thirds applies to action footage too. Keep the horizon at the top third and your riding line in the center. For follow-cam, the filmer should stay 15–20 feet behind the rider at the same speed.
- Audio: Wind noise is the #1 enemy of snowboard audio. Use a foam windscreen on external microphones. For voice-over, record narration in a quiet room (lodge) and add it in post-production rather than trying to capture clean audio on the mountain.
- Battery management: Keep spare batteries in your jacket pocket (body heat keeps them warm). Swap batteries every 30 minutes in cold weather. A battery grip extends recording time and doubles as a handle.
- Storage: At the end of each day, transfer footage to a laptop or external SSD. Don’t rely on SD cards — they can fail. Format cards after successful backup.
Content creation on a budget
You don’t need a $500 camera setup to create great snowboard content. A single GoPro Hero 13 ($350) with a helmet mount ($20) and selfie stick ($30) produces excellent footage. Free editing software (DaVinci Resolve, CapCut) handles most editing needs. The most important factor isn’t gear — it’s planning your shots before you ride. Know what you want to film, position your camera accordingly, and ride with purpose. The best snowboard content comes from intentional filming, not expensive equipment.
❓ Snowboard bag packing – 20 most feared questions
100% yes. Place boots at the ends (nose/tail) to act as bumpers. Wrap bindings in soft layers, position near the waist. Just stay under 50lb airline limit.
Typically 1–3. Use padded board sleeves between each. For 3 boards, remove all bindings and stagger tips.
Most airlines treat them as standard checked bags if length+width+height ≤ 62 inches (157cm). Always check specific carrier – some have ski/snowboard waivers.
Absolutely. Use TSA-approved combination locks. Add an AirTag – airlines lost 2.5% of bags in 2025.
Wax is fine, but files, scrapers with metal edges, and multi-tools with blades must be checked. P-Tex candles are allowed but some TSA agents flag them – safer in checked.
Stuff the helmet with beanie, gloves, socks. Place it near the handle side, surrounded by soft items. Never put a board edge against helmet.
Use foam edge guards, cut pool noodles, or old yoga mat strips. Also available as aftermarket edge savers.
Not mandatory. Many riders leave them mounted but loosen the disc screws ¼ turn to prevent warping from pressure changes.
Always go 165cm. Extra room lets you add padding, boots, and clothing.
Yes – even with step‑ons. Some resorts in Europe require leashes. Why they matter.
Always in a microfiber goggle bag, inside helmet or boot. Never loose – lenses scratch instantly.
All-in-one saves weight and airline fees. But separate boot bag gives more organization if you tend to overpack. Personal preference.
Southwest is the cheapest — two free checked bags with no oversize fees. Alaska and JetBlue are next. Budget carriers (Spirit, Frontier) have 40lb limits and charge for everything.
Yes, and you should if your bag is close to the weight limit. Boots weigh 4–8 pounds total — wearing them saves significant bag weight. They’re also comfortable enough for a 3-hour flight.
Services like Ship Skis (shipskis.com) and Luggage Forward (luggageforward.com) ship directly to your resort. Cost: $60–100 each way. Eliminates airline risk entirely. Book 2 weeks before departure.
All-temperature hydrocarbon wax (yellow/white). It covers the widest range of conditions and is the safest choice when you don’t know the exact temperature range at your destination.
Place a small silica gel packet inside the goggle lens area and close the goggle strap to hold it in place. This absorbs moisture during transit. Apply anti-fog spray before your first ride day.
Always bring your own. Rental helmets are one-size-fits-most, may not have MIPS protection, and are worn by hundreds of people (hygiene). Your own helmet fits perfectly and you know its history.
Use a modular packing system: one bag for each person’s core gear, one shared bag for tools and accessories. Label everything. Keep the shared bag accessible in the car so you don’t have to unpack everything at each stop.
Hand warmers. Every single trip, someone in the group realizes they forgot hand warmers. Buy a bulk pack of 40 and distribute them before departure. It’s the cheapest insurance policy in snowboarding.
🎒 Pack like a pro, ride like a local
You now hold the most exhaustive snowboard bag packing checklist ever assembled — 27 sections, 82+ items, and the deep context behind every single one. From abrasion-resistant bags to airline-by-airline baggage policies, from MIPS helmet technology to the physics of weight distribution, from Japanese onsen etiquette to backcountry avalanche safety.
This isn’t a list you read once and forget. Bookmark it. Return before every trip. The section you skip is the one you’ll regret at 6 AM in a cold parking lot with the lifts about to open. The 2026 season is waiting. Most of this gear — the wheeled bags, step-on bindings, merino layers, tune kits, and avalanche safety equipment — is ready on Amazon with free returns. You’re one click from the most organized bag at baggage claim.
🛒 COMPLETE YOUR PACKING LIST


