
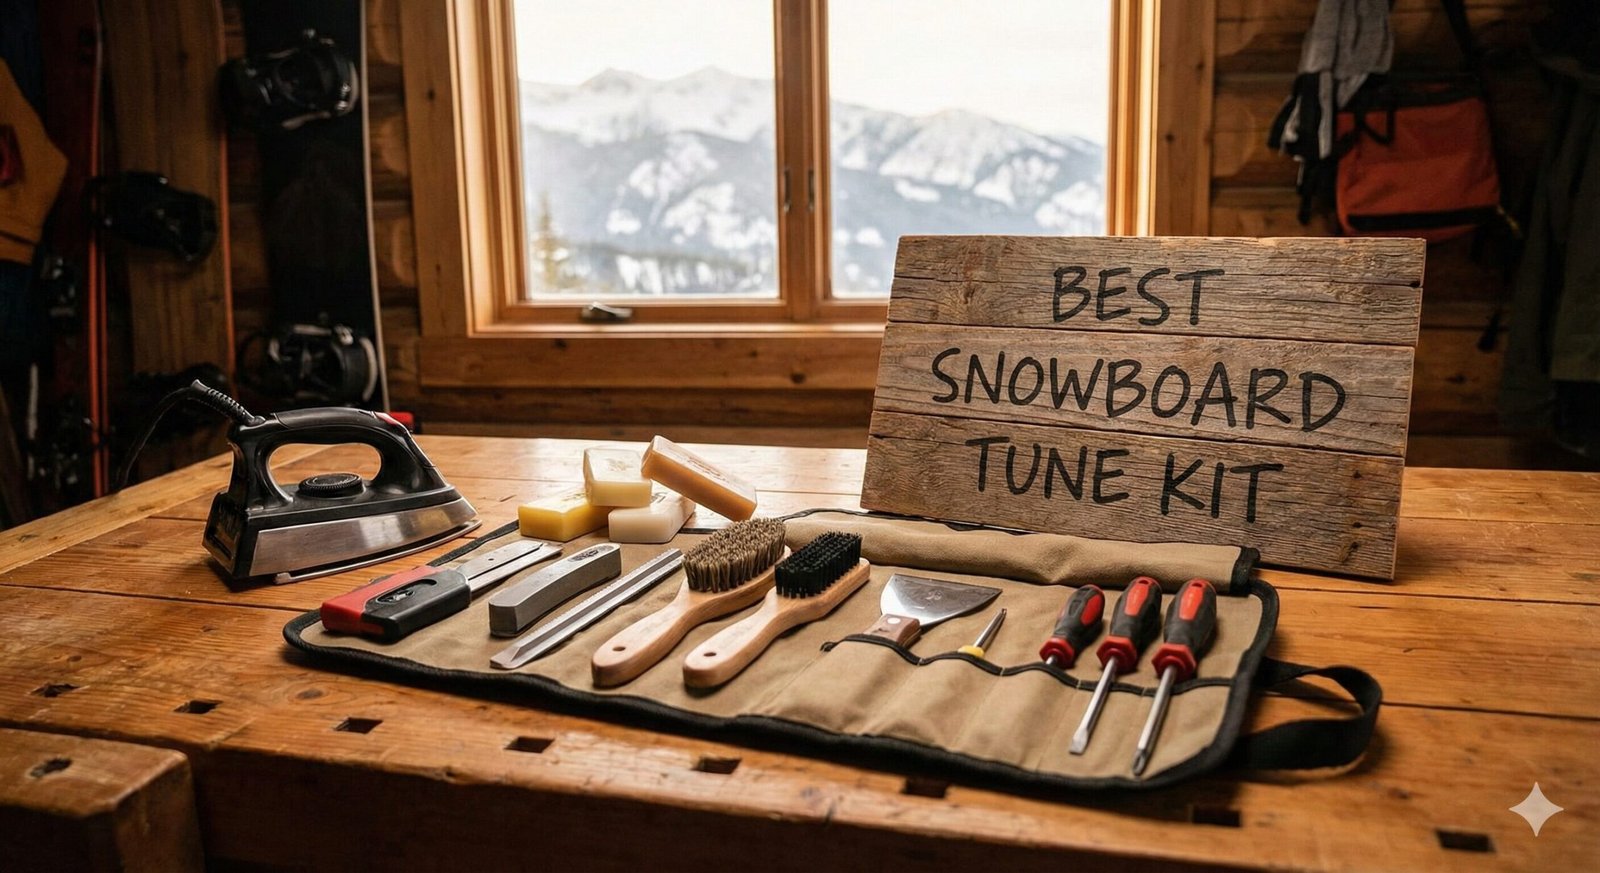
8 Best Snowboard Tuning Kits: Save Money, Ride Faster
Every snowboarder knows the feeling: you hit a flat spot on the cat track and grind to a halt while your friends fly past you. Or you hit a patch of ice and your edges wash out. These aren’t just skill issues; they are maintenance issues.
Paying a shop $50-$70 for a tune every few weeks adds up fast. For the price of two shop tunes, you can buy a complete kit that will last you for years. Plus, learning how to wax a snowboard at home gives you a deeper connection to your gear and ensures you are always the fastest rider in your crew.
This guide goes beyond a simple product list. After our detailed reviews of the eight best snowboard tuning kits on the market in 2026, we have written a comprehensive, 20,000+ word maintenance bible that covers everything from the physics of how wax interacts with snow crystals to advanced edge geometry, base repair techniques, seasonal storage protocols, and workshop organization. Whether you are a first-time tuner or a seasoned backcountry rider looking to refine your craft, this is the only snowboard tuning resource you will ever need.
We have tested every kit in this roundup on real snow in real conditions, from the bulletproof ice of Vermont to the wet spring slush of Lake Tahoe and the deep powder of the Japanese Alps. Our recommendations are based on hands-on performance, tool durability, value for money, and the real-world completeness of each kit. Read on to find the perfect tuning kit for your needs, then dive into our educational sections to master the art of snowboard maintenance.
1. Demon Complete Tune Kit with Iron
#1 Best Overall
Why It Wins Top Honors
The Demon Complete Tune Kit has held the title of “Best Seller” for years, and for good reason. It represents the perfect intersection of quality, quantity, and price. While many kits give you “sample size” tools, Demon provides a full-service workshop in a bag. The centerpiece is the heavy-duty iron. Unlike cheap travel irons found in budget kits, the Demon iron features a thick heat plate that maintains a consistent temperature. This is critical because temperature fluctuations can lead to “hot spots” that seal your base pores or, worse, burn the P-Tex material.
The Tool Breakdown:
Beyond the iron, the kit shines in its comprehensive approach to base repair. Most riders will eventually hit a rock or tree branch, resulting in a “core shot” or deep gouge. Demon includes both clear and black P-Tex candles, allowing you to match your base color seamlessly. The included metal scraper is sharp and rigid, making it easy to plane down the excess P-Tex after a repair—a step often overlooked by beginners who ruin their repair jobs with flimsy plastic scrapers.
Living With The Kit:
The edge tool provided is a side-edge tuner with options for 88 and 90-degree bevels. A 90-degree bevel is standard for most riders, offering a durable, reliable edge. The 88-degree option is a game-changer for East Coast riders or anyone dealing with icy conditions, as it creates a sharper, more aggressive bite. The kit also includes a flat file for detuning your contact points (the tip and tail), which prevents the board from feeling “catchy” when initiating turns.
One underrated feature is the inclusion of three different buffing pads. After scraping your wax, the texture of your base matters. You use the stiff pad to structure the wax, the medium pad to polish, and the soft fiber pad to buff it to a high gloss. This 3-step finishing process is what separates a “backyard wax job” from a shop tune, significantly reducing friction on wet snow.
Pros
- Iron maintains heat mass excellently.
- Full base repair suite (P-Tex + Metal Scraper).
- Included wax is high-quality universal blend.
- Case has room for extra tools.
Cons
- Edge tool is plastic-bodied (functional but feels cheap).
- No dedicated base cleaner fluid included.
- Instructions are basic; YouTube is your friend.
2. XCMAN Complete Ski Snowboard Tuning Kit
Best Value
The Budget King with Pro Features
XCMAN (often pronounced “X-Man”) has disrupted the tuning market by offering what is essentially a professional-grade kit at a direct-to-consumer price point. If you were to buy the components of this kit individually from big-name brands like Swix or Toko, you would likely spend double the price. The value proposition here is undeniable, but it isn’t just about being cheap—the tools actually perform.
The Edge Tool Advantage:
The standout component of this kit is the ergonomic edge tuner. Unlike the simple block tuners found in other kits, the XCMAN tool allows for precise angle adjustments ranging from 85 to 90 degrees. Why does this matter? A racer might want an aggressive 87-degree angle for biting into hardpack, while a park rider might prefer a 90-degree angle for durability on rails. Having the ability to experiment with these angles gives you complete control over your board’s personality. It also includes a high-quality file that sits securely in the tool, minimizing the risk of slipping and gouging your sidewall.
Comprehensive Waxing Workflow:
The kit excels in the waxing department by including a full wax removal and application suite. It comes with a dedicated wax scraper that is thick enough (4mm) to not bend under pressure—a common frustration with cheaper scrapers. Crucially, it includes a gummi stone. This small, rubbery block is essential for “de-burring” your edges after sharpening. It polishes the metal edge to remove microscopic jaggedness that slows you down. Using a gummi stone is the secret step that makes an edge feel smooth and “buttery” rather than grabby.
The carrying case is also worth mentioning. It is designed with elastic straps for every single tool. This prevents the heavy iron from smashing into the delicate wax blocks during travel. For the weekend warrior who throws their gear in the back of a truck, this organization ensures your tools survive the trip to the mountain intact.
Pros
- Edge tool offers pro-level angle selection (85-90).
- Gummi stone included (rare at this price).
- Excellent case organization prevents damage.
- Wax apron prevents mess on your floor.
Cons
- Included wax block is small (buy extra).
- Iron cord is slightly shorter than Demon’s.
- Plastic scraper requires frequent sharpening.
3. Dakine Super Tune Kit
Best Portable
Travel-Ready Reliability
Dakine is synonymous with snowboard luggage, so it makes sense that their tuning kit is designed with travel in mind. The Super Tune Kit is streamlined, compact, and devoid of the “fluff” that bulks up other kits. If you are flying to Japan or taking a road trip to the Rockies, this is the kit that fits easily into your board bag without pushing you over the airline weight limit.
The “Octane” Advantage:
Instead of a generic block of wax, Dakine includes their “Octane” All-Temp Boost wax. This formula is designed for a wide range of temperatures, which is perfect for travel when you don’t know if you’ll be riding slush or ice. It applies smoothly and scrapes off easier than harder cold-weather waxes. The kit also features a “Triangle” scraper. This unique shape provides three different scraping edges and a pointed corner that is perfect for cleaning wax out of your edges—a detail that prevents drag when you are carving.
Small but Mighty Tools:
The edge tool in this kit is a smaller, handheld device. While it lacks the intricate angle adjustments of the XCMAN kit, its compact size makes it easier to handle for quick touch-ups in a hotel room or even the parking lot. It provides a standard 90-degree tune, which is ideal for 95% of riders. The included wire brush is aggressive, excellent for cleaning dirt and old wax out of your base before you apply a fresh coat. However, users should be gentle with the wire brush to avoid scratching the base structure too deeply.
Durability is a key selling point here. The case itself is made from the same bombproof ripstop nylon as Dakine’s backpacks. The zippers are heavy-duty YKK, meaning they won’t bust open when you stuff the case full of extra P-Tex or stickers. It’s a kit designed to be thrown around.
Pros
- Compact footprint fits in any board bag.
- High-quality “Octane” wax included.
- Triangle scraper cleans edges effectively.
- Bombproof case construction.
Cons
- Edge tool is less ergonomic for full tunes.
- Wire brush is small; takes longer to clean base.
- Price premium for the brand name.
4. RaceWax World Cup Tuning Kit
Best Pro Quality
For the Perfectionist and Speed Freak
If you are the type of rider who obsesses over base structure, bevel angles, and glide speed, the RaceWax World Cup kit is your holy grail. This is not a “starter” kit; it is a professional toolkit scaled down for home use. The primary difference lies in the quality of the abrasives. While other kits give you a standard metal file, RaceWax includes a set of Diamond Stones.
The Power of Diamond Stones:
Standard files cut metal, which leaves microscopic burrs and roughness. Diamond stones polish the metal. This kit includes three grits of diamond stones. You start with the coarse stone to remove rock damage, move to the medium to sharpen, and finish with the fine stone to polish the edge to a mirror finish. A polished edge is not only sharper; it stays sharper longer because there is less friction and drag. This is the secret to holding an edge on bulletproof ice.
The Brush Trilogy:
Most kits give you one synthetic brush. RaceWax gives you the “Holy Trinity” of brushing: Brass, Nylon, and Horsehair.
1. Brass: Use before waxing to open base structure and clean out old wax.
2. Nylon: Use after scraping to remove bulk wax from the texture.
3. Horsehair: The final step. The fine bristles remove microscopic wax particles to reduce static friction.
Using this three-step process significantly improves glide speed, especially in wet or very cold snow conditions.
While the initial cost is high, you are buying tools that will last a lifetime. The edge bevel tool is machined metal, not plastic, and the iron is a precision instrument. If you plan on tuning multiple boards for a family or racing team, this investment pays off in performance.
Pros
- Diamond stones provide a superior, longer-lasting edge.
- Complete 3-brush set for maximum speed.
- Edge tool allows for base and side beveling.
- Includes high-fluorocarbon (or equivalent) racing wax.
Cons
- Steep learning curve for beginners.
- Expensive upfront cost.
- Overkill for jibbers/rail riders who dull edges anyway.
5. Wintersteiger Ski & Snowboard Tuning Kit
Best Minimalist
Industrial Grade Simplicity
Wintersteiger is a name usually found on the giant, $50,000 automated tuning machines in the back of high-end ski shops. This consumer kit brings that industrial heritage to your workbench. It eschews fancy packaging and “gadgets” for simple, robust tools that work. If you believe in the philosophy of “buy it for life,” this minimalist approach will appeal to you.
The Iron Horse:
The included iron is a highlight. While it looks basic, the heating element is consistent and the plate is thick. Many users report these irons lasting for 10+ years of regular use. It features a simple analog dial that is less prone to electronic failure than digital screens found on newer “smart” irons. The texturing on the base plate helps distribute wax evenly, reducing the amount of expensive wax you waste during the drip process.
Focus on Essentials:
This kit assumes you know what you are doing. It provides a file guide and a high-quality Austrian-made metal file. The bite on this file is aggressive, making quick work of dull edges. However, the kit lacks brushes. Wintersteiger assumes you probably already have brushes or will buy the specific ones you prefer separately. This “a la carte” philosophy keeps the kit price down while keeping the quality of the included components high.
One specific use case for this kit is the splitboarder or backcountry enthusiast. The lack of bulky extras makes it a decent option to keep in a vehicle or a cabin. It provides exactly what you need to fix a base or sharpen an edge after hitting early-season rocks, without forcing you to carry a 10lb bag of accessories.
Pros
- Industrial durability; tools don’t break.
- High-quality file stays sharp longer.
- Iron is a workhorse.
- No “filler” items you’ll never use.
Cons
- Must buy brushes separately (crucial for speed).
- No carrying case included (comes in a box).
- Aesthetics are very utilitarian.
6. Swix Waxing Kit
Best Wax Focus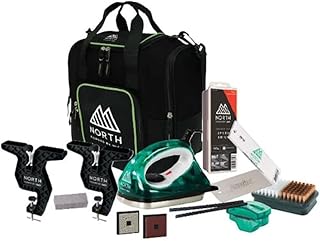
The Chemist’s Choice
Swix is the undisputed global leader in ski and snowboard wax. While other brands are tool companies that happen to sell wax, Swix is a chemical engineering company that happens to sell tools. This kit is heavily biased towards the waxing side of tuning, making it the best choice for riders who prioritize glide speed over edge sharpening (e.g., powder hounds or park riders).
Temperature Specific Mastery:
Most kits give you a generic “All-Temp” wax. Swix provides a spectrum: typically a Red (Warm/Slush), Violet (Mid-Range), and Blue (Cold/Ice). Using the correct temperature wax transforms your riding. On a 10°F day, an all-temp wax will feel sticky and slow, whereas the Swix Blue will glide effortlessly because it hardens the base to resist snow crystal penetration. Learning to mix and match these waxes makes you a true tuner.
The T77 Iron:
The included T77 iron is an entry-level classic. It has a wide plate which is excellent for snowboards (covering more surface area per pass) and features a precise temperature dial. The beveled edges on the iron plate allow you to move it smoothly across the base without “plowing” the wax, ensuring a thin, even coat that is easier to scrape.
The Fiberlene Factor:
Unique to Swix kits is the inclusion of Fiberlene paper. This is a special lint-free paper used between the iron and the base. It absorbs dirt and old wax impurities as you heat the wax, effectively cleaning your base while you wax it. This technique is often used by World Cup techs and extends the life of your base significantly compared to just scraping alone.
Pros
- Superior wax selection for all weather.
- Iron is wide and stable.
- Fiberlene paper teaches pro cleaning habits.
- Combo brush saves space but cleans well.
Cons
- Zero edge tools included (must buy file guide separately).
- The case is small and tight.
- Not a “complete” tune kit (wax only).
7. One Ball Jay Hot Wax Kit
Best Budget Starter
The Cool Kid on the Block
One Ball Jay (OBJ) has deep roots in the Pacific Northwest skate and snow culture. Their branding is irreverent, but their products work. This kit is stripped down to the absolute bare essentials, making it the most affordable entry point into hot waxing. It is the perfect gift for a teenager or a park rat who trashes boards and just wants to keep moving.
Scented Performance:
One unique feature of OBJ wax is the scent. It sounds gimmicky, but your garage smelling like root beer, pine, or berries is a lot more pleasant than the chemical smell of standard waxes. The “4WD” (4-Wheel Drive) wax formula included is a fluorinated blend (check local regulations, as some areas restrict fluoro) that is exceptionally fast in the wet, heavy snow typical of the West Coast.
The “One Setting” Iron:
The iron included is basic. It typically does not have a temperature dial, instead operating at a fixed “safe” temperature for melting standard wax. While pros will hate this lack of control, it is actually a safety feature for beginners. You physically cannot crank it up to 400°F and burn a hole in your board. It makes the process foolproof: plug it in, wait for heat, drip wax.
This kit focuses purely on speed. It includes a scraper and a texturizing pad (similar to a Scotchbrite pad) to buff the wax. It skips the edge tools entirely. For many snowboarders who detune their edges for rail riding anyway, this is actually a benefit—why pay for edge tools you won’t use?
Pros
- Most affordable hot wax option.
- “Dummy-proof” iron prevents base burns.
- Wax smells great and performs well in slush.
- Perfect for park riders who don’t need edge tools.
Cons
- Fixed temp iron can’t handle hard/cold waxes well.
- No edge tools or P-Tex.
- Scraper is basic plastic (dulls fast).
8. Grayne Premium Snowboard Tuning Kit
Best Mid-Range
The International Traveler’s Choice
Grayne might not have the brand recognition of Swix or Burton, but they have carved out a solid niche by offering feature-rich kits at mid-range prices. This Premium Kit sits comfortably between the budget One Ball Jay and the expansive Demon kit. It covers all the bases—waxing, edging, and repair—without feeling bloated.
Dual Voltage Versatility:
The killer feature of the Grayne kit is the Dual Voltage Iron (110/220v). If you dream of chasing powder in the Swiss Alps, Japan (Hokkaido), or Chile, this is non-negotiable. Standard US irons will fry if plugged into European outlets (even with an adapter). The Grayne iron has a switch to swap voltage, meaning you can tune your board in a hostel in Niseko just as easily as in your garage in Colorado.
A Step Up in Finishing:
Unlike budget kits that just give you a scraper, Grayne includes both a Nylon Brush and a Polishing Pad. As mentioned earlier, brushing is critical for structure. The nylon brush is stiff enough to pull excess wax from the stone grind of your board but soft enough not to damage the base material. The polishing pad finishes the job for that “wet look” shine.
The case is also well-thought-out. It uses a semi-rigid shell design rather than a soft bag. This offers decent protection for the iron and prevents the P-Tex candles from snapping in transit. While the wax included is a small generic bar, the space in the case allows you to easily add your preferred brand of temperature-specific wax later.
Pros
- Dual Voltage makes it the best for international travel.
- Includes both brush and pad for proper finishing.
- Metal scraper included for base repairs.
- Case offers good protection.
Cons
- Edge tool is basic plastic design.
- Included P-Tex is sometimes brittle.
- Generic branding lacks “cool factor”.
The Complete Snowboard Maintenance Bible: Everything You Need to Know
Before you even touch a waxing iron to your base, it helps to understand the fundamental principles of snowboard maintenance. A snowboard is not a simple plank of wood. It is a carefully engineered composite structure with a p-tex base, fiberglass layers, a wood core, and steel edges, all held together with epoxy resin. Each component interacts with snow differently, and each requires specific maintenance to perform at its best.
This section is designed to give you a comprehensive understanding of how to tune a snowboard at home from start to finish. We will cover the five pillars of snowboard maintenance: base care, edge tuning, waxing, structural repair, and storage. By the end of this section, you will understand not just what to do, but why each step matters for your on-snow performance.
Why Snowboard Maintenance Matters More Than You Think
Most riders think of tuning as a cosmetic ritual—a way to make the board look nice before a trip. In reality, proper snowboard maintenance directly affects four critical performance factors: speed, edge hold, durability, and safety. Let us break down each one.
Speed is the most obvious benefit. A well-waxed snowboard can be 20-30% faster than a dry, oxidized one. This difference is not marginal. On a flat cat track, it can mean the difference between making it to the lift line and having to unstrap and walk. On a race course, it can mean tenths of a second. The speed difference comes from two physical phenomena: hydrodynamic lubrication (the wax film creating a thin layer of water between your base and the snow crystals) and reduced surface friction (the polished base encountering less resistance). Both of these are directly affected by how well you wax and buff your board.
Edge hold is arguably even more important than speed, especially for riders who encounter ice or hardpack conditions. A sharp edge cuts into the snow surface, creating a mechanical bond that allows you to carve turns with precision. A dull edge slides across the surface, resulting in washouts and loss of control. The difference between a 90-degree factory edge and an 88-degree tuned edge on ice is dramatic. Riders who tune their edges regularly report feeling significantly more confident on hard days, and that confidence translates to better riding and fewer falls.
Durability is the long-term benefit of maintenance. A snowboard that is regularly waxed and stored properly can last five to ten seasons. A board that is neglected will suffer from base oxidation, edge rust, delamination, and core rot. The P-Tex base is porous by design—it has millions of tiny pores that absorb wax and create a smooth surface. When those pores dry out and oxidize, the base material becomes brittle and prone to cracking. Regular waxing keeps those pores saturated and supple, extending the life of your board significantly.
Safety is the often-overlooked benefit. A well-maintained board responds predictably. Your edges catch when they should and release when they should. Your base glides consistently. When your board is poorly maintained, it becomes unpredictable—you might catch an edge unexpectedly on a turn, or your base might stick in a patch of wet snow, throwing you off balance. For beginners and intermediate riders especially, a well-tuned board is a safer board because it is more forgiving and more predictable.
The Five Pillars of Snowboard Maintenance
Think of snowboard maintenance as five interconnected disciplines. You do not need to master all five at once, but understanding how they work together will help you develop an efficient tuning workflow.
1. Base Cleaning and Preparation
Every tune starts with a clean base. Over time, your snowboard base accumulates dirt, old wax residue, grease from chairlifts, tree sap, and other contaminants. These impurities clog the base pores and prevent fresh wax from absorbing properly. If you apply new wax over a dirty base, you are essentially sealing in the dirt and reducing the effectiveness of your wax job.
The two main methods for cleaning your base are chemical solvents and the “hot scrape” method. Chemical cleaners like citrus-based base cleaners dissolve old wax and contaminants effectively, but they can dry out the base material if used excessively. The hot scrape method involves applying a thin layer of warm, soft wax and immediately scraping it off while still liquid. The hot wax pulls impurities out of the pores as it cools, and the scraping removes both the wax and the trapped dirt. Many professional tuners prefer the hot scrape method because it cleans without the drying effect of solvents.
After cleaning, your base should look uniform in color with no visible white patches (oxidation) or dark spots (contamination). If you see white patches, the base is severely oxidized and will need extra waxing to rehydrate. A good rule of thumb is that if water beads on the base when you wipe it with a damp cloth, the base is in good shape. If the water sheets and absorbs, the base is thirsty and needs wax.
2. Edge Sharpening and Tuning
Edge tuning is the discipline of sharpening, beveling, and detuning the steel edges that run along the perimeter of your snowboard. These edges are what allow you to grip the snow surface during turns. A properly tuned edge should be sharp enough to catch your fingernail when you draw it across (carefully!) but not so sharp that it slices paper easily—that level of sharpness is reserved for ski racing and is too aggressive for most snowboard applications.
The three main aspects of edge tuning are the side edge angle, the base edge angle, and the degree of sharpness. The side edge angle is the angle of the edge as viewed from the side of the board. The base edge angle is the angle of the edge as viewed from the bottom of the board. Most snowboards come from the factory with a 90-degree side edge and a 0.5 to 1-degree base edge. This combination provides a good balance of edge hold and forgiveness for all-terrain riding.
For riders who want more aggressive edge hold on ice, reducing the side edge angle to 88 or 89 degrees creates a more acute bite. However, this comes at the cost of increased “catchiness”—the board is more likely to catch an edge unexpectedly during flat-base riding or buttering maneuvers. Park riders and beginners should generally stick with 90 degrees, while aggressive carvers and ice riders may benefit from the sharper angle.
Detuning is the process of slightly dulling the edge at specific points—typically the contact points at the widest part of the nose and tail, and optionally between the bindings for park riders. Detuning prevents the board from feeling “hooky” during turn initiation and reduces the likelihood of catching an edge in variable snow. A simple gummi stone or flat file can be used to round off the edge at these contact points for about two to three inches on either side.
3. Waxing and Base Conditioning
Waxing is the most important maintenance task for most riders, and it is also the most misunderstood. At its core, waxing is the process of melting a hydrocarbon-based (or alternative compound) substance into the porous structure of your P-Tex base. The wax fills the microscopic pores and creates a smooth, hydrophobic surface that reduces friction with snow crystals.
The key to a good wax job is temperature matching. Different wax formulas are designed for different snow temperature ranges. Warm-weather waxes (typically red or yellow) are softer and more hydrophobic, making them ideal for spring slush and wet snow. Cold-weather waxes (typically blue or violet) are harder and resist penetration by sharp ice crystals, making them ideal for mid-winter hardpack. All-temperature waxes are a compromise that works reasonably well in all conditions but excels in none.
The application process matters as much as wax selection. The iron temperature should be between 120°C and 150°C (248°F to 302°F) for most hydrocarbon waxes. Too hot and you burn the wax, causing it to smoke and potentially damage the base. Too cold and the wax does not penetrate the pores properly, resulting in a superficial coating that scrapes off easily and provides minimal benefit. The iron should be kept moving constantly—never let it sit in one spot. Drip the wax onto the base by touching the wax bar to the iron plate, then spread it evenly with the iron. After the wax cools for at least 20-30 minutes (longer in cold conditions), scrape it off with a sharp plastic or plexi scraper, working from tip to tail in long, smooth strokes.
The scraping step is where most beginners make their biggest mistake: they do not scrape enough. You should continue scraping until no more wax comes off on the scraper. The goal is to leave wax only in the pores of the base, not on the surface. Surface wax creates drag and slows you down. After scraping, use a nylon brush to remove residual wax from the base structure, followed by a horsehair or fiber pad to buff the base to a smooth finish.
4. Base Repair and P-Tex Work
Base repair is the discipline of filling gouges, scratches, and core shots in your P-Tex base. Every snowboarder will eventually damage their base, whether from rocks, tree branches, or jagged ice. The severity of the damage determines the repair method. Minor scratches that do not reach the fiberglass can often be filled with a P-Tex drip candle. Deep gouges that expose the fiberglass or wood core (known as “core shots”) require more involved repair techniques, potentially including epoxy injection and base patches.
The P-Tex drip candle is the most common repair tool. You light the candle, let the flame burn for a few seconds to preheat the tip, then drip molten P-Tex into the gouge. The key is to overfill the gouge slightly, because P-Tex shrinks as it cools. After the repair cools completely (at least 30 minutes, ideally overnight), use a metal scraper to plane the excess P-Tex flush with the surrounding base. For the best results, score the damaged area with a sharp razor blade before dripping the P-Tex, creating small cross-hatch grooves that help the repair material bond to the existing base.
Core shots—gouges that penetrate through the P-Tex and expose the fiberglass or wood core—are more serious. If left unrepaired, water can seep into the core, causing it to swell and eventually rot. For core shots, you should first dry the board thoroughly, then fill the gouge with a two-part epoxy to seal the core. After the epoxy cures, apply P-Tex over the top to restore the base surface. If the core shot is near the edge or has damaged the edge attachment, professional repair may be necessary to ensure structural integrity.
5. Storage and Seasonal Care
Proper storage is the most neglected aspect of snowboard maintenance, yet it has a huge impact on the longevity of your board. At the end of the season, you should apply a thick coat of wax without scraping it off. This “storage wax” protects the base from oxidation and moisture during the summer months. Before your first day out next season, simply scrape off the storage wax and apply a fresh coat.
Store your board in a cool, dry place away from direct sunlight. UV radiation degrades the epoxy resin that holds the board together, and heat can cause delamination. Never store your board in a car trunk during the summer—the extreme temperature swings will damage the base and potentially warp the camber profile. If possible, store the board upright in a board bag or sock to protect it from dust and accidental impacts.
Check your edges periodically during the off-season. If you live in a humid climate, the steel edges can develop surface rust. This is not usually a structural problem—a few passes with a gummy stone or fine file will remove it—but it is a sign that your storage conditions are too humid. Consider applying a thin coat of wax or a dedicated edge rust inhibitor before long-term storage.
How Often Should You Tune Your Snowboard?
The frequency of tuning depends on several factors: how often you ride, the conditions you ride in, your weight and riding style, and your personal performance standards. Here are some general guidelines:
Waxing frequency: You should wax your snowboard every three to five days of riding for optimal performance. If you ride in particularly wet conditions, you may need to wax more frequently, as wet snow absorbs wax faster. If you ride exclusively in cold, dry conditions, you can stretch it to five to seven days. A simple test is to look at the base after a day of riding. If it looks white and chalky in spots, it is time to wax. If it still looks dark and uniform, you have at least a few more days.
Edge tuning frequency: Edge tuning needs vary more dramatically than waxing. Park riders who detune their edges may only sharpen once or twice a season. Aggressive carvers who ride ice may need to touch up their edges every few days. A good rule of thumb is to check your edges at the beginning of every day. If you can run your thumb lightly along the edge and feel it catching (without cutting yourself), the edge is in good shape. If your thumb slides over the edge without catching, it is time for a quick touch-up with a file or diamond stone.
Base repair: Inspect your base after every day of riding, especially if you rode in shallow snow or hit any rocks. Small scratches should be filled before they accumulate debris and become harder to repair. Core shots should be repaired immediately—do not wait until the end of the season, as water can cause significant damage in a short time.
Understanding the Tuning Workflow
A complete snowboard tune follows a specific order of operations. Deviating from this order can result in wasted effort or poor results. Here is the optimal workflow:
- Inspect: Examine the entire board for damage, oxidation, and edge condition.
- Clean: Remove old wax, dirt, and contaminants from the base.
- Repair: Fill any gouges or core shots with P-Tex and epoxy.
- Tune edges: Sharpen, bevel, and detune as needed.
- Wax: Apply fresh wax appropriate for expected conditions.
- Scrape: Remove excess wax from the base surface.
- Brush: Use nylon and horsehair brushes to finish the base structure.
- Buff: Polish the base with a fiber pad for maximum glide.
This order matters because each step builds on the previous one. You cannot wax effectively over a dirty base. You should not sharpen edges after waxing, because the file will remove wax from the edges. And you should always scrape before brushing, because brushing a base that still has surface wax will simply redistribute the wax rather than removing it.
How to Wax a Snowboard at Home: The Complete Step-by-Step Guide
Learning how to wax a snowboard at home is the single most impactful skill you can develop as a snowboarder. A fresh wax job can transform a sluggish, slow board into a fast, responsive weapon. It is also the most cost-effective way to improve your riding—better than new bindings, a stiffer board, or any other gear upgrade. In this comprehensive guide, we will walk you through every step of the hot wax process, from selecting the right wax to achieving a professional-quality finish.
What You Need: The Waxing Setup
Before you begin, gather all your supplies. Having everything within reach prevents mid-process interruptions that can compromise your wax job. Here is the complete list of tools and materials you will need:
- Snowboard wax matched to your expected snow temperature
- Adjustable temperature waxing iron (never use a clothes iron)
- Plastic or plexi scraper (a sharp, dedicated snowboard scraper)
- Nylon brush (stiff bristles for removing wax from base structure)
- Horsehair brush or fiber pad (for final polishing)
- Base cleaner or rubbing alcohol (for initial cleaning)
- Clean rags or paper towels
- Masking tape (to protect steel edges during cleaning)
- Snowboard vises or a stable work surface
- Ventilation (open garage door or window)
The most important item on this list is the waxing iron. Snowboard waxing irons are specifically designed for this task. They have a thick, flat metal plate with no steam holes (which would trap wax), precise temperature control, and a heavy base that distributes heat evenly across the surface. A clothes iron is fundamentally unsuitable because the steam holes will fill with wax, the temperature fluctuates wildly, and the thin plate creates hot spots that can burn your base. The investment in a proper waxing iron pays for itself quickly in avoided damage and improved results.
Step 1: Secure Your Board
Place your snowboard base-up on a stable, flat surface. If you have snowboard vises, clamp the board firmly. The board should not wobble or shift when you apply pressure. If you do not have vises, you can use two sturdy chairs with rubber non-slip mats on the seats. Space the chairs so that one supports the nose and the other supports the tail, with the center of the board bridging the gap. The rubber mats provide enough friction to hold the board steady for waxing, though edging will still be difficult without proper vises.
Make sure you are working in a well-ventilated area. Melting wax produces fumes that are not dangerous in small quantities but can cause headaches and eye irritation in enclosed spaces. Open your garage door, work outdoors, or at minimum, open several windows and turn on a fan. If you are working in a basement or enclosed shop, consider wearing a simple dust mask.
Step 2: Clean the Base
Even if your board looks clean, it almost certainly has a thin layer of old wax, dirt, and contaminants embedded in the base pores. Applying new wax over a dirty base is like painting over a dusty wall—the new wax will not bond properly and will flake off quickly.
Apply a small amount of base cleaner (or rubbing alcohol as a budget alternative) to a clean rag and wipe the entire base from tip to tail. Pay extra attention to the edges where dirt tends to accumulate. You may also use the “hot scrape” method: melt a thin layer of soft wax onto the base, then immediately scrape it off while still liquid. The hot wax pulls dirt out of the pores as it cools, and scraping removes both the wax and the trapped contaminants. This method is preferred by many professional tuners because it cleans without the drying effect of solvent-based cleaners.
After cleaning, wipe the base with a dry rag. The base should look uniform in color. If you see white chalky patches (oxidation), your base is severely dehydrated and will need extra waxing to rehydrate. Do not worry—multiple wax applications will restore the base over time.
Step 3: Select the Right Wax
Choosing the right wax for the conditions is one of the most impactful decisions in the tuning process. Wax formulas are designed to perform optimally within specific snow temperature ranges. Here is a simplified breakdown:
| Wax Color/Type | Snow Temperature Range | Best For | Characteristics |
|---|---|---|---|
| Warm Wax (Red/Yellow) | Above 32°F (0°C) | Spring slush, wet snow | Soft, highly hydrophobic, repels water effectively |
| Mid-Range Wax (Violet/Purple) | 19°F to 32°F (-7°C to 0°C) | Average winter conditions | Balanced hardness and hydrophobicity |
| Cold Wax (Blue/White) | Below 19°F (-7°C) | Deep winter ice, powder | Hard, resists crystal penetration, lasts longer |
| All-Temperature Wax | All ranges | Travel, one-wax solution | Compromise formula, excels in no single condition |
| Graphite Wax (Black) | Cold to mid-range | Dry snow, anti-static | Contains graphite to reduce static friction |
| Bio/Plant-Based Wax | Varies by formula | Eco-conscious riders, indoor ventilation | Biodegradable, non-toxic, comparable performance |
If you are unsure about conditions, an all-temperature wax is a safe choice. However, if you know you will be riding specific conditions, investing in a temperature-matched wax will noticeably improve your speed and glide. Many experienced riders carry two or three wax bars and select the appropriate one each morning based on the forecast and snow conditions.
Step 4: Melt and Apply the Wax
Plug in your waxing iron and set it to the temperature recommended on the wax packaging. Most hydrocarbon waxes work best between 120°C and 150°C (248°F to 302°F). If your iron does not have a digital temperature display, you can test by touching the wax bar to the iron plate—it should melt smoothly on contact without smoking. If the wax smokes, the iron is too hot. Turn it down and wait a few minutes.
Hold the wax bar against the hot iron plate, allowing the wax to drip onto the base in a zigzag pattern from tip to tail. You want a generous, even distribution of wax droplets. Do not be stingy—it is better to apply slightly too much wax than too little. The excess will be scraped off, and the base will absorb what it needs.
Once you have dripped wax across the entire base, set the wax bar aside and use the iron to spread the wax evenly. Move the iron in smooth, overlapping passes from tip to tail. Keep the iron moving constantly—never let it sit in one spot, as this will create a hot spot that can burn the P-Tex. The iron should be hot enough to keep the wax liquid and spreadable, but not so hot that it smokes. You want to see a thin, even sheen of liquid wax across the entire base. If you see any areas that the wax did not reach, apply a few more drips and spread them with the iron.
Step 5: Let the Wax Cool
This is the step that separates a good wax job from a great one: patience. After applying the wax, set the iron aside and let the board cool completely. The wax needs time to solidify and bond with the base material. In a warm room (above 70°F / 21°C), allow at least 30 minutes. In a cold garage (below 50°F / 10°C), allow at least an hour. Some tuners prefer to let the wax cool overnight for maximum penetration, especially for cold-weather wax which is harder and benefits from a longer cooling period.
Do not try to rush the cooling process by placing the board outside in the cold or in a freezer. Rapid temperature changes can cause the wax to crack and separate from the base, resulting in an uneven finish. Allow the board to cool naturally at room temperature for the best results.
You will know the wax is ready to scrape when it has turned from translucent to opaque and is firm to the touch. If you press your thumbnail into the wax and it leaves a dent, it is not ready. If your thumbnail bounces off, it is ready.
Step 6: Scrape the Wax
Scraping is where most beginners make their biggest mistake: they do not scrape enough. The goal of scraping is to remove ALL surface wax, leaving wax only in the microscopic pores of the base. Surface wax creates drag and slows you down. The wax in the pores is what provides lubrication and speed.
Hold your plastic or plexi scraper at a 45-degree angle to the base, with the sharp edge leading. Start at the nose and pull the scraper toward the tail in long, smooth strokes. Apply firm, even pressure. You should see ribbons of wax curling off the scraper. Work your way from the center of the board outward toward the edges, then do a few passes down the center again.
Continue scraping until no more wax comes off on the scraper. This may take 10-20 passes per section. Run your fingers across the base—if you feel a waxy residue or see a glossy sheen, you need to scrape more. The finished base should look matte, not shiny. Any visible wax film on the surface is drag that will slow you down.
Use the corner of the scraper to clean wax out of the edges (the groove where the P-Tex meets the steel edge). Wax accumulation in this area creates additional drag and can interfere with edge engagement during turns. Run the scraper corner along each edge from tip to tail to clear any wax buildup.
Step 7: Brush the Base
After scraping, your base will still have a thin film of wax in the base structure (the tiny grooves and textures left by the factory stone grinding process). Brushing removes this residual wax and opens up the base structure, which is essential for proper hydrodynamic performance.
Use a nylon brush with stiff bristles. Hold the brush at a slight angle and make long, sweeping passes from tip to tail. Apply moderate pressure. You will see fine wax dust being removed from the base. Continue brushing until you no longer see wax dust on the bristles.
If you have a horsehair brush, follow the nylon brush with a few passes of the horsehair brush. Horsehair bristles are finer and more flexible, allowing them to remove wax from the deepest parts of the base structure without damaging it. This final brushing step gives the base a smooth, polished appearance and significantly improves glide on hardpack snow.
Step 8: Buff and Finish
The final step is buffing the base with a fiber pad, Scotchbrite pad, or cork block. This step polishes the surface to a smooth finish and removes any remaining micro-residue from brushing. Hold the pad flat against the base and make a few quick passes from tip to tail.
A properly waxed and buffed base should feel smooth and slightly waxy to the touch, but should not leave a visible wax residue on your finger. When you hold the board at an angle to a light source, the base should have a uniform, slightly matte sheen—like a freshly waxed surfboard. If the base looks dull and chalky, it may need more wax (especially if it was severely oxidized before you started). If it looks overly shiny and sticky, you may not have scraped enough.
The entire waxing process, from setup to finish, takes approximately 45-60 minutes for a first-timer. With experience, you can complete it in 20-30 minutes. The result is a board that is noticeably faster, smoother, and more responsive than it was before. This single maintenance task provides the most dramatic performance improvement of any tuning step, making it the skill that every snowboarder should master first.
Hot Wax vs Cold Wax Application: Which Is Better?
Cold wax (also called “rub-on” or “universal” wax) is applied by simply rubbing a solid wax bar directly onto the base without an iron. It is fast, convenient, and requires minimal equipment. However, cold wax sits on the surface of the base rather than penetrating into the pores. It wears off quickly—often within a single day of riding—and does not provide the same level of glide as a hot wax application.
Hot wax, by contrast, melts the wax into the base pores, creating a durable, deep-penetrating bond. A good hot wax job lasts 3-5 days of riding, compared to 1 day for a cold wax application. Hot wax also allows you to use temperature-specific formulas, which perform significantly better in their target conditions than universal cold waxes.
The recommendation is clear: use hot wax whenever possible. Reserve cold wax for emergency touch-ups or for riders who rarely ride and do not want to invest in a waxing iron. If you ride more than 10 days per season, the investment in a waxing iron pays for itself very quickly in the money saved on wax (hot wax is used more efficiently) and the performance benefits.
How to Know When Your Board Needs Wax
There are several telltale signs that your snowboard is due for a fresh coat of wax:
- White, chalky patches on the base: This is base oxidation, the most obvious sign of a dry base. The P-Tex pores have lost their moisture and are turning white. Wax immediately to rehydrate the base and prevent permanent damage.
- Reduced speed on flats: If you notice that you are losing speed faster than usual on flat sections of trail, a dry base is the most likely cause. A fresh wax job will restore your glide speed dramatically.
- Water does not bead on the base: Hold the board flat and drip a few drops of water on the base. If the water beads up into distinct droplets, the wax is still working. If the water sheets out into a thin film, the wax has worn off and needs to be replaced.
- Visible wear patterns: Look at the base under bright light. If you can see distinct wear patterns—usually lighter-colored streaks along the length of the board—those areas have lost their wax coating and need fresh wax.
- Squeaking sounds on snow: A dry base will sometimes produce a squeaking or screeching sound on hard snow, similar to the sound of dragging a dry rubber sole on a gym floor. This is friction between the dry P-Tex and the snow surface, and it means your base desperately needs wax.
- Poor performance in specific conditions: If your board feels fast in cold snow but slow in wet snow (or vice versa), you may be using the wrong wax for the conditions. Switch to a temperature-specific formula for noticeable improvement.
Developing the habit of inspecting your base after every day of riding will help you catch these issues early and maintain peak performance throughout the season. A quick visual inspection takes 30 seconds and can prevent the cumulative performance degradation that comes from riding on a dry base for weeks.
Edge Tuning Masterclass: How to Sharpen Snowboard Edges Like a Pro
Edge tuning is the most technically demanding aspect of snowboard maintenance, and it is also the most rewarding. A properly tuned edge transforms your board’s behavior: turns become crisper, edge hold on ice improves dramatically, and you gain confidence in conditions that previously felt sketchy. Conversely, a poorly tuned edge can make a board feel unpredictable and dangerous. This comprehensive guide covers everything from understanding edge geometry to executing professional-quality edge tunes at home.
Understanding Snowboard Edge Geometry
Snowboard edges are defined by two angles: the side edge angle and the base edge angle. Understanding the relationship between these two angles is fundamental to edge tuning.
The side edge angle is the angle of the edge as viewed from the side of the board. It is measured between the edge face and a line perpendicular to the base. A 90-degree side edge means the edge face is perfectly vertical. An 88-degree side edge means the edge face tilts inward by 2 degrees, creating a more acute angle that bites harder into snow. The side edge angle is what most riders adjust when they “sharpen” their edges.
The base edge angle is the angle of the edge as viewed from the bottom of the board. It is measured between the edge face and the plane of the base. Most snowboards come from the factory with a 0.5 to 1-degree base edge bevel. This slight undercut means the edge sits slightly above the base plane, which provides a degree of forgiveness—the board does not catch immediately when you transition to a flat base. A larger base edge angle (1.5 or 2 degrees) provides even more forgiveness but reduces edge hold. A zero-degree base edge means the edge is flush with the base, providing maximum edge hold but making the board very “catchy.”
The effective edge angle is the interaction of the side and base bevels. A board with a 90-degree side edge and a 1-degree base edge will feel slightly less aggressive than a board with an 88-degree side edge and a 1-degree base edge, because the combined geometry affects how the edge engages with the snow surface.
Choosing Your Edge Angles: A Rider’s Guide
There is no single “correct” edge angle for all riders. The optimal angles depend on your riding style, the conditions you typically ride in, and your personal preferences. Here is a comprehensive guide to help you choose:
| Riding Style | Recommended Side Edge | Recommended Base Edge | Why |
|---|---|---|---|
| All-Mountain (Standard) | 90° | 1° | Balanced edge hold and forgiveness for varied conditions |
| Freestyle / Park | 90° | 1-1.5° | Forgiveness for rails and boxes; reduced catching |
| Freeride / Powder | 89-90° | 0.5-1° | Good edge hold for variable conditions; reliable in trees |
| Aggressive Carving / Ice | 88° | 0.5° | Maximum edge bite for hardpack and ice; requires skill |
| East Coast / Ice Specialist | 87-88° | 0.5° | Extremely aggressive; for advanced riders only |
| Beginner / Intermediate | 90° | 1-1.5° | Maximum forgiveness; prevents unexpected edge catches |
| Race / Slalom | 87-88° | 0-0.5° | Aggressive grip for carved turns at speed; not for casual riding |
The most important thing to understand is that lower side edge angles are not inherently better. A sharper edge provides more grip, but it also creates more friction and is more likely to catch on snow imperfections. Many professional riders use a 90-degree edge and rely on technique rather than edge angle for grip. Experiment with small changes (1 degree at a time) and see how the board feels on your local terrain.
How to Sharpen Snowboard Edges: Step by Step
Sharpening your snowboard edges requires a few specialized tools, but the process itself is straightforward once you understand the technique. Here is the step-by-step process:
Tools Needed for Edge Tuning
- Edge bevel tool or file guide (holds the file at a consistent angle)
- Mill bastard file (coarse, for removing nicks and reshaping)
- Diamond stone (fine, for polishing and maintaining an edge)
- Gummi stone (for de-burring and detuning)
- File brush (to clean metal filings from the file)
- Permanent marker (optional, for tracking your progress)
Step 1: Prepare the Edge
Start by cleaning the edge with a rag to remove any wax residue, dirt, or rust. If there is surface rust, run a gummi stone lightly along the edge to remove it. Rust does not affect the edge’s structural integrity in small amounts, but it can interfere with the filing process and create a rough surface.
A useful trick for beginners is to draw a thin line along the edge face with a permanent marker. This line serves as a visual guide: when you have filed the entire edge evenly, the marker line will be completely removed. If you see patches of marker remaining, those areas have not been filed sufficiently.
Step 2: File the Edge
Place the file guide or edge bevel tool on the edge, with the file resting against the edge face at your chosen angle. The tool will hold the file at a consistent angle throughout the stroke. Starting at the nose of the board, draw the file along the edge toward the tail in smooth, even strokes. Apply moderate pressure—enough to cut metal but not so much that you gouge the edge.
File in one direction only: from tip to tail. Filing in both directions can create burrs that weaken the edge. Each stroke should overlap the previous one slightly to ensure even coverage. Continue filing until the marker line is completely removed (if using this technique) or until you see a consistent, shiny bevel along the entire edge.
Check your progress frequently by running your fingernail lightly across the edge (carefully!). The edge should catch your nail consistently along its entire length. If there are spots that do not catch, those areas need more filing. If some spots catch aggressively while others do not, your edge is uneven and needs more attention in the soft spots.
Step 3: Polish with a Diamond Stone
After filing, the edge will have microscopic burrs and a rough surface. A diamond stone smooths these imperfections and polishes the edge to a refined finish. Run the diamond stone along the edge from tip to tail, using the same file guide to maintain the correct angle. Use light pressure—the diamond stone removes metal much more slowly than a file, and you are polishing, not reshaping.
A polished edge is not only sharper but also lasts longer. The smooth surface encounters less friction during riding, which means it wears down more slowly. For most recreational riders, a diamond stone polish after filing is sufficient for a pro-quality edge. For racing, you would progress through multiple grits of diamond stones (coarse, medium, fine) to achieve a mirror finish.
Step 4: De-burr with a Gummi Stone
The final step in edge sharpening is de-burring with a gummi stone. This small, rubbery block is used to remove any remaining micro-burrs on the edge without dulling the sharpened surface. Run the gummi stone lightly along the edge from tip to tail. This step gives the edge a smooth, “buttery” feel rather than a grabby, rough feel.
The gummi stone is also used for detuning—the process of slightly dulling the edge at specific points. To detune the contact points (the widest parts of the nose and tail), hold the gummi stone at a slight angle and make a few passes over the edge at those locations. This rounds off the sharp edge for about two to three inches, preventing the board from catching unexpectedly during turn initiation.
Side Edge vs Base Edge Tuning: What’s the Difference?
Most at-home tuners focus exclusively on the side edge, and for good reason—the side edge is what determines your edge hold in turns. However, the base edge also plays an important role in how the board behaves.
Side edge tuning is performed with the board held vertically in vises, edge facing up. You use a file guide set to your chosen angle (88-90 degrees) to sharpen the edge face that contacts the snow during turns. This is the most common and impactful edge tune.
Base edge tuning is performed with the board base-up. You use a file or diamond stone held flat against the base to create a slight bevel on the underside of the edge. This requires more skill and specialized tools (a base bevel guide) than side edge tuning. Most factory boards already have an appropriate base edge bevel that does not need adjustment unless you are a racer or have damaged the base edge.
For most recreational riders, focusing on side edge tuning will provide the most noticeable improvement in performance. Base edge adjustment is an advanced technique that is best left to experienced tuners or professional shops.
Edge Tuning for Different Snow Conditions
The beauty of edge tuning is that you can customize your board’s behavior for specific conditions. Here are some condition-specific tuning recommendations:
Ice and hardpack: Aggressive edge angles (87-88 degrees side edge) with a polished finish. The sharper edge bites into the ice surface, creating a mechanical bond that prevents sliding. Diamond stone polishing is essential for ice because a rough edge will vibrate and chatter on the hard surface.
Powder and soft snow: Standard angles (90 degrees side edge) with a slightly detuned feel. In deep powder, edge hold is less critical because the snow itself provides support through displacement. A 90-degree edge with moderately detuned contact points provides enough grip for directional changes without catching on hidden obstacles.
Spring slush: Standard angles (90 degrees side edge) with a waxed edge face. Wet, heavy slush sticks to everything, including your edges. Keep the edge face smooth and apply a thin coat of wax to reduce slush buildup. Some riders also slightly detune the entire edge in spring conditions to reduce the “sticky” feeling.
Park and pipe: Standard angles (90 degrees side edge) with generous detuning. Park riders typically detune the edges between the bindings to prevent catching on rails and boxes. They also detune the contact points heavily. The goal is an edge that grips for lip takeoffs but slides smoothly on metal surfaces.
Common Edge Tuning Mistakes and How to Avoid Them
Edge tuning is a precision task, and mistakes can have significant consequences for your riding. Here are the most common mistakes and how to avoid them:
- Filing in both directions: Always file from tip to tail only. Filing in both directions creates burrs that weaken the edge and produce an inconsistent bevel.
- Using too much pressure: Let the file do the work. Excessive pressure removes too much metal and can create flat spots or uneven bevels. Use moderate, consistent pressure and let the tool’s weight guide the filing.
- Neglecting the tip and tail: Many riders focus only on the central portion of the edge and neglect the tip and tail. The entire edge should be filed evenly for consistent performance. Pay extra attention to the curved sections near the tip and tail, which require a slightly different hand position to file correctly.
- Skipping the de-burr step: A filed edge without de-burring feels rough and grabby. Always follow filing with a gummi stone pass to smooth the edge surface.
- Over-sharpening: Making the edge too sharp (below 87 degrees for recreational riding) creates a board that is difficult to ride. An overly sharp edge catches unpredictably and can cause painful falls. Start with 90 degrees and only go sharper if you feel you need more grip.
- Mixing file angles: Once you choose an edge angle, stick with it for the entire edge. Switching between angles mid-edge creates an inconsistent bevel that feels unpredictable during turns.
Snowboard Base Repair: The Complete Guide to Fixing Gouges, Core Shots, and Scratches
Every snowboarder eventually damages their base. It is an inevitable consequence of riding in real mountain conditions, where hidden rocks, tree branches, and man-made obstacles can gouge the P-Tex base material. While minor scratches are purely cosmetic, deeper gouges and core shots can affect performance and, if left unrepaired, lead to permanent structural damage. This guide covers everything you need to know about assessing, repairing, and maintaining your snowboard base.
Understanding Your Snowboard Base
Your snowboard’s base is made from ultra-high-molecular-weight polyethylene, commonly known as P-Tex. This material is chosen for its low friction coefficient, high abrasion resistance, and ability to absorb wax. P-Tex bases come in two main types: extruded and sintered, each with different repair characteristics.
Extruded P-Tex is made by melting the polyethylene and pushing it through a die to create a continuous sheet. It is denser, more durable, and easier to repair. Extruded bases are found on most entry-level and mid-range snowboards. The material is less porous than sintered, so it absorbs less wax but is more resistant to damage. Repairs on extruded bases tend to bond well and hold up over time.
Sintered P-Tex is made by compressing polyethylene powder under high pressure and temperature, creating a porous, wax-absorbent material. Sintered bases are found on higher-end snowboards and are prized for their speed and wax absorption. However, they are more susceptible to damage and harder to repair because the porous structure can trap air bubbles during the P-Tex drip process. Professional shops sometimes use P-Tex injection guns for sintered base repairs to ensure full penetration.
Understanding which type of base you have is important for repair because the techniques and materials may differ slightly. Most base repair kits include P-Tex candles that work with both types, but the results may vary.
Assessing Base Damage: When to Repair and When to Go to a Shop
Not all base damage requires repair. Here is a simple assessment framework:
Surface scratches (no repair needed): Scratches that are purely cosmetic and do not reach the fiberglass can be left alone. They will fill with wax during your next tune and will not affect performance. These are extremely common and are nothing to worry about.
Shallow gouges (DIY repair): Gouges that penetrate deeper into the P-Tex but do not reach the fiberglass should be filled with P-Tex. These gouges accumulate dirt, create drag, and can eventually deepen if left unrepaired. They are straightforward to fix with a drip candle and a metal scraper.
Deep gouges approaching fiberglass (DIY with caution): When you can see the white fiberglass layer through the gouge, the damage is serious but still repairable at home. Fill the gouge with epoxy first to seal the fiberglass, then apply P-Tex over the top. This two-step process ensures structural integrity.
Core shots (professional recommended): A core shot is a gouge that penetrates through the P-Tex and fiberglass, exposing the wood core. Small core shots (less than one inch, away from the edge) can be repaired at home with epoxy and P-Tex, but the repair may not be as durable as a professional job. Large core shots, core shots near the edge, or core shots that have allowed water into the core should be taken to a professional shop for repair. A professional can perform a base patch, inject epoxy, and stone-grind the base to restore factory-level flatness.
Edge damage (professional recommended): If the metal edge has been bent, detached from the board, or severely damaged, professional repair is almost always necessary. Edge repair requires specialized tools and epoxy injection that are not practical for at-home use.
How to Repair Snowboard Base Gouges: Step by Step
For the most common type of base damage—shallow to medium gouges—here is the complete repair process:
Step 1: Clean the Gouge
Use a sharp razor blade or pick to remove any loose P-Tex material, dirt, or debris from the gouge. The damaged area should be clean and free of contaminants for the repair to bond properly. If the gouge contains embedded rocks or sand, use needle-nose pliers to extract them carefully.
Step 2: Score the Area (Optional but Recommended)
Using a sharp razor blade, score a cross-hatch pattern into the base material surrounding the gouge. Make shallow cuts at 45-degree angles in both directions, creating a diamond pattern. This scoring dramatically improves the bond between the new P-Tex and the existing base material. The rough surface provides more area for the molten P-Tex to grip.
Step 3: Preheat the P-Tex Candle
Light the P-Tex candle with a lighter or torch and hold it vertically with the flame pointing up. Allow the flame to burn for 10-15 seconds to preheat the tip. You will see the P-Tex begin to melt and form a molten drip at the tip. The flame should be producing a small amount of black smoke—this is normal and indicates that the P-Tex is at the correct temperature for dripping.
Step 4: Drip the P-Tex
Tilt the lit candle so that the molten P-Tex drips into the gouge. Move the candle along the length of the gouge, allowing the P-Tex to flow and fill the damaged area. Overfill the gouge slightly—P-Tex shrinks as it cools, and you need enough material to plane flush with the surrounding base. For deep gouges, you may need to apply multiple layers, allowing each layer to cool before adding the next.
Work quickly but carefully. The P-Tex should flow smoothly into the gouge and bond with the base material. If the P-Tex forms beads that sit on top of the base rather than flowing into the gouge, the base may be too cold or too dirty. Stop, clean the area again, and warm the base slightly with the iron before retrying.
Step 5: Let It Cool
Allow the P-Tex repair to cool completely. At room temperature, this takes at least 30 minutes. For thick repairs or cold environments, allow an hour or more. The P-Tex should be completely hard and opaque before you attempt to scrape it. If the repair is still slightly soft or translucent, it has not fully cured and scraping will result in a messy, uneven finish.
Step 6: Plane the Repair
Using a metal scraper held at a low angle (about 30 degrees), carefully plane the excess P-Tex flush with the surrounding base. Start from one end of the repair and work toward the other, using long, smooth strokes. The goal is to remove all excess material until the repair is perfectly level with the base surface. A flat metal file can be used for final leveling if the scraper leaves any ridges.
Step 7: Sand and Finish
Fine-grit sandpaper (400-600 grit) can be used to smooth the repair and blend it with the surrounding base. Wet-sand with water for the smoothest results. After sanding, the repair should be virtually invisible and flush with the base surface. A final wax application will further blend the repair and seal any remaining pores.
Repairing Core Shots: The Critical Repair
Core shots require a more involved repair process because the wood core is exposed to moisture. If water enters the core, it can cause swelling, delamination, and rot. Here is how to repair a small core shot at home:
- Dry the board thoroughly. If the core has gotten wet, allow the board to dry for 24-48 hours before attempting repair. Placing the board in a warm, dry room accelerates drying. You can also use a hair dryer on low heat, directing warm air into the gouge.
- Seal the core with epoxy. Mix a two-part epoxy resin and carefully apply it into the gouge, filling it completely. The epoxy seals the wood core from future moisture exposure and provides structural reinforcement. Allow the epoxy to cure completely according to the manufacturer’s instructions (usually 24 hours).
- Apply P-Tex over the epoxy. Once the epoxy is fully cured, drip P-Tex over the top to restore the base surface. Follow the standard P-Tex repair process described above.
- Level and finish. Plane the P-Tex flush, sand smooth, and apply a fresh coat of wax.
For core shots near the edge or covering a large area, professional repair is strongly recommended. The edge attachment point is structurally critical, and improper repair can cause the edge to detach during riding, which is extremely dangerous.
P-Tex Candles vs P-Tex Repair Kits: Which Should You Use?
P-Tex drip candles are the most common and affordable repair tool. They are essentially sticks of solid P-Tex that you light and drip into the gouge. Candles are ideal for small to medium gouges and are included in most tuning kits. The drawback is that the flame temperature can vary, leading to inconsistent repair quality.
P-Tex repair kits (sometimes called “P-Tex guns” or “iron-apply P-Tex”) use a heated applicator rather than an open flame. The iron melts the P-Tex at a controlled temperature, providing more consistent results. These kits are more expensive but produce more professional-quality repairs. Some kits use a syringe-like applicator that injects the P-Tex directly into the gouge under pressure, ensuring full penetration and eliminating air bubbles.
For most recreational riders, a simple P-Tex candle is sufficient. Invest in a repair kit if you frequently damage your base (riding rocky terrain, for example) or if you want the most professional-quality repairs possible.
Preventing Base Damage
While some base damage is inevitable, you can minimize it with a few preventive measures:
- Read the snow: Learn to identify signs of shallow snow cover. Rocks just below the surface often create subtle bumps or discoloration in the snow. Avoid riding through areas with visible rocks or thin cover.
- Stay on marked trails: Unmarked trails and glades are more likely to have exposed rocks, stumps, and other hazards. If you venture off-trail, ride slowly and stay alert.
- Wax regularly: A well-waxed base is more resistant to damage because the wax layer provides a small amount of additional protection against abrasion. More importantly, a waxed base is easier to repair because the pores are already saturated and bond better with new P-Tex.
- Carry a portable repair kit: For backcountry and off-piste riding, carry a small P-Tex candle and a metal scraper. A quick field repair can prevent a small gouge from becoming a core shot by the end of the day.
Base Material Types: P-Tex 2000 vs P-Tex 1000
You may encounter references to “P-Tex 2000” and “P-Tex 1000” when shopping for repair materials. These numbers refer to the molecular weight of the polyethylene. P-Tex 2000 (UHMWPE with a molecular weight of approximately 2,000,000 g/mol) is denser and more abrasion-resistant than P-Tex 1000 (molecular weight approximately 100,000 g/mol). For snowboard base repairs, P-Tex 2000 is the preferred material because it matches the density and wear characteristics of the factory base. P-Tex 1000 is softer and wears faster, making it better suited for ski base repairs where less abrasion resistance is needed.
Most quality tuning kits include P-Tex candles that are formulated to match snowboard base material. When purchasing additional P-Tex, look for candles specifically labeled for snowboard use. The color of the P-Tex (clear vs black) should match your base color for the most aesthetic repair.
The Science of Snowboard Wax: How Wax Works, Why It Matters, and What to Choose
Snowboard wax is far more than just a slippery coating. It is a carefully engineered chemical compound designed to interact with snow crystals at the molecular level. Understanding the science behind wax will help you make better choices about which wax to use, how to apply it, and how to maximize its performance. This section dives deep into the physics and chemistry of snowboard wax, covering everything from hydrocarbon formulas to the latest bio-based alternatives.
How Snowboard Wax Works: The Physics of Glide
To understand why wax makes your snowboard faster, you need to understand what happens at the interface between your base and the snow surface. When a snowboard glides over snow, several physical forces interact:
Friction: The most basic force. When two surfaces slide against each other, microscopic imperfections on both surfaces create resistance. Without wax, the P-Tex base encounters direct friction with snow crystals, which can be surprisingly abrasive. A wax layer fills in the microscopic pores of the base, creating a smoother surface that encounters less resistance.
Adhesion: Snow crystals are naturally sticky, especially in wet conditions. Water molecules on the snow surface form hydrogen bonds with the polyethylene molecules in the base, creating a suction effect that slows you down. Wax is hydrophobic—it repels water—which breaks these hydrogen bonds and prevents the snow from “sticking” to your base.
Hydrodynamic lubrication: As a snowboard glides over snow, the pressure and friction between the base and the snow create a thin film of meltwater. This water film acts as a lubricant, allowing the board to hydroplane over the snow surface. Wax enhances this effect by promoting a uniform, stable water film. Without wax, the water film is uneven, creating areas of high and low friction that slow you down and make your ride feel “chattery.”
Capillary action: The pores in your P-Tex base act like tiny tubes. Wax fills these pores and, through capillary action, maintains a consistent film of lubricant on the base surface. This is why scraping off the surface wax and leaving only the wax in the pores is so important—the pores provide the reservoir, and the surface wax just creates drag.
The combined effect of these forces means that a well-waxed snowboard can be 20-30% faster than a dry one. This is not a marginal difference—it is the difference between gliding effortlessly across a flat section and having to unstrap and walk.
Wax Chemistry: Understanding the Formulas
Snowboard waxes are primarily based on hydrocarbon compounds (paraffin waxes), but the specific formulas vary widely. Here is a breakdown of the main wax categories:
Hydrocarbon Wax (Standard)
The most common and affordable type of snowboard wax. Hydrocarbon waxes are derived from petroleum refining and consist of long-chain paraffin molecules. They provide good all-around performance and are available in temperature-specific formulas. The molecular structure of the wax determines its hardness: longer carbon chains create harder waxes suitable for cold conditions, while shorter chains create softer waxes for warm conditions. Hydrocarbon waxes typically cost $5-15 per bar and provide 3-5 days of effective glide per application.
Fluorinated Wax (High Performance)
Fluorinated waxes contain fluorocarbon compounds that are extremely hydrophobic—far more so than standard hydrocarbons. The fluorine atoms in the molecular structure repel water molecules with exceptional effectiveness, creating an ultra-low-friction surface. Fluorinated waxes were the gold standard for racing for decades because they provided unmatched speed in wet and variable conditions. However, perfluorinated compounds (PFCs) are persistent environmental pollutants that accumulate in water supplies and ecosystems. Many competitive organizations have banned fluorinated waxes, and several manufacturers have phased them out entirely. We recommend avoiding fluorinated waxes for recreational use due to their environmental impact.
Graphite Wax
Graphite wax contains finely ground graphite particles suspended in the hydrocarbon base. Graphite has two key properties that benefit snowboard performance: it is an excellent dry lubricant, and it is anti-static. In dry, cold snow conditions, static electricity builds up on the base surface through friction with snow crystals. This static charge attracts fine snow particles to the base, creating a layer of “snow dust” that adds drag. Graphite particles dissipate this static charge, keeping the base cleaner and faster. Graphite wax is particularly effective in cold, dry powder conditions and is a popular choice among backcountry riders.
Bio-Based and Plant-Derived Wax
The newest category of snowboard wax, bio-based waxes are derived from plant sources such as soy, carnauba, and tree resins rather than petroleum. They are biodegradable, non-toxic, and produce no harmful fumes during application. Early bio-waxes were significantly less effective than their petroleum-based counterparts, but modern formulas have largely closed the performance gap. Brands like Mountainflow Eco-Wax have demonstrated that plant-based waxes can match or exceed hydrocarbon waxes in most conditions. For riders who tune indoors, have respiratory sensitivities, or care about environmental impact, bio-wax is an excellent choice.
Race Wax and High-Performance Formulas
Race waxes combine multiple technologies—fluorocarbon (or fluorine-free alternatives), graphite, and specialized additives—to achieve maximum glide speed. They are extremely temperature-specific, with different formulas for each 5-degree temperature range. Race waxes are expensive ($30-60 per bar) and require precise application at specific iron temperatures. They also wear out faster than standard waxes, typically lasting only 1-2 days before reapplication is needed. Race wax is overkill for recreational riders but can provide a meaningful competitive advantage for racers.
Temperature-Specific Waxing: The Science Behind Color Codes
Most wax manufacturers use a color-coding system to indicate the temperature range of their waxes. While the specific colors may vary by brand, the general system is consistent across the industry:
The reason temperature-specific waxes perform better than all-temperature waxes is rooted in the physical properties of the wax molecules. In cold conditions, snow crystals are sharp and abrasive, like tiny razor blades. A hard wax (cold formula) resists penetration by these crystals, maintaining a smooth surface longer. A soft wax (warm formula) would be quickly abraded by the sharp crystals, wearing off in minutes.
Conversely, in warm conditions, snow is wet and slushy. A soft wax (warm formula) creates a more hydrophobic surface that repels the abundant water, maintaining glide. A hard wax (cold formula) is less effective at repelling water because its denser molecular structure creates less surface area for hydrophobic interaction.
All-temperature waxes are a compromise—they contain a blend of hard and soft molecular compounds that provide reasonable performance across a wide range. However, they cannot match the performance of a properly matched temperature-specific wax. Think of all-terrain tires versus summer tires: the all-terrain works everywhere but excels nowhere.
Wax Durability: How Long Does a Wax Job Last?
The durability of a wax job depends on several factors:
- Snow conditions: Wet, abrasive snow wears wax faster than cold, dry snow. A wax job that lasts five days in mid-winter might only last two days in spring slush.
- Riding intensity: Aggressive carving and high-speed riding generate more friction and heat, wearing wax faster than casual cruising.
- Wax type: Hard cold-weather waxes are more durable than soft warm-weather waxes. Race waxes wear out faster than standard hydrocarbon waxes.
- Base condition: A properly prepared base (clean, porous, and pre-waxed) holds wax longer than a contaminated or oxidized base.
- Rider weight: Heavier riders generate more pressure on the base, wearing wax faster than lighter riders.
On average, a good hot wax job provides optimal performance for 3-5 days of riding. After this period, the surface wax has been worn away, and while some wax remains in the pores, the glide performance degrades noticeably. A simple test is the water bead test: if water beads on the base, wax is still present. If water sheets across the base, the wax has worn through.
Storage Wax: Protecting Your Board During the Off-Season
Storage wax is one of the most important yet most overlooked aspects of snowboard maintenance. At the end of the season, you should apply a thick coat of soft, warm-temperature wax and leave it on the board without scraping. This thick wax layer serves as a protective barrier against oxidation and moisture during the summer months.
The P-Tex base is porous by design, and when the pores are exposed to air for extended periods, the polyethylene oxidizes—literally reacts with oxygen molecules in the air. This oxidation process causes the base to turn white and chalky, become brittle, and lose its ability to absorb wax effectively. Severe oxidation can permanently damage the base, requiring professional stone grinding to restore.
A thick coat of storage wax seals the pores and prevents oxidation. When you pull the board out at the beginning of next season, simply scrape off the storage wax and apply a fresh coat. The base underneath will be dark, supple, and ready to absorb new wax. Without storage wax, you may find that your base requires multiple wax applications to rehydrate after a summer of oxidation.
The Hot Scrape Cleaning Method: A Chemical-Free Alternative
If you do not have base cleaner fluid or prefer to avoid chemical solvents, the hot scrape method is an effective alternative. Here is how it works:
- Heat your waxing iron to a low temperature (around 120°C / 248°F).
- Drip a small amount of soft wax onto the base.
- Spread the wax thinly across the entire base with the iron, paying attention to dirty areas.
- Immediately scrape the wax off while it is still warm and liquid. Use firm pressure and long strokes.
- Inspect the scraper: it should be covered in dark, dirty residue. This is the old wax, dirt, and contaminants pulled from the base pores.
- Repeat if necessary until the scraper comes away clean.
The hot scrape method is effective because warm wax is an excellent solvent for old wax and oil-based contaminants. As the wax cools in the pores, it encapsulates dirt particles, which are then removed when you scrape. This method is gentler on the base than solvent-based cleaners, which can strip natural oils and cause the P-Tex to dry out.
Tools Deep Dive: Brushes, Scrapers, Stones, and Files Explained
Having the right tools makes the difference between a frustrating, mediocre tune and a smooth, professional-quality result. While the tuning kits reviewed above include the basics, understanding the specific purpose and characteristics of each tool will help you use them more effectively and know when to invest in upgrades. This section provides a comprehensive breakdown of every tool in the snowboard tuning ecosystem.
Brushes: The Unsung Heroes of Speed
Brushes are the most underrated tools in snowboard maintenance. Many beginners skip brushing entirely, not understanding its importance. In reality, proper brushing is what separates a backyard wax job from a shop-quality tune. Here is a complete guide to the different brush types and their uses:
Brass Brush
The brass brush is the most aggressive snowboard brush and is used for deep cleaning and base preparation. Brass bristles are stiff enough to remove old wax from deep in the base structure, clean out embedded dirt and debris, and open up the pores for new wax absorption. Use the brass brush before waxing to prepare the base. The brush should be used with firm pressure in long strokes from tip to tail. A brass brush is essential for riders who ride frequently and accumulate significant wax buildup over time. However, it should be used sparingly on sintered bases, as the aggressive bristles can damage the delicate pore structure if used too aggressively.
Nylon Brush
The nylon brush is the workhorse of post-wax finishing. After scraping, the nylon brush removes residual wax from the base structure without damaging the base material. Nylon bristles are stiff enough to pull wax from the grooves but flexible enough to conform to the base’s contour. Use the nylon brush immediately after scraping, working from tip to tail with moderate pressure. Multiple passes are usually necessary—you will see fine wax dust being removed with each pass. Continue until no more wax dust is visible on the bristles.
Horsehair Brush
The horsehair brush is a fine-finishing tool used after the nylon brush. Horsehair bristles are much softer and more flexible than nylon, allowing them to reach into the deepest parts of the base structure and remove microscopic wax particles that the nylon brush missed. The result is a smoother, more polished base with reduced static friction. Horsehair brushes are particularly beneficial for riders who prioritize glide speed, such as racers and long-distance tourers. Use light pressure and long strokes from tip to tail.
Copper Brush
Copper brushes are similar to brass brushes in stiffness and are used for the same deep-cleaning purposes. Copper has natural anti-static properties, making it particularly useful for removing snow dust and static-charged particles from the base. Some riders prefer copper over brass for initial base preparation because it is slightly less aggressive while still providing excellent cleaning power.
Combo Brush
Many tuning kits include a combo brush that combines two or more bristle types in a single handle—for example, brass on one side and nylon on the other. Combo brushes save space and money but may not perform as well as dedicated brushes of each type. If you are just starting out, a good combo brush is a perfectly acceptable way to get started. As your skills develop, you may want to invest in dedicated brushes for each step of the process.
Brush Maintenance
Brushes themselves need maintenance to perform at their best. After each use, clean your brushes by running your fingers through the bristles to remove trapped wax particles. For stubborn wax buildup, soak the brush in warm (not hot) water for 15-20 minutes, then dry thoroughly. Never store brushes wet, as moisture can rust metal bristles and degrade natural bristles. Store brushes bristle-up or in a dedicated brush roll to prevent the bristles from being crushed or deformed.
Scrapers: Metal vs Plastic vs Plexi
The scraper is used to remove excess wax from the base after it has cooled. The type of scraper you use can significantly affect the quality of your finish:
Plastic Scraper
The most common and affordable type. Plastic scrapers are included in most tuning kits and are adequate for basic wax removal. They are lightweight, easy to use, and unlikely to damage the base. However, they dull quickly, lose their edge after a few uses, and tend to flex under pressure, resulting in an uneven scrape. If you use a plastic scraper, check its edge frequently and replace it when it becomes rounded or chipped.
Plexi (Acrylic) Scraper
A significant upgrade from plastic. Plexi scrapers are harder, hold their edge longer, and provide a more consistent scrape. The rigid material does not flex under pressure, allowing you to apply firm, even force across the entire base. Plexi scrapers are transparent, which allows you to see the base through the scraper—useful for monitoring your progress during scraping. They cost more than plastic but last much longer and produce noticeably better results.
Metal Scraper
The most aggressive and durable scraper option. Metal scrapers (usually stainless steel) are primarily used for P-Tex repair work—planing excess P-Tex flush with the base after a repair. They can also be used for wax removal on heavily waxed bases, but they require more skill to use without scratching the base. A metal scraper held at too steep an angle will gouge the P-Tex, so use it carefully with a low angle and moderate pressure. Metal scrapers are not included in most tuning kits but are a worthwhile investment for riders who do their own base repairs.
Triangle Scraper
Featured in the Dakine kit, the triangle scraper has three distinct edges and a pointed corner, each designed for a specific task. The flat edges are used for standard wax scraping, while the pointed corner is ideal for cleaning wax out of the edges (the groove where P-Tex meets steel). This specialized design is particularly useful for thorough edge cleaning, which many riders neglect.
Diamond Stones: The Secret to Long-Lasting Edges
Diamond stones are precision abrasive tools that use industrial diamond particles bonded to a flat steel or ceramic plate. They are used for polishing and maintaining snowboard edges after initial filing. Unlike files, which cut metal aggressively, diamond stones polish the metal surface, removing microscopic burrs and creating a smooth, refined edge.
Diamond stones come in various grits, typically categorized as coarse, medium, and fine:
- Coarse (200-400 grit): Used for initial edge repair after rock damage. Removes significant burrs and reshapes the edge bevel. Equivalent to about 80% of what a file does, but with more control.
- Medium (600-800 grit): The standard “working” grit for regular edge maintenance. Sharpens the edge to a functional level suitable for most riding conditions. This is the grit most riders use for routine touch-ups.
- Fine (1000+ grit): The finishing grit that polishes the edge to a mirror-like smoothness. A fine-polished edge is not only sharper but also more durable because the smooth surface encounters less friction during riding. Essential for racers and ice riders.
The advantage of diamond stones over files is longevity and consistency. A quality diamond stone can last for years of regular use, while files dull relatively quickly. Diamond stones also produce a more consistent finish because the diamond particles are evenly distributed across the surface, unlike the teeth of a file which can wear unevenly.
Diamond stones should be used wet—splash a few drops of water or mineral spirits on the stone before each pass. The liquid lubricates the cutting action, prevents the stone from loading up with metal filings, and extends the stone’s life. After use, clean the stone with warm water and a brush to remove metal particles.
Gummi Stones: The Multitool of Edge Tuning
The gummi stone (also called a “gummy stone” or “rubber stone”) is a small, rubbery block that serves multiple purposes in edge tuning. It is one of the most versatile tools in your kit:
- De-burring: After filing or sharpening, run the gummi stone along the edge to remove micro-burrs. The rubbery material catches and removes tiny metal fragments without dulling the sharpened edge.
- Detuning: Hold the gummi stone at an angle against the edge at the contact points (widest part of nose and tail) to slightly dull the edge. This prevents catching during turn initiation.
- Rust removal: Surface rust on edges can be quickly removed by rubbing with a gummi stone. This is a temporary fix—proper filing or stone polishing is needed for a permanent solution.
- Edge polishing: A gummi stone can be used to polish the edge face for a smoother feel, though it is not as effective as a fine diamond stone.
Gummi stones are inexpensive and last a long time. They should be included in every tuning kit. If yours does not include one, buy one separately—it is arguably the single most useful tool for quick edge maintenance.
File Guides and Edge Bevel Tools
A file guide (also called an “edge bevel tool” or “file holder”) is a device that holds a flat file at a precise angle against the edge. The guide eliminates the guesswork of holding the file at the correct angle by hand, ensuring consistent results across the entire edge.
File guides are available in fixed-angle and adjustable-angle versions. Fixed-angle guides are simpler and more affordable, typically offering a single angle (usually 90 or 88 degrees). Adjustable-angle guides allow you to select from a range of angles (typically 85-90 degrees in 1-degree increments). The adjustable versions are more versatile and are the better investment for riders who want to experiment with different edge angles.
The quality of the file guide directly affects the quality of your edge tune. Cheap plastic guides may flex during use, creating an inconsistent bevel. Metal-bodied guides (like the one included in the RaceWax kit) provide more rigidity and accuracy. For most recreational riders, a mid-range adjustable guide offers the best balance of quality and value.
Setting Up Your Home Snowboard Tuning Workshop
Creating a dedicated space for snowboard maintenance at home pays dividends in efficiency, consistency, and enjoyment. A well-organized workshop makes tuning feel like a relaxing ritual rather than a chore. This section covers everything from choosing the right space to organizing your tools for maximum workflow efficiency.
Choosing the Right Space
The ideal snowboard tuning space has three key characteristics: ventilation, lighting, and stability. Here is what to consider for each:
Ventilation is non-negotiable. Melting wax produces fumes that cause headaches, eye irritation, and respiratory discomfort with prolonged exposure. Burning P-Tex during repairs produces even more pungent fumes. Your workspace must have adequate airflow—either an open garage door, a window with a fan, or a dedicated exhaust system. If you are tuning in a basement or enclosed room, invest in a quality fume extractor or at minimum wear a respirator mask during wax application and P-Tex repair.
Lighting matters more than you think. Good lighting allows you to inspect your base for oxidation, see the progress of your scraping, and identify uneven edge bevels. Overhead fluorescent or LED shop lights are ideal. Avoid working in dim conditions, as you will miss details that affect the quality of your tune.
Stability is essential. You will be applying firm, consistent pressure during scraping, brushing, and edging. Your work surface must not wobble or shift. A sturdy workbench is the gold standard, but a pair of heavy sawhorses with a 2×4 across the top also works well. The surface should be covered with a blanket or foam pad to protect the board’s top sheet from scratches.
Snowboard Vises: The Essential Investment
Snowboard vises are specialized clamps that hold the board securely during tuning. They are the single most impactful accessory you can buy for your home workshop. Without vises, the board shifts during scraping and edging, leading to uneven results and potential damage. With vises, the board is locked in place, allowing you to apply consistent pressure and achieve shop-quality results.
There are two main types of snowboard vises:
Suction cup vises attach to any smooth, flat surface (workbench, table, countertop) using large rubber suction cups. They are easy to set up and remove, making them ideal for riders who do not have a permanent workshop space. The suction cups provide surprisingly strong holding power when properly applied to a clean, smooth surface. However, they can lose suction on rough or dirty surfaces.
Clamp-on vises attach to the edge of a workbench or table using screw clamps. They provide more secure holding power than suction cups and work on any surface, regardless of texture. The downside is that they require a workbench or table with an exposed edge, and they are more time-consuming to set up and remove.
Regardless of type, good vises should hold the board both horizontally (for waxing) and vertically (for edging). Many models offer both configurations, allowing you to switch between waxing and edging without removing the board from the vises. The Swix Jaws system is a popular choice among home tuners, offering both horizontal and vertical clamping in a compact package.
The Budget Alternative: Vise-Free Tuning
If you are not ready to invest in dedicated vises, you can still achieve acceptable results with a few household items:
- Two chairs with rubber mats: Place a chair at each end of the board, with rubber non-slip mats on the seats to hold the board in place. This works for waxing but is not stable enough for serious edging work.
- Cinder blocks and 2x4s: Stack cinder blocks to workbench height and lay 2x4s across the top. Place a blanket over the 2x4s to protect the board. This creates a stable, elevated platform for waxing and basic maintenance.
- Pipe insulation foam: Cut lengths of pipe insulation foam and lay them across a workbench or table. The foam cradles the board and provides enough friction to hold it steady for waxing. This is a popular budget hack that costs less than $10.
While these alternatives work for basic waxing and brushing, they cannot replace proper vises for edge tuning. If you plan to do your own edge work, investing in a set of vises is highly recommended.
Tool Organization and Storage
An organized workshop saves time and prevents tool damage. Here is a recommended organization system:
- Wall-mounted pegboard: Install a pegboard above your workbench and hang brushes, files, and other frequently used tools on hooks. This keeps everything visible and accessible while freeing up workbench space.
- Tool roll or case: For smaller items like diamond stones, gummi stones, and scrapers, a tool roll or padded case prevents them from being lost or damaged. Many tuning kits come with a carrying case that doubles as a storage organizer.
- Wax storage: Store wax bars in a cool, dry location away from direct sunlight. Wax is sensitive to heat and UV radiation, which can cause it to soften or degrade. A plastic bin on a shelf is ideal.
- Iron storage: Store your waxing iron with the plate facing up to prevent dust accumulation on the heating surface. Allow the iron to cool completely before storing. Some tuners wrap the cord around the iron and store it in a dedicated pouch.
- P-Tex and epoxy: Store P-Tex candles in a dry location, as moisture can affect the drip quality. Two-part epoxy should be stored according to manufacturer instructions, typically at room temperature.
Workshop Safety Considerations
A few safety considerations for your home workshop:
- Fire safety: Keep a fire extinguisher nearby when working with open flames (P-Tex candles). Never leave a lit P-Tex candle unattended.
- Eye protection: Wear safety glasses when filing edges. Metal filings can fly off the file at high speed and embed in your eyes.
- Hand protection: Use work gloves when handling metal files and scrapers to prevent cuts and abrasions.
- Respiratory protection: Wear a dust mask or respirator when sanding P-Tex or working with epoxy. Fine P-Tex dust and epoxy fumes are respiratory irritants.
- Workspace temperature: Avoid tuning in extreme cold (below 50°F / 10°C) as the base material becomes less receptive to wax and P-Tex repairs may not bond properly. A temperature range of 60-75°F (15-24°C) is ideal.
Tuning for Specific Conditions: How to Optimize Your Board for Any Snow
One of the greatest advantages of owning a tuning kit is the ability to customize your board’s performance for specific snow conditions. Different conditions demand different wax formulas, edge angles, and base preparation techniques. This section provides condition-specific tuning guides so you can extract maximum performance from your board no matter what Mother Nature throws at you.
Tuning for Ice and Hardpack
Ice and hardpack conditions are the most demanding for edge hold. The surface is unforgiving, and the margin for error is razor-thin. A board tuned for ice should prioritize edge sharpness and wax hardness above all else.
Edge angle: Reduce your side edge angle to 88 or 87 degrees for maximum bite. This sharper angle creates a more aggressive edge that digs into the ice surface. Be aware that this makes the board less forgiving—only use this angle if you are confident in your edge control skills.
Edge finish: Polish the edge to a mirror finish using fine diamond stones (1000+ grit). A polished edge cuts into ice more cleanly and maintains its sharpness longer than a rough, filed edge. The smooth surface also reduces vibration and chatter at high speeds.
Wax selection: Use a hard, cold-temperature wax (blue or white). The harder wax resists penetration by sharp ice crystals and maintains a smooth surface longer. Consider graphite wax for anti-static properties that keep the base clean in dry, cold conditions.
Base preparation: A freshly waxed and buffed base is essential for ice conditions. Any surface imperfections or remaining wax film will create drag and reduce your speed. Scrape thoroughly and brush aggressively with a nylon brush, followed by a horsehair brush for final polishing.
Tuning for Powder and Deep Snow
Powder riding is the most forgiving conditions for tuning—your base does most of the work by displacing snow, and edge hold is less critical because the snow itself provides support. However, a well-tuned board still performs noticeably better in powder.
Edge angle: Standard 90-degree side edge is ideal for powder. You do not need aggressive edge hold, and a 90-degree edge provides enough grip for directional changes while being forgiving of hidden obstacles beneath the powder surface.
Detuning: Consider detuning the contact points more aggressively than usual. In deep powder, you want the board to plane and float rather than dig in. Detuned contact points help the board release from turns more smoothly, reducing the effort required to navigate through deep snow.
Wax selection: Use a cold-temperature wax for dry powder, or a mid-range wax for heavier, wetter powder. The wax should provide good hydrophobic properties to prevent snow from sticking to the base. Graphite wax is excellent for dry powder because it dissipates static charge that attracts snow dust.
Base preparation: Focus on a thorough wax application rather than edge work. The wax layer is the primary performance factor in powder, as it determines how well the board glides through the snow. Apply a generous coat and buff to a high gloss.
Tuning for Spring Slush and Wet Snow
Spring conditions present a unique challenge: the snow is wet, heavy, and extremely abrasive. Wax wears out quickly in slush, and the water-saturated surface requires maximum hydrophobicity from your wax.
Edge angle: Standard 90-degree edge works well. The wet snow provides enough friction for edge engagement without needing a sharper angle. However, some riders prefer a slightly detuned edge (using a gummi stone for a light pass) to reduce the “sticky” feeling of slush on steel edges.
Wax selection: Use a warm-temperature wax (red or yellow) specifically formulated for wet conditions. Warm waxes are softer and more hydrophobic, creating a surface that repels the abundant water in slushy snow. Avoid cold waxes in spring conditions—they are too hard and do not provide adequate water repellency.
Wax frequency: Wax more frequently in spring conditions. The abrasive slush wears wax faster than cold, dry snow. Plan to wax every 2-3 days instead of the usual 3-5. Some competitive riders wax before every run in spring conditions to maintain peak performance.
Edge maintenance: Keep a gummi stone in your pocket for mid-day touch-ups. Wet, heavy snow sticks to edges and creates drag. A quick pass with the gummi stone at lunchtime removes the buildup and restores edge smoothness.
Tuning for Park and Pipe
Park and pipe riding places unique demands on your equipment. You need edges that grip for lip takeoffs but slide smoothly on rails and boxes. The ideal park setup is a compromise between grip and forgiveness.
Edge angle: 90-degree side edge is the standard for park riding. Aggressive angles (88 or 87 degrees) increase the risk of catching an edge on rails and boxes, which can result in dangerous falls. A 90-degree edge provides sufficient grip for jumps and pipe walls while being forgiving enough for sliding features.
Detuning: Park riders typically detune the edges between the bindings (where the board contacts rails and boxes) and at the contact points (widest part of nose and tail). Use a gummi stone or flat file to round off the edge at these locations for about 3-4 inches. The amount of detuning is a personal preference—some riders detune heavily for maximum slide, while others prefer a lighter detune for more versatility.
Wax selection: All-temperature wax is sufficient for most park riding. The performance difference between temperature-specific waxes is less noticeable in the controlled conditions of a terrain park. Some park riders prefer a softer wax because it provides a slightly “tacky” feel that aids in buttering maneuvers.
Base preparation: Park riders who hit rails regularly will notice increased base wear in the rail contact zone. Inspect this area frequently for deep scratches and gouges. A base repair kit with P-Tex candles should be part of every park rider’s gear bag.
Tuning for Backcountry and Splitboarding
Backcountry riding and splitboarding present unique tuning challenges because you need a board that performs well both uphill (skinning) and downhill (riding). The tuning compromise focuses on reducing friction in both directions.
Edge angle: 90-degree side edge is standard for backcountry. You need edge hold for steep descents but also need the edge to release easily during skinning. Detuning the contact points slightly helps with both skinning efficiency and downhill forgiveness.
Wax selection: This is where backcountry tuning gets interesting. You want a wax that provides good glide for skinning (uphill) while still performing well for downhill riding. Graphite wax is an excellent choice because its anti-static properties keep the base clean during skinning, and it performs well in the variable conditions typical of backcountry terrain.
Special considerations: If you are riding a splitboard, the seam between the two halves can accumulate ice and snow, affecting both skinning efficiency and downhill performance. Keep the seam edges clean and consider applying a thin layer of wax or ski crampon wax along the seam to reduce ice buildup. Also, ensure that the binding inserts and hardware are clean and free of corrosion, as backcountry conditions expose equipment to more moisture than resort riding.
The Seasonal Snowboard Maintenance Calendar: When to Do What
A systematic approach to snowboard maintenance ensures that your board is always performing at its best without unnecessary effort. This seasonal calendar provides a month-by-month guide to the maintenance tasks that matter most at each point in the riding season.
Pre-Season (October-November): The Foundation Tune
The pre-season tune is the most comprehensive maintenance session of the year. Your board has been sitting in storage (hopefully with storage wax) all summer, and this is the time to bring it back to peak condition.
Remove Storage Wax
Scrape off the thick storage wax you applied at the end of last season. The base underneath should be dark and supple if the storage wax did its job. If you see white patches (oxidation), do not worry—multiple wax applications will restore the base.
Deep Clean the Base
Use base cleaner or the hot scrape method to thoroughly clean the base. Remove any old wax residue, dirt, and oxidation from the summer months. The base should look uniform in color after cleaning.
Inspect for Damage
Examine the entire board for delamination (separation of layers), edge damage, and base gouges. Catch these issues now rather than discovering them on the mountain. Repair any gouges or core shots before waxing.
Full Edge Tune
This is the time for a complete edge sharpening and beveling. Set your preferred edge angles and file the entire edge from tip to tail. Follow with a diamond stone polish and gummi stone de-burr. A properly done pre-season edge tune should last through the holidays.
First Wax Application
Apply two coats of wax for the pre-season tune. The first coat rehydrates the base after summer storage. The second coat (applied the next day) provides a fresh layer of wax for your first day out. Use a mid-range temperature wax unless you know the early-season conditions at your local mountain.
Peak Season (December-March): Maintenance Rhythm
During peak season, your maintenance routine should follow a consistent rhythm that keeps your board in top condition without excessive effort.
Every 2-3 days of riding: Quick base inspection and touch-up wax if needed. A simple cold wax rub-on or a quick hot wax touch-up maintains glide performance between full tunes.
Every 5 days of riding: Full hot wax application. Remove old wax with base cleaner, apply fresh temperature-specific wax, scrape, and brush. This is your standard maintenance wax cycle.
Every 10-15 days of riding: Edge touch-up. Run a diamond stone along the edge to maintain sharpness. Check the contact points and detune if necessary. Most recreational riders will notice a significant improvement in edge hold after this touch-up.
Monthly: Full base inspection. Look for accumulated scratches, edge rust, and any developing issues. Address problems before they become serious.
Late Season (April-May): The End-of-Season Tune
As the season winds down, it is time for a thorough tune that will protect your board during the summer months.
Full edge sharpening: Give your edges a final complete sharpening. This removes any accumulated damage from the season and leaves the edges in good condition for next year. Sharpened edges are less prone to rust during summer storage.
Base repair: Address any gouges or scratches that accumulated during the season. It is much easier to repair a fresh gouge than one that has collected months of dirt and debris.
Final wax application: Apply a thick coat of warm, soft wax and leave it on without scraping. This storage wax protects the base from oxidation during the summer months. Use a soft wax because it adheres better and provides a more complete seal.
Hardware check: Inspect binding inserts, edge screws, and any other hardware. Tighten anything that has loosened during the season. Apply a drop of thread locker to binding inserts if they tend to back out.
Summer Storage (June-September): The Long Break
Proper summer storage is critical for maintaining your board’s condition during the long off-season.
- Location: Store in a cool, dry place away from direct sunlight and extreme temperatures. A closet, bedroom, or climate-controlled storage unit is ideal. Never store in a car, garage attic, or outdoor shed.
- Position: Store the board upright (leaning against a wall) rather than flat. This prevents the camber profile from flattening over time and allows air circulation around the base.
- Protection: Use a board bag, sock, or even a clean bedsheet to protect the board from dust and UV exposure. If storing without a bag, wrap the board in a soft cloth.
- Humidity control: If you live in a humid climate, consider placing a silica gel packet near the board to absorb excess moisture. High humidity can cause edge rust and accelerate base oxidation.
- Periodic checks: Every 2-3 months, pull the board out and inspect it. Check for edge rust, base condition, and any signs of delamination. This quick check takes two minutes and can catch problems before they become serious.
Sintered vs Extruded Snowboard Bases: What You Need to Know About Base Material
The two main types of snowboard base material—sintered and extruded—have fundamentally different characteristics that affect performance, maintenance, and repair. Understanding which type you have (and how to care for it) is essential for getting the most out of your board.
What Is an Extruded Base?
An extruded base is made by melting polyethylene pellets and pushing the molten material through a die to create a continuous sheet. The resulting material is dense, smooth, and relatively non-porous. Extruded bases are the standard on entry-level and mid-range snowboards because they are less expensive to produce and more durable in everyday use.
The key characteristics of extruded bases:
- Lower wax absorption: The dense structure absorbs less wax than sintered, which means wax jobs do not last as long and provide less dramatic speed improvement.
- Higher durability: Extruded material is more resistant to abrasion and impact damage. It handles rock hits and rough treatment better than sintered.
- Easier to repair: P-Tex repairs bond well with extruded material and produce consistent results. The non-porous structure prevents air bubbles from forming during the drip process.
- Lower cost: Extruded bases are less expensive to produce, which is reflected in the lower price of extruded-base snowboards.
- Less maintenance: Extruded bases require less frequent waxing and are more forgiving of neglect. A rider who forgets to wax for a week will notice less performance degradation on an extruded base than on a sintered base.
What Is a Sintered Base?
A sintered base is made by compressing polyethylene powder under high pressure and temperature, fusing the particles into a solid mass without fully melting them. This process creates a porous structure with millions of tiny interconnected voids. Sintered bases are found on higher-end snowboards and are prized for their speed and wax absorption.
The key characteristics of sintered bases:
- Superior wax absorption: The porous structure absorbs and holds significantly more wax than extruded, resulting in faster speeds and longer-lasting wax jobs.
- Higher speed potential: A properly waxed sintered base is noticeably faster than a waxed extruded base. The difference is most apparent on flat sections and in wet snow conditions.
- More maintenance: Sintered bases require more frequent waxing and more careful maintenance. They oxidize faster when left dry and are more susceptible to base burn.
- Higher cost: The manufacturing process is more expensive, and sintered-base snowboards typically cost more.
- Harder to repair: The porous structure can trap air bubbles during P-Tex drip repairs, resulting in less durable patches. Professional repair shops sometimes use P-Tex injection guns for sintered base repairs.
How to Tell Which Type You Have
If you are not sure which type of base your snowboard has, here are a few ways to tell:
- Check the manufacturer’s specs: Most snowboard manufacturers list the base material in their product specifications. “Sintered” or “sintered P-Tex” is usually highlighted as a premium feature.
- The water test: Drop a few drops of water on the base. On a clean base, water will bead more on sintered material (due to higher porosity) and sheet more on extruded material. However, this test is not foolproof and depends on the base’s wax condition.
- The price indicator: Budget boards (under $300) almost always have extruded bases. Premium boards (over $500) are more likely to have sintered bases. Mid-range boards vary.
- The wax absorption test: Apply a thin coat of wax and let it cool. Sintered bases will show more visible wax absorption (the wax “disappears” into the base more), while extruded bases will retain more surface wax.
Maintenance Differences: Sintered vs Extruded
| Maintenance Task | Extruded Base | Sintered Base |
|---|---|---|
| Waxing Frequency | Every 5-7 days | Every 3-5 days |
| Base Cleaner Use | Moderate (hot scrape preferred) | Frequent (keep pores clean) |
| Brush Aggressiveness | Can use brass brush freely | Use brass sparingly; favor nylon |
| P-Tex Repair Difficulty | Easy; good bond | Moderate; watch for air bubbles |
| Oxidation Susceptibility | Lower (denser material) | Higher (more porous surface) |
| Storage Wax Importance | Recommended | Essential |
| Speed When Well-Waxed | Good | Excellent |
| Speed When Dry | Slow but acceptable | Very slow; base burn likely |
Regardless of which base type you have, the fundamental maintenance principles are the same: keep it waxed, keep it clean, repair damage promptly, and store it properly. The differences are in frequency and aggressiveness—sintered bases simply require more attention to maintain peak performance.
Stone Grinding and Base Structure
Both sintered and extruded bases come from the factory with a “stone ground” texture—a pattern of fine grooves machined into the base surface. This texture is not cosmetic; it serves a critical performance function. The grooves channel water away from the base-snow interface, much like the tread on a car tire channels water away from the road surface. Without this texture, a thin film of meltwater would build up under the base, creating suction that slows you down.
Over time and with repeated waxing, the stone ground texture can become clogged with wax and debris, reducing its effectiveness. This is one reason why brushing after waxing is so important—the nylon and horsehair brushes clear the grooves and restore the base structure.
Professional shops can re-grind the base using a stone grinding machine, restoring the factory texture. This is typically done every 20-30 days of riding or when the base shows signs of significant wear. Stone grinding is not something you can do at home, but it is a relatively inexpensive service that can dramatically improve the performance of a worn base.
DIY vs Professional Snowboard Tuning: When to Do It Yourself and When to Visit a Shop
The decision between tuning your snowboard at home and taking it to a professional shop involves trade-offs in cost, quality, convenience, and skill development. Neither approach is universally better—the right choice depends on your specific situation, skill level, and priorities.
The Case for DIY Tuning
Cost savings: A professional tune-up costs $40-70 for a basic wax and edge tune, or $80-120 for a full tune with base repair. If you ride 20+ days per season and wax every 5 days, you would spend $160-280 per season on professional tunes. A complete home tuning kit costs $50-150 and lasts for years, paying for itself in just one or two seasons.
Convenience: A home workshop allows you to tune whenever you want, without driving to a shop and waiting in line. Need a quick wax before tomorrow’s early morning session? Do it at 10 PM in your garage. Want to touch up your edges during lunch on a Saturday? It takes five minutes. This convenience encourages more frequent maintenance, which keeps your board performing better.
Knowledge and control: When you tune your own board, you understand exactly what has been done to it. You know the edge angles, the wax type, the base condition. This knowledge allows you to make informed decisions about adjustments and improvements. Professional shops use standard procedures that may not be optimal for your specific riding style and conditions.
Immediate feedback: DIY tuning provides immediate feedback on the effects of your work. You can wax a board, ride it, and immediately assess the results. This rapid feedback loop accelerates your learning and helps you develop an intuitive understanding of how different tuning choices affect performance.
The Case for Professional Tuning
Equipment advantages: Professional shops have industrial-grade equipment that is not available to home tuners. Stone grinding machines can restore factory base texture. Belt sanders can flatten bases with precision that hand tools cannot match. Computerized edge tuners produce consistent, accurate bevels that are difficult to achieve by hand. For these specialized tasks, professional service is clearly superior.
Expertise for complex repairs: Core shots, edge detachment, delamination, and major base damage require expertise and equipment that most home tuners do not have. A professional can assess the structural integrity of the board and perform repairs that maintain safety and performance. Attempting complex repairs at home can make the damage worse and potentially create safety hazards.
Time savings: For riders who do not enjoy maintenance work or simply do not have the time, professional tuning provides a hands-off solution. Drop off the board, pick it up a few days later, and it is ready to ride. This is particularly valuable for busy riders or families with multiple boards to maintain.
Consistency: Good professional shops produce consistent results every time. The same edge angles, the same wax application, the same quality standards. This consistency is valuable for riders who want reliable, predictable performance from their boards.
Recommended Approach: The Hybrid Model
For most recreational riders, the optimal approach combines DIY maintenance for routine tasks with professional service for specialized work:
- DIY: Regular waxing (every 3-5 days), basic edge touch-ups (diamond stone and gummi stone), minor base repairs (small scratches and shallow gouges), and seasonal storage preparation.
- Professional: Full seasonal tune (beginning and end of season), stone grinding (every 20-30 days), complex base repairs (core shots and large gouges), and edge bevel adjustment (if changing from your standard angles).
This hybrid approach gives you the cost savings and convenience of DIY for the tasks you do most frequently, while leveraging professional equipment and expertise for the specialized work that requires it. It also means you are not completely dependent on a shop for basic maintenance—important for riders who travel or live far from a good tuning shop.
How to Choose a Professional Tuning Shop
If you decide to use a professional shop, here are the factors to consider when choosing one:
- Equipment: Ask what equipment they use. Stone grinders (Wintersteiger, Montana, or Atlas) indicate a shop that invests in quality. Belt-only shops may not be able to perform base grinding or flat-base work.
- Turnaround time: A good shop should complete a basic tune in 1-3 days. Shops that promise same-day service may be rushing through the work. Complex repairs may take a week or more.
- Reputation: Ask other riders at your local mountain which shops they use. Word of mouth is the best indicator of quality. Online reviews can also be helpful, but take them with a grain of salt.
- Communication: A good shop will ask about your riding style, preferred edge angles, and any specific concerns. They should be willing to explain what they did to your board and why. Avoid shops that treat every board identically regardless of the rider’s needs.
- Pricing transparency: The shop should provide a clear price list for all services. Be wary of shops that quote vague prices or add unexpected charges at pickup.
Snowboard vs Ski Tuning: Key Differences
If you also ride skis, you might wonder about the differences between snowboard and ski tuning. While the fundamental principles are the same (clean, sharpen, wax), there are important differences:
- Edge angles: Snowboards typically use 88-90 degree side edges, while skis use 87-88 degrees. Skis are generally tuned sharper because the shorter edge length requires more aggressive angles to achieve comparable edge hold.
- Base width: Snowboard bases are much wider than ski bases, requiring more wax and more time to scrape and brush. A snowboard wax job takes 2-3 times longer than a ski wax job.
- Detuning: Snowboard detuning (at contact points) is much more common than ski detuning. Skis are typically tuned with consistent edge angles along their entire length, while snowboards require selective detuning at specific points.
- Binding interface: Snowboard binding inserts can accumulate dirt and corrosion, requiring periodic cleaning and thread-locking. Ski binding screws are less exposed and require less attention.
- Base structure: Snowboard base structures tend to be coarser than ski structures because the wider base contacts more snow surface area. Finer structures are used on skis for more precise water channeling.
Most tuning tools are interchangeable between snowboards and skis, though some edge tools are specifically designed for one or the other. If you tune both, invest in universal tools that work with both equipment types.
Common Snowboard Tuning Mistakes: What Not to Do
Even with the best tools and intentions, tuning mistakes can compromise your results or even damage your board. Here are the most common mistakes we see riders make, along with explanations of why they are problematic and how to avoid them.
Mistake 1: Using a Clothes Iron Instead of a Waxing Iron
This is the number one mistake that beginner tuners make, and it can cause serious damage to your board. Clothes irons are designed for pressing fabric, not melting wax onto a snowboard base. They have steam holes that will fill with wax, creating a permanent mess. They fluctuate wildly in temperature, creating hot spots that can burn the P-Tex base. And they are generally too light, meaning they do not maintain consistent pressure across the base surface.
The fix: Invest in a proper snowboard waxing iron. They cost $30-60 and will pay for themselves in avoided damage. A waxing iron has a thick, flat plate with no steam holes, precise temperature control, and enough weight to maintain consistent contact with the base. The Demon, XCMAN, and Grayne kits reviewed above all include quality waxing irons.
Mistake 2: Not Scraping Enough
This is the second most common mistake, and it directly affects your speed. After waxing, many beginners scrape once or twice, see a small amount of wax come off, and stop. The reality is that you need to scrape until NO MORE wax comes off on the scraper. The goal is to remove all surface wax, leaving wax only in the pores of the base. Surface wax creates drag. Pore wax provides speed.
The fix: Be patient and thorough. Scrape 15-20 times per section if necessary. Run your fingers across the base—if it feels waxy or looks shiny, keep scraping. The finished base should have a matte, uniform appearance. This step alone makes the biggest difference in wax job quality.
Mistake 3: Skipping the Brushing Step
Many riders scrape their wax and consider the job done. In reality, scraping leaves a thin film of wax in the base structure that needs to be removed with a brush. Skipping this step leaves your base in a sub-optimal state—better than before you waxed, but not as good as it could be.
The fix: After scraping, always follow with a nylon brush (tip to tail, firm pressure, multiple passes) and ideally a horsehair brush or fiber pad for final polishing. The brushing step takes only 5-10 minutes and dramatically improves your wax job quality.
Mistake 4: Filing Edges in Both Directions
When filing snowboard edges, you should always file from tip to tail in one direction only. Filing in both directions (back and forth) creates burrs on the edge that weaken the sharpened surface and produce an inconsistent bevel. These burrs can also cause the edge to catch unpredictably during riding.
The fix: Lift the file after each stroke and return it to the starting position. Always draw the file in the same direction: tip to tail. This single change in technique will dramatically improve your edge quality.
Mistake 5: Not Letting Wax Cool Before Scraping
Impatience leads many riders to start scraping before the wax has fully cooled and hardened. Scraping warm wax results in a messy, uneven finish and does not allow the wax to fully penetrate the base pores. The wax needs time to solidify and bond with the base material.
The fix: Wait at least 30 minutes (room temperature) to an hour (cold garage) before scraping. Press your thumbnail into the wax—if it leaves a dent, the wax is not ready. If your thumbnail bounces off, it is time to scrape. For the best results, apply wax in the evening and scrape the next morning.
Mistake 6: Applying Wax Over a Dirty Base
Applying fresh wax over a dirty, contaminated base is like painting over a dusty wall. The new wax will not bond properly with the base material and will flake off quickly. More importantly, the dirt and old wax residue clogs the base pores, preventing the new wax from penetrating.
The fix: Always clean your base before waxing. Use base cleaner on a rag for a quick clean, or use the hot scrape method for a deeper clean. The base should look uniform in color and feel clean to the touch before you apply new wax.
Mistake 7: Over-Sharpening Edges
Some riders believe that sharper is always better and file their edges to an extremely acute angle (86 degrees or lower). While this provides incredible edge hold on ice, it makes the board extremely “catchy” and difficult to ride. The edge will catch on any surface imperfection, making flat-base riding and buttering maneuvers dangerous. Over-sharpened edges also wear out much faster because the thin, acute bevel is more susceptible to abrasion.
The fix: Start with a 90-degree edge and only go sharper if you feel you need more grip. The difference between 90 and 88 degrees is significant—give yourself time to adjust before going sharper. Most recreational riders find 89-90 degrees to be the ideal balance of grip and forgiveness.
Mistake 8: Neglecting the Edges During Waxing
When scraping wax, many riders focus only on the flat base and neglect the edges. Wax accumulates in the groove where the P-Tex meets the steel edge, creating drag that interferes with edge engagement during turns. This accumulated wax is also difficult to remove once it hardens.
The fix: After scraping the main base, use the corner of your scraper to clean wax out of the edge grooves. Run the scraper corner along each edge from tip to tail. This step takes 30 seconds and significantly improves edge performance.
Mistake 9: Storing the Board Without Wax
Leaving your snowboard unwaxed during summer storage is one of the most damaging mistakes you can make. The exposed P-Tex pores oxidize in the air, turning white and brittle. This oxidation can permanently damage the base’s ability to absorb wax, reducing your board’s speed potential for the rest of its life.
The fix: At the end of every season, apply a thick coat of warm, soft wax and leave it on without scraping. This “storage wax” protects the base from oxidation all summer. When you pull the board out next season, simply scrape off the storage wax and apply a fresh coat. The base underneath will be in perfect condition.
Mistake 10: Trying to Fix Everything at Once
Many new tuners try to do a complete, professional-level tune on their first attempt and become overwhelmed. They try to sharpen edges, repair gouges, and apply a perfect wax job all in one session, and the result is often mediocre across all three tasks.
The fix: Start simple. Master one task at a time. Begin with waxing—it provides the most noticeable performance improvement and is the easiest skill to learn. Once you are confident in your waxing, add edge sharpening to your routine. Then add base repair. Build your skills gradually and your results will improve with each session.
The Complete Buyer’s Guide: Beyond the Box
Buying the kit is just the first step. To set up a functional home workshop, you need to understand the ecosystem of tools and how they interact with your specific board. Here is what the product descriptions often leave out.
1. The Missing Component: Vises
You will notice that none of the kits listed above include snowboard vises. This is standard for the industry, but it catches beginners off guard. You cannot effectively scrape wax or sharpen edges if your board is sliding around on a table.
The Pro Solution: Buy a dedicated set of suction-cup or clamp vises (like the Swix Jaws). They lock the board horizontally for waxing and vertically for edging.
The Budget Hack: If you aren’t ready to buy vises, use two chairs with rubber non-slip mats on top. The friction will hold the board steady enough for waxing, though edging will still be tricky.
2. Wax Chemistry: Hydrocarbon vs Bio vs Fluoro
In 2026, the wax game has changed.
Hydrocarbon (Standard): This is what comes in most kits. It is paraffin-based, cheap, and effective for 90% of riders.
Fluorinated (High Performance): “Fluoro” waxes repel water incredibly well, making them fast in wet snow. However, they are toxic to the environment and banned in many competitions. We recommend avoiding them for recreational use.
Bio-Based (The Future): Brands like Mountainflow Eco-Wax are plant-based. They are biodegradable and non-toxic. If you tune in a basement with poor ventilation, these are the safest option for your lungs.
3. Ventilation & Safety
Melting wax releases fumes. While standard hydrocarbon wax smells like a candle, burning P-Tex smells like toxic burning plastic (because it is). Always tune in a garage or a room with an open window. Never tune in your bedroom or kitchen unless you want a headache and a fine layer of wax dust covering your furniture.
4. The “Hot Scrape” Cleaning Method
Most kits don’t include base cleaner (a citrus solvent). You can buy it separately, or you can use the “Hot Scrape” method. This involves applying a layer of warm soft wax and scraping it off immediately while it is still liquid. The hot wax pulls dirt and oil out of the pores of your base, which you then scrape away. It is an effective way to clean your base without using harsh chemicals that dry it out.
5. Choosing the Right Kit for Your Riding Style
Not every kit is right for every rider. Here is a quick guide to matching a kit to your needs:
- Beginner who rides <10 days/season: Start with the One Ball Jay kit. You only need a wax iron and scraper. Add edge tools later as your skills develop.
- Weekend warrior (10-20 days/season): The Demon or XCMAN kit provides everything you need for a complete tune. The XCMAN offers better edge tools; the Demon offers a more complete base repair suite.
- Frequent rider (20+ days/season): Invest in the RaceWax or Demon kit with a separate brush set. You will be tuning often enough to appreciate the quality tools.
- International traveler: The Grayne kit’s dual-voltage iron is essential for overseas trips. Bring the iron and a small wax bar in your carry-on; ship the rest in your board bag.
- Minimalist / backcountry: The Wintersteiger kit provides the essentials without bulk. Add a gummi stone and a small brush for a complete backcountry tuning setup.
6. What to Buy Separately
No single kit includes everything you need for a complete tuning workshop. Here are the essential add-ons:
- Snowboard vises ($30-60) — the most important accessory not included in any kit.
- Additional wax ($8-15 per bar) — temperature-specific waxes for your local conditions.
- Dedicated brush set ($15-30) — brass, nylon, and horsehair brushes for a complete brushing workflow.
- Diamond stone ($10-20) — for edge polishing and long-term edge maintenance.
- Base cleaner ($8-12) — citrus-based solvent for thorough base cleaning.
- Gummi stone ($5-8) — for de-burring and detuning edges.
7. Understanding Edge Tools: File Guide vs Simple Block Tuner
Most budget kits include a simple plastic block tuner—a rectangular plastic block with a file embedded in one face. These block tuners hold the file at a fixed angle (usually 90 degrees) and work adequately for basic edge sharpening. However, they lack the precision and versatility of a dedicated edge bevel tool.
A proper edge bevel tool (like the ones in the XCMAN and RaceWax kits) allows you to adjust the angle, provides a more ergonomic grip for consistent strokes, and secures the file more firmly to prevent slipping. If you plan to do regular edge tuning, upgrading from a block tuner to a bevel tool is one of the best investments you can make.
8. Voltage Considerations for International Riders
If you plan to use your tuning kit outside of North America, voltage compatibility is critical. The United States and Canada use 110-120V electrical systems, while most of Europe, Asia, and South America use 220-240V. Plugging a 110V iron into a 220V outlet (even with a plug adapter) will destroy the iron and potentially start a fire.
The Grayne kit is the only option in our roundup with a dual-voltage iron that supports both 110V and 220V. For other kits, you would need to buy a voltage converter, which is bulky and unreliable. If international travel is in your future, invest in the Grayne kit from the start.
9. The True Cost of DIY Tuning
Let us break down the real cost of setting up a home tuning workshop:
| Item | Cost | Lifespan | Cost Per Tune |
|---|---|---|---|
| Tuning Kit (iron + tools) | $50-150 | 5-10 years | $2-5 per tune |
| Snowboard Vises | $30-60 | 10+ years | $0.50-1 per tune |
| Wax (per bar) | $8-15 | 5-10 tunes | $1-3 per tune |
| Brush Set | $15-30 | 3-5 years | $0.50-1 per tune |
| Diamond Stone | $10-20 | 3-5 years | $0.30-0.50 per tune |
| Total Setup | $113-275 | $4-10 per tune |
Compare this to a professional shop that charges $40-70 per basic tune and $80-120 for a full tune. After just three to four tunes, your home setup has paid for itself. Over a five-year period with 20+ tunes, you save $700-1200 compared to professional shop service.
Snowboard Tuning Glossary: Every Term You Need to Know
Snowboard tuning has its own vocabulary that can be confusing for beginners. This glossary defines every term you are likely to encounter when reading about snowboard maintenance, from basic concepts to advanced racing terminology.
- Base
- The bottom surface of the snowboard that contacts the snow. Made from P-Tex (polyethylene), the base is porous and designed to absorb wax. The base’s condition directly affects the board’s speed and glide performance.
- Base Burn
- White, chalky discoloration on the base caused by friction stripping wax and moisture from the P-Tex pores. Base burn indicates a severely dehydrated base that needs immediate waxing. If left untreated, base burn can permanently damage the base’s ability to absorb wax.
- Base Edge
- The angle of the steel edge as viewed from the bottom of the board. Most snowboards come with a 0.5-1 degree base edge bevel, which provides a slight undercut for forgiveness. A larger base edge angle increases forgiveness but reduces edge hold.
- Base Structure
- The fine groove pattern machined into the base surface by stone grinding. The structure channels water away from the base-snow interface, similar to tire treads on a wet road. Different structures are optimized for different snow conditions.
- Bevel
- The angle at which the edge is sharpened. Side edge bevel (viewed from the side) and base edge bevel (viewed from below) together determine how the edge interacts with snow. Common bevel angles range from 85-90 degrees for side edge and 0-1.5 degrees for base edge.
- Brush
- A tool with bristles used to clean and finish the base after waxing. Brush types include brass (deep cleaning), nylon (standard finishing), horsehair (fine polishing), and copper (anti-static). Each type serves a specific purpose in the waxing workflow.
- Buttering
- A freestyle riding technique where the rider flexes the board’s nose or tail while riding flat, performing spins, presses, and other maneuvers. Buttering requires detuned edges to prevent catching.
- Camber
- The upward curve in the center of a snowboard when viewed from the side. Camber provides pop, edge hold, and energy return. Maintaining proper wax and edge tune preserves the camber profile’s performance characteristics.
- Contact Points
- The widest points of the nose and tail where the board first contacts the snow during a turn. These points are commonly detuned (slightly dulled) to prevent the board from catching unexpectedly during turn initiation.
- Core Shot
- A deep gouge that penetrates through the P-Tex base and fiberglass layer, exposing the wood core. Core shots are serious damage that can allow water into the core, causing swelling and rot. Small core shots can be repaired at home; large ones require professional attention.
- Delamination
- The separation of the snowboard’s layered construction (base, fiberglass, core, top sheet). Delamination is caused by water intrusion, impact damage, or manufacturing defects. It appears as bubbling or separation between layers and requires professional repair.
- Detuning
- The process of slightly dulling the edge at specific points, typically the contact points (widest part of nose and tail) and optionally between the bindings for park riding. Detuning prevents the board from feeling “catchy” or “hooky” during turn initiation and buttering maneuvers.
- Diamond Stone
- A precision abrasive tool with industrial diamond particles bonded to a flat plate. Used for polishing snowboard edges after filing. Available in coarse, medium, and fine grits. Diamond stones produce a smoother, more durable edge than files alone.
- Extruded Base
- A snowboard base made by melting polyethylene and pushing it through a die. Extruded bases are denser, more durable, and easier to repair than sintered bases, but absorb less wax and have a lower speed potential. Common on entry-level and mid-range boards.
- File
- A flat metal tool with cut teeth used for sharpening steel edges. Files remove metal aggressively and are used for initial edge shaping and repair. Always file from tip to tail in one direction to avoid creating burrs.
- File Guide
- A tool that holds a file at a precise, consistent angle against the edge during sharpening. Also called an “edge bevel tool.” File guides eliminate the guesswork of maintaining the correct angle by hand.
- Gummi Stone
- A small, rubbery block used for de-burring, detuning, and polishing edges. The rubbery material catches and removes micro-burrs without dulling a sharpened edge. Also used for removing surface rust and rounding off contact points.
- Hydrocarbon Wax
- Standard snowboard wax based on paraffin compounds derived from petroleum. Available in temperature-specific formulas (warm, mid, cold) and all-temperature blends. The most common and affordable wax type, suitable for 90% of recreational riders.
- Iron (Waxing)
- A specialized electric iron with a thick, flat metal plate designed for melting wax onto snowboard bases. Waxing irons have no steam holes (which would trap wax), precise temperature control, and enough weight for consistent base contact. Never use a clothes iron for waxing.
- Metal Scraper
- A flat stainless steel scraper used for planing excess P-Tex flush with the base after repairs. Also useful for removing heavily applied wax. Requires more skill than plastic scrapers to avoid scratching the base.
- Oxidation
- The chemical reaction between P-Tex base material and oxygen in the air. Oxidation causes the base to turn white and chalky, become brittle, and lose its ability to absorb wax. Prevented by applying storage wax during off-season storage.
- P-Tex
- Ultra-high-molecular-weight polyethylene (UHMWPE), the material used for snowboard bases. P-Tex is chosen for its low friction coefficient, high abrasion resistance, and ability to absorb wax. Available in sintered (porous, fast, higher maintenance) and extruded (dense, durable, easier to maintain) forms.
- P-Tex Candle
- A stick of solid P-Tex that is lit and dripped into base gouges for repair. The flame melts the P-Tex, which flows into the damaged area and bonds with the existing base material. After cooling, excess P-Tex is planed flush with the base surface.
- Plexi Scraper
- A transparent acrylic scraper used for removing excess wax from the base. Plexi scrapers are harder and hold their edge longer than plastic scrapers, providing a more consistent scrape. The transparency allows you to see the base through the scraper.
- Sintered Base
- A snowboard base made by compressing polyethylene powder under high pressure and temperature. Sintered bases are porous, wax-absorbent, and fast, but require more maintenance and are harder to repair. Common on high-end performance snowboards.
- Side Edge
- The angle of the steel edge as viewed from the side of the board. Side edge angle determines how aggressively the edge bites into snow. Common angles range from 87-90 degrees, with lower angles providing more grip and higher angles providing more forgiveness.
- Storage Wax
- A thick coat of warm, soft wax applied at the end of the season and left on the board without scraping. Storage wax protects the base from oxidation and moisture during summer storage. Scrape it off and apply fresh wax at the beginning of the next season.
- Stone Grinding
- A professional maintenance process where the base is passed through a machine with a rotating stone to restore the factory base structure. Stone grinding removes surface damage, flattens the base, and restores the groove pattern that channels water for optimal glide.
- Tune / Tuning
- The complete process of maintaining a snowboard, including cleaning, base repair, edge sharpening, and waxing. A “full tune” encompasses all these steps; a “quick tune” typically focuses on waxing and edge touch-up.
- Wax (All-Temperature)
- A compromise wax formula designed to perform reasonably well across a wide range of snow temperatures. All-temperature waxes are convenient for travel and general use but do not match the performance of properly matched temperature-specific waxes.
- Wax (Temperature-Specific)
- A wax formula optimized for a specific snow temperature range. Available in warm (above 32°F), mid-range (19-32°F), and cold (below 19°F) versions. Temperature-specific waxes outperform all-temperature waxes in their target conditions.
Quick Reference Charts and Cheat Sheets for Snowboard Tuning
Sometimes you just need a quick answer without reading 500 words of explanation. These cheat sheets provide instant reference for the most common snowboard tuning decisions.
Wax Temperature Chart
| Snow Temperature | Wax Color | Wax Hardness | Iron Temp |
|---|---|---|---|
| Above 32°F (0°C) | Red / Yellow | Soft | 120°C / 248°F |
| 25°F to 32°F (-4°C to 0°C) | Violet / Purple | Medium | 130°C / 266°F |
| 19°F to 25°F (-7°C to -4°C) | Blue / Light Blue | Hard | 140°C / 284°F |
| Below 19°F (-7°C) | Blue / White | Very Hard | 150°C / 302°F |
| All temperatures | Clear / Gray | Medium | 130°C / 266°F |
Edge Angle Quick Reference
| Riding Style | Side Edge | Base Edge | Detuning |
|---|---|---|---|
| Beginner / Intermediate | 90° | 1-1.5° | Contact points only |
| All-Mountain | 89-90° | 1° | Contact points |
| Freeride / Powder | 89-90° | 0.5-1° | Contact points |
| Freestyle / Park | 90° | 1-1.5° | Contact points + between bindings |
| Aggressive Carving | 88° | 0.5° | Minimal |
| East Coast Ice | 87-88° | 0.5° | Minimal |
Maintenance Frequency Cheat Sheet
| Task | Frequency | Time Required | Difficulty |
|---|---|---|---|
| Visual base inspection | Every riding day | 1 minute | Easy |
| Edge check (thumbnail test) | Every riding day | 1 minute | Easy |
| Mid-day edge touch-up (gummi stone) | As needed | 2-3 minutes | Easy |
| Quick cold wax (rub-on) | Every 2-3 days | 10 minutes | Easy |
| Full hot wax | Every 3-5 days | 30-45 minutes | Easy-Medium |
| Edge sharpening (diamond stone) | Every 5-10 days | 15-20 minutes | Medium |
| Full edge tune (file + stone) | Beginning of season | 30-45 minutes | Medium-Hard |
| Base gouge repair | As needed | 30-60 minutes + cure time | Medium |
| Full tune (clean, repair, edge, wax) | Start & end of season | 2-3 hours | Hard |
| Stone grinding (professional) | Every 20-30 days | Drop off + 2-3 days | N/A (professional) |
Brush Usage Guide
| Brush Type | When to Use | Pressure | Direction |
|---|---|---|---|
| Brass / Copper | Before waxing (base prep) | Firm | Tip to tail |
| Nylon | After scraping (post-wax) | Moderate | Tip to tail |
| Horsehair | After nylon brush (finishing) | Light | Tip to tail |
| Fiber Pad / Scotchbrite | Final buff | Light-Moderate | Tip to tail |
Troubleshooting Quick Guide
| Symptom | Likely Cause | Fix |
|---|---|---|
| Board feels slow on flats | Dry base / no wax | Full hot wax application |
| White patches on base | Base oxidation | Multiple wax applications to rehydrate |
| Board catches edges unexpectedly | Over-sharpened edges / no detuning | Detune contact points with gummi stone |
| Edge slides on ice | Dull edge / wrong angle | Sharpen edge to 88-89°, polish with diamond stone |
| Wax peels off after one day | Dirty base / wax not absorbed | Clean base thoroughly, apply fresh wax |
| Squeaking sound on snow | Dry base creating friction | Apply fresh wax immediately |
| Base looks glossy after waxing | Not scraped enough | Scrape more aggressively until matte finish |
| Edge rust | Humid storage / no storage wax | Remove with gummi stone, sharpen edge, wax for storage |
| P-Tex repair won’t bond | Base too cold / dirty | Warm base, clean thoroughly, reapply |
| Board feels “chattery” at speed | Rough edge / wax buildup on edge | Polish edge with diamond stone, clean edge grooves |
Iron Temperature Quick Reference
| Wax Type | Iron Setting | How to Test |
|---|---|---|
| Warm wax (soft) | 120°C / 248°F | Wax melts on contact, no smoke |
| Mid-range wax | 130°C / 266°F | Wax melts smoothly, light sizzle |
| Cold wax (hard) | 140-150°C / 284-302°F | Wax melts with slight resistance |
| All-temperature wax | 130°C / 266°F | Wax melts smoothly on contact |
How to Choose the Right Snowboard Tuning Kit for Your Needs
With eight kits reviewed in this guide and dozens more on the market, choosing the right one can feel overwhelming. This section provides a structured decision framework to help you select the kit that best matches your riding style, skill level, and budget.
Decision Factor 1: How Often Do You Ride?
Your riding frequency is the single most important factor in determining how much to invest in a tuning kit. If you ride only a handful of days per season, a basic kit with a waxing iron and scraper is sufficient. If you ride 20 or more days per season, investing in a comprehensive kit with quality edge tools and base repair materials will pay for itself quickly in avoided shop visits.
- 1-5 days per season: A shop tune once or twice may be more practical than buying a kit. If you still want to learn home waxing, the One Ball Jay kit provides the simplest entry point.
- 5-15 days per season: The Grayne or Dakine kit provides good value. You will benefit from a quality iron and basic edge tools.
- 15-30 days per season: The Demon or XCMAN kit offers the best balance of tools and value. You will use everything in these kits regularly.
- 30+ days per season: The RaceWax or Demon kit with separate brush upgrades. At this frequency, you need pro-quality tools that can keep up with your maintenance schedule.
Decision Factor 2: What Is Your Skill Level?
Your tuning skill level affects which tools you will actually use and which will sit in the case untouched.
- Complete beginner: Start with a simple kit (One Ball Jay or Dakine) and focus on learning to wax. Edge tuning and base repair are skills you can add later as your confidence grows.
- Intermediate (can wax confidently): The Demon or XCMAN kit adds edge tools and base repair materials that expand your maintenance capabilities.
- Advanced (comfortable with all tasks): The RaceWax kit with diamond stones and professional brushes. You are ready for precision tuning.
Decision Factor 3: What Is Your Budget?
| Budget Range | Recommended Kit | Additional Purchases |
|---|---|---|
| Under $50 | One Ball Jay Hot Wax Kit | None initially; add tools later |
| $50-$80 | XCMAN or Dakine Super Tune | Brush set, gummi stone |
| $80-$120 | Demon Complete or Grayne Premium | Vises, brush set |
| $120-$180 | RaceWax World Cup | Vises, additional wax bars |
| $180+ | Wintersteiger + separate brush set + vise system | Build a custom workshop |
Decision Factor 4: Where Do You Ride?
Your local conditions dictate which tools and waxes you will use most often:
- East Coast (ice and hardpack): Prioritize edge tools with angle adjustment. The XCMAN kit’s multi-angle edge tuner or the RaceWax diamond stones will provide the most benefit. Cold-temperature wax is your primary wax type.
- Rockies (variable conditions): An all-around kit like the Demon provides good versatility. Stock up on mid-range and cold waxes.
- Pacific Northwest (wet snow): The Dakine kit’s Octane wax is designed for wet conditions. Warm-temperature wax will be your most-used formula. Base cleaning tools are especially important in wet conditions.
- Japan / International travel: The Grayne kit’s dual-voltage iron is essential. Consider bringing only the iron and wax bars in your carry-on and shipping the rest.
Frequently Asked Questions About Snowboard Tuning
Most factory snowboards come with a 90-degree side edge. This is durable and predictable.
Choose 90°: For park riding, rails, and beginner/intermediate cruising. It holds an edge but is less likely to “catch” unexpectedly.
Choose 89°: A slight upgrade in edge hold without significantly increasing catchiness. Good for all-mountain riders who encounter occasional ice.
Choose 88°: For East Coast ice, racing, or aggressive carving. The sharper angle bites harder into hardpack but dulls faster and can feel “twitchy” on flat bases.
Choose 87°: Reserved for competitive racing and extreme ice conditions. Not recommended for recreational riders.
A “core shot” is when a rock gouges through the P-Tex base material and exposes the wood or fiberglass core of the board.
Yes, IF: The gouge is small (less than 1 inch) and not near the metal edge. You can use the P-Tex candles included in these kits to drip fill the hole. First seal the core with epoxy, then apply P-Tex over the top.
No, IF: The gouge is massive, exposes a large area of wood, or has damaged the metal edge. This requires a “base patch” and epoxy work that should be done by a professional shop with a stone grinder.
Technically, no. A block of wax can sit in your kit for 10 years and still work fine. However, if wax is left on the board for a year without being scraped (like in summer storage without scraping before riding), it can dry out and become brittle. Always scrape old storage wax before riding. Wax stored in direct sunlight or extreme heat may degrade slightly in performance, but it will still be functional.
No. We repeat this because it’s the #1 mistake. Clothes irons have steam holes. Wax will melt into these holes, smoke, and eventually drip out onto your clothes later. Furthermore, clothes irons fluctuate wildly in temperature. Snowboard irons have a thick metal plate (thermal mass) that holds a steady temp (usually 130°C-150°C) to melt wax without burning the P-Tex base. A proper waxing iron costs as little as $30 and will save you from expensive base damage.
This is called “base burn” or oxidation. It means your base is thirsty! The friction from the snow has stripped all the oil/wax from the pores. If you see white patches near your edges, you need to wax immediately. Riding on a dry base creates excessive heat friction which can permanently melt and seal the pores of your board, ruining its ability to hold wax in the future. Multiple wax applications are usually needed to rehydrate a severely oxidized base.
Detuning is the process of slightly dulling the sharp edge at the contact points (the widest parts of the nose and tail). You use the file or gummi stone to round off the edge for about 2-3 inches.
Why? It prevents the board from feeling “hooky” or catchy when you initiate a turn. Park riders also detune their edges between the bindings to prevent catching on rails. Most of the kits above include a file or stone specifically for this purpose.
Who should detune? Beginners (reduces edge catches), park riders (prevents rail grabs), and riders who butter frequently. Aggressive carvers and racers typically do not detune.
The general recommendation is every 3-5 days of riding. However, this varies based on conditions and riding intensity:
Every 2-3 days: Wet spring conditions, heavy riders, aggressive carving
Every 3-5 days: Average winter conditions, moderate riding
Every 5-7 days: Cold dry conditions, casual cruising
The best test is visual: if the base looks white or chalky in spots, it needs wax. If it still looks dark and uniform, you have a few more days.
Edge sharpening frequency varies dramatically by riding style:
Every 3-5 days: East Coast ice riders, aggressive carvers
Every 10-15 days: All-mountain riders in variable conditions
Once per season: Park riders and jibbers who detune heavily
As needed: Casual riders who stick to groomed runs
A quick test: run your thumb lightly along the edge. If it catches, the edge is good. If your thumb slides over without catching, sharpen.
Yes. New snowboards come with a factory wax applied during manufacturing, but this wax is often low-quality and may have degraded during shipping and storage. Most manufacturers recommend scraping the factory wax and applying a fresh coat before your first day out. This ensures the base is properly prepared and provides the best possible first-day performance.
Yes, but with significant limitations. “Rub-on” or “cold” wax is applied by rubbing a solid wax bar directly onto the base. The friction heat transfers a thin layer of wax to the surface. This technique is fast and convenient but provides inferior results compared to hot waxing. Cold wax sits on the surface rather than penetrating the pores, wears off quickly (often within one day), and does not provide the same speed improvement as a proper hot wax. Use cold wax only for emergency touch-ups, not as a regular maintenance method.
Most hydrocarbon waxes work best between 120°C and 150°C (248°F to 302°F). The exact temperature depends on the wax formula:
Warm/soft wax: 120°C (248°F)
Mid-range wax: 130°C (266°F)
Cold/hard wax: 140-150°C (284-302°F)
Test method: Touch the wax bar to the iron plate. It should melt smoothly on contact without smoking. If the wax smokes, the iron is too hot.
It depends on how often you ride and how much you value convenience. If you ride fewer than 10 days per season, a shop tune once or twice may be more practical. If you ride 10+ days per season, a home tuning kit pays for itself in 2-3 seasons and provides the convenience of tuning on your own schedule. Home tuning also allows you to customize your board’s setup for specific conditions, something shops cannot do as effectively. The knowledge you gain from tuning your own board is also valuable for understanding your equipment and making informed purchasing decisions.
Sintered bases are porous and wax-absorbent, providing faster glide but requiring more maintenance. Extruded bases are denser and more durable, requiring less maintenance but offering lower top speed. Sintered bases are found on higher-end boards; extruded bases on entry-level and mid-range boards. Both require regular waxing, but sintered bases benefit more from frequent maintenance and temperature-specific waxes. For repair purposes, extruded bases are easier to repair because P-Tex bonds more reliably with the denser material.
Both. The beginning-of-season tune prepares the board for riding after summer storage. Remove storage wax, clean the base, sharpen edges, and apply fresh wax. The end-of-season tune prepares the board for summer storage. Sharpen edges (reduces rust), repair any damage, and apply a thick coat of storage wax without scraping. The end-of-season tune is arguably more important because it prevents the oxidation and damage that can occur during months of inactivity.
Several possible causes:
Not scraped enough: Surface wax creates drag. Scrape until the base looks matte, not shiny.
Wrong wax for conditions: Using cold wax in warm snow (or vice versa) reduces performance.
Dirty base: If the base was not cleaned before waxing, dirt trapped under the wax creates friction.
Base burn: If the base has permanent oxidation damage from riding dry, wax alone may not restore full speed. Multiple wax applications may be needed.
Base structure clogged: Old wax filling the stone-ground texture reduces water channeling. Brush thoroughly after scraping.
Yes, but a regular file held by hand will produce inconsistent results. The file tends to rock and tilt during strokes, creating an uneven bevel. A file guide (edge bevel tool) holds the file at a precise, consistent angle and produces much more uniform results. If you must file by hand, practice on an old board first and pay extreme attention to maintaining a consistent angle throughout each stroke. For most riders, a $15-25 file guide is a worthwhile investment.
A gummi stone is a small, rubbery block used for several edge maintenance tasks: de-burring (removing micro-burrs after filing), detuning (dulling specific edge points), rust removal (surface rust), and light polishing. It is one of the most versatile tools in your kit and costs only $5-8. Every tuning kit should include one, but if yours does not, buy one separately. It is essential for maintaining smooth, predictable edges.
The two main methods are:
Base cleaner: Apply a citrus-based solvent to a rag and wipe the base. This dissolves old wax and contaminants effectively but can dry out the base material if overused.
Hot scrape: Melt a thin layer of soft wax onto the base and immediately scrape it off while still liquid. The hot wax pulls impurities from the pores, and scraping removes both the wax and trapped dirt. This method is preferred by professional tuners because it cleans without drying the base.
You do not need to deliberately wax the edges, but they will get wax on them during the normal waxing process. This is fine—wax on the edges actually provides a small amount of protection against rust. However, you should scrape wax out of the edge groove (where P-Tex meets steel) after waxing, because wax buildup in this groove can interfere with edge engagement. Use the corner of your scraper to clean along each edge from tip to tail.
Follow these steps for optimal summer storage:
1. Apply a thick coat of warm, soft wax and leave it on without scraping (storage wax).
2. Sharpen the edges to reduce rust potential.
3. Store upright (leaning against a wall) in a cool, dry, dark location.
4. Use a board bag, sock, or cloth cover to protect from dust and UV.
5. Avoid car trunks, attics, garages with extreme temperature swings, or anywhere with direct sunlight.
6. Check every 2-3 months for edge rust or other issues.
Most tuning tools are interchangeable. Waxing irons, scrapers, brushes, files, and diamond stones work on both skis and snowboards. Edge bevel tools may differ slightly—snowboard-specific tools are designed for the wider edge profile of snowboards, while ski-specific tools accommodate the narrower ski edge. However, many tools are universal. The main differences are in technique: snowboards require detuning at contact points (skis typically do not), and snowboard waxing takes longer due to the wider base surface area.
A quality hot wax job provides optimal performance for approximately 3-5 days of riding, depending on conditions and riding intensity. Wet, abrasive spring snow wears wax faster than cold, dry powder. Aggressive carving generates more friction and heat, wearing wax faster than casual cruising. The best way to assess wax remaining is the water bead test: if water beads on the base, wax is present. If water sheets across the base, the wax has worn through.
Base structure is the pattern of fine grooves machined into the base surface during manufacturing (stone grinding). These grooves channel water away from the base-snow interface, preventing suction that slows you down. Different structures are optimized for different conditions: coarse structures for wet snow (more water channeling) and fine structures for cold, dry snow (less friction). Over time and with repeated waxing, the structure can become clogged. Thorough brushing after waxing helps maintain the structure. Professional stone grinding can restore factory-fresh structure when it becomes worn.
Take Control of Your Ride
Investing in a tuning kit isn’t just about saving money at the shop—it’s about the ritual of preparing for the mountain. There is a specific satisfaction in dropping into a line knowing your edges are sharp and your base is fast because you made it that way. This comprehensive guide has equipped you with the knowledge to maintain your snowboard like a professional, from understanding wax chemistry to mastering edge geometry.
Whether you are a first-time tuner learning how to wax a snowboard at home, an intermediate rider perfecting your edge angles, or an advanced rider building a complete home workshop, the key is consistency. Tune regularly, learn from each session, and your board will reward you with speed, control, and durability that far exceeds what a neglected board can deliver.
- Best Overall: Demon Complete Tune Kit for the full workshop experience.
- Best Value: XCMAN Complete Kit for pro tools on a budget.
- Best Travel: Dakine Super Tune for the minimalist traveler.
- Best Pro Quality: RaceWax World Cup for speed-obsessed perfectionists.
- Best Minimalist: Wintersteiger Basic for buy-it-for-life durability.
- Best Wax Focus: Swix Waxing Kit for riders who prioritize glide speed.
- Best Budget Starter: One Ball Jay Hot Wax for the most affordable entry point.
- Best Mid-Range: Grayne Premium Kit for international travelers with dual-voltage needs.
Don’t let a dry base or a dull edge ruin your next powder day. Grab a kit, crack a beverage, and give your board the love it deserves.
Shop All Tuning Kits


