

Mastering the Edge: The Definitive Guide on How to Carve on a Snowboard
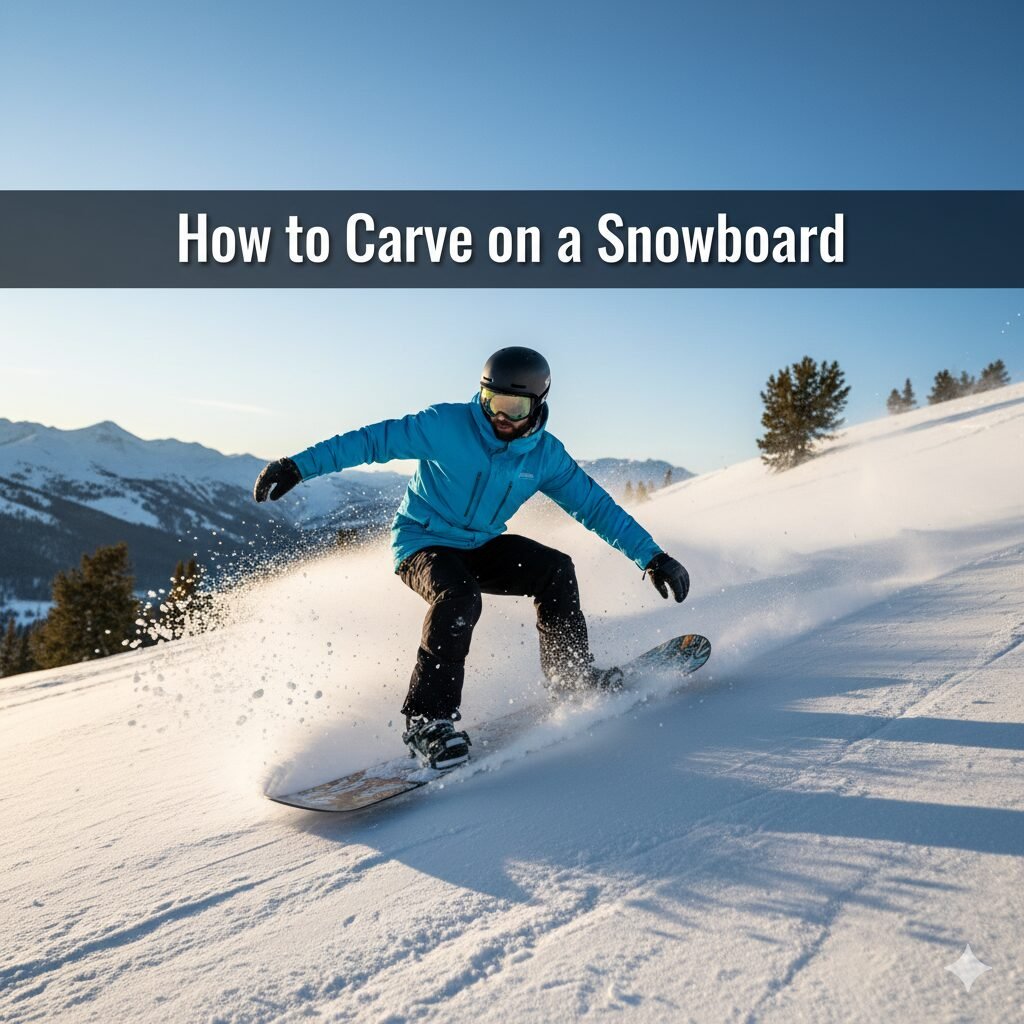
Carving is, simply put, the reason snowboarding is fun. It’s the highest expression of control and speed. While many riders link turns by skidding across the slope—shedding speed and leaving a cloudy trail of snow—true carving involves turning solely on the edge of the board, leaving a clean, thin line in the snow that looks like it was cut with a knife. This allows you to maintain momentum, increase speed, and feel the ultimate G-force of a banked turn.
This skill differentiates a cruising intermediate from a high-performance expert. It requires patience, precise technique, and the right gear. Given the high speeds involved, understanding this technique is also paramount to safety, as improper technique is one reason snowboarding can be dangerous. This guide will walk you through the biomechanics, equipment setup, and step-by-step drills needed to execute a perfect, unskidded turn.
Chapter 1: The Prerequisite: Gear & Stance Setup
You cannot carve effectively with freestyle gear and a sloppy stance. Carving demands stiffness, precision, and power transmission. If you’re serious about this, invest in the right setup. This is often the biggest expense, so consider when is the best time to buy snowboarding gear to maximize savings.
1. Non-Negotiable Gear Requirements
- Boots (The Power Source): Your boots are the interface between your body and the edge. For carving, you need stiff boots (flex rating 7-10). Soft boots (flex 3-5) flex too much, causing a delayed power transfer, leading to a skidded turn. If your feet hurt when snowboarding, it could be the fit—check our guide on why do my feet hurt when i snowboard. Top carving boots include brands like K2 (check out our K2 snowboard boots review) or Vans (are vans snowboard boots true to size).
- Bindings (The Transmission): You need bindings with a high stiffness rating and a rigid highback to push against.
- Board (The Rail): Look for boards with stiff flex (6-8) and a camber profile or a hybrid camber profile. Camber provides the “spring” and stability needed to hold a powerful edge through the arc. Some high-end brands like Yes (are yes snowboards good) or DC (are dc snowboards good) offer excellent carving platforms.
- Tuning: A sharp edge is mandatory. Carving relies on the edge biting into the snow. Make sure you regularly maintain your base edge and side edge. Read our guide on why wax your snowboard—a fast base helps maintain momentum through the arc.
2. Stance Adjustments for Carving
Your stance must facilitate powerful lateral pressure and angulation.
- Angles: Carvers typically use positive angles on both feet (e.g., +18° front, +9° back). This forward-facing angle encourages pressure over the front edge and aligns your body to angulate into the turn.
- Width: A slightly wider-than-normal stance can help you get lower and achieve greater angulation.
- Forward Lean: Increase the forward lean on your highbacks. This forces your knees to bend and transfers ankle pressure directly to the heel edge, improving response time.
Chapter 2: The Biomechanics of the Carve (The Four Phases)
A perfect carved turn is a continuous cycle of four interconnected phases. It’s less about the board and more about moving your Center of Mass (COM) laterally across the board.
Phase 1: Initiation (Flexion and Edge Tilt)
Goal: Set the board on edge without rotation.
- Lateral Movement: The turn begins not by twisting your body, but by tilting your knees and ankles into the new direction of travel. Initiate the toe-side by driving your knees forward and down towards the snow. Initiate the heel-side by pushing your shins forward and down, flexing your ankles.
- Fall Line: Start your transition at the moment the board crosses the fall line (the steepest part of the slope). This is where you have maximum momentum, allowing the carve to feel effortless.
- Body Position: Maintain an upright posture with your shoulders parallel to the board. Flex your hips and knees equally.
Phase 2: Edge Engagement and Angulation
Goal: Transfer your COM directly over the engaged edge to resist the G-force.
- Angulation: This is the key carving concept. Angulation is bending your body at the ankle, knee, and hip joints to move your COM outside the boots. Imagine trying to touch your hand to the snow—but keeping your head and shoulders upright.
- Ankle Steering: Your boots and bindings transmit power from your ankles and shins. Drive your shins into the highbacks (heel-side) or drive your toes into the bindings (toe-side). This is where the stiffness of your boots truly matters.
- Knee Drive: The knee acts as the most powerful leverage joint. Drive your front knee aggressively into the turn.
Phase 3: Pressure Control and Sustaining the Arc
Goal: Maintain consistent, increasing pressure on the engaged edge through the steepest part of the turn (apex).
- Center the Pressure: As speed and edge angle increase, the G-force pushes you back towards the center of the board. You must counter this by moving your COM further outside the arc.
- Extension: Gradually extend your legs as you enter the apex of the turn. This pushes the edge deeper into the snow, increasing the radius hold and resisting the G-force. You should feel immense pressure building up under your feet.
- Sustained Angulation: Keep your hips and knees fully bent, creating maximum angulation. Your body should resemble the letter ‘C’ bending into the mountain. If your turn is wide enough, you are entering the realm of the “Eurocarve”—an extreme angle that requires protection (best impact shorts for snowboarding).
Phase 4: Completion and Release (The Transition)
Goal: Release the pressure cleanly and immediately transition to the new edge.
- Progressive Release: As you finish the arc and begin to control your speed, progressively reduce the edge angle by flattening your feet and extending your legs fully. The board will naturally accelerate out of the turn.
- Pivot to New Turn: When the board is flat, initiate the new turn immediately by flexing your hips and knees and tilting your entire body towards the new edge. This smooth, fluid motion distinguishes an expert from an intermediate.
Your body follows your eyes. When initiating a carve, look across the slope to where you want the apex of your turn to be, and not at the snow directly in front of your board. Carving requires commitment and speed, and looking ahead is the best way to maintain both balance and confidence.
Chapter 3: Carving Drills & Troubleshooting
Practice is essential. Never skip the drills. If you are struggling, remember that professional help is invaluable—ask yourself if are snowboard lessons worth it? The answer for carving is almost always yes.
Drill 1: The Sustained Traverse (Pure Edge Hold)
This is the most fundamental carving drill. It isolates the angulation and pressure control phases.
- Find a wide, groomed blue or black slope.
- Start on the heel edge, moving across the slope (traversing).
- Slowly increase your edge angle by driving your knees and hips toward the uphill side. Your goal is to move your COM further and further uphill.
- Hold the edge for as long as possible. The board should feel like it is gripping a rail. There should be zero skidding (no spray of snow).
- Repeat on the toe edge, driving your shins and hips downhill, pushing your boots into the snow.
Drill 2: The Fall-Line Connect (Steering with the Ankle)
This drill trains the initiation and release phases by focusing on precise ankle and knee control.
- Start linking slow, wide turns.
- In the initiation phase, focus solely on tilting the board by flexing the ankles and knees—do not rotate your shoulders or hips.
- Try to keep the board on edge as you cross the fall line (the steepest part). Let the edge pull you through the turn without any skidding.
- Focus on minimizing the time the board spends flat during the transition. The goal is to immediately transfer pressure from the release of one heel-side turn to the tilt of the next toe-side turn.
Troubleshooting Common Carving Failures
| Symptom | Root Cause | Solution |
|---|---|---|
| Skidding/Sliding Out | Not committing COM over the edge; too much rotation; soft gear. | Drive your hips further outside the board; increase angulation; buy stiffer boots (best snowboard boots). |
| Losing Edge at Apex | Insufficient pressure *after* initiation; extending the legs too early. | Wait longer to extend; aggressively drive your front knee into the turn; maintain high forward lean. |
| Unwanted Rotation/Spinning | Turning with the shoulders/hips instead of the knees/ankles. | Keep your shoulders aligned with the board’s axis; only turn your head; twist with the ankles. |
| Too Much Speed | Not completing the turn. | Complete the arc so the board points uphill before releasing the edge. Embrace the speed—it’s necessary! |
Chapter 4: Advanced Techniques and Carving Gear Reviews
Once you master the basic four-phase turn, you can increase speed and angulation. Advanced carving is about high-speed geometry, reducing the turn radius, and maintaining control in challenging conditions.
1. Advanced Carving Concepts
- Fore/Aft Pressure: Use fore/aft pressure (front foot vs. back foot) to control the turn radius. Pressing the front foot lengthens the carve radius; pressing the back foot tightens the carve radius.
- Extension into the Fall Line: Instead of flexing to initiate, initiate by extending your center of mass forward over the nose as you cross the fall line. This accelerates the board and sets a lightning-fast edge.
- High-G Turns (Eurocarves): For deep trenches where your hand can skim the snow, the angulation is so extreme that you must counterbalance by tucking your weight back under your COM. This is an advanced movement that generates serious G-forces—be protected!
2. Essential Gear for High-Performance Carving
At high speeds, you need gear that offers precise feedback and maximum protection. Look for deals—check guides on how expensive is snowboarding and how to save money.

Vans Aura Pro Snowboard Boots
Carving absolutely requires stiff boots. The Vans Aura Pro (or similar models like the K2 Boundary) offers a mid-to-stiff flex that provides excellent heel hold and immediate energy transfer. This means the second you flex your ankle, the board reacts—crucial for maintaining a clean arc at speed. Remember, sizing is key: check our guide on are vans snowboard boots true to size before purchasing.
Check Price on Amazon
Anon M4 Toric Snowboard Goggles
At high speeds, vision is everything. Poor visibility is dangerous. These top-tier toric goggles (best snowboard goggles) offer a wide field of vision, crucial for looking ahead and across the slope to set your turn. They also come with interchangeable lenses for variable conditions—essential for maintaining edge control on ice versus powder.
Check Price on Amazon
Demon Complete Ski and Snowboard Tuning Kit
Carving is impossible without sharp edges and a fast base. This tuning kit includes tools for edge maintenance (file guides, stones) and waxing supplies (iron, wax). Regular tuning not only improves your performance but is a fundamental part of board safety and longevity. Remember the importance of maintaining your base, detailed in why wax your snowboard.
Check Price on Amazon
Triple Eight Bumsaver Padded Impact Shorts
Carving is high-speed, high-consequence riding. When you lose an edge at speed, the fall is hard and often lands you directly on your hip or tailbone. These impact shorts (best impact shorts for snowboarding) provide dense foam padding that significantly reduces the risk of bruising or serious injury. Paired with a top-rated helmet (best snowboard helmets), this is smart riding.
Check Price on AmazonChapter 5: Final Thoughts & General Snowboarding FAQs
Why Carving Makes Snowboarding the Best Sport
Carving is the purest form of control and acceleration. It transforms the simple act of turning into a geometric dance with gravity. This technical finesse is one reason snowboarding is the best winter sport, offering a level of physical engagement that contrasts with other snow sports. The feeling of pulling Gs through a carve is an experience that makes the cost (how expensive is snowboarding) and effort entirely worthwhile.
| General Snowboarding Questions | Expert Advice |
|---|---|
| Why do people wear large mitts/gloves? | Mittens are generally warmer because they allow your fingers to share heat. They are also often preferred by freestyle riders for their ease of grabbing. Compare options in our mittens vs gloves for snowboarding guide, but note that why snowboarders wear mittens is mostly about comfort and warmth. |
| How important is my initial gear purchase? | Very important. While best snowboard bags can wait, your boots are critical. Get the best you can afford, and make sure they fit perfectly. Never compromise on a helmet. |
| What about advanced gear brands? | Many excellent brands exist. Boards often cater to specific niches. For instance, brands like Gilson (are gilson snowboards good) often focus on unique base designs that can aid specific types of carving. |
| I want to ride in the deep snow. What’s the link to carving? | While carving is primarily a groomed slope skill, the edge control transfers directly to powder riding. For true deep snow, explore guides on backcountry snowboarding. Carving skills are still valuable for traversing and controlling speed on steep terrain. |
| Is it worth traveling abroad for snowboarding? | Yes, absolutely. The scale and diversity of terrain in the top european ski resorts and other advanced spots (snowboarding in colorado, best snowboarding destinations) offer challenges not found everywhere. The variety of snow can make carving feel entirely different. |
| What if I’m a beginner? | Start with the basics: linking skidded turns. Once you are comfortable controlling speed, the transition to carving is the next logical step. If you’re a true novice, check out snowboarding resorts for beginners before tackling carving. |
| Is snowboarding really better than skiing? | That’s a subjective question! We think so. Many feel the fluid, surfing motion and deep carving angles make why snowboarding is better than skiing an easy case to make. But the choice is yours. |
| I’ve heard about lace length. Is that important? | Boot laces are a small detail, but important for ensuring proper fit. You can find details on how long are snowboard boot laces if you need replacements, but focus on the BOA/lace tension for heel hold first. |
| Where can I find general tips and tricks? | You can explore more technical and lifestyle guides at snowboardbible.com for everything from learning to riding like a champion. |
Chapter 6 Carving vs. Skidding: Understanding the Critical Difference
One of the most common questions we receive at snowboardbible.com is: “Am I actually carving, or am I just skidding?” This confusion is natural because the two techniques look similar from a distance, but they are fundamentally different movements with different outcomes. Understanding this distinction is the single biggest leap you can make from intermediate to expert snowboarding.
When you skid a turn, you rotate your upper body and push the tail of the board sideways through the arc. The board is essentially scraping across the snow surface, which creates a wide, cloudy spray of snow behind you. Skidding bleeds speed at every point in the turn. It’s the default way most people learn to snowboard because it feels safe—you’re always shedding velocity.
When you carve a turn, you tilt the board onto its edge and let the sidecut geometry pull you through the arc. The board bends into a curve, and the edge tracks through the snow like a rail. You leave a thin, clean line—not a wide smear. The key difference: carving maintains or even increases your speed through the turn. There is no braking action. This is both exhilarating and, for many riders, terrifying.
Visual Cues: How to Tell the Difference
The simplest way to identify your turn type is to look behind you after a run. A carved turn leaves a single, clean line in the snow—like a pen drawn across paper. A skidded turn leaves a wide, smeared path that looks like someone dragged a brush across the surface. On groomed runs, you can also look at the edge of the turn: a true carve has a visible trench or “rail” in the snow, while a skid shows a flat, scraped area.
Another tell is your upper body. In a skidded turn, your shoulders and hips rotate into the turn, and your trailing hand often swings outward. In a pure carve, your shoulders stay relatively quiet and aligned with the board’s direction. The movement comes entirely from your lower body—ankles, knees, and hips creating angulation.
Why Skidding Isn’t Always Bad
Before you beat yourself up for skidding, know this: skidding is a valid technique in many situations. In steep terrain, moguls, or crowded slopes, controlled skidding is how you manage speed and navigate safely. Even the best carvers skid when conditions demand it—icy steeps, tight bumps, or flat cat-tracks where there’s not enough speed to hold an edge. The goal isn’t to eliminate skidding entirely; it’s to have carving in your toolbox so you can deploy it when conditions allow.
Think of it like driving a manual transmission. You don’t drive in first gear on the highway, but you need to know how to shift. Skidding is your first gear; carving is your top gear. Master both, and you’ll have complete control in every situation on the mountain.
The Physics Behind Carving vs. Skidding
Understanding the physics helps demystify why carving feels so different. When you skid, you’re applying a lateral (sideways) force to the board. This force pushes snow particles aside, creating friction that slows you down. The wider the skid, the more friction, the more speed you lose. It’s essentially the same physics as a car doing a burnout—the tires are spinning but the car isn’t moving forward efficiently.
When you carve, the board’s edge cuts into the snow at an angle. The sidecut radius of the board (the inward curve of the board’s edge) forces the board to bend into an arc when tilted on edge. This arc naturally pulls you through the turn. There is minimal lateral friction—just the edge slicing through the snow. This is why carving feels so fast and smooth. You’re converting potential energy (height on the slope) into kinetic energy (forward motion) with maximum efficiency.
The Progression Path: From Skidding to Carving
Most riders follow a predictable progression. First, you learn to link skidded turns on easy terrain—this is where you spend your first dozen days on the mountain. As you gain confidence, you naturally start to trust the edge and lean more, which produces a hybrid turn: part carve, part skid. This is the “intermediate plateau” that frustrates so many riders.
To break through, you need to isolate the carving mechanics. Start with short traverses across the slope, gradually increasing your edge angle until you can hold a clean line without any skidding. Once you can do this on both edges, start connecting those carved traverses into full S-shaped turns. This is the progression we detail in Chapter 3’s drills, but understanding why you’re doing those drills—because you’re replacing lateral friction with geometric edge hold—makes the practice feel purposeful rather than repetitive.
Chapter 7 Best Snowboard for Carving: Board Selection Deep Dive
Choosing the right board for carving is one of the most impactful decisions you’ll make. While we covered the basics in Chapter 1, this section dives deeper into the specific characteristics that make a board excel at carving, and why certain board designs are better suited for this discipline than others. If you’re serious about why snowboarding is fun, the right carving board will amplify that experience tenfold.
Understanding Sidecut Radius
Sidecut radius is the most important carving specification on any snowboard. It refers to the radius of the imaginary circle that would be formed by extending the curved edges of your board. A board with a deep sidecut (small radius, like 6-7 meters) will naturally turn tighter and feel more responsive at moderate speeds. A board with a shallow sidecut (large radius, like 9-12 meters) will make wider, more drawn-out turns that feel stable at high speed.
For dedicated carving, most riders prefer a medium-to-deep sidecut (7-9 meters). This gives you the agility to make responsive turns on groomed runs while still offering stability when you’re charging hard. The sidecut works in conjunction with the board’s flex: a stiff board with a deep sidecut will snap you through turns aggressively, while a softer board with the same sidecut will feel more forgiving and gradual.
Camber Profile: Why It Matters for Carving
The board’s camber profile determines how the edge contacts the snow when you tilt it on edge. There are three main profiles:
- Traditional Camber: The board arches upward between the contact points, with the tip and tail touching the snow. When you edge, the camber compresses and the full effective edge engages with the snow. This provides maximum edge hold, pop, and precision—this is the gold standard for carving. The spring-like camber also stores energy that releases at the end of each turn, giving you acceleration into the next.
- Rocker (Reverse Camber): The board contacts the snow at the center, with the tip and tail lifting up. This makes turns easy and forgiving but sacrifices edge hold at speed. Rocker boards are great for powder and park but are a poor choice for dedicated carving.
- Hybrid Camber: Combines elements of both—typically camber between the bindings with rocker at the tips. This offers a compromise: decent edge hold with some forgiveness. Popular all-mountain profiles, but they won’t match a full-camber board’s carving precision.
Board Stiffness: The Flex Rating
Flex is rated on a scale of 1 (softest) to 10 (stiffest). For carving, you want a board in the 6-8 range. Here’s why stiffness matters for carving:
- Edge Response: A stiff board transfers your movements to the edge faster. When you initiate a carve by tilting your ankles, a stiff board responds immediately. A soft board will flex and delay the edge engagement, often resulting in a skid.
- Stability at Speed: Carving generates speed. A stiff board holds its edge through vibrations and chatter that would destabilize a softer board. This is especially important on hardpack or icy conditions where the board needs to cut through the surface rather than bounce off it.
- Energy Return: A stiff camber board stores more energy during the turn and releases it at the exit, propelling you into the next turn. This “pop” between turns is what makes carved linking feel so dynamic and fluid.
Board Shape: Directional vs. Twin
For dedicated carving, a directional shape is superior to a twin shape. Directional boards have a longer nose than tail, with the stance set back slightly. This design is optimized for riding in one direction—exactly what carving requires. The set-back stance puts more weight over the front edge, improving edge engagement and control at speed. A twin shape is symmetrical, designed for switch riding and park, and its centered stance doesn’t favor the aggressive front-foot pressure that carving demands.
Some directional boards also feature a tapered shape, where the tail is narrower than the nose. This design naturally sinks the tail and floats the nose, which helps in carving transitions by keeping the board tracking cleanly through the arc.
Recommended Carving Boards by Skill Level
| Skill Level | Board Type | Key Features | Why It Works |
|---|---|---|---|
| Intermediate (Learning to Carve) | All-Mountain Carver | Hybrid camber, flex 5-7, medium sidecut | Forgiving enough to learn on, stiff enough to hold an edge when you commit |
| Advanced (Refining Technique) | Directional Carver | Full camber, flex 7-8, deep sidecut | Maximum edge hold, responsive feel, energy return between turns |
| Expert (High-Speed Carving) | Dedicated Carving Board | Full camber, flex 8-10, setback stance, metal edges | Uncompromising precision, designed for one thing: fast, clean carved turns |
Many intermediate riders fear stiff boards because they think they’ll be punished for mistakes. In reality, a stiff board is more predictable—you know exactly how it will respond. The “unforgiving” feeling comes from boots and bindings that don’t match the board’s stiffness. If your board is a flex 8 but your boots are a flex 4, the mismatch will feel chaotic. Always match your gear: stiff board → stiff boots → stiff bindings.
Chapter 8 How to Lean on a Snowboard: Mastering Body Position
If there’s one concept that separates confident carvers from hesitant intermediates, it’s understanding how to lean on a snowboard. This isn’t just about tipping your body—it’s about understanding where your center of mass needs to be relative to the board’s edge, and how to move it there efficiently. Many riders think leaning means “falling into the turn,” but carving requires a much more precise and controlled movement.
Understanding Your Center of Mass (COM)
Your center of mass is the point where your body’s weight is集中 (concentrated). When you’re standing still on flat ground, your COM is roughly at your belly button, centered over the board. When you begin to carve, your COM needs to move outside the board’s edge—over the snow—to resist the centrifugal force that’s pushing you toward the center of the turn.
Think of it like a motorcycle turning. The rider leans into the turn, placing their COM over the inside edge of the tire. The faster the turn, the more they must lean. If they don’t lean enough, centrifugal force pushes them outward and they lose the turn. The same principle applies to snowboard carving: the faster and tighter your turn, the more your COM must move outside the board.
The Three Types of Lean
There are three distinct types of lean in snowboarding, and confusing them is the source of most carving mistakes:
- Tilting (Edge Angle): This is the ankle and knee movement that sets the board on edge. Tilting is how you establish the edge—it’s not the lean itself, but the prerequisite. You tilt first, then angulate to balance over the edge.
- Angulation (The Real Lean): This is the hip and knee bend that moves your COM laterally over the engaged edge. On a toe-side turn, you push your hips forward and up while driving your knees toward the snow. On a heel-side turn, you push your hips back and up while driving your shins forward. This is where the magic happens. Angulation moves your COM away from the board’s center and over the edge, allowing you to resist higher G-forces.
- Inclination (The Mistake): This is when riders lean their entire body into the turn from the ankles—like tipping a rigid pole. While inclination works at low speeds, it fails at higher speeds because your COM isn’t far enough outside the edge to resist the G-force. You’ll feel like you’re falling toward the inside of the turn. This is the most common reason intermediates can’t hold a carve at speed.
The correct carving body position combines tilting + angulation. You tilt the board on edge, then angulate your body over the edge. This puts your COM directly over the engaged edge while your upper body stays relatively upright—a position that’s both stable and powerful.
Drill: The Wall Lean
Practice this at home to build muscle memory:
- Stand facing a wall, about arm’s length away.
- Place your hands on the wall at shoulder height.
- Push your hips forward toward the wall while keeping your head and shoulders back.
- Your body should form a “C” shape—hips forward, shoulders back, weight on the balls of your feet.
- This “C” shape is exactly the angulation you need for a toe-side carve. Practice holding this position for 30 seconds to build strength.
Common Lean Mistakes and Fixes
- Leaning Back (Aft Pressure): If you feel the board’s nose lifting or you’re losing control, you’re likely leaning too far back. Your weight should be distributed roughly 60/40 front-to-back on a carving board. The front foot drives the turn; the back foot follows. Check that your best snowboard boots have proper heel hold to prevent this.
- Shoulder Rotation: If your shoulders are turning into the turn, you’re using rotation instead of angulation. Keep your shoulders aligned with the board’s direction and use your hips and knees to create the lean. Imagine your upper body is a stable platform and your lower body does all the work.
- Looking Down: Looking at the snow directly in front of your board causes you to tip your head forward, which shifts your COM forward and unbalances your lean. Look ahead—across the slope to where you want to go.
Chapter 9 Carving on Different Snow Conditions
One of the most overlooked aspects of carving instruction is that snow conditions change everything. The technique that works perfectly on a groomed blue run at 10 AM may feel completely wrong by 2 PM when the sun has softened the snow into slush. Learning to adapt your carving technique to different snow conditions is what separates a fair-weather carver from a year-round expert.
Carving on Hardpack and Ice
Hardpack—compressed, groomed snow that hasn’t been touched by sun—is the ideal carving surface. The edge bites cleanly, the board tracks predictably, and you can generate maximum speed with confidence. This is where you’ll develop your fundamental carving skills.
Ice is hardpack’s evil twin. When the surface is truly icy (not just hard), the edge struggles to bite. You’ll notice a distinct “skating” feeling where the board slides sideways despite being on edge. To carve on ice:
- Increase your edge angle: A steeper edge angle forces more of the edge into the ice, creating a deeper bite.
- Reduce your speed: Ice reduces your margin for error. Slow down to give yourself time to react if the edge releases.
- Use smooth, progressive movements: Jerky movements on ice will break the edge’s grip. Every movement must be deliberate and gradual.
- Sharpen your edges: Regular tuning is critical for ice. A dull edge will skip across ice while a sharp one will dig in. Use a file guide to maintain a consistent edge bevel.
- Consider your board: Boards with longer effective edges and deeper sidecuts perform better on ice because they have more edge surface in contact with the snow.
Carving in Powder
While carving is primarily a groomed-slope skill, you can still carve in powder—just differently. In deep powder, the board naturally floats, and the edge engages differently because the snow is soft and yielding. To carve in powder:
- Shift weight back slightly: Unlike groomed carving where you want 60/40 front-to-back weight, powder requires a more centered or slightly back-weighted stance to keep the nose up.
- Use wider turns: The deeper sidecut won’t grip as aggressively in powder because the snow is too soft. Wider, more gradual turns allow the board to float through the arc.
- Stay committed: The temptation in powder is to lean back and “ride the tail.” This feels safe but actually reduces your control. Trust the board’s float and maintain a forward-leaning posture.
For backcountry powder riding, check our comprehensive guide on backcountry snowboarding for avalanche safety and gear requirements.
Carving in Slush and Spring Conditions
Slush is soft, wet snow that has been partially melted by the sun. It’s heavy, slow, and unpredictable. The biggest challenge with slush carving is that the surface is inconsistent—one turn might be on firm snow, the next in a patch of heavy slush. To handle slush:
- Increase your angulation: Slush demands more aggressive edge engagement to maintain grip through the heavy snow.
- Expect resistance: Slush slows you down more than hardpack. You’ll need more speed at the top of the turn to carry through the arc.
- Be ready for “grabby” patches: Slush can suddenly grab your edge, causing the board to decelerate rapidly. Keep your knees flexed and ready to absorb these surprises.
- Ride early: The best slush carving happens in the morning before the sun fully softens the surface. By afternoon, slush can become a slop-fest that’s nearly impossible to carve cleanly.
Carving on Groomed Runs: The Ideal Surface
Groomed runs are where carving truly shines. The smooth, consistent surface allows the board’s edge to track cleanly through the arc. For the best carving experience on groomers, ride early in the morning after the groomers have run overnight. The freshly groomed “corduroy” surface provides the perfect combination of smooth texture and firm snow that allows maximum edge hold with minimal effort.
As the day progresses and more riders track out the groomers, the surface becomes choppy and inconsistent. This doesn’t make carving impossible—it just requires more active pressure management and absorbent knee work to handle the micro-terrain changes. The best carvers can maintain a clean arc even through tracked-out chop, but it requires significantly more skill and effort.
Chapter 10 The Physics of Carving: Edge Angle, Speed, and G-Force
Carving isn’t just about feeling—it’s about physics. Understanding the forces at play during a carved turn will help you make better decisions about speed, edge angle, and body position. This isn’t a physics lecture; it’s practical knowledge that will make you a better carver.
Edge Angle: The Degrees That Matter
Edge angle is the degree to which your board is tilted relative to the snow surface. A flat board has 0° edge angle. A board tilted fully on its side has 90° edge angle (which you’ll never reach). For most carving situations, edge angles range from 20° to 70°, with the most common carving angle being around 45° to 60°.
The relationship between edge angle and speed is governed by centripetal force. As you increase speed through a turn, the centrifugal force (the force pushing you outward) increases proportionally to the square of your speed. This means doubling your speed quadruples the outward force. To resist this force and hold your edge, you must increase your edge angle and angulation. This is why faster carving requires more extreme body positions—it’s not optional; it’s physics.
The Radius of Your Turn
Your turn radius is determined by three factors: the board’s sidecut radius, your edge angle, and your speed. A deeper sidecut creates a tighter turn radius. A steeper edge angle also tightens the radius. And paradoxically, higher speed creates a wider radius (because the centrifugal force is stronger). This means that to maintain a tight turn at higher speeds, you need both a deeper edge angle and a board with sufficient sidecut to handle the forces.
This physics explains why carving at high speed feels like such a workout. You’re fighting exponentially increasing forces with your body, and every increase in speed demands a proportionally greater physical effort to maintain your edge and position.
G-Force: What It Feels Like
G-force is the acceleration you feel during a turn, expressed as a multiple of gravitational acceleration. During a moderate carve, you might experience 1-2 Gs (one to two times your body weight pressing through the edge). During an aggressive Eurocarve, you can experience 3-4 Gs or more. This is why impact protection (best impact shorts for snowboarding) and a quality helmet (best snowboard helmets) are essential for high-speed carving.
The human body is well-equipped to handle these forces horizontally (unlike vertical G-forces in aviation). However, the forces are concentrated on your ankles, knees, and core. This is why carving-specific fitness (covered in Chapter 13) focuses on lower body strength, core stability, and ankle mobility.
Speed Management Through Turn Shape
Unlike skidding, where you can scrub speed at any point in the turn, carving gives you speed control through turn shape. A rounder, more C-shaped turn maintains more speed because the board stays on edge longer. A tighter, more hook-shaped turn (where the board finishes pointing uphill) reduces speed by converting forward momentum into upward momentum. Mastering turn shape is the primary speed control mechanism for carvers.
Chapter 11 How to Stop Skidding When Snowboarding
If you’ve been snowboarding for a while and suspect that your turns are more skid than carve, you’re not alone. Stopping the skid is one of the most challenging transitions in snowboarding because skidding feels safe and familiar, while carving feels fast and unfamiliar. But the rewards are immense: cleaner turns, better speed control, and the pure joy of feeling the board track perfectly through the snow.
Identify Your Skid Triggers
Before you can fix the skid, you need to understand what’s causing it. Common skid triggers include:
- Upper body rotation: Turning your shoulders or hips into the turn is the #1 cause of skidding. This rotates the board and pushes the tail sideways. Fix: Keep your shoulders aligned with the board’s direction. Only your lower body should move.
- Insufficient edge angle: If you’re not tilted enough on edge, the board will slide sideways instead of tracking through the arc. Fix: Commit to more angulation. Push your hips further outside the board.
- Timing issues: Initiating the turn too early (before the fall line) or too late (after the fall line) creates a skid. Fix: Start your transition exactly at the fall line, where gravity is strongest and the board is most willing to tilt.
- Soft gear: If your boots or bindings are too soft, the edge won’t respond quickly enough to your movements, causing a delayed engagement that manifests as a skid. Fix: Invest in stiffer gear (best snowboard boots).
The Elimination Drill: One Turn at a Time
The most effective way to eliminate skidding is to focus on one turn at a time. Don’t try to link perfect carves immediately—that’s overwhelming. Instead:
- Start at the top of a groomed run.
- Make one wide, drawn-out traverse across the slope on your toe edge. Your goal: zero skidding. Hold the edge as long as possible, increasing the angle gradually.
- At the end of the traverse, initiate a single carved turn to the heel edge. Focus exclusively on this one transition.
- Hold the heel edge traverse. Again: zero skidding.
- Repeat: one toe traverse, one carved turn, one heel traverse, one carved turn.
By isolating each turn, you can focus entirely on the mechanics without the pressure of linking multiple turns. As your confidence builds, gradually shorten the traverses and link the turns more closely.
Set up your phone at the bottom of a run and film yourself making turns. You’ll be shocked at what you see. The turn you thought was a perfect carve is probably a 70/30 skid/carve hybrid. Video feedback is the fastest way to identify and correct skidding habits. Compare your turns to videos of professional carvers and note the differences in body position, edge angle, and board trajectory.
Chapter 12 How Fast Do Snowboarders Go When Carving?
Speed is both the reward and the risk of carving. When you see professional carvers blasting down groomed runs, leaving clean lines in the snow, you might wonder: how fast are they actually going? And more importantly: is that safe?
Typical Carving Speeds
Speed varies dramatically based on terrain, conditions, and rider skill. Here’s a rough breakdown:
- Learning to Carve (Blue Runs): 15-25 mph (24-40 km/h). This is the speed range where most intermediates learn the basics. It’s fast enough to engage the edge but slow enough to feel safe.
- Intermediate Carving (Groomed Blacks): 25-40 mph (40-64 km/h). At this speed, the G-forces become noticeable. You need solid angulation and commitment to hold the edge.
- Advanced Carving (Wide Groomers): 40-60 mph (64-96 km/h). This is where carving gets serious. The forces are significant, the consequences of a fall are severe, and the gear requirements are non-negotiable.
- Expert/Professional Carving: 60+ mph (96+ km/h). Professional carvers and racers regularly exceed 60 mph on steep groomed runs. At these speeds, the slightest error can result in a high-speed crash. This is where full protective gear is absolutely mandatory.
Why Speed Isn’t Everything
Many riders chase speed as if it’s the ultimate goal of carving. While speed is exhilarating, clean technique at moderate speed is more impressive than sloppy technique at high speed. A perfectly executed carve at 25 mph, where the board tracks cleanly through the entire arc, is far more rewarding—and safer—than a skidded, off-balance turn at 50 mph.
Focus on building speed gradually as your technique improves. Let the speed be a byproduct of good carving, not the goal. As your angulation improves and your board holds a cleaner edge, speed will naturally increase. Trying to force speed before your technique is ready is the fastest way to end up in the medical tent.
Speed and Safety
At high speeds, your margin for error shrinks exponentially. A small mistake at 20 mph might result in a minor skid. The same mistake at 50 mph can send you flying across the run. This is why safety gear is non-negotiable for high-speed carving:
- Helmet: Always. Every run. No exceptions. See our best snowboard helmets guide.
- Impact Shorts: Protect your tailbone and hips during high-speed falls. See best impact shorts for snowboarding.
- Goggles: Clear vision is essential. At high speeds, your brain processes visual information faster, and you need goggles that enhance contrast and reduce glare. See best snowboard goggles.
- Wrist Guards: The natural instinct during a fall is to put your hands out. Wrist guards prevent fractures. Consider padded base layers under your jacket for additional protection.
Chapter 13 Snowboard Carving Workout: Off-Season Training
Carving is physically demanding. The combination of balance, core strength, leg power, and flexibility required to hold a clean carved turn at speed means that your off-season training has a direct impact on your on-mountain performance. If you want to carve better, train smarter during the summer months.
Key Muscle Groups for Carving
Carving primarily engages four muscle groups:
- Quadriceps and Glutes: These are your primary power generators. They control knee flexion and hip extension, which are the foundation of angulation. Strong quads and glutes allow you to hold a deep carving position for longer without fatiguing.
- Core (Abdominals and Obliques): Your core stabilizes your upper body while your lower body creates the angulation. A weak core leads to upper body collapse during high-G turns, which breaks your edge hold.
- Ankle Stabilizers: Your ankles are the first link in the power chain. Strong ankle stabilizers allow you to maintain precise edge control even when the board encounters variable terrain. Weak ankles lead to the “ankle roll” that causes many carving crashes.
- Inner Thigh (Adductors): These muscles control the squeeze between your knees during edge transitions. Strong adductors allow smoother, faster transitions from one edge to the other.
The Carving-Specific Training Program
This program focuses on the specific demands of carving. Perform 3 sessions per week during the off-season:
Session 1: Lower Body Strength
- Goblet Squats: 3 sets of 12 reps. Focus on depth and control. This builds the quad and glute strength needed for deep angulation.
- Single-Leg Romanian Deadlifts: 3 sets of 10 per leg. Builds hamstring and glute strength while challenging your balance—exactly what carving demands.
- Lateral Lunges: 3 sets of 12 per side. Builds the lateral strength needed for toe-side and heel-side angulation.
- Calf Raises: 3 sets of 15. Builds the ankle stability needed for precise edge control.
Session 2: Core and Balance
- Plank Hold: 3 sets of 45 seconds. Builds the core stability needed to maintain upper body position during turns.
- Side Plank: 3 sets of 30 seconds per side. Targets the obliques, which are critical for lateral angulation.
- Single-Leg Balance on BOSU Ball: 3 sets of 30 seconds per leg. Simulates the balance demands of carving on an unstable surface.
- Medicine Ball Russian Twists: 3 sets of 20. Builds rotational core strength for maintaining shoulder alignment during turns.
Session 3: Explosive Power and Flexibility
- Box Jumps: 3 sets of 8. Builds explosive leg power for quick edge transitions.
- Lateral Box Shuffles: 3 sets of 12 per side. Builds lateral explosive power for fast edge-to-edge transitions.
- Hip Flexor Stretch: 2 sets of 30 seconds per side. Improves hip mobility for deeper angulation.
- Ankle Circles and Flexion: 2 sets of 15 per direction. Maintains ankle mobility for precise edge control.
Yoga is one of the best cross-training activities for carving. It builds balance, flexibility, core strength, and body awareness—all critical for carving. Focus on poses that emphasize hip opening (Pigeon Pose), single-leg balance (Warrior III), and lateral flexibility (Extended Side Angle). Even 20 minutes of yoga, 3 times per week, will noticeably improve your carving form on the mountain.
Chapter 14 Best Carving Snowboard Boots: Detailed Reviews
We’ve said it before and we’ll say it again: boots are the most important piece of gear for carving. Your board can be perfect, your bindings can be dialed, but if your boots are soft, poorly fitted, or uncomfortable, your carving will suffer. This section provides detailed reviews of the best carving boots on the market.
When shopping for carving boots, prioritize these three factors:
- Flex Rating (7-10): Stiffer boots transmit power faster and more precisely. A flex 8-10 is ideal for dedicated carvers; a flex 6-7 works for intermediates learning to carve.
- Heel Hold: Any heel lift inside the boot delays power transfer and creates an imprecise feel. Look for boots with integrated heel locks, J-bars, or BOA heel-hold systems.
- Fit: The boot should feel snug (not tight) with your toes lightly touching the front. When you flex forward, your heel should stay locked in place. If your heel lifts, the boot is too big or the wrong shape for your foot.
For a comprehensive guide to boot sizing and fit, check our reviews of the best snowboard boots and our specific guide on why do my feet hurt when i snowboard.
Boot Flex Rating Guide
| Flex Rating | Rider Type | Response Time | Best For |
|---|---|---|---|
| 3-5 (Soft) | Beginner/Freestyle | Slow | Park, jibbing, relaxed riding |
| 5-7 (Medium) | Intermediate/All-Mountain | Moderate | Learning to carve, all-mountain riding |
| 7-9 (Stiff) | Advanced Carver | Fast | Groomed carving, high-speed riding |
| 9-10 (Very Stiff) | Expert/Racer | Instant | Competition carving, maximum precision |
Remember that boots break in over time. A boot that feels stiff on day one will soften slightly after 10-15 days of riding. This is normal and actually desirable—the boot molds to your foot shape while maintaining its core stiffness. Don’t buy boots that feel perfect in the store without flexing them; buy boots that feel slightly too stiff and let them break in.
Chapter 15 How to Control Speed While Carving
Speed control is the number one concern for riders learning to carve. The natural fear is: “If I’m not skidding to slow down, how do I stop?” This is a legitimate concern, and understanding speed control is essential for safe, confident carving.
Turn Shape: Your Primary Speed Control
In carving, your turn shape is your speed control. Think of your turn as a letter on the snow:
- “C” Shape (Wide Turn): The board stays on edge for most of the arc, maintaining or slightly increasing speed. This is the fastest turn shape and is used when you want to maintain momentum across a flat section.
- “S” Shape (Medium Turn): The board alternates between edges with moderate turn radius. Speed stays relatively constant. This is the default carving speed control.
- “J” or Hook Shape (Tight Turn): The board finishes the turn pointing uphill, converting forward momentum into upward momentum. This reduces speed significantly. Use this when you need to shed speed before a section.
The key insight: you don’t need to skid to control speed. You control speed by how much of the turn arc you complete. A turn that finishes with the board pointing uphill will slow you down more than a turn that finishes with the board pointing across the slope. This is called “finishing the turn” and it’s the most important speed control technique in carving.
Edge Angle and Speed
Higher edge angles create more friction (because more edge is in contact with the snow), which slightly reduces speed. Lower edge angles reduce friction and maintain speed. While this effect is subtle compared to turn shape, it’s worth understanding: if you need to slow down slightly, increase your edge angle; if you need to maintain speed, keep the angle lower.
The “Speed Trap” and How to Avoid It
The “speed trap” is what happens when you link carved turns without completing each one. Each turn accelerates you slightly, and by the third or fourth turn, you’re going much faster than intended. This is the most common reason intermediates abandon carving—it feels uncontrollable.
The solution is simple: complete every turn. Before initiating the next turn, make sure the current turn has finished with the board pointing uphill or across the slope. This converts your momentum and resets your speed. It’s tempting to rush into the next turn, especially when carving feels exciting, but completing each turn is the only way to maintain control at speed.
Chapter 16 Carving on Steep Slopes and Variable Terrain
Once you’ve mastered carving on groomed blue and easy black runs, the next challenge is taking those skills to steeper terrain. Steep slopes amplify everything: the forces are higher, the consequences are greater, and the technique must be more precise. This section covers how to adapt your carving for steep terrain.
Why Steep Terrain Changes Everything
On a groomed blue run, gravity provides a moderate force that pulls you down the slope. On a steep black run, gravity pulls much harder. This means:
- More speed, faster: You accelerate more quickly, giving you less time to set up each turn.
- Higher G-forces: The combination of speed and steepness creates much higher forces through each turn.
- Less room for error: A mistake on a steep slope has much higher consequences—you’ll slide further and faster.
- Different snow conditions: Steep slopes often have harder, more wind-affected snow because snow tends to slough off steep terrain.
Steep Terrain Carving Technique
The fundamental carving technique doesn’t change on steep terrain—only the application. Here’s what to adjust:
- Tighter turn radius: On steep terrain, you need shorter, quicker turns to manage speed. Focus on a more hook-shaped turn that finishes pointing uphill.
- More aggressive initiation: Because gravity is pulling harder, you need to set the edge faster. Focus on a quicker, more decisive ankle tilt at the start of each turn.
- Higher edge angles: Steep terrain demands steeper edge angles to resist the increased forces. This means more extreme angulation—pushing your hips further outside the board.
- Faster transitions: The fall line crosses more quickly on steep terrain, so you need to transition between edges faster. Practice quick ankle-driven edge changes to keep up with the terrain.
Carving Through Bumps (Moguls)
Moguls seem like the enemy of carving, but you can carve through them—just differently. The key is to use the troughs between moguls as your turn initiation points. Time your edge change to occur in the troughs, and use the mogul’s shape to help guide your turn. The mogul’s upward face becomes your acceleration zone, and the trough becomes your transition zone.
This requires impeccable timing and quick reflexes. Start with small, soft moguls before attempting steep, icy bumps. And always maintain a slightly more relaxed upper body posture—rigid posture in bumps will transfer every impact to your joints.
Chapter 17 Wax for Carving: Base Speed Matters
You’ve tuned your edges, dialed your stance, and mastered the technique. But there’s one more factor that directly affects your carving performance: wax. A properly waxed base is faster, more consistent, and easier to turn than a dry, dirty base. If you’ve ever felt your board “sticking” or “dragging” through a turn, a lack of wax is likely the cause.
Why Wax Matters for Carving
Snowboard bases are made of P-Tex, a porous plastic that absorbs wax. When waxed, the base’s pores are filled with a slick, hydrophobic layer that reduces friction with the snow. Without wax, the base is dry and porous—it creates micro-suction with the snow, slowing you down and making the board feel “grabby” in turns.
For carving specifically, a fast base is crucial because:
- Consistent speed: A waxed base maintains consistent speed through the arc, allowing you to predict and control your turn shape. A dry base creates inconsistent speed, making turn control unpredictable.
- Smoother edge engagement: A fast base allows the board to glide into the turn smoothly, making it easier to set the edge cleanly. A slow base can cause the board to “catch” during edge engagement, creating a skid.
- Less fatigue: A fast base requires less effort to maintain speed, saving your legs for the physical demands of angulation and edge hold.
Choosing the Right Wax
Different wax formulas are designed for different snow temperatures. Using the wrong wax is like wearing winter boots in summer—it works, but not optimally.
- Cold Wax (Blue/Purple): For snow temperatures below -5°C (23°F). Harder wax that resists abrasion from cold, dry snow crystals. Use this in mid-winter conditions.
- Universal Wax (Yellow/Clear): A middle-ground formula that works in most conditions. Good for riders who don’t want to carry multiple wax types.
- Warm Wax (Red/Pink): For snow temperatures above 0°C (32°F). Softer wax that repels water from wet, slushy snow. Essential for spring and warm-weather carving.
For more details on waxing technique and frequency, read our complete guide on why wax your snowboard.
Waxing Frequency for Carvers
Carving puts more stress on your base than casual riding because you’re riding with higher edge angles and more consistent pressure. For dedicated carvers, we recommend waxing every 3-5 riding days. If you’re riding in particularly cold or abrasive conditions, wax after every session.
Hot waxing (applying wax with an iron) is the gold standard for performance. rub-on wax is convenient for mid-day touch-ups but doesn’t penetrate the base as deeply. If you’re serious about carving, invest in a basic waxing kit and learn the technique—it’s one of the highest-ROI investments you can make in your snowboarding.
Chapter 18 Snowboard Sizing for Carving
Getting the right board size is critical for carving. A board that’s too short will feel unstable at speed and won’t hold an edge through the full arc. A board that’s too long will be difficult to initiate turns and will require more physical effort to angulate. Here’s how to size a carving board correctly.
Length Guidelines
For carving, your board should be longer than what you’d choose for freestyle or park riding. The additional length provides:
- Longer effective edge: More edge in contact with the snow means better grip and stability at speed.
- Greater stability: A longer board is less likely to chatter or vibrate at high speeds.
- Wider turn radius: A longer board has a naturally wider turn radius, which is desirable for the drawn-out arcs of carving.
A general guideline: for dedicated carving, choose a board that reaches between your chin and nose when stood on its tail. For all-mountain carving (where you also ride park and powder), a board reaching your chin is a good compromise.
Width Considerations
Board width is measured at the waist (the narrowest point). For carving, you want a board that’s wide enough that your boots don’t overhang the edges but narrow enough to allow quick edge transitions. Boot overhang causes “toe drag” and “heel drag”—where your boots catch the snow during deep angulation, which can cause a fall.
Check that your boots are centered on the board with approximately 1-2 cm of overhang on each side. If your boots are larger than US 11, consider a “wide” version of your chosen board. Most board manufacturers offer wide models specifically for riders with larger feet.
Chapter 19 Safety Gear for High-Speed Carving
We’ve touched on safety throughout this guide, but this section consolidates everything you need to know about protecting yourself during high-speed carving. Carving at 30+ mph is a high-consequence activity—the forces involved in a fall at these speeds are significant, and the right safety gear can mean the difference between walking away and being carried off the mountain.
Non-Negotiable Safety Gear
- Helmet: This is the single most important piece of safety gear. Period. A high-quality helmet with MIPS (Multi-directional Impact Protection System) reduces the risk of traumatic brain injury during high-speed falls. Never carve without one. See our guide to the best snowboard helmets.
- Goggles: At high speeds, your brain processes visual information faster. Poor goggles cause eye fatigue, reduce contrast, and make it harder to read the terrain. Invest in goggles with interchangeable lenses and anti-fog technology. See best snowboard goggles.
Recommended Safety Gear
- Impact Shorts: Dense foam padding that protects your tailbone and hips during high-speed falls. Essential for carving—especially if you’re pushing into Eurocarve territory. See best impact shorts for snowboarding.
- Wrist Guards: The natural instinct during a fall is to extend your arms. Wrist guards prevent fractures. Many modern wrist guards are designed to fit inside gloves without adding bulk.
- Padded Base Layer: A compression shirt or jacket with built-in padding protects your shoulders, elbows, and spine. These are increasingly popular among high-speed carvers.
- Knee Pads: While less common in snowboarding, knee pads can be valuable for riders who are learning to Eurocarve and frequently fall to their knees.
Chapter 20 How to Progress from Intermediate to Expert Carver
Reaching the intermediate plateau in snowboarding is common. You can link turns, control your speed, and navigate most terrain. But something is missing—the fluid, effortless style that expert carvers seem to possess. This section provides a roadmap for breaking through that plateau and reaching expert-level carving.
The Intermediate Plateau: Why It Happens
The intermediate plateau occurs because your brain has optimized for safety, not performance. Skidding feels safe because it provides constant braking. Carving feels dangerous because it maintains speed. Your brain resists the transition because, from a survival perspective, going fast is risky. This psychological barrier is often the biggest obstacle—not technical skill.
The 4-Week Progression Plan
This plan is designed to systematically build your carving skills over four weeks. Each week focuses on a specific phase of the carving progression:
Week 1: Foundation (Edge Awareness)
Focus entirely on edge hold during traverses. Spend each run doing nothing but traversing across the slope on one edge, gradually increasing the edge angle. Your goal: hold the edge for the entire traverse with zero skidding. If you skid, reduce the angle and try again. This week builds the muscle memory for edge engagement.
Week 2: Initiation (The Transition)
Now focus on the transition between edges. Practice quick, clean edge changes at the fall line. Use the ankle-driven tilting motion described in Chapter 2. The goal: minimize the time the board spends flat between turns. Quick, decisive transitions are the hallmark of expert carving.
Week 3: Pressure (The Apex)
Focus on sustaining pressure through the apex of the turn. Practice extending your legs at the apex to push the edge deeper into the snow. You should feel immense pressure building under your feet at the turn’s peak. This is where the G-forces live, and learning to control them is the key to high-performance carving.
Week 4: Integration (Linking It All)
Now bring all four phases together. Link carved turns, focusing on smooth, fluid motion from initiation through completion. Film yourself and compare your turns to professional carvers. Identify the weakest phase and revisit the appropriate week’s drills.
Common Intermediate Plateaus and Solutions
| Plateau | Symptom | Solution |
|---|---|---|
| The “Skidded Carve” | Turns look carved but the tail slides at the end | Focus on completing the turn—make the board point uphill before releasing the edge |
| The “Speed Scare” | Abandon carving at the first sign of speed | Gradually increase speed over multiple sessions; use turn shape to control speed |
| The “Shoulder Rotate” | Upper body turns into the turn, causing skidding | Hold your hands on your hips while riding; this prevents shoulder rotation |
| The “Backseat Driver” | Weight too far back, nose lifts, edge loses grip | Consciously shift weight forward; think “nose heavy” |
We know we’ve said it before, but it bears repeating: the fastest way to break through the intermediate plateau is with professional instruction. A good instructor will identify your specific weakness—whether it’s timing, body position, or fear—and give you targeted drills to fix it. Even one lesson can save you months of trial-and-error practice. Ask yourself: are snowboard lessons worth it? For carving, the answer is almost always yes.
Chapter 21 Snowboard Wax and Tuning for Maximum Carving Performance
Your board’s condition directly impacts your carving performance. A well-tuned board with sharp edges and a fresh wax job will carve cleaner, faster, and with more confidence than a dull, dirty board. This section covers the essential tuning practices every carver should follow.
Edge Tuning: Sharpen Your Weapon
Carving relies entirely on your board’s edge biting into the snow. A dull edge won’t hold on hardpack or ice—it’ll slide sideways, creating a skid. Here’s how to maintain your edges:
- Side Edge Bevel: Most carving boards perform best with a 1-2° side edge bevel. This means the edge is filed to a 1-2° angle relative to the board’s base. A steeper bevel (like 3°) creates a sharper edge that bites harder but wears faster. A shallower bevel (like 0°) is more durable but won’t grip as aggressively.
- Base Edge Bevel: A 0.5-1° base edge bevel is standard. This ensures the edge doesn’t catch on the snow when the board is flat. Too much base edge reduces edge hold; too little causes catching.
- Filing Frequency: For dedicated carvers, file your edges every 3-5 days of riding. Use a diamond stone for light touch-ups and a file for reshaping. Always file in one direction, never back and forth.
Base Maintenance
The base of your board needs to be smooth, flat, and waxed. Scratches, gouges, and dry spots all create friction that slows you down and affects edge engagement. Regular waxing (covered in Chapter 17) is the most important base maintenance task.
For deep gouges that expose the board’s core, use P-Tex candles to fill the damage. Unrepaired gouges allow moisture to penetrate the core, causing delamination and permanent damage. If you’re unsure about base repair, take your board to a professional shop.
The Complete Tuning Checklist
- Inspect edges for burrs, rust, and dull spots
- File side edges to desired bevel (1-2° for carving)
- File base edge to desired bevel (0.5-1°)
- Polish edges with a diamond stone for smooth engagement
- Repair any P-Tex damage in the base
- Hot wax with temperature-appropriate wax
- Scrape and brush the wax for a smooth finish
- Inspect bindings for loose screws and proper alignment
For the tools to do this yourself, check out the Demon Complete Tuning Kit featured earlier in this guide. For more on why base maintenance matters, read our guide on why wax your snowboard.
Chapter 22 Carving vs. Freestyle Snowboarding: Finding Your Style
Snowboarding offers two distinct riding philosophies: carving and freestyle. While many riders enjoy both, understanding the differences helps you choose the right gear, terrain, and progression path. This section explores how carving and freestyle differ, and why you might want to specialize—or not.
What Is Freestyle Snowboarding?
Freestyle is the creative, expressive side of snowboarding. It includes terrain park riding (jumps, rails, halfpipes), tricks on natural features (rocks, stumps, wind lips), and general “playing” on the mountain. Freestyle riders value playfulness, versatility, and creativity over speed and precision. They ride twin-shaped boards, soft boots, and prefer centered stances.
How Carving Differs from Freestyle
| Aspect | Carving | Freestyle |
|---|---|---|
| Primary Goal | Speed, precision, edge control | Creativity, expression, tricks |
| Board Shape | Directional, set-back stance | Twin, centered stance |
| Board Flex | Stiff (7-10) | Soft to medium (3-6) |
| Boots | Stiff (7-10) | Soft to medium (3-6) |
| Terrain | Groomed runs, steeps | Park, pipes, natural features |
| Stance Angles | Positive/positive (+18/+9) | Duck (+15/-15) or neutral |
| Speed | High | Variable |
Can You Do Both?
Absolutely. Many of the best all-mountain riders blend carving fundamentals with freestyle creativity. The key is understanding that each discipline has its own gear requirements. You can’t carve effectively on a soft freestyle board, and you can’t ride park effectively on a stiff carving board. If you want to do both, consider a quiver approach: a stiff carving board for groomer days and a playful freestyle board for park days.
The all-mountain compromise works too. An all-mountain board with a hybrid camber profile, medium-stiff flex, and directional twin shape can handle both carving and light freestyle riding—though it won’t excel at either. For riders who prioritize one discipline over the other, dedicated gear is always the better choice.
Chapter 23 Reading Snow Conditions: The Carver’s Eye
Expert carvers don’t just react to snow conditions—they read them in advance. Being able to look at a slope and predict how the snow will feel under your board is a skill that develops with experience, but understanding the basics will accelerate your learning.
The Four Main Snow Conditions
- Powder (Fresh Snow): Soft, deep, untracked snow. The board floats rather than carving on the surface. Carving in powder requires a centered or slightly back-weighted stance and wider turn shapes. Best for: advanced riders with powder-specific boards.
- Groomed (Corduroy): Freshly groomed runs with a smooth, consistent texture. The ideal carving surface—firm enough for edge hold, smooth enough for clean tracking. Best for: all carving skill levels.
- Hardpack/Ice: Compressed, wind-affected snow that’s firm and sometimes icy. Requires sharp edges, aggressive angulation, and smooth movements. Best for: intermediate to expert carvers with well-tuned gear.
- Slush (Spring Snow): Warm, wet, heavy snow that’s slow and inconsistent. Requires aggressive edge engagement and tolerance for variable resistance. Best for: experienced carvers who can adapt quickly.
How to Read the Snow from a Distance
Before you drop into a run, take 30 seconds to observe the snow surface. Look for these visual cues:
- Sheen/Glare: A shiny or reflective surface indicates ice or hardpack. Expect fast, firm conditions that demand sharp edges.
- Matte/Flat: A dull, flat surface indicates powder or soft snow. Expect slower conditions with more resistance.
- Rutted/Choppy: Visible tracks and uneven surface indicate heavily trafficked terrain. Expect variable conditions that require absorbent knees and active balance.
- Corduroy Lines: Visible parallel grooves indicate fresh grooming. This is the carving sweet spot—get there early!
Chapter 24 Carving Etiquette and Mountain Safety
Carving at high speed requires awareness of other riders on the mountain. Unlike casual riding, carving generates significant speed, and a collision at carving speeds can cause serious injury to you and others. This section covers the etiquette and safety practices every carver must follow.
The Responsibility Code
The National Ski Areas Association’s Responsibility Code applies to snowboarders as well. The most relevant points for carvers:
- Always stay in control: You must be able to stop or avoid other people or objects. At carving speeds, this means choosing wide, uncrowded runs and being prepared to abort your turn if someone enters your line.
- People ahead of you have the right of way: The rider downhill from you has the right of way. You are responsible for avoiding them. This is especially important when carving because your speed and trajectory are less predictable to other riders.
- Look uphill and yield to others: When starting downhill or merging onto a trail, look uphill and yield to oncoming traffic. At carving speeds, you need more distance to stop or change direction.
- Observe all posted signs and warnings: Closed runs, slow zones, and terrain park rules exist for your safety. Don’t carve through slow zones or crowded areas.
Choosing the Right Terrain for Carving
Not every run is suitable for carving. Look for:
- Wide groomed runs: Give yourself room to make wide carved turns without cutting off other riders.
- Low-traffic times: Early morning (first hour after lifts open) and late afternoon typically have fewer riders. Mid-morning on weekdays is also good.
- Appropriate difficulty: Don’t try to carve on terrain that’s beyond your skill level. If you can’t link skidded turns on a black run, you’re not ready to carve it.
- Good visibility: Carving requires excellent vision to read the terrain and spot other riders. Avoid carving in fog, flat light, or heavy snowfall.
Communication on the Mountain
Use standard mountain communication to keep yourself and others safe:
- Call out your position: When passing another rider, call “on your left” or “on your right” to alert them of your approach.
- Give space: When carving behind or near other riders, maintain at least 2-3 board lengths of distance. At carving speeds, you need more reaction time.
- Stop in safe places: If you need to stop, move to the side of the run—not in the middle. Stopping on a blind crest or around a corner is extremely dangerous.
Chapter 25 Frequently Asked Questions About Snowboard Carving
We’ve compiled the most common questions we receive about snowboard carving. If your question isn’t answered here, explore more guides at snowboardbible.com.
| Question | Answer |
|---|---|
| How long does it take to learn to carve? | Most riders can learn basic carved turns in 2-4 weeks of focused practice (riding 3-4 days per week). However, mastering carving—the kind where you can hold clean arcs at high speed on any terrain—takes 1-2 full seasons of dedicated practice. The physical conditioning (snowboarding is the best winter sport for a reason) and muscle memory take time to develop. |
| Can I learn to carve on a rental board? | You can learn the basics on a rental, but rental boards are typically soft all-mountain boards that aren’t optimized for carving. Once you’re committed to learning to carve, investing in your own board, boots, and bindings will accelerate your progress significantly. Consider when is the best time to buy snowboarding gear for the best deals. |
| Is carving dangerous? | Carving at high speed carries inherent risks, like any high-speed activity. However, with proper technique, appropriate gear, and smart terrain selection, carving is no more dangerous than other mountain sports. The key is progression—build your skills gradually and don’t attempt speeds or terrain beyond your ability. See why snowboarding can be dangerous for a balanced perspective on risk. |
| What’s the difference between carving and racing? | Racing (giant slalom, super-G) is competitive carving with specific course elements, gates, and timing. The fundamental technique is similar, but racing demands even more precision, aggression, and specialized gear (race boards, race boots, body armor). Many carvers find that racing improves their recreational carving by pushing them to be more precise and aggressive. |
| Can I carve on a twin-shaped board? | You can learn to carve on a twin, but a directional board is significantly better for dedicated carving. The set-back stance, longer nose, and stiffer tail of a directional board all contribute to better edge hold and stability at speed. If you’re serious about carving, invest in a directional board. If you want to do both freestyle and carving, check our best snowboarding destinations for varied terrain. |
| How do I know if I’m carving or skidding? | Look behind you. A carved turn leaves a thin, clean line. A skidded turn leaves a wide, smeared path. If you’re leaving a spray of snow, you’re skidding. If the snow is undisturbed except for a single thin line, you’re carving. You can also video yourself and watch for tail rotation—if your tail swings sideways, you’re skidding. |
| Do I need special boots for carving? | Yes. Stiff boots (flex 7-10) are essential for carving. Soft boots flex too much, delaying power transfer and causing imprecise edge control. See our best snowboard boots guide for recommendations. If your boots hurt, check why do my feet hurt when i snowboard. |
| What terrain is best for learning to carve? | Wide, groomed blue runs are ideal for learning. The moderate pitch provides enough speed for edge engagement without being overwhelming. Groomed black runs are good for intermediate carvers. Avoid moguls, trees, and crowded runs while learning. Check our guide to snowboarding resorts for beginners for the best learning terrain. |
| Is snowboarding better than skiing for carving? | Both sports offer incredible carving experiences, but they’re fundamentally different. Snowboard carving involves the entire body as a single unit, creating deep, sweeping arcs. Ski carving uses independent leg action for quicker, tighter turns. Many riders find snowboard carving more physically engaging and fluid. See why snowboarding is better than skiing for our take on the debate. |
| How do I carve on steeper terrain? | Steep terrain requires tighter turn shapes, faster edge transitions, and more aggressive angulation. Focus on completing each turn (finishing with the board pointing uphill) to manage speed. Start with moderate steeps and gradually progress to steeper terrain. For the best steep terrain, explore snowboarding in Colorado or the top European ski resorts. |
| Can kids learn to carve? | Absolutely. Children can learn carving fundamentals as young as 8-10 years old, once they have solid basic turning skills. The key is making it fun and not forcing aggressive technique before they’re ready. Kids’ carving progression follows the same path as adults: traverse holds → edge transitions → linked turns. Many of the snowboarding resorts for beginners have excellent children’s programs that include carving instruction. |
| What about night snowboarding and carving? | Night riding on groomed runs can actually be excellent for carving. The slopes are typically less crowded, and the freshly groomed surface (most resorts groom in the afternoon for evening sessions) provides a perfect carving surface. The key is visibility—make sure your goggles are rated for low light and that you know the terrain well. Don’t attempt new terrain at night. |
Your Carving Journey: The Final Word
Carving is a lifelong pursuit. Even professional riders continue to refine their technique season after season. The journey from intermediate skidded turns to expert carved arcs is one of the most rewarding progressions in snowboarding. It requires patience, practice, and the right gear—but the payoff is extraordinary. The feeling of pulling Gs through a clean carve, the sight of a perfect thin line in the snow behind you, the sheer speed and control—this is what makes snowboarding the best winter sport.
Start with the fundamentals covered in this guide. Practice the drills. Invest in the right gear. Take a lesson. And most importantly, enjoy the process. Every clean carve is a small victory, and every fall is a lesson. See you on the slopes—leave nothing but thin lines.


