
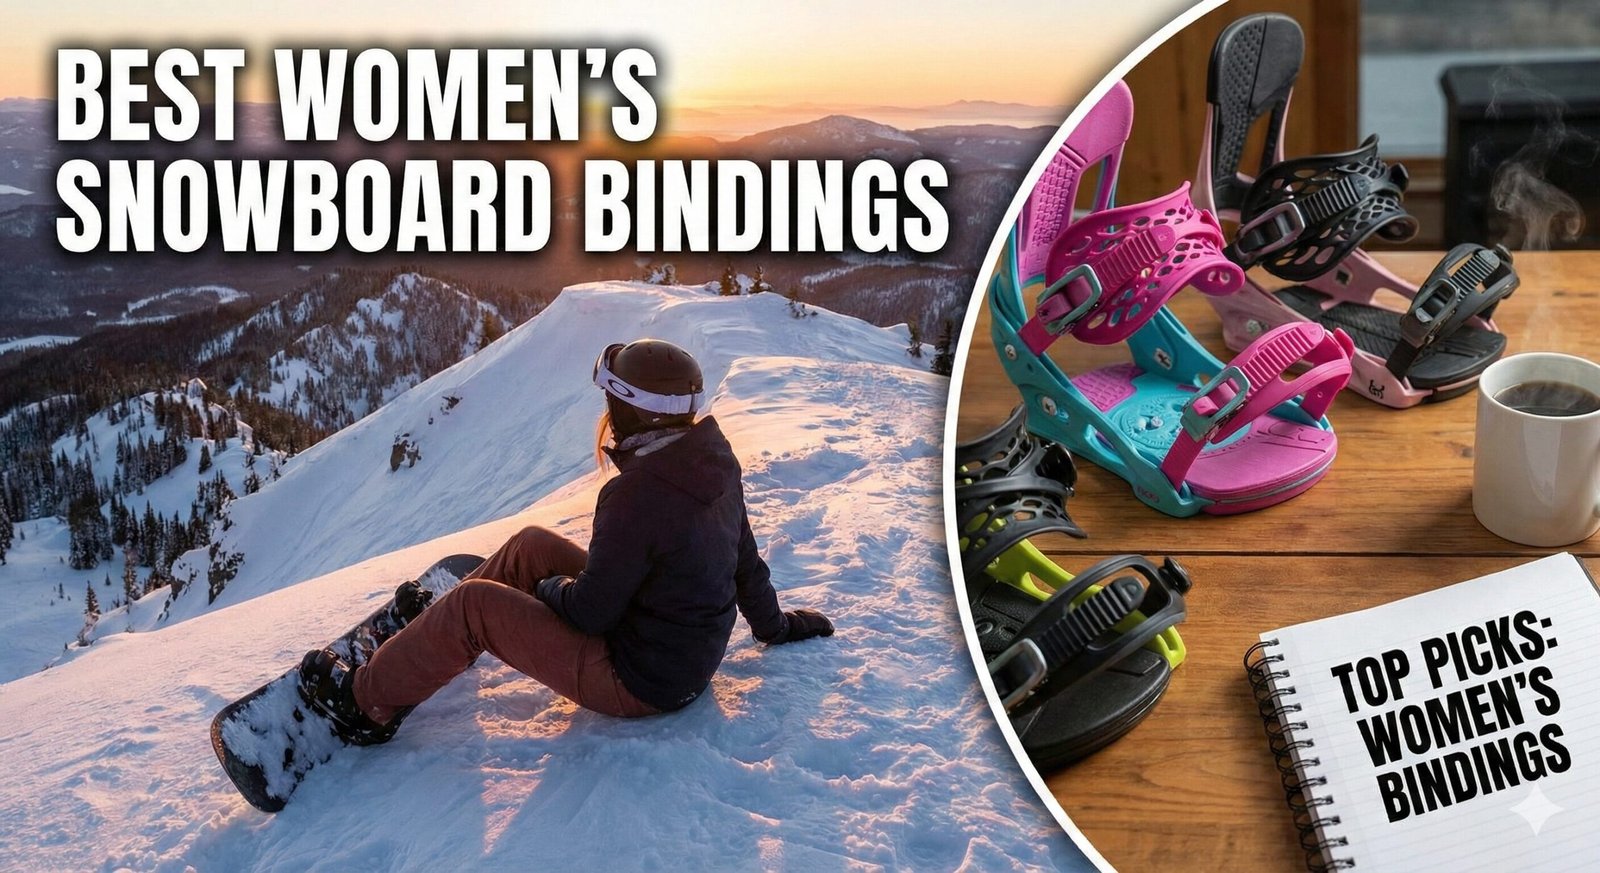
For years, the snowboard industry operated on the “shrink it and pink it” philosophy — taking men’s gear, making it smaller, painting it pastel, and calling it a women’s product. Fortunately, those days are long gone.
Modern women’s bindings are engineered from the ground up to match female biomechanics. They feature lower highbacks to accommodate lower calf muscles, specific flex patterns for lighter weight ratios, and narrower heel cups for secure boot fit. Choosing the right binding is the critical link between your body and your board; get it right, and your board feels like an extension of your mind.
Why do women’s bindings have shorter highbacks? Biologically, women’s calf muscles sit lower on the leg than men’s. A men’s highback often digs into a woman’s calf, causing pain and forcing an upright stance. Women-specific highbacks feature a distinct “U” shape or shorter profile to provide response without the bite.
The Evolution of Women’s Snowboard Bindings
The history of women’s snowboard bindings is a story of gradual recognition and engineering innovation. In the earliest days of snowboarding, there was essentially one binding design — a heavy, cumbersome strap-in system built for the average male foot. Women who wanted to ride had no choice but to cramp their smaller boots into oversized bindings that offered poor response, uncomfortable pressure points, and a fit that was, quite literally, never designed for them.
The first significant shift came when Burton introduced the first dedicated women’s binding line in the early 2000s. While the initial offerings were still relatively simple adaptations of men’s designs, they introduced shorter highbacks, narrower heel cups, and softer flex patterns — the foundational elements that would define women’s-specific snowboard bindings for decades to come.
Fast forward to today, and the landscape is unrecognizable. Brands like Union, Burton, Jones, Ride, K2, and Rossignol each invest millions in women’s-specific R&D. The industry now recognizes that women are not a niche market — they represent roughly 40% of all snowboarders worldwide. Major resorts report that women’s participation has grown by over 15% in the last five years alone, and the equipment market has responded accordingly.
Modern women’s bindings feature advanced materials like magnesium buckles, carbon-fiber-reinforced baseplates, and thermoformed EVA cushioning systems. Highbacks are now anatomically sculpted for the female calf. Straps use multi-density foams and exoskeletal designs that eliminate pressure points while maximizing response. The days of simply painting a men’s binding pink are firmly behind us.
Why Binding Choice Matters More Than You Think
Many riders focus obsessively on board choice — debating camber profiles, sidecut radii, and core materials — while treating bindings as an afterthought. This is a fundamental misunderstanding of how snowboard performance works. The binding is the single most important interface in the entire system. It is the point where your body’s movements are translated into board response. A $700 board paired with mediocre bindings will underperform a $400 board paired with excellent bindings, every single time.
Think of it this way: the board is the engine, the bindings are the steering wheel and the suspension combined. You can have the most powerful engine in the world, but if the steering is loose and the suspension is harsh, the ride will be terrible. Bindings determine how precisely your movements are transmitted to the board, how much vibration reaches your legs, and how comfortable you feel after eight hours of riding.
For women specifically, the importance of proper binding selection cannot be overstated. Because women generally have lighter body weight, narrower feet, and different lower-leg anatomy, a binding that works perfectly for a 180-pound man will often feel harsh, unresponsive, or simply painful on a 130-pound woman. The right women’s binding accounts for all of these factors, delivering a ride that feels intuitive and effortless rather than forced and fatiguing.
How This Guide Works
This is not a simple listicle where we throw five products at you and call it a day. This is a comprehensive, deep-dive resource designed to be the last snowboard binding guide you will ever need to read. We cover everything from the fundamental science of how bindings work, to detailed material analysis, to step-by-step adjustment guides. Whether you are buying your very first pair of bindings or upgrading from an intermediate setup to something that can handle the most demanding terrain, this guide has you covered.
We tested each binding in this review across multiple conditions: fresh powder, hard-packed groomers, icy steeps, park features, and variable spring snow. We evaluated response, comfort, durability, adjustability, and value. We also consulted with professional snowboard instructors, competitive riders, and binding designers to ensure our recommendations are grounded in real-world performance, not marketing hype.
Use the table of contents to jump to any section, or read straight through for the full picture. Either way, you will walk away with the knowledge to make a confident, informed decision about the bindings that will define your time on the mountain.
Understanding Binding Types: Strap-In, Step-On, and Rear-Entry
Before diving into specific product recommendations, it is essential to understand the three main categories of snowboard bindings available today. Each type uses a different mechanism to secure your boot to the board, and each has distinct advantages and trade-offs that affect performance, convenience, and versatility.
Traditional Strap-In Bindings
Strap-in bindings are the most common and widely used snowboard binding system in the world. They use two straps — an ankle strap and a toe strap — that you manually tighten using ratchet buckles. This is the system that has been the industry standard since the early days of snowboarding, and for good reason: it works exceptionally well.
The ankle strap wraps over the top of your boot’s instep, holding your heel firmly into the binding’s heel cup. The toe strap (modern designs use a “cap strap” that wraps over the front of your toes rather than pressing down from above) pulls your foot backward into the heel cup, creating a secure, locked-in feel. The ratchet buckles allow you to fine-tune the tightness of each strap independently, giving you precise control over pressure distribution.
The primary advantages of strap-in bindings are versatility and compatibility. They work with virtually any snowboard boot, any board mounting system, and any riding style. You can adjust the forward lean, highback rotation, strap position, and stance width to suit your preferences. If something breaks — a buckle, a strap, a ladder — individual components can be replaced without buying an entirely new binding. This repairability and customization make strap-in bindings the default choice for most riders, from beginners to professionals.
The disadvantage is convenience. Strapping in requires you to sit down (or balance precariously), thread straps, and crank ratchets — a process that takes 30 to 60 seconds per binding. Over the course of a day with 20+ lift rides, that adds up. It also means your gloves touch the snow, your butt gets cold and wet, and skiers in your group are often waiting at the bottom of the lift while you fumble with frozen buckles.
Examples in this review: Union Trilogy, Burton Lexa X, Jones Aurora, Union Rosa.
Step-On Bindings
Step-on bindings represent the most significant innovation in snowboard binding technology in decades. Instead of straps, step-on systems use mechanical connection points built into both the binding and a compatible boot. You literally step into the binding, and it locks automatically.
Burton’s Step On system, the most popular step-on design currently available, uses three connection points: two toe hooks on either side of the binding and one heel cleat at the back. You step your boot into the binding, and the heel cleat engages first with an audible click, followed by the toe hooks. To release, you lift a lever on the highback and step out. The entire process takes about three to five seconds once you have mastered the technique.
The advantages are obvious: speed, convenience, and cleanliness. You never have to sit in the snow, your gloves stay dry, and you can be riding while your strap-in friends are still buckling up. For ski-cross groups, snowboard instructors who get in and out constantly, or riders who simply value efficiency, step-on systems are transformative.
However, step-on systems come with significant trade-offs. First, you must purchase compatible boots — you cannot use your existing strap-in boots. This effectively doubles the cost of switching to a step-on system. Second, the mechanical connection points add weight to the boot. Third, while response is excellent in certain directions, the system can feel less locked-in during certain maneuvers compared to a well-adjusted strap-in binding. Some riders report that the toe-side response feels slightly less precise because the connection relies on hooks rather than a compressive strap. Fourth, deep powder can make stepping in difficult — you need to clear snow from the connection points before engaging.
It is also worth noting that step-on systems are a proprietary technology. Burton owns the Step On patent, meaning only Burton makes compatible boots. If Burton decides to discontinue or change the system, you are locked into a dead ecosystem. Strap-in bindings, by contrast, are an open standard that works with any boot from any manufacturer.
Examples in this review: Burton Step On Re:Flex.
Rear-Entry (Speed-Entry) Bindings
Rear-entry bindings, sometimes called “speed-entry” or “flow-through” bindings, are a hybrid between strap-in and step-on systems. They use a hinged highback that folds backward to allow your boot to slide in from the rear, then snaps up and locks into place. They still have straps, but the straps stay connected and you slide your foot under them rather than threading and cranking them each time.
Brands like Flow and K2 have championed this design for years. The idea is to combine the secure fit of strap-in bindings with much faster entry and exit. In practice, rear-entry bindings do offer faster strap-in times — typically 10 to 15 seconds versus 30 to 60 seconds for traditional strap-in — but they do not match the speed of true step-on systems.
The main trade-off with rear-entry bindings is response and adjustability. Because the highback is hinged, it introduces a small amount of flex at the pivot point that a fixed highback does not have. This can make the binding feel slightly less responsive on aggressive heel-side turns. Additionally, strap adjustment is more limited than on traditional strap-in bindings, because the straps are designed to stay in a fixed position for quick entry.
Rear-entry bindings are a solid choice for intermediate riders who want faster entry without committing to a proprietary boot system, but they are generally not the first choice for advanced riders who demand maximum response and customization.
Quick Comparison: Which Type Is Right for You?
| Feature | Strap-In | Step-On | Rear-Entry |
|---|---|---|---|
| Entry Speed | Slow (30–60 sec) | Fast (3–5 sec) | Medium (10–15 sec) |
| Boot Compatibility | Any snowboard boot | Proprietary boots only | Most boots (some fit issues) |
| Response | Excellent (fully adjustable) | Very Good (some dead spots) | Good (hinge adds flex) |
| Customization | Maximum (infinite adjustments) | Limited (fixed connection points) | Moderate (limited strap adjust) |
| Repairability | Excellent (individual parts replaceable) | Limited (proprietary parts) | Moderate |
| Weight | Varies by model | Slightly heavier (boot + binding) | Slightly heavier (hinge mechanism) |
| Powder Performance | Excellent | Moderate (snow clearance needed) | Good |
| Best For | All riders, especially advanced | Convenience-focused riders | Intermediate all-mountain |
1. Union Trilogy
Best Overall
The Gold Standard for All-Mountain Performance
If you walk into the locker room of any major slopestyle contest or look at the setups of backcountry guides in Alaska, you will see one binding dominate the field: the Union Trilogy. It has earned its reputation not through flashy gimmicks, but through bombproof reliability and a flex pattern that feels “just right” for 90% of riding scenarios.
The “Duraflex ST” Difference:
The core of the Trilogy’s performance lies in the “Stage 4 Duraflex ST” baseplate. “ST” stands for Super Tough. Union blends nylon with more fiberglass than their standard bindings, creating a base that is incredibly responsive edge-to-edge but retains enough torsional flex to be playful when you want to tweak a grab. Unlike carbon-injected bases which can feel brittle and “chattery” on hard ice, the Duraflex material dampens vibrations, acting like a suspension system for your feet. After a long day of riding chopped-up groomers, your feet will thank you.
Strap Tech & Comfort:
The updated Exoframe 6.0 Ankle Strap is a masterpiece of minimalism. It uses a multi-layered geometric shape that acts as a suspension system over your boot. Because there is no stitching or padding to pack out, the response remains consistent from day 1 to day 100. It molds perfectly to the shape of your boot, eliminating the “pressure bite” over the instep that plagues cheaper bindings. Paired with the magnesium ratchets (which are lighter and stronger than aluminum), strapping in feels mechanical, smooth, and secure.
On-Snow Feel:
Ride them, and you will notice the Canted Footbeds immediately. The footbed is angled slightly inward (3 degrees), aligning your knees and ankles in a more natural stance. This reduces joint fatigue and allows you to drive more power into the nose and tail of the board for ollies. Whether you are laying deep trenches on morning corduroy or navigating tight tree runs where split-second reaction time is key, the Trilogy feels like an extension of your body. It disappears underneath you — which is the highest compliment you can pay a binding.
Who Should Buy the Union Trilogy:
The Trilogy is ideal for intermediate-to-advanced riders who want one binding that can do everything well. If you spend most of your time on groomers but occasionally venture into the trees, ride a little park, or dabble in side-country powder, the Trilogy handles it all without compromise. It is particularly well-suited for riders who value durability and long-term value — Union offers a lifetime warranty on the baseplate, and the binding’s construction quality means it will last for many seasons of hard riding.
Who Should Look Elsewhere:
If you are a dedicated park rat who wants the softest, most tweakable binding possible, the Trilogy’s medium-stiff flex might feel a touch too rigid for buttering and surface tricks. If you are a true beginner who has never strapped into a snowboard before, the Trilogy’s responsiveness might overwhelm you — the Union Rosa (reviewed below) is a better starting point. And if convenience is your top priority, the Burton Step On offers faster entry.
Real-World Durability:
We tested the Trilogy across an entire season of aggressive all-mountain riding — over 80 days on snow. The baseplate showed zero signs of stress fractures or deformation. The magnesium ratchets continued to operate smoothly after exposure to ice, freezing rain, and sub-zero temperatures. The straps maintained their shape and responsiveness without packing out. This is a binding that is built to last, and the lifetime baseplate warranty from Union backs that claim up.
One of the less-discussed advantages of the Trilogy is its heel cup adjustability. Union uses an aluminum heel cup that can be repositioned forward or backward to accommodate different boot sizes and dial in the perfect heel-to-toe balance. This adjustment is critical for eliminating “toe drag” (where your toes catch in the snow during deep carves) and ensuring that your boot is perfectly centered over the board. Many competing bindings in this price range do not offer this level of fine-tuning.
Pros
- Bombproof durability (Lifetime baseplate warranty).
- Magnesium buckles never freeze or stick.
- Canted footbeds save your knees.
- Responsive without feeling “twitchy.”
- Adjustable heel cup for perfect boot centering.
- Exoframe straps pack out less over time.
Cons
- Pricey investment for casual riders.
- The stiff heel cup can be tricky to adjust perfectly.
- Not the lightest binding in its class.
- Universal disk adds slight dead spot vs mini-discs.
If you love the Union brand but want something softer for park riding, you might also consider the Union Legacy bindings, which offer a more surfy feel.
Check Price on Amazon2. Burton Step On Re:Flex
Best Convenience
The Revolution Is Here to Stay
When Burton first launched the Step On system, skeptics called it a gimmick. Years later, those skeptics are eating their words while Step On riders are already halfway down the mountain before the strap-in crew has even sat down. This is not just about speed; it is about a fundamental shift in how energy is transferred from boot to board.
How It Works (The Mechanics):
The system relies on three connection points: two toe hooks and one heel cleat. When you step in, the heel cleat locks into the highback first, followed by the toe hooks engaging with the sides of the boot. Because the boot is mechanically anchored to the highback, there is zero “play” or lag. When you lean back on your heel edge, the response is instantaneous. There are no straps to stretch or loosen. This creates a ride that feels incredibly precise, almost like driving a sports car with stiff suspension.
The “Re:Flex” Advantage:
Burton uses their “Re:Flex” baseplate technology here, which removes the rigid materials from under your foot and replaces them with cushioning. This allows the board to flex naturally under the binding, rather than creating a “dead spot” of rigid plastic. This is crucial for Step Ons, as the direct connection could otherwise feel too harsh. The cushioning smooths out the ride, making it enjoyable for all-day cruising.
Living With Step Ons:
The learning curve is surprisingly short. You will likely struggle the first three times you try to get in, but by the end of day one, it becomes muscle memory. Getting out is equally easy — lift the lever on the highback, lean forward, and step out. This system is a game-changer for riders who ski with friends (no more making skiers wait), instructors who need to get in and out constantly, or older riders who find bending over to strap in painful on their back. It keeps your butt off the cold snow, keeping you warmer and drier throughout the day.
The Boot Question:
The biggest barrier to entry with the Step On system is the boot requirement. You must use Burton Step On compatible boots, which typically retail between $200 and $400. This means that switching to Step Ons is not just a binding purchase — it is an investment in an entirely new boot-binding system. On the plus side, Burton’s women’s Step On boot lineup has expanded significantly, with options ranging from soft flex (for beginners and park riders) to stiff flex (for freeride and all-mountain charging). The Ion Step On and the Felix Step On are the current standouts, offering excellent fit, warmth, and performance.
Step On vs. Traditional: The Honest Trade-Off:
After extensive testing, here is the honest assessment. For pure convenience and speed, Step On wins by a mile. For maximum customization and boot compatibility, traditional strap-in wins. For deep powder performance, strap-in wins (snow can pack into the Step On connection points, requiring you to clear them before stepping in). For heel-side response, Step On wins (the direct mechanical connection eliminates strap stretch). For toe-side response, it is roughly a tie with high-end strap-in bindings. For park riding, opinions are split — some riders love the locked-in feel for jumps, while others miss the ability to tweak and loosen straps for creative jibbing.
Pros
- Unbeatable convenience and speed.
- Zero pressure points (no straps cutting off circulation).
- Direct energy transfer improves heel-side turns.
- No loose straps to step on while skating.
- Keeps you warmer and drier (no sitting in snow).
- Excellent Re:Flex cushioning for all-day comfort.
Cons
- Must buy specific Step On boots ($$$).
- Deep powder entry requires practice (clearing snow).
- Cannot adjust forward lean on the fly.
- Proprietary system limits future boot choices.
- Slightly heavier overall system than strap-in.
Before investing in this system, it is crucial to understand the trade-offs. Read our deep dive on Burton Step On Bindings: Pros and Cons to see if they fit your riding style.
View Step On Collection3. Burton Lexa X Re:Flex
Best Freeride
For The Rider Who Charges Hard
The standard Burton Lexa has been a staple for decades, but the Lexa X takes the platform and injects it with steroids. This binding is not for the timid. It is stiff, reactive, and designed for women who ride fast, jump big, and demand absolute control in high-consequence terrain.
The “Heel Hammock” Tech:
The secret sauce of the Lexa X is the Heel Hammock. Look closely at the highback, and you will see a rubberized, suspended mesh sitting inside the plastic frame. This hammock grips the heel of your boot like a vice. It provides such incredible hold that you can actually ride with your ankle straps slightly looser than normal for comfort, without sacrificing any response. When you lean into a heel-side turn on steep ice, the Hammock locks you in, ensuring zero lag between your movement and the board’s edge.
Double Take Buckles & Asym Strap:
Burton’s “Double Take” buckles are an engineering marvel. They use helical teeth on the ladder straps (teeth on both sides) which allows for immediate engagement. You don’t have to fish around to get the buckle to catch; it grabs instantly and cranks down fast. The Asym Hammockstrap ankle strap is minimal but supportive. It can be flipped — wear it one way for more power, or flip it for more mobility during park laps. This customizability allows expert riders to fine-tune the binding to the day’s conditions.
Damping & Comfort:
Despite its stiffness, the Lexa X is surprisingly comfortable thanks to the B3 Gel cushioning in the footbed. This is the same gel found in high-end running shoes, designed to withstand impacts without breaking down in cold temperatures. If you overshoot a jump or ride through chattery frozen crud, the B3 Gel eats the vibration so your knees do not have to.
Who Should Buy the Burton Lexa X:
The Lexa X is built for aggressive intermediate to expert riders who spend most of their time charging steeps, bombing groomers, and sending it off medium-to-large kickers. If your idea of a good time is finding the steepest, iciest run on the mountain and carving it at full speed, the Lexa X is your binding. It is also an excellent choice for heavier women (over 150 pounds) who need a stiffer binding to adequately drive the board.
Who Should Look Elsewhere:
If you are a beginner, the Lexa X will punish you. Its stiff flex transmits every mistake directly to the board, and the aggressive response will catch your edges before you have the skill to control it. If you spend most of your time in the park, the softer Union Rosa or a dedicated park binding will serve you better. If you weigh under 120 pounds, you may not be able to flex the highback sufficiently to get the full response benefit — a medium-flex binding like the Trilogy will feel more intuitive.
On-Mountain Performance Notes:
During our testing, the Lexa X excelled on hard-packed groomers and icy terrain. The Heel Hammock provided noticeably better heel-edge grip than any competing binding we tested, including some with higher price tags. On powder days, the B3 Gel cushioning absorbed variable snow conditions without transmitting harsh vibrations. In the park, the binding felt stable on medium kickers but was slightly overkill for small boxes and jib features — the stiff flex made pressing and buttering more fatiguing than necessary.
One subtle but important detail: the Lexa X’s highback is asymmetric, meaning it is shaped differently on the toe side versus the heel side. This mirrors the natural angle of your calf and provides more direct contact on heel-side turns. It is a small engineering detail that has a disproportionately large impact on performance — once you feel the difference, you will notice the absence on other bindings.
Pros
- Unmatched edge hold and response.
- Heel Hammock improves comfort and grip.
- Best-in-class ratchet system.
- B3 Gel saves your knees on hard landings.
- Asymmetric highback mirrors calf anatomy.
- Flippable strap for power vs. mobility tuning.
Cons
- Unforgiving for beginners (catch edges easily).
- Stiff flex can feel harsh at slow speeds.
- Heavyweight riders may need even stiffer option.
- Premium price point.
4. Jones Aurora
Best Surf Feel
The Science of SKATETECH
Jones (founded by freeride legend Jeremy Jones) does not do “normal.” The Aurora binding features SKATETECH technology, originally licensed from NOW Bindings. Instead of a static baseplate screwed flat to the board, the binding sits on a central kingpin — exactly like the trucks on a skateboard. This allows the binding to rock back and forth, transferring energy directly from your foot to the board’s edges through four rubber bushings.
Why Different is Better:
The result of this tech is a ride that feels incredibly “surfy” and efficient. Because the hanger pivots, you do not have to press as hard to engage a turn. This significantly reduces foot fatigue. You can ride longer, harder days because the binding is doing the mechanical work for you. It excels in powder, where that subtle rocking motion allows for smooth, fluid slashes that feel more like surfing water than riding snow.
Customizable Bushings:
The Aurora comes with interchangeable bushings (Soft and Hard).
Surf Mode (Soft): Put the soft bushings in for maximum tweakability. This setup allows the binding to roll deeply, perfect for powder days and creative riding.
Freeride Mode (Hard): Swap in the hard bushings for a direct, responsive feel. This is ideal for technical steeps or icy days where you need instant edge engagement. Essentially, you are getting two bindings for the price of one.
The “Halo Hanger 3.0” base is wider than previous iterations, accommodating wider modern snowboard boots without pinching. The Intelligent Straps (which flop open when unbuckled) make stepping in easy, preventing you from stepping on your straps in the lift line.
Who Should Buy the Jones Aurora:
The Aurora is ideal for riders who prioritize a fluid, surf-like feel and want something genuinely different from traditional bindings. It is particularly well-suited for powder enthusiasts, creative freeriders, and riders who experience foot fatigue on conventional bindings. If you enjoy carving deep, flowing turns and want a binding that reduces the effort required to engage your edges, the SKATETECH system is transformative. It is also a great choice for riders with knee or ankle issues, because the pivoting hanger reduces the force required to initiate turns.
Who Should Look Elsewhere:
If you prefer a locked-in, traditional feel, the Aurora’s rocking motion might feel unfamiliar and unsettling at first. Riders who prioritize ultra-lightweight setups should note that the kingpin and hanger mechanism adds weight compared to conventional designs. If you ride primarily in the park, the pivoting mechanism can feel unpredictable on rails and boxes where you want a flat, stable platform.
The Learning Curve:
The SKATETECH system has a noticeable learning curve. On your first day, the pivoting motion will feel strange — your board will seem to “wobble” under your feet. Do not panic. This is normal. By the end of day one, most riders have adapted, and by day two, they cannot imagine going back to a traditional binding. The key is to trust the system and resist the urge to over-control the board. Let the bushings do the work.
Durability Considerations:
The rubber bushings are wear items — they will compress and lose their resilience over time, particularly with heavy use. Jones sells replacement bushing kits for approximately $20, and swapping them out takes about 15 minutes with basic tools. Expect to replace bushings every 50 to 80 days of riding, depending on your weight and riding style. The rest of the binding — the aluminum kingpin, the glass-filled nylon hanger, and the straps — are built to last multiple seasons.
Pros
- Reduces foot fatigue significantly.
- Unique surf-like sensation in turns.
- Two modes (Surf/Freeride) add versatility.
- Straps stay open for easy entry.
- Less force needed to initiate turns.
- Excellent for riders with joint issues.
Cons
- Heavier than traditional bindings.
- Setup is more complex (kingpin adjustment).
- Bushings are wear items that need replacement.
- Learning curve for the pivoting motion.
- Not ideal for park/jib riding.
5. Union Rosa
Best Budget / Beginner
Lightweight Progression
There is a misconception that “budget” means “bad.” The Union Rosa proves this wrong. It is consistently one of the lightest bindings on the market, regardless of price point. For a beginner rider, removing weight from your feet makes learning to turn, stop, and maneuver the board significantly easier physically. Less weight means less fatigue, which means more runs.
Forgiveness is Key:
The Rosa features a soft flex rating (around 4/10). Why do you want this? When you are learning, you make mistakes. You might lean too far back or twitch your foot. A stiff binding would instantly transfer that mistake to the board, causing you to catch an edge and slam. The Rosa’s softer highback and baseplate offer a bit of “give,” smoothing out those inputs and keeping you upright. It is forgiving, playful, and confidence-inspiring.
Thermoformed EVA Bushings:
Underfoot, Union uses a Thermoformed EVA bushing system. Unlike paint-dipped baseplates found on other cheap bindings, this EVA foam provides genuine shock absorption. It dampens the vibrations from rough snow, preventing that “rattling bone” feeling in your feet. It also allows for true board flex, meaning the binding will not create a dead spot in the middle of your snowboard, helping you learn how to flex and pop the board properly.
Aluminum vs. Plastic:
Even at this entry-level price, Union equips the Rosa with Aluminum ratchets. Most competitors in the sub-$180 range use plastic ratchets that strip and break in the cold. Union’s commitment to using aluminum here ensures the binding will last for multiple seasons of progression, giving you incredible value for money.
Who Should Buy the Union Rosa:
The Rosa is purpose-built for beginners and early-intermediate riders who are serious about learning but do not want to invest hundreds of dollars before they know if snowboarding is for them. It is also an excellent choice for riders who prioritize weight savings above all else — at approximately 680 grams per binding (in medium), the Rosa is lighter than many bindings that cost two or three times as much. If you are a lighter rider (under 130 pounds) who does not need aggressive response, the Rosa’s soft flex will feel just right.
Who Should Look Elsewhere:
If you are an intermediate rider who has progressed beyond basic turns and is starting to ride faster, tackle steeper terrain, or venture off-piste, you will outgrow the Rosa’s soft flex relatively quickly. The binding lacks the response needed for aggressive carving and high-speed stability. If you weigh more than 160 pounds, the soft flex may feel mushy and unresponsive. In that case, the Union Trilogy or Burton Lexa X would be better investments.
Value Proposition:
At its price point (typically under $180), the Rosa offers a combination of features that is almost unheard of in the budget binding category: aluminum buckles, EVA cushioning, an adjustable forward lean, and a lightweight Duraflex baseplate. Most competing bindings at this price use plastic buckles, skip cushioning entirely, and offer minimal adjustability. The Rosa punches well above its weight class, which is why it consistently tops “best budget binding” lists across the industry.
One important note: the Rosa uses a “Mini-Disc” mounting system, which has a smaller footprint than standard full-size discs. This allows the board to flex more naturally underfoot, but it is only compatible with the 2×4 and Channel mounting patterns. If you have an older board with a 4×4 or 3D hole pattern, you will need to check compatibility before purchasing.
Pros
- Incredible value for the quality.
- Forgiving flex helps beginners learn faster.
- Aluminum buckles (rare at this price).
- Extremely lightweight.
- Mini-Disc improves board feel.
- EVA cushioning for genuine shock absorption.
Cons
- Not stable at high speeds (get chatter).
- Minimal padding on ankle straps.
- Simple highback lacks advanced adjustment.
- Will be outgrown by progressing riders.
- Mini-Disc limits compatibility with older boards.
For a complete breakdown of why this is the ultimate starter binding, check our full Union Rosa Bindings Review.
Check Low PriceFull Side-by-Side Comparison
Seeing the numbers side by side makes it easier to narrow down which binding matches your priorities. Below is a comprehensive comparison of all five bindings reviewed in this guide across the categories that matter most.
| Binding | Flex | Weight | Price Range | Best For | Buckle Type | Cushioning | Warranty |
|---|---|---|---|---|---|---|---|
| Union Trilogy | Medium-Stiff (7/10) | ~890g | $$-$$$ | All-Mountain | Magnesium S1 | Canted EVA | Lifetime Baseplate |
| Burton Step On | Medium (6/10) | ~850g | $$$ | Convenience | N/A (Step-On) | Re:Flex FullBED | 1 Year |
| Burton Lexa X | Stiff (8/10) | ~920g | $$$ | Freeride/Charging | Double Take Aluminum | B3 Gel + AutoCANT | 1 Year |
| Jones Aurora | Custom (5-8/10) | ~960g | $$$ | Powder/Surf | Aluminum | SKATETECH Bushings | 2 Years |
| Union Rosa | Soft (4/10) | ~680g | $ | Beginner/Budget | Aluminum | Thermoformed EVA | Lifetime Baseplate |
I want one binding that does everything well: Union Trilogy.
I want maximum convenience and speed: Burton Step On (requires compatible boots).
I ride aggressively and charge hard: Burton Lexa X.
I want a unique, surfy ride for powder and carving: Jones Aurora.
I am on a budget or just starting out: Union Rosa.
Flex Ratings Explained: What the Numbers Actually Mean
Every binding listing includes a “flex rating,” usually expressed as a number from 1 to 10 or described as soft, medium, or stiff. But what do these numbers actually mean in terms of how the binding feels on snow? Understanding flex ratings is essential for matching a binding to your skill level, riding style, and physical attributes.
The Flex Rating Scale
Most manufacturers use a 1-to-10 scale where 1 is the softest and 10 is the stiffest. Here is what each range feels like in practice:
Soft Flex (1–3): These bindings bend easily with very little force. They allow a tremendous amount of movement and playfulness, making them ideal for beginners who need forgiveness and park riders who want maximum tweakability for rails, boxes, and butters. The downside is that soft bindings transmit very little precision at speed. If you try to carve aggressively on hard snow, a soft binding will flex and wobble instead of driving the board’s edge into the snow. They also provide minimal vibration dampening at high speeds.
Medium Flex (4–6): The “Goldilocks zone” for the majority of riders. Medium-flex bindings offer a balance between responsiveness and playfulness. They are responsive enough for confident carving on groomers, forgiving enough for beginner mistakes, and playful enough for casual park laps. The Union Rosa (4/10) sits at the softer end of this range, while the Burton Step On (6/10) sits at the firmer end. If you are unsure what flex you need, medium is almost always a safe bet.
Medium-Stiff Flex (7–8): This is where performance-oriented all-mountain and freeride bindings live. The Union Trilogy (7/10) and Burton Lexa X (8/10) both fall in this range. These bindings are highly responsive — the slightest movement of your ankle or knee translates directly to board response. They excel at high-speed carving, steep terrain, and aggressive riding. The trade-off is that they are less forgiving of mistakes. If you twitch your foot or shift your weight incorrectly, a stiff binding will instantly transfer that input to the board, potentially causing you to catch an edge. These bindings are best suited for intermediate to advanced riders with solid technique.
Stiff Flex (9–10): Reserved for the most aggressive riders — think competitive snowboarders, big mountain freeriders, and riders who spend most of their time at top speed on challenging terrain. Stiff bindings provide maximum response and precision but are virtually unforgiving of mistakes. They are not recommended for anyone below an advanced skill level.
How Body Weight Affects Flex Perception
A critical and often overlooked factor: your body weight directly affects how a binding’s flex feels. A 100-pound rider on a medium-stiff (7/10) binding will experience it as stiffer than a 180-pound rider on the exact same binding. This is because lighter riders apply less force, meaning the binding does not flex as far under their weight.
As a general rule: if you weigh under 130 pounds, consider dropping one flex level from your ideal. For example, if your riding style suggests a medium-stiff binding, try a medium flex instead. If you weigh over 160 pounds, consider going up one flex level. A soft binding that feels perfect for a 130-pound rider might feel like a noodle under a 170-pound rider.
| Flex Range | Rating | Rider Level | Best Riding Style | Response | Forgiveness |
|---|---|---|---|---|---|
| Soft | 1–3 | Beginner | Park, Jibbing, Learning | Low | Very High |
| Medium | 4–6 | Beginner–Intermediate | All-Mountain, Casual Park | Moderate | Moderate |
| Medium-Stiff | 7–8 | Intermediate–Advanced | All-Mountain, Freeride, Carving | High | Low |
| Stiff | 9–10 | Advanced–Expert | Freeride, Big Mountain, Racing | Very High | Very Low |
How Flex Affects Specific Riding Scenarios
Powder Days: Medium to medium-stiff flex works best. You need enough response to keep the nose up and drive through variable snow, but enough give to absorb bumps and maintain flow. Too soft, and you lose control at speed. Too stiff, and the binding fights the natural bounce of the snow.
Park and Jibbing: Soft to medium flex is ideal. You need the binding to move with you as you twist, press, and butter on features. Stiff bindings feel harsh on landings from small features and make surface tricks exhausting.
Icy Steeps: Medium-stiff to stiff flex is essential. You need every ounce of response to drive the board’s edge into hard snow. A soft binding will flex and skip across the ice instead of biting in, leading to washed-out turns and potential falls.
All-Day Cruiser: Medium flex is the sweet spot. Comfortable enough for hours of riding, responsive enough for confident turning, and forgiving enough to enjoy without constant focus.
Women’s Snowboard Binding Sizing Guide: How to Get the Perfect Fit
Getting the right binding size is critical for performance and comfort. A binding that is too small will crush your toes and prevent proper boot engagement. A binding that is too large will allow your foot to slide around inside, reducing response and creating dangerous pressure points. Here is exactly how to determine your correct size.
Understanding Binding Size Labels
Unlike clothing, snowboard bindings do not use standard women’s dress sizes. Instead, they are labeled as Small, Medium, Large, or Extra-Large — and each brand’s sizing runs slightly different. More importantly, binding size is determined by your boot size, not your foot length in inches or centimeters.
| Binding Size | Women’s US Boot Size | EU Boot Size | UK Boot Size | Typical Foot Length |
|---|---|---|---|---|
| XS | 4–6 | 35–37 | 2–4 | 22–23 cm |
| S | 5.5–7.5 | 36–38.5 | 3–5.5 | 23–24.5 cm |
| M | 7–9.5 | 38–41 | 5–7.5 | 24.5–26 cm |
| L | 9–11 | 40.5–43 | 7–9 | 26–27.5 cm |
The table above is a general guide. Always check the specific binding manufacturer’s size chart before purchasing. Burton, Union, Jones, and Ride each have slightly different size ranges for their bindings. A Medium in Union may correspond to a different boot size range than a Medium in Burton. Cross-reference the manufacturer’s chart with your actual boot size to ensure a proper fit.
The Toe and Heel Overhang Test
Once you have your boots strapped into your bindings, perform this essential check: your boot should extend slightly beyond the edges of the binding on both the toe and heel sides, but not beyond the edges of the board. Here is how to check:
- Strap in completely. Tighten both ankle and toe straps to your normal riding tightness. Do not overtighten — just snug.
- Look down from above. View your setup from directly overhead. You should see approximately equal amounts of boot extending past the binding on both the toe and heel sides. If one side extends significantly more than the other, your boot is not centered.
- Check board overhang. View from the front and back. Your boot should NOT extend past the edges of the snowboard. If it does, you will experience “toe drag” or “heel drag” — your boot will catch in the snow during deep carves, potentially throwing you off balance.
- Adjust if needed. Use the binding’s adjustable heel cup or footbed to center your boot. Most premium bindings (like the Union Trilogy) offer heel cup adjustment that can shift the boot forward or backward by up to one centimeter.
Common Sizing Mistakes
Mistake #1: Buying the same size binding as your shoe size. Snowboard boot sizing is different from street shoe sizing. A women’s US size 8 street shoe might be a size 7 or 7.5 in snowboard boots. Always measure your foot in centimeters and use the manufacturer’s chart, not your everyday shoe size.
Mistake #2: Buying too large “to be safe.” A binding that is one size too large will allow your foot to shift inside the binding during turns, reducing response and creating inconsistent feel. It can also cause the straps to not tighten properly because they are stretched to their maximum length. Always buy the size that matches your actual boot size.
Mistake #3: Ignoring boot-binding compatibility. Some boots are wider or narrower than others at the same labeled size. A bulky boot like the Burton Moto may fit differently in the same binding size than a slim boot like the Ride Sage. If possible, try your specific boots in the binding before purchasing, or check the manufacturer’s compatibility charts.
What to Do Between Sizes
If your boot size falls on the boundary between two binding sizes, the general rule is to go smaller. A slightly tight binding can be adjusted (loosening the heel cup, adjusting the footbed), but a binding that is too large cannot be made smaller. Additionally, boots pack out (the liner compresses) over time, so a binding that feels slightly snug on day one will feel perfect by day 20.
That said, if your toes are pressing firmly against the front of the binding in the smaller size, go up. Toe pressure causes cold feet, numbness, and pain — none of which are acceptable. The ideal fit is one where your toes lightly brush the front of the binding when standing upright, and pull back slightly when you flex into a riding stance.
Snowboard Mounting Systems Explained: 4×4, 2×4, Channel, and 3D
Before you buy new bindings, you need to know what mounting system your board uses. Mounting a binding with the wrong disk pattern is like trying to put a square peg in a round hole — it simply will not work. Here is a complete breakdown of every mounting system you might encounter.
4×4 Insert Pattern
The 4×4 pattern uses four threaded inserts arranged in a square, spaced 4 centimeters apart both horizontally and vertically. This was the industry standard for years and is still found on many older boards and some budget-friendly models. Most modern bindings are compatible with 4×4 patterns using their standard universal disk.
The limitation of the 4×4 system is stance width adjustability. Because the inserts are fixed in a grid, your stance width options are limited to 2-centimeter increments. For most riders, this is not a problem, but riders who prefer very specific stance widths may find the 4×4 system restrictive.
2×4 Insert Pattern
The 2×4 pattern is an evolution of the 4×4 system. It uses the same four-insert square, but the vertical spacing is reduced to 2 centimeters. This effectively doubles the number of stance width options available to you, allowing adjustments in 1-centimeter increments. The 2×4 pattern is the most common mounting system found on modern snowboards and is compatible with virtually every binding on the market.
Burton Channel System (EST / ICS)
Burton’s proprietary Channel system replaces the traditional insert grid with a single elongated slot running down the center of the board. The binding attaches to the Channel using a special disk with two screws that slide along the slot. This provides virtually infinite stance width and position adjustment — you can place your binding anywhere along the Channel’s length, in minute increments.
The Channel system also offers superior board feel because the mounting hardware has a smaller footprint than traditional inserts, allowing the board to flex more naturally under the binding. Burton’s “Re:Flex” mounting system, found on bindings like the Step On and Lexa X, is designed to work seamlessly with the Channel while also being compatible with standard 4×4 and 2×4 inserts via an adapter disk.
Most bindings sold today include a universal disk that is compatible with 2×4, 4×4, AND the Channel system. However, some bindings (particularly budget models) only include a 2×4/4×4 disk. If you have a Burton board with the Channel system, always verify that the binding comes with a Channel-compatible disk, or purchase one separately from the binding manufacturer.
Burton 3D Pattern (Legacy)
The 3D pattern is Burton’s original mounting system, found on older Burton boards (roughly pre-2014). It uses three inserts arranged in a triangle rather than a square. The 3D pattern is now considered a legacy system and is no longer used on new boards. However, if you have an older Burton board, you may need a specific 3D adapter disk to mount modern bindings. These disks are sometimes included in the binding box, but often must be ordered separately from the manufacturer.
| System | Insert Layout | Stance Adjustability | Found On | Binding Compatibility |
|---|---|---|---|---|
| 4×4 | 4 inserts, 4cm square | 2cm increments | Older boards, some budget models | Most bindings (standard disk) |
| 2×4 | 4 inserts, 2cm vertical spacing | 1cm increments | Most modern boards | All bindings (standard disk) |
| Channel | Single slot | Infinite (micro-adjustable) | Burton boards (modern) | Bindings with Channel disk or Re:Flex |
| 3D | 3 inserts, triangular | Limited | Older Burton boards (legacy) | Requires specific 3D adapter disk |
Mini-Disc vs. Full-Size Disc
You will see terms like “Mini-Disk” (Union) or “Re:Flex” (Burton) in binding specifications. Here is what they mean:
Standard Full Discs: Offer maximum stability and response. They feel solid but create a “dead spot” underfoot where the board cannot flex naturally. This dead spot is typically about the size of your palm and is the area directly under the mounting hardware.
Mini-Discs: Reduce the contact footprint significantly — often by 50% or more. This allows the board to flex more naturally under your feet, providing a “surfier” feel and better board feel on rails. However, Mini-Discs are generally not compatible with the older 4×4 insert patterns found on cheap or vintage boards. They work with 2×4 and Channel systems.
The difference between a mini-disc and a full-size disc is subtle but noticeable for experienced riders. On groomed runs at moderate speed, most riders cannot tell the difference. But in the park (where board flex underfoot matters for pressing and buttering) or in powder (where natural board flex helps with float), the mini-disc provides a measurably more natural ride.
How to Adjust Your Snowboard Bindings: The Complete Setup Guide
Even the most expensive binding in the world will feel terrible if it is not properly adjusted to your body, your boots, and your riding style. Proper binding setup takes 15 to 30 minutes with a basic screwdriver, and the difference in performance is dramatic. Here is a step-by-step guide to every adjustment you can make.
1. Stance Width
Your stance width is the distance between the centers of your two bindings, measured across the board. The correct stance width depends on your height, leg length, and riding style. Here is a quick reference:
| Rider Height | Recommended Stance Width | Park (Wider) | Freeride (Narrower) |
|---|---|---|---|
| 4’10” – 5’2″ | 17–18 inches | 18–19 inches | 16–17 inches |
| 5’2″ – 5’6″ | 18–19 inches | 19–20 inches | 17–18 inches |
| 5’6″ – 5’10” | 19–20 inches | 20–21 inches | 18–19 inches |
| 5’10” – 6’0″+ | 20–21 inches | 21–22 inches | 19–20 inches |
A quick way to find your natural stance width: stand on a flat surface in your snowboard boots and jump straight up, letting your feet land naturally. The distance between your feet when you land is approximately your ideal stance width. This works because your body naturally defaults to its most stable and powerful position.
2. Binding Angles (Duck Stance vs. Directional)
Your binding angles determine the direction your feet point while riding. There are two main approaches:
Duck Stance: Both bindings point in opposite directions, typically at mirror angles like +15°/-15° or +18°/-12°. The front foot points slightly forward and the back foot points slightly backward. Duck stance is the most popular setup for park and freestyle riders because it allows you to ride equally well in both directions (regular and switch). It also provides a more balanced feel and reduces strain on the knees.
Directional Stance: Both bindings point mostly forward, typically at angles like +21°/+6° or +18°/+3°. This is favored by freeriders and all-mountain riders who spend most of their time riding in one direction. Directional stance provides more power on heel-side turns and is more efficient for carving, but it makes switch riding more difficult.
Recommended Starting Points:
- Beginner: +15° front / 0° back (simple and easy to learn on)
- Park/Freestyle: +15°/-15° (symmetric duck stance)
- All-Mountain: +18°/-6° (slightly duck for versatility)
- Freeride/Carving: +21°/+6° (directional for power)
- Powder: +24°/+6° or more set back (maximize float)
3. Forward Lean
Forward lean is the angle at which the highback tilts toward the toe edge of the board. It is one of the most impactful and least-understood adjustments on a snowboard binding.
More Forward Lean (Steeper Angle): Forces your knees into a more bent position, putting you in an athletic stance ready to engage the heel edge. This increases response on heel-side turns because you start closer to the engagement point. However, it can feel fatiguing over a full day because your calves are constantly under tension. It also makes flat-basing and toe-side turns feel less natural because the highback is pushing against your calf.
Less Forward Lean (Flatter Angle): Allows your legs to be straighter and more relaxed. This is more comfortable for all-day riding and provides better mobility for flat-basing, skating, and toe-side turns. The trade-off is that heel-side response is slightly slower because your highback has to travel farther before engaging.
The Pro Setting: Most professional riders and instructors set their forward lean to a moderate position — enough to provide quick heel-side response but not so much that it causes fatigue. A good starting point is the middle of the adjustment range. From there, increase by one or two clicks if you want more aggressive heel-side response, or decrease if you want more comfort and mobility.
Many bindings now feature “tool-free” forward lean adjusters — a lever or dial on the back of the highback that you can adjust by hand. This allows you to change your forward lean on the lift or between runs without carrying a screwdriver. If your binding has this feature, experiment with different settings throughout the day to find what works for different terrain.
4. Highback Rotation
Most riders bolt their bindings on and go. But pro tuners know about Highback Rotation. Your feet are angled (e.g., +15° / -15°), but your board’s edge is straight. If you do not rotate your highbacks, they will be misaligned with your heel edge, losing power.
The Fix: Almost all premium bindings allow you to rotate the highback independently of the baseplate. You want to rotate them so the back of the binding is parallel to the heel edge of your snowboard. This ensures that when you lean back, 100% of your energy goes into the edge, rather than twisting the binding frame.
5. Strap Position and Centering
The ankle strap should sit directly over the instep of your boot — the highest point where the boot bends when you flex forward. If the strap sits too far forward (toward your toes) or too far back (toward your heel), it will create pressure points and reduce response.
The toe strap (cap strap) should wrap snugly over the front of your boot’s toe box. It should be tight enough to pull your foot back into the heel cup, but not so tight that it crushes your toes. Adjust the strap position using the mounting screws on the strap’s base, and fine-tune the tightness using the ratchet buckles.
Never place the toe strap on TOP of your foot (old-school style). Always place it over the FRONT of your toes (cap-strap style). Placing the strap on top crushes your toes, cuts off circulation, and causes cold feet. Placing it over the front pushes your heel back into the heel cup, improving both comfort and response.
6. Boot Centering (Toe/Heel Drag Prevention)
When your boot is strapped in, you should have equal overhang on the toe and heel side. If your toes hang way over the edge of the board, you will catch them in the snow during deep carves (“toe drag”). Similarly, excessive heel overhang causes “heel drag.”
The Fix: Most bindings have an adjustable heel cup (Union) or an adjustable gas pedal/footbed (Burton). Slide these forward or backward until your boot is perfectly centered over the board’s width. The goal is approximately equal toe and heel overhang, with neither side extending past the board’s edge.
7. Stance Setback
Stance setback refers to how far your bindings are positioned toward the tail of the board. Most boards have a “reference stance” marked on the board, which places the bindings at the designed center point. However, you can often shift your bindings back (toward the tail) by up to one or two centimeters using different insert positions.
When to Set Back: In powder, setting your stance back shifts your weight toward the tail, keeping the nose of the board floating on top of the snow. For carving on groomers, a centered stance provides the most balanced feel. For park riding, a centered stance is essential for switch riding.
Matching Bindings to Your Riding Style: A Complete Guide
Not all bindings work equally well for all riding styles. A binding that excels in the park might be terrible for freeride, and vice versa. Here is how to match your binding choice to the type of riding you do most often.
All-Mountain Riding
All-mountain riders are the generalists of the snowboard world. They spend their days exploring everything the resort has to offer — groomers, trees, side hits, the occasional park lap, and powder when it falls. They need a binding that does everything reasonably well without excelling or failing dramatically at any one thing.
Ideal Binding Characteristics: Medium-stiff flex (6–7/10), moderate weight, good cushioning, and ample adjustability. The binding should be responsive enough for confident carving but forgiving enough for playful exploration.
Our Pick: The Union Trilogy. Its 7/10 flex strikes the perfect balance between response and playfulness, and its lifetime baseplate warranty means it will last through years of varied riding.
Park and Freestyle Riding
Park riders spend their days on jumps, rails, boxes, and halfpipes. They need a binding that allows maximum freedom of movement, absorbs impact from landings, and provides a “tweakable” feel for creative tricks. Park riders also spend a lot of time riding switch (backwards), so a symmetric duck stance is essential.
Ideal Binding Characteristics: Soft to medium flex (3–5/10), lightweight, excellent cushioning (especially in the heel), and a symmetric highback design. The binding should feel like an extension of your shoe — barely there when you want to move freely, but supportive when you stomp a landing.
Our Pick: The Union Rosa at 4/10 flex is ideal for park riding. For riders who want more response on bigger jumps, consider a medium-flex binding like the Burton Step On.
Freeride and Big Mountain Riding
Freeride riders chase the steepest, most challenging terrain on the mountain. They ride fast, commit to big lines, and demand absolute precision from their equipment. A missed edge at speed on a 40-degree face is not a minor inconvenience — it is a potential disaster. For these riders, binding response is not a preference; it is a safety requirement.
Ideal Binding Characteristics: Stiff flex (8–10/10), maximum response, heavy-duty construction, and vibration dampening. The binding should feel locked-in and secure, with zero lag between your input and the board’s response.
Our Pick: The Burton Lexa X. Its Heel Hammock highback and stiff flex provide the edge hold and response needed for aggressive freeride riding.
Powder Riding
Powder riders live for deep snow days. They need a binding that facilitates a set-back stance, provides enough response to keep the nose floating, and offers a fluid, surfy feel for smooth turns in variable snow.
Ideal Binding Characteristics: Medium flex (5–7/10), fluid response, and ideally a pivoting or surf-oriented design. Setback compatibility is essential for proper powder stance.
Our Pick: The Jones Aurora with SKATETECH technology provides a uniquely surf-like feel that excels in deep snow.
Carving and Groomer Riding
Some riders live for the feeling of laying deep trenches on freshly groomed runs. They want maximum power transfer and precise edge control.
Ideal Binding Characteristics: Medium-stiff to stiff flex (7–9/10), canted footbeds, and secure boot hold.
Our Pick: The Union Trilogy with canted footbeds and Duraflex ST baseplate. The Burton Lexa X for maximum aggression.
Backcountry and Splitboarding
Backcountry riders need bindings that are lightweight for the uphill climb and responsive for the descent.
Ideal Binding Characteristics: Lightweight construction, medium-stiff flex, and splitboard compatibility.
Beginner and Learning
Beginners need bindings that forgive mistakes, reduce fatigue, and build confidence.
Ideal Binding Characteristics: Soft flex (3–5/10), lightweight, forgiving, and easy to use.
Our Pick: The Union Rosa.
Women’s Snowboard Binding Brands: Complete Comparison
Understanding each brand’s strengths helps narrow your search.
Union Binding Company
Known for durability and their lifetime baseplate warranty. Duraflex baseplate material offers excellent vibration dampening. Women’s lineup: Trilogy, Rosa, Legacy.
Burton
The largest snowboard company. Pioneered Step On, Channel, and Re:Flex. Women’s bindings: Lexa, Step On, Cartel. Premium pricing but backed by massive R&D.
Jones Snowboards
Founded by freeride legend Jeremy Jones. SKATETECH technology delivers a unique surf-like ride. Aurora is the flagship women’s binding.
Ride Snowboards
Known for lightweight designs and ThinGrip toe straps. Women’s bindings: Sage, A-6, A-9. Popular among park and all-mountain riders.
K2 Snowboarding
Innovative features like Custom Response system. Women’s bindings: Sayer, Forma, Bond. Good value at competitive prices.
Rossignol
Decades of ski expertise applied to snowboard bindings. Magnesium buckles and shock-absorbing designs. Excellent value for money.
Brand Warranty Comparison
| Brand | Baseplate Warranty | Overall Warranty | Notable Policies |
|---|---|---|---|
| Union | Lifetime | Lifetime (baseplate) | Best in industry |
| Burton | 1 Year | 1 Year | Excellent customer service |
| Jones | 2 Years | 2 Years | Strong coverage |
| Ride | Lifetime (chassis) | Lifetime (chassis) | Similar to Union |
| K2 | 2 Years | 2 Years | Average coverage |
Budget Tiers: What You Get at Every Price Point
Under $150: Entry-Level
Basic binding with plastic ratchets, minimal cushioning, and limited adjustability. Fine for learning and casual use. Expect to replace sooner.
$150–$250: Mid-Range
The sweet spot for most riders. Aluminum ratchets, EVA cushioning, multiple adjustments, and multi-season durability. The Union Rosa excels here.
$250–$350: Performance
Premium technology: magnesium buckles, advanced cushioning, precision highbacks, comprehensive adjustability. The Union Trilogy and Burton Lexa X live here.
$350+: Premium
The absolute best materials and technology. Carbon fiber, proprietary systems, specialized designs. The Jones Aurora and Burton Step On packages.
The best value is in the $200–$300 range where you get the features that matter without premium markup.
Materials Science: What Your Bindings Are Made Of
Baseplate Materials
Nylon: Most common. Lightweight and affordable with natural flex. Can become brittle in extreme cold.
Nylon-Fiberglass Composite: Industry standard for performance. Union’s Duraflex balances response with vibration dampening.
Carbon-Fiber Reinforced: Premium option. Maximum stiffness and minimum weight, but can feel chattery on rough snow.
Aluminum: Used in heel cups and structural components for maximum strength.
Buckle Materials
Plastic: Only in cheapest bindings. Prone to stripping and freezing. Avoid.
Aluminum: Standard for mid-range and performance. Strong, reliable, cold-resistant.
Magnesium: Premium choice. 33% lighter than aluminum with comparable strength. Found in the Union Trilogy.
Strap Materials
EVA Foam: Common padding material. Lightweight and cushiony but packs out over time.
Multilayer Composite: Higher-end. Multiple layers maintain shape longer. Union’s Exoframe and Burton’s Hammockstraps.
Women’s-Specific Engineering: The Science Behind the Design
Biomechanical Differences
Calf Muscle Position: Women’s calf muscles sit lower on the leg. Women’s highbacks use a lower profile and wider “U” shape to accommodate this without discomfort.
Q-Angle: Women’s wider hips create a steeper angle from hip to knee. Canted footbeds (2.5–3°) realign joints and reduce stress.
Foot Shape: Women’s feet are narrower in the heel and wider in the forefoot. Bindings account for this with specific heel cup and strap dimensions.
Body Weight: Lighter riders need softer flex and lighter materials for adequate board response.
Common Misconceptions
“Women’s bindings are just smaller men’s bindings.” False. Modern women’s bindings are designed from the ground up with women-specific geometry, flex, and features.
“If the fit is OK, a men’s binding works fine.” Even if it fits, performance will be suboptimal due to incorrect highback contact, strap pressure points, and mismatched flex.
Boot-Binding Compatibility Guide
Boot Width and Binding Width
Standard-width boots fit most bindings. Wide-fit boots may need a wider baseplate or more open toe strap design.
Boot Flex and Binding Flex Matching
| Boot Flex | Ideal Binding Flex | Example Pairings |
|---|---|---|
| Soft (1–3) | Soft (2–4) | Burton Mint + Union Rosa |
| Medium (4–6) | Medium (5–7) | Burton Felix + Union Trilogy |
| Stiff (7–10) | Stiff (7–9) | Burton Ion + Burton Lexa X |
Boot Brand Notes
Burton: Seamless with Burton bindings. Fully compatible with all strap-in bindings. Step On requires Burton boots only.
ThirtyTwo: Plush and comfortable. Slightly wider profile may feel tight in narrow bindings.
DC: Tend to run slightly smaller. Check DC’s specific sizing charts.
Common Mistakes to Avoid
Mistake #1: Buying Based on Looks
Prioritize performance over aesthetics. Most brands offer multiple color options for their performance bindings.
Mistake #2: Ignoring Flex Rating
The most common binding mistake. Match flex to your actual skill level and riding style.
Mistake #3: Not Adjusting After Purchase
Bindings require setup: stance width, angles, forward lean, highback rotation, strap position, and boot centering. Take 20 minutes to dial it in.
Mistake #4: Buying Too Stiff “To Grow Into”
A binding that is too stiff punishes mistakes and slows progression. Buy for your current level.
Mistake #5: Not Checking Boot Compatibility
Boot shapes vary between brands. Try before you buy, or check compatibility charts.
Mistake #6: Over-Tightening Straps
Tighter does not mean more secure. Over-tightening causes cold toes and reduced response. Snug is sufficient.
Mistake #7: Not Checking Hardware
Check all screws before every ride. A 30-second check prevents dangerous failures.
Mistake #8: Using Men’s Bindings
Even in the “right size,” men’s bindings have wrong highback geometry, heel cup width, and flex for women. Always use women’s-specific.
Mistake #9: Ignoring Weight
The difference between a lightweight binding (~680g) and a heavier one (~960g) is over a pound per pair. It adds up over a full day.
Mistake #10: Forgetting Upgrade Paths
Consider your entire gear ecosystem. Switching to Step On requires new boots. Mini-discs may not work with older boards.
Maintenance and Care Guide
After Every Ride
- Remove snow and ice. Tap bindings to dislodge packed snow. Brush ice from ratchet mechanisms. Never use sharp objects.
- Inspect for damage. Check straps for tears, buckles for missing teeth, and baseplates for cracks.
- Dry thoroughly. Let wet bindings dry at room temperature before storing. Never store wet bindings in airtight bags.
Mid-Season Maintenance
- Tighten all screws. Check baseplate, highback, and strap screws. Apply blue threadlocker if screws consistently loosen.
- Lubricate ratchets. Use dry lubricant (silicone or PTFE spray) to prevent freezing. Avoid wet lubricants like WD-40.
- Check strap padding. Feel for packing out. Replace straps if padding is noticeably thinner than new.
- Inspect footbed. Check EVA for crumbling or excessive compression. Replace if worn.
End-of-Season Storage
- Clean thoroughly. Wipe with damp cloth to remove dirt and salt. Use mild soap for stubborn grime.
- Loosen all straps. Fully open ratchets to release tension. Storing under tension accelerates fatigue.
- Store in cool, dry place. Away from sunlight, heat, and moisture. Breathable cloth bag is ideal. Never store in a hot car trunk.
When to Replace
- Cracked or broken baseplate (immediate replacement)
- Straps that no longer hold tension
- Buckles that skip or slip
- Highback that has lost its shape
- Visible UV damage (chalkiness, brittleness)
Typical Lifespan: 100–200 days with proper care (5–10 seasons for most riders).
The Complete Buyer’s Guide
The “Q-Angle” Factor & Canting
Women’s wider hips create a steeper Q-angle. Canted footbeds (2.5–3°) align joints and reduce knee stress. Found in the Union Trilogy and Burton Lexa X.
Highback Rotation: The Pro Secret
Rotate highbacks to be parallel with the heel edge. This ensures 100% of your energy goes into edge engagement.
Mini-Disc vs. Full-Size Disc
Full Discs: Maximum stability but create a dead spot underfoot.
Mini-Discs: Smaller footprint allows natural board flex. Not compatible with old 4×4 patterns.
A common mistake is setting the stance too wide.
Park/Freestyle: Slightly wider than shoulder width.
Freeride/Powder: Slightly narrower or set back.
The Test: Jump down from a small step. Where your feet land naturally is your ideal width.
How to Shop Online
- Know your boot size in centimeters. Most reliable metric across brands.
- Check the manufacturer’s size chart. Medium in one brand does not equal Medium in another.
- Read reviews with your boot brand. Boot shapes vary.
- Verify mounting compatibility. Check your board’s system.
- Check the return policy. Free returns are ideal.
When to Buy
Best time: end-of-season sales (March through May) with 20 to 40% discounts. Next best: early season (September through November). Avoid mid-season unless you find a deal.
Expert Tips and Rider Insights
Ride new bindings at 80% tightness for two days before pushing them hard. This lets materials settle for better long-term comfort.
Carry a spare ratchet ladder strap and small multi-tool in your jacket pocket. Can save your day on the mountain.
Adjust forward lean with the seasons: more for firm early-season snow, less for soft spring conditions. Takes 30 seconds.
A $30 boot dryer extends the life of your entire setup by preventing moisture damage to bindings and hardware.
What Professional Instructors Recommend
- Always set up bindings before your first run
- Carry a multi-tool with Phillips, flathead, and Allen key
- Replace straps before they fail
- Match binding flex to boot flex
- Take a binding setup clinic at the start of season
Warranty and Customer Service
What Warranties Cover
Manufacturing Defects: Baseplate cracks, highback snaps without impact, strap delamination.
Material Failures: Buckle malfunctions, ratchet stripping, strap stretching beyond tolerance.
What Warranties Do NOT Cover
- Normal wear and tear
- Damage from crashes or abuse
- Improper installation
- UV degradation from sun exposure
- Cosmetic damage
Filing a Warranty Claim
- Document the issue. Take clear photos from multiple angles. Note purchase date and retailer.
- Contact the manufacturer. Visit their website and find the warranty claim form.
- Provide documentation. Submit photos, receipt, and description of the issue.
- Ship if required. Some brands need the binding for inspection. Others accept photo-only claims.
- Wait for resolution. Typically 2 to 4 weeks for repair, replacement, or credit.
Always save your purchase receipt. Digital confirmations from online retailers are accepted by all major brands. Take a photo and store it on your phone.
Powder Day Binding Setup: How to Optimize for Deep Snow
Powder days are rare and precious. When the snow is deep, every piece of your setup matters — and your binding setup can make the difference between floating effortlessly on top of the snow and struggling to keep your nose above the surface. Here is how to optimize your bindings for powder performance.
Set Your Stance Back
The single most important powder adjustment is moving your bindings backward toward the tail of the board. This shifts your weight distribution rearward, allowing the nose of the board to rise naturally on top of the snow instead of diving beneath it. Most boards have multiple insert positions that allow you to shift your bindings back by one to two centimeters beyond the reference stance.
If your board has a powder-specific design with a tapered tail and a directional shape, the setback effect is even more pronounced. Some riders move their bindings back as far as the inserts will allow on deep powder days, then return them to center for the next groomer day.
Adjust Your Binding Angles
For powder riding, a slightly more directional stance angle is often beneficial. Increasing your front foot angle to +21° or +24° (from a typical +15°) and keeping your back foot at a low positive angle (+3° to +6°) creates a stance that naturally points your body downhill. This makes it easier to maintain a forward-leaning posture that keeps the nose up and allows fluid, surf-like turns through deep snow.
Avoid a deeply ducked stance in powder. While duck stance (+15°/-15°) is excellent for park riding, the backward-pointing back foot can catch in deep snow and make heel-side turns less efficient. A slight forward angle on both feet is more natural and effective in deep snow.
Soften Your Forward Lean
Most bindings allow you to reduce or remove forward lean entirely. In powder, you generally want less forward lean because you are riding in a more upright, relaxed stance. Aggressive forward lean forces your knees into a deep bend, which is great for carving groomers but exhausting in deep snow where you need to stay fluid and adaptable. Reduce your forward lean to the minimum setting for powder days, and restore it when you return to groomed terrain.
Choose the Right Bindings for Powder
Not all bindings are equally suited for powder riding. Bindings with medium flex (5 to 7 on a 10-point scale) tend to work best in deep snow because they allow the board to flex naturally while still providing enough response for directional control. The Jones Aurora with its SKATETECH pivoting system is particularly well-suited for powder because the binding rocks with the board rather than fighting against it, creating a fluid, surf-like sensation.
Stance Width: Slightly narrower than your normal stance (reduces the effort needed to heel-side turn in deep snow).
Stance Setback: Maximum rearward position allowed by your board’s inserts.
Binding Angles: Front +21° to +24°, Back +3° to +6° (directional).
Forward Lean: Minimum or zero for relaxed, fluid riding.
Strap Tightness: Normal tightness — do not over-tighten as you will be making large, flowing movements rather than aggressive carves.
Park and Jib Binding Setup: Optimize for Freestyle
Park riding demands a completely different binding setup than freeride or all-mountain. In the park, your priority shifts from response and precision to playfulness, tweakability, and impact absorption. Here is how to dial in your bindings for park performance.
Stance Width: Go Wider
Park riders typically ride a wider stance than freeriders or all-mountain riders. A wider stance provides a more stable platform for landing jumps and a better balance point for pressing on rails and boxes. As a general rule, park riders should set their stance width to slightly wider than shoulder width. This provides maximum stability without restricting your ability to flex and move.
The wider stance also makes it easier to distribute your weight evenly between your feet, which is essential for maintaining balance on rails and boxes. If your stance is too narrow, you will feel top-heavy and unstable on features.
Duck Stance is Essential
Park riders should always ride a duck stance — mirror angles on both feet, such as +15°/-15° or +18°/-12°. This ensures that you can ride equally well in both directions (regular and switch), which is essential for landing tricks, riding switch into features, and maintaining versatility in the park. A directional stance in the park limits your options and makes switch riding uncomfortable and unstable.
For beginners in the park, a symmetric +15°/-15° duck stance is the simplest starting point. More advanced riders may prefer a slight asymmetry like +18°/-12°, which provides a touch more power on the front foot for initiating spins while still allowing comfortable switch riding.
Reduce Forward Lean
In the park, less forward lean is almost always better. Forward lean forces your calves into an aggressive, forward-leaning position that is great for carving but counterproductive for park riding. In the park, you need to be able to stand tall for balanced landings, crouch low for absorbing impacts, and shift your weight freely for tricks. Removing forward lean or setting it to minimum gives you the freedom to move naturally.
Soft to Medium Flex is Ideal
Soft bindings (3 to 5 on a 10-point scale) are the park rider’s best friend. They allow you to bend, twist, and tweak your board without resistance. This is essential for jibbing on rails (where you need to press the board against the feature) and for buttering on flat ground (where you need to flex the nose or tail of the board). Stiff bindings fight these movements, making park riding feel stiff and unnatural.
However, if you ride large jumps (40 feet or more), you may want a medium-flex binding (5 to 6) for the additional response and landing stability. Large jumps require precise takeoffs and stable landings, and a binding that is too soft can feel vague and unpredictable at the speeds needed to clear big features.
Cushioning Matters
Park riders take more impacts than any other type of rider — landing jumps, hitting features, and falling on hard-packed snow. Look for bindings with generous EVA or gel cushioning in the heel area. This absorbs landing impacts and reduces the jarring sensation that can cause leg fatigue and injury. Bindings with canted footbeds (like the Union Trilogy) also help by aligning your joints in a more natural position during landings.
Carving on Ice: How Binding Choice Affects Edge Hold
Icy conditions are the ultimate test of your equipment. On hard-packed, frozen snow, the margin between a clean carve and a washed-out turn is razor-thin. Your binding choice plays a critical role in how well your board holds an edge on ice.
Why Stiff Bindings Excel on Ice
When you carve on ice, you need to drive the board’s edge into the surface with maximum force and precision. A stiff binding transmits your input directly and immediately — when you lean into a heel-side turn, the highback pushes the board’s edge into the ice with zero lag. A soft binding, by contrast, flexes under the pressure, absorbing some of your input before it reaches the board. On groomers and powder, this flexing is a feature (it dampens vibrations). On ice, it is a liability — it reduces edge pressure and causes the board to slide rather than carve.
This is why the Burton Lexa X, with its stiff 8/10 flex and Heel Hammock highback, excels in icy conditions. The Hammock grips the boot heel so firmly that every ounce of your force is transmitted directly to the board’s edge. There is no slack, no flex, no delay. On hard ice, this translates to confident, controlled carves even at high speeds.
Highback Rotation for Ice
Properly rotated highbacks are especially important on ice. When your highback is aligned with your board’s heel edge (rather than aligned with your binding angle), the force distribution is maximized. This means that when you lean back on a heel-side turn, 100% of your force goes into the edge rather than being dissipated through the highback frame. On ice, this difference is amplified — what might be imperceptible on soft snow becomes the difference between holding an edge and sliding out.
Canted Footbeds Help
Canted footbeds align your ankle, knee, and hip joints in a more natural position, which allows you to apply more consistent force through your legs to the board’s edges. On ice, where edge pressure must be maintained throughout the entire turn (not just at the initiation), this consistent force distribution is critical. Bindings like the Union Trilogy, with their 3-degree canted footbeds, provide measurably better ice performance than bindings with flat footbeds.
Boot-Binding Stiffness Match
For ice carving, both your boot and binding should be on the stiffer end of the spectrum. A stiff boot in a stiff binding creates a solid, direct connection that maximizes response. A stiff boot in a soft binding creates a mismatch — the boot wants to respond aggressively, but the binding absorbs the input. If you frequently ride in icy conditions, invest in both a stiff boot (7 to 9 flex) and a stiff binding (7 to 9 flex) for the best results.
Binding Weight and Rider Weight: Finding the Right Balance
Two often-overlooked factors that significantly affect binding performance are the weight of the bindings themselves and the weight of the rider. Understanding how these interact helps you make a more informed purchasing decision.
How Rider Weight Affects Binding Performance
Your body weight directly determines how much force you apply to the binding. A heavier rider generates more force during turns, jumps, and landings, which means the binding flexes further under load. A lighter rider generates less force, so the binding does not flex as far. This is why the same binding can feel “medium” to a 150-pound rider and “stiff” to a 110-pound rider.
| Rider Weight | Ideal Binding Flex | Why |
|---|---|---|
| Under 100 lbs | Soft to Medium (3–5) | Lighter riders need softer flex for adequate response |
| 100–130 lbs | Medium (4–6) | Medium flex balances response and forgiveness |
| 130–160 lbs | Medium-Stiff (6–7) | Average weight with standard binding response |
| 160–190 lbs | Stiff (7–8) | Heavier riders need stiffer flex for control |
| Over 190 lbs | Stiff (8–9) | Maximum stiffness for adequate response at high weight |
How Binding Weight Affects Fatigue
Binding weight is more significant than most riders realize. A heavier binding increases the rotational mass at the end of your legs, which means your muscles have to work harder to initiate and control turns. Over a full day of riding — with hundreds of turn initiations, lift rides, and walking — this extra weight accumulates into noticeable fatigue.
The weight difference between the lightest and heaviest bindings in our review is approximately 280 grams per binding (560 grams per pair). That is over one pound of extra weight on your feet. While this might sound trivial, consider that a competitive marathon runner obsesses over saving 50 grams on their shoes. In snowboarding, where your legs are doing all the work for hours on end, binding weight is a meaningful performance factor.
For riders who prioritize weight savings (particularly lighter riders and those who spend long days on the mountain), the Union Rosa at approximately 680 grams per binding is an outstanding choice. For riders who need the response of a stiffer binding but want to minimize weight, the Union Trilogy at approximately 890 grams offers an excellent balance of performance and weight.
The Weight-Response Trade-Off
There is a general correlation between binding weight and response: heavier bindings tend to be stiffer and more responsive, while lighter bindings tend to be softer and more forgiving. This is because the materials that add stiffness (fiberglass, carbon fiber, aluminum) also add weight. Ultra-lightweight bindings achieve their low weight by using less reinforcement material, which reduces stiffness and response.
The exception is magnesium components, which offer high strength at lower weight than aluminum. Bindings like the Union Trilogy that use magnesium buckles achieve excellent response without the weight penalty of aluminum. This is why premium bindings often cost more — they use advanced materials that break the traditional weight-response trade-off.
Seasonal Riding Guide: Adjusting Your Bindings Through the Year
Snowboard conditions change dramatically throughout the season. Early season brings hard-packed groomers and man-made snow. Mid-season offers the best conditions with fresh snow and well-maintained runs. Late season brings slush, ice, and variable terrain. Adapting your binding setup to these conditions helps you get the most out of every day on the mountain.
Early Season (November – December)
Early season conditions are typically hard-packed and firm. Resorts are often running on a limited number of trails with man-made snow, which creates a dense, abrasive surface. For these conditions:
- Forward lean: Increase slightly for more aggressive heel-side response on hard snow.
- Binding angles: Standard all-mountain angles work well (+18°/-6° or +15°/-15°).
- Strap tightness: Snug for precise response on firm surfaces.
- Check hardware: Cold temperatures can cause hardware to contract and loosen. Check all screws before your first ride of the season.
Mid-Season (January – February)
Mid-season typically offers the best overall conditions. Fresh snowfall provides powder days, groomed runs are well-maintained, and temperatures are consistently cold. This is the time to dial in your ideal setup and enjoy peak performance.
- Forward lean: Your standard setting. Adjust up or down based on the day’s conditions.
- Powder days: Set your stance back, reduce forward lean, and widen your front angle for floating in deep snow.
- Groomer days: Standard stance with moderate forward lean for carving response.
- Mid-season maintenance: This is a good time to perform mid-season maintenance — tighten screws, lubricate ratchets, and inspect straps for wear.
Late Season (March – April)
Late season brings spring conditions: soft snow in the morning, slushy afternoons, and icy mornings after overnight freezes. The snow is heavy and wet, and conditions can change within hours. Adapt your setup accordingly:
- Forward lean: Reduce for a more relaxed, surfy feel in soft snow.
- Binding angles: Consider a slightly wider stance for stability on variable terrain.
- Strap tightness: Slightly looser for comfort in warm conditions. Your boots will be more comfortable in warm weather, and over-tightening can restrict blood flow and cause sweating.
- End-of-season prep: After your last day, follow the end-of-season storage procedures to protect your bindings over the summer.
In spring slush, your bindings will collect more wet snow than in winter. Clear snow from your ratchets more frequently during the day, as wet snow can freeze in the mechanism if temperatures drop in the afternoon. Carry a small brush to keep your ratchets clear.
Women’s vs. Men’s Bindings: A Detailed Technical Comparison
Understanding the specific engineering differences between women’s and men’s snowboard bindings helps clarify why women-specific designs are not just a marketing gimmick but a genuine performance necessity.
Highback Geometry
The most significant difference between women’s and men’s bindings is the highback design. Women’s highbacks are typically 15 to 25 millimeters shorter than men’s highbacks in equivalent sizes. This is not just a scaling difference — the shape is fundamentally different. Women’s highbacks feature a wider, more rounded profile that accommodates the lower position of the female calf muscle. Men’s highbacks tend to be narrower and more rectangular, with a higher contact point that aligns with the male calf.
The flex pattern of the highback also differs. Women’s highbacks are generally softer in torsional flex (side-to-side bending) while maintaining comparable stiffness in longitudinal flex (front-to-back bending). This allows women riders to make subtle foot adjustments for balance and style without fighting against a rigid highback, while still getting full response when leaning into turns.
Heel Cup Dimensions
Women’s bindings feature narrower heel cups that match the typically narrower heel profile of women’s snowboard boots. This prevents the boot from shifting side-to-side within the binding, which would reduce response and create inconsistent feel. A men’s heel cup on a women’s boot leaves gaps on either side, allowing the boot to wobble during turns.
Baseplate Width
Women’s baseplates are narrower to match the narrower last (width) of women’s boots. This ensures that the boot sits properly centered on the baseplate, with appropriate overhang on both sides. A baseplate that is too wide for the boot creates instability because the boot is not supported at its edges, leading to pressure points and reduced response.
Flex Calibration
Women’s bindings are calibrated for lighter body weights. The same nylon-fiberglass composite that provides medium-stiff flex for a 180-pound male rider may feel excessively stiff for a 120-pound female rider. Women’s bindings use a slightly higher ratio of nylon to fiberglass, creating a flex that responds appropriately to the lower forces generated by lighter riders.
Strap Design
Women’s ankle straps are typically shorter in length and narrower in width to match the smaller volume of women’s boots. The toe straps are designed for the generally narrower forefoot of women’s feet. These dimensional differences ensure that the straps apply pressure evenly across the boot without creating hot spots or pressure points.
On average, women’s bindings differ from men’s bindings in the following ways:
Highback height: 15–25mm shorter
Heel cup width: 5–10mm narrower
Baseplate width: 5–8mm narrower
Ankle strap length: 10–20mm shorter
Torsional flex: 10–20% softer
Weight: 10–15% lighter (due to smaller dimensions and optimized material ratios)
Buying Used Snowboard Bindings: What to Look For
Buying used bindings can be an excellent way to get premium equipment at a fraction of the retail price. However, used bindings carry risks that new bindings do not. Here is a comprehensive guide to evaluating used bindings before you buy.
Visual Inspection Checklist
- Check the baseplate for cracks. Inspect the entire baseplate, especially around the mounting holes and the highback hinge points. Hairline cracks can propagate under load and cause catastrophic failure. If you see any cracks, walk away.
- Inspect the straps for delamination. Look for separation between the layers of the strap material. Press on the straps and feel for soft spots or areas where the padding has separated from the structural layer. Minor delamination is cosmetic; major delamination affects safety.
- Test every ratchet. Crank each buckle through its full range of motion. It should click smoothly and hold position without slipping. If a ratchet skips, sticks, or feels loose, the internal mechanism is worn and will need replacement.
- Check the highback hinge. Fold the highback forward and backward. It should move smoothly without grinding, clicking, or excessive play. A worn hinge reduces response and can eventually fail.
- Examine the heel cup (if adjustable). Check that the heel cup adjustment mechanism works smoothly and locks securely. Rust or corrosion on the adjustment hardware is a red flag.
- Look for UV damage. Faded, chalky, or brittle-looking plastic indicates prolonged sun exposure. UV-degraded plastic loses structural strength and may fail under load.
Questions to Ask the Seller
- How many days were these bindings ridden? Under 50 days is like new. 50 to 100 days is well-used but often still solid. Over 100 days, expect significant wear.
- Have any parts been replaced? Replacement straps or buckles are fine if they are genuine manufacturer parts. Aftermarket parts may not meet the original specifications.
- What boots were used with these bindings? This helps you assess whether the binding has been shaped by a boot that is very different from yours.
- Were they stored properly? Bindings stored in a dry, temperature-controlled environment last much longer than those left in damp garages or car trunks.
Fair Pricing for Used Bindings
A general rule: used bindings in good condition are worth 40 to 60% of their current retail price, depending on age and condition. Bindings that are one to two seasons old with minimal wear can command 50 to 60%. Bindings that are three or more seasons old should be priced at 30 to 40% of retail. If the binding has been discontinued and is no longer available new, you may pay a slight premium for a well-maintained example.
Do not buy used bindings if: you see any cracks in the baseplate or highback; the ratchets are visibly worn or corroded; the straps are severely delaminated; the binding is more than 8 to 10 years old (plastic degradation makes old bindings unsafe regardless of apparent condition); or the seller cannot tell you anything about the binding’s history.
Advanced Binding Tuning: Pro-Level Adjustments
Once you have mastered the basics of binding setup, these advanced tuning techniques can further refine your ride. These adjustments are used by professional riders and competitive athletes to extract maximum performance from their equipment.
Mixed Forward Lean Settings
Most riders set the same forward lean on both bindings, but some advanced riders use different settings on each foot. A common approach is to set slightly more forward lean on the front binding (for quicker turn initiation) and slightly less on the back binding (for more relaxed, surfy feel on heel-side turns). This creates a binding setup that initiates turns aggressively but completes them with a more fluid, relaxed feel.
Asymmetric Strap Tightness
Some riders tighten their ankle straps differently on each foot. If you ride predominantly on your heel side (common for freeriders), you might tighten the back foot’s ankle strap slightly more for additional heel-side response. If you ride predominantly on your toe side (common for park riders who do a lot of jibbing), you might loosen the front foot’s ankle strap for more toe-side mobility. These are subtle adjustments that make a noticeable difference for experienced riders.
Custom Footbed Modifications
Some riders add aftermarket footbeds or modify existing footbeds to suit their preferences. Common modifications include adding arch support (for riders with flat feet), adding extra cushioning under the heel (for riders who experience heel bruising from hard landings), or trimming the footbed to reduce weight. If you have specific foot issues (plantar fasciitis, bunions, or high arches), custom footbed modifications can dramatically improve comfort.
Highback Canting Adjustments
Some premium bindings allow you to adjust the cant (angle) of the highback independently from the baseplate. This is different from highback rotation — canting tilts the highback side-to-side rather than rotating it front-to-back. By canting the highback to match the angle of your calf muscle, you can improve comfort and response simultaneously. This adjustment is particularly valuable for riders with larger calves or those who experience highback pressure points.
Binding-to-Board Damping Tuning
The interface between your binding and your board is a critical vibration path. Adding thin rubber or silicone pads between the binding baseplate and the board can significantly reduce vibration transmission, creating a smoother, more comfortable ride. This is especially beneficial for riders who spend long days on firm, chattery snow. Some manufacturers offer proprietary damping pads designed for their specific mounting systems.
The goal of advanced tuning is not to make dramatic changes but to eliminate small inefficiencies that compound over a full day of riding. A half-degree of forward lean adjustment, a single ratchet click of strap tightness, or a millimeter of heel cup position can transform a good setup into a great one. Take small steps, test each change over a full day, and keep notes on what works for you.
Eco-Friendly and Sustainable Snowboard Bindings
Environmental consciousness is increasingly important in the snowboard industry, and binding manufacturers are responding with more sustainable materials, manufacturing processes, and corporate practices. Here is a look at the current state of eco-friendly binding options.
Sustainable Materials
Recycled Aluminum: Union uses recycled aluminum in their buckle components, reducing the energy and raw materials needed for production. Aluminum is infinitely recyclable without loss of quality, making it one of the most sustainable metals available.
Bio-Based Plastics: Burton has invested in developing bio-based nylon composites that use plant-derived polymers instead of petroleum-based ones. These materials offer comparable performance to traditional nylon while reducing the binding’s carbon footprint.
Recycled EVA: Some manufacturers are incorporating recycled EVA foam into their footbeds. EVA (ethylene-vinyl acetate) is typically derived from petroleum, but recycled EVA diverts material from landfills and reduces the need for virgin production.
Water-Based Adhesives: The glues used to bond strap layers traditionally contain volatile organic compounds (VOCs). Several brands have switched to water-based adhesives that are less harmful to manufacturing workers and the environment.
Sustainable Manufacturing
Beyond materials, manufacturers are addressing sustainability in their manufacturing processes. Burton has committed to carbon-neutral operations and publishes annual sustainability reports. Jones Snowboards has invested in renewable energy for their facilities and packaging made from recycled materials. Union has reduced waste in their manufacturing through precision molding techniques that minimize material scrap.
Durability as Sustainability
Perhaps the most environmentally impactful choice a rider can make is to buy a durable binding that lasts for many seasons. A binding that lasts 150 days of riding generates far less waste than a budget binding that needs replacement every 30 days. Union’s lifetime baseplate warranty reflects this philosophy — by building bindings that last, they reduce the total number of bindings that end up in landfills.
No snowboard binding is perfectly “green” — they all use petroleum-derived plastics, metals that require energy-intensive extraction, and manufacturing processes that generate emissions. The most sustainable choice is a binding that lasts a long time, is repairable (individual straps and buckles can be replaced), and is from a company with transparent sustainability practices. Look for brands that publish sustainability reports and use recycled or bio-based materials where possible.
Binding Troubleshooting: Solving Common Problems
Even well-maintained bindings can develop issues. Here is a troubleshooting guide for the most common problems riders encounter.
Problem: Ratchet Won’t Catch or Skips
Possible Causes: Worn ratchet teeth, ice buildup in the mechanism, or a bent ladder strap.
Fixes: First, clear any ice from the ratchet using a soft brush. If the ratchet still skips, inspect the ladder strap teeth for wear. Worn teeth can be replaced by purchasing a replacement ladder strap from the manufacturer (typically $10 to $20). If the ratchet mechanism itself is worn, the buckle may need replacement.
Problem: Binding Squeaks or Creaks
Possible Causes: Snow between the binding and board, loose mounting hardware, or friction between plastic components.
Fixes: Remove the binding, clean all surfaces, and re-mount with tightened screws. Apply a thin layer of wax to the mounting disk to reduce plastic-on-board friction. For highback squeaks, apply a small amount of silicone lubricant to the hinge point.
Problem: Straps Pack Out (Lose Padding)
Possible Causes: Normal wear from repeated compression, exposure to cold temperatures, or poor storage.
Fixes: Minor packing can be compensated by tightening the ratchet one or two additional clicks. Major packing requires strap replacement. To extend strap life, avoid storing bindings with the straps fully tightened, and use a boot dryer to remove moisture after each ride.
Problem: Highback Feels Loose or Wobbly
Possible Causes: Worn highback hinge, loose hinge bolt, or cracked highback mounting point.
Fixes: Check the hinge bolt tightness first — this is the most common cause and is easily fixed with a wrench. If the bolt is tight but the highback still feels loose, the hinge mechanism is likely worn and may need professional repair or replacement.
Problem: Toe Strap Slips Sideways
Possible Causes: Toe strap mounting screws are loose, the strap is incorrectly positioned, or the boot is too narrow for the strap.
Fixes: Tighten the toe strap mounting screws. Reposition the strap so it wraps over the front of the boot’s toe box (cap-strap position). If the boot is very narrow, the strap may not grip properly — consider a narrower strap or a different binding model designed for narrower boots.
Problem: Baseplate Cracks
Possible Causes: Impact damage, material fatigue from age, over-tightened mounting screws, or manufacturing defect.
Fixes: A cracked baseplate is a safety-critical failure. Stop using the binding immediately. If the binding is under warranty (Union offers a lifetime baseplate warranty), file a warranty claim for a replacement. If out of warranty, the binding should be retired and replaced. Do not attempt to repair a cracked baseplate with epoxy or other adhesives — the repair will not be strong enough to withstand riding forces.
Problem: Forward Lean Adjuster Stuck
Possible Causes: Ice buildup, corrosion on the adjuster mechanism, or a worn adjuster component.
Fixes: Gently warm the adjuster with your hands or a boot dryer. Do not force the mechanism — you may break the adjuster. If the adjuster is corroded, clean it with a dry lubricant and work it back and forth gently. If the adjuster is worn, it can usually be replaced as a separate part from the manufacturer.
Complete Beginner’s Guide to Women’s Snowboard Bindings
If you are brand new to snowboarding, the world of bindings can feel overwhelming. This section is specifically designed for first-time buyers who need clear, jargon-free guidance on choosing their first pair of bindings.
What You Actually Need
As a beginner, you do not need the most expensive binding on the shelf. You need a binding that is comfortable, forgiving, and easy to use. Here are the absolute essentials:
- Soft flex (3 to 5 out of 10). This allows the binding to absorb your mistakes rather than punishing them. A soft binding is like learning to drive in an automatic car — it smooths out your inputs and keeps you in control.
- Aluminum or metal ratchets. Plastic ratchets can fail in cold weather. Metal ratchets are more reliable and will last through your learning period and beyond.
- Proper size. Match the binding size to your actual snowboard boot size (not your street shoe size). Check the manufacturer’s size chart.
- EVA or foam cushioning. This absorbs vibrations from rough snow and makes your feet more comfortable throughout the day.
What You Do NOT Need (Yet)
- Stiff flex. You are not ready for a stiff binding. It will make learning harder and more frustrating.
- Premium features. Canted footbeds, magnesium buckles, and adjustable heel cups are nice but not necessary for learning.
- Step On system. While convenient, the additional cost of proprietary boots makes Step On a poor value for beginners who may not stick with the sport.
Your First Setup: Step by Step
- Mount the bindings to your board. Use the reference stance position marked on your board. This is the manufacturer’s recommended position for balanced performance.
- Set your binding angles. Start with +15° front foot and 0° back foot. This is the simplest and most forgiving starting angle for beginners. As you progress, you can experiment with different angles.
- Set stance width. Start with the reference stance width marked on your board. You can adjust later as you discover your preferences.
- Set forward lean to minimum. As a beginner, you want maximum comfort and minimum calf strain. Set the forward lean to its lowest setting.
- Strap in and adjust. Put your boots on, strap into the bindings, and check that the straps are centered over your instep and toe. Tighten until snug but not painful.
- Do the overhang check. Look down from above. Your boot should be centered over the board with equal toe and heel overhang. Neither should extend past the board’s edge.
Recommended First Bindings
The Union Rosa is our top recommendation for beginner women riders. It offers the ideal combination of soft flex, lightweight design, aluminum ratchets, and EVA cushioning at a price that does not break the bank. If the Rosa is not available, any binding with a flex rating of 3 to 5, metal ratchets, and proper sizing will serve you well as you learn.
The most important thing you can do as a beginner is to have your bindings professionally set up at a shop. A 15-minute setup by an experienced technician will ensure your bindings are correctly positioned, properly adjusted, and optimized for your specific boots and board. Most shops offer free setup with a binding purchase. Take advantage of this — it will make your learning experience dramatically better.
Frequently Asked Questions
Over the toes (Cap Strap). 99% of modern bindings are designed this way. Placing the strap over the front of your boot toe pushes your heel back into the heel cup, locking you in securely. Placing it on top of your foot crushes your toes and causes cold feet.
You should have equal overhang on toe and heel side. Use the adjustable heel cup or footbed to center your boot. Neither side should extend past the board’s edge.
Yes. Plastics degrade from UV and cold. A 10+ year old binding is a safety risk. Expect 4 to 5 years of peak performance riding 20 days per season.
Depends on the hole pattern. 2×4 and 4×4 fits most bindings. The Channel needs a compatible disk. 3D requires a specific adapter disk.
Usually snow between binding and board, or loose hardware. Remove, dry, and re-tighten. Wax on the mounting disk can also help.
Not recommended. Men’s bindings have wider heel cups and taller highbacks that may not fit women’s boots securely. Always use women’s-specific bindings.
Burton’s proprietary mounting system with infinite micro-adjustment. Most bindings include a universal disk compatible with Channel and standard inserts.
Snug, not crushing. Heel should not lift when flexing forward. You should be able to slide a finger between strap and boot. If toes go numb, loosen them.
Step On offers convenience but needs proprietary boots. Traditional works with any boot and offers maximum adjustability. Choose based on your priorities.
Soft to medium (3 to 5 out of 10). Forgiving, lightweight, and comfortable. The Union Rosa is an excellent beginner choice.
Before every ride day. Vibration and temperature changes loosen screws. A 30-second check prevents dangerous failures.
Yes, especially for women. They align ankle, knee, and hip joints, reducing stress and fatigue. The difference is subtle but significant over a full day.
Re:Flex is universal, works with all boards. EST is Burton Channel-only, provides maximum board feel but limited compatibility.
Several brands are trending toward sustainability. Union uses recycled aluminum, Burton uses bio-based materials, Jones incorporates recycled components.
Yes with a versatile all-mountain binding (6 to 7 out of 10 flex). Dedicated park or freeride riders benefit from specialized flex. The Union Trilogy is the best compromise.
Forward lean tilts the highback toward the toe edge for quicker heel response. Highback rotation pivots to align with your binding angles. Both improve response through different mechanisms.
Cold makes materials stiffer. Riding involves dynamic movements you cannot replicate standing still. Try loosening straps by 1 to 2 clicks and adjusting footbed position.
Carry a multi-tool and spare screws. Replace missing screws immediately. Riding with missing hardware can damage your board’s inserts.
Ideally yes. They need to work together as a system. Many shops offer discounted packages. If buying online, verify compatibility with manufacturer charts.
Not directly. Splitboarding requires specialized bindings or touring brackets. Some brands offer splitboard-specific bindings or adapter systems.


