
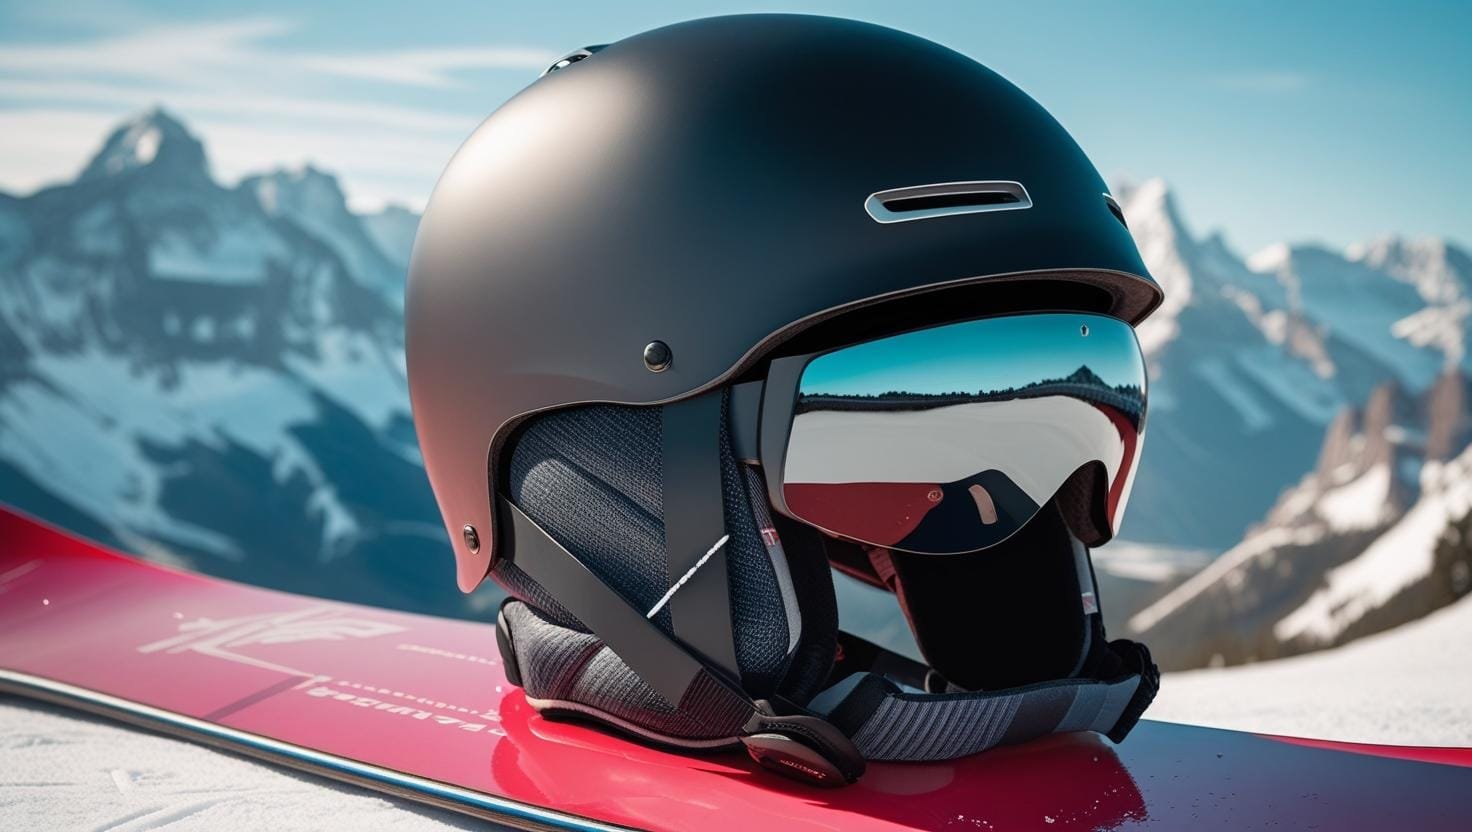
The Ultimate Snowboard Helmet Guide: Safety Science & Top Rankings
In the high-velocity world of snowboarding, your helmet is more than just a required accessory—it is your most critical insurance policy against life-altering injuries. As winter sports evolve, riders are pushing faster and jumping higher, making the physics of impact more complex. Modern helmets are no longer just plastic shells with foam; they are sophisticated optical-and-impact-engineered instruments designed to mitigate both linear and rotational forces. We have spent months analyzing material density, venting aerodynamics, and long-term durability to bring you this exhaustive guide to the five best helmets on the market today. For more on why the sport deserves this level of protection, see our guide to why snowboarding is the best winter sport.
I. The Master Guide: Decoding Professional Safety Standards
Before selecting a helmet based on aesthetic alone, a rider must understand the biomechanics of a crash. When you catch an edge on a toeside turn, your head doesn’t just hit the snow vertically; it strikes at an angle. This creates rotational torque, which is the primary cause of concussions. Here is the technical breakdown of what makes a helmet “safe” in today’s market. For more on why crashes happen, see our why snowboarding can be dangerous guide.
1. Advanced Impact Mitigation: MIPS & Beyond
The Multi-directional Impact Protection System (MIPS) has revolutionized head safety. By inserting a low-friction layer between the helmet’s liner and the outer shell, MIPS allows the helmet to slide 10 to 15 millimeters in all directions during the first few milliseconds of an impact. This “slip plane” mimics the brain’s own cerebrospinal fluid, dispersing energy that would otherwise twist the brain inside the skull. We also look for WaveCel or Koroyd, which use collapsible structures (like drinking straws or honeycombs) that crumple more efficiently than traditional EPS foam, absorbing significantly more energy in high-speed collisions.
2. Shell Construction: In-Mold vs. Hard-Shell vs. Hybrid
In-Mold helmets fuse a polycarbonate outer shell with the impact-absorbing foam liner in a single molding process. They are incredibly lightweight and allow for sleek venting, though they are more prone to cosmetic dings. Hard-Shell helmets use a thick ABS plastic shell glued to the foam; they are heavier but much more durable for daily park use. The Hybrid Shell—found in premium models—combines a tough hard-shell top with in-mold sides, offering the perfect balance of weight and ruggedness.
3. The Anatomy of Fit: BOA® and Aerodynamics
A helmet that moves on your head is a helmet that fails. A proper fit should feel like a firm handshake around your skull. The BOA® Fit System remains the gold standard, using aircraft-grade stainless steel wires to provide 360-degree tension adjustment. Aerodynamics also play a role; high-speed carving creates “helmet lift” if the venting isn’t designed to move air smoothly over the surface. Finally, ensure your helmet and goggles are “stack-compatible,” meaning the helmet’s brim aligns perfectly with your goggle’s top frame to prevent the dreaded “gaper gap” and forehead freeze. For goggle recommendations, see our best snowboarding goggles guide.
II. MIPS vs. WaveCel vs. Koroyd: Which Rotational Safety Tech Actually Wins?
The safety acronyms on modern helmet hang-tags can feel overwhelming. Every brand markets its own version of “rotational energy management,” and while they all address the same fundamental problem—the twisting force your brain experiences during an angled impact—they solve it in very different ways. Understanding the difference isn’t just academic; it could change which helmet you buy.
The Problem They’re All Solving
Traditional helmets were designed primarily to handle linear impacts—straight-down, perpendicular hits to the top of the skull. Real-world snowboarding crashes are almost never that clean. When you slam your head into packed groomer snow at speed, or take a sideway fall in the halfpipe, the force arrives at an oblique angle. This oblique impact creates rotational acceleration—a spinning and twisting of the brain inside the skull—that is the root cause of most concussions and diffuse axonal injuries. Standard EPS foam handles linear forces beautifully. It handles rotational forces poorly.
MIPS (Slip Plane)
A thin, low-friction plastic shell sits between the EPS liner and the inner padding. On impact, this layer slides 10–15mm independently of the outer shell, redirecting rotational energy away from the brain. MIPS is the most widely adopted system, found across every price tier from budget to ultra-premium. Its key advantage is that it adds minimal weight and can be retrofitted into almost any helmet design.
Best for: All riders; proven track record across 20+ years of research.
Koroyd (Structural Absorption)
Koroyd replaces sections of EPS foam with thousands of thermally welded co-polymer tubes, each only 3mm in diameter, arranged like a honeycomb. On impact, these tubes crumple progressively and uniformly, converting kinetic energy into deformation energy far more efficiently than foam. Smith uses Koroyd in its flagship helmets. The result is up to 48% more energy absorption than EPS alone.
Best for: High-speed riders who want maximum linear and oblique protection in one system.
WaveCel (Collapsible Cell Matrix)
Developed by Trek and licensed to select helmet brands, WaveCel is a flexible, accordion-like cell structure laminated to the inner shell. It flexes on oblique impact to manage rotational forces, then crumples on direct impact to absorb linear energy—handling both in one material layer rather than relying on a separate slip plane. Some independent studies suggest WaveCel outperforms MIPS on oblique impacts at higher velocities.
Best for: Riders who want a single-layer system without a separate moving component.
💡 Our Verdict on Impact Tech
Any certified helmet with MIPS is vastly superior to one without it. If your budget allows, Koroyd (Smith) and WaveCel represent the next tier of protection and are worth the premium for frequent or aggressive riders. But do not let the absence of Koroyd or WaveCel push you toward a non-MIPS helmet; MIPS + EPS remains a highly effective, proven combination. For more on why safety matters, see our why snowboarding can be dangerous guide.
III. Snowboard Helmet Sizing Guide: How to Measure Your Head Correctly
According to most major helmet brands, improper fit is the single most common reason an otherwise excellent helmet fails to provide its rated protection in a real crash. A helmet that is even one size too large can rotate during impact, moving the protective foam out of position precisely when you need it most. Getting your size right takes about 90 seconds and a fabric tape measure. For general sizing help, see our snowboard sizing guide.
Step-by-Step: How to Measure Your Head for a Snowboard Helmet
- Use a soft fabric tape measure (a string and a ruler work equally well). Metal tape measures are too rigid to sit flush against the skull.
- Wrap the tape around the largest part of your head—approximately one inch (2.5cm) above your eyebrows in the front and around the widest point at the back of the skull. This is your “hat size” circumference.
- Keep the tape level and snug but not tight. It should sit flat against the skin without compressing it. Take the measurement three times and use the largest number.
- Note your head shape: look at your head from above in a mirror (or take a photo). Is it rounder (Round/Oval Contour) or longer front-to-back (Long Oval Contour)? Most helmets are designed for a round oval, but some brands offer long oval fit options.
Use this general sizing chart as a starting point. Always verify against the specific brand’s sizing guide before purchasing, as sizing varies by manufacturer:
| Size | Head Circumference (cm) | Head Circumference (inches) | Typical Fit For |
|---|---|---|---|
| XS | 51–53 cm | 20–20.9″ | Small adult / large youth |
| S | 53–55 cm | 20.9–21.7″ | Average women’s / small men’s |
| M | 55–57 cm | 21.7–22.4″ | Average adult |
| L | 57–59 cm | 22.4–23.2″ | Large adult |
| XL | 59–61 cm | 23.2–24″ | Extra-large / wide head |
| XXL | 61–63 cm | 24–24.8″ | Big heads / wide oval |
Helmets for Riders with Big Heads or Wide Heads
Riders with head circumferences above 61cm or particularly wide oval skulls often struggle to find helmets that fit correctly. The most common mistake is buying a helmet that is technically the right circumference but designed for a narrower oval—resulting in painful pressure on the temples while the front and back of the skull float loosely inside. Several brands have responded to this by offering extended-size runs and wide-oval fit systems. Giro’s adjustable fit dial makes their large and XL options particularly accommodating for non-standard head shapes. Smith’s BOA 360 system allows micro-adjustment that can compensate for up to 10mm of oval shape variation. If you consistently find helmets uncomfortably tight at the temples with space to spare front-to-back, specifically search for “wide oval fit” or “long oval” helmets.
How a Properly Fitting Snowboard Helmet Should Feel
Once the helmet is on your head and the fit system is tightened, perform this four-point check:
- Forehead coverage: The brim should sit approximately one to two finger-widths above your eyebrows. If it’s lower, it will interfere with your goggles; if it’s higher, your forehead is exposed in a forward fall.
- Side-to-side shake test: Shake your head vigorously from side to side. The helmet should move with your skin and scalp, not slide independently over it.
- Nod test: Tip your chin down sharply. The helmet should not tip forward over your eyes.
- No pressure points: After five minutes of wear, there should be no concentrated pressure on any single point of the skull—particularly the temples and the crown.
⚠️ Never Guess on Size When Buying Online
Always measure your head circumference before ordering online. Returning a helmet is a hassle, and riders who guess their size and end up with a poor fit often “make it work” rather than exchange—which can have serious safety consequences. Many brands include a measuring tape in the box of their helmets for exactly this reason. For more on first-time gear, see our guide to choosing your first snowboard.
IV. Snowboard Helmet vs. Ski Helmet: Are They Actually Different?
This is one of the most common questions we receive, and the answer is more nuanced than a simple yes or no. From a pure safety certification standpoint, there is no difference: both must pass identical ASTM F2040 and CE EN 1077 standards. However, the design priorities of each sport create meaningful ergonomic differences that, for regular riders, are worth understanding.
How Snowboard Helmet Design Differs From Ski Helmet Design
Ear coverage and hearing: Snowboard helmets traditionally offer more substantial ear coverage. Snowboarders ride in a sideways stance and spend more time in low-speed, close-terrain situations—tree runs, park features, street-style riding—where hearing other riders, music, or terrain cues is valuable. Ski helmets more commonly use a minimal, clip-in ear pad design optimized for aerodynamics at higher straight-line speeds. Many snowboard-specific helmets also include audio-compatible ear pads from the factory, ready to accept clip-in speaker systems.
Brim and goggle interface: Snowboard helmets are frequently designed with a shorter or adjustable brim (see Oakley’s MOD5 Modular Brim System) to interface cleanly with the large-frame goggles popular in snowboarding. Ski helmet brims are sometimes designed for smaller-framed race goggles.
Overall aesthetics: Snowboard helmets—particularly hardshell and skate-style designs like the Giro Ledge—lean into a streetwear-influenced, lower-profile aesthetic. Ski helmets trend toward a more aerodynamic, sport-specific look.
The bottom line: Can you snowboard in a ski helmet? Absolutely, and it will protect your head just as well. But a snowboard-specific helmet will fit your goggles better, accommodate your music setup, and look more appropriate for the mountain culture you’re riding in. For more on why snowboarding is the better choice, see our snowboarding vs skiing comparison.
Snowboard Helmets vs. Bike Helmets: Why You Cannot Swap Them
A far more important distinction than ski vs. snowboard is snowboard vs. bike. Despite looking superficially similar, these helmets are not interchangeable and are dangerous to treat as such. Road and mountain bike helmets are certified to different standards (CPSC 1203 in the US, EN 1078 in Europe) that test for single-impact scenarios at lower velocities. They are often made with larger venting channels that reduce the structural mass of the foam—appropriate for a cyclist who needs cooling but entirely wrong for a snowboarder who needs sustained protection across multiple potential impacts in a session. Many bike helmets also use EPS foam that is too thin at the rear and sides to protect against the angular falls common in snowboarding.
⚠️ Never Wear a Bike Helmet on the Mountain
Ski patrol at most resorts is trained to recognize non-snow-certified helmets. Using a bike helmet on snow is not only dangerous—it provides false confidence in a product not engineered for the cold, the speeds, or the impact angles of the sport. Always check that your helmet carries ASTM F2040 or CE EN 1077 certification. For more on why snowboarding requires proper gear, see our why snowboarding can be dangerous guide.
V. Best Snowboard Helmets for Kids and Youth: A Parent’s Complete Guide
Children’s heads are proportionally larger relative to their bodies than adults’, and their neck muscles are weaker—meaning they are actually more vulnerable to rotational head injuries than adults, not less. The instinct to buy a budget helmet for a child because “they’ll outgrow it anyway” is one of the most costly mistakes a snowboarding parent can make. Here is what to look for when protecting a young rider’s developing brain.
Why MIPS Is Even More Important for Children
The biomechanical argument for MIPS is stronger in children than in adults. A child’s brain is still developing neural pathways throughout adolescence, and research suggests that repeated sub-concussive impacts—hits that don’t produce obvious symptoms but still create rotational acceleration—can affect long-term cognitive development. MIPS technology reduces the rotational force transmitted to the brain by up to 40% in oblique impacts, making it a non-negotiable feature for youth helmets in our view, regardless of price tier.
Key Features to Look for in a Youth Snowboard Helmet
- MIPS or equivalent rotational protection: As discussed above, this is the minimum acceptable standard for a child’s helmet. Several brands now include MIPS in their youth helmets at very accessible price points.
- Adjustable fit system: Children’s heads grow, and their hair changes volume with hats, braids, and ponytails. A helmet with a dial-adjustable fit system (BOA or equivalent) can accommodate year-to-year growth and different hairstyles without needing annual replacement.
- Pony tail port or ponytail-friendly design: Many girls’ and women’s helmets include an opening at the back of the fit dial to accommodate a ponytail or low braid, preventing the helmet from sitting unnaturally high on the head.
- Warm liner and ear protection: Children feel the cold more acutely than adults and are less likely to speak up about cold ears until they’re miserable. A plush, removable liner and padded ear covers dramatically improve the experience and keep kids on the mountain longer.
- A single season’s fit vs. two seasons: Unlike gloves or goggles, helmets should not be bought “with room to grow.” A helmet that is too large cannot protect properly. Size down and replace when needed; the cost of a correct-fitting helmet is far lower than the cost of a preventable injury.
Youth Helmet Sizing
Children’s helmet sizing follows the same measurement methodology as adults—tape measure around the widest point of the head. Most youth helmets cover the range from roughly 48cm to 56cm and are labeled by specific circumference rather than generic S/M/L to reduce the risk of incorrect fit. Always measure your child’s head each season before re-using last year’s helmet, as head circumference increases most rapidly between ages 4 and 10. For more on getting kids started in the sport, see our why snowboarding is the best winter sport guide.
VI. Snowboard Helmet Audio Systems: Everything You Need to Know
Music on the mountain is part of the culture—but how you deliver it to your ears matters both for safety and sound quality. Modern snowboard helmets have evolved from simple “audio-compatible” ear pads (which were really just thin foam with a small pocket) to sophisticated wireless audio integration that rivals dedicated headphones. Here is a breakdown of the current state of helmet audio.
Built-In vs. Add-On Helmet Audio
Audio-compatible helmets have a thin pocket inside the ear pad, sized to accept a standard 40–45mm speaker unit. These are sold separately, typically by the helmet brand or by third-party companies like Outdoor Tech. The speakers connect to your phone via Bluetooth and clip in and out easily, meaning you can move them between helmets. Most riders who already own quality Bluetooth speakers prefer this modular approach.
Integrated audio helmets build the speakers directly into the earlap structure. Some premium options—particularly from Bern and Smith—include built-in microphones for hands-free calls, which is genuinely useful when you need to coordinate with a group on the mountain. The downside is that integrated audio is harder to upgrade, and the speaker quality is fixed to whatever the manufacturer chose at the factory.
Sound Quality Considerations
The acoustics of a snowboard helmet are fundamentally different from in-ear headphones. Because the speakers sit a short distance from your ear canal rather than inside it, the perceived bass response is lower and ambient noise bleeds in freely. This is actually a safety feature—you can hear the mountain environment around you—but it means helmet audio systems will always sound less full than quality earbuds at the same price. If audio quality is your primary concern, a pair of bone conduction headphones worn at the temple area under the helmet liner offers a good compromise: excellent audio clarity with full situational awareness.
🎧 Safety Note on Helmet Audio Volume
Several ski patrols and mountain safety organizations recommend keeping helmet audio at a volume level where you can still clearly hear someone shouting at you from 10 feet away. Being unable to hear approaching riders, snowmobiles, ski patrol announcements, or verbal warnings from your group is a genuine risk factor. Keep it loud enough to enjoy, quiet enough to stay aware. For more on why awareness matters, see our snowboard fall safety guide.
VII. How to Clean and Care for Your Snowboard Helmet
A helmet that is poorly maintained ages faster, smells worse, and can develop degraded foam that compromises its protective performance. Yet most riders do nothing beyond a cursory wipe-down at the end of the season. Proper helmet care is a 30-minute-per-season investment that meaningfully extends the life of a piece of equipment that may cost $150 to $400. For more on gear maintenance, see our snowboard waxing guide.
How to Clean the Helmet Exterior
The outer shell of a polycarbonate or ABS helmet can be cleaned with a damp cloth and mild soap. Avoid petroleum-based cleaners, alcohol wipes, or solvent-based products—these can chemically degrade the plastic and the foam underneath without any visible exterior damage. The degradation is invisible until the helmet is tested in an impact, at which point a compromised shell can crack rather than flex. Simply use lukewarm water and a drop of dish soap on a soft cloth; wipe in circles, rinse with a clean damp cloth, and allow to air dry at room temperature. Never use a heat gun or hair dryer to speed up drying.
How to Wash the Interior Liner and Ear Pads
The interior of a snowboard helmet absorbs significant amounts of sweat, sunscreen, hair product, and natural skin oils over a season. If the padding is removable—and in most modern helmets it is—take it out and wash it by hand in cool water with a small amount of gentle detergent or technical fabric wash (like Nikwax Tech Wash). Gently squeeze the water through the foam; do not wring or twist the padding, as this can tear the foam cell structure. Rinse thoroughly and allow to air dry completely before reinstalling—typically 24 hours at room temperature. Damp padding reinstalled in a helmet encourages mold and mildew growth.
If the padding is not removable, use a damp cloth and a small amount of diluted antibacterial soap, working it gently into the fabric. A very light spritz of a fabric-safe odor eliminator (like Febreze Sport) can help with persistent odors between full washes.
Seasonal Storage: How to Preserve Your Helmet Between Seasons
Where and how you store your helmet in the off-season has a direct impact on how long the EPS foam remains effective. The two enemies of EPS foam are UV light and extreme heat. Storing a helmet in a car—particularly a dark car in summer—where interior temperatures can reach 140°F (60°C) accelerates the chemical breakdown of EPS at a rate equivalent to several additional seasons of normal use. UV light degrades the polycarbonate outer shell, causing micro-cracking that isn’t visible to the naked eye but reduces impact resistance.
✓ DO: Proper Helmet Storage
- Store in a cool, dry place away from direct sunlight
- Keep in a helmet bag or box to prevent dust and accidental drops
- Remove the liner and let it air out fully before long-term storage
- Store at room temperature (60–75°F / 15–24°C)
- Check the manufacturing date sticker annually against your replacement schedule
✗ DON’T: Common Storage Mistakes
- Don’t store in a hot car, attic, or garage in summer
- Don’t hang by the straps long-term—it distorts the chin strap hardware
- Don’t pile heavy gear on top of the helmet
- Don’t use as a storage bowl for gloves, goggles, or snacks
- Don’t expose to prolonged UV light on a window shelf or outdoor rack
VIII. When to Replace Your Snowboard Helmet: The Complete Guide
The question of when to replace a helmet is one of the most important—and most frequently avoided—decisions a snowboarder makes about their safety. Helmets are not indefinitely reusable safety devices. They are consumables engineered to perform at peak protection for a finite period and then degrade. The industry standard recommendation of five years for a regularly used, never-crashed helmet is not arbitrary; it is based on accelerated aging tests of EPS foam and polycarbonate shell materials conducted by major certification bodies. For more on why snowboarding requires proper gear maintenance, see our snowboard waxing guide.
The Five Key Replacement Triggers
- Any significant impact: If your helmet has taken a hit that was hard enough that you were dazed, rattled, or concerned, replace the helmet before your next ride. EPS foam is a single-impact material. Even if the helmet looks pristine externally, the foam has crushed internally and will not perform a second time. This is the most important and most frequently ignored replacement trigger.
- Visible cracks in the outer shell: Any crack, however small, in the ABS or polycarbonate shell indicates that the structural integrity has been compromised. The shell’s role is to distribute impact force across a wide area; a cracked shell concentrates force rather than dispersing it.
- Degraded or compressed padding: If the inner padding no longer springs back after compression, it has reached the end of its functional life. Compressed padding also means your head sits closer to the shell than designed, reducing the effective impact absorption zone.
- Five-year age limit: Even a helmet that has never been crashed and looks brand new should be retired at the five-year mark from the manufacturing date (printed inside the shell). UV exposure, temperature cycles, and chemical exposure from sweat and sunscreen cause EPS foam to become progressively more brittle. An aged helmet may pass a visual inspection but fail catastrophically in an impact.
- Unknown history: If you are considering a second-hand helmet or cannot verify whether a helmet has been in a significant crash, do not use it. There is no reliable way to inspect EPS foam for internal damage without specialized equipment. Used helmets are not safe gifts, no matter how new they appear.
The Real Cost of Snowboarding Head Injuries
Head and neck injuries account for approximately 3–17% of all snowboarding injuries, according to data published by the International Journal of Sports Medicine and the National Ski Areas Association. While this percentage may seem small, the consequences are disproportionately severe—head injuries in snowboarding are responsible for the majority of fatalities and permanent disability outcomes in the sport. Research consistently shows that helmet use reduces the risk of head injury by 30–50% and the severity of injuries that do occur by a wider margin. The argument for wearing a properly fitted, current-certification helmet has never been stronger, and the argument for delaying helmet replacement has never been weaker.
IX. Best Snowboard Helmets for Cold Weather: Staying Warm Without Sacrificing Ventilation
There is an inherent tension at the core of helmet thermal management: the same vents that keep your head cool on a sunny spring afternoon are the same channels through which biting Arctic wind steals warmth on a January blizzard day. The best cold-weather helmets solve this problem through active vent systems—closeable ports that let you dial the airflow up or down depending on conditions. If you predominantly ride in cold climates, this feature should be near the top of your priority list.
Active vs. Passive Venting: What’s the Difference?
Passive venting is the most common design: vents are open all the time, fixed in the shell. This is fine for moderate climates and freestyle riding where the physical exertion keeps your head warm regardless. For cold-weather resort and backcountry riding, however, passive vents become a liability in full-gale wind or at sub-zero temperatures, allowing cold air to circulate freely around your scalp.
Active venting uses sliders, levers, or rotating gates that you can physically close to seal the vent channels. On a cold morning, close the front vents to retain heat; as the afternoon warms and you’re sweating on a long groomer run, open everything up to prevent overheating. The Smith Vantage’s two-slider system—which controls front and back vents independently—is the gold standard of active vent design for snowboarding.
The Role of the Helmet Liner
For extreme cold (below 0°F / -18°C), even the best active vent system benefits from supplementary insulation via the helmet liner. A thin, helmet-specific fleece beanie worn under your helmet—rather than a thick wool knit that interferes with fit and safety—adds meaningful warmth without compromising the impact protection geometry. Several helmet brands sell proprietary helmet liners sized specifically for their fit systems. Alternatively, a thin Merino wool or Polartec Power Stretch balaclava that sits flush against the scalp without creating a bulky slip layer is an excellent all-conditions solution. For sock recommendations, see our best snowboard socks guide.
🌨️ Extreme Cold / Backcountry
Closeable active vents, warm plush liner, Merino balaclava compatibility
→ Smith Vantage MIPS
🏔️ Variable All-Mountain Resort
Active or semi-active venting, removable liner, audio-compatible ear pads
→ Oakley MOD5 MIPS
🛹 Park / Mild Conditions
Passive venting, durable hard shell, lightweight and low-profile
→ Giro Ledge MIPS
💰 Budget / Casual Resort
Adequate passive venting, dial fit, warm ear pads at a low price
→ OutdoorMaster Kelvin
X. Women’s Snowboard Helmets: Do They Make a Difference?
As we touched on briefly in our FAQ section, the safety technology in a women’s snowboard helmet is identical to that of a men’s model. Rotational energy management, shell construction, and certification standards are gender-neutral. Where women’s-specific helmets genuinely differ—and where the difference matters—is in fit, comfort, and aesthetics.
The Fit Difference
On average, women’s heads have a slightly different shape profile than men’s: a marginally narrower front-to-back measurement relative to side-to-side width, and a different position of the occipital ridge (the bony prominence at the back of the skull). A women’s-specific helmet is engineered around these average differences to provide a more comfortable, more secure fit for female-proportioned skulls. This means less “gapping” at the forehead and a better seal around the ear pads. For women with heads at the smaller end of the range (under 54cm), women’s-specific sizing also provides more granular size options than unisex models, which often jump from XS to M with nothing in between.
Ponytail-Friendly Features
One of the most practically impactful women’s-specific helmet features is a modified fit dial or vent at the rear of the helmet to accommodate a ponytail or braided hair. Without this accommodation, a ponytail pushes the helmet forward off the back of the skull, compromising fit and exposing the occipital region. Most major brands—Smith, Giro, Anon—offer at least one model in their women’s line with a ponytail port. If this applies to you, it’s a feature worth specifically seeking out rather than trying to force a standard helmet to accommodate a hairstyle it wasn’t designed for. For more on women’s gear, see our best snowboard socks guide.
XI. Traveling With Your Snowboard Helmet: Protection on the Road
The irony of helmet travel is that the very piece of equipment designed to protect your head from trauma is often the item most carelessly handled during transit. Helmets dropped from overhead bins, squished in car trunks, and used as improvised bowls for loose gear are commonplace scenes in ski resort parking lots. A single significant drop onto a hard surface from even waist height can compress EPS foam enough to reduce its effectiveness in a real impact—and that compression will be invisible to the naked eye.
Best Practices for Helmet Transport
- Always use a dedicated helmet bag: A padded helmet bag with a rigid or semi-rigid shell is the single best investment for travel protection. Several brands include a basic bag with their helmets; upgrading to a hard-case option is worth it for frequent travelers or anyone checking gear in airline luggage.
- Never check a helmet in soft luggage without padding: A helmet packed loosely in a duffel bag with other gear will take impacts from shifting contents throughout the journey. Wrap the helmet in a soft jacket or fleece, ensure nothing can fall on top of it inside the bag, and consider whether the checked baggage journey justifies the risk. For storage solutions, see our best snowboard bags guide.
- Avoid storing in a car in summer: As discussed in the storage section, extreme heat is a silent destroyer of EPS foam. If you leave your helmet in the car after the season ends, the first warm weekend can begin the degradation process. Carry the helmet inside whenever you’re not actively at the mountain.
- Use the helmet hook on your snowboard bag: Many purpose-built snowboard bags include an external helmet attachment—a quick-clip or stretchy net on the outside of the bag. This is fine for mountain transport between the car and the hill, but is not suitable for airline travel where the helmet will be exposed to the baggage handling system without padding.
XII. Our Top Picks: Full Reviews
1. Smith Vantage MIPS
Best Overall Performance & Protection

The Smith Vantage is widely regarded by professional patrollers and backcountry enthusiasts as the pinnacle of helmet engineering. Its Hybrid SL shell construction provides a bombproof ABS top to protect against tree branches or high-speed impacts, while the in-mold lower section sheds unnecessary weight. What truly sets the Vantage apart is the integration of Zonal Koroyd®. This green, honeycomb-like material doesn’t just sit there; it is engineered to crumple on impact, absorbing up to 48% more energy than standard EPS foam alone. For more on why snowboarding is worth the investment, see our why snowboarding is so fun guide.
From a comfort standpoint, the Vantage is unmatched. It features 21 active vents controlled by two separate sliders, allowing you to fine-tune the temperature of the front and back of your head independently. On a cold morning, close the front vents to keep heat in; on a sweaty afternoon hike, open them all to create a wind-tunnel effect. The Boa® 360 fit system ensures the helmet stays centered even during heavy vibration in chattery conditions. If you ride 50+ days a year in varying climates, this is the investment your brain deserves.
- Impact Tech: MIPS® + Zonal Koroyd®
- Aerodynamics: AirEvac™ integration for fog-free goggles
- Fit: Boa® 360 Custom Fit System
- Best For: Professionals, backcountry riders, and those who demand elite thermal regulation.
2. Giro Ledge MIPS
Best Value & Skate-Inspired Style

The Giro Ledge is proof that safety shouldn’t be a luxury. While it looks like a simple skate-style helmet, the “Ledge” is a marvel of Hard-Shell Construction. This helmet is built for the park rider who spends their days hitting rails and occasionally taking “hard slams” on ice. The ABS outer shell is incredibly resistant to the repetitive dings that come from being tossed in a trunk or hitting a metal feature. Inside, you still get a full MIPS liner, ensuring that even at this lower price point, your rotational safety is never compromised. For more on why snowboarding is the best sport, see our why snowboarding is the best winter sport guide.
The Ledge utilizes Stack Ventilation, which aligns the helmet’s front vents with your goggles to suck warm air out before it can condense into fog. While the venting is “passive”—meaning you can’t close the holes—it is tuned specifically for the high-output energy of freestyle riding. The ear pads are fully removable for spring sessions, and the internal Auto Loc 2 fit system provides a secure, self-adjusting fit without the complexity of dials. It’s the ultimate “workhorse” helmet that looks just as good in the streets as it does on the summit.
- Safety: MIPS® technology included at an entry-level price
- Style: Low-profile, brimless skate aesthetic
- Durability: High-impact ABS shell for maximum lifespan
- Best For: Park riders, seasonal workers, and riders on a strict budget who refuse to skip MIPS.
3. Oakley MOD5 MIPS
Best for Goggle Integration

Oakley approached helmet design from an optical perspective, leading to the creation of the MOD5. The standout feature is the Modular Brim System (MBS). Most helmets have a fixed brim that might not play nice with a specific goggle shape, leading to air leaks or pressure on the nose. The MOD5 comes with two interchangeable brims, allowing you to perfectly mate the helmet to any goggle in the world (though it works best with Oakley Prizm optics). This creates a seamless seal that keeps the wind out of your eyes and the fog off your lenses. For goggle recommendations, see our best snowboarding goggles guide.
Underneath its futuristic aesthetic, the MOD5 is a Hybrid Shell powerhouse. It places rugged ABS plastic on the high-wear areas and lightweight in-mold polycarbonate on the sides to reduce neck strain. The adjustable venting system is smooth and easy to operate with gloves, and the inclusion of a Fidlock® magnetic buckle means no more fumbling with chin straps in the cold. It feels premium from the moment you put it on, providing a “wrapped” sensation that feels much more secure than traditional lightweight helmets.
- Innovation: Modular Brim System (MBS) for custom goggle fit
- Buckle: Fidlock® magnetic snap for one-handed use
- Construction: Hybrid Dura-Matter shell for weight/strength balance
- Best For: High-speed groomer carvers and riders who demand a perfect helmet-goggle marriage.
4. Anon Raider 3
Best for Classic Style & Durability

The Anon Raider 3 is the “pickup truck” of the snowboard world: it isn’t flashy, but it will never let you down. Built with Endura-Shell construction, it uses an injection-molded ABS exterior that can handle years of abuse. Whether you’re a beginner taking frequent tumbles or a seasoned rider who treats their gear with “controlled aggression,” the Raider 3 is designed to survive the daily grind. It features a classic multi-sport certification, meaning you can technically swap the liner and use it for skateboarding in the summer. For more on why snowboarding is so fun, see our why snowboarding is so fun guide.
The interior is lined with a high-density fleece that is remarkably soft against the skin, and the auto-adjust fit system uses a stretchy elastic band at the back to pull the helmet snug against your head without needing a dial. While it lacks the active venting of the Smith Vantage, the passive channels are strategically placed to draw heat up and out of the crown. It’s a no-nonsense helmet for the rider who wants a clean look, legendary Burton-backed durability, and a price tag that leaves enough money left over for a lift ticket.
- Durability: Endura-shell ABS construction (extremely rugged)
- Versatility: Multi-season certified for snow and bike/skate
- Comfort: Long-hair fleece liner for extra warmth
- Best For: Traditionalists, seasonal travelers, and riders who prefer a “set it and forget it” fit.
5. OutdoorMaster Kelvin Helmet
Best Budget Pick

The OutdoorMaster Kelvin has disrupted the helmet industry by offering full ASTM F2040 safety certification for a fraction of the cost of big-name brands. We often hear from beginners who wonder if a “cheap” helmet is safe—the answer is a resounding yes. If it carries the ASTM or CE seal, it has passed the same drop-tests and penetration-tests as helmets triple its price. The Kelvin uses a traditional ABS shell and EPS foam combination, providing a rock-solid foundation for anyone starting their snowboarding journey. For first-timer guidance, see our guide to choosing your first snowboard.
What surprised our testers about the Kelvin was the inclusion of 14 vents and a dial-adjustable fit system—features usually reserved for mid-tier helmets. While the padding isn’t as luxurious as the Smith Vantage and it lacks MIPS technology, it is perfectly adequate for weekend warriors and casual riders. The ear pads are surprisingly warm and audio-compatible, and the goggle clip at the back is robust and easy to use. For the price of a dinner at the lodge, the Kelvin provides the essential protection you need to ride with confidence.
- Value: Unbeatable price-to-protection ratio
- Ventilation: 14 strategically placed passive vents
- Fit System: Micro-dial adjustment for custom sizing
- Best For: New snowboarders, casual vacationers, and anyone looking for a safe, secondary helmet.
XIII. Snowboard Helmet Price Tiers: What Do You Actually Get at Each Budget?
The range of snowboard helmet prices—from $35 to $450+—can feel bewildering, especially when the visual differences between an entry-level and a premium helmet are subtle. Here is a transparent breakdown of what changes at each price tier and which riders each tier is actually suited for. For cost comparisons, see our snowboarding vs skiing cost breakdown.
Under $75: Entry-Level (Certified but Basic)
At this tier you will find ABS hard-shell construction with basic EPS foam, passive venting, a simple dial or elastic fit system, and, critically, no MIPS or equivalent rotational protection. The helmet will carry ASTM F2040 or CE EN 1077 certification, which means it has passed the minimum required safety tests. It will protect you from a severe direct linear impact. What it will not do is mitigate rotational forces, provide fine-tuned ventilation control, or give you the comfort and fit quality of higher-tier options. Suitable for: absolute beginners who ride 5 days or fewer per season and need certified head protection while deciding if they want to invest further in the sport.
$75–$150: Mid-Range (MIPS Enters the Picture)
This is where MIPS technology becomes accessible. At this price point, most major brands—Giro, Smith, Anon, K2—offer helmets with full MIPS integration, better-quality padding, more sophisticated passive venting, and in some cases the BOA dial fit system. Shell construction remains primarily hard-shell ABS or basic in-mold polycarbonate. The padding is comfortable enough for a full day of riding without hot spots or pressure. Suitable for: regular resort riders who ride 10–30 days per season and want a meaningful safety upgrade over entry-level without spending premium money.
$150–$280: Premium Performance
Premium helmets combine MIPS with advanced secondary foam technologies (Koroyd, WaveCel, or Smartshock), hybrid shell construction for the optimal weight-durability balance, active vent systems with glove-friendly controls, and significantly better liner quality. Fit systems at this tier are almost universally BOA 360 or equivalent, providing micro-adjustable, tool-free sizing. Audio compatibility and integrated AirEvac goggle ventilation systems also appear here. Suitable for: dedicated resort and backcountry riders who ride 20+ days per season and want the best combination of protection, thermal comfort, and longevity.
$280+: Ultra-Premium and Carbon Fiber
At the highest price tier, you are primarily paying for weight reduction (via carbon fiber shell construction), the most premium liner materials (luxury fleece, removable for machine washing), and leading-edge impact tech combinations. Carbon fiber allows shell thickness to be reduced to 1–2mm while maintaining structural strength, which translates to a helmet that is meaningfully lighter—around 380–420g versus 500–600g for a typical premium helmet. For riders who suffer from neck fatigue on long days or ride in high-speed racing conditions where every gram matters, this weight reduction is a performance advantage. For the average resort rider, the cost-to-benefit ratio narrows considerably at this tier.
XIV. Advanced FAQ: Expert Advice
1. Does a helmet actually expire if I never crash?
Yes. The EPS foam (expanded polystyrene) inside your helmet is a petrochemical product. Over time, exposure to UV rays, extreme temperature cycles (hot cars in summer, frozen resorts in winter), and hair oils/sweat causes the foam to become brittle. Most safety experts recommend a replacement every 5 years even if the helmet looks brand new. Many brands now print an “expiration date” or manufacturing date inside the shell. For more on why the sport requires proper gear, see our why snowboarding is the best winter sport guide.
2. What is the difference between ASTM F2040 and CE EN 1077?
ASTM F2040 is the North American standard, which involves more rigorous drop-tests and cold-weather penetration tests. CE EN 1077 is the European standard, divided into Class A (full ear coverage) and Class B (soft ears). Most premium helmets carry both certifications to ensure global compliance, but the ASTM standard is generally considered slightly more stringent for snowboarders.
3. My helmet has a tiny crack in the plastic. Is it still safe?
No. A helmet is a “one-and-done” safety device. Even a small crack in the outer shell indicates that the structural integrity of the EPS foam underneath may have been compromised. The shell’s job is to spread the force of the impact; if it is cracked, the force will be concentrated in one spot, potentially causing the helmet to split during a real crash.
4. How do I know if my helmet is the right size without a professional?
Put the helmet on and tighten the dial. Shake your head vigorously from side to side and front to back. The helmet should move with your skin, not slide over it. If the helmet tilts forward and covers your eyes, it’s too big. If you feel a “pulsing” or sharp pain in your temples, it is too small or the wrong internal shape (Round Contour vs. Oval). For more on sizing, see our snowboard sizing guide.
5. Can I paint my helmet or put stickers on it?
Stickers are generally fine, but be very careful with paint and solvents. Some spray paints contain chemicals that can actually melt the polycarbonate shell or degrade the EPS foam. If you must customize, use water-based acrylic pens or stickers specifically designed for plastics. Never use permanent markers like Sharpies directly on the foam liner.
6. Should I wear a beanie under my helmet?
Modern helmets are designed to fit directly against your head for maximum safety. Wearing a thick beanie can create a “slip layer” that allows the helmet to rotate during an impact, negating the benefits of MIPS. If you’re cold, look for a thin, helmet-specific liner or balaclava. If you must wear a beanie, remove the helmet’s internal padding first to ensure the shell still sits low enough on your forehead.
7. What is “Multi-Impact” foam?
Standard EPS foam is single-impact; it crushes and stays crushed. EPP (Expanded Polypropylene) is a multi-impact foam found in some freestyle helmets. It can take several small bumps and “bounce back” to its original shape. However, even EPP helmets should be replaced after one major, high-speed collision.
8. Why do my goggles fog up when I put my helmet on?
This is usually caused by poor ventilation alignment. If the helmet sits too low on the goggles, it blocks the goggle’s top vents, trapping moist air inside. Look for helmets with “Stack Vents” (like Giro) or “AirEvac” (like Smith) that act as a chimney to pull moisture out of the goggles and through the helmet. For goggle recommendations, see our best snowboarding goggles guide.
9. Are carbon fiber helmets worth the $400+ price tag?
Carbon fiber is incredibly strong and stiff, which allows manufacturers to make the helmet shell much thinner and lighter. For high-speed racers or those who suffer from neck fatigue, the weight savings are significant. For the average resort rider, a hybrid or polycarbonate shell provides the same level of safety for half the price.
10. Is there a difference between men’s and women’s helmets?
Biologically, there is no difference in skull strength between genders, so the safety tech is identical. The only real differences are sizing (women’s models often come in smaller ranges), colorways, and “ponytail-friendly” fit systems that allow for a low bun or braid at the back of the neck. For more on women’s gear, see our best snowboard socks guide.
11. How do I stop my helmet liner from smelling after a season?
The key is regular airing and periodic washing. After every session, remove the inner pads (if removable) and let them air dry completely before storing the helmet. At the end of the season, wash removable pads in cool water with a gentle technical fabric cleaner. For non-removable liners, a light spray of enzyme-based odor eliminator (diluted Mirazyme works well) applied to the lining and allowed to air dry prevents the bacterial buildup that causes persistent odor. Avoid storing a helmet with damp padding—this is the single fastest way to generate serious mildew inside the shell.
12. Can I use a ski helmet for snowboarding?
Yes, from a safety certification standpoint—both sports require ASTM F2040 or CE EN 1077, so the protective capability is equivalent. Where ski helmets may fall short for snowboarders is in goggle compatibility (some ski helmets are designed for narrower race goggle frames), ear coverage depth, and the presence of wrist leash hooks or goggle clips specific to snowboard use. For casual use, a ski helmet you already own is perfectly acceptable. For regular snowboarding, a snowboard-specific model will serve you better across fit, function, and style. For more on why snowboarding is the better choice, see our snowboarding vs skiing comparison.
13. What is a “gaper gap” and how do I avoid it?
A “gaper gap” is the exposed strip of forehead between the bottom brim of your helmet and the top frame of your goggles. Beyond being a style faux pas in mountain culture, it is genuinely a warmth issue—exposed forehead skin at speed creates rapid heat loss and can lead to painful wind burn in cold conditions. To avoid it, ensure your helmet sits low enough that the brim aligns with or slightly overlaps the top bar of your goggles. If there is still a gap with proper helmet fit, look for helmets with adjustable brims (like Oakley’s MOD5) or goggles with a taller top frame. Alternatively, wearing a balaclava or helmet liner that covers the forehead fills the gap on cold days.
14. Should I buy a helmet with a built-in visor?
Helmets with integrated visors—sometimes called “goggle helmets” or “full-face shields”—are a relatively niche category in snowboarding, more common in ski racing. The primary advantage is a single, unified system with no gap between goggles and helmet and no risk of goggle fog caused by misalignment. The primary disadvantages are lens swap difficulty (changing from a clear to a tinted lens in changing weather is much harder with an integrated system), higher cost, and the fact that if either the lens or the helmet is damaged, the entire unit needs replacement. For most snowboarders, separate goggles and a compatible helmet offer more flexibility and better long-term value.
15. How tight should the chin strap be?
The chin strap is the last line of defense that keeps the helmet on your head if the fit system loosens during a crash. The correct tension allows you to slide two fingers—no more—between the strap and your chin. If you can fit three or four fingers, the strap is too loose and the helmet can be pulled off in a severe impact. If you cannot fit any fingers and the strap is pressing uncomfortably into the underside of your jaw, it is too tight and will be uncomfortable over a long day. Most helmet chin straps are made from webbing that does not stretch significantly—what you set in the morning is approximately what you’ll have all day.
Conclusion: Our Final Verdict
There is no excuse to ride without a helmet. The technology has become so light and comfortable that you will likely forget you’re wearing one—until the moment you need it. For more on why the sport is worth protecting yourself for, see our guide to why snowboarding is so fun.
- If you want the absolute best-in-class protection, ventilation, and comfort, the Smith Vantage MIPS is the ultimate choice for the serious rider.
- If you’re looking for an amazing blend of proven safety, modern style, and affordability, the Giro Ledge MIPS is our top value pick for park and resort use.
- If you’re just starting out or need a reliable helmet on a tight budget, the OutdoorMaster Kelvin provides the certified safety you need to focus on your turns, not your gear.
Your brain is your most important piece of snowboarding equipment—protect it. We’ll see you on the mountain! For tips on getting started, see our why snowboarding is the best winter sport guide.


