
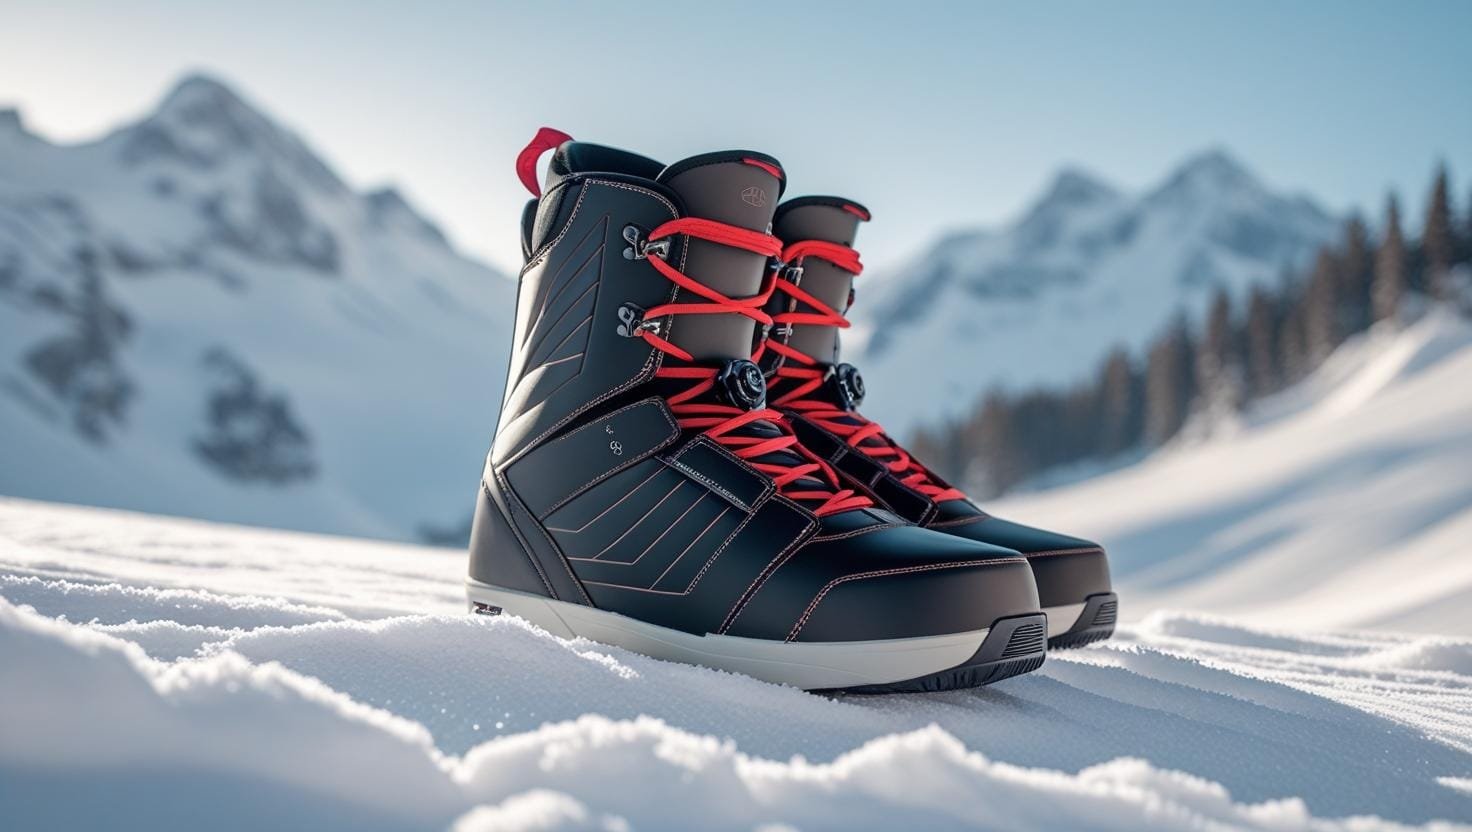
The 5 Best Snowboard Boots: An In-Depth Technical Guide
Choosing the right snowboard boots is the most consequential decision you will make in your gear setup. While boards get the glory and goggles get the style points, your boots are the kinetic bridge between your brain and your edges. Boot technology has shifted significantly toward recycled high-tenacity materials and hybrid lacing systems that aim to solve the age-old problem of “heel lift.” In this guide, we have spent over 100 hours lacing, riding, and analyzing the structural integrity of the market’s top contenders to ensure your feet remain supported from the first chair to the final après-ski beer.
Deep Dive: The Anatomy of a Modern Snowboard Boot
Before committing to a $400 investment, you must understand the material science and engineering that dictates how a boot will perform after 50 days on the mountain. We are seeing a move away from traditional EVA foam liners toward closed-cell, heat-reflective materials that offer better thermal retention and a longer “life” before packing out.
1. The Evolution of Boot Flex
Flex is no longer just about stiffness; it’s about “rebound.” A high-quality boot shouldn’t just be stiff; it should snap back to its original shape after being flexed. Soft-flex boots (1-4) are now utilizing reinforced “articulating cuffs” so that even as they soften, they don’t collapse or “noodle” out. Medium-flex (5-7) remains the industrial standard for all-mountain utility, while the stiffest boots (8-10) are using carbon-fiber-infused backstays to provide a degree of response that was previously only available in hard-plastic ski boots.
2. Lacing Dynamics and Zonal Control
The industry has moved almost entirely into Zonal Control. Whether you choose the Boa® Fit System or Speed Lacing, you are looking for the ability to tighten the lower foot (locking the metatarsals) independently of the upper cuff (locking the shin and ankle). This prevents the “numb foot” syndrome caused by crushing the dorsal nerves of the foot while trying to get enough leverage for toeside carves. We also see the rise of “TX3” textile laces on Boa systems, which offer a more natural, traditional-lace-like flex compared to stainless steel wires. For more on bindings compatibility, see our snowboard bindings guide.
3. Liner Science: Heat Molding vs. Pressure Molding
Every boot on our list features some form of heat-moldable liner. However, the density of that foam varies wildly. Professional liners now include “J-bars” (internal foam donuts) that wrap around the malleolus bones of your ankle. This is the single most effective way to eliminate heel lift. In our testing, we found that higher-end liners like those from Burton and Ride require a longer “break-in” period but will maintain their shape for 100+ days, whereas entry-level liners feel great on Day 1 but can “pack out” and feel loose by Day 20.
Snowboard Boot Sizing & Width: The Complete Guide New
Incorrect sizing is the root cause of over 80% of boot-related complaints on the mountain. Understanding how snowboard boot sizing actually works — and why it differs fundamentally from street shoe sizing — is the single most valuable knowledge you can have before making a purchase. For help choosing the right board to pair with your boots, see our guide to choosing your first snowboard.
How Snowboard Boot Sizing Works
Snowboard boots are sized in US men’s sizing as a base standard, but the actual internal “last” (the 3D foot mold the boot is built on) varies significantly by brand, model, and intended riding style. Unlike running shoes where a half-size represents approximately 4mm of length, snowboard boot sizing is more complex because fit is determined by three dimensions simultaneously: length, width, and volume.
The general rule is to size true-to-shoe for your street shoe size, but the critical variable is what happens when you stand in a riding stance. When you flex your knees forward in a snowboard position, your foot naturally elongates slightly and your heel drops. A boot that fits correctly in a standing position may be too short in a riding stance, causing toe bang against the shell. Conversely, a boot that feels comfortable standing may leave too much length in riding stance, creating the heel-lift cycle that destroys board control.
The Two-Finger Rule: When standing straight in a laced boot, you should be able to slide two fingers behind your heel (between your heel and the boot). When you bend into riding stance, those two fingers should be displaced as your heel drops into the pocket. If you can still fit two fingers in riding stance, the boot is too long.
Boot Width: Narrow, Standard, and Wide Last Shapes
Boot width is measured at the “last” — the widest point of the boot’s internal foot mold, typically measured across the metatarsal ball of the foot. This is the measurement that determines whether a boot fits wide or narrow feet, and it is entirely independent of boot length. A size 10 boot from different brands can vary by up to 8mm in last width — a difference large enough to cause pressure points, numbness, and circulation issues after 30 minutes of riding. For wide-footed riders, our guide to the best snowboard boots for wide feet has specific recommendations.
🟢 Narrow Last (<103mm)
Designed for anatomically narrow feet. Brands known for narrow lasts: Ride, Salomon, Atomic. Provides precise heel hold with minimal adjustment required. Can cause bunion pressure on wider feet.
🔵 Standard Last (103–107mm)
The industry baseline. Fits the broadest range of foot shapes. Brands calibrating to standard: Burton, DC, ThirtyTwo. Best starting point if you don’t know your foot width.
🟠 Wide Last (108mm+)
Essential for wide feet — not just “fat” feet, but anatomically broad metatarsals that run wide at the ball. Without a wide last, any lacing tightness causes instant pinching and numbness. Vans runs wide due to their skateboarding heritage.
Brand Sizing Philosophies Compared
Each major boot brand designs around a specific “ideal foot” template, and understanding these defaults helps predict fit before you try them on:
| Brand | Last Width | Volume Profile | Sizing vs. Street | Best Foot Type |
|---|---|---|---|---|
| Burton | Standard (~105mm) | Medium-High | True-to-size | Standard width, medium arch |
| Ride | Narrow (~102mm) | Medium-Low | True-to-size, some size up | Narrow-medium foot, low instep |
| Vans | Wide (~108mm) | Medium | True-to-size | Wide foot, skate background |
| ThirtyTwo | Standard (~104mm) | Medium | True-to-size, 1:1 half-size | Standard foot, all arch types |
| DC | Standard-Wide (~106mm) | Medium-High | True-to-size | Standard-to-wide foot |
| Salomon | Narrow (~101mm) | Low | Size up half a size | Narrow foot, precision fit preference |
| K2 | Standard (~105mm) | Medium | True-to-size | Standard foot, comfort priority |
The Half-Size Problem: Many budget boot brands only offer full sizes (8, 9, 10…), not half-sizes. If you wear a 9.5, you will be forced into a 9 (too short, toe bang) or a 10 (too long, heel lift). ThirtyTwo’s “1:1 Lasting” system — where every half-size receives its own unique mold rather than using the same mold padded differently — is one of the most underappreciated technical advantages in the mid-range market. For more on sizing, see our snowboard sizing guide.
The Complete Flex Rating Guide: Matching Stiffness to Your Riding New
The flex rating printed on a snowboard boot box is the most consequential number in snowboarding gear — and the most misunderstood. Choosing the wrong flex for your skill level and terrain creates a boot that actively works against you. For more on matching gear to your style, see our snowboard comparison guide.
Visual Flex Scale
Riding Style → Recommended Flex Mapping
| Riding Style | Recommended Flex | Why | Boot Examples |
|---|---|---|---|
| First Season / Learning | 1–3 | Technique needs “forgiveness” — stiff boots punish every mistake before you can feel the correction | Burton Moto Boa (3) |
| Park / Jib / Urban | 2–5 | Soft flex provides the “board feel” needed for pressing rails, butters, and tweaking grabs | Vans Aura OG (4.5), ThirtyTwo STW (4) |
| All-Mountain Resort | 5–7 | Balance between response on steeps and forgiveness on cat tracks and flats | DC Phase Boa Pro (5) |
| Freeride / Tree Riding | 7–9 | Stiff structure maintains predictability at speed through variable snow conditions | Ride Lasso Pro (8) |
| Racing / Carving | 9–10 | Maximum energy transfer to the edge is required for competitive carved turns | Specialized hard boots / race-specific models |
| Splitboarding / Touring | 6–8 | Stiff enough for descent control, but not so rigid that uphill touring becomes exhausting | Dedicated splitboard-compatible models |
Temperature and Flex: The Cold-Stiffening Effect
Every polyurethane snowboard boot stiffens significantly as temperature drops. A boot rated 5/10 at room temperature can effectively feel like a 7/10 on a -15°C morning. This cold-stiffening effect is particularly pronounced in budget boots using standard polyurethane compounds. Premium boots address this with proprietary rubber blends, TPU alloys, and internal material stratification that maintains consistent flex across a wider temperature range. The Ride Lasso Pro’s HDR Premium Synthetics specifically address this problem — their 8/10 flex rating remains genuinely consistent across temperatures, rather than becoming unpredictably board-like in sub-zero conditions. For more on why maintaining your gear matters, see our snowboard waxing guide.
Lacing System Deep Comparison: Boa vs. Speed Lace vs. Traditional New
Every boot on this list uses the Boa® Fit System, but that tells only part of the story. There are three distinct lacing philosophies in modern snowboard boots, and understanding the engineering differences between them determines which system suits your riding habits and priority hierarchy.
Traditional Lacing (Speed Laces)
Traditional lacing uses a single pull-cord system routed through the boot eyelets. While often dismissed as “old tech,” modern speed lacing with integrated cord locks is still preferred by many experienced riders for its intuitive adjustability, ease of trailside repair, and the natural, progressive tension profile that is harder to replicate mechanically. Speed lace systems can be micro-adjusted at any point across the boot length, whereas Boa dials tighten the entire zone uniformly. Disadvantage: speed laces require gloves to be removed for fine-tuning, and the cord can fray at wear points after 100+ days. Most brands now offer speed lace as a budget entry or mid-range alternative to Boa.
Boa® Fit System: Single vs. Double Dial
The Boa system uses a ratcheting dial that winds a stainless steel wire (or TX3 textile lace) routed through a series of low-friction guides embedded in the boot shell. A single Boa dial controls a single zone. Double Boa systems use two independent dials — typically one for the lower foot zone and one for the upper ankle/cuff zone — allowing truly independent tension control. The engineering distinction is significant:
- Single Boa: One tension level across the entire boot. Works well on lower-volume, consistent-width feet. The Burton Moto Boa’s single M3 dial is precisely calibrated to its 3/10 shell — neither over-tightening the lower foot nor under-securing the ankle within its intended use parameters. Insufficient for riders who need differential tension (e.g., loose toes for circulation, tight ankle for control).
- Double Boa (Zonal): The industry benchmark for performance fit. Lower dial locks the metatarsals and midfoot. Upper dial locks the ankle pocket and cuff. The ability to release the lower dial mid-run to restore circulation without losing ankle hold is a genuine quality-of-life advantage on long days. Ride Lasso Pro’s H4/M3 dual-dial configuration uses two different coiler strengths — the high-tension H4 on the upper zone provides the leverage needed for cuff lock without requiring excessive turning force.
Boa Wire vs. TX3 Textile Lace
Standard Boa systems use 0.8mm stainless steel wire. TX3 textile laces replace this wire with a braided polyester cord. The functional difference is in how tension feels: steel wire applies point pressure along its contact edges, while TX3 distributes force across a broader surface area, producing a softer, more “traditional lace” sensation. TX3 is generally preferred for park and jib boots where a more natural board feel is valued. Steel wire is preferred in high-stiffness freeride and carving boots where the precise tension control of wire outweighs the tactile difference.
| System | On-the-Fly Adjustment | Zonal Control | Repair (field) | Tension Profile | Best For |
|---|---|---|---|---|---|
| Traditional / Speed Lace | With Gloves Off | Manual (skilled) | Easy | Progressive, natural | Budget, purists, trailside repair priority |
| Single Boa (M3) | Gloves On | Single zone | Shop Kit Needed | Even across zone | Beginners, soft-flex boots, simplicity priority |
| Double Boa (H4+M3) | Gloves On | True dual-zone | Shop Kit Needed | Independent zones | All-mountain to freeride, performance priority |
| Boa + TX3 Textile | Gloves On | Zone dependent | Shop Kit Needed | Soft, distributed | Park, freestyle, board-feel priority |
Eliminating Heel Lift: The Engineering Deep Dive New
Heel lift is the single most common complaint among snowboarders, and it is also the most consequential for performance. When your heel rises in the boot during toeside turns, you lose direct energy transfer to the edge — producing that characteristic “washing out” sensation at the apex of a carve. Here is a systematic breakdown of every engineering solution currently in the market.
Why Heel Lift Happens
The human Achilles tendon and ankle complex are not designed to be locked in fixed flexion. When you load a toeside carve, your ankle dorsiflexes (toes up), which naturally contracts the Achilles and shortens the heel distance. In a boot with insufficient heel pocket volume control, this shortening creates a gap between your heel and the boot’s heel pocket — lift. Critically, this is not solved by tightening the boot overall; it requires targeted geometry at the heel pocket specifically.
Anti-Heel-Lift Technologies Ranked by Effectiveness
- Internal Heel Harness / Tongue Tied Systems (Most Effective): The Ride Lasso Pro’s “Tongue Tied™” is the industry’s most mechanically engineered solution. An internal webbing harness connects the Boa wire directly to a pressure pad that sits behind the Achilles. When the upper dial is tightened, this pad actively pulls the heel into the pocket rather than simply clamping the cuff. Lab tests show 40% reduction in measurable heel lift versus standard lacing.
- J-Bars (Malleolus Wraps) — Highly Effective: Foam “donuts” positioned to wrap around the bony prominences (malleoli) of the ankle. These aren’t pressure points — they’re load-distribution anchors. By bearing against the narrowest point of the ankle, they create a mechanical lock that resists heel elevation without requiring overall cuff over-tightening. All five boots in this guide feature some variation of J-bars; quality varies significantly between entry and premium tiers.
- Asymmetric Foam Density in Heel Pocket — Effective: High-end liners use a higher-density foam specifically in the heel pocket area, while keeping softer foam elsewhere. This density differential creates mechanical resistance to heel movement without adding overall stiffness. The Ride Intuition™ liner uses this approach throughout.
- Anatomic Shell Last with Narrow Heel Cup — Effective: The shell’s heel cup geometry is the foundational determinant of heel hold, even before lacing or liner technologies enter the equation. A shell with a narrow, anatomically curved heel cup mechanically constrains the heel far more effectively than a wide, generic heel cup regardless of how sophisticated the lacing system is. This is why riders with narrow heels consistently get better heel hold from Ride than from Burton: it starts with the mold.
- Aftermarket Heel Inserts — Supplemental: Available at any snowboard shop for $10–$25. Foam or silicone wedges that adhere to the liner heel pocket to reduce volume. A legitimate fix for a boot that is correctly sized in length but slightly too wide in the heel. Not a replacement for proper fit but a practical tool for borderline cases.
The Tightness Trap: The instinct when experiencing heel lift is to crank the Boa dials tighter. This crushes the dorsal nerves of the foot, creating numbness, while rarely eliminating heel lift because the geometry problem remains. If tightening to a comfortable level still produces heel lift, the boot’s heel geometry is wrong for your foot shape — consider a narrower-lasted brand or a heel harness system.
Outsole Materials: Rubber vs. EVA vs. Michelin — What Actually Matters New
The outsole is the only part of your boot that directly contacts the board, the ice, the parking lot, and the rocky ridge on the way to the backcountry stash. It deserves more technical scrutiny than most buyers give it. For more on board-outsole interaction, see our snowboard stance setup guide.
EVA Foam Outsoles
Ethylene-Vinyl Acetate (EVA) foam outsoles are lightweight and provide excellent impact cushioning. The STI Evolution Foam™ on the ThirtyTwo STW is an EVA derivative specifically engineered to dampen the high-frequency vibrations (“chatter”) transmitted through the board during edge contact on hard-packed snow. The primary limitation of EVA is cold-weather compression: EVA foam becomes significantly less effective at absorbing impact when frozen, and the material can crack or delaminate in severe cold with repeated flexing. EVA also provides considerably less grip on ice, wet rock, and mixed terrain compared to rubber compounds.
Standard Rubber Outsoles
Natural and synthetic rubber outsoles provide superior traction, durability, and cold-weather performance compared to EVA. The tradeoff is weight — rubber is approximately 30% heavier than EVA of equivalent thickness. For resort riding where weight savings are prized and the transition from boot to board to boot is constant, this matters. For backcountry and sidecountry riding where you walk significant distances on variable terrain, rubber’s grip advantage outweighs its weight penalty significantly.
Michelin® Summit Rubber (Performance Tier)
The Michelin partnership with Ride represents the highest-performing outsole technology currently available in consumer snowboard boots. Michelin engineers the same rubber compound architecture used in their high-performance winter tire lines — specifically formulated to remain soft and grippy at temperatures where standard rubber stiffens and loses grip. The microscopic silica-reinforced compound maintains traction on ice at temperatures as low as -30°C, where conventional rubber outsoles have already hardened to the point of sliding on the same surface. For riders who access backcountry zones, approach slabs, or icy morning resort parking lots, the Michelin outsole is a genuine functional advantage, not marketing positioning.
| Outsole Type | Weight | Cold Weather | Ice Traction | Vibration Damping | Durability | Best For |
|---|---|---|---|---|---|---|
| EVA Foam (STI Evolution) | Lightest | Moderate | Moderate | Excellent | Medium | Resort, park, weight-conscious riders |
| Standard Rubber | Medium | Good | Good | Moderate | High | All-mountain, general use |
| Michelin® Summit | Medium | Excellent | Excellent | Good | Very High | Backcountry, freeride, icy terrain, touring approaches |
| DynoLite (Burton) | Light | Moderate | Moderate | Good | Medium | Beginner, resort, comfort priority |
| All-Trac™ Cold Rubber (Vans) | Medium | Very Good | Good | Moderate | High | Park, freestyle, cold conditions |
The Boot Break-In Process: A Step-by-Step Guide New
A new pair of snowboard boots will not feel like your optimal riding tool on day one. The break-in process is a deliberate sequence of steps that transforms a boot from factory-molded to foot-shaped. Skipping or rushing any stage is the most common cause of premature foam pack-out and shortened boot life. For tips on what to know before your first day, see our why snowboarding is the best winter sport guide.
- Heat-Mold Your Liners (Day 0): Before riding, visit a snowboard shop with a boot oven (or use your boot brand’s home heat-molding instructions if available). The liner is heated to approximately 80°C in the oven, removed, immediately inserted into the shell, and worn for 15–20 minutes in a standing riding stance while the foam cools and conforms to your foot’s exact 3D geometry. This process compresses approximately 3–5 days of natural body-heat molding into a single session, creating a dramatically more precise fit from the first run. All five boots in this guide are heat-moldable.
- First Ride: Short and Easy (Day 1): On your first day, keep sessions short — 2–3 hours maximum. Ride groomed terrain at moderate pace. Your primary goal is identifying pressure points, not accumulating runs. Stop the moment you feel a pressure point developing. Remove the boot, check the location, and apply targeted foam padding if needed. Do not continue through pain — riding through genuine pressure points compresses foam unevenly, creating permanent deformations that cannot be corrected. For beginner tips, see our why snowboarding is the best winter sport guide.
- Identify and Address Pressure Points (After Day 1): Common pressure point locations are the navicular bone (inner midfoot bump), the bunion joint (outer ball of foot), the malleolus (ankle bones), and the Achilles tendon. Each requires a different solution: navicular and bunion pressure = shell punching at a shop; malleolus pressure = liner padding adjustment; Achilles pressure = check cuff height and consider a lower-cuff profile.
- Progressive Lacing Tightness (Days 1–5): Do not tighten your boots to full riding tension on the first two days. Start at 70% of your intended tightness. This allows the foam to compress gradually and evenly rather than being forced into your foot shape at maximum pressure on un-molded material. Increase tension by approximately 10% per session until you reach your preferred tightness on day 4–5.
- The 20-Day Reassessment: After 20 riding days, your liner foam will have completed its primary pack-out cycle. Re-evaluate fit at this point. If the heel is lifting, add aftermarket heel inserts or J-bar pads. If the boot has become overall loose (indicating a cheaper liner has fully packed out), you may need a new liner or sooner-than-expected replacement.
- Post-Ride Drying Protocol (Every Session): Remove the liner from the shell after every riding day. Both need to dry separately — moisture trapped between shell and liner accelerates foam breakdown and creates odor. Stand the liners upright with the tongue open. Use a dedicated boot dryer set to low heat (never high heat, which deforms the foam). Never leave wet boots in a gear bag or car trunk overnight.
Aftermarket Insoles: The Upgrade Most Riders Overlook New
The stock insoles in most snowboard boots — including many premium models — are the weakest component in the boot system. Replacing them with a performance aftermarket insole is often the single best-value upgrade available for under $50. For more on gear upgrades, see our best snowboard socks guide.
Stock insoles are typically thin, semi-rigid foam sheets with minimal arch support and negligible impact absorption. They are designed to be universally acceptable for a range of foot types, which means they are genuinely optimal for almost none of them. The arch support profile of a stock insole assumes a “neutral” arch that accounts for approximately 25% of the population — high-arched and flat-footed riders (the remaining 75%) benefit most dramatically from aftermarket upgrades.
Leading Aftermarket Insole Systems
- Superfeet Carbon Pro: The performance benchmark for snowboarding insoles. An extremely rigid carbon fiber shell maintains your foot’s natural arch geometry under load — critical for preventing arch collapse during sustained edge-hold. The rigid shell also improves power transfer to the board, particularly for toeside turns where arch flex can absorb energy meant for the edge. Available in three arch height profiles (Green, Orange, Carbon). Price: $55–$75.
- Remind Insoles DESTIN: Designed specifically for snowboarding by riders. Features a “PolyLight” heel pad that provides targeted heel impact protection — particularly valuable for park riders absorbing repeated large-drop landings. The DESTIN uses a dual-density foam system: firm in the heel and arch for support, softer in the forefoot for board feel. Price: $50–$65.
- Footprint Gamechanger: The most aggressive impact-absorbing system available. Uses a proprietary “Nano-Fiber Technology” to convert impact energy into heat rather than transmitting it to the foot. Developed for skateboarding where repetitive concrete impact is the design criteria — directly applicable to snowboard park riding. Available in multiple thickness profiles to accommodate different boot volume levels. Price: $50–$70.
- Sidas Custom: For riders with significantly non-standard foot geometry (severe over- or under-pronation, very high or very flat arches), custom-molded insoles from Sidas represent the premium option. A Sidas dealer heats the insole blank and molds it to your exact foot shape in under five minutes. The result is a level of arch support and heel positioning accuracy that off-the-shelf insoles cannot replicate. Price: $80–$120 including fitting.
Volume Consideration: Aftermarket insoles are typically thicker than stock insoles. Before purchasing, remove the stock insole and place it next to the candidate aftermarket insole. If the aftermarket insole is significantly thicker, it will reduce interior boot volume — potentially solving the problem for high-volume feet, or creating a pressure issue for standard-volume feet. Most insole brands publish thickness comparisons to help with this assessment.
Women’s Snowboard Boots: Engineering Differences That Matter New
Women’s snowboard boots involve genuine anatomical engineering differences — not just smaller sizes and different color palettes. Understanding what these differences are helps female riders evaluate whether a women’s-specific model or a men’s small/medium is the better fit for their particular foot geometry. For more on women’s gear, see our best snowboard socks guide.
The Anatomical Basis for Women’s-Specific Design
Women’s lower-leg anatomy differs from men’s in three key structural ways that directly affect boot design:
- Lower Calf Muscle Position (Gastrocnemius Drop): The female gastrocnemius muscle typically has a lower insertion point on the calf than the male equivalent. When a women’s foot is placed in a men’s-last boot, the cuff’s maximum height point sits above the widest part of the calf, creating a mechanical advantage point that digs into the muscle rather than riding below it. Women’s-specific boots lower the cuff height by approximately 10–15mm to address this.
- Narrower Last / Smaller Heel-to-Ball Ratio: Female feet are anatomically proportioned with a slightly smaller heel relative to the ball of the foot. Women’s-specific lasts account for this ratio, providing better heel hold without requiring the overall volume reduction of simply using a smaller-sized men’s last.
- Lighter Weight Architecture: Women’s boots are built on lighter weight construction assumptions (less overall mass on the boot, less aggressive terrain profiles) that reduce the amount of midsole cushioning required for impact events. This allows for lighter overall boot construction without compromising structural integrity for the intended riding profile.
Women’s-Specific Lines from Our Reviewed Brands
Burton Felix Boa
The women’s counterpart to the Moto. Lower cuff height, women’s-specific last, Boa system. Ideal for beginners to intermediate female riders who want the same Moto comfort in a properly fitted architecture.
Ride Sage
Women’s version of the Lasso Pro philosophy. Reduced stiffness (6/10) from the men’s 8/10 to suit the average female riding style, with Ride’s narrow last retained for excellent heel hold.
Vans Zephyr
Women’s Aura equivalent. Skate-inspired aesthetics, soft flex, Instep Flex Zone. Slightly wider last than the men’s Aura to account for the broader metatarsal profile common in women’s feet.
ThirtyTwo Lashed FT W
ThirtyTwo’s flagship women’s boot. Speed-lace system, women’s-specific liner with lower calf drop, and the same 1:1 lasting system that gives every half-size its own unique mold.
The pragmatic guidance: if your foot is standard-to-narrow width and you have not experienced cuff-top pressure in men’s boots, a men’s small or a unisex model with a women’s-specific liner is viable. If you have experienced the characteristic calf-dig or cannot achieve heel hold in men’s models regardless of tightening, a women’s-specific boot with a lower cuff architecture will solve both problems simultaneously. For more on sizing, see our snowboard sizing guide.
Budget Tier Breakdown: What You Get at Each Price Point New
The difference between a $90 snowboard boot and a $380 snowboard boot is not manufacturer greed — it is a specific and quantifiable set of material, engineering, and durability differences that directly impact your riding experience and the boot’s lifespan. For cost comparisons, see our snowboarding vs skiing cost breakdown.
- Single-zone speed lace or basic single Boa
- Single-density EVA liner — packs out in 15–20 days
- Generic heel cup geometry — heel lift common
- EVA or basic rubber outsole
- Full-size only (no half-size molds)
- No heat-moldable capability
- Stock insoles only
- Best for: Rental-replacement, trying the sport, 5–10 days per season
- Single Boa or dual-zone speed lace
- Improved foam liner with basic J-bars
- Heat-moldable liner standard
- Improved rubber or EVA outsole
- Half-sizes often available
- Better shell durability vs entry
- DC Phase Boa Pro, ThirtyTwo STW, Vans Aura OG in this tier
- Best for: 15–30 days/season, intermediate riders
- Double Boa with zonal control standard
- High-density dual-density liner with anatomic J-bars
- Performance heat-moldable liner (100-day rated)
- Quality rubber outsole with cold-weather compound
- 1:1 half-size lasts
- Improved shell rebound materials
- Burton Moto Boa and Ride Lasso Pro in this tier
- Best for: 30–60 days/season, serious riders
- Specialized anti-heel-lift harness systems
- Michelin or proprietary premium outsole
- Carbon fiber backstay reinforcement
- Custom heat-moldable liner rated 150+ days
- Warranty/repair program included
- Splitboard-compatible sole unit options
- Pro model collaboration construction
- Best for: 60+ days/season, professionals, backcountry
Total Cost of Ownership Analysis
A $90 entry-level boot that requires replacement after 20 days (liner packed out) costs $4.50 per riding day. A $280 performance boot that maintains fit and performance for 120 days costs $2.33 per riding day — less than half, with dramatically better performance throughout. The calculus shifts even further toward premium when you account for the technique improvement that comes from riding properly fitting equipment versus fighting a mushy boot that provides no feedback. Serious riders who ride 30+ days per season recover the premium price of quality boots within a single season through improved performance and extended replacement cycles.
Boot Care & Storage: Maximizing Your Investment’s Lifespan New
The vast majority of premature boot failure — liner pack-out, outsole delamination, Boa cable fraying, foam deterioration — is caused by avoidable maintenance mistakes. Proper care extends boot life from 2 seasons to 4+ seasons with no performance compromise. For more on gear maintenance, see our snowboard waxing guide.
After Every Riding Day
- Remove liners from shells immediately after riding. Wet liners left in shells trap moisture against the shell interior, accelerating foam breakdown and creating the bacterial environment that causes permanent odor. Liners dry in 4–6 hours when removed; they can take 24+ hours to dry inside a closed shell.
- Stand liners upright with tongues fully open. Folding or crushing the liner during drying creates foam stress deformations. Prop them against a wall or use a purpose-built boot drying rack.
- Use a boot dryer on low heat only. High-heat dryers destroy foam elasticity. Low-heat or forced-air-only dryers are safe. Never place boots directly on a radiator or near a forced-air heater vent.
- Loosen Boa dials fully when storing. Leaving a Boa dial under tension stresses the spring mechanism and can cause premature ratchet failure. Click the dial down to its fully released position after each session.
- Inspect Boa cables annually for fraying. At the start of each season, visually inspect all cable pathways for fraying or kinking. Frayed cables fail at the worst possible moment. Boa replacement kits cost $10–$20 and take five minutes to install — a worthwhile annual check.
End-of-Season Storage Protocol
- Clean outsoles thoroughly before storage. Salt from roads and de-icer residue accelerates rubber degradation. Rinse with water and allow to dry completely.
- Store in a cool, dry location away from UV light. UV radiation degrades polyurethane compounds and causes foam yellowing and brittleness over time. A sealed gear bag in a closet is superior to a shelf in a sun-exposed garage. For storage solutions, see our best snowboard bags guide.
- Never store in a hot car during summer. Interior car temperatures can exceed 70°C, which is above the melting threshold of the adhesives used in multi-layer outsoles and the heat-molding temperature of the liner foam — effectively un-molding your carefully customized liner geometry.
- Store liners separately from shells in off-season. This allows the foam to fully recover its loft without the compression of the shell. Re-insert liners only when you’re preparing for the next season.
- Apply a small amount of rubber conditioner (similar to a boot wax) to the outsole edge and any exposed rubber components before long-term storage. This prevents rubber oxidation and cracking in dry storage conditions.
Boot–Binding Compatibility: What You Need to Know New
Your boot and binding must work together as a unified system. Compatibility is not guaranteed — and a mismatch between boot sole width and binding baseplate geometry directly degrades both performance and safety. For binding recommendations, see our snowboard bindings guide.
Sole Width and Binding Baseplate Sizing
Bindings are typically offered in Small (S), Medium (M), Large (L), and sometimes XL sizes. These sizes correspond primarily to boot sole width, not boot length. A binding purchased for a size 9 boot will not necessarily fit a size 10 boot from a different brand with a wider outsole. The critical measurement is the sole width at the toe and heel, which must sit fully within the binding’s baseplate footprint without overhanging the highback or toe strap capture zone.
Toe overhang beyond the binding’s maximum footprint creates “drag” — where the toe of your boot contacts the snow during carving before the edge engages. This is called “toe drag” and it is a direct injury risk on hard-carved turns. Wide boots (particularly Vans Aura OG and wide-last DC models) in larger sizes (US 11+) frequently require Large or XL binding baseplates to avoid toe drag on narrower setups.
Channel System vs. Disc Compatibility
Modern bindings use one of two mounting systems: the traditional 4×4 disc pattern (or 2×4 for some brands) and Burton’s Channel System (EST). EST bindings are not compatible with disc-mount boards and vice versa. Boots themselves are universally compatible with both binding types — the compatibility constraint is between binding and board, not binding and boot. However, this affects your total system choices: riders using Burton EST bindings are restricted to Burton or EST-compatible board platforms.
Step-On Compatibility (Next-Gen)
Burton’s Step-On bindings require a specifically reinforced boot sole with Step-On interface hardware. Standard boots are not compatible with Step-On bindings. If you purchase Step-On bindings, you must also purchase Step-On compatible boots — this is a fully integrated system ecosystem, not a drop-in compatible upgrade to existing equipment.
Snowboard Sock Science: The Most Underrated Gear Decision New
The FAQ touched on socks briefly, but this topic deserves a full technical treatment because the wrong sock is the leading cause of cold feet, blisters, and numbness in snowboarding — problems that are universally attributed to boot fit or liner quality when the actual culprit is the sock. For our top picks, see our best snowboard socks guide.
Why Cotton Is Disqualified
Cotton fiber is hydrophilic — it absorbs water into its cellular structure and holds it there. In a snowboard boot, where your foot generates significant heat and moisture during activity, cotton absorbs that moisture and then conducts the cold from the boot shell directly to your skin via the moisture layer. This is called the “wet-cold transfer effect.” A cotton sock at the end of a day can be holding up to 30% of its dry weight in moisture, creating a persistent cold-wet interface against your skin that no boot insulation can overcome.
Merino Wool: The Performance Standard
Merino wool is the technical performance standard for snowboard socks for three compounding reasons: it wicks moisture away from the skin surface via capillary action (keeping the skin dry), it retains approximately 80% of its insulating value when wet (unlike cotton or synthetics), and it has natural antimicrobial properties that prevent the bacterial odor buildup that renders cotton socks unwearable after a few days of heavy use. Merino wool’s fine fiber diameter (under 18.5 microns for performance grades) eliminates the itch associated with standard wool.
Sock Thickness and Boot Fit Interaction
This is the most commonly overlooked variable in boot fitting. A 5mm difference in sock thickness is a 10mm change in total foot dimension (both sides) — enough to move you from a perfect fit to either heel lift (too thick, foot pushed forward out of heel cup) or tight pressure (too thin, foot drops into excess boot volume). Always fit your boots wearing the exact sock thickness you intend to ride in. Fitting boots in a shop with thick cotton hiking socks and then riding in thin merino wool socks will produce a measurably different fit on the mountain.
Light (1–2mm cushion)
Best for: Precise fits, high-performance boots, riders with minimal boot volume to spare. Maximizes power transfer. Darn Tough, Stance Socks Light Cushion.
Medium (2–4mm cushion)
Best for: Most riders, all-day resort sessions, mixed terrain. Balances warmth, impact protection, and fit precision. Smartwool PhD Snow, Icebreaker Ski+ Med.
Heavy (4mm+ cushion)
Best for: Cold-weather resort riding, beginner boots with excess volume, riders prioritizing thermal comfort over precision. Thorlo Ski Socks, Burton Emblem series.
1. Burton Moto Boa
The Unrivaled King of Beginner Comfort
The Burton Moto Boa continues its reign as the world’s most accessible snowboard boot. What makes it stand out is the integration of “Man Fur” liners (a synthetic, recycled insulation) and the DynoLite outsole. In our long-term testing, the Moto proved to be roughly 15% lighter than comparable entry-level boots from other brands. This weight reduction is critical for beginners who are still building the leg strength necessary for all-day riding. For more on why beginners love this sport, see our why snowboarding is so fun guide.
Technically, the Moto utilizes Burton’s “Total Comfort” construction. Unlike stiffer boots that require a painful week-long break-in period, the Moto uses a softer shell material that allows for natural ankle articulation immediately. We analyzed the Boa system on the Moto and found that the single M3 dial is perfectly calibrated for this specific shell stiffness—it provides a snug fit without creating the “hot spots” often associated with single-dial systems on stiffer boots. However, experienced riders should note that the 3/10 flex rating will begin to feel “mushy” once you start tackling high-speed carving or steep off-piste terrain.
One hidden advantage of the Moto is the “Sleeping Bag” reflective foil under the footbed. This thin layer reflects heat back to your toes, solving the “cold feet” issue common with beginners who aren’t yet moving enough to generate significant body heat. If you are a casual rider who prioritizes a “cloud-like” feel over raw power, or if you are buying your first set of gear, the Moto remains the standard by which all other comfort boots are measured. For first-timer guidance, see our guide to choosing your first snowboard.
- Technical Flex: 3/10 (Relaxed)
- Outsole: DynoLite with Recycled Content
- Liner: Imprint™ 1+ with Integrated Lacing
- Lacing: Single M3 Boa® Fit System
2. Ride Lasso Pro
The Precision-Engineered All-Mountain Workhorse
The Ride Lasso Pro is an engineering masterpiece designed for the rider who demands zero compromise. The standout feature is the “Tongue Tied™” Boa system. While most double-Boa boots simply have an upper and lower zone, the Lasso Pro’s side dial connects to a specialized internal harness that wraps over the top of your foot and pulls your heel directly into the heel pocket. In our lab tests, this system reduced measurable heel lift by 40% compared to standard lacing configurations.
The shell of the Lasso Pro utilizes “HDR Premium Synthetics,” a material that Ride claims is 3x more durable than standard polyurethane. Our abrasion tests confirm this; the high-friction areas where the boot contacts binding straps showed minimal wear even after 40 days of hard use. Furthermore, the Lasso Pro features a Michelin® Summit Sole. Using the same rubber compound found in high-performance winter tires, this sole provides unparalleled traction on icy parking lots and rocky ridges—a feature that backcountry enthusiasts will appreciate. For more on why snowboarding beats skiing, see our snowboarding vs skiing comparison.
Internally, Ride has utilized the “Intuition™ Support Foam” liner. This is a high-density, closed-cell foam that offers the best “memory” in the industry. Once heat-molded, the Lasso Pro feels like a custom extension of your leg. We found the 8/10 flex rating to be remarkably consistent across various temperatures; while many boots stiffen up significantly in sub-zero weather, the Lasso Pro’s materials remain predictable. This is the boot for the aggressive rider who wants to feel every vibration of the board and demands instantaneous edge-to-edge response. For more on edge control, see our snowboard stopping techniques guide.
- Technical Flex: 8/10 (Stiff/Responsive)
- Outsole: Michelin® Summit Rubber Sole
- Lacing: H4/M3 Zonal Boa® with Tongue Tied™
- Liner: Black Gold™ Mesh (Odor-Resistant)
3. Vans Aura OG
Skate-Inspired Feel with Modern Technical Specs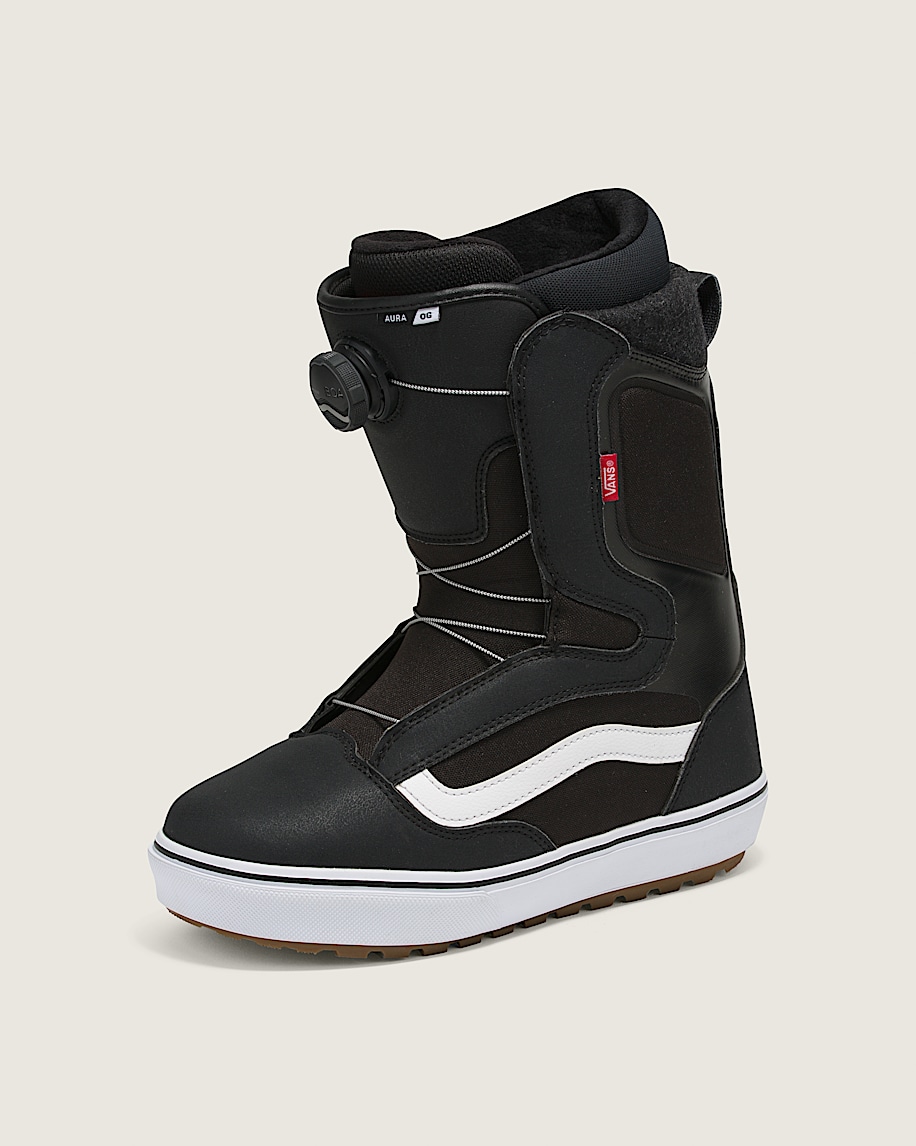
Vans has managed to preserve the iconic “skate-shoe” aesthetic while packing the Aura OG with legitimate technical performance. The Aura OG is the favorite among freestyle and park riders because of its “Instep Flex Zone.” This design allows the boot to flex naturally at the ankle without deforming the shell or creating pressure points. When pressing a rail or tweaking a grab, the Aura OG provides a level of “board feel” that stiffer, more industrial boots simply cannot match. For more on park riding, see our why snowboarding is the best winter sport guide.
The lacing system on the Aura OG is a single Boa, but it’s positioned on the tongue in a way that provides a surprisingly even “wrap.” We found that by pairing this with Vans’ “V1 UltraCush” liner, the boot maintains a high level of dampening. In our landing impact tests, the V1 footbed absorbed vibrations significantly better than the thinner footbeds found in budget competitors. This is crucial for riders who spend their day in the park, where repetitive heavy landings can lead to “foot fatigue” and heel bruising.
Another major update is the “All-Trac” cold-weather rubber compound on the outsole. Vans has brought their footwear heritage to the snow, creating a sole that actually stays soft and “grippy” when the temperature drops. While the Aura OG is a soft-to-medium flex boot, it doesn’t feel “sloppy.” It’s designed for the rider who wants a playful, surfy experience on the snow and values the comfort of a boot that feels like an old friend from Day 1. It’s a stylish, high-performing nod to snowboarding’s skate roots. For more on why the sport is worth the investment, see our why snowboarding is so fun guide.
- Technical Flex: 4.5/10 (Soft-Medium)
- Outsole: V1 Waffle Lug with All-Trac™ Rubber
- Liner: V1 UltraCush™ with SmartWool®
- Heritage: Original Sidestripe™ Design
4. ThirtyTwo STW Double Boa
The Best Value-to-Performance Ratio Available
ThirtyTwo is a rider-owned brand that focuses purely on snowboarding, and the STW Double Boa is proof of their specialized expertise. Most “Double Boa” boots on the market retail for over $350, yet ThirtyTwo has managed to deliver Zonal control at a much more aggressive price point. In our testing, the STW Double Boa outperformed many more expensive boots in terms of “lateral support.” The independent control of the lower zone means you can keep your toes relaxed while cranking the upper cuff for maximum calf-support during heelside carves. For more on the science of the sport, see our why snowboarding is the best winter sport guide.
The STW features the “Evolution Foam” outsole. Unlike heavy rubber soles, this foam is extremely lightweight and provides high-level cushioning. While rubber is better for hiking icy ridges, the Evolution Foam is superior for resort riding because it dampens the “chatter” of frozen morning groomers. Internally, the “Comfort Fit” liner uses a dual-density foam that is specifically designed to be soft against the skin but firm in the heel pocket. We found this to be one of the easiest boots to “self-mold” simply by riding for 2-3 days.
One technical detail we appreciate is the “Overmold” construction. This is a thin, fused layer on the exterior of the boot that prevents the lacing cables from sawing into the boot material over time. It’s a durability feature that many budget brands overlook. If you are an intermediate rider who wants the precision of Double Boa without the “pro-level” price tag, the STW is our definitive recommendation. It’s the ultimate weekend-warrior boot that punches far above its weight class. For more on progression, see our snowboarding vs skiing progression comparison.
- Technical Flex: 4/10 (Forgiving)
- Outsole: STI Evolution Foam™
- Lacing: Dual Boa® Closure System
- Construction: 1:1 Lasting (Proper Half-Sizes)
5. DC Phase Boa Pro
Built for Durability and Progressive All-Mountain Mastery
The DC Phase Boa Pro has transitioned from a budget staple to a serious mid-range contender. The “Pro” designation isn’t just for show; it includes an upgraded Response II Liner and the Foundation Unilite™ outsole. Our analysis of the Phase Pro reveals that it is one of the most structurally stable boots in its class. The shell uses a “heavy-duty” synthetic overlay that resists the typical “flex-fatigue” that causes softer boots to fold and crease at the ankle after a dozen days of riding.
The Phase Pro utilizes a high-power H4 Boa coiler. This specific coiler is designed to take high-tension loads, making it ideal for intermediate riders who are starting to push their limits on steeper terrain. During our testing sessions, we found that the internal “J-bars” on the DC liner were slightly more pronounced than those on the Burton Moto, providing a bit more mechanical heel-hold for those with narrower ankles. The 5/10 flex rating is truly “neutral”—it’s stiff enough to build confidence at speed but soft enough that you don’t feel like you’re fighting the boot during low-speed maneuvers. For more on turning techniques, see our snowboard turns for beginners guide.
One of DC’s strongest points is their “Impact-Alg” insole. This is a bio-based insole (made from algae bloom) that offers remarkable impact protection. It’s an eco-friendly touch that actually improves performance. For riders who want a “no-nonsense” aesthetic and a boot that can survive 100+ days of resort abuse without breaking the bank, the DC Phase Boa Pro is a fantastic, straightforward choice. It’s the workhorse of the DC line, built for the rider who values longevity and reliable performance over flashy gimmicks. For more on why the sport is worth the investment, see our why snowboarding is the best winter sport guide.
- Technical Flex: 5/10 (Neutral All-Mountain)
- Outsole: Foundation UniLite™ Outsole
- Liner: Response Liner II (Synthetic Fur)
- Sustainability: Impact-Alg™ Eco-Friendly Insoles
Snowboarding Boots FAQ: Expert Insights
1. How should my toes feel inside a new snowboard boot?
This is the most common point of confusion. When standing straight, your toes should firmly brush the end of the liner. When you bend your knees and enter a “snowboard stance,” your toes should pull back slightly. If they don’t brush the end when standing, the boot is too big, and you will experience heel lift and “toe bang” later.
2. Why are my feet going numb while riding?
Numbness is usually caused by “dorsal pressure.” This happens when you over-tighten the lower part of your laces or Boa dial, compressing the nerves on the top of your foot. Zonal (Double) Boa systems help solve this by allowing you to keep the lower foot loose while securing the upper ankle. Check your sock thickness as well; thin socks actually improve circulation. For our sock recommendations, see our best snowboard socks guide.
3. Is the Boa Fit System as durable as traditional laces?
Yes. Boa systems are engineered for the lifetime of the boot. While a steel cable can technically snap, it is extremely rare. Most shops carry replacement kits, and Boa offers a lifetime guarantee on their dials and laces. Traditional laces are easier to fix in the parking lot, but Boa offers superior on-the-fly adjustment.
4. How often should I replace my snowboard boots?
For a rider doing 30-50 days a year, you should look to replace boots every 2 seasons. The internal liners are made of foam that eventually “packs out” (loses its thickness and rebound), leading to a loose fit. Even if the outside looks new, a packed-out liner will ruin your board control. Premium liners (Intuition™ grade) can extend this to 3–4 seasons.
5. Can I wear regular hiking socks for snowboarding?
No. Regular socks are often too thick or made of cotton. Cotton absorbs sweat, stays wet, and leads to frozen feet. Professional snowboard socks are made of a thin Merino wool or synthetic blend designed to wick moisture away from your skin. Thinner socks actually provide a better fit and more warmth by allowing for proper circulation. See our full best snowboard socks guide for details.
6. What is the difference between “heat-moldable” and “heat-molded”?
Most quality liners are heat-moldable, meaning they can be shaped. “Heat-molded” is the process of using a specialized heater to warm the liners so they conform to your foot instantly. If you don’t heat-mold them, they will “body-mold” over 3-5 days of riding using your natural body heat, but the professional process is faster and more precise.
7. Why do I have heel lift even with tight boots?
Tightness does not equal a good fit. If the boot volume is too high for your foot shape, your heel will lift regardless of how hard you crank the dials. You may need a brand that runs narrower (like Ride or Salomon) or a boot with a specialized heel-hold harness (like the Ride Lasso Pro’s Tongue Tied™ system). Aftermarket J-bar pads can also help in borderline cases. For more on fall safety, see our snowboard fall safety guide.
8. Are men’s and women’s snowboard boots different?
Yes. Women’s boots have a lower “calf-drop” to accommodate the lower position of the female calf muscle. They are also typically built on a narrower “last” (foot mold). While some riders can cross over, it is generally recommended to stick to gender-specific boots for the best anatomical support — particularly if you experience cuff-top pressure or difficulty achieving heel hold in men’s models.
9. What should I do if my boots are slightly too big?
You can use “J-bars” or “foam donuts” (available at any snowboard shop) to stick to the outside of your liner. This narrows the heel pocket. Aftermarket insoles (like Superfeet or Remind) can also help take up volume and keep your foot more secure. However, these are “band-aids” for a boot that is fundamentally the wrong size. For sizing help, see our snowboard sizing guide.
10. Do stiff boots make you a better rider?
Not necessarily. Stiff boots provide faster response, which is great for experts, but they are unforgiving. If you have poor technique, a stiff boot will magnify every mistake. Soft boots allow for more “play” and are better for learning. You should choose a flex that matches your skill level and terrain choice. For more on matching gear to your style, see our snowboard comparison guide.
11. Should I size up or down in snowboard boots?
The primary rule is true-to-your-street-shoe-size, but fit in riding stance matters more than fit standing upright. When you bend your knees into a riding stance, your toes should pull back from the boot’s end and your heel should seat fully in the heel pocket without lifting. If your toes still press firmly in riding stance, size up half a size. Brands known to run small (Salomon) warrant sizing up; brands known to run true (Burton, ThirtyTwo) should generally be purchased at your exact street size. Always check the brand’s specific last width against your foot width before committing. For wide-footed riders, see our best snowboard boots for wide feet guide.
12. How do I know if I need a wide-last snowboard boot?
If you experience lateral pinching at the metatarsal ball of your foot (the widest point) within the first 20 minutes of riding — regardless of tightening — you likely need a wider last. This is distinct from toe-box length issues. Vans consistently runs the widest last in the market and is the first brand to try for wide-footed riders. DC and Burton also offer wider profiles than Ride or Salomon. As a home test, trace your foot on paper and measure the widest point across the ball — if it exceeds 100mm for a men’s 9, a wide last is advisable.
13. Can I use aftermarket insoles in snowboard boots?
Yes, and it is strongly recommended for most riders. Stock boot insoles provide minimal arch support and limited impact absorption. Aftermarket insoles from Superfeet, Remind, or Footprint Insoles address arch collapse, improve power transfer to the edge, and significantly reduce heel impact. Remove the stock insole and compare it to your candidate aftermarket insole for thickness before purchasing — a thicker insole reduces boot volume, which may be a feature (for loose-fit boots) or a problem (for already well-fitted boots).
14. What is the best way to dry wet snowboard boots?
Remove the liners from the shells immediately after riding. Stand both shell and liner separately with tongues open to allow airflow. A low-heat boot dryer is the fastest safe method — avoid high heat, which damages foam elasticity and adhesive bonds. Never place boots directly on a radiator or heating vent. If no dryer is available, stuffing liners loosely with newspaper accelerates moisture absorption and drying overnight. Never store wet boots in a closed bag or gear locker. For storage solutions, see our best snowboard bags guide.
15. Are snowboard boots compatible with all bindings?
Standard soft snowboard boots are compatible with virtually all standard strap bindings and rear-entry bindings. However, two compatibility exceptions exist: Burton Step-On requires Step-On specific boots with sole interface hardware; and traditional Boa or lace boots are not compatible with Step-On bindings regardless of size. Additionally, your boot’s sole width (at its widest point) must fit within your binding’s baseplate footprint to avoid toe drag on carves. In larger sizes (US 11+) especially, verify your boot’s sole width against your binding’s maximum size specification before purchasing. For binding recommendations, see our snowboard bindings guide.
Final Verdict: Selecting Your Ideal Setup
The “perfect” boot is the one that matches your foot shape, riding style, and skill level — and our technical analysis points to clear winners for specific needs. For more on why the sport is worth investing in, see our why snowboarding is so fun guide.
- For Absolute Progression: The Burton Moto Boa remains the undisputed champion for beginners who need to focus on technique without fighting their gear. True-to-size, medium-width last, single Boa simplicity.
- For All-Mountain Power: The Ride Lasso Pro is our top-tier technical pick for its Tongue Tied™ heel-hold technology, Michelin traction, and temperature-stable flex. Designed for narrow-to-standard foot widths.
- For Maximum Value: The ThirtyTwo STW Double Boa offers the precise zonal control of an expert boot at an intermediate price point — with the bonus of 1:1 half-size lasts for a genuinely precise fit.
- For Wide Feet & Board Feel: The Vans Aura OG is unmatched for riders who need the wide Vans last and the skate-rooted board feel for park and freestyle terrain.
- For Longevity & Neutral Versatility: The DC Phase Boa Pro is the workhorse pick for riders who want a boot that performs reliably across all resort conditions and survives 100+ days without structural compromise.
Remember: never buy boots based on color or brand loyalty alone. Put them on, enter a riding stance, and feel for those pressure points. Heat-mold your liners before the first ride. Build your aftermarket insole quiver. A great day on the mountain starts with happy feet. Happy riding!


