
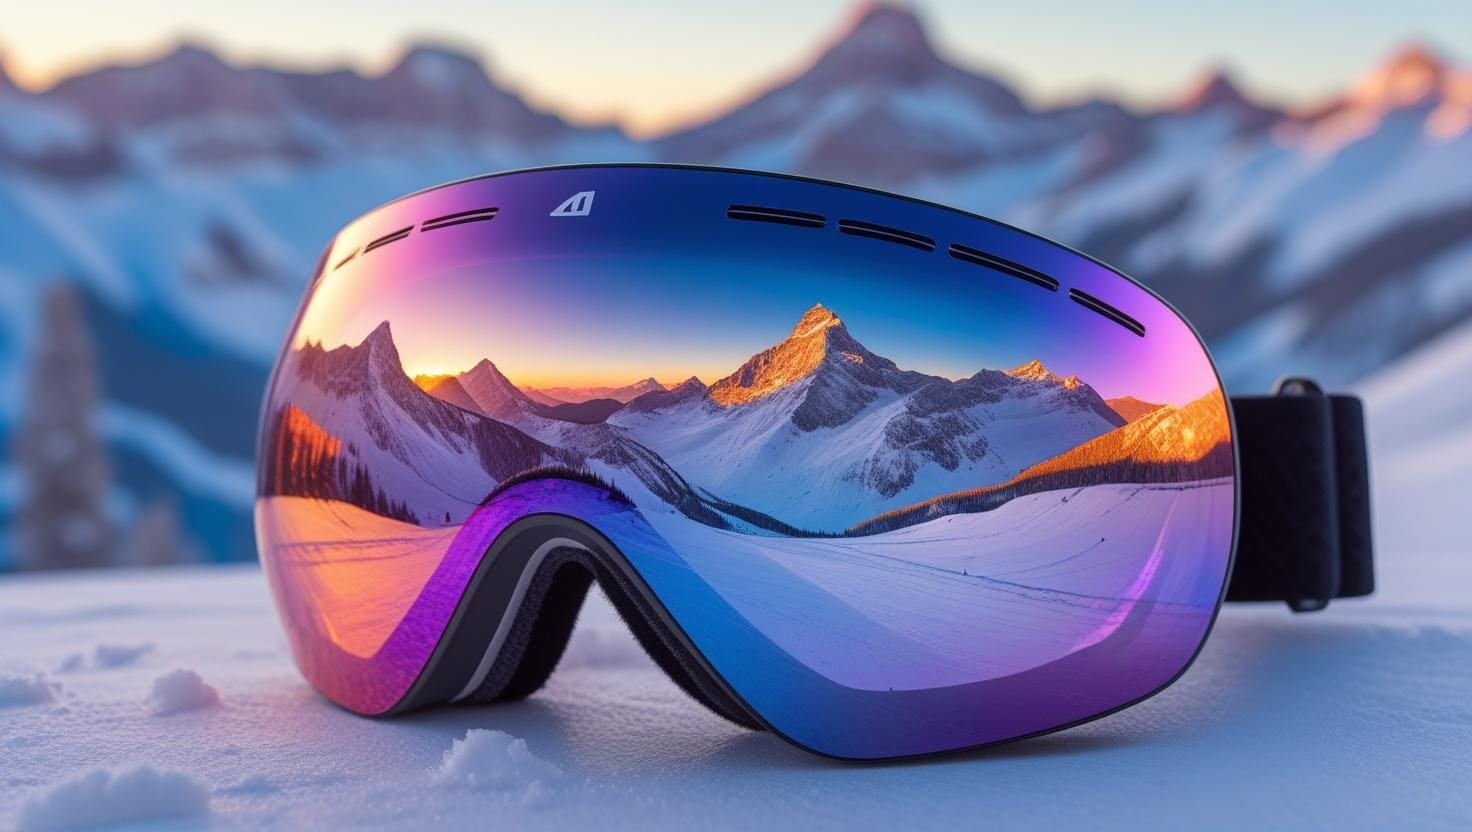
The Ultimate Snowboard Goggle Guide
In the high-velocity world of snowboarding, your vision is your most valuable asset. As you navigate technical tree runs, navigate the chaotic shadows of a sunset session, or drop into a white-out bowl, your ability to read the terrain defines both your safety and your performance. Goggle technology has moved far beyond simple plastic shields; we are now in the era of high-definition optics, proprietary contrast-enhancing dyes, and thermal-regulation systems that mimic military-grade aerospace tech. This comprehensive guide breaks down the science of vision on snow, ensuring you see every bump, dip, and ice patch before it sees you. For more on why the sport is worth the investment, see our guide to why snowboarding is so fun.
Goggle Buyer’s Guide: Deep Dive Into Optical Science
Choosing the right goggles requires balancing physics, geometry, and environmental conditions. Manufacturers are prioritizing lens depth and rapid-change systems more than ever. Here is the technical breakdown you need to master before investing in premium eyewear.
Spherical vs. Cylindrical vs. Toric Lenses
Spherical lenses are engineered to mimic the horizontal and vertical curvature of the human eye. This dual-axis curve serves two critical purposes: first, it provides a massive internal air volume that creates a superior thermal buffer against fogging. Second, it reduces optical distortion by ensuring light rays pass perpendicularly through the lens to your retina. This results in superior peripheral vision and “true” distance perception, which is essential when dropping off high-consequence cliffs.
Cylindrical lenses offer a classic, low-profile aesthetic. Curving only on the horizontal axis, they sit closer to the face. While historically prone to minor peripheral distortion, modern high-end cylindricals have largely solved this through injection molding. They are often favored by park riders for their slim look. Toric lenses, the newest hybrid, feature a tighter vertical curve than a spherical lens, offering the best of both worlds—maximum field of view with a less “bug-eyed” profile.
VLT & Contrast Tech: Seeing Through the Noise
Visible Light Transmission (VLT) measures how much light your lens lets through. However, the current market is defined by contrast dyes. Technologies like Oakley Prizm and Smith ChromaPop don’t just dim the sun; they selectively filter out the “noisy” light waves that cause color confusion. By emphasizing the blue and orange parts of the spectrum, these lenses make shadows on the snow (terrain variations) look significantly darker and sharper.
- Sun (5-15% VLT): These often feature heavy mirror coatings to reflect intense high-altitude radiation. Without these on a bluebird day, you risk snow blindness and retina fatigue.
- Variable (20-50% VLT): The “one-lens” solution. These lenses use advanced coatings to adapt to moving clouds, allowing for enough light in the trees while blocking the glare of the open flats.
- Storm/Night (60-90% VLT): These lenses, often yellow or light rose, are designed to “find the light” in flat, gray conditions. They effectively boost contrast in white-out situations where depth perception usually disappears.
Fog Management & Thermal Buffers
Fogging is a thermodynamic failure. When warm moisture from your face meets the cold exterior lens, it condenses into droplets. Premium goggles combat this with dual-pane thermal barriers—essentially a double-paned window for your face. We also look for “permeable” foam and perimeter venting that aligns with helmet airflow. If your helmet’s brim blocks your goggle’s top vents, you will fog instantly. Keep an eye out for goggles with electronic anti-fog fans or chemically etched permanent anti-fog coatings that don’t wipe off over time. For more on why the sport is worth protecting your gear for, see our why snowboarding is the best winter sport guide.
Lens Material Science: Polycarbonate, Trivex & Beyond New
Most goggle buyers obsess over tint and VLT while ignoring the single most important variable: what the lens is actually made of. The base material determines impact resistance, optical clarity, weight, and how well coatings adhere to the surface.
Polycarbonate: The Industry Standard
The vast majority of snowboard goggle lenses—including many premium models—use polycarbonate (PC) as their base material. Polycarbonate offers an excellent balance of lightweight construction, high impact resistance (it was originally developed for bullet-resistant windows), and ease of manufacturing in complex curved shapes like toric and spherical geometries. PC naturally blocks most UV radiation, which is critical at altitude, but a UV400 coating is still applied to ensure 100% UVA and UVB blockage.
The limitation of polycarbonate is its relatively low Abbe value—a measure of optical dispersion. At the edges of a large spherical lens, cheap polycarbonate can introduce subtle chromatic aberration, where colors appear to slightly “smear” at the periphery. High-grade PC, as used by Oakley (Plutonite), is purified to reduce this effect dramatically.
Trivex: The Premium Alternative
Trivex lenses were originally developed for military helicopter canopies. They have a significantly higher Abbe value than polycarbonate—meaning less chromatic aberration and sharper, more natural peripheral vision. They are also around 10% lighter than PC, which sounds minor but matters considerably during a six-hour day on the mountain. The trade-off is cost: Trivex is significantly more expensive to produce, so it is reserved for flagship-tier goggles. If a brand advertises “high-definition” or “HD optics” as a key feature, Trivex or a Trivex-derived compound is very likely involved.
Carl Zeiss & Proprietary Compounds
Giro’s partnership with Carl ZEISS represents the most technically precise lenses in the consumer market. ZEISS applies their expertise in precision optical grinding—normally used for camera lenses and medical equipment—to goggle lens production. Each lens is held to a near-zero optical deviation standard, ensuring that what you see is an accurate representation of the terrain, with no warping or distortion introduced by the lens itself. This is why the Contour RS earns its premium price even among veteran riders who are skeptical of marketing claims.
Lens Coatings: The Full Stack
A modern premium goggle lens is not just a curved piece of plastic—it is a stack of up to seven distinct coatings, each performing a specific function:
- UV400 Blocker: The innermost functional layer. Blocks 100% of UVA and UVB radiation. Non-negotiable at altitude, where UV intensity is approximately 4% higher for every 300 meters of elevation gain.
- Anti-Fog (Hydrophilic): Applied to the inner lens surface. This coating is hydrophilic—it actively absorbs microscopic water molecules from the air inside the goggle before they can condense into visible droplets. This is the coating you destroy when you wipe the inside of a wet lens.
- Contrast Dye Layer: The proprietary layer where technologies like Prizm and ChromaPop live. This is not a surface coating but rather a dye embedded into the lens material itself during manufacturing, making it highly durable.
- Anti-Scratch Hard Coat: Applied to the outer lens surface. A thin layer of silicone-based polymer that adds surface hardness. This is the first line of defense against micro-abrasion from snow crystals hitting the lens at speed.
- Hydrophobic (Water-Repellent) Top Coat: The outermost layer. Causes water droplets to bead and roll off rather than spreading into a film. Essential for maintaining visibility in sleet, wet snow, and rain. Some brands also add an oleophobic (oil-repellent) layer to prevent fingerprint contamination.
- Mirror Coating (External): An optional metallic vapor-deposited coating that reflects a percentage of incoming light before it even enters the lens stack. The color of the mirror coating affects VLT and which light frequencies are reflected.
Pro tip on UV at altitude: Fresh snow reflects up to 85% of UV radiation, compared to about 15% for grass and 25% for dry sand. At 3,000 meters elevation, ambient UV intensity is roughly 25% higher than at sea level. Wearing goggles without proper UV400 certification—even on an overcast day—is a direct path to photokeratitis (snow blindness). For more on why snowboarding safety matters, see our why snowboarding can be dangerous guide.
Mirror Coating Color Decoder New
Mirror coatings are perhaps the most misunderstood aspect of goggle shopping. The color you see on the outside of the lens and the tint you see when you look through the lens are two very different things—and both affect performance.
Mirror coatings are achieved through physical vapor deposition (PVD)—a process where vaporized metallic compounds are deposited in an ultra-thin layer (measured in nanometers) onto the lens surface in a vacuum chamber. Different metals and oxides reflect different wavelengths of light. The reflected color and the transmitted color are always opposite on the color spectrum: a blue-mirror lens transmits warmer, yellower tones to your eye, while a gold-mirror lens transmits cooler, bluer tones. This is why Oakley’s “Prizm Sapphire” lens looks electric blue from the outside but delivers a rose-warm tint to your retina.
Don’t choose your lens by mirror color alone. The underlying VLT and contrast dye are far more important for performance. A rose mirror coat can be applied over both a 15% VLT sun lens and a 70% VLT storm lens—they look similar from the outside but perform completely differently. Always check the VLT percentage, not just the mirror color, when building your lens quiver.
Photochromic Lenses: The Auto-Tinting Science Explained New
Photochromic lenses were briefly mentioned in our FAQ section, but they represent a significant and rapidly evolving lens category that deserves a full technical breakdown—especially for riders who don’t want to carry a second lens in their pocket.
How Photochromic Technology Works
Photochromic lenses contain organic molecules—most commonly oxazines or naphthopyrans—that change molecular structure when exposed to UV radiation. In the absence of UV light (indoors, tunnels, deep tree coverage), these molecules remain in a “clear” configuration that allows maximum light transmission. When UV intensity increases (full sun, high altitude), the UV energy causes the molecules to adopt an “open ring” structure that absorbs visible light, darkening the lens.
The key variable that most buyers don’t appreciate is temperature dependency. Photochromic reaction speed slows significantly in cold temperatures—which is a problem in snowboarding, where lens temperatures can drop well below freezing. At -10°C, a photochromic lens can take 3-5 minutes to reach maximum darkness, compared to 30-60 seconds at room temperature. This means you can drop into a sun-blasted open bowl and be partially blinded for several minutes while waiting for the lens to catch up. Premium brands address this by using next-generation photochromic compounds engineered specifically for cold-weather use, but it remains an inherent limitation of the technology.
Leading Photochromic Systems on the Market
- Transitions Lens Partnership (Various Brands): The most widely licensed photochromic system in eyewear. Transitions has developed cold-optimized formulas specifically for snow sports. Their XTRActive lens is engineered to activate even behind a car windshield (which normally blocks most UV), making it useful for liftlines in vehicles or gondolas.
- Oakley Adapt (Photochromic Prizm): Oakley layers their Prizm contrast dye beneath a photochromic layer, meaning you get the contrast enhancement benefits regardless of the current darkness level. This is technologically the most sophisticated consumer photochromic offering available.
- Smith Photochromic (ChromaPop Sun to Storm Range): Smith offers several ChromaPop lenses with a photochromic layer that transitions from approximately 25% VLT (full sun) to 55% VLT (overcast). This range covers most riding conditions but is not ideal for true flat-light storm riding at 80%+ VLT.
- Julbo ReactiV: Julbo specializes in photochromic mountain optics and produces arguably the fastest-reacting cold-weather photochromic system available. Their Reactiv range includes Reactiv 0-3 (VLT 5-38%) for sun to variable and Reactiv 1-3 (VLT 18-83%) for the broadest single-lens range currently on the market.
Who Should Choose Photochromic?
Photochromic lenses are ideal for riders who prioritize convenience above peak-condition performance. They are the best solution for lift operators, ski patrollers, and instructors who spend the entire day on the mountain across dramatically changing light and shadow conditions. For high-performance freeriders dropping into pre-visualized lines, however, having the exact right VLT lens for the specific light condition will always provide a slight optical edge over an auto-adjusting lens that may be mid-transition during the critical moments.
| Lens Type | VLT Range | Light Change Speed | Cold Performance | Best For | Carry Spare? |
|---|---|---|---|---|---|
| Photochromic | Variable (auto) | 30 sec–5 min | Moderate | All-day convenience riders, instructors | Optional |
| Fixed Sun Lens | 5–20% VLT | Instant (manual swap) | Excellent | Bluebird dedicated sessions | Yes — for storms |
| Fixed Storm Lens | 60–90% VLT | Instant (manual swap) | Excellent | Flat light, night riding, heavy overcast | Yes — for sun |
| Variable/Versatile | 20–50% VLT | N/A (fixed mid-range) | Excellent | Mixed-light mountain days | Recommended |
| Mirrored Sun | 8–18% VLT | Instant (manual swap) | Excellent | High-altitude, glacier, extreme sun | Yes — for shade |
Helmet Compatibility: The Gap Problem Nobody Talks About New
Nothing ruins a day on the mountain faster than discovering your brand-new goggles leave a 3-centimeter strip of forehead exposed to the wind. Goggle-helmet compatibility is one of the most underresearched aspects of snowboard gear purchasing—and one of the most important.
What is OFC (OutFront Compatible)?
OutFront Compatible (OFC) is a standardized interface system originally developed by Smith to ensure that their goggle frames sit correctly against the brim of their helmets. When a goggle is OFC-rated for a specific helmet (or helmet line), it means the goggle frame geometry, strap routing, and brim interface have been designed and tested together to eliminate the “gaper gap”—the exposed forehead strip between the goggle frame and the helmet brim.
Smith pioneered this system and maintains the tightest brand integration in the market, which is why pairing a Smith goggle with a Smith helmet produces the most seamless fit in the industry. However, OFC compatibility has since expanded into a general design principle adopted by Oakley, Giro, Anon (under the Burton umbrella), and others—though terminology differs by brand.
How to Check Compatibility Before Buying
The safest approach is to physically try the combination in store. If that’s not possible, these principles generally hold:
- Same-brand pairing is the safest default. Smith + Smith, Giro + Giro, Oakley + Oakley, Anon + Burton—manufacturers design within their own ecosystem for first-tier compatibility.
- Frameless and semi-frameless goggles adapt better across different helmet brands than fully-framed goggles, because the absence of a rigid top bar reduces the likelihood of a gap at the helmet brim.
- Large-volume spherical goggles are the most likely to create a gap with third-party helmets because they protrude further from the face.
- Check strap routing channels. Many helmets have a retention clip on the back strap cutout that is specifically sized for that brand’s straps. A different brand’s strap can slip loose during a fall.
The Goggle Strap System Explained
The goggle strap does more than hold the goggle to your face—it needs to hold the goggle to your helmet. Key features to look for:
- Silicone anti-slip strips: High-quality straps have a raised silicone pattern on the inner surface that grips the helmet. Budget goggles often use smooth elastic, which slides freely and results in goggles shifting during high-speed riding or impacts.
- Width (50mm vs. 35mm): Wider straps distribute the clamping force over more surface area, improving both comfort and grip on the helmet. 50mm straps are now the standard on mid-range and premium models.
- Strap clip adjuster location: Side-buckle adjusters (at the temples) allow you to fine-tune fit without removing your helmet. Rear-of-strap adjusters are less convenient but create a cleaner profile.
- Glove-friendly adjusters: The best straps feature oversized buckles that can be adjusted while wearing thick gloves. This seems trivial until you’re on a chairlift in -20°C trying to tighten your goggles with numb hands.
Quick compatibility check: After securing your goggles over your helmet, press the top of the goggle frame against the helmet brim and look in a mirror. You should not see any exposed skin between the brim and the foam. Then lift your head toward the sky—if the goggle drops away from the brim, the profile is incompatible and you’ll experience a gap in normal riding position. For more on helmet recommendations, see our best snowboard helmets guide.
Face Shape & Fit Guide: Finding Your Perfect Size New
Goggle sizing is one of the most confusing areas of snowboard gear. Unlike ski equipment, there are no universal sizing standards, and “Large” from one brand may fit the same as “Medium” from another. Here’s how to navigate it systematically.
The Three Critical Fit Dimensions
Goggle fit is determined by three independent measurements, and all three must align for a comfortable, functional fit:
- Nose Bridge Width: The distance between the center of the lens at the nose cutout. Riders with narrow nose bridges (common in East Asian facial structures) will find that many Western-fit goggles sit too high on the bridge, creating a gap above the nose where cold air and wind enter. Look for “Asian Fit” or “Low Bridge” designated models from Oakley, Smith, and other brands—these have a wider, flatter nose cutout that seals properly against lower bridge profiles.
- Face Volume (Lens-to-Face Distance): Defined by the depth of the goggle frame. High-volume spherical goggles sit further from the face and work well for riders with prominent cheekbones or a larger overall face structure. Cylindrical lenses sit closer and work better for flatter or narrower face profiles.
- Temple Seal: The outer edges of the foam should make full contact with the temples and forehead without pushing down on the cheekbones. If you can feel the frame resting on your cheekbones, the goggle is too wide or the foam geometry is wrong for your face.
👤 Small/Narrow Face
Look for: Small (S) or Medium (M) sizing, reduced-size designations (like Giro Contour RS), cylindrical lenses, or women’s-specific models. Frameless designs adapt better to narrow faces than fully-framed options.
👤 Medium/Standard Face
The broadest selection applies to standard medium faces. Most goggle “Large” sizes from mainstream brands are calibrated for this category. Both spherical and toric lens geometries work well.
👤 Large/Wide Face
Look for: XL sizing, high-volume spherical frames, and frameless or semi-frameless designs that have no rigid edge to dig into the temples. Oakley’s Flight Deck L and XXL variants were specifically developed for larger face profiles.
👤 Low Bridge / Asian Fit
Brands offering dedicated Asian Fit: Oakley (Asian Fit line), Smith (Low Bridge Fit on Squad, I/O Mag), Anon (low bridge variants). These models have modified foam architecture and lower nose cutouts for a proper seal without relying on bridge pressure.
How to Test Fit Without the Mountain
If you’re buying online and can’t try before purchasing, use this at-home test: hold the goggle frame against your face without the strap. The foam should contact the forehead, temples, and below-cheekbone area simultaneously. There should be no visible gap above the nose. The frame should not require any downward pressure to seat correctly. A goggle that only seals properly when the strap is overtightened will cause pressure headaches and is the wrong fit for your face geometry.
OTG Goggles: The Complete Guide for Glasses Wearers New
Over-The-Glasses (OTG) goggles go far beyond what our brief FAQ mention covered. For the estimated 40% of snowboarders who wear prescription glasses, understanding OTG technology is as important as understanding VLT.
What Separates an OTG Goggle from a Standard Model
A genuine OTG goggle is not simply a goggle with more interior space. Several specific engineering elements must be present to correctly accommodate prescription frames:
- Temple channel cutouts: Recessed channels in the foam along the outer edges of the frame allow the temples (arms) of glasses to pass through the goggle seal without creating pressure points or air gaps. On a standard goggle, the goggle foam pushes the glasses arms into your skull with significant force, causing pain and headaches within 30 minutes.
- Deeper lens-to-face distance: OTG frames provide 10-15mm more interior depth to accommodate the glasses frame sitting in front of the face.
- Wider nose bridge opening: The nose cutout on OTG models is broader to accommodate the nose bridge of standard prescription frames without pinching.
- Flat inner lens area: Cylindrical inner lenses perform better in OTG configurations because the flat inner face minimizes the risk of the prescription lens touching the goggle lens and causing distortion.
Prescription Insert Systems: The Alternative
For riders whose prescription is complex (strong astigmatism correction, prism, high minus or plus values), OTG goggles still introduce a visual hierarchy problem: your brain is looking through two optical systems simultaneously (prescription lens + goggle lens), which can cause fatigue and introduce edge distortion. The more optically precise solution is a prescription insert.
Several brands—including Oakley, Smith, and Bolle—offer internal optical frames that clip inside the goggle near the inner lens surface. Your optician fits your prescription lenses directly into this insert. The goggle lens then handles all UV protection, contrast, and VLT functions, while the insert handles only vision correction. The result is a single coherent optical path with no layering of optical distortions. While more expensive than OTG ($60-$150 for the insert, plus lens fitting fees), prescription inserts are the professional-grade solution for riders who need reliable vision correction on demanding terrain.
Top OTG Models Currently Available
- Smith Proxy OTG: One of the most popular dedicated OTG goggles in the Smith lineup. Cylindrical ChromaPop lens, wide temple channels, and a softer triple-layer foam specifically shaped for glasses wearers.
- Oakley Airbrake XL OTG: Oakley’s most accommodating OTG configuration. The XL sizing provides generous internal volume and the Switchlock lens-change system allows swapping lenses without removing your glasses.
- OutdoorMaster OTG: The budget-friendly entry into OTG goggles. The flexible TPU frame is forgiving over prescription frames, and the anti-fog coating performs surprisingly well at this price point. Ideal for occasional riders who don’t want to invest in premium OTG tech.
Night Riding & Flat-Light Mastery: The Low-Light Lens Guide New
Night riding is the fastest-growing segment of snowboard participation, and flat-light riding in whiteout conditions remains one of the most technically demanding environments for human vision. Your standard sun lens will leave you completely blind in these conditions.
The Physics of Flat-Light Failure
Human depth perception in snowy, overcast conditions degrades because of a phenomenon called “contrast washout.” In normal lighting, shadows provide the visual cues that allow our brains to construct a three-dimensional terrain model. In flat light, the light source (an even gray sky) illuminates snow uniformly from all angles simultaneously, eliminating shadows entirely. The result is a monochromatic white plane that provides zero depth information—you literally cannot see undulations in the snow surface until you’re already inside them.
The solution is a lens that artificially enhances the micro-contrast that flat-light conditions suppress. Yellow and amber lenses (65-90% VLT) achieve this by blocking the blue wavelengths that dominate overcast, foggy, and dawn/dusk lighting. The remaining light—richer in red and green wavelengths—provides more robust contrast information to the visual cortex than the full-spectrum white light it replaces. This is the same reason night-vision scopes and shooting glasses use yellow or amber filters: the blue-blocking effect is well-documented in photoreceptor research.
Understanding Night Riding Lens Requirements
Night riding under resort lighting presents unique challenges. Unlike natural daylight or overcast conditions, resort lighting is discontinuous—it creates hard light/shadow boundaries at the perimeter of each lamp’s cone, making the transition between lit and unlit snow particularly disorienting. Additionally, resort lighting is often sodium-vapor or LED based, which has a different spectral composition than sunlight.
- Clear lenses (90-99% VLT): The highest transmission option, used primarily under artificial resort lighting or in extremely low natural light. These provide no contrast enhancement but maximise the amount of light reaching the eye. Most useful for slow-speed night laps on groomed terrain.
- Yellow (75-90% VLT): The optimal balance for mixed night/dawn/dusk conditions. Blue-blocking enhances contrast under both artificial and low natural light. Highly recommended as a dedicated night riding lens.
- Light Rose / Copper (60-75% VLT): Versatile transition lenses that perform well from late afternoon through dusk and into early night riding. The rose tint enhances terrain depth significantly better than yellow in transition light conditions.
| Condition | Recommended VLT | Best Tint Color | Mirror Coating? | Contrast Priority |
|---|---|---|---|---|
| Full sun, bluebird | 5–18% | Gold, Bronze, Red | Yes — heavy | Glare reduction |
| Partly cloudy / variable | 20–45% | Rose, Green, Silver | Optional | Balance |
| Heavy overcast / flat light | 50–75% | Amber, Copper, Yellow | No | Depth perception |
| Storm / whiteout | 70–90% | Yellow, Light Rose | No | Maximum contrast |
| Night riding (resort lights) | 75–99% | Yellow, Clear | No | Maximum transmission |
| Dawn / dusk transition | 55–75% | Rose, Light Amber | No | Terrain definition |
Building a Two-Lens Quiver for All Conditions
Rather than chasing a single photochromic “do-everything” solution, experienced riders build a two-lens system that covers the full VLT range with a fast-swap goggle. The optimal pairing for most riders at most resorts is a 15-25% VLT tinted sun lens paired with a 65-80% VLT amber or yellow storm lens. This two-lens setup covers approximately 95% of riding conditions and costs less than most photochromic lens upgrades.
Complete Brand & Model Comparison Table New
The five reviewed models, plus notable alternatives, presented side-by-side across every specification that matters for your purchasing decision.
| Model | Lens Geo | Lens Tech | Swap System | Anti-Fog Rating | OTG? | Asian Fit? | Best Use Case | Price Tier |
|---|---|---|---|---|---|---|---|---|
| Oakley Flight Deck L | Spherical | Prizm™ Snow | Ridgelock (manual) | F3 Military Grade | No | Yes (variant) | Freeride, Backcountry | Premium |
| Smith Squad MAG | Cylindrical | ChromaPop™ | MAG (6 magnets + levers) | 5X Robust | No | Yes (Low Bridge) | All-Mountain, Variable Conditions | Premium |
| Anon M4 Toric MFI | Toric | Perceive™ | Magna-Tech (14 magnets) | Dual Pane | No | No | Extreme cold, integrated face protection | Premium |
| OutdoorMaster PRO | Spherical | Standard | 8-Magnet Quick Change | Standard Dual Layer | Yes (variant) | No | Beginners, budget riders, backup pair | Budget |
| Giro Contour RS | Toric | ZEISS VIVID | Magnetic-Assist | EVAK Non-Absorbent | No | No | Small faces, riders demanding ZEISS optics | Premium |
| Smith I/O MAG S | Spherical | ChromaPop™ | MAG System | 5X Robust | No | Yes | Small faces, all-mountain versatility | Premium |
| Dragon NFX2 | Cylindrical (Infinity Lens) | Lumalens™ | Super Quick Release | Armored Anti-Fog | No | No | Park, freestyle, style-conscious riders | Mid-Premium |
| Julbo Aerospace | Cylindrical | Reactiv Photochromic | Clip-on (manual) | Dual Foam | Yes | No | All-day riders, variable light specialists | Mid-Premium |
Budget Tier Breakdown: What You Actually Get at Each Price Point New
The difference between a $40 goggle and a $280 goggle is not just brand prestige—there are specific, quantifiable optical and engineering differences at each price tier that directly impact your riding experience. For more on gear cost comparisons, see our snowboarding vs skiing cost breakdown.
- Cylindrical or basic spherical lens
- Single-layer foam (less moisture management)
- Standard dual-pane construction
- No proprietary contrast dye—standard tint only
- Manual lens change (no magnetic system)
- Basic anti-fog coating (degrades faster)
- Narrow strap without silicone grip
- Best for: First-time buyers, rare riders, children learning
- Quality spherical or toric lens geometry
- Dual or triple-layer foam with moisture wicking
- Improved anti-fog durability
- Some proprietary contrast enhancement (entry-level)
- Basic magnetic or quick-release lens system
- Wider silicone-backed strap
- OTG variants often available
- Best for: Regular riders seeking value, students, intermediate level
- Premium spherical, toric, or cylindrical with TLT optics
- Proprietary contrast dye (ChromaPop, Prizm entry)
- Robust magnetic lens-swap system
- 5X or equivalent anti-fog rating
- Full perimeter venting with helmet integration
- UV400 certified lens
- OFC helmet compatibility system
- Best for: Serious intermediate to advanced riders, 10+ days per season
- Premium lens material (Trivex, Plutonite, ZEISS)
- Advanced contrast dye (Prizm, ChromaPop Sun, Perceive)
- Multi-magnet precision lens swap (10–14 magnets)
- Military-grade anti-fog (F3, permanent chemical etch)
- MFI or equivalent face-mask integration
- Full lens ecosystem with 10+ available lens options
- Hydrophobic + oleophobic outer coating stack
- Best for: Expert riders, professionals, those in high-consequence terrain
Total Cost of Ownership Analysis
The “cheap goggle” fallacy is worth addressing directly. A $50 goggle with a degrading anti-fog coating that needs replacement after one season is more expensive over five years than a $220 goggle with a permanent chemical anti-fog etch that lasts the life of the lens. When you add the ongoing cost of replacement lenses (budget brands: $20-$40 per lens; premium brands: $60-$100 per lens but lasting twice as long), and factor in the performance difference on high-consequence terrain, the premium option often delivers better value per riding day for anyone who takes snowboarding seriously.
Lens Ecosystems: Why Spare Lens Availability Matters New
The goggle you buy today is really a platform. The long-term value of your investment depends heavily on the breadth and affordability of the lens ecosystem that supports it.
Evaluating a Brand’s Lens Library
Before committing to a goggle frame, research how many replacement lens options are available and at what price. A frame that only supports two lens options—one sun and one storm—provides far less flexibility than a frame that supports fifteen lenses spanning every VLT level, photochromic options, and specialty coatings.
- Oakley Flight Deck: Extensive Prizm lens library spanning 8+ distinct lenses including photochromic, night, torch, and four sun-condition options. Replacement lenses range from $70-$120. The Ridgelock system is proprietary to Flight Deck—not compatible with other Oakley frames.
- Smith MAG-compatible frames (Squad, I/O Mag, Vice): Smith’s MAG system is shared across their entire performance goggle lineup, meaning any MAG-compatible lens fits any MAG-compatible frame. This creates an enormous interchangeable lens ecosystem. ChromaPop lens prices range from $65-$110.
- Anon Magna-Tech frames: Anon’s magnetic system is also shared across their product line, including both Toric and Cylindrical lens options fitting the same frame. Perceive lenses are priced $65-$100.
- OutdoorMaster: The widest lens library in the budget tier by far. Most replacement lenses are $15-$35, and the brand offers over 15 tint and VLT combinations. The magnetic system is shared across most of their frame lineup. Ideal for riders who want to experiment with different conditions at minimal cost.
- Giro / ZEISS: The ZEISS lens ecosystem is smaller than Smith or Oakley but every lens meets exceptional optical standards. ZEISS replacement lenses are priced in the $80-$120 range.
How to Build a Lean Two-Lens Quiver
The most cost-effective lens strategy for most riders is a precisely chosen two-lens setup that covers the full spectrum of conditions without duplication or gap. A practical framework:
- Choose your primary lens for the condition type you ride most. If you ride primarily on bluebird weekend days, a 15-25% VLT mirrored sun lens is your primary. If you ride mostly in the Pacific Northwest or Europe where overcast dominates, a 35-55% VLT variable lens serves better as your primary.
- Choose your backup lens for the opposite extreme. Sun-primary riders need a 65-80% VLT amber storm lens. Variable-primary riders need a dedicated 10-20% VLT sun lens for clear-sky days.
- Consider a photochromic upgrade lens as an optional third option if you ride consecutive all-day sessions with dramatically changing weather patterns. This lens can replace both the primary and backup in marginal-condition days.
- Invest in a lens case that can store your secondary lens inside your jacket. Many premium goggle bags include a rigid compartment for a second lens. Never store a loose lens in a pocket where it will contact keys, phone edges, or other hard objects.
Complete Care & Maintenance Guide: Making Your Investment Last New
Premium goggles are precision optical instruments. The difference between a lens that lasts five seasons and one that fogs out after two is almost entirely a function of how it is maintained. Most lens damage is caused by the owner, not by the mountain. For more on gear maintenance, see our snowboard waxing guide.
The Anti-Fog Coating Rules (Non-Negotiable)
The inner lens surface is coated with a delicate hydrophilic polymer that is the primary defense against fogging. Once this coating is compromised, no amount of anti-fog spray or treatment will restore its original performance. The only remedy is a replacement lens.
- Never wipe the inner lens when it is wet. Ever. If the goggle fogs up on the mountain, remove it from your face and let it air dry. Moving air—even the cold mountain air—will clear the fog faster than any wiping action, with zero coating damage.
- If snow gets inside the goggle, gently shake it to remove the snow, then let it air dry with the strap loose. Never blow warm breath directly into the lens interior—this is exactly what causes the moisture condensation you’re trying to remove.
- To clean the inner lens when dry, use only the included microfiber bag or cloth. Use a gentle circular dabbing motion, not a wiping motion. Wiping drags particles across the coating surface and introduces micro-scratches that degrade the hydrophilic layer over time.
- Never use any cleaning solution—including lens sprays, water, or alcohol—on the inner lens. These solvents strip the anti-fog coating directly.
Outer Lens Care
The outer lens is more durable than the inner surface but still requires careful handling. The anti-scratch hard coat and hydrophobic outer layer can be maintained with these practices:
- Use the microfiber bag for outer lens cleaning as well, but here gentle wiping is acceptable as long as you first ensure no grit or abrasive particles are on the surface. Blow off visible debris before applying the cloth.
- If the outer lens has developed a persistent haze or water no longer beads properly, a small amount of Rain-X Original applied with a microfiber cloth can partially restore hydrophobic performance. Apply, let haze, then buff to clarity. This is a maintenance treatment, not a permanent fix.
- Micro-scratches on the outer lens are largely cosmetic and do not affect optical performance significantly. Deep gouges or cracks, however, compromise structural integrity and require lens replacement.
Storage Best Practices
- Always store in the goggle bag or hard case. The goggle bag is a cleaning tool (microfiber) and a storage tool simultaneously. Storing loose in a gear bag alongside boots, straps, and hardware is the single most common cause of avoidable outer lens scratching. For storage solutions, see our best snowboard bags guide.
- Never store in a hot car during off-season. Temperatures inside a parked car can exceed 70°C in summer. This thermal stress can cause the lens glue (which bonds the inner and outer lens layers of dual-pane construction) to delaminate, creating an irreversible fogging source between the layers. It also degrades the foam adhesive and causes frame warping on thermoplastic frames.
- Store lenses separately from the frame when possible during long-term off-season storage. Remove the lens and place it flat in the goggle bag inside the hard case. This eliminates stress on the lens-frame junction and allows the foam to fully decompress.
- Hang goggles by the strap rather than resting them lens-down on a hard surface. Even brief resting on a hard edge can imprint a visible line into the soft inner foam that permanently affects face seal performance.
End-of-Season Deep Clean
Once per season, perform this maintenance procedure before storage:
- Remove the lens and set it safely aside in the goggle bag.
- Hand-wash the foam and frame with lukewarm water and a tiny amount of mild dish soap. Do not use hot water—it will shrink the foam. Rinse thoroughly with cool water.
- Allow the frame to air dry completely (24-48 hours) before reassembling. Do not use a hair dryer or any heat source.
- Clean the strap’s silicone grip surface with a dry cloth to remove mineral deposits from sweat and snow. Mineral buildup can cause the silicone to lose its tacky anti-slip properties.
- Inspect the magnet seats (if applicable) for corrosion or debris. Clean with a dry cotton swab. A single drop of isopropyl alcohol on the swab can remove stubborn deposits—but ensure it is completely dry before reattaching the lens.
- Reassemble, store in the hard case, and place in a cool, dark drawer or storage shelf away from UV light (which can yellow certain foam types over time).
1. Oakley Flight Deck L (Prizm)
Best Field of View & Optical Clarity

The Oakley Flight Deck L remains the undisputed heavyweight champion of peripheral vision. Inspired by the visors of fighter pilots, this rimless design removes the traditional frame boundaries that clutter your “downward” view. This is critical for snowboarders who need to see their lead foot and the terrain directly beneath them without tilting their head. The injection-molded Plutonite lens is remarkably durable, and the F3 anti-fog coating is among the most resilient we’ve tested. For more on why the sport deserves premium gear, see our why snowboarding is so fun guide.
What truly separates the Flight Deck is the Prizm™ Snow technology. Oakley spent years studying the light spectrum on glaciers to develop dyes that boost terrain contrast to an almost unnatural level. Even in flat, gray light, the Prizm Sapphire and Rose lenses can pull out shadows that look invisible to the naked eye. The “L” (Large) sizing is generous, providing a massive surface area that accommodates most faces comfortably, though riders with particularly small bridges may find the “M” version a better fit. The Ridgelock lens system, while manual, ensures a completely airtight seal against the wind.
- Lens Geometry: Premium Injection-molded Spherical
- Venting: Full perimeter channel venting with helmet integration
- Anti-Fog: F3 Military-grade inner lens coating
- Best For: High-speed chargers and backcountry riders who demand the absolute widest field of vision.
2. Smith Squad MAG
Best Overall Package & Lens Swapping

The Smith Squad MAG is the industrial-strength answer to changing weather. The Smith MAG system continues to lead the pack in security. Using six N52 magnets and two locking levers on the sides, the lens is held in place with more force than you’ll ever exert in a crash, yet it can be swapped in under 10 seconds. This is a game-changer when you’re on the chairlift and the sun suddenly ducks behind a storm front. The Squad’s cylindrical look is timeless, sitting flush against the face for a sleek profile. For more on why snowboarding beats skiing, see our snowboarding vs skiing comparison.
Optically, the ChromaPop™ lens tech is Smith’s secret weapon. It filters two specific wavelengths of light that cause color confusion, giving you a more natural yet highly vivid view of the mountain. The Squad MAG package is particularly valuable because it almost always includes a dedicated low-light “Storm” lens and a high-end hard case. The 5X anti-fog inner lens is specifically engineered to handle five times more moisture than standard lenses, making this an excellent choice for riders who tend to run hot or ride in humid regions like the Pacific Northwest.
- Lens Geometry: Carbonic-X Cylindrical with TLT optics
- Bonus Lens: Includes two ChromaPop™ lenses (Sun & Storm)
- Anti-Fog: 5X robust internal anti-fog tech
- Best For: Versatile riders who want the fastest lens-swapping tech in a premium, inclusive package.
3. Anon M4 Toric MFI
Best for Features & Face Protection

The Anon M4 is the “Swiss Army Knife” of high-end goggles. What makes it legendary is the MFI® (Magnetic Facemask Integration). The bottom of the goggle frame contains four magnetic points that snap onto an included face mask. This creates a gapless, seamless seal between your goggles and your mask, preventing the “moist breath” fogging that plagues riders who tuck their masks into their goggles. For riders in extreme cold (think Japan or Vermont), this tech is life-changing. For more on why snowboarding safety matters, see our why snowboarding can be dangerous guide.
The M4 is also unique because the frame is compatible with both Toric and Cylindrical lenses, allowing you to change your entire “look” just by swapping lenses. The Perceive lens technology provides world-class contrast, and the lenses are finished with a hydrophobic and oleophobic coating, meaning water and fingerprints slide right off. The Magna-Tech quick-change system uses 14 rare-earth magnets for a connection that is incredibly fast and satisfyingly secure. This is the choice for the gear junkie who wants every possible bell and whistle in one kit.
- Lens Geometry: Toric (mimics spherical optics in a lower profile)
- Special Feature: Includes MFI magnetic facemask and molded hard case
- Interchange System: Magna-Tech (14 rare-earth magnets)
- Best For: Cold-climate riders and those who prioritize integrated face protection and high-end features.
4. OutdoorMaster PRO
Best Value & Budget Pick

The OutdoorMaster PRO proved to the industry that high-performance features don’t have to cost $200. While it lacks the proprietary contrast dyes of Oakley or Smith, the injection-molded spherical lens provides clarity that is 90% as good as the big brands for a fraction of the cost. The magnetic system is surprisingly robust, featuring eight magnets that hold the lens firmly in place during impacts. For beginners or those who only get 5-10 days on the mountain a year, this is the smartest financial choice. For first-timer guidance, see our guide to choosing your first snowboard.
Durability is where this goggle shines for the price. The TPU frame is highly flexible even in deep freezes, and the triple-layer foam provides a comfortable, moisture-wicking fit. OutdoorMaster offers an enormous selection of spare lenses (often for less than $25), meaning you can build a full VLT quiver without breaking the bank. While the anti-fog coating isn’t quite as permanent as Smith’s 5X tech, if you treat them with care and don’t wipe the inside when wet, they will last for several seasons of heavy riding.
- Lens Geometry: Injection-molded Spherical
- Interchange System: 8-Magnet Quick-Change
- Frame: Ultra-flexible TPU with long-strap compatibility
- Best For: Beginners, budget-conscious riders, and those who want an affordable backup pair.
5. Giro Contour RS
Best for Smaller Faces

Riders with smaller facial structures often struggle with “standard” goggles that push down on their nose or leave gaps at the temples. The Giro Contour RS (Reduced Size) is the precision-engineered answer. Giro maintained the massive Expansion View (EXV+) tech of their flagship model but narrowed the frame architecture to fit small-to-medium faces perfectly. You get a “large” view in a compact package. The ZEISS VIVID lenses are another standout, developed to specifically emphasize blue light, which is the light that provides terrain detail in the snow.
The Contour RS features a semi-frameless toric shape that looks modern and aggressive. Giro’s EVAK Vent Technology is particularly impressive; it uses a new foam made from non-absorbent material that minimizes fogging while staying durable enough for years of use. Unlike some smaller goggles that feel “budget,” the Contour RS is a top-tier professional instrument. It comes with a bonus low-light lens, a hard case, and features a seamless magnetic-assist lens change system. It’s the ultimate choice for riders who need a refined fit without sacrificing world-class ZEISS optics. For more on gear that fits properly, see our best snowboard helmets guide.
- Lens Geometry: Toric with Expansion View (EXV+) technology
- Lens Partner: World-class VIVID optics by ZEISS
- Ventilation: EVAK non-absorbent vent foam
- Best For: Riders with smaller faces who demand professional-level ZEISS optics and a massive field of view.
Women’s Snowboard Goggles: What’s Actually Different New
Women’s goggle sizing is often dismissed as a marketing distinction, but there are genuine anatomical differences that make women’s-specific or small/medium sizing significantly more functional for many female riders.
The average female facial structure features a narrower nose bridge, a shorter forehead height, and a smaller overall face volume compared to the average male facial structure for which most “standard” goggles are calibrated. When a goggle designed for this larger template is worn on a smaller face, several problems emerge: the frame contacts the nose bridge and rests on the cheekbones rather than sealing against them; the foam’s upper edge falls mid-forehead rather than at the hairline; and the temple seals leave small gaps at the outer edges.
Genuine Women’s-Specific Engineering
The best women’s goggle lines—as opposed to simply recolored men’s models—incorporate these structural modifications:
- Reduced frame width: Narrower temple-to-temple measurement, typically 10-20mm shorter than equivalent men’s models.
- Lower nose bridge: The nose cutout is positioned lower in the frame to accommodate the typical lower nose bridge placement on female facial structures.
- Contoured foam: Women’s models often use a facial interface foam with a different cross-section profile—less volume in the nose-cheek transition and more in the temple-forehead contact zone.
- Narrower strap width: A 35mm strap is standard on women’s models vs. 45-50mm on men’s, fitting more naturally under a women’s-cut helmet.
Major brands offering dedicated women’s lines include Smith (Drift, Skyline), Oakley (Flight Tracker, Canopy), Giro (Facet, Aria), and Anon (WM1, Insight). The Giro Contour RS, reviewed above, is technically gender-neutral but is widely purchased by female riders as a direct-fit solution due to its reduced-size frame architecture.
The Pragmatic Approach: Small/Medium Unisex
Many experienced female riders find that unisex Small or Medium sizing from brands with comprehensive size ranges offers better value than purchasing from a women’s-specific sub-line, as the lens ecosystem (number of available replacement lens options) is typically broader for unisex models. Smith’s I/O MAG S and Oakley’s Flight Deck M are popular examples of unisex small-format goggles that fit the majority of female faces without women’s-specific branding. For more on women’s gear, see our best snowboard socks guide.
Snowboard vs. Ski Goggles: Is There a Real Difference? New
You’ll find snowboard-specific goggles and ski-specific goggles on the shelves of every gear shop. But are the differences real and functional, or primarily marketing?
The honest answer is: mostly marketing, with a few genuine distinctions that matter in specific contexts.
What’s Genuinely Different
- Frame curvature profile: Snowboarders ride in a sideways stance, meaning the “downward” field of view (toward the lead foot) is positioned at the side of the face rather than directly below. Some snowboard-specific goggle frames have a subtly asymmetric bottom taper or a more extended lower frame edge to improve this oblique downward sightline. The Oakley Flight Deck’s rimless design was specifically developed with this sideway snowboard stance in mind.
- Helmet strap groove placement: Snowboard helmets typically feature a different brim geometry and strap routing position than ski helmets, due to the head orientation difference between the two sports. Goggle straps engineered for snowboard helmets may have a subtly different rear clip position.
- Lens size trend: Snowboard culture has historically favored larger, more visually prominent lens profiles—partly functional (wider field of view) and partly aesthetic. The oversized, rimless spherical goggle that dominates snowboard branding is less common in traditional alpine ski equipment.
What Isn’t Different
VLT, contrast dye technology, anti-fog systems, lens material, UV protection, and magnetic lens-swap systems are identical in their engineering between snowboard and ski goggle versions from the same brand. A Smith Squad MAG “for snowboarding” and a Smith Squad MAG “for skiing” use the same lens, the same MAG interchange system, and the same 5X anti-fog inner coating. The category distinction is primarily a retail taxonomy, not an engineering specification.
The practical implication: if you find a ski goggle that fits your face perfectly, has the optical system you want, and is compatible with your helmet, there is no technical reason to avoid it for snowboarding. For more on why snowboarding is the better choice overall, see our snowboarding vs skiing comparison.
Frequently Asked Questions (FAQ)
1. How do I stop my goggles from fogging up?
Thermal management is key. First, ensure your helmet’s brim doesn’t block the top vents of your goggles. Second, never wipe the inside of the lens when it’s wet; you’ll smear the anti-fog coating. If you fall and get snow inside, shake it out and let them air dry. Finally, don’t tuck your neck warmer into your goggles—your warm breath will travel straight into the lens.
2. What does VLT stand for and why does it matter?
VLT stands for Visible Light Transmission. It is the percentage of light that passes through the lens. Low VLT (10-20%) is for sun, while High VLT (60-90%) is for storms. Choosing the wrong VLT can lead to snow-blindness in the sun or “flat-light” accidents in the gray-out. For more on snow safety, see our snowboard fall safety guide.
3. Can I wear my glasses under snowboard goggles?
Yes, look for “OTG” (Over The Glasses) specific goggles. These have deeper frames and cutouts in the foam at the temples to accommodate the arms of your glasses without putting pressure on your face. For complex prescriptions, a prescription lens insert system fitted inside the goggle provides even better optical performance.
4. How do I clean the inside of my goggle lens?
Be extremely careful. The inside of the lens is coated with a hydrophilic chemical that absorbs moisture. Wiping it when wet will ruin the lens. If you must clean a dry lens, use only the microfiber bag and “dab” rather than wipe.
5. Spherical vs. Toric vs. Cylindrical—which is best?
Spherical offers the best volume and optics but looks bulky. Cylindrical is stylish and low-profile but has minor distortion. Toric is the current hybrid choice, offering spherical clarity in a slimmer, modern shape. For small faces, a reduced-size toric goggle like the Giro Contour RS often provides the optimal combination of optics and fit.
6. Are magnetic lens systems safe during a crash?
Yes. High-end systems like Smith MAG or Anon Magna-Tech use rare-earth magnets and locking mechanisms that can withstand significant impacts. They are much safer and more secure than cheap, generic magnetic goggles. The N52 neodymium magnets used in premium systems maintain hold under lateral forces well beyond any crash scenario.
7. Why are Oakley and Smith goggles so expensive?
You are paying for R&D. Technologies like Prizm and ChromaPop involve complex dyes that filter out specific light waves. This isn’t just a tint; it’s an optical filter that fundamentally changes how you see the terrain. You also pay for superior lens materials (Plutonite, Trivex-derived), more durable anti-fog systems, and broader lens ecosystems. For more on why gear matters, see our why snowboarding is the best winter sport guide.
8. How long do goggle lenses last?
With proper care, a lens lasts 2-4 seasons. Eventually, the anti-fog coating will degrade and the lens will accumulate micro-scratches from the mountain environment. If they fog instantly when you put them on, it’s time for a replacement. Premium chemical-etch anti-fog systems (as opposed to basic spray coatings) can extend this to 4-6 seasons with careful use.
9. What is “Photochromic” lens technology?
Photochromic lenses contain organic molecules that automatically change their VLT based on UV intensity. They darken in the sun and lighten in the shade. In cold temperatures, the reaction slows significantly (3-5 minutes vs. 30 seconds at room temperature), so they perform best for instructors and all-day riders rather than performance-focused freeriders who need exact VLT for specific conditions. For more on gear that adapts, see our snowboard comparison guide.
10. How should I store my goggles in the off-season?
Store them in a hard case in a cool, dry place. Avoid leaving them in a hot car during the summer, as extreme heat can cause the glue in the foam to fail and the anti-fog coatings to peel. Remove the lens from the frame and store them separately to eliminate stress on the lens-frame junction. For storage tips, see our waxing and storage guide.
11. What is helmet compatibility and how do I check it before buying?
Helmet compatibility refers to whether your goggle frame profile will sit flush against your helmet’s brim without leaving an exposed gap at the forehead. The best check is a physical try-on in store. If buying online, pair same-brand goggle and helmet whenever possible (Smith + Smith, Giro + Giro), as manufacturers design within their own ecosystem for first-tier compatibility. Frameless and semi-frameless designs are the most forgiving across different helmet brands. For helmet recommendations, see our best snowboard helmets guide.
12. Do I need different goggles for night riding?
You don’t need a different frame, but you absolutely need a different lens. Night riding requires a high-VLT lens (75-99%) in yellow or amber tint. Standard sun lenses at 10-20% VLT are nearly opaque under resort lighting and will leave you effectively blind on unlit sections of the mountain. Most premium goggle systems include a storm/low-light lens in their package—this lens will also work for night riding in most conditions.
13. What lens should I use for flat light and whiteout conditions?
A yellow or amber lens at 65-85% VLT is the optimal choice for flat-light and whiteout conditions. These lenses work by blocking blue-spectrum light—which dominates overcast, even illumination—and transmitting red and green wavelengths that are more effective at registering terrain shadows. The result is significantly better depth perception in monochromatic snow environments. For more on terrain reading, see our snowboard stopping techniques guide.
14. Can I use ski goggles for snowboarding?
Yes. The optical technology, anti-fog systems, and lens materials are identical between ski and snowboard designations from the same brand. The distinction is primarily retail categorization. The main practical consideration is whether the goggle frame is compatible with your snowboard helmet, since some ski-category goggles are calibrated for ski-specific helmet brim geometries.
15. How do I choose between a fixed lens and a photochromic lens?
Choose photochromic if you ride all-day consecutive sessions with dramatically changing weather, don’t want to carry a spare lens, or spend significant time in gondolas and liftlines transitioning between light and shadow. Choose a fixed lens (paired with a second spare lens) if you ride in consistent conditions, prioritize peak optical performance for specific conditions, or prefer the immediate response of a manual lens swap to the delayed reaction of photochromic molecules. For more on why gear choices matter, see our why snowboarding is the best winter sport guide.
Conclusion: Our Final Verdict
Vision is synonymous with performance and safety on snow. Investing in high-quality goggles isn’t just about fashion; it’s about giving your brain the data it needs to navigate the mountain safely and confidently. For more on why the sport is worth the investment, see our guide to why snowboarding is so fun.
- For the ultimate field of view and elite contrast tech, the Oakley Flight Deck L is the gold standard—particularly for large-to-standard faces and backcountry riding.
- For those who need to swap lenses instantly as the clouds move in, the Smith Squad MAG offers the most reliable overall package, with the added value of a dual-lens kit.
- For the extreme-cold rider who needs the MFI magnetic mask system and maximum face protection, the Anon M4 Toric MFI is a technological masterpiece.
- For riders with smaller faces who demand world-class ZEISS optics, the Giro Contour RS is unmatched in its category.
- For beginners or those seeking maximum value with surprisingly capable optics, the OutdoorMaster PRO delivers far more than its price suggests.
Remember: the best goggle is the one that fits your face correctly, suits your primary riding conditions, and has a lens ecosystem that grows with your riding. Ride safe, stay clear, and we’ll see you in the powder. For tips on getting started, see our why snowboarding is the best winter sport guide.


