
Your First Drop-In: The Ultimate Guide to the Best Snowboarding Resorts for Beginners
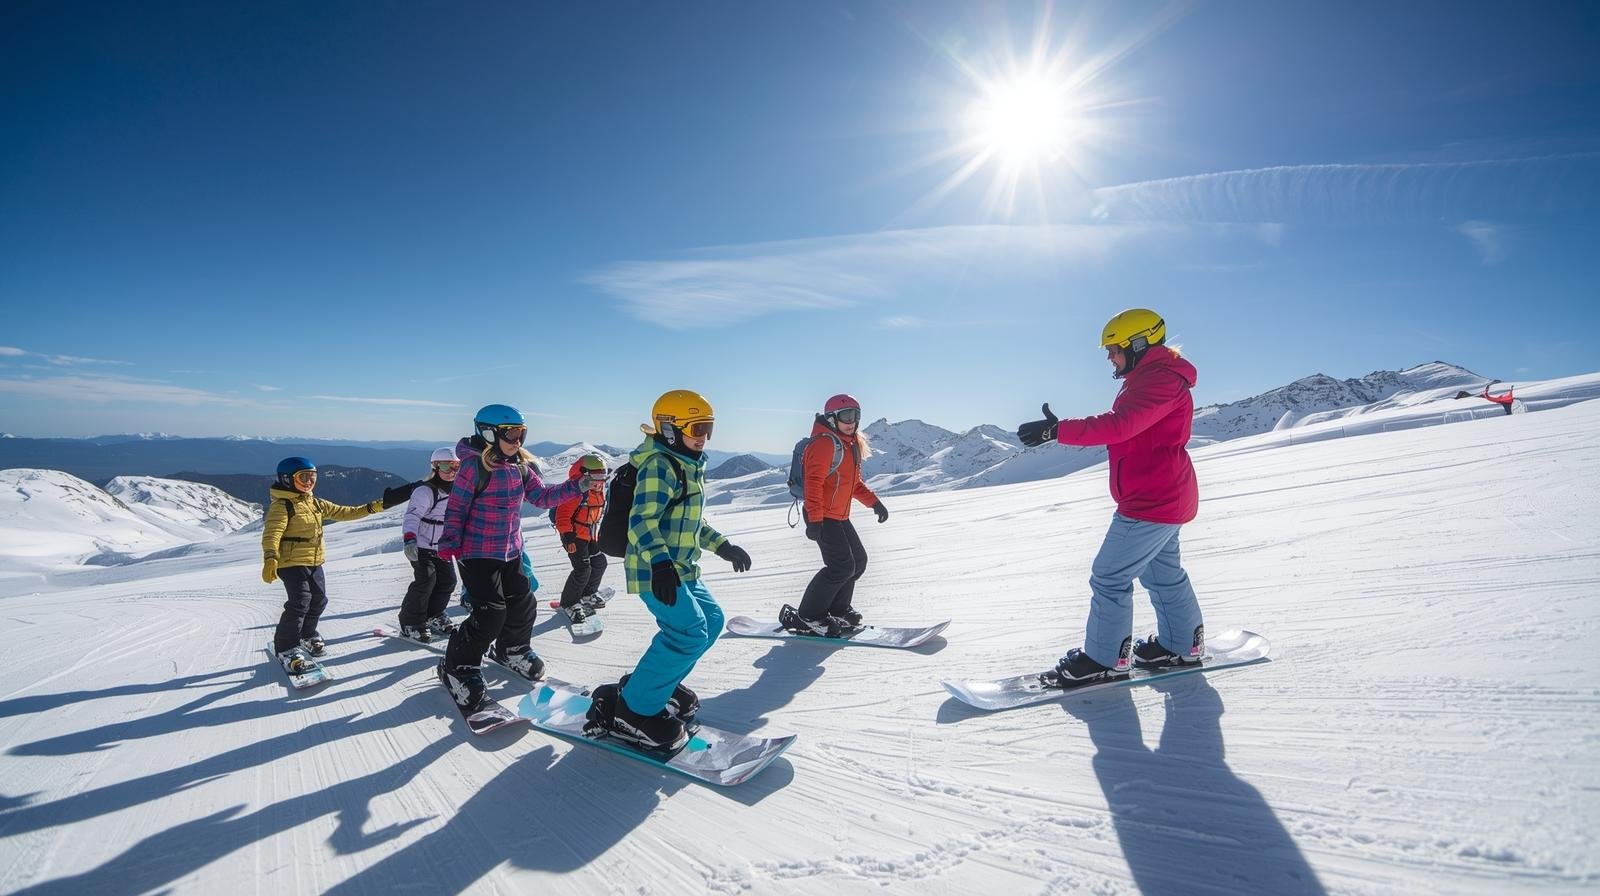
I still vividly remember my first day on a snowboard. It was a glorious mess of falling, laughing, and a sore tailbone. I spent more time sitting in the snow than actually riding, but by the end of the day, I linked two turns together, and in that moment, I was hooked for life. Learning to snowboard is a journey, and where you start that journey can make all the difference. Choosing the wrong mountain—one that’s too steep, too crowded, or too intimidating—can turn a potential passion into a frustrating experience.
That’s why I created this guide. After years of riding mountains big and small, I’ve seen what works for new riders and what doesn’t. This isn’t just a list of resorts with green circles on the map. This is a deep dive into the places that truly welcome and nurture beginners, with world-class instruction, perfectly designed learning areas, and a clear path for you to progress from nervously sliding to confidently carving. Let’s find the perfect place for you to fall in love with snowboarding.
What’s Inside This Guide
- What Truly Makes a Resort “Beginner-Friendly”?
- The A-List: Top U.S. Resorts to Start Your Journey
- West Coast & East Coast Beginner Havens
- Midwest & Hidden Gem Beginner Resorts
- International Beginner-Friendly Resorts Worth the Trip
- Gear Up For Success: Your First-Timer’s Shopping List
- Understanding Your Snowboard: Anatomy & Terminology
- How to Choose the Right Snowboard Size
- Regular vs. Goofy: Finding Your Stance
- Preparing Your Body Before the Mountain
- Your First Day on the Mountain: What to Expect
- How to Fall Safely (Yes, It’s a Skill)
- 10 Common Beginner Mistakes and How to Avoid Them
- Your Snowboard Progression Milestones
- Mountain Etiquette & Safety Rules
- How to Read a Trail Map Like a Pro
- Should You Rent or Buy Your First Snowboard?
- Planning Your First Snowboard Trip on a Budget
- Epic Pass vs. Ikon Pass: Which is Better for Beginners?
- Snowboarding with Kids: A Family Beginner’s Guide
- Women’s Beginner Snowboarding Guide
- Mental Game: Overcoming the Fear Factor
- Spring Snowboarding: Why Late Season is Great for Learning
- Night Riding: A Fun Way to Get More Practice
- Basic Snowboard Maintenance & Care
- Snowboard Glossary: Terms Every Beginner Should Know
- Dealing with Altitude: Tips for Mountain Towns
- The Ultimate Snowboard Fitness Guide for Beginners
- Snowboard Injury Prevention & Common Injuries
- Taking It to the Next Level: From Green to Blue Runs
- Beginner Terrain Parks: Your First Park Experience
- Best Apps & Resources for Beginner Snowboarders
- Final Thoughts: Embrace the Learning Curve
Whether you’re a complete beginner who has never strapped into a snowboard, or you’ve dabbled a few times and want to really commit to the sport, this guide has everything you need. We’ll cover not just the best resorts but also the essential gear, fitness preparation, mental strategies, and practical tips that will dramatically shorten your learning curve and maximize your fun on the mountain.
What Truly Makes a Resort “Beginner-Friendly”?
It’s more than just having a “bunny hill.” A truly great beginner resort is designed with learning in mind. Here’s the criteria I used to pick the winners:
- Quality of the Snowboard School: Are the instructors certified, patient, and experienced with first-timers? Do they offer small group lessons or private coaching? A great instructor is your fast-track to success.
- Dedicated Learning Zones: The best resorts have areas completely separate from the main mountain traffic. Look for “magic carpet” lifts (conveyor belts that are easy to get on and off), gentle slopes, and a non-intimidating environment.
- Terrain Progression: This is key. A great resort doesn’t just have easy runs; it has a logical “next step.” There should be long, wide, and gently-pitched green runs that let you practice your turns after you graduate from the learning zone, followed by mellow blue runs that don’t have surprise steep pitches.
- Affordability: Let’s be honest, snowboarding can be expensive. We’re looking at resorts that offer beginner packages (lift ticket, lesson, rental) that provide great value and won’t break the bank.
- Resort Layout and Navigation: A confusing mountain is a frustrating mountain. The best beginner spots are easy to navigate, with clear signage and minimal flat spots where you might get stuck.
Pro Tip: What “Beginner-Friendly” Really Means
When you’re researching resorts, don’t just look at the percentage of green runs. Pay attention to the connectivity of those runs. Some resorts have plenty of beginner terrain, but it’s scattered across the mountain, requiring you to ride intermediate trails just to get between them. The best beginner resorts cluster their easy terrain together so you can spend an entire day without ever accidentally ending up on a run that’s too steep for your skill level. Also, look for resorts that have dedicated beginner lifts — specifically surface lifts like magic carpets or T-bars designed for learning, rather than having beginners compete for space on the same high-speed chairlifts used by advanced riders.
Once you’re shredding confidently, you might want to explore more challenging mountains. For that, check out our comprehensive guide to the overall best snowboarding destinations in the world.
The A-List: Top U.S. Resorts to Start Your Snowboarding Journey
We’ve scoured the country to find the absolute best places to learn. These resorts roll out the white carpet for newcomers.
1. Park City, Utah: The King of Accessibility & Progression

If I had to recommend just one resort to a brand-new rider, it would probably be Park City. As the largest ski resort in the United States, its sheer size means there is an incredible amount of terrain dedicated to learning. The resort has two main base areas, Park City Mountain Village and Canyons Village, both with top-tier learning centers.
My experience teaching a friend to ride here was fantastic. We started at the “First Time” park at the main village, which is completely isolated from other skiers and riders. The magic carpets and mellow grade were perfect for getting the basics of balancing and heel-side sliding down. What truly sets Park City apart is the next step: the High Meadow Park. It’s a dedicated mid-mountain learning area served by its own high-speed quad, meaning you get the “real mountain” experience without the terrifying pitch. The runs are long, wide, and perfect for linking those first S-turns.
The Vibe & Logistics:
Park City is incredibly easy to get to, just a 40-minute drive from Salt Lake City International Airport. The free bus system in town is excellent, making it easy to get around without a car. The town itself is a historic mining town with a vibrant Main Street full of restaurants and shops.
Why It’s Great for Beginners
- Massive amount of beginner terrain.
- Isolated, top-tier learning zones.
- Excellent terrain progression to easy blues.
- Super accessible from a major airport.
- World-class snowboard school.
Things to Consider
- Can be very crowded, especially on weekends.
- Lift tickets are among the most expensive.
- Its massive size can be overwhelming to navigate at first.
2. Buttermilk, Colorado: Gentle Slopes & X Games Dreams

Don’t let its fame as the home of the Winter X Games fool you. Buttermilk is, by far, the most beginner-friendly of the four Aspen Snowmass mountains. In fact, it was designed with learning in mind. Nearly 75% of its terrain is rated as beginner or intermediate. The mountain’s pitch is consistently gentle, and the runs are famously uncrowded, giving you plenty of space to learn without feeling pressured.
The base area, known as The Hideout, is a fantastic, innovative learning center for children. For adults, the main learning area at the base offers the perfect pitch to get comfortable. What I love about Buttermilk is the run called “Westward Ho.” It’s a 3-mile long green run that goes from the summit all the way to the base. It’s the perfect “graduation” run, allowing you to enjoy stunning views and practice your turns for a long, uninterrupted descent. This is a huge confidence builder. For more on this region, explore our guide to snowboarding in Colorado.
The Vibe & Logistics:
Buttermilk has a very relaxed, family-friendly vibe. It’s much more mellow than the main Aspen mountain. You can fly directly into Aspen/Pitkin County Airport (ASE), which is incredibly convenient. The free bus system connecting all four mountains and the towns of Aspen and Snowmass is excellent.
Why It’s Great for Beginners
- Extremely gentle and consistent pitch.
- Typically uncrowded slopes.
- Fantastic, long green runs from the summit.
- World-renowned Snowmass ski & snowboard school.
- Easy to navigate.
Things to Consider
- Aspen is a very expensive destination overall.
- Less challenging terrain for when you progress quickly.
- Limited nightlife directly at the Buttermilk base.
West Coast & East Coast Beginner Havens
3. Northstar California: Tahoe’s Learning Paradise
Lake Tahoe has many famously challenging resorts, but Northstar is the exception. It has a well-deserved reputation for being family-friendly, with an emphasis on grooming and a relaxed pace. The entire front side of the mountain is a network of rolling, gentle green and blue runs that are perfect for beginners. The learning area near the mid-mountain lodge is spacious and gets great sun.
One of Northstar’s best features for beginners is the consistency of its grooming. They are meticulous about it, meaning you get smooth “corduroy” to practice on every morning, which is much easier to learn on than bumpy, choppy snow. The village at the base is also fantastic, with an ice rink, fire pits, and plenty of mellow après-ski options.
The Vibe & Logistics:
Northstar has an upscale but laid-back family vibe. It’s located on the north side of Lake Tahoe and is an easy drive from the Reno-Tahoe International Airport (RNO). It’s a great choice for a mixed-ability group visiting the Tahoe area.
Why It’s Great for Beginners
- Legendary grooming creates perfect learning conditions.
- Warm, sunny Tahoe weather most of the season.
- Excellent village base area with family amenities.
- Large network of beginner-friendly green and blue runs.
- Great progression terrain for advancing skills.
Things to Consider
- Can get windy and cold on upper mountain.
- Longer drive from Bay Area airports.
- Busy during holiday periods.
4. Okemo, Vermont: The East Coast’s Corduroy King
For those on the East Coast, Okemo is a standout choice for beginners. It has a massive, dedicated learning area at the base served by multiple magic carpets. Okemo’s biggest strength is its commitment to snow quality. Their snowmaking and grooming operations are legendary, ensuring that even when Mother Nature doesn’t cooperate, the learning slopes are covered in soft, forgiving snow.
The resort’s layout is also very intuitive. Once you’re ready to explore, the main Sunburst Six lift provides access to a huge pod of green runs, like “Open Slope” and “Sapphire,” which are wide and never too steep. It’s easy to spend the whole day on this part of the mountain without ever feeling like you’re in over your head.
The Vibe & Logistics:
Okemo is the quintessential Vermont family resort. The nearby town of Ludlow is charming and cozy. It’s within a few hours’ drive of major hubs like Boston and New York City, making it a popular weekend destination.
Why It’s Great for Beginners
- Best-in-class grooming and snowmaking.
- Spacious, well-designed learning areas.
- Excellent beginner terrain pod on the mountain.
- Charming nearby town of Ludlow.
- Great value compared to western resorts.
Things to Consider
- Smaller overall mountain size.
- Weather can be unpredictable on the East Coast.
- Limited advanced terrain for progression.
5. Breckenridge, Colorado: High Altitude, High Excitement
Breckenridge is one of the most popular resorts in Colorado, and for good reason. The resort has invested heavily in its beginner infrastructure, particularly at the base area. The “Breck Learning Campus” at the base of Peak 9 is one of the best dedicated beginner areas in the country. It features gentle slopes, magic carpets, and a conveyor lift system called the “Trollstollen” that serves the beginner terrain.
What I love about Breckenridge for beginners is the sheer volume of green terrain that’s accessible from the mid-mountain area. Once you’ve mastered the learning campus, you can ride the Peak 8 SuperConnect and access a wide network of long, gentle green runs that wind down the mountain. The resort is also one of the few places where you can ride above the treeline as a beginner, giving you incredible panoramic views of the Tenmile Range.
The Vibe & Logistics:
Breckenridge has a vibrant, energetic town with a historic Main Street packed with restaurants, shops, and bars. The free “Free Ride” bus system connects the town to the resort. It’s about a 2-hour drive from Denver International Airport, but the resort offers shuttle services. The town sits at about 9,600 feet, so take it easy on your first day to acclimate.
Why It’s Great for Beginners
- Exceptional dedicated learning campus at the base.
- Large amount of beginner terrain across the mountain.
- Vibrant, walkable town with great dining and nightlife.
- Part of the Epic Pass network.
- Beautiful high-alpine scenery.
Things to Consider
- High altitude can cause altitude sickness.
- Very crowded during peak season.
- Can be windy on upper mountain.
6. Sugarloaf, Maine: East Coast’s Best Kept Secret
Sugarloaf might be known for its challenging terrain, but it’s also one of the best places on the East Coast to learn snowboarding. The resort’s learning area at the base is well-designed with its own dedicated lift and gentle terrain. What sets Sugarloaf apart is the quality of its instruction — the ski and snowboard school here has a stellar reputation for producing confident riders.
Once you progress beyond the learning area, the Wideawl Trail is a masterpiece of beginner terrain. It’s one of the longest beginner runs in the East, stretching over a mile with a consistent, gentle pitch. The resort also gets fantastic natural snow, averaging over 300 inches per year, which means soft, forgiving conditions for learning.
The Vibe & Logistics:
Sugarloaf has a tight-knit, authentic mountain community vibe. The base village has everything you need without feeling商业化. It’s about a 3-hour drive from Portland, Maine, and Boston. The resort offers shuttle services during peak season.
Why It’s Great for Beginners
- Excellent natural snow conditions.
- Outstanding ski and snowboard school.
- Long, consistent beginner runs.
- Authentic mountain community atmosphere.
- Less crowded than many New England resorts.
Things to Consider
- Longer drive from major airports.
- Can be cold and windy.
- Limited nightlife compared to larger resorts.
7. Killington, Vermont: The Beast of the East
Killington is one of the largest resorts in the eastern United States, and it has a surprisingly excellent setup for beginners despite its reputation for challenging terrain. The Snowdance Base Area is a dedicated learning zone with its own magic carpets and a perfectly pitched beginner slope. The ski school here is one of the most respected in the East, with instructors who specialize in first-timer experiences.
Once you’re ready to venture beyond the learning area, Killington offers a vast network of beginner-friendly green and easy blue runs, particularly on the Ramshead side of the mountain. The Ramshead Learn to Ride area is completely separated from the main mountain, giving you a stress-free environment to build confidence. The resort also offers night skiing on select trails, which is great for getting extra practice time.
The Vibe & Logistics:
Killington has an energetic, party-friendly atmosphere. The town along Route 4 has plenty of restaurants, bars, and après-ski spots. It’s about a 4-hour drive from New York City and 3 hours from Boston. The resort offers bus services from both cities on weekends.
Why It’s Great for Beginners
- Large dedicated learning area with own lifts.
- Extensive beginner terrain on Ramshead side.
- Night skiing available for extra practice.
- Long season due to advanced snowmaking.
- Easy access from NYC and Boston.
Things to Consider
- The mountain’s size can be overwhelming.
- Parking can be challenging on busy days.
- Some runs require traversing to connect.
8. Keystone, Colorado: Family-Friendly at Every Turn
Keystone Resort is often overshadowed by its famous neighbor Breckenridge, but it’s actually one of the most beginner-friendly resorts in Colorado. The resort’s “Kidtopia” program is legendary, but the adult beginner experience is equally well-designed. The learning area at the base is spacious and well-separated from main mountain traffic.
What I particularly appreciate about Keystone for beginners is the progression terrain. After you master the learning area, you can ride the Discovery lift to access a pod of gentle green runs that are perfectly pitched for practicing turns. The runs are wide, well-groomed, and offer stunning views of the Continental Divide. Keystone also offers night skiing on select nights, which is unusual for Colorado resorts and gives beginners extra time to practice.
The Vibe & Logistics:
Keystone has a charming, pedestrian-friendly village at the base with restaurants, shops, and a tubing hill. It’s about a 1.5-hour drive from Denver, making it one of the closest major resorts to the airport. The free Summit Stage bus connects Keystone to Breckenridge and other nearby towns.
Why It’s Great for Beginners
- Excellent progression terrain for advancing skills.
- Night skiing available on select nights.
- Close to Denver for easy airport access.
- Part of the Epic Pass network.
- Charming base village with great dining.
Things to Consider
- High altitude requires acclimation.
- Can get crowded during holidays.
- Some beginner runs require a short hike.
9. Jay Peak, Vermont: Powder Paradise for Learning
Jay Peak is famous for getting some of the most snow on the East Coast, averaging over 350 inches per year. But what many people don’t realize is that it’s also an excellent place to learn. The learning area at the base is well-designed, and the resort’s investment in its snowboard school has paid off — instructors here are consistently rated among the best in the East.
Once you’re past the learning phase, Jay Peak offers some of the most enjoyable beginner terrain in Vermont. The “Howling Wolf” trail is a favorite among new riders — it’s long, consistently pitched, and offers beautiful mountain views. The resort’s location near the Canadian border means it gets consistent snowfall throughout the season, so you’ll always have soft conditions to practice on.
The Vibe & Logistics:
Jay Peak has a unique vibe thanks to its proximity to Canada. The resort has invested heavily in its base area, including an indoor waterpark (Pump House) that’s great for families. It’s about a 5-hour drive from Boston but only 1.5 hours from Montreal. The international access makes it a unique destination.
Why It’s Great for Beginners
- Incredible natural snowfall for soft learning conditions.
- Excellent snowboard school with great instructors.
- Unique Canadian-border location and vibe.
- Indoor waterpark for off-slope fun.
- Less crowded than many Vermont resorts.
Things to Consider
- Long drive from most East Coast cities.
- Can be very cold and windy.
- Smaller town with fewer off-mountain options.
10. Sunday River, Maine: The New England Classic
Sunday River is one of the largest resorts in New England, and its learning infrastructure is top-notch. The resort has a dedicated “Learning Center” at the base that includes multiple magic carpets, a terrain park for beginners, and a lodge where you can warm up and grab lunch. The instruction here is exceptional — the resort has won numerous awards for its ski and snowboard school.
What I love about Sunday River for beginners is the sheer amount of beginner terrain spread across the mountain’s eight peaks. Once you’re ready to explore, you can access green runs from multiple lifts, giving you variety without having to tackle challenging terrain. The “Sunday River Terrain Park” also has a beginner section with small, gentle features perfect for your first park experience.
The Vibe & Logistics:
Sunday River has a classic New England feel with its multiple base lodges and charming Maine surroundings. It’s about a 3-hour drive from Portland and 5 hours from Boston. The nearby town of Bethel offers lodging, dining, and a welcoming community atmosphere.
Why It’s Great for Beginners
- Award-winning ski and snowboard school.
- Vast amount of beginner terrain across multiple peaks.
- Beginner-friendly terrain park section.
- Excellent snowmaking ensures consistent conditions.
- Part of the Ikon Pass network.
Things to Consider
- The multiple peaks can be confusing at first.
- Long drive from major airports.
- Wind can affect upper mountain lifts.
Midwest & Hidden Gem Beginner Resorts
Not everyone can travel to Colorado or Utah for their first snowboard trip. The Midwest and some lesser-known resorts across the country offer excellent learning experiences at a fraction of the cost. These hidden gems deserve recognition for their commitment to beginner-friendly instruction and terrain.
11. Granite Peak, Wisconsin: Midwest’s Best Learning Mountain
Granite Peak in Wausau, Wisconsin, consistently ranks as one of the best Midwest resorts for learning. The resort has invested heavily in its beginner infrastructure, including a dedicated learning area with magic carpets and well-designed beginner terrain. The mountain has a surprising amount of vertical drop for the Midwest (over 700 feet), but the beginner runs are perfectly pitched and groomed.
What makes Granite Peak special for beginners is its progressive terrain. After mastering the learning area, you can access several long, gentle green runs that wind down the mountain. The grooming here is exceptional, with the resort maintaining smooth, consistent surfaces throughout the day. For Midwest residents, this is the perfect first-trip destination without the cost and time commitment of traveling to the Rockies.
The Vibe & Logistics:
Granite Peak has a friendly, welcoming atmosphere. The base lodge is modern and comfortable, with rental shops and a cafeteria. It’s an easy drive from Milwaukee, Madison, and Minneapolis, making it a great weekend destination. The nearby city of Wausau offers hotels, restaurants, and other activities for non-skiing family members.
Why It’s Great for Beginners
- Excellent beginner infrastructure for the Midwest.
- Great grooming and snowmaking.
- Affordable compared to western resorts.
- Easy drive from major Midwest cities.
- Progressive terrain for advancing skills.
Things to Consider
- Smaller than western resorts.
- Weather can be unpredictable.
- Limited advanced terrain.
12. Lutsen Mountains, Minnesota: North Shore Adventure
Lutsen Mountains on Minnesota’s North Shore is the largest ski resort in the Midwest, and it’s an excellent place for beginners to learn. The resort has a dedicated learning area called “Meadows” with its own chairlift and gentle terrain. The views of Lake Superior from the beginner runs are absolutely stunning, making it one of the most scenic learning environments in the country.
The beginner terrain at Lutsen is well-designed, with wide, gentle runs that are perfect for practicing turns. The resort also offers lessons and packages specifically designed for first-timers, including equipment rental and instruction. The North Shore setting provides a unique learning experience — you’re surrounded by forests and lake views while you learn.
The Vibe & Logistics:
Lutsen has a rustic, adventurous feel. The nearby town of Lutsen and the North Shore communities offer lodging, dining, and outdoor activities. It’s about a 5-hour drive from Minneapolis, making it a great weekend destination. The area also offers snowshoeing, cross-country skiing, and ice fishing for non-snowboarding family members.
Why It’s Great for Beginners
- Stunning Lake Superior views while learning.
- Spacious, well-designed beginner area.
- Multiple activities for non-snowboarders.
- Affordable pricing.
- Unique North Shore adventure atmosphere.
Things to Consider
- Long drive from Minneapolis.
- Smaller than western resorts.
- Weather can be very cold.
13. Crystal Mountain, Washington: Pacific Northwest’s Hidden Gem
Crystal Mountain is Washington State’s largest ski resort, and it’s a fantastic place for beginners despite its reputation for challenging terrain. The resort’s “learning area” at the base is well-designed, with multiple magic carpets and a dedicated chairlift for beginners. The instructors here are patient and skilled at working with first-timers.
Once you’re ready to explore the mountain, Crystal offers several excellent beginner runs, particularly in the “Green Valley” area. These runs are long, wide, and offer incredible views of Mount Rainier. The resort gets excellent natural snow, averaging over 300 inches per year, which means soft, forgiving conditions for learning.
The Vibe & Logistics:
Crystal Mountain has a rustic, authentic mountain feel. The base area has lodges, restaurants, and a resort village. It’s about a 2-hour drive from Seattle, making it accessible for Pacific Northwest residents. The proximity to Mount Rainier provides stunning scenery that makes learning even more special.
Why It’s Great for Beginners
- Stunning Mount Rainier views from beginner runs.
- Excellent natural snow conditions.
- Dedicated learning area with own lifts.
- Accessible from Seattle.
- Authentic mountain atmosphere.
Things to Consider
- Mountain road can be challenging in bad weather.
- Smaller learning area than some resorts.
- Limited nightlife.
International Beginner-Friendly Resorts Worth the Trip
If you’re looking to combine learning to snowboard with an international adventure, several resorts around the world offer exceptional beginner experiences. These resorts combine world-class instruction with stunning scenery and unique cultural experiences.
14. Banff Sunshine Village, Alberta, Canada
Banff Sunshine Village is one of Canada’s premier resorts, and it’s surprisingly beginner-friendly. The resort has a dedicated learning area at the base called “Village Learning Area” with magic carpets and gentle terrain. The snowboard school here is excellent, with instructors who specialize in first-timer experiences.
What sets Banff apart for beginners is the scenery. You’ll be learning to snowboard with views of the Canadian Rockies that are absolutely jaw-dropping. The resort also gets consistent snow throughout the season, with an average of 300+ inches per year. Once you progress, there are several long, gentle green runs that offer stunning mountain views.
Why It’s Great for Beginners
- Breathtaking Canadian Rocky Mountain scenery.
- Excellent snow conditions and grooming.
- Outstanding snowboard school.
- Part of the Banff National Park experience.
- Consistent snowfall throughout the season.
Things to Consider
- Requires international travel.
- Higher cost for lift tickets and lessons.
- Can be very cold in January and February.
15. Nendaz, Switzerland: European Beginner Paradise
While many European resorts are known for challenging terrain, Nendaz in the Swiss Alps is a wonderful exception. It’s part of the massive 4 Vallées ski area but has excellent beginner terrain of its own. The resort has a dedicated learning area with modern lifts and gentle slopes. The Swiss snowboard schools are renowned for their quality instruction.
Learning to snowboard in Switzerland offers a unique experience — you’ll be riding with views of the Matterhorn and other iconic peaks. The resort also has a fantastic network of long, gentle beginner runs that connect to the larger 4 Vallées area, giving you room to grow. The grooming here is impeccable, and the Swiss commitment to quality infrastructure means you’ll have excellent conditions for learning.
Why It’s Great for Beginners
- Incredible Swiss Alpine scenery.
- World-class Swiss ski and snowboard schools.
- Access to massive 4 Vallées ski area.
- Impeccable grooming and infrastructure.
- Authentic Swiss mountain village experience.
Things to Consider
- Switzerland is expensive.
- Requires international travel.
- Some beginner runs require gondola rides.
16. Nozawa Onsen, Japan: Culture Meets Snowboarding
Japan has become a snowboarding mecca, and Nozawa Onsen is one of the best places for beginners to start their journey. This traditional hot spring village has a small but perfectly designed ski area with excellent beginner terrain. The resort has a dedicated learning zone called “Daiichi Family Course” with gentle slopes and its own lift.
What makes Nozawa special for beginners is the combination of excellent instruction, natural hot springs, and incredible powder snow. The resort receives massive amounts of snowfall (over 30 feet per year!), creating soft, forgiving conditions for learning. After a day on the slopes, you can soak in one of the village’s free public hot springs — the perfect way to recover from sore muscles.
Why It’s Great for Beginners
- Incredible natural powder snow for learning.
- Traditional Japanese hot spring village experience.
- Affordable by international standards.
- Excellent instruction with small class sizes.
- Unique cultural immersion opportunity.
Things to Consider
- Requires international travel and potentially language barrier.
- Smaller than many western resorts.
- Heavy snowfall can affect visibility.
17. La Rosière, France: Italian Border Charm
La Rosière in the French Alps is a hidden gem for beginners. This resort sits on the Italian border and offers a unique blend of French and Italian culture. The resort has a dedicated beginner area called “Le Blizzard” with gentle slopes, magic carpets, and excellent instruction. What’s unique about La Rosière is its “Espace San Bernardo” area, which provides easy access to the Italian side for when you’re ready to explore.
The beginner terrain here is exceptional — wide, well-groomed runs with stunning views of the Mont Blanc massif. The French snowboard schools are excellent, with patient instructors who specialize in first-timers. The village itself is charming and authentic, with traditional Savoyard architecture and fantastic local cuisine.
Why It’s Great for Beginners
- Unique French-Italian border experience.
- Excellent dedicated beginner area.
- Stunning Mont Blanc views.
- Authentic Savoyard village atmosphere.
- Access to Italian ski area for progression.
Things to Consider
- Requires international travel.
- Smaller resort than some French alternatives.
- Altitude can be challenging.
Gear Up For Success: Your First-Timer’s Shopping List
While renting is a great option for your first day, you’ll want your own gear as soon as you’re hooked. Comfort and a forgiving setup are key for beginners. Here’s what to look for, featuring products perfect for learning.

Burton Ripcord Flat Top Snowboard
This board is specifically designed to help you progress. Its flat profile is stable and less likely to catch an edge than traditional camber boards. A soft, forgiving flex makes it easy to initiate turns. It’s the perfect first board to build confidence.
Check Price on Amazon
Dakine Freestyle Snowboard Bag
Once you have your own gear, you need to protect it. The Dakine Freestyle is a simple, durable, and padded bag that’s perfect for car trips or as a carry-on for flights. See more options in our guide to the best snowboard bags.
Check Price on Amazon
Burton Moto BOA Snowboard Boots
Your boots are your most important piece of gear. The Moto BOA is famous for its out-of-the-box comfort and forgiving flex. The BOA system lets you dial in the perfect fit easily. Find your perfect pair with our guide to the best snowboard boots.
Check Price on AmazonBeginner Gear Strategy: Rent First, Buy Smart
For your very first trip, rent everything. This lets you try different board sizes and boot fits without committing thousands of dollars. Most resorts have excellent rental shops, and many beginner packages include rental gear with lessons. Once you’ve ridden 3-5 days and know you love the sport, start buying your own gear piece by piece. Buy boots first — they’re the most personal piece of equipment and having your own boots will dramatically improve your comfort and control. Then buy a board and bindings. Leave jacket, pants, goggles, and helmet for last, since you can rent these or use ski equivalents until you know what features matter most to you.
Understanding Your Snowboard: Anatomy & Terminology
Before you hit the slopes, it helps to understand what you’re standing on. A snowboard might look like a simple piece of equipment, but every part has a purpose, and understanding the terminology will help you communicate with instructors, rental technicians, and other riders.
Board Parts
Nose and Tail
The nose is the front end of the snowboard (the direction you’re facing when you ride), and the tail is the back end. On directional boards, the nose is slightly longer and softer than the tail. On twin-tip boards (which are great for beginners), the nose and tail are symmetrical, making it easier to ride switch (backwards).
Waist
The waist is the narrowest point of the snowboard, typically under your feet. The waist width determines how your boots fit on the board — if it’s too narrow, your boots will overhang and catch in the snow (toe drag), and if it’s too wide, you’ll have less control over edge-to-edge transitions.
Effective Edge
The effective edge is the part of the board’s metal edge that actually contacts the snow when you’re turning. A longer effective edge provides more stability and grip, while a shorter one makes the board easier to turn. For beginners, a moderate effective edge is ideal — enough stability for learning but not so much that turns require excessive effort.
Camber / Rocker / Flat
These terms describe the profile (shape) of the board when viewed from the side. Camber arches up in the middle when unweighted, providing pop and edge grip but can be less forgiving. Rocker (or reverse camber) curves up at the ends, making the board more forgiving and easier to turn — great for beginners. Flat profile sits flat against the snow, offering a middle ground between camber and rocker. Many beginner boards use a flat or rocker profile for the most forgiving ride.
Sidecut
The sidecut is the curved indentation along the edges of the board between the nose and tail. This curve is what allows the board to turn — when you tilt the board on edge, the sidecut creates an arc in the snow. A deeper sidecut creates tighter turns, while a shallower sidecut produces wider, more sweeping turns. Beginners typically benefit from a moderate sidecut that allows for easy, controlled turns.
Flex Rating
The flex rating describes how stiff or soft the board is. It’s usually rated on a scale of 1-10, with 1 being the softest and 10 being the stiffest. Soft flex (1-4) is ideal for beginners because it’s more forgiving and easier to turn at slower speeds. Stiffer boards are better for advanced riders who need stability at high speeds. Most beginner snowboards have a flex rating of 2-4.
How to Choose the Right Snowboard Size
One of the most common mistakes beginners make is riding a board that’s the wrong size. A board that’s too long will be difficult to turn and control, while one that’s too short will feel unstable at speed. Here’s how to find the right size for your body and riding style.
The Basic Sizing Method
The simplest way to estimate your snowboard size is to stand the board on its tail and see where the nose reaches on your body. For beginners, the board should typically reach somewhere between your chin and nose. Here’s a more detailed breakdown:
- Board Length: Your weight is the most important factor in determining board length. Heavier riders need longer boards for support, while lighter riders can use shorter boards for easier turning. A general rule: your board should weigh approximately 100% of your body weight in grams (e.g., a 160-pound rider would ride a board around 150-160 cm long).
- Board Width: The board should be wide enough that your boots don’t hang over the edges too much. If you have large feet (size 11+), you’ll need a “wide” board to prevent toe and heel drag. For boot sizes 8-10, a standard-width board is fine.
- Your Height: While weight is more important, height also plays a role. Taller riders generally need longer boards, while shorter riders do better with shorter boards. The chin-to-nose method gives you a quick starting point.
Sizing Chart for Beginners
Rider Weight: 100-120 lbs → Board Length: 138-146 cm
Rider Weight: 120-140 lbs → Board Length: 143-151 cm
Rider Weight: 140-160 lbs → Board Length: 148-156 cm
Rider Weight: 160-180 lbs → Board Length: 153-161 cm
Rider Weight: 180-200 lbs → Board Length: 158-166 cm
Rider Weight: 200-220 lbs → Board Length: 163-171 cm
Rider Weight: 220+ lbs → Board Length: 166+ cm
Beginner Sizing Tip
When in doubt, go shorter rather than longer. A shorter board is easier to turn and more forgiving for beginners. You can always progress to a longer board as your skills improve. The most important thing is that you feel comfortable and in control. If you’re at a rental shop, ask the technician to help you find the right size — they do this all day and can recommend the perfect board for your body type and skill level.
Regular vs. Goofy: Finding Your Snowboard Stance
Before you start riding, you need to know which foot goes in front. This is called your “stance,” and it’s one of the first things you’ll figure out on your first day. There are two stances: regular (left foot forward) and goofy (right foot forward). Neither is better than the other — it’s purely a matter of personal preference, just like being left-handed or right-handed.
How to Determine Your Stance
There are several simple tests to figure out which stance feels natural:
- The Slide Test: Stand on a smooth floor in your socks and have someone push you gently from behind. Whichever foot you step forward with is likely your front foot. If you step forward with your left foot, you’re regular. Right foot, you’re goofy.
- The Stair Test: Stand at the bottom of a flight of stairs and pretend to walk up them. The foot you naturally lead with is likely your front foot on a snowboard.
- The Skateboard Test: If you’ve ever skateboarded, surfed, or wakeboarded, you probably already know your stance. Whatever feels natural on those boards will likely be your snowboard stance too.
- The Push Test: Stand with your feet together and have someone push you from the side. Whichever direction you naturally turn and step is your dominant side. If you turn to face your left shoulder, you’re regular. If you turn to face your right shoulder, you’re goofy.
Don’t Overthink It
About 70% of riders are regular (left foot forward), but that doesn’t mean you should be too. Try both stances if you’re unsure — start with whichever feels more natural, but don’t be afraid to switch if something feels off. Your snowboard instructor can help you determine the best stance on your first lesson. The most important thing is that you feel balanced and comfortable.
Stance Width and Angles
Once you know your stance direction, you’ll also need to set your stance width (how far apart your feet are) and your binding angles (the angle at which your bindings are tilted). For beginners:
- Stance Width: A good starting point is to set your bindings approximately shoulder-width apart. Most rental shops will set this up for you, but you can adjust it as you get more comfortable. A wider stance provides more stability, while a narrower stance makes it easier to turn.
- Binding Angles: For beginners, a “duck stance” works well — this means both bindings are angled slightly outward (e.g., +15 degrees on the front foot and -15 degrees on the back foot). This makes it comfortable to ride in both directions. Alternatively, a simple +15/+9 setup is also beginner-friendly.
Preparing Your Body Before the Mountain
Snowboarding is a physically demanding sport that uses muscles you might not normally engage. Spending even two weeks doing some basic conditioning before your trip can make a dramatic difference in how you feel on the mountain and how quickly you progress. You don’t need to become a gym rat — just some targeted exercises will help tremendously.
Key Muscle Groups for Snowboarding
- Core (Abs and Lower Back): Your core is the foundation of snowboarding balance. Strong core muscles help you maintain proper posture and control on the board. Exercises: planks, Russian twists, bird-dogs, dead bugs.
- Quadriceps (Front of Thighs): You’ll be in a semi-squat position for hours, and your quads take the brunt of it. Exercises: wall sits, bodyweight squats, lunges, step-ups.
- Glutes: Your glutes are crucial for initiating turns and absorbing bumps. Exercises: glute bridges, hip thrusts, squats, donkey kicks.
- Calves: Your calves are constantly engaged as you balance on the board. Exercises: calf raises, single-leg calf raises, jump rope.
- Inner and Outer Thighs: Snowboarding requires lateral movements that engage your adductors and abductors. Exercises: lateral lunges, side steps with resistance bands, wall ball squeezes.
A Simple 2-Week Pre-Trip Workout Plan
Monday: Lower Body Focus
3 sets of 15 bodyweight squats, 3 sets of 12 lunges per leg, 3 sets of 20-second wall sits, 3 sets of 15 glute bridges. Rest 30 seconds between sets.
Wednesday: Core & Balance
3 sets of 30-second planks, 3 sets of 10 bird-dogs per side, 3 sets of 12 Russian twists, 3 sets of 20 single-leg balance holds (10 per leg). Rest 30 seconds between sets.
Friday: Full Body & Cardio
20 minutes of jumping jacks or light jogging, 3 sets of 10 burpees (modified if needed), 3 sets of 15 mountain climbers, 3 sets of 10 squat jumps. This builds endurance for long days on the mountain.
Daily: Stretching
10 minutes of daily stretching focusing on hip flexors, hamstrings, and lower back. Tight hips are a snowboarder’s enemy. Consider adding yoga to your routine — it’s excellent for balance and flexibility.
Important: Don’t Overdo It
The goal is to prepare your body, not exhaust it before your trip. These exercises should feel challenging but not exhausting. If you’re new to exercise, start with fewer reps and build up gradually. The worst thing you can do is injure yourself before your snowboard trip even begins. Listen to your body and stop if something hurts.
Your First Day on the Mountain: What to Expect
Knowing what to expect on your first day can make the experience much less overwhelming. Here’s a detailed walkthrough of what a typical first day looks like, from arrival to après-ski.
Morning: Getting Set Up
Arrive early — at least 30 minutes before your lesson starts. This gives you time to pick up your rental gear without rushing. At the rental shop, you’ll be fitted for boots, a board, and bindings. Make sure the boots feel snug but not painful. Your toes should lightly touch the front of the boot, and when you flex your knees forward, they should pull back slightly. If anything hurts, speak up — the rental tech can help.
After getting your gear, head to the learning area and find your instructor. Most lessons begin with introductions, a quick overview of the terrain, and basic safety rules. Your instructor will show you how to strap into your board properly and how to stand up from a sitting position.
Late Morning: Learning the Basics
The first few hours will focus on the absolute fundamentals: standing on the board, sliding on flat terrain, and getting comfortable with the heel-side edge. You’ll spend a lot of time sitting down, standing up, and falling — and that’s completely normal. Your instructor will guide you through each step with patience and encouragement.
One of the most important skills you’ll learn is the “falling leaf” — a technique where you slide down the slope on your heel edge, shifting your weight from side to side to control your direction. This is your first taste of control on the board, and it’s a huge confidence builder.
Lunch: Refuel and Recharge
Take a proper lunch break. You’ll be burning more calories than you realize, and your body needs fuel to keep learning. Find a warm lodge, remove your boots (they’re more comfortable to walk in than you’d think), and eat a substantial meal. This is also a great time to chat with your instructor about your morning progress and get tips for the afternoon.
Afternoon: Putting It All Together
After lunch, your instructor will likely introduce you to toe-side edge control and eventually attempt your first turns. By the end of the lesson, many beginners can link a few basic turns together. Don’t expect to be carving down the mountain — the goal is simply to understand the mechanics of turning and to feel some sense of control.
The afternoon is when fatigue really sets in. Your legs will feel heavy, your feet might be sore, and you’ll be mentally exhausted. This is when most beginners want to quit. Push through if you can — the last hour of the day often produces the biggest breakthroughs. But also listen to your body. If you’re truly spent, it’s better to call it a day than to push too hard and get injured.
End of Day: Après-Ski
After you’ve unstrapped for the last time, take a moment to celebrate what you accomplished. You stood sideways on a slippery surface and slid down a mountain — that’s not nothing! Head to the lodge or a nearby restaurant for some après-ski. Stretch gently, rehydrate, and eat a good dinner. Your body will thank you tomorrow.
How to Fall Safely (Yes, It’s a Skill)
Falling is an inevitable part of learning to snowboard. In fact, you’ll probably fall more in your first day than most people fall in a week of skiing. The good news is that learning to fall properly can significantly reduce your risk of injury and minimize soreness.
The Golden Rules of Falling
- Don’t Reach for the Ground: The most common snowboarding injury is a broken wrist from reaching out to catch yourself. When you feel yourself falling, keep your arms close to your body and make fists. This instinctively prevents you from extending your hands.
- Fall Sideways: Try to fall on your side rather than forward or backward. This distributes the impact across a larger area and avoids direct hits to your wrists, tailbone, or head.
- Relax Your Body: This sounds counterintuitive, but tensing up actually increases your risk of injury. Try to relax and go with the fall. A relaxed body absorbs impact better than a rigid one.
- Fall Uphill When Possible: If you feel a fall coming on, try to direct it uphill. This uses gravity to slow your momentum and results in a softer landing.
- Get Out of the Way: If you fall on a busy run, make an effort to get to the side as quickly as possible. Other riders and skiers need clear sight lines to avoid you. Once you’re safely on the side, take your time getting up.
Pro Tip: Impact Shorts
One of the best investments a beginner can make is a pair of padded “impact shorts.” These are thin, padded shorts that fit under your snow pants and protect your tailbone and hips from hard impacts. They’re virtually invisible under your pants and can save you days of soreness. Many riders wear them throughout their careers, not just as beginners.
Getting Up After a Fall
Getting up off the snow is harder than it looks, especially when you’re tired. Here’s the easiest method:
- Roll onto your stomach so the board is behind you.
- Position the board perpendicular to the slope (across the hill, not pointing downhill).
- Push yourself up with your hands while keeping the board’s edge dug into the snow.
- Once you’re on your knees, bring one foot forward and push up to a standing position.
- Alternatively, if you’re on your back, roll to one side, dig the heel edge into the snow, and push yourself up.
Practice getting up a few times on flat terrain before you head to the slopes. It’s much harder to do when you’re exhausted and on a steep pitch.
10 Common Beginner Mistakes and How to Avoid Them
Having taught many friends and seen countless beginners on the mountain, I’ve identified the most common mistakes that hold new riders back. Avoiding these pitfalls will dramatically accelerate your learning.
Mistake #1: Not Taking a Lesson
This is the biggest mistake beginners make. Self-teaching through YouTube videos or having a friend teach you might seem like a good way to save money, but it often leads to bad habits that are extremely hard to break later. A professional instructor will teach you proper technique from the start, saving you time, frustration, and potential injury.
Mistake #2: Looking Down at Your Board
When you look down at your feet, you throw off your balance and limit your ability to see what’s ahead. Train yourself to look in the direction you want to go. Your board will follow your eyes. It feels unnatural at first, but it’s one of the most important habits to develop early.
Mistake #3: Straightening Your Legs
Standing up straight with locked knees is the most common cause of losing control. Always keep your knees bent and your weight centered over the board. Think of it as sitting in an invisible chair. This athletic stance gives you better balance and control.
Mistake #4: Leaning Too Far Back
Many beginners instinctively lean back when going downhill, like they’re trying to get away from the slope. This puts too much weight on the back foot and makes the board hard to control. Keep your weight centered or slightly forward to maintain control.
Mistake #5: Using Your Arms for Balance
Flailing your arms might feel like it helps with balance, but it actually throws off your center of gravity. Keep your arms relaxed at your sides or slightly forward. Your balance should come from your core and legs, not your arms.
Mistake #6: Trying to Go Too Fast Too Soon
Speed is not your friend when you’re learning. Control is. It’s tempting to point the board downhill and let gravity do its thing, but this usually ends in an uncontrolled fall. Focus on controlling your speed through turn shape and edge pressure. Slower is faster when it comes to learning.
Mistake #7: Not Edge-Changing Properly
Beginners often try to turn by twisting their upper body rather than properly shifting their weight from heel edge to toe edge (or vice versa). The turn comes from your feet and legs, not your shoulders. Focus on rolling your ankles and knees to initiate edge changes.
Mistake #8: Fighting the Mountain
Some beginners tense up and try to resist the mountain’s forces rather than flowing with them. Snowboarding is about working with gravity, not against it. Relax, trust the process, and let the board do its job. Tension leads to fatigue and falls.
Mistake #9: Not Taking Breaks
Snowboarding is exhausting, especially for beginners. When you’re tired, your technique deteriorates, you make more mistakes, and you increase your risk of injury. Take regular breaks to rest, hydrate, and refuel. There’s no shame in sitting out a run to recharge.
Mistake #10: Giving Up Too Soon
The first day or two of snowboarding can be incredibly frustrating. You’ll fall a lot, your body will ache, and progress might feel painfully slow. But this is completely normal. Most riders don’t feel truly comfortable until their third or fourth day. Give yourself at least 2-3 days before deciding if snowboarding is for you.
Your Snowboard Progression Milestones
Understanding what to expect at each stage of your snowboard journey helps set realistic expectations and celebrate your progress. Here’s a timeline of typical milestones for a dedicated beginner.
Day 1: Surviving and Discovering
You’ll spend most of the day learning to balance, slide, and fall safely. By the end, you might be able to do a “falling leaf” on your heel edge and possibly attempt your first toe-side slides. The main achievement is simply getting comfortable on the board and understanding how it moves. You’ll be sore, tired, and probably addicted.
Days 2-3: Linking Turns
This is where the magic happens. You’ll start linking heel-side and toe-side turns together, creating those beautiful S-shapes down the mountain. It will feel wobbly and uncertain, but you’re doing it. By the end of day 3, most riders can navigate easy green runs with some confidence.
Days 4-5: Building Confidence
Your turns will start to feel more natural and fluid. You’ll be able to control your speed better and navigate around other riders. The green runs that felt intimidating on day 1 will start to feel comfortable. You might even start venturing onto easy blue runs.
Week 2: Finding Your Rhythm
By your second week of riding, you’ll be linking turns more smoothly and with more control. You’ll start developing your own riding style and preferences. Easy blue runs will feel manageable, and you’ll be riding the chairlifts with confidence.
Month 2-3: Intermediate Territory
You’ll be comfortable on most blue runs and might even tackle some easier black diamonds. Your turns will be smoother, your speed will increase, and you’ll start carving rather than skidding turns. This is where snowboarding truly becomes fun and addictive.
Month 6+: Advanced Beginner / Intermediate
You’ll be riding confidently across the mountain, seeking out varied terrain and challenging yourself. You might start exploring terrain parks, steeper terrain, or even backcountry. The learning never stops, but now it’s about refinement and expansion rather than basic survival.
Every Rider’s Journey is Different
Don’t compare your progress to others. Some people pick up snowboarding quickly, while others need more time. Factors like your athletic background, age, fear level, and how often you ride all affect your progression. The key is to enjoy the process and celebrate each small victory. Every turn you link, every run you complete, is an achievement worth celebrating.
Mountain Etiquette & Safety Rules
Understanding mountain etiquette isn’t just about being polite — it’s about keeping yourself and others safe. These rules are based on the International Responsibility Code, which is the universal standard for ski area safety.
The 7 Rules Every Beginner Must Know
Rule 1: Always Stay in Control
You must be able to stop or avoid other people or objects. This doesn’t mean going slowly — it means riding at a speed where you can react to unexpected situations. If you can’t stop quickly, you’re going too fast for your skill level.
Rule 2: People Ahead of You Have the Right of Way
The person downhill from you (the person ahead) has the right of way. It’s your responsibility to avoid them. They can’t see you coming, so it’s up to you to plan your line and give them plenty of space.
Rule 3: Stop in Safe Places
If you need to stop, move to the side of the trail. Never stop in the middle of a run or below a blind spot (like below a knoll or around a corner). If you fall, try to get up and move to the side as quickly as possible.
Rule 4: Look Uphill Before Starting
Before you start riding or merge onto a trail, look uphill to make sure no one is coming. Other riders have the right of way, and you need to make sure it’s safe before you enter their path.
Rule 5: Respect Signs and Warnings
Resort signs exist for a reason. Stay off closed trails, respect slow zones, and don’t venture into terrain that’s beyond your ability level. A closed trail usually means it’s dangerous or being groomed — not that it’s a secret powder stash.
Rule 6: Know How to Use Lifts Safely
Before getting on a lift, observe how others load and unload. Don’t sit down until the lift operator tells you to. When getting off, stand up and glide away from the unloading area immediately. If you fall getting off, move to the side as quickly as possible.
Rule 7: Report Accidents
If you witness or are involved in an accident, stay at the scene and report it to ski patrol or a resort employee. Don’t move an injured person unless they’re in immediate danger. If you have a phone, note your location using trail markers or lift names.
How to Read a Trail Map Like a Pro
Trail maps can look overwhelming at first, but they’re actually quite simple once you understand the basics. Here’s everything you need to know to navigate the mountain confidently.
Trail Ratings Explained
- Green Circle (Beginner): These are the easiest trails on the mountain. They have gentle slopes (typically 6-25% grade) and are wide and well-groomed. As a beginner, stick to green trails until you’re consistently comfortable and in control.
- Blue Square (Intermediate): These trails are steeper (25-40% grade) and may have some variable terrain. Only attempt blues once you can confidently link turns on green runs. Many blue runs at beginner-friendly resorts are quite mellow and are a natural next step.
- Black Diamond (Advanced): These trails are steep (40%+ grade) and may have bumps, trees, or other challenges. Do not attempt these until you’re a confident intermediate rider.
- Double Black Diamond (Expert): These are the most challenging trails on the mountain, with extreme steepness, cliffs, narrow chutes, and other hazards. Leave these for the experts.
Other Map Symbols
- Lifts: Different symbols represent different lift types — chairs, gondolas, magic carpets, and surface lifts.
- Terrain Parks: Usually marked with a special symbol (often a star or half-circle). Parks have jumps, rails, and other features.
- Slow Zones: Areas marked for reduced speed, often near base areas and learning zones.
- Closed Trails: Typically shown as dashed lines or with an “X” over them.
- Lodge Symbols: Indicate dining, restrooms, and rental shops.
Trail Map Pro Tips
Download the resort’s app before your trip. Most resorts have apps with interactive trail maps that show your location in real-time (using GPS). This is incredibly helpful when you’re trying to find your way around. Also, snap a photo of the trail map with your phone before you head out — it’s easier to reference than a paper map when you’re on the slopes. And always ride with a buddy when exploring new terrain, especially on your first visit to a resort.
Should You Rent or Buy Your First Snowboard?
This is one of the first decisions you’ll face as a new snowboarder. The short answer for most beginners: rent for your first few trips, then buy gradually. Here’s the full breakdown.
When to Rent
- Your First 1-3 Trips: You don’t yet know if snowboarding is for you, and you definitely don’t know what size or style of board works best for you. Renting lets you try different setups without commitment.
- You Only Ride Occasionally: If you only snowboard 1-3 times per year, renting makes financial sense. The cost of buying, maintaining, storing, and transporting gear might exceed what you’d spend on rentals over several years.
- You’re Traveling by Air: Flying with snowboard gear is expensive and inconvenient. Many airlines charge $30-50 each way for ski/snowboard bags, and there’s always a risk of damaged or lost equipment.
When to Buy
- You’ve Ridden 5+ Days and Know You Love It: At this point, you know snowboarding is a long-term passion, and you have a sense of what you like in a board.
- You Ride Regularly: If you’re planning to ride 10+ days per season, buying your own gear pays for itself quickly.
- You Want Consistent Equipment: Having your own gear means you’re always on the same setup, which accelerates your learning. Rental gear can vary in quality and fit.
What to Buy First
If you decide to buy, here’s the priority order:
- Boots: This is the single most important purchase. Your boots are the interface between your body and the board. A well-fitting pair of boots dramatically improves comfort, control, and your overall experience. Never buy boots online without trying them on first.
- Board and Bindings: These go together as a package. Choose a board that matches your size, riding style, and skill level. Most beginners do well with a soft-to-medium flex, rocker or flat profile, twin-tip board.
- Helmet: Non-negotiable. A properly fitting helmet is the most important safety accessory. This is one item where you should never compromise on quality or fit.
- Goggles: Good goggles are essential for visibility and eye protection. Look for lenses that work in various light conditions.
- Outerwear (Jacket and Pants): These can wait until you’ve ridden enough to know what features matter to you. Waterproof and breathable are the key qualities to look for.
Planning Your First Snowboard Trip on a Budget
Snowboarding can be expensive, but it doesn’t have to break the bank. With smart planning, you can have an incredible first experience without emptying your savings account. Here’s how to plan a budget-friendly snowboard trip.
Timing is Everything
- Avoid Holiday Weeks: Christmas, New Year’s, Presidents’ Day weekend, and spring break are the most expensive times to visit resorts. Prices for everything — lift tickets, lodging, lessons, rentals — can double or triple during peak periods.
- Target Midweek: Tuesday through Thursday are typically the cheapest days to ride. Lodging rates drop significantly, and you’ll encounter smaller crowds.
- Early and Late Season: November and April are often the cheapest months. While snow conditions may be less reliable, many resorts have excellent early-season terrain and late-season spring conditions can be wonderful for learning.
Save on Lift Tickets
- Buy in Advance Online: Most resorts offer discounts of 20-40% when you buy lift tickets online at least 7 days in advance.
- Look for Learn-to-Ride Packages: Many resorts offer special beginner packages that bundle a lift ticket, lesson, and rental for a discounted price. These are often the best value for first-timers.
- Consider Multi-Day Tickets: If you plan to ride multiple days, multi-day tickets often offer significant savings over buying daily tickets.
- Check for Deals: Websites like Liftopia, GetSkiTickets, and the resort’s own website often have last-minute deals and discounts.
Save on Lodging
- Stay Off-Mountain: Lodging in resort towns is always more expensive than in nearby towns. A 20-30 minute drive can save you 30-50% on accommodation.
- Consider Hostels or Shared Lodging: Many resort towns have hostels or shared-lodging options that are much cheaper than hotels.
- Look for Package Deals: Some resorts offer lodging + lift ticket packages that provide better value than booking separately.
- Camp or RV: If you’re adventurous, some resorts allow camping or have RV parks nearby. This can dramatically reduce your lodging costs.
Save on Food
- Pack Your Own Lunch: On-mountain food is notoriously expensive. Pack sandwiches, snacks, and a thermos of hot cocoa to eat during your break.
- Eat at Happy Hour: Many resort-town restaurants offer happy hour specials on food and drinks in the late afternoon.
- Cook Your Own Meals: If your lodging has a kitchen, cooking your own breakfast and dinner can save a significant amount of money.
Budget Tip: The Epic Day Pass
If you’re planning just one or two days of riding, look into the Epic Day Pass from Vail Resorts. You can buy 1-7 days of access at select resorts for a fraction of the cost of daily tickets. This can save you hundreds of dollars compared to buying tickets at the window. The Ikon Pass also offers similar day-pass options.
Epic Pass vs. Ikon Pass: Which is Better for Beginners?
The multi-resort pass revolution has changed the economics of snowboarding. Instead of buying expensive daily lift tickets, you can purchase a season pass that gives you access to dozens of resorts. But which pass is better for a beginner? Let’s break it down.
Epic Pass (Vail Resorts)
The Epic Pass gives you access to Vail Resorts properties, including Breckenridge, Keystone, Park City, Northstar, and many others. For beginners, the key benefit is the Epic Day Pass, which lets you buy a set number of days at a discounted rate. The Epic Pass also includes access to the “Learn to Ride” programs at many resorts, which offer discounted lessons and rentals for pass holders.
- Best For: Beginners who want access to major Colorado and Utah resorts, or who are based on the West Coast.
- Price: The Epic Day Pass starts at around $82/day (prices vary by resort and date). The full Epic Pass starts at around $600 for the season.
- Beginner-Friendly Resorts: Breckenridge, Keystone, Park City, Northstar, Heavenly, Stowe.
Ikon Pass (Alterra Mountain Company)
The Ikon Pass gives you access to resorts like Winter Park, Crystal Mountain, Sunday River, Sugarloaf, and others. For beginners, the Ikon Pass offers the Ikon Session Pass, which provides a set number of days at a discounted rate. The Ikon Pass also has partnerships with many resorts that offer discounted beginner lessons.
- Best For: Beginners who want access to a wider variety of resorts across the country, or who prefer the Pacific Northwest and New England.
- Price: The Ikon Session Pass starts at around $95/day (prices vary by resort and date). The full Ikon Pass starts at around $700 for the season.
- Beginner-Friendly Resorts: Winter Park, Crystal Mountain, Sunday River, Sugarloaf, Loon Mountain, Copper Mountain.
My Recommendation for Beginners
Don’t buy a full season pass until you’ve committed to the sport. Start with the Day Pass options (Epic Day Pass or Ikon Session Pass) for your first season. Ride a few days, see which resorts you like, and then decide if a full pass makes sense for the following year. Many beginners find that 5-10 days per season is plenty, and a day pass is much more economical than a full season pass for that frequency.
Snowboarding with Kids: A Family Beginner’s Guide
Taking your kids snowboarding is one of the most rewarding family activities you can do together. But it requires some extra planning and a different approach than learning as an adult. Here’s everything you need to know about introducing your children to snowboarding.
What Age Can Kids Start Snowboarding?
Most resorts offer snowboard lessons for children as young as 3-4 years old, but the ideal age to start is typically between 5-7. At this age, kids have the balance, coordination, and attention span needed to learn effectively. Younger children may find snowboarding frustrating because of the physical demands and the amount of time spent on the ground.
Choosing the Right Resort for Families
Look for resorts with dedicated children’s learning programs, specifically:
- Children’s Snowboard School: Not all ski schools are equal when it comes to kids. Look for programs that specialize in snowboarding (not just skiing), with small class sizes and instructors trained in child development.
- Kids’ Learning Areas: Many resorts have dedicated children’s learning zones with fun features like tunnels, gentle slopes, and themed areas. These keep kids engaged and make learning fun.
- Family-Friendly Base Areas: Look for resorts with kid-friendly amenities at the base — warming huts, hot chocolate, kid-friendly restaurants, and indoor play areas for when kids need a break.
Essential Tips for Snowboarding with Kids
- Keep Sessions Short: Young children have limited attention spans and physical endurance. Plan for 1-2 hour sessions with frequent breaks. It’s better to leave them wanting more than to push until they’re exhausted and miserable.
- Make It Fun: Use games, songs, and rewards to keep kids engaged. Many children’s programs use themed games and obstacle courses to make learning playful.
- Dress Them Warmly: Kids get cold faster than adults. Layer them up with moisture-wicking base layers, warm mid-layers, and waterproof outer layers. Don’t forget waterproof gloves, a helmet, goggles, and hand warmers.
- Pack Extra Food and Drinks: Kids burn tons of energy snowboarding. Pack plenty of snacks and warm drinks to keep their energy up throughout the day.
- Be Patient: Kids learn at their own pace. Some will take to snowboarding immediately; others may need several days before they feel comfortable. Don’t push them too hard — the goal is to create a positive association with the sport.
Family-Friendly Resort Picks
For the best family snowboarding experience, consider these resorts: Buttermilk (CO) — The Hideout children’s learning area is world-class. Keystone (CO) — Kidtopia is one of the best children’s programs in the country. Northstar (CA) — Family-friendly atmosphere with ice skating and fire pits. Okemo (VT) — Excellent children’s programs with a cozy New England feel. Loon Mountain (NH) — Great children’s terrain and family-friendly base area.
Women’s Beginner Snowboarding Guide
While the fundamentals of snowboarding are the same for everyone, women often face some unique considerations when learning. From gear designed specifically for female riders to physical differences that affect technique, here’s what every woman should know before her first day on the mountain.
Women-Specific Gear
Modern women’s snowboard gear isn’t just “shrink it and pink it” — it’s designed with female anatomy in mind:
- Women’s Snowboards: Typically shorter, lighter, and with a softer flex than men’s boards. They also have a narrower waist width to accommodate generally smaller feet. A women’s-specific board will feel more responsive and easier to control for most female riders.
- Women’s Boots: Designed with a narrower heel pocket, lower calf area, and softer flex. Women’s boots also typically have shorter ankle cuffs to accommodate the generally shorter lower leg length. Proper fit is even more critical for women, as poorly fitting boots can cause significant discomfort.
- Women’s Bindings: Smaller base plates, shorter straps, and softer flex designed to work with women’s boots. Women’s bindings also typically have a slightly different highback angle to match the natural stance of female riders.
- Women’s Outerwear: Cut differently to accommodate a woman’s body shape — typically with a narrower waist, wider hips, and shorter torso. Look for jackets with a slightly longer back to keep your lower back covered when bending forward.
Physical Considerations
Women tend to have a lower center of gravity, which can actually be an advantage in snowboarding — it often makes balance easier. However, women may also have less upper body strength, which can make getting up after falls more tiring. Focus on building core and leg strength before your trip.
Women also tend to have wider hips relative to their knees, which can create a slightly different alignment when riding. This is why women-specific boards and bindings can make a significant difference in comfort and control.
Women’s-Only Lessons
Many resorts offer women’s-only snowboard lessons and camps. These can be incredibly beneficial, especially for beginners who may feel intimidated in mixed-gender groups. The instructors understand the specific challenges women face, and the environment is often more supportive and encouraging. Ask your resort if they offer women’s programs.
Mental Game: Overcoming the Fear Factor
Fear is the number one obstacle that holds beginner snowboarders back. The fear of falling, the fear of speed, the fear of losing control — these are all completely natural responses. But if you let fear dominate, you’ll never progress. Here’s how to manage the mental side of learning to snowboard.
Understanding Your Fear
First, recognize that fear is normal and healthy. It’s your brain’s way of protecting you from danger. The problem isn’t having fear — it’s letting fear paralyze you. The key is to distinguish between rational fear (genuine danger that requires caution) and irrational fear (anxiety about things that are unlikely to happen).
Strategies for Managing Fear
- Start Small: Don’t try to tackle a blue run on your first day. Build confidence gradually by mastering each skill before moving to the next challenge. Small wins build the confidence you need for bigger challenges.
- Visualize Success: Before attempting something new, close your eyes and visualize yourself doing it successfully. This mental rehearsal activates the same neural pathways as actual practice and can reduce anxiety.
- Focus on What You Can Control: You can’t control the weather, the snow conditions, or other people on the mountain. But you can control your technique, your speed, and your decision-making. Focus on these controllable factors.
- Use Positive Self-Talk: Replace “I can’t do this” with “I’m learning” or “I’ll get better with practice.” The words you use internally have a powerful effect on your confidence and performance.
- Buddy Up: Riding with a friend provides emotional support and makes the experience more enjoyable. You can encourage each other, celebrate small victories, and laugh off the falls together.
- Accept the Falls: Reframe falling as part of the learning process rather than a failure. Every fall teaches you something about balance, timing, and technique. Some of the best riders in the world fell thousands of times before they mastered the sport.
The “One More Run” Rule
When you’re feeling scared or tired, challenge yourself to do “just one more run.” Often, the fear is worse than the actual experience, and once you start that run, you realize it’s not as bad as you imagined. This gradual exposure builds confidence over time. But also know when to stop — if you’re truly exhausted or conditions are dangerous, it’s smart to call it a day.
Spring Snowboarding: Why Late Season is Great for Learning
Many beginners focus on mid-winter for their first snowboard trip, but late season (March through April) can actually be one of the best times to learn. Here’s why spring snowboarding deserves your consideration.
Benefits of Learning in Spring
- Warmer Temperatures: Spring temperatures mean you’re more comfortable when you fall, and your body doesn’t get cold as quickly. This makes the learning experience much more pleasant.
- Softer Snow: Spring snow is often softer and more forgiving than mid-winter hardpack. This makes it easier to learn turns and less painful when you fall.
- Smaller Crowds: Most tourists have finished their winter vacations by March, meaning shorter lift lines and less crowded slopes.
- Lower Prices: Spring is typically the off-season, with discounted lift tickets, lodging, and rental gear. You can often save 30-50% compared to peak season prices.
- Longer Days: Spring means more daylight hours, giving you more time on the slopes. Many resorts also offer extended hours during spring break.
- Fun Atmosphere: Spring skiing and snowboarding has a party-like atmosphere. Expect music, events, pond skims, and a generally festive vibe on the mountain.
Spring Riding Considerations
Spring conditions can vary dramatically throughout the day. Mornings typically have firm, groomed snow that softens into slush by mid-afternoon. Plan to ride in the morning when conditions are best, and be prepared for changing conditions. Also, sunscreen is essential in spring — the combination of high altitude and reflective snow can burn you quickly. Apply SPF 50+ and reapply throughout the day. Don’t forget lip balm with SPF as well.
Night Riding: A Fun Way to Get More Practice
Some resorts offer night skiing and snowboarding on select trails, typically from late afternoon until 8-9 PM. For beginners, night riding offers some unique advantages that can accelerate your learning.
Why Night Riding is Great for Beginners
- Less Crowded: Night sessions typically draw fewer riders, meaning more open space to practice. You won’t have to worry about navigating around crowds while you’re still learning.
- Cooler Temperatures: Evening temperatures create firmer, more consistent snow conditions. This can actually be easier to learn on than soft afternoon slush.
- Less Pressure: There’s something about the evening atmosphere that feels more relaxed. With fewer people watching and less self-consciousness, you might find yourself trying new things you wouldn’t attempt during the day.
- More Practice Time: If you’re only at the resort for a short trip, night riding effectively doubles your available practice time. Even 2-3 extra runs in the evening can accelerate your progress.
- Beautiful Atmosphere: Riding under the lights with the mountain illuminated at night is a magical experience. The contrast between the dark sky and the bright slopes creates a unique, memorable atmosphere.
Tips for Night Riding
- Use Low-Light Goggle Lenses: Yellow, rose, or clear lenses are designed for low-light conditions and will help you see terrain features better at night.
- Stick to Familiar Terrain: Don’t explore new runs at night. Stick to trails you’ve already ridden during the day so you know what to expect.
- Dress Warmer: Temperatures drop significantly after sunset. Add an extra layer and make sure your gloves are warm and waterproof.
- Ride with a Buddy: Night riding is more enjoyable and safer with a friend. Keep each other in sight and agree on meeting points.
Best Resorts for Night Riding
Not all resorts offer night skiing/riding. Some of the best for night sessions include: Killington (VT) — One of the largest night skiing areas in the East. Keystone (CO) — Offers night skiing several nights per week. Loon Mountain (NH) — Excellent night skiing with well-lit trails. Sunday River (ME) — Night riding on select trails. Cranmore (NH) — Affordable night sessions in a beginner-friendly environment.
Basic Snowboard Maintenance & Care
Taking care of your snowboard will extend its life, improve its performance, and save you money in the long run. Even if you’re a beginner, understanding basic maintenance will help you keep your gear in great condition.
Waxing Your Snowboard
Waxing is the most important maintenance task for your snowboard. Wax keeps the base hydrated, reduces friction, and helps the board glide smoothly over the snow. A freshly waxed board feels like a completely different ride compared to a dry, unwaxed one.
- How Often: For regular riders, wax every 3-5 days of riding. If you’re riding a few times per season, wax at the start and end of each season.
- DIY vs. Shop: You can wax your board at home with an iron, wax, and some patience. Many shops also offer waxing services for $20-30. As a beginner, consider having the shop do it until you’re comfortable doing it yourself.
- Temperature-Specific Wax: Different waxes are designed for different temperature ranges. Most shops can recommend the right wax for the conditions you’ll be riding in.
Edge Tuning
Your board’s metal edges need to be sharp and smooth for optimal performance. Dull edges make it harder to control your board, especially on hardpack and icy conditions.
- Check Your Edges: Run your finger gently along the edge (carefully!). It should feel smooth and sharp, not jagged or rounded.
- Professional Tuning: For beginners, it’s best to have your edges professionally tuned once per season. A shop can sharpen, detune, and repair your edges as needed.
- Detuning for Beginners: Some beginners benefit from slightly detuned (less sharp) edges, which make the board more forgiving and less likely to catch. Ask your shop about this option.
Storage Tips
- Clean After Each Session: Wipe down the base and edges to remove dirt, grime, and moisture. This prevents rust and keeps the base in good condition.
- Loosen Your Bindings: When storing your board, loosen the binding straps to reduce stress on the materials.
- Store in a Cool, Dry Place: Avoid storing your board in direct sunlight, near heat sources, or in humid environments. A closet or garage shelf is ideal.
- Use a Board Bag: A padded board bag protects your board during transport and storage. See our recommended bag in the gear section above.
Snowboard Glossary: Terms Every Beginner Should Know
The snowboard world has its own vocabulary, and knowing the key terms will help you communicate with instructors, rental technicians, and fellow riders. Here’s an essential glossary for beginners.
Carving
A turning technique where you ride along the edge of the board, leaving a clean, thin line in the snow. Carving is more efficient and controlled than skidding turns, and it’s a skill that develops over time.
Corduroy
The textured pattern left in the snow by grooming machines. Corduroy snow is smooth, consistent, and ideal for learning. It’s named for its resemblance to the fabric corduroy.
Edge
The metal strip running along the sides of the snowboard. There are two edges: the toe edge (front of the board) and the heel edge (back of the board). You control the board by applying pressure to these edges.
Fall Line
The most direct path down the slope, following gravity. Riding the fall line means pointing straight downhill. Beginners typically avoid the fall line until they’ve developed good edge control.
Garland
A practice exercise where you ride back and forth across the slope on one edge, making small turns without fully changing edges. Garlands help you practice edge control and turn initiation.
Goofy
Riding with your right foot forward. About 30% of snowboarders ride goofy. The opposite of regular stance.
Heel Edge
The edge of the board under your heels. When you balance on your heel edge, your toes are lifted off the snow. This is typically the first edge beginners learn to control.
Jibbing
Riding on non-snow surfaces like rails, boxes, logs, or other features. This is an advanced skill typically seen in terrain parks. Beginners should focus on basic riding before attempting jibs.
Ollie
A jump where you pop off the tail of the board while lifting the nose. Ollies are a fundamental trick and the basis for many advanced maneuvers. This is an intermediate to advanced skill.
Regular
Riding with your left foot forward. About 70% of snowboarders ride regular. The opposite of goofy stance.
S-Turn
A complete turn that transitions from a heel edge to a toe edge (or vice versa), creating an “S” shape in the snow. Linking S-turns is the fundamental skill of snowboarding.
Switch
Riding in the opposite of your normal stance (e.g., a regular rider riding with their right foot forward). Riding switch is an advanced skill that takes significant practice.
Toe Edge
The edge of the board under your toes. When you balance on your toe edge, your heels are lifted off the snow. Toe-side turns are generally harder for beginners to learn than heel-side turns.
Traverse
Riding across the slope rather than straight down. Traversing is an important skill for controlling your speed and navigating the mountain. You’ll traverse frequently while learning.
Dealing with Altitude: Tips for Mountain Towns
Many of the best snowboarding resorts are located at high elevations, which can cause altitude sickness if you’re not acclimated. Understanding altitude sickness and how to prevent it is essential, especially if you’re coming from sea level.
What is Altitude Sickness?
Altitude sickness occurs when you travel to high elevations (typically above 7,000 feet) too quickly. The reduced air pressure means less oxygen reaches your bloodstream, causing symptoms like headaches, nausea, fatigue, dizziness, and shortness of breath. Most people experience some mild symptoms at altitude, but severe altitude sickness is rare in healthy individuals.
Tips for Preventing Altitude Sickness
- Acclimate Gradually: If possible, arrive a day early and take it easy for the first 24 hours. Avoid strenuous activity until you’ve had time to adjust.
- Stay Hydrated: Dehydration worsens altitude symptoms. Drink plenty of water throughout the day, even if you don’t feel thirsty. Avoid alcohol for the first day or two.
- Eat Light Meals: Heavy meals require more oxygen to digest, which can worsen altitude symptoms. Eat smaller, more frequent meals.
- Avoid Overexertion: Take it easy on your first day. Don’t try to ride every run or push yourself too hard. Listen to your body and rest when needed.
- Consider Medication: Consult your doctor about acetazolamide (Diamox), a medication that can prevent and treat altitude sickness. It’s available by prescription and can be very effective.
High Altitude Resorts to Watch
Some Colorado resorts sit at particularly high elevations: Breckenridge base area is at 9,600 feet with peaks above 13,000 feet. Copper Mountain base is at 9,712 feet. Keystone base is at 9,280 feet. Vail base is at 8,120 feet. If you’re coming from sea level, plan for an acclimation day before your first day of riding. Utah resorts like Park City are slightly lower (base at 6,890 feet), which can be easier for those sensitive to altitude.
The Ultimate Snowboard Fitness Guide for Beginners
Getting in shape before your snowboard trip will dramatically improve your experience on the mountain. The good news is that you don’t need a gym membership or hours of training — just some focused exercises a few times per week.
The Four Pillars of Snowboard Fitness
Pillar 1: Leg Strength
Your legs are your primary contact point with the board and bear the brunt of the physical demands. Focus on squats, lunges, and wall sits to build endurance. Strong legs mean less fatigue, more control, and fewer falls. Aim for exercises that build muscular endurance (higher reps, lower weight) rather than raw power.
Pillar 2: Core Stability
A strong core is the foundation of balance and control. It keeps you centered over the board, helps you absorb bumps, and prevents lower back pain. Planks, dead bugs, and bird-dogs are excellent core exercises for snowboarders. Don’t forget about your obliques — rotational exercises like Russian twists help with turning.
Pillar 3: Cardiovascular Endurance
Snowboarding is surprisingly cardiovascularly demanding, especially at altitude. You’ll be riding lifts, walking in boots, and constantly engaging your muscles. Building cardiovascular endurance through jogging, cycling, swimming, or even brisk walking will help you last longer on the mountain without getting exhausted.
Pillar 4: Flexibility and Balance
Flexibility helps prevent injuries and makes movement more fluid. Balance is obviously crucial for snowboarding. Yoga and Pilates are excellent for both. Even 10 minutes of daily stretching focusing on hip flexors, hamstrings, and calves will make a noticeable difference. Single-leg balance exercises (standing on one foot with your eyes closed) dramatically improve your stability on the board.
Sample Weekly Workout Schedule
- Monday: 20-minute jog or bike ride + 15 minutes of bodyweight squats, lunges, and calf raises.
- Tuesday: 15-minute yoga or stretching routine + 10 minutes of balance exercises.
- Wednesday: 20-minute HIIT workout (30 seconds of jumping jacks, mountain climbers, burpees with 30 seconds rest).
- Thursday: 15 minutes of core work (planks, bird-dogs, dead bugs, Russian twists).
- Friday: 30-minute walk or hike + full-body stretching.
- Saturday: Active recovery — light walk, yoga, or swimming.
- Sunday: Rest day.
Snowboard-Specific Exercise: The Squat Hold
One of the most snowboard-specific exercises you can do is the squat hold. Stand with your feet shoulder-width apart, lower into a squat position (as if sitting in a chair), and hold for 30-60 seconds. This mimics the snowboarding stance and builds endurance in the exact muscles you’ll be using all day. Add some side-to-side weight shifts while holding the squat to simulate edge-to-edge movements. Do 3 sets with 30-second rests.
Snowboard Injury Prevention & Common Injuries
Understanding common snowboard injuries and how to prevent them will help you stay safe on the mountain. The good news is that most snowboard injuries are preventable with proper preparation, equipment, and technique.
Most Common Beginner Injuries
- Wrist Injuries: The most common snowboard injury, caused by reaching out to break a fall. Prevention: Learn to fall without reaching for the ground. Wear wrist guards (many gloves have built-in wrist guards).
- Shoulder Injuries: Falls onto an outstretched arm can cause shoulder dislocations, separations, or rotator cuff injuries. Prevention: Same as wrist injuries — don’t reach for the ground. Build shoulder strength through exercise.
- Head Injuries: Concussions and other head injuries from falls or collisions. Prevention: Always wear a helmet. This is non-negotiable. Modern snowboard helmets are comfortable, lightweight, and potentially life-saving.
- Lower Back Pain: Caused by the snowboarding stance and frequent falls onto the tailbone. Prevention: Strengthen your core, wear impact shorts, and take breaks when you’re tired.
- Knee Injuries: Less common than in skiing but still possible, especially from twisting falls. Prevention: Build leg strength, maintain flexibility, and ride within your ability level.
- Collisions: Hitting trees, lift towers, other riders, or fixed objects. Prevention: Stay in control, follow the responsibility code, ride within your ability level, and be aware of your surroundings.
Essential Safety Equipment
- Helmet: The single most important piece of safety equipment. Modern helmets are designed specifically for snow sports and provide excellent protection. Make sure it fits properly — it should sit level on your head, cover your forehead, and not move when you shake your head.
- Wrist Guards: Built into many snowboard gloves, wrist guards can prevent the most common snowboarding injury. Even if your gloves don’t have them, you can buy slip-in wrist guards separately.
- Impact Shorts: Padded shorts that protect your tailbone and hips from hard falls. These are thin enough to fit under your snow pants and can save you significant soreness.
- Knee Pads: Optional but helpful for beginners who spend a lot of time kneeling on hard snow. Soft, flexible knee pads fit under your snow pants comfortably.
- Goggles with UV Protection: Snow reflects up to 80% of UV rays, making sunburn and snow blindness real risks. Quality goggles protect your eyes from UV, wind, and debris.
When to Stop Riding
If you experience any sharp pain, dizziness, confusion, or nausea while riding, stop immediately and seek help. Don’t try to “push through” an injury — you’ll only make it worse. Ski patrol is there to help, and there’s no shame in calling for assistance. It’s always better to be cautious and safe than to risk a more serious injury.
Taking It to the Next Level: From Green to Blue Runs
Once you’ve mastered the green runs and can confidently link turns, it’s time to progress to blue (intermediate) terrain. This transition is a significant milestone in your snowboard journey, and approaching it the right way will build your confidence and keep you safe.
Signs You’re Ready for Blue Runs
- You can link turns smoothly and consistently on green runs.
- You can control your speed without relying on skidded turns.
- You can stop confidently on command.
- You’re comfortable riding the chairlift and navigating the mountain.
- You can ride for several hours without excessive fatigue.
Tips for Your First Blue Run
- Start with an Easy Blue: Not all blue runs are created equal. Ask your instructor or a knowledgeable local which blue runs are the easiest and most beginner-friendly. Look for wide, groomed blues with consistent pitch.
- Ride with a Friend: Having a more experienced friend ride with you provides moral support and can help you navigate. They can also alert you to upcoming terrain changes.
- Use the Whole Mountain: Blue runs are often wider than greens, giving you more room to make big, sweeping turns. Use this space to control your speed and make gradual, controlled turns.
- Don’t Go Straight Down: Resist the urge to point the board straight down the fall line. Make wide, round turns that traverse across the slope. This controls your speed and gives you time to think about your next turn.
- Take Breaks: Blue runs are more physically demanding than greens. Stop and rest when you need to. There’s no shame in taking a breather mid-run.
The Progression Principle
The key to progressing safely is the “one step at a time” approach. Master each skill before moving to the next challenge. If you find a blue run too difficult, go back to greens until you feel more confident. There’s no timeline for progression — some riders progress quickly, others take longer. The important thing is to enjoy the journey and feel confident in your abilities.
Beginner Terrain Parks: Your First Park Experience
Terrain parks are areas of the mountain with features like jumps, rails, boxes, and halfpipes designed for freestyle riding. While terrain parks are typically associated with advanced riders, many resorts now have beginner-specific parks that are perfect for your first park experience.
Understanding Park Features
- Boxes: Flat, wide features that you slide across on the base of your board. Boxes are the most beginner-friendly park features because they’re wide and easy to balance on.
- Rails: Narrow metal features that you slide across. Rails require more balance and precision than boxes, making them better suited for intermediate riders.
- Small Jumps: Gentle, low jumps that are designed for learning basic air awareness. These typically have very small take-offs and long, flat landings.
- Banks and Waves: Undulating terrain features that teach you to absorb and flow with terrain changes. These are excellent for building park skills without the risk of air.
Park Etiquette
- Look Before You Drop: Always check that the feature is clear before you start your run. If someone is on the feature, wait your turn.
- Call Your Drop: When it’s your turn, clearly signal that you’re going by raising your hand or calling “dropping.”
- Clear the Landing: After hitting a feature, move out of the landing area as quickly as possible to make room for the next rider.
- Know Your Limits: Don’t attempt features that are beyond your skill level. Progress gradually from smaller to larger features.
- Start Small: Begin with the smallest features and work your way up. There’s no shame in starting with the smallest box or jump — that’s how everyone starts.
Park Progression Plan
Step 1: Ride over flat boxes on a gentle slope to get comfortable with sliding. Step 2: Try slightly angled boxes and small banks. Step 3: Attempt your first small jump (with a spotter if possible). Step 4: Progress to larger boxes and features. Always progress one step at a time, and don’t rush to the big features. The small stuff is where you build the fundamentals.
Best Apps & Resources for Beginner Snowboarders
The right tools and resources can significantly enhance your snowboard learning experience. From tracking your progress to finding the best conditions, these apps and resources are invaluable for beginners.
Essential Apps
- Resort-Specific Apps: Nearly every major resort has its own app with interactive trail maps, lift status, snow reports, and lesson booking. Download the app for your resort before your trip. Many also include GPS tracking so you can see your location on the trail map in real-time.
- OnTheSnow / OpenSnow: These apps provide snow reports, conditions, and forecasts for resorts across the country. Great for comparing conditions at different resorts and planning your trip timing.
- Snowboard Training Apps: Apps like Snowboard Mentality and Snowboard Lessons provide video tutorials and structured learning plans you can follow between trips. Watching technique videos can accelerate your learning.
- Fitness Apps: Use apps like Nike Training Club or Peloton for pre-season fitness routines specifically designed for winter sports.
Learning Resources
- YouTube Channels: Channels like SnowboardProCamp, Snowboard Tutor, and Malcolm Moore offer excellent free tutorials for all levels. Watch these before your trip to familiarize yourself with basic techniques.
- Snowboard Forums: Communities like r/snowboarding on Reddit and Snowboarder Magazine’s forums are great places to ask questions, get advice, and connect with other riders.
- Snowboard Magazines: Publications like TransWorld Snowboarding, Snowboarder Magazine, and Method Mag provide gear reviews, resort guides, and technique articles.
My Top App Pick for Beginners
The single most useful app for a beginner is the resort’s own app. It provides real-time information about lift status, trail conditions, and lesson availability. Many also have GPS tracking so you can always find your way around the mountain. Download it before your trip, explore the trail map, and familiarize yourself with the resort layout.
A Note on Your Future Adventures
As you progress, you’ll start dreaming of bigger lines and deeper powder. You might hear tales of legendary off-piste terrain in places like Chamonix, one of the top European ski resorts. Or perhaps you’ll want to explore the untracked wilderness via backcountry snowboarding. These are incredible goals to have, but they require advanced skills, avalanche safety knowledge, and proper equipment. For now, focus on mastering the fundamentals at these fantastic beginner resorts. Your epic adventures will be waiting for you when you’re ready!
First Timer’s FAQ: Your Questions Answered
Layering is key! Avoid cotton, as it traps moisture and makes you cold. Start with a synthetic or wool base layer (long underwear), add a fleece or puffy jacket as a mid-layer, and finish with waterproof pants and a jacket. Don’t forget wool or synthetic socks (only one pair!), waterproof gloves or mittens, and of course, a helmet and goggles. You can find our top picks for the best snowboard helmets and best snowboard goggles to ensure you’re safe and can see clearly.
Always take a professional lesson. While your friend may be a great rider, they are likely not a great teacher. Professional instructors are trained to teach the fundamentals in a safe, proven progression. They can identify your mistakes instantly and give you the right feedback to fix them. A two-hour lesson will often progress you further than a full weekend of struggling with a friend. It’s the best investment you can make in the sport.
The common wisdom is: Snowboarding is harder to learn, but easier to master. Skiing is easier to learn, but harder to master. The first day or two on a snowboard can be tougher because you’ll be learning to balance sideways and will likely fall more. However, once you can link turns, progression can be quite fast. Skiing feels more natural at first, but advancing to parallel turns and expert terrain can be a long-term technical challenge.
Expect to be sore! You’ll be using muscles in your core, glutes, and legs that you don’t normally use. Your tailbone will likely be the sorest spot from sitting down and falling. Wearing padded shorts or “impact shorts” under your snow pants is a pro tip that can make a huge difference in your comfort and confidence.
A typical beginner package (lift ticket, lesson, and rental gear) costs between $150-$350 per day depending on the resort and time of season. Budget resorts in the Midwest can be as low as $75-$150 for a complete beginner package. Premium resorts like Park City or Breckenridge can cost $300-$500 for a full day package. Buying multi-day packages, visiting midweek, and shopping for deals online can significantly reduce costs. Many resorts offer discounted “first-timer” packages specifically designed to make learning affordable.
You don’t need to be an athlete to start snowboarding, but a basic level of fitness will make your experience much more enjoyable. Being able to comfortably do bodyweight squats, hold a plank for 30 seconds, and walk briskly for 30 minutes is a good baseline. If you’re not very active, start a simple exercise routine 2-3 weeks before your trip — focus on leg strength, core stability, and cardiovascular endurance. The fitter you are, the longer you’ll be able to ride and the more quickly you’ll progress.
It depends on the severity of your condition, and you should always consult your doctor before starting any new sport. Many people with knee or back issues successfully snowboard, but it requires extra precautions. Knee braces and back supports can provide additional stability. Starting with a professional instructor who can teach you proper technique is especially important, as bad form can exacerbate existing conditions. Some riders find that snowboarding is actually easier on their knees than skiing, since the fixed stance reduces twisting forces.
Most people can link basic turns and ride green runs comfortably within 3-5 days of riding. However, everyone progresses at a different pace. Some riders feel comfortable after just 2 days, while others may need a full week. Your athletic background, age, fear level, and how often you ride all affect your learning speed. The key is consistency — riding 2-3 consecutive days is much more effective than spreading the same number of days across several months.
No, there’s no need to learn skiing first. While some people believe skiing provides a helpful foundation for snowboarding, the two sports use very different techniques and muscle movements. Learning to ski first can actually develop habits (like facing forward and using your arms for balance) that you’ll need to unlearn when you start snowboarding. If you want to snowboard, just start snowboarding. The learning curve may be steeper initially, but you’ll develop snowboarding-specific skills from day one.
Arrive early — at least 30-60 minutes before your lesson starts. This gives you time to pick up your rental gear, use the restroom, and get to the learning area without rushing. Morning is the best time to learn because the snow conditions are typically better (freshly groomed “corduroy”), your energy levels are high, and you have the whole day ahead of you. Arriving late means rushing through the rental process and possibly missing the start of your lesson, which puts you behind from the beginning.
Like any sport, snowboarding carries some risk of injury, but it’s statistically one of the safer outdoor activities when practiced with proper instruction and equipment. The key to staying safe is: take a professional lesson, wear a helmet (non-negotiable), learn to fall properly, stay within your ability level, and follow mountain safety rules. Wrist guards and impact shorts can further reduce injury risk. Most beginner injuries are minor — bruises, sore muscles, and the occasional wrist sprain. Serious injuries are rare when you follow safety guidelines.
January and February typically offer the most reliable snow conditions, while March and April provide warmer temperatures and softer snow — both are great for learning. Avoid December and holiday weeks if possible, as resorts are most crowded and expensive during this time. Early season (late November/early December) and late season (March/April) often have the best prices and smallest crowds. The “best” month really depends on your priorities: reliability of snow (January-February), affordability and weather (March-April), or avoiding crowds (midweek in any month).
If you’ve always wanted to try snowboarding, start with snowboarding! Don’t let anyone convince you to try skiing first. If you’re truly unsure, many resorts offer “demo” or “discovery” packages that let you try both sports in a single day. Consider your goals: if you want to ride powder in the backcountry, snowboarding excels at that. If you want to race or want the ability to easily switch between disciplines, skiing might be better. But for pure fun and style, snowboarding is hard to beat.
Final Thoughts: Embrace the Learning Curve
Learning to snowboard is one of the most rewarding challenges you can undertake. There will be frustrating moments, but they are quickly forgotten the first time you float down a mountain, effortlessly linking turns and taking in the incredible scenery. The key is to start in the right environment, with the right gear, and the right attitude.
Choose any of these resorts, book a lesson, and give it your all. Be patient with yourself, celebrate the small victories, and don’t be afraid to fall. Every rider you see cruising gracefully down the mountain went through the exact same process. Your adventure is just beginning.
Remember: the mountain will always be there. There’s no rush to progress, no need to compare yourself to others, and no shame in taking it slow. Snowboarding is a lifelong journey, and every day on the mountain is a chance to learn something new, challenge yourself, and experience the pure joy of gliding over snow. Welcome to the snowboard family — we’re thrilled to have you.


