
Off-Season Domination: The Ultimate Fitness Guide for Snowboarding
Snowboarding is more than a sport; it’s a full-body athletic pursuit disguised as leisure. To truly unlock the joy of riding—to carve deep trenches, float effortlessly through powder, and ride bell-to-bell without burning out—you need a physical foundation built in the off-season. Riding is a unique blend of isometric holding power, eccentric strength, and explosive rotational core stability.
Trying to tackle the mountain without proper conditioning is often why riders feel aches, suffer injury, or struggle with fatigue. This comprehensive guide provides a structured, three-phase fitness regimen designed to bulletproof your body for the slopes. We will focus on the four key physical domains—Leg Strength, Core Stability, Endurance, and Flexibility—that separate a day of struggle from a season of stoke. Remember, proper physical prep is the best way to avoid injury, as snowboarding is dangerous when you’re fatigued, and fatigue compromises form.
Chapter 1: The Biomechanics of Shredding—Why Snowboarding is Unique
Snowboarding is unique because it forces your body into sustained, unilateral tension. Most conventional gym workouts miss these key demands. Understanding these biomechanics is the first step toward building a training program that actually transfers to the mountain. When you understand why certain movements matter, every rep in the gym becomes more purposeful.
1. The Four Pillars of Snowboard Fitness
- Pillar 1: Eccentric Leg Strength: This is the ability of your muscles to resist lengthening under load. Every time you ride through choppy snow, land a jump, or absorb a bump, your quads and glutes are firing eccentrically. This is what prevents the dreaded “burning legs” and protects your knees.
- Pillar 2: Rotational Core Stability: Your core is the transmission that transfers power from your upper body to the board’s edge. Carving, buttering, and turning all require the core to simultaneously stabilize the spine while initiating rotational power. A weak core means less control, more skidding, and increased risk of back injury.
- Pillar 3: Unilateral Balance and Agility: Unlike skiing, snowboarding is a single-platform sport. You rely heavily on single-leg stability to control the toe and heel edges. Agility is critical for quick edge changes and navigating glades, which is why snowboarding is the best winter sport for full body awareness.
- Pillar 4: Endurance (Aerobic/Anaerobic): Riding bell-to-bell requires sustained aerobic fitness. However, quick, intense efforts (sprinting to the lift, landing a trick, riding tight powder) demand anaerobic bursts.
2. Common Physical Failures and Gear Links
Physical weakness often manifests as discomfort or equipment issues:
- Foot Pain: If your feet hurt, it’s often due to the constant isometric contraction of the smaller stabilizing muscles in your foot trying to compensate for weak core and leg muscles. Read why do my feet hurt when i snowboard—the fix usually starts with better arch support and stronger stabilizing muscles.
- Back/Hip Pain: Usually a sign of poor rotational core stability. This is often where protective gear (best impact shorts for snowboarding) comes in handy, but fitness is the best defense.
- Early Fatigue: This is the most dangerous failure. When you fatigue, your form breaks down, leading to catching an edge or falling awkwardly. This is often when snowboarding is dangerous.
Chapter 2: The Three-Phase Snowboard Training Program
A successful program moves from building raw strength to converting that strength into dynamic, ride-specific power.
Phase 1: Foundational Strength (The Base, 12+ Weeks Out)
Goal: Build raw strength and correct muscle imbalances. Focus on heavy, controlled movements.
- Lower Body: Back squats, Romanian Deadlifts (RDLs), and lunges. Focus on the eccentric (lowering) phase, taking 3-4 seconds to lower the weight. This builds knee and joint resilience.
- Core: Planks, bird-dogs, and Pallof presses. Focus on resisting rotation and maintaining a rigid spine.
- Cardio: Long-duration, low-intensity sessions (running, cycling) to build aerobic capacity.
Phase 2: Power and Agility (6-12 Weeks Out)
Goal: Convert raw strength into explosive power and dynamic stability, necessary for riding aggressive terrain (backcountry snowboarding) or linking tight carves.
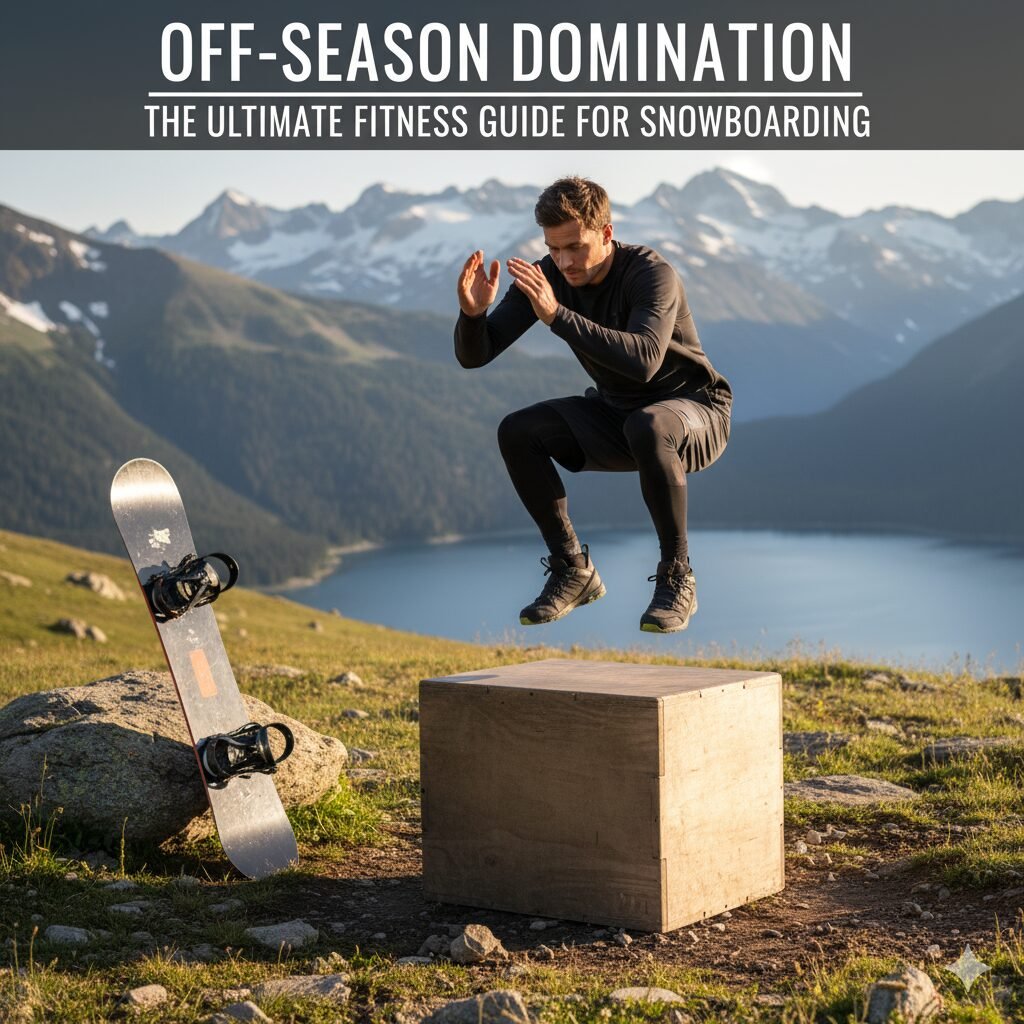
- Plyometrics: Box jumps, squat jumps, and lateral bounds. These mimic the quick, explosive forces involved in ollies and jump landings.
- Unilateral Strength: Single-leg squats (pistols or step-downs) and Bulgarian Split Squats. This isolates the muscles used to steer the board, greatly improving edge control and preventing the kind of imbalance that causes discomfort in gear like K2 snowboard boots.
- Rotational Power: Medicine ball throws (rotational and overhead), cable wood chops, and Russian twists. These build the core strength needed to link turns fluidly.
Phase 3: Pre-Season Conditioning (0-6 Weeks Out)
Goal: Maximize anaerobic endurance and ride-specific muscular stamina. This phase is about long, painful sets designed to mimic the burn of a long run.
- High-Intensity Interval Training (HIIT): Short, intense bursts followed by brief recovery (e.g., 30 seconds of burpees, 30 seconds rest). This builds the stamina needed for continuous riding.
- Isometric Holds: Wall sits (holding the snowboard stance) and static split squats. Hold each position for 60-120 seconds. This is the most snowboard-specific training, directly translating to leg stamina for long runs in places like snowboarding in Colorado.
- Dynamic Balance: Stand on a balance board or a bosu ball while performing squats or twists. This trains the micro-muscles in the ankles and feet that stabilize the board during high-speed carving.
Chapter 3: Essential Fitness Gear and Recovery (Amazon Picks)
You don’t need a fancy gym membership. The most effective snowboard-specific exercises can be done at home with minimal equipment.
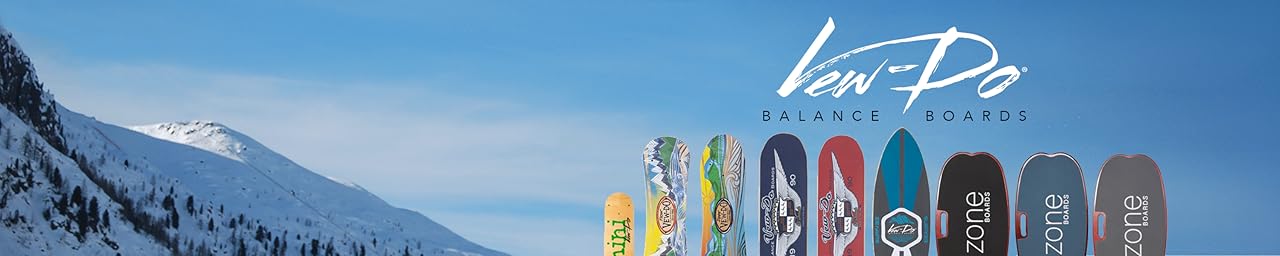
Vew-Do Balance Board (Snowboard Specific)
This is the single most valuable piece of off-season training equipment. It directly simulates the stability challenge of riding a snowboard. Practicing squats, ollies, and twists on this board builds the small stabilizer muscles in your ankles and feet, reducing the risk of fatigue and injury. It dramatically improves edge-to-edge transition speed, crucial for aggressive carving. This device helps train the muscles often responsible for foot discomfort (why do my feet hurt when i snowboard).
Check Price on Amazon
Resistance Band Set with Door Anchor
These bands are lightweight, portable, and perfect for building rotational core strength (Pallof Press, rotational chops) needed for initiating turns and maintaining balance. The tension mimics the forces your body resists while steering the board. They are also excellent for warm-ups and activation before your actual ride, an essential practice, regardless of whether you wear mittens vs gloves for snowboarding.
Check Price on Amazon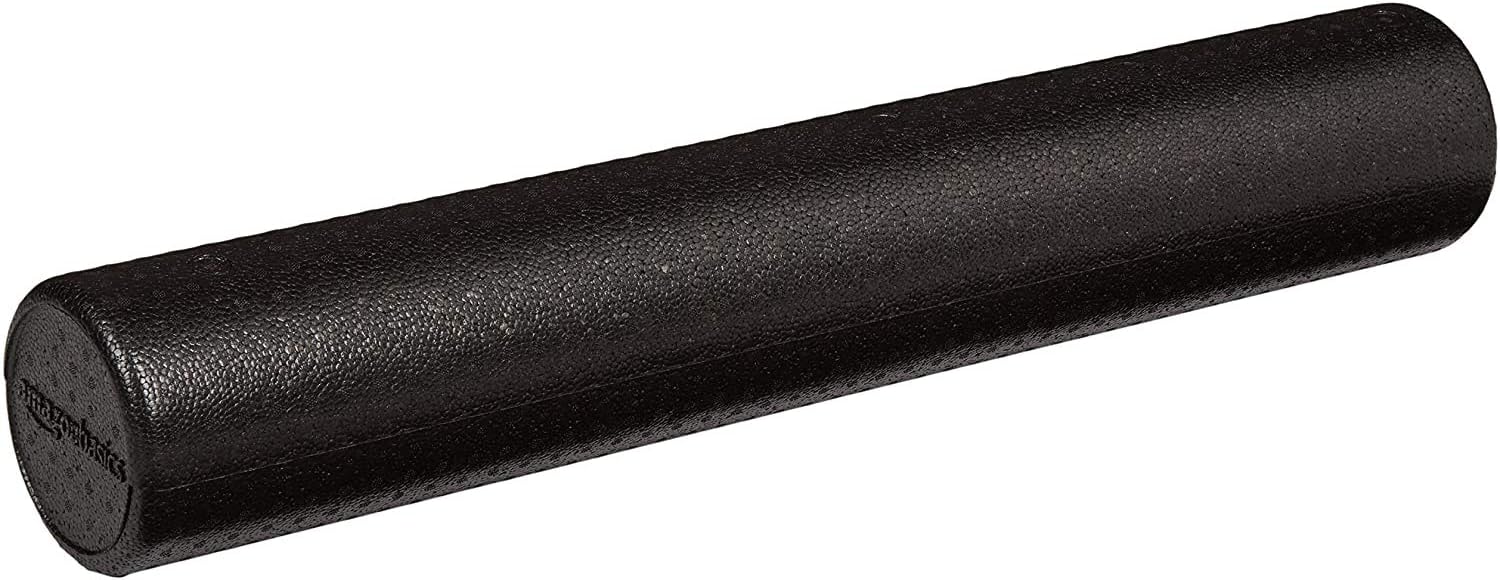
High-Density Foam Roller for Deep Tissue Massage
Recovery is non-negotiable. Tight hips and quads inhibit your range of motion and reduce your ability to absorb bumps (eccentric failure). A foam roller is essential for releasing fascia and improving flexibility, allowing you to get lower in your turns and ride longer without stiffness. Recovery techniques are key to maximizing your time on the mountain (why snowboarding is fun).
Check Price on Amazon
Compression Socks (High Performance)
Compression socks improve blood flow, reducing muscle vibration and minimizing lactic acid buildup during long, sustained runs. They are highly effective for long resort days and travel to distant slopes (best snowboarding destinations). They also provide much-needed support for the lower leg, which often suffers strain inside stiff boots (best snowboard boots).
Check Price on Amazon
Amazon Basics Cast Iron Kettlebell
A single kettlebell is your best friend for Phase 2 power training. It allows you to perform highly functional exercises like goblet squats, swings, and Turkish Get-Ups—all of which build the raw, asymmetric core and hip power needed to navigate terrain and absorb shock. This functional training is a necessary precursor before attempting advanced lessons.
Check Price on AmazonChapter 4: Comprehensive Snowboarding FAQs & The Fitness Link
Fitness transcends the gym; it affects every piece of gear, every turn you make, and every decision on the mountain. Conditioning is the non-negotiable insurance policy against injury and fatigue.
The Fitness-Gear Connection
Your fitness level dictates the quality of gear you need. A well-conditioned rider can manage a slightly less stiff boot or board. A rider with weak legs will need maximum support from stiff boots and a rigid board (like performance boards from Yes or Gilson). Training your body is the most cost-effective way to improve performance, even more so than timing a gear purchase (when is the best time to buy snowboarding gear).
| General Snowboarding Topic | Expert Insight |
|---|---|
| Boot Laces & Fit | Properly trained feet and ankles make boot fit easier. Even minor details like how long are snowboard boot laces matter for achieving perfect tension. Ensure the boot gives you zero heel lift, even in stiff models like those in the K2 snowboard boots review or Vans sizing guide. |
| Safety & Protection | Fitness reduces the risk of injury, but protection is still mandatory. Always wear a helmet (best snowboard helmets) and consider impact shorts (best impact shorts for snowboarding) for park or high-speed carving sessions. |
| Endurance & Destinations | High-altitude riding in places like Colorado or the top European ski resorts demands peak aerobic fitness. Your endurance training should be prioritized before these trips. For beginners, training allows you to make the most of your first trips to beginner resorts. |
| Board Types & Style | Strength allows you to handle aggressive boards (like DC snowboards) or deep powder boards for backcountry snowboarding. Core strength helps you style out tricks and feel the flow, which is the heart of why snowboarding is fun. |
| Style and Function | Fitness is the best foundation, but gear matters too. Whether you prefer the flow of best baggy snowboard pants or the warmth of mittens over gloves, physical preparation ensures you can ride with confidence and control. |
| Logistics & Cost | Remember to protect your body and your gear. Proper fitness helps you avoid costly injuries, and smart storage (best snowboard bags) protects your investment. Your physical prep is as valuable as any piece of gear you purchase. |
| General Resources | For all gear reviews, destination tips, and technique advice, visit snowboardbible.com. |
Chapter 5: Muscle Anatomy for Snowboarding—What You Need to Train and Why
Before diving into detailed workout programs, it is critical to understand exactly which muscles drive snowboarding performance. Too many riders focus on their quads and ignore their posterior chain, or they train their upper body while neglecting the stabilizer muscles that actually control the board. This chapter provides a deep dive into the muscle groups that matter most for snowboarding, how they function during a run, and why neglecting any single group creates a chain of compensation that leads to fatigue and injury.
5.1 The Quadriceps—Your Brakes and Shock Absorbers
The quadriceps are a group of four muscles on the front of the thigh: the rectus femoris, vastus lateralis, vastus medialis, and vastus intermedius. In snowboarding, these muscles serve as your primary shock absorbers and your brakes. Every time you land a jump, absorb a mogul, or ride through choppy terrain, your quads are eccentrically loading—meaning they are lengthening under tension to slow your body down and prevent you from collapsing.
The rectus femoris is particularly important because it crosses both the hip and the knee joint. It assists with hip flexion (lifting your knee) and knee extension (straightening the leg). When you transition from a toe-side carve to a heel-side carve, your rectus femoris is working to control that movement. If this muscle is weak or fatigued, you lose the ability to make clean, controlled transitions, and your turns become skidded rather than carved.
The vastus medialis, the teardrop-shaped muscle on the inside of your knee, plays a critical role in patellar tracking. When this muscle is weak, your kneecap does not track properly, which leads to anterior knee pain—one of the most common complaints among snowboarders. Training this muscle specifically through terminal knee extensions and VMO-targeted squats can prevent this issue entirely.
The vastus lateralis and vastus intermedius provide raw power. These muscles generate the force needed to stand up from a deep squat position, push off for an ollie, or power through a deep carve. Eccentric training of these muscles—specifically slow negatives on squats and leg presses—builds the durability needed to ride all day without the dreaded “burning legs” sensation that forces riders back to the lodge by early afternoon.
5.2 The Glutes—Your Power Engine and Hip Stabilizer
The gluteus maximus is the largest muscle in your body and the primary engine for hip extension. In snowboarding, hip extension is what allows you to drive through a carve, push your hips forward during a press, and generate the force needed for ollies and jumps. A weak gluteus maximus means your lower back and hamstrings have to compensate, which leads to the lower back pain and hamstring strains that plague many riders.
The gluteus medius and gluteus minimus are arguably even more important for snowboarding, despite being smaller muscles. These muscles control hip abduction (moving your leg away from the midline) and internal/external rotation. When you stand sideways on a snowboard, your hips are constantly adjusting to maintain balance over the edge. The gluteus medius and minimus are what make these micro-adjustments possible. When these muscles are weak, your knees cave inward (valgus collapse), which puts enormous stress on the ACL and MCL ligaments—the structures most commonly injured in snowboarding.
Single-leg exercises like Bulgarian split squats, single-leg deadlifts, and lateral band walks are the most effective way to train these muscles. The balance component of single-leg work also trains the proprioceptive system, which is your body’s ability to sense its position in space. This proprioceptive training directly translates to better balance on the board and faster reactions when you hit unexpected terrain.
5.3 The Core—Your Transmission System
The core is not just your “abs.” It is a complex cylinder of muscles that includes the rectus abdominis, internal and external obliques, transverse abdominis, erector spinae, multifidus, diaphragm, and pelvic floor muscles. Together, these muscles create a rigid cylinder around your spine that protects it from injury while allowing controlled rotation.
The rectus abdominis—your “six-pack” muscle—is responsible for spinal flexion. While this muscle is important for crunches and sit-ups, it plays a relatively minor role in snowboarding. The muscles that matter far more are the obliques and the transverse abdominis.
The external and internal obliques control rotational movement of the trunk. When you initiate a heelside turn, your upper body rotates slightly in the direction of the turn while your lower body resists that rotation. This “counter-rotation” is what allows you to generate edge pressure and control the board. The obliques are what make this counter-rotation possible. Without strong obliques, riders tend to over-rotate their upper body, which leads to washout turns and loss of control.
The transverse abdominis is your body’s natural weight belt. It wraps around your spine like a corset and provides deep stability. When this muscle is activated correctly, it creates intra-abdominal pressure that supports the lumbar spine. Weakness in the transverse abdominis is a primary cause of lower back pain in snowboarders, particularly when riding in a flexed position for extended periods.
The erector spinae and multifidus muscles run along your spine and are responsible for extension and anti-flexion. When you ride in a crouched position, these muscles are under constant tension to prevent your spine from rounding. If they fatigue, your posture collapses, and you lose the ability to absorb bumps effectively. This is why many riders experience lower back pain toward the end of a long day—it is not just muscle fatigue but a breakdown in spinal stability.
5.4 The Hamstrings—Your Deceleration and Control System
The hamstrings—a group of three muscles on the back of the thigh (biceps femoris, semitendinosus, and semimembranosus)—are responsible for knee flexion and hip extension. In snowboarding, they work eccentrically to decelerate the lower leg during a landing and concentrically to pull your body back into a balanced position after a bump.
The hamstrings also play a critical role in preventing ACL injuries. Research has shown that a strong hamstring-to-quadriceps strength ratio is one of the best predictors of knee injury risk. When the quadriceps overpower the hamstrings, the tibia slides forward relative to the femur, which puts enormous stress on the ACL. Training the hamstrings through Romanian deadlifts, Nordic hamstring curls, and glute-ham raises creates the balance needed to protect the knee.
Another often-overlooked function of the hamstrings in snowboarding is their role in controlling hip rotation during turns. The hamstrings help stabilize the femur in the hip socket, preventing excessive internal rotation that can cause the knee to collapse inward. This is particularly important for riders who ride with a duck stance, as the externally rotated foot position places additional demands on the hamstrings to control rotational forces.
5.5 The Calves and Feet—Your Edge Control System
The calves—primarily the gastrocnemius and soleus muscles—are responsible for plantar flexion (pointing your toes down) and dorsiflexion (pulling your toes up). In snowboarding, these muscles control the fine-tuning of edge angle. When you press into a toeside carve, your calves are engaged to maintain the edge angle. When you transition to a heelside carve, the anterior tibialis (the muscle on the front of your shin) engages to lift your toes and control the heel edge.
The smaller muscles of the feet—intrinsic foot muscles—play a surprisingly large role in snowboarding performance. These muscles control the arch of your foot and provide the fine motor control needed for subtle weight shifts. When these muscles are weak, your arch collapses, which changes the alignment of your entire kinetic chain—from your ankle to your knee to your hip to your spine. This is a primary cause of foot pain in snowboarding (why do my feet hurt when i snowboard).
Training these muscles through barefoot exercises, towel scrunches, single-leg balance work, and balance board training strengthens the entire lower extremity and improves edge control. This training also reduces fatigue in the feet, allowing riders to maintain precise edge control throughout the entire day rather than losing finesse as their feet tire.
5.6 The Hip Flexors—Your Stance and Recovery System
The hip flexors—primarily the psoas major and iliacus—are responsible for lifting your knee toward your chest. In snowboarding, these muscles work isometrically to maintain your crouched riding stance. When you are in a low athletic position, your hip flexors are under constant tension to keep your hips flexed. If these muscles fatigue, your stance rises, and you lose the ability to absorb terrain effectively.
The hip flexors also play a critical role in recovery from off-balance situations. When you start to fall, your hip flexors fire reflexively to lift your leg and help you regain balance. Riders with weak hip flexors are more likely to fall from situations that a well-conditioned rider would recover from easily.
Modern sedentary lifestyles create tight, weak hip flexors. Sitting for 8+ hours per day shortens the psoas, which limits hip extension range of motion and reduces the muscle’s ability to generate force. This is why many riders feel restricted in their stance and cannot get low enough in their turns. Hip flexor stretches and targeted strengthening exercises (like hanging leg raises and mountain climbers) are essential for snowboard performance.
Pro Tip: The Full-Body Connection
Snowboarding is a whole-body activity. Focusing on just one muscle group creates imbalances that lead to injury. The training programs in this guide are designed to develop all major muscle groups in balance, with specific emphasis on the muscles that matter most for snowboarding performance. Remember, snowboard lessons are only as effective as the physical foundation beneath them—you cannot execute proper technique if your body is not capable of the movement.
Chapter 6: Pre-Ride Warm-Up and Activation Routines
Most riders skip the warm-up and go straight to the lift line. This is one of the biggest mistakes you can make—not just for performance, but for injury prevention. Cold muscles are stiff, slow to react, and far more susceptible to strains and tears. A proper warm-up activates the specific muscles used in snowboarding, increases blood flow to the working tissues, and primes your nervous system for the reactive demands of riding. The routine below takes 10-15 minutes and should be performed before your first run of the day, regardless of conditions.
6.1 The Five-Minute Pulse Raiser
Before stretching or activating specific muscles, you need to elevate your core body temperature. Cold muscles operate at reduced efficiency—they contract more slowly, generate less force, and are more prone to micro-tears. The goal of this phase is to increase blood flow to all major muscle groups without causing fatigue.
Jumping Jacks (60 seconds): Perform standard jumping jacks at a moderate pace. Focus on full range of motion—arms should touch overhead, and feet should spread wider than shoulder width. This movement activates the calves, quadriceps, and shoulder girdle simultaneously.
High Knees (60 seconds): Run in place while driving your knees to waist height. Focus on a quick cadence and upright posture. This activates the hip flexors and core while continuing to elevate heart rate.
Butt Kicks (60 seconds): Run in place while kicking your heels toward your glutes. This dynamically stretches the quadriceps and activates the hamstrings—two muscle groups that will be under enormous tension during your ride.
Lateral Shuffles (60 seconds): Shuffle side to side in a low athletic stance, covering about 10 feet in each direction. Stay low with your knees bent and weight centered. This activates the gluteus medius and mimics the lateral weight shifts of snowboarding.
Squat to Stand (60 seconds): Squat down deep, grab your toes, and then extend your legs while keeping your hands on your toes, stretching the hamstrings. Return to the deep squat and repeat. This mobilizes the hips, knees, and ankles while dynamically stretching the posterior chain.
6.2 Specific Muscle Activation
After raising your pulse, you need to “wake up” the specific muscles that control snowboarding movements. This is called neuromuscular activation—essentially, you are creating a stronger mind-muscle connection so that when these muscles need to fire during riding, they respond faster and more forcefully.
Glute Bridges (2 sets of 15): Lie on your back with knees bent and feet flat on the floor. Drive through your heels to lift your hips until your body forms a straight line from knees to shoulders. Squeeze your glutes hard at the top for 2 seconds. This activates the glutes and teaches your nervous system to engage them during hip extension movements like carving and jumping.
Clamshells (2 sets of 15 each side): Lie on your side with knees bent at 45 degrees and stacked on top of each other. Keeping your feet together, open your top knee toward the ceiling as far as possible, then slowly lower it back down. This specifically activates the gluteus medius, the muscle responsible for preventing knee valgus during turns.
Band Pull-Aparts (2 sets of 15): Hold a resistance band at shoulder height with arms extended in front of you. Pull the band apart by squeezing your shoulder blades together until the band touches your chest. This activates the rear deltoids and upper back muscles that help maintain an upright posture while riding.
Pallof Press Hold (2 sets of 20 seconds each side): Attach a resistance band to a stable point at chest height. Stand sideways to the anchor point and hold the band at your chest. Press the band straight out in front of you and hold for 20 seconds, resisting the band’s pull to rotate you. This activates the deep core stabilizers that control rotational forces during turns.
6.3 Dynamic Mobility Flow
The final phase of your warm-up connects all the activated muscles through movement patterns that mimic snowboarding. This is not static stretching—you are moving through full ranges of motion to prepare your joints for the demands of riding.
World’s Greatest Stretch (5 each side): From a lunge position, place your inside hand on the floor and rotate your outside arm toward the ceiling, following it with your eyes. Return to the lunge, then straighten your front leg to stretch the hamstring. This mobilizes the hips, thoracic spine, and ankles simultaneously—three areas that are critical for snowboarding performance.
Single-Leg RDL with Reach (5 each side): Stand on one leg, hinge at the hip, and reach toward the floor with the opposite hand while extending the free leg behind you. Return to standing. This activates the posterior chain, challenges balance, and prepares the ankle stabilizers for riding.
Lateral Lunges (5 each side): Step wide to one side and sit your hips back as if sitting in a chair, keeping the other leg straight. Push back to center and repeat on the other side. This mobilizes the adductors and activates the glutes and quads in a lateral movement pattern that closely mimics edge transitions.
Thoracic Rotation on All Fours (5 each side): On your hands and knees, place one hand behind your head and rotate your elbow toward the ceiling, then toward the floor. This mobilizes the thoracic spine, which is essential for the counter-rotation movements used in turning. Riders with restricted thoracic mobility tend to compensate with excessive lumbar rotation, which leads to lower back pain.
The Warm-Up is Non-Negotiable
Skipping your warm-up to get one more run in is a false economy. The risk of injury from cold muscles far outweighs the value of one additional run. Elite riders and competitive snowboarders universally perform structured warm-ups before every session. Even five minutes of movement is better than nothing. If you are riding in particularly cold conditions (Colorado, the Alps), extend your warm-up to 15-20 minutes, as cold temperatures significantly increase muscle stiffness and injury risk.
Chapter 7: Detailed Weekly Workout Plans for Each Training Phase
This chapter provides the exact workouts, sets, reps, and rest periods for each phase of training. These plans are designed for intermediate lifters with access to a basic gym. Modifications for beginners and advanced athletes are included. Perform these workouts 3-4 days per week, with at least one rest day between lower body sessions.
Phase 1: Foundational Strength (Weeks 1-12)
Monday — Lower Body Emphasis
| Exercise | Sets x Reps | Tempo | Rest | Notes |
|---|---|---|---|---|
| Barbell Back Squat | 4 x 8 | 4-0-2-0 | 3 min | Eccentric focus—4 seconds down |
| Romanian Deadlift | 4 x 10 | 3-1-1-0 | 2.5 min | Feel the hamstring stretch |
| Bulgarian Split Squat | 3 x 10 each | 3-0-1-1 | 2 min | Rear foot elevated on bench |
| Leg Press | 3 x 12 | 3-0-1-1 | 2 min | Feet shoulder width, full ROM |
| Calf Raises | 4 x 15 | 2-1-2-0 | 1 min | Hold peak contraction 1 second |
Wednesday — Upper Body and Core
| Exercise | Sets x Reps | Tempo | Rest | Notes |
|---|---|---|---|---|
| Dumbbell Bench Press | 4 x 10 | 3-0-1-0 | 2 min | Full range of motion |
| Barbell Bent Over Row | 4 x 10 | 2-1-2-0 | 2 min | 45 degree torso angle |
| Face Pulls | 3 x 15 | 2-1-2-0 | 1 min | External rotation at end |
| Plank Hold | 3 x 45-60 sec | Isometric | 1 min | Squeeze glutes and brace core |
| Bird Dog | 3 x 10 each | 2-1-2-0 | 1 min | Opposite arm and leg |
| Pallof Press | 3 x 12 each | 2-1-2-0 | 1 min | Resist rotation |
Friday — Lower Body Power and Posterior Chain
| Exercise | Sets x Reps | Tempo | Rest | Notes |
|---|---|---|---|---|
| Conventional Deadlift | 4 x 6 | 2-0-1-1 | 3 min | Heavy but controlled |
| Walking Lunges | 3 x 12 each | 2-0-1-0 | 2 min | Long stride for glute emphasis |
| Leg Curl | 3 x 12 | 3-0-1-1 | 1.5 min | Eccentric focus |
| Side Plank | 3 x 30-45 sec each | Isometric | 1 min | Hips high, body straight |
| Dead Bug | 3 x 10 each | 2-1-2-0 | 1 min | Lower back pressed into floor |
Phase 2: Power and Agility (Weeks 6-12)
Monday — Plyometrics and Power
| Exercise | Sets x Reps | Tempo | Rest | Notes |
|---|---|---|---|---|
| Box Jumps | 4 x 6 | Explosive | 3 min | Step down, don’t jump down |
| Lateral Bounds | 4 x 8 each | Explosive | 2.5 min | Land soft and balanced |
| Squat Jumps | 3 x 10 | Explosive | 2.5 min | Full depth squat before jump |
| Single-Leg Hop for Distance | 3 x 6 each | Explosive | 2 min | Stick the landing |
| Medicine Ball Slam | 3 x 10 | Explosive | 2 min | Full body extension and slam |
Wednesday — Rotational Power and Unilateral Strength
| Exercise | Sets x Reps | Tempo | Rest | Notes |
|---|---|---|---|---|
| Russian Twists | 4 x 15 each | 2-0-1-0 | 1.5 min | Feet off ground for difficulty |
| Cable Wood Chop High-to-Low | 3 x 12 each | 2-0-2-0 | 1.5 min | Control the rotation |
| Single-Leg Squat to Box | 3 x 8 each | 3-0-1-1 | 2 min | Touch box, don’t sit |
| Medicine Ball Rotational Throw | 3 x 8 each | Explosive | 2 min | Against wall, full rotation |
| Pistol Squat Progression | 3 x 5 each | 3-0-1-1 | 2 min | Use assistance if needed |
Friday — Full Body Power
| Exercise | Sets x Reps | Tempo | Rest | Notes |
|---|---|---|---|---|
| Kettlebell Swing | 4 x 12 | Explosive | 2.5 min | Hip hinge, not squat |
| Bulgarian Split Squat with Dumbbell | 3 x 8 each | 2-0-1-1 | 2 min | Heavy weight |
| Push Press | 4 x 6 | Explosive | 3 min | Leg drive into press |
| Turkish Get-Up | 3 x 3 each | Controlled | 2 min | Full body integration |
| Band Resisted Lateral Walk | 3 x 12 each | 2-0-1-0 | 1 min | Mini band above knees |
Phase 3: Pre-Season Conditioning (Weeks 0-6)
Monday — Isometric Endurance and HIIT
| Exercise | Sets x Duration | Rest | Notes |
|---|---|---|---|
| Wall Sit | 4 x 90 sec | 90 sec | Thighs parallel to floor |
| Burpees | 5 x 30 sec on / 30 sec off | 30 sec | Max effort during work periods |
| Static Split Squat Hold | 3 x 60 sec each | 60 sec | Rear foot elevated |
| Mountain Climbers | 4 x 30 sec on / 30 sec off | 30 sec | Fast pace, core tight |
| Plank Hold | 3 x 90 sec | 60 sec | Add weight if too easy |
Wednesday — Ride-Specific Circuit
| Exercise | Sets x Reps/Duration | Rest | Notes |
|---|---|---|---|
| Goblet Squat | 3 x 15 | 30 sec | Deep squat, pause at bottom |
| Lateral Lunge to Hop | 3 x 10 each | 30 sec | Lateral power and stability |
| Bosu Ball Squat | 3 x 12 | 30 sec | Bosu dome side down |
| Medicine Ball Slam | 3 x 12 | 30 sec | Maximum force |
| Balance Board Squat | 3 x 10 | 30 sec | On Vew-Do or similar |
| Jump Rope | 3 x 60 sec | 60 sec | Single leg for variation |
Friday — Endurance Ride Simulation
| Exercise | Sets x Duration | Rest | Notes |
|---|---|---|---|
| Assault Bike (or Running) | 1 x 10 min | 5 min | Moderate steady state |
| Wall Sit Circuit | 3 x 60 sec | 45 sec | Standard, then narrow, then wide stance |
| Squat to Calf Raise | 3 x 20 | 45 sec | Continuous movement |
| Balancing Single-Leg Deadlift | 3 x 10 each | 30 sec | Bodyweight only, slow and controlled |
| Bear Crawl | 3 x 40 ft | 45 sec | Core tight, knees 1 inch off ground |
| Cooldown Walk | 1 x 5 min | — | Easy pace, deep breathing |
Chapter 8: Cardio Training for Snowboarding—Building Mountain Endurance
Endurance is the foundation that allows you to enjoy every run. Without adequate cardiovascular fitness, even the most technically skilled rider will fade by mid-morning, making sloppy decisions and increasing injury risk. Snowboarding demands a unique blend of aerobic endurance (sustained effort over hours) and anaerobic capacity (short, intense bursts). Understanding these energy systems and training them appropriately is the key to riding bell-to-bell without “bonking.”
8.1 Understanding the Energy Systems
The Aerobic System: This is your base energy system. It uses oxygen to convert fat and carbohydrates into ATP (adenosine triphosphate), the energy currency of your cells. The aerobic system is active during low-to-moderate intensity activities—like cruising a blue run at a steady pace. A strong aerobic base means you can ride for hours without getting winded. It also accelerates recovery between intense runs, allowing you to maintain high performance throughout the day.
The Anaerobic System: This system kicks in when the demand for energy exceeds what your aerobic system can provide—like sprinting through a flat section, landing a jump, or reacting to a sudden obstacle. The anaerobic system uses stored glycogen and produces lactic acid as a byproduct. When this system is overtaxed, your muscles burn, your form breaks down, and you become fatigued. Training this system improves your ability to handle intense bursts and recover quickly.
The Phosphocreatine System: This is your “instant energy” system. It provides energy for efforts lasting less than 10 seconds—like the explosive burst needed for an ollie or the reactive muscle activation needed to catch yourself after a near-fall. While this system is primarily genetic, you can improve its efficiency through plyometric training.
8.2 Heart Rate Zones for Snowboard Training
Understanding heart rate zones allows you to train specific energy systems with precision. Here is how the five standard zones apply to snowboarding:
Zone 1 (50-60% max HR) — Recovery and Base Building: Easy walking, light cycling, or gentle yoga. This zone builds your aerobic base and promotes recovery. Use this zone on rest days or after intense training sessions. It is also the zone you operate in during easy cruising runs on gentle terrain.
Zone 2 (60-70% max HR) — Aerobic Endurance: Steady-state running, cycling, or swimming at a conversational pace. This is the most important zone for snowboarding endurance. Spending 60-90 minutes in Zone 2 builds mitochondrial density (more energy-producing cells), increases capillary density (better oxygen delivery), and teaches your body to burn fat for fuel. Most of your cardio training should be in this zone.
Zone 3 (70-80% max HR) — Tempo and Lactate Threshold: A “comfortably hard” pace where you can speak in short phrases but not hold a conversation. This zone trains your body to clear lactate more efficiently, allowing you to sustain higher intensities before fatiguing. This is the zone you operate in during aggressive carving runs or when riding challenging terrain.
Zone 4 (80-90% max HR) — Anaerobic Threshold: A hard effort where you can only speak a few words. This zone improves your lactate threshold—the intensity at which lactate accumulates faster than it can be cleared. Training in this zone through interval work (like Tabata or 4×4 intervals) improves your ability to handle intense bursts of effort, such as sprinting to catch a lift or powering through deep powder.
Zone 5 (90-100% max HR) — Maximum Effort: An all-out effort lasting 30 seconds to 2 minutes. This zone trains your VO2 max—the maximum amount of oxygen your body can use during intense exercise. While you rarely ride at Zone 5 intensity, improving your VO2 max raises the ceiling on all other energy systems, making Zone 2 and Zone 3 efforts feel easier.
8.3 Sample Cardio Program for Snowboarding
Weeks 1-4 (Base Building):
- Monday: 45-minute Zone 2 run or cycle
- Wednesday: 30-minute Zone 2 swim or row
- Saturday: 60-90 minute Zone 2 hike, bike, or run
- Total weekly cardio volume: 2.5-3 hours
Weeks 5-8 (Threshold Development):
- Monday: 40-minute Zone 2 run with 4×4-minute Zone 4 intervals (3-minute Zone 2 recovery between intervals)
- Wednesday: 30-minute Zone 2 swim with 6x50m Zone 4 sprints
- Saturday: 60-minute Zone 2 hike with 3×5-minute Zone 3 tempo efforts
- Total weekly cardio volume: 2 hours
Weeks 9-12 (Anaerobic and VO2 Max):
- Monday: 30-minute session: 5-minute warm-up, then 8×30-second Zone 5 sprints with 90-second Zone 2 recovery, 5-minute cool-down
- Wednesday: 40-minute Zone 2 run with 6×1-minute Zone 4 hill sprints
- Saturday: 45-minute Zone 2 ride with 4×3-minute Zone 3-4 threshold efforts
- Total weekly cardio volume: 1.75 hours
Altitude Considerations
If you plan to ride at high-altitude resorts like those in Colorado or the European Alps, your cardiovascular system faces additional stress. At 10,000+ feet, there is approximately 30% less oxygen available per breath. If you live at low altitude, begin your cardio training 8-12 weeks before your trip to give your body time to adapt. Consider adding interval training at higher intensities to simulate the oxygen demands of altitude riding. If possible, arrive at altitude 2-3 days before riding to allow initial acclimatization.
8.4 Cardio Machines That Best Transfer to Snowboarding
Rowing Machine: The rowing machine is arguably the best cardio machine for snowboarders. It works the entire posterior chain—hamstrings, glutes, back, and shoulders—while providing an excellent cardiovascular workout. The hip hinge movement pattern of rowing directly mimics the movement patterns used in snowboarding. Perform steady-state rows in Zone 2 for endurance or interval rows in Zone 4 for anaerobic capacity.
Assault Bike (Air Bike): The assault bike provides both upper and lower body resistance, making it a total-body cardio tool. The resistance scales with effort—the harder you pedal, the harder it gets. This makes it ideal for interval training. Perform 30-second all-out sprints with 60-second recovery for 10-15 rounds to build anaerobic capacity.
Stair Climber: The stair climber targets the quadriceps, glutes, and calves while building cardiovascular endurance. The repetitive stepping motion simulates the sustained muscular effort of riding. Perform 20-30 minute sessions at a moderate pace (Zone 2-3) to build muscular endurance in the lower body.
Elliptical: The elliptical provides a low-impact cardiovascular workout that is easy on the joints. While it does not provide the same strength stimulus as a rowing machine or stair climber, it is an excellent option for recovery days or riders with joint issues. Focus on maintaining Zone 2-3 intensity for 30-45 minutes.
Trail Running: While not a machine, trail running is perhaps the single best cardio activity for snowboarders. The uneven terrain challenges your balance, strengthens your ankle stabilizers, builds cardiovascular endurance, and trains your body to react to unpredictable surface changes—all of which directly transfer to snowboarding. Run on trails 1-2 times per week during your cardio training phase.
Chapter 9: Stretching and Flexibility for Snowboarding Performance
Flexibility is the forgotten pillar of snowboarding fitness. While strength and endurance get most of the attention, flexibility directly impacts your ability to achieve a low, athletic stance, absorb terrain effectively, and recover from off-balance situations. Tight muscles restrict your range of motion, which means you cannot get low enough in your turns, your movements become labored, and your injury risk increases dramatically.
This chapter covers the specific stretches and mobility work that matter most for snowboarding, organized by body region. Perform these stretches after every training session and on rest days for maximum benefit. Hold each stretch for 30-60 seconds, breathing deeply and never bouncing.
9.1 Hip Flexor Stretches
Tight hip flexors are epidemic among snowboarders and desk workers alike. When the psoas and iliacus are shortened from prolonged sitting, they pull the lumbar spine into excessive extension, causing lower back pain. They also limit hip flexion range of motion, which prevents you from achieving a deep athletic stance. If you cannot squat deeply without your heels lifting or your torso collapsing forward, tight hip flexors are likely a major contributor.
Kneeling Hip Flexor Stretch: Kneel on one knee with the other foot flat on the floor in front of you (lunge position). Push your hips forward until you feel a stretch in the front of the kneeling leg’s hip. Keep your torso upright and avoid arching your lower back. For a deeper stretch, raise the arm on the kneeling-leg side overhead and lean slightly toward the opposite side. Hold for 60 seconds each side.
Half-Kneeling Hip Flexor with Rotation: From the same kneeling lunge position, place the opposite hand on the floor inside the front foot. Rotate your torso toward the front leg, reaching your free arm toward the ceiling. This adds a thoracic spine rotation component, addressing two mobility restrictions simultaneously. Hold for 45 seconds each side.
Pigeon Pose: From a push-up position, bring one knee forward and place it behind the same-side wrist, with the foot angled toward the opposite hip. Extend the back leg straight behind you. Lower your torso over the front leg until you feel a deep stretch in the hip of the front leg. This stretches the external hip rotators and glutes, which are often tight from the rotational demands of snowboarding. Hold for 60-90 seconds each side.
9.2 Hamstring Stretches
Flexible hamstrings allow you to maintain a hip-hinged riding stance without straining your lower back. When hamstrings are tight, riders tend to round their lumbar spine to compensate, which leads to the classic “snowboarder’s back”—chronic lower back pain from sustained flexion under load.
Standing Hamstring Stretch: Place one heel on a low surface (bench, step, or chair) with your leg straight. Hinge at the hips and reach toward your toes until you feel a stretch along the back of your thigh. Keep your back flat—rounding defeats the purpose. Hold for 45-60 seconds each side.
Supine Hamstring Stretch with Strap: Lie on your back and loop a towel or yoga strap around one foot. Straighten the leg toward the ceiling and gently pull it toward your head until you feel a stretch. This is the most controlled way to stretch the hamstrings because your back is supported on the floor. Hold for 60 seconds each side.
Single-Leg RDL as Active Stretch: Stand on one leg and hinge forward at the hips, extending the free leg behind you as far as possible while reaching toward the floor. This is an “active” stretch—it builds strength through the full range of motion rather than just passively lengthening the muscle. Perform 8-10 slow repetitions each side as part of your warm-up or cooldown.
9.3 Hip Adductor (Inner Thigh) Stretches
The adductors are heavily used in snowboarding for lateral stability and edge control. When these muscles are tight, they limit your ability to shift weight laterally, which makes edge transitions slower and less smooth. Tight adductors also contribute to knee pain by altering the tracking of the patella.
Butterfly Stretch: Sit on the floor with the soles of your feet pressed together and your knees dropped to the sides. Hold your feet and gently press your knees toward the floor using your elbows. Sit tall and hinge forward slightly from the hips for a deeper stretch. Hold for 60-90 seconds.
Sumo Squat Stretch: Stand with your feet wider than shoulder width, toes pointed slightly outward. Squat down as deep as possible, using your elbows to push your knees apart. Hold the bottom position and focus on breathing into the stretch. This targets the adductors while also improving ankle and hip mobility. Hold for 60 seconds.
Side Lunge Stretch: Stand with feet wide apart. Shift your weight to one side, bending that knee and keeping the other leg straight. Sit your hips back and down until you feel a stretch along the inner thigh of the straight leg. Hold for 45-60 seconds each side.
9.4 Thoracic Spine Mobility
The thoracic spine (mid-back) is the most overlooked area of mobility work for snowboarders, yet it is one of the most important. Limited thoracic rotation forces the lumbar spine (lower back) and cervical spine (neck) to compensate, which leads to pain in both areas. Snowboarding requires significant rotational mobility for counter-rotation during turns, looking over your shoulder to check for traffic, and maintaining balance during dynamic movements.
Foam Roller Thoracic Extension: Place a foam roller perpendicular to your spine at mid-back level. Cross your arms over your chest and lean back over the roller, allowing your spine to extend. Move the roller to three different positions along your thoracic spine and spend 30 seconds at each position. This restores extension mobility and reduces stiffness.
Open Book Stretch: Lie on your side with your knees stacked and bent at 90 degrees. Extend both arms in front of you. Keeping your knees together, rotate your top arm toward the floor behind you, following it with your eyes. This stretches the pectorals and improves thoracic rotation. Hold for 30 seconds each side, performing 3-4 repetitions.
Quadruped Thoracic Rotation: On your hands and knees, place one hand behind your head. Rotate your elbow toward the ceiling, opening your chest, then rotate it toward the floor. Perform 10-12 slow repetitions each side, focusing on maximizing the range of motion through the thoracic spine without moving the lumbar spine.
9.5 Ankle Mobility
Limited ankle dorsiflexion (the ability to pull your toes toward your shin) is one of the most common mobility restrictions in snowboarders. When your ankles cannot dorsiflex sufficiently, your body compensates by shifting weight forward onto the balls of your feet, which leads to calf fatigue, foot pain (why do my feet hurt when i snowboard), and reduced edge control. Poor ankle mobility also prevents you from achieving a deep, balanced stance.
Wall Ankle Stretch: Stand facing a wall with one foot about 6 inches away. Keeping your heel on the ground, try to touch your knee to the wall. Gradually move your foot further from the wall and repeat until you find your maximum range. Hold for 30 seconds each side.
Deep Squat Hold: Squat down as deep as possible with your feet shoulder width apart and toes slightly out. Use a doorway or pole for balance if needed. Focus on keeping your heels on the ground and your chest up. This stretches the ankles, hips, and thoracic spine simultaneously. Hold for 60-90 seconds.
Calf Stretch on Step: Stand on the edge of a step with the balls of your feet on the step and your heels hanging off. Lower your heels toward the floor until you feel a stretch in your calves. For a deeper stretch, bend one knee slightly to target the soleus (the deeper calf muscle). Hold for 45 seconds each side.
Flexibility is a Daily Practice
Flexibility gains come from consistency, not intensity. Stretching for 15 minutes every day is far more effective than one intense stretching session per week. The body adapts to regular, gentle stimulus over time. Make stretching a non-negotiable part of your daily routine—even on days you don’t train. Your hips, hamstrings, and ankles will thank you when you’re linking deep carves on the mountain. And remember, proper flexibility is a key factor in whether snowboard lessons will be effective—you need the physical range of motion to execute the techniques being taught.
Chapter 10: Yoga for Snowboarding—The Complete Practice
Yoga is one of the most effective cross-training activities for snowboarding. It develops flexibility, balance, core strength, body awareness, and mental focus—all attributes that directly improve riding performance. Many professional snowboarders include yoga in their training programs, and for good reason: the combination of strength and flexibility that yoga develops is exactly what snowboarding demands.
This chapter provides a complete yoga practice specifically designed for snowboarders. You do not need to be flexible or experienced with yoga to start—this sequence is designed to meet you where you are and progressively develop the qualities that matter most for snowboarding.
10.1 The Snowboarder’s Yoga Flow (30-45 minutes)
Sun Salutation A (5 rounds): Begin with five rounds of Sun Salutation A to warm up the entire body. This classic sequence moves through Mountain Pose, Forward Fold, Halfway Lift, Plank, Chaturanga (or knees-chest-chin), Upward Dog (or Cobra), Downward Dog, and back to Mountain Pose. Focus on linking breath with movement—inhale on extensions, exhale on folds and compressions. This warms up the spine, shoulders, hips, and hamstrings while building heat in the body.
Warrior II Flow (3 rounds each side): From Downward Dog, step one foot forward between your hands and rise into Warrior II. Hold for 5 breaths, then flow into Extended Side Angle (forearm on front thigh, top arm reaching overhead), then reverse your warrior (top arm reaching back). Return to Warrior II and repeat the flow three times before switching sides. This sequence builds leg strength, hip flexibility, and lateral stability—all essential for edge control.
Chair Pose to Forward Fold (5 rounds): From Mountain Pose, sit your hips back and down into Chair Pose, keeping your weight in your heels and your arms overhead. Hold for 3 breaths, then fold forward over your legs. Return to Chair Pose and repeat. This builds quadriceps endurance and teaches the hip-hinge pattern that is fundamental to snowboarding stance. The transition between Chair and Forward Fold also dynamically stretches the hamstrings.
Crescent Lunge with Twist (5 each side): From Downward Dog, step one foot forward into a high lunge with your back knee off the ground. Raise your arms overhead, then twist your torso toward the front leg, bringing your hands to prayer position at your chest. Hook your outside elbow over your front knee for a deeper twist. This builds hip flexor flexibility, balance, and thoracic rotation—the exact combination needed for dynamic turning.
Pigeon Pose (2 minutes each side): From Downward Dog, bring one knee forward and place it behind the same-side wrist. Extend the back leg straight and lower your torso over the front leg. This is the deepest hip opener in the sequence and targets the external rotators and glutes. Snowboarders who struggle with this pose typically have tight hips that limit their ability to achieve a deep, stable stance. Be patient with this pose—progress comes with consistent practice.
Tree Pose (1 minute each side): Stand on one leg and place the sole of the other foot on your inner thigh (or calf—never on the knee). Bring your hands to prayer position at your chest or extend them overhead. Fix your gaze on a single point for balance. This directly trains the single-leg balance and proprioception that snowboarding demands. For an added challenge, close your eyes for the last 15 seconds.
Bridge Pose (3 rounds of 5 breaths): Lie on your back with knees bent and feet flat on the floor, hip width apart. Press through your feet to lift your hips toward the ceiling, squeezing your glutes at the top. Hold for 5 breaths, then lower slowly. This activates the glutes and hamstrings while stretching the hip flexors and chest. It is also an excellent pose for counteracting the effects of prolonged sitting.
Seated Forward Fold (2 minutes): Sit with your legs extended in front of you and fold forward from the hips, reaching for your toes. Keep your back as flat as possible—rounding reduces the effectiveness of the stretch. This provides a deep, sustained stretch for the entire posterior chain—hamstrings, calves, and lower back. Breathe deeply and allow gravity to gradually increase the stretch over the 2-minute hold.
Supine Twist (1 minute each side): Lie on your back and bring one knee to your chest, then guide it across your body toward the floor on the opposite side. Extend your arms out to the sides and look toward the opposite knee. This releases tension in the lower back, stretches the glutes and obliques, and provides a gentle spinal rotation. It is an ideal cooldown pose after an intense training session or ride.
Savasana (5 minutes): Lie flat on your back with your arms at your sides and legs extended. Close your eyes and focus on your breath. Allow your body to relax completely. This final relaxation pose is not just rest—it is when your body integrates the benefits of the practice. The nervous system downregulates, cortisol levels drop, and the muscles begin to recover. Do not skip Savasana—five minutes of focused relaxation provides disproportionate benefits.
10.2 Yoga Poses for Specific Snowboarding Issues
For Lower Back Pain: Cat-Cow (spinal mobilization), Child’s Pose (spinal decompression), Supine Twist (spinal rotation), and Bridge Pose (glute activation with spinal support). Perform these poses daily if you experience chronic lower back pain.
For Knee Pain: Warrior II (leg strengthening with knee alignment), Chair Pose (quadriceps strengthening in a functional pattern), and Half Splits (hamstring flexibility to reduce knee strain). Avoid deep knee flexion poses if your knee is acutely inflamed.
For Foot Pain: Downward Dog (calf and plantar fascia stretching), Toe Squats (stretching the toe flexors), and Tree Pose (balance and intrinsic foot strengthening). Rolling your foot on a tennis ball for 2-3 minutes before yoga also helps release tension in the plantar fascia (why do my feet hurt when i snowboard).
For Shoulder Stiffness: Thread the Needle (thoracic and shoulder mobility), Eagle Arms (scapular protraction and rhomboid stretch), and Cow Face Arms (shoulder internal and external rotation). These poses address the stiffness that develops from holding your arms out for balance during riding.
Yoga Timing
Perform your yoga practice on rest days from strength training or in the evening after a training session. Avoid intense yoga immediately before heavy lifting, as the flexibility gains from yoga can temporarily reduce joint stability. For on-snow days, a gentle 15-minute yoga flow in the morning (focusing on Sun Salutations and hip openers) is ideal for warming up and improving range of motion before riding. Many top riders also practice yoga in the evening after riding to promote recovery and reduce next-day soreness.
Chapter 11: Injury Prevention—Protecting Your Body on and off the Mountain
Snowboarding carries inherent risks, but the vast majority of injuries are preventable through proper conditioning, smart riding habits, and appropriate protective gear. Understanding the most common snowboarding injuries—and how to prevent them—is essential knowledge for every rider. This chapter provides a comprehensive guide to injury prevention, covering the most common injuries, their causes, and the specific exercises and strategies that reduce your risk.
11.1 The Most Common Snowboarding Injuries
Wrist Fractures (Colles’ Fracture): Wrist fractures are the single most common snowboarding injury, accounting for approximately 25-30% of all snowboard injuries. They occur when a rider falls and extends their hands to break the fall. The impact force travels up the wrist and fractures the distal radius. Wrist fractures are significantly more common in beginners than advanced riders, as beginners fall more frequently and have not learned to fall without extending their arms.
Prevention Strategy: Wrist guards are the single most effective prevention tool for wrist fractures. They absorb and distribute the impact force that would otherwise concentrate on the wrist joint. Additionally, learning to fall correctly—tucking the arms in and rolling with the fall rather than reaching out—dramatically reduces wrist injury risk. Strengthening the wrist flexors and extensors through resistance band exercises also provides additional protection. Some riders also benefit from impact shorts that provide additional padding during falls.
ACL Tears (Anterior Cruciate Ligament): ACL tears are the most serious common snowboarding injury, typically requiring surgery and 6-12 months of rehabilitation. They occur during sudden deceleration, pivoting, or landing from a jump with the knee in a vulnerable position (extended and internally rotated). Catching an edge and being thrown into an awkward knee position is a common mechanism of ACL tears in snowboarding.
Prevention Strategy: ACL prevention starts with strengthening the muscles that protect the knee. The hamstrings, glutes, and quadriceps all play critical roles in stabilizing the knee joint. Specifically, single-leg exercises that challenge balance (like single-leg squats and single-leg deadlifts) train the neuromuscular control that prevents the knee from collapsing into a vulnerable position. Lateral band walks strengthen the gluteus medius, which controls hip internal rotation—a key factor in ACL injury risk. Plyometric training that teaches proper landing mechanics (soft knees, hips back, knees tracking over toes) is also critical for preventing ACL tears during jumps and drops.
Shoulder Injuries (AC Separation, Dislocation): Shoulder injuries account for approximately 10-15% of snowboarding injuries. They occur from falling onto an outstretched hand (which transmits force to the shoulder) or from direct impact with the ground or obstacles. Acromioclavicular (AC) separations and shoulder dislocations are the most common shoulder injuries.
Prevention Strategy: Strengthening the rotator cuff and scapular stabilizers provides protection against shoulder injuries. External rotation exercises with resistance bands, face pulls, and prone Y-T-W raises strengthen the muscles that stabilize the shoulder joint. Maintaining good thoracic spine mobility also reduces shoulder injury risk by ensuring the shoulder blade can move freely during arm movements. As with wrist injuries, learning to fall without extending the arm directly reduces shoulder injury risk.
Concussions: Concussions are a serious concern in snowboarding, particularly for park and halfpipe riders. They occur from impact with the ground, obstacles, or other riders. Even mild concussions can have long-term neurological consequences, making prevention critical.
Prevention Strategy: Wearing a properly fitted helmet is the single most effective prevention tool for concussions. Modern snowboard helmets are designed to absorb and distribute impact forces that would otherwise be concentrated on the skull. A helmet does not prevent all concussions, but it significantly reduces the severity of head impacts. Additionally, developing proper falling techniques, riding within your ability level, and being aware of your surroundings all reduce concussion risk. For more information on helmet selection, see best snowboard helmets.
Lower Back Injuries: Lower back pain and injuries are extremely common in snowboarding, particularly among riders who spend long days on the mountain or ride in aggressive terrain. The causes include sustained flexion under load, rotational forces, and impact from jumps and landings. While most lower back pain is muscular and resolves with rest and conditioning, more serious injuries like herniated discs can occur from high-energy impacts.
Prevention Strategy: Core strength is the primary defense against lower back injuries. A strong core—particularly the deep stabilizers like the transverse abdominis and multifidus—protects the lumbar spine from excessive movement under load. Planks, dead bugs, bird dogs, and Pallof presses build this deep stability. Hip flexibility is equally important—tight hip flexors and hamstrings force the lumbar spine to compensate, increasing injury risk. Yoga and targeted stretching (as outlined in Chapters 9 and 10) address these restrictions. Additionally, impact shorts with built-in back protection provide an additional layer of defense during high-impact riding.
11.2 The Role of Fatigue in Injury
Research consistently shows that injury risk increases significantly as the day progresses and fatigue accumulates. A study of ski patrol data found that the risk of injury was 3-5 times higher in the last two hours of riding compared to the first two hours. This is because fatigue degrades neuromuscular control—your muscles react more slowly, your balance deteriorates, and your ability to absorb impacts decreases.
The most dangerous time on the mountain is not the morning, when you are fresh and focused, but the afternoon, when fatigue has accumulated but you are still pushing for “just one more run.” This is the time when most injuries occur. Recognizing this pattern and having the discipline to stop before you are exhausted is one of the smartest things you can do as a rider.
Building cardiovascular and muscular endurance through off-season training delays the onset of fatigue, extending the window of time during which you ride safely. This is why the endurance training outlined in Chapter 8 is not just about performance—it is about safety. A rider with superior endurance maintains proper form longer, reacts faster, and makes better decisions throughout the day.
11.3 The Role of Protective Gear
While fitness is the best defense against injury, protective gear provides an essential additional layer of protection. Here is a guide to the protective gear that matters most:
Helmet: Non-negotiable for every rider, every run. Modern helmets are lightweight, well-ventilated, and designed specifically for snow sports. They reduce the risk and severity of head injuries dramatically. See best snowboard helmets for our recommendations.
Wrist Guards: Essential for beginners and recommended for all riders. They can be worn as standalone gloves or integrated into snowboard gloves. Wrist guards reduce the risk of wrist fractures by 50-85%.
Impact Shorts: Padded shorts that protect the tailbone, hips, and thighs during falls. Particularly valuable for park riders and beginners who fall frequently. See best impact shorts for snowboarding for our top picks.
Back Protector: A spine protector that absorbs impact forces to the back. Recommended for park riders, halfpipe riders, and anyone riding in aggressive terrain. Many modern impact shorts include integrated back protection.
Knee Pads: Soft-shell knee pads protect against impact and abrasion during falls. They are particularly valuable for freestyle riders who frequently land on their knees.
Elbow Pads: Similar to knee pads, elbow pads protect against impact and abrasion. They are recommended for beginners who are still learning to control their falls.
Prevention is Always Better Than Treatment
The best injury is the one that never happens. Invest in your conditioning, wear appropriate protective gear, learn to fall safely, and ride within your ability level. When you do feel fatigued, stop riding for the day—no run is worth an injury that could sideline you for months. Remember, proper fitness not only prevents injuries but also enhances every aspect of your riding experience, from the depth of your carves to the duration of your rides (why snowboarding is fun).
Chapter 12: Age-Specific Training Considerations for Snowboarders
Snowboarding is a lifelong sport, but your training approach should evolve with your age. A 25-year-old rider recovering from a weekend session has different needs than a 50-year-old rider preparing for the season. This chapter provides age-specific modifications to the training programs in this guide, ensuring that riders of all ages can train safely and effectively.
12.1 Riders Under 25: Building the Foundation
Young riders are in the prime of their physical development. Testosterone and growth hormone levels are naturally high, recovery is fast, and the body adapts quickly to training stimuli. This is the ideal time to build a broad athletic foundation that will serve you for decades.
Training Priorities:
- Learn proper lifting technique. This is the time to build movement quality that will last a lifetime. Focus on mastering the squat, deadlift, lunge, and pressing patterns before adding significant weight.
- Build general athleticism. Play multiple sports, develop coordination, and challenge your body in varied ways. The athletic skills you develop now—balance, agility, coordination, power—transfer directly to snowboarding and protect you from injury.
- Develop cardiovascular fitness. Young riders often neglect cardio in favor of lifting, but a strong aerobic base is essential for long days on the mountain. Include 2-3 cardio sessions per week.
- Don’t neglect flexibility. Young athletes are often the stiffest because they rely on natural athleticism rather than mobility work. Establishing a daily stretching and yoga habit now will prevent the chronic issues that plague older riders.
Recovery Considerations: Young riders recover quickly, which can be a double-edged sword. The fast recovery allows for higher training volume, but it can also mask overtraining. Monitor your energy levels, sleep quality, and motivation—if you feel consistently depleted, reduce training volume for a week.
12.2 Riders Ages 25-40: Maintaining Peak Performance
This is the age range where most competitive and serious recreational riders perform at their highest level. Strength, power, and cardiovascular fitness are all near their peak, but recovery begins to slow compared to your early twenties. The key challenge in this age range is managing training stress to maintain performance while avoiding injury.
Training Priorities:
- Prioritize movement quality over load. As you age, the margin for error in heavy lifting decreases. Focus on perfect form, controlled tempos, and appropriate loads rather than chasing personal records.
- Incorporate more unilateral work. Unilateral exercises (single-leg squats, single-arm presses) correct imbalances that develop over years of training and riding. They also build the balance and stability that snowboarding demands.
- Maintain power training. Power—the ability to generate force quickly—begins to decline in your thirties. Include plyometrics and explosive movements (box jumps, medicine ball throws, kettlebell swings) at least twice per week to slow this decline.
- Emphasize recovery. Recovery becomes increasingly important in this age range. Prioritize sleep (7-9 hours per night), include regular foam rolling and stretching, and consider periodic deload weeks where you reduce training volume by 40-50%.
Recovery Considerations: Sleep is the single most powerful recovery tool. Aim for 7-9 hours per night. Nutrition becomes more important—ensure adequate protein intake (0.7-1 gram per pound of body weight), stay hydrated, and consider anti-inflammatory foods (berries, fatty fish, leafy greens) to reduce training-related inflammation.
12.3 Riders Ages 40-55: Adaptation and Longevity
Riders in this age range face the challenge of declining hormone levels, slower recovery, and accumulated wear and tear on joints. However, with smart training, riders over 40 can continue to ride aggressively and enjoy the sport for decades. The key is adapting your training to work with your body rather than against it.
Training Priorities:
- Focus on joint health. As you age, cartilage becomes less resilient and joints become more susceptible to injury. Include joint mobility work in every warm-up, maintain a healthy body weight to reduce joint loading, and avoid high-impact activities that stress the knees and spine.
- Emphasize flexibility and mobility. Flexibility declines naturally with age, making mobility work increasingly important. Dedicate 15-20 minutes daily to stretching and yoga. This maintains your range of motion and allows you to achieve the deep, athletic stance that snowboarding requires.
- Maintain strength with lower volume. You can still build and maintain significant strength after 40, but you need more recovery between sessions. Reduce your training frequency to 3 sessions per week and focus on compound movements that provide the most benefit per unit of effort.
- Train balance and proprioception. Balance declines with age, increasing the risk of falls. Include balance board training, single-leg exercises, and stability work in every training session. This is one of the most important things you can do to maintain snowboarding performance and prevent injuries.
Recovery Considerations: Recovery is the limiting factor for riders over 40. You cannot train as frequently or as intensely as you did in your twenties, but you can train just as effectively by allowing more recovery between sessions. Prioritize sleep, nutrition, and stress management. Consider working with a physical therapist or trainer who specializes in working with masters athletes to develop a program tailored to your specific needs.
12.4 Riders Ages 55+: The Lifelong Rider
Snowboarding after 55 requires a commitment to fitness that goes beyond performance—it is about maintaining the physical capacity to enjoy the sport safely. The good news is that research consistently shows that regular exercise can significantly slow the age-related decline in strength, cardiovascular fitness, and flexibility. Many riders continue to enjoy aggressive riding well into their 60s and 70s with proper conditioning.
Training Priorities:
- Consistency over intensity. The most important thing is to keep moving. Regular, moderate exercise provides far more benefit than occasional intense sessions. Aim for 30-60 minutes of activity most days of the week.
- Strength training is essential. Muscle mass declines approximately 3-5% per decade after age 30, accelerating after 60. Resistance training is the only proven intervention to reverse this decline. Include strength training 2-3 times per week, focusing on compound movements with moderate loads and controlled tempos.
- Balance training is critical. Balance declines significantly with age, and falls are the leading cause of injury in older adults. Include balance training in every workout—balance boards, single-leg stands, and stability exercises.
- Flexibility and mobility are non-negotiable. Maintaining range of motion is essential for achieving a safe riding stance and absorbing terrain. Dedicate 20-30 minutes daily to stretching and mobility work.
- Protect your joints. Consider wearing additional protective gear (impact shorts, knee pads, back protector) to reduce injury risk from falls. Ride groomed terrain and avoid high-risk features that could result in serious injury.
Recovery Considerations: Recovery takes longer as you age. Allow 48-72 hours between strength sessions targeting the same muscle groups. Prioritize sleep, nutrition, and hydration. Consider working with a healthcare provider to address any chronic conditions that may affect your training or riding.
Age is Just a Number
The oldest competitive snowboarders are in their 50s and 60s, and recreational riders continue well into their 70s and beyond. The key to lifelong riding is consistent training, smart recovery, and a willingness to adapt your approach as your body changes. Do not let age be an excuse to stop riding—let it be the motivation to train smarter. Whether you are a beginner (beginner resorts) or an experienced rider, the principles in this guide apply to you.
Chapter 13: Nutrition for Snowboarding Performance and Recovery
Fuel is what powers your performance. You can have the strongest legs and the most powerful core, but if your nutrition is poor, your body cannot perform at its potential. Snowboarding is a physically demanding activity that burns 300-600 calories per hour depending on intensity, terrain, and conditions. Proper nutrition ensures that you have the energy to ride all day, recover effectively between sessions, and maintain a healthy body composition that supports performance.
13.1 Macronutrient Requirements
Carbohydrates: Carbohydrates are your body’s preferred fuel source for high-intensity exercise. During snowboarding, your muscles rely heavily on glycogen (stored carbohydrate) for energy. When glycogen stores are depleted, performance drops dramatically—you feel fatigued, your reaction time slows, and your decision-making deteriorates. This is the dreaded “bonk” that forces riders back to the lodge.
Aim for 3-5 grams of carbohydrate per pound of body weight per day for regular training days, and 4-6 grams on heavy training or riding days. Focus on complex carbohydrates (oats, brown rice, sweet potatoes, whole grain bread) for sustained energy, and simple carbohydrates (fruit, sports drinks, gels) for quick energy during intense riding. Pre-ride meals should be consumed 2-3 hours before riding and should be primarily carbohydrate-based with moderate protein and low fat.
Protein: Protein is the building block for muscle repair and growth. During training, you create microscopic tears in your muscle fibers. Protein provides the amino acids needed to repair these tears and build stronger muscles. Without adequate protein, your muscles cannot recover properly, and your training adaptations are blunted.
Aim for 0.7-1 gram of protein per pound of body weight per day. Distribute your protein intake evenly across 4-5 meals throughout the day for optimal muscle protein synthesis. High-quality protein sources include chicken, fish, eggs, Greek yogurt, cottage cheese, legumes, and protein supplements. Post-training protein intake is particularly important—consume 20-30 grams of protein within 30-60 minutes after training to maximize recovery.
Fats: Dietary fat is essential for hormone production (including testosterone and growth hormone), joint health, and absorption of fat-soluble vitamins (A, D, E, K). It also provides a secondary fuel source during low-to-moderate intensity exercise. However, excessive fat intake can lead to unwanted weight gain, which increases joint stress and reduces power-to-weight ratio.
Aim for 0.3-0.5 grams of fat per pound of body weight per day. Focus on unsaturated fats (olive oil, avocado, nuts, fatty fish) and limit saturated and trans fats. Omega-3 fatty acids (found in fatty fish, flaxseeds, and walnuts) are particularly beneficial for reducing inflammation and supporting joint health—both important for snowboarders.
13.2 Hydration
Dehydration is one of the most common and preventable causes of reduced performance on the mountain. At altitude, the air is drier and your body loses moisture more rapidly through respiration. Combined with the physical exertion of riding, dehydration can set in quickly—even if you don’t feel thirsty. Dehydration of just 2% body weight can reduce performance by 10-20%, impairing strength, endurance, balance, and cognitive function.
Pre-Ride Hydration: Drink 16-20 ounces of water 2-3 hours before riding, and another 8-12 ounces 30 minutes before your first run. This ensures you start your day fully hydrated.
During-Ride Hydration: Drink 6-8 ounces of water or sports drink every 20-30 minutes while riding. If you are riding at altitude or in cold, dry conditions, increase this to 8-10 ounces. Sports drinks with electrolytes are particularly valuable during intense riding, as they replace sodium and potassium lost through sweat.
Post-Ride Hydration: Weigh yourself before and after riding. For every pound lost, drink 16-20 ounces of fluid to rehydrate. Water is usually sufficient for recovery, but if you lost significant sweat or rode for more than 3 hours, a sports drink or electrolyte supplement can accelerate rehydration.
The Pre-Ride Meal Template
Eat this meal 2-3 hours before riding for optimal performance:
- Carbohydrates: Oatmeal with banana and honey, or whole grain toast with jam
- Protein: 2-3 eggs, or Greek yogurt with nuts
- Fat: Small amount of nut butter or avocado
- Fluid: 16-20 oz water with a pinch of salt
This combination provides sustained energy without causing digestive distress. Avoid high-fiber, high-fat, or very large meals close to riding time, as they can cause stomach discomfort during exercise.
13.3 Supplements for Snowboarding
While whole foods should be the foundation of your nutrition, certain supplements can provide additional benefits for snowboarders:
Creatine Monohydrate: The most researched and effective supplement for improving strength and power output. Take 3-5 grams daily, every day, not just on training days. Creatine increases the availability of phosphocreatine in your muscles, which improves performance during short, intense efforts like jump landings and sprint intervals.
Vitamin D: Many riders are deficient in vitamin D, particularly during winter months when sun exposure is limited. Vitamin D is essential for bone health, immune function, and muscle function. Take 1000-2000 IU daily, especially during winter. Get your levels tested by a healthcare provider for personalized dosing.
Omega-3 Fish Oil: Omega-3 fatty acids reduce inflammation, support joint health, and may improve recovery from intense exercise. Take 2-3 grams of combined EPA and DHA daily. This is particularly valuable for riders with joint pain or those who ride frequently.
Magnesium: Magnesium is involved in over 300 enzymatic reactions in the body, including muscle contraction, nerve function, and energy production. Many athletes are deficient, and supplementation can improve sleep quality, reduce muscle cramps, and enhance recovery. Take 200-400 mg of magnesium glycinate or citrate before bed.
Branched-Chain Amino Acids (BCAAs): BCAAs (leucine, isoleucine, and valine) can reduce muscle soreness and accelerate recovery when whole-food protein intake is insufficient. They are particularly valuable during long riding days when eating a full meal is impractical. Drink 5-10 grams during your ride or between runs.
13.4 Nutrition for On-Snow Days
Breakfast (2-3 hours before riding): Oatmeal with berries, banana, and a tablespoon of nut butter. Two scrambled eggs. 16 oz water. This provides a balance of complex carbohydrates, protein, and healthy fats for sustained energy.
Mid-Morning Snack (on the lift): A banana or energy bar. 8 oz water or sports drink. This tops off glycogen stores and maintains hydration without causing digestive distress.
Lunch (30-45 minutes): Grilled chicken or turkey sandwich on whole grain bread with lettuce, tomato, and avocado. Side of fruit. 16 oz water or sports drink. Keep lunch moderate in size—too much food will make you sluggish for the afternoon session.
Afternoon Snack (on the lift): Trail mix (nuts, dried fruit, dark chocolate) or an energy bar. 8 oz water. This provides quick energy for the final runs of the day.
Post-Ride Recovery Meal (within 60 minutes): Grilled salmon or chicken with sweet potato and steamed vegetables. 16-20 oz water. This provides protein for muscle repair, carbohydrates to replenish glycogen, and micronutrients for overall recovery.
Evening: Continue hydrating. A casein protein shake or Greek yogurt before bed provides slow-digesting protein for overnight recovery. Ensure adequate sleep (7-9 hours) as this is when the majority of physical recovery occurs.
Chapter 14: Recovery Protocols—Maximizing Adaptation Between Sessions
Recovery is not the absence of training—it is an active process that determines how much benefit you gain from your workouts. Without adequate recovery, your body cannot repair the damage created by training, and you stagnate or regress. With optimal recovery, you adapt more quickly, build more strength, and arrive at the mountain fresh and powerful. This chapter covers the evidence-based recovery strategies that matter most for snowboarders.
14.1 Sleep: The Master Recovery Tool
Sleep is the single most important recovery tool available to you—and it is free. During sleep, your body releases growth hormone, repairs damaged muscle tissue, consolidates motor learning (improving technique), and restores immune function. Research consistently shows that athletes who sleep 8-9 hours per night perform significantly better than those who sleep 6-7 hours.
Sleep Optimization Strategies:
- Consistent Schedule: Go to bed and wake up at the same time every day, even on weekends. This regulates your circadian rhythm and improves sleep quality.
- Dark Environment: Make your bedroom as dark as possible. Use blackout curtains, cover LED lights, and remove electronic devices. Even small amounts of light can suppress melatonin production and disrupt sleep.
- Cool Temperature: The ideal sleep temperature is 65-68°F (18-20°C). A cool environment promotes deeper sleep.
- No Screens Before Bed: The blue light emitted by phones, tablets, and computers suppresses melatonin production. Stop using screens 60-90 minutes before bed.
- Avoid Caffeine After 2 PM: Caffeine has a half-life of 5-6 hours, meaning half the caffeine from your 2 PM coffee is still in your system at 7-8 PM. Avoid caffeine after 2 PM to ensure it does not interfere with sleep.
- Magnesium Supplementation: Taking 200-400 mg of magnesium glycinate 30-60 minutes before bed can improve sleep quality and reduce muscle cramps.
14.2 Active Recovery
Active recovery—low-intensity movement on rest days—promotes blood flow to damaged muscles, accelerates the removal of metabolic waste products, and reduces muscle soreness. Active recovery is more effective than complete rest for reducing delayed-onset muscle soreness (DOMS) and maintaining mobility.
Effective Active Recovery Activities:
- Walking: 30-60 minutes of easy walking is one of the best active recovery activities. It promotes blood flow throughout the entire body without placing significant stress on any muscle group.
- Swimming: Swimming provides a full-body workout with zero impact on joints. The water pressure also promotes circulation and reduces swelling. 20-30 minutes of easy swimming is ideal active recovery.
- Cycling: Easy cycling (Zone 1-2) promotes blood flow to the legs without the eccentric stress of running. 30-45 minutes at an easy pace is sufficient.
- Yoga: A gentle yoga session (as outlined in Chapter 10) combines active recovery with flexibility and mobility work. This is one of the most efficient recovery activities for snowboarders.
- Foam Rolling: While not technically “active” recovery, foam rolling promotes blood flow to tight and sore muscles, reduces fascial adhesions, and improves range of motion. Spend 10-15 minutes foam rolling major muscle groups (quads, hamstrings, glutes, calves, thoracic spine) on rest days and after training sessions.
14.3 Cold and Heat Therapy
Cold Water Immersion (Ice Baths): Submerging in cold water (50-59°F / 10-15°C) for 10-15 minutes after intense training or riding reduces inflammation, decreases muscle soreness, and accelerates recovery. The cold constricts blood vessels, reducing swelling and tissue damage. After exiting the cold water, the vessels dilate, flushing metabolic waste products from the muscles. While uncomfortable, ice baths are one of the most effective acute recovery tools available.
Contrast Therapy: Alternating between hot (100-104°F / 38-40°C) and cold (50-59°F / 10-15°C) water immersion creates a “pumping” effect that accelerates blood flow and waste removal. Alternate 1-2 minutes of hot with 1-2 minutes of cold for 10-15 minutes total. This is particularly effective for reducing swelling and improving range of motion after injury.
Sauna: Regular sauna use (15-20 minutes at 170-190°F / 77-88°C) promotes relaxation, increases blood flow, and may enhance growth hormone release. Some research suggests that regular sauna use improves cardiovascular fitness and heat tolerance. Use sauna on rest days or after training sessions—not before intense workouts, as it can cause dehydration and impair performance.
14.4 Massage and Manual Therapy
Massage reduces muscle tension, breaks up fascial adhesions, promotes blood flow, and accelerates recovery. Regular massage—whether from a professional therapist or a self-massage tool—is one of the most effective recovery strategies for athletes who train frequently.
Self-Massage Tools:
- Foam Roller: The most versatile self-massage tool. Use it for large muscle groups (quads, hamstrings, glutes, calves, back). Spend 1-2 minutes per muscle group, applying pressure to tender spots and holding for 20-30 seconds.
- Lacrosse Ball: A lacrosse ball provides more targeted pressure than a foam roller. Use it for smaller muscles and hard-to-reach areas (feet, glutes, upper back, shoulders). Place the ball between your body and the floor or wall and apply pressure to tender spots.
- Massage Gun: Percussive therapy devices provide rapid, targeted pressure that reduces muscle tension and promotes blood flow. Use on large muscle groups at low-to-moderate intensity for 1-2 minutes per area. Avoid using directly over bones, joints, or acute injuries.
Professional Massage: If budget allows, regular professional massage (bi-weekly or monthly) provides benefits that are difficult to replicate with self-massage. Sports massage focuses on the specific needs of athletes and can address chronic tension patterns that contribute to injury and performance limitations.
14.5 Periodization and Deload Weeks
Periodization is the systematic planning of training to optimize performance and prevent overtraining. The basic principle is simple: train hard for 3-4 weeks, then reduce volume and intensity for one week (a “deload” week) to allow full recovery before starting the next training block.
Deload Week Guidelines:
- Reduce training volume by 40-50% (fewer sets and exercises)
- Reduce training intensity by 10-20% (lighter weights)
- Maintain training frequency (keep showing up, just do less)
- Prioritize sleep, nutrition, and recovery activities
- Use deload weeks to address mobility restrictions, get a sports massage, or visit a physical therapist
The body adapts to training stress during recovery, not during the training itself. Without periodic deload weeks, accumulated fatigue impairs adaptation and increases injury risk. Deload weeks are not a sign of weakness—they are a strategic investment in long-term performance.
Recovery on the Mountain
Recovery does not stop when you arrive at the resort. Between runs, take advantage of the lift ride to stretch your hip flexors and quads (the muscles that are most shortened during riding). Use the lodge for a mid-day foam rolling session. Stay hydrated and fueled with proper nutrition (see Chapter 13). And when you feel the first signs of fatigue—slower reaction time, loss of balance, or poor decision-making—call it a day. One extra run is never worth the increased injury risk from riding fatigued. Smart recovery on the mountain is what separates riders who enjoy a full season from those who get injured early.
Chapter 15: Training for Specific Riding Styles
Not all snowboarding is the same, and your training should reflect the specific demands of your preferred riding style. A halfpipe rider has different physical requirements than a backcountry explorer, and a freestyle rider in the park faces different injury risks than a carving specialist on groomed runs. This chapter provides style-specific training modifications that help you excel in your chosen discipline.
15.1 Freestyle/Park Training
Freestyle snowboarding demands explosive power, rotational strength, spatial awareness, and the ability to absorb high-impact landings. Park riders also face the highest injury risk of any discipline, making injury prevention training particularly important.
Key Training Focus Areas:
- Explosive Lower Body Power: Box jumps, squat jumps, depth jumps, and broad jumps develop the power needed for ollies, nollies, and boosting off kickers. Perform these exercises with maximum intent—every rep should be explosive.
- Rotational Core Strength: Medicine ball rotational throws, cable wood chops, and Russian twists build the core strength needed for spins and rotational tricks. Include both anti-rotation exercises (Pallof press) and rotational exercises to build a complete core.
- Eccentric Leg Strength: Deep squats with a 4-5 second eccentric phase, Nordic hamstring curls, and single-leg box jumps train the eccentric strength needed to absorb high-impact landings. This is the most important quality for preventing knee and ankle injuries in the park.
- Proprioception and Balance: Balance board training, single-leg exercises, and Bosu ball work develop the proprioception needed for aerial awareness and landing stability. These exercises also strengthen the ankle stabilizers that prevent sprains.
- Upper Body Strength: Push-ups, pull-ups, and overhead pressing build the upper body strength needed for grabs, rail slides, and self-arrest during falls. A strong upper body also protects the shoulders and wrists during impact.
Sample Freestyle-Specific Weekly Plan:
| Day | Focus | Key Exercises |
|---|---|---|
| Monday | Explosive Power | Box jumps, squat jumps, broad jumps, medicine ball slams |
| Wednesday | Rotational Core + Balance | Russian twists, wood chops, balance board squats, single-leg deadlifts |
| Friday | Full Body Strength | Squats, deadlifts, pull-ups, push-ups, Turkish get-ups |
| Saturday | Active Recovery | Yoga flow, foam rolling, light stretching |
15.2 Backcountry and Powder Training
Backcountry snowboarding presents unique physical demands that differ significantly from resort riding. Hiking to terrain, riding through deep powder, navigating variable conditions, and self-rescue capabilities all require a specific fitness profile. Backcountry riders need exceptional cardiovascular endurance, functional strength, and the ability to perform under fatigued conditions far from medical help.
Key Training Focus Areas:
- Cardiovascular Endurance: Backcountry riding often involves hours of hiking with a heavy pack before you even begin riding. Building a large aerobic base through long-distance running, hiking, cycling, or skiing is essential. Aim for 3-5 cardio sessions per week, including at least one long-duration session (60-90 minutes).
- Loaded Carrying Strength: Hiking with a 30-50 pound pack requires significant leg and core strength. Include weighted step-ups, farmer’s carries, loaded lunges, and pack squats in your training. These exercises simulate the specific demands of backcountry hiking.
- Powder-Specific Endurance: Riding powder is significantly more physically demanding than riding groomed runs. The deep snow requires constant, sustained leg effort to maintain flotation. Train this through long wall sits (120+ seconds), slow eccentric squats, and sustained single-leg balance work.
- Agility and Balance: Backcountry terrain is variable and unpredictable. Balance board training, Bosu ball exercises, and agility ladder drills develop the reactive balance needed to navigate variable conditions safely.
- Self-Rescue Skills: In the backcountry, you are your own rescue team. Upper body strength for self-arrest with an ice axe, core strength for climbing out of tree wells, and cardiovascular fitness for self-rescue scenarios are all essential. Include pull-ups, bear crawls, and high-intensity interval training in your program.
Backcountry-Specific Conditioning
If you plan to ride backcountry terrain, consider adding a weekly “tour simulation” to your training. Load a pack with 30-40 pounds and hike for 60-90 minutes on hilly terrain. This simulates the specific physical demands of backcountry touring and reveals any weaknesses in your conditioning before you are miles from civilization. The physical demands of backcountry riding also require top-quality equipment—see our best snowboard boots and best snowboard bags for carrying your gear to remote terrain.
15.3 Carving and Groomed Run Training
Carving is the art of riding the board’s edge through clean, arcing turns at speed. It demands exceptional isometric leg strength, rapid edge-to-edge transitions, and the cardiovascular endurance to maintain high-speed riding for extended periods. Carving specialists also tend to ride longer days than freestyle riders, making endurance training particularly important.
Key Training Focus Areas:
- Isometric Leg Strength: Extended wall sits, slow eccentric squats, and single-leg isometric holds build the sustained leg strength needed for deep carves. The ability to hold a low, stable stance for minutes at a time is what separates good carvers from great ones.
- Lateral Power and Stability: Lateral lunges, lateral bounds, and side-lying hip abduction exercises build the lateral stability needed for quick edge changes. The ability to transfer weight rapidly from toe edge to heel edge is what enables fluid, linked carves.
- Cardiovascular Endurance: Carving is a sustained, high-intensity activity that demands excellent aerobic and anaerobic fitness. Build your endurance base through Zone 2 training and supplement with Zone 3-4 threshold work.
- Hip Mobility: Deep carves require significant hip flexion and abduction range of motion. If your hips are tight, you cannot achieve the low, stacked stance that efficient carving requires. Include daily hip mobility work (see Chapter 9).
- Ankle Mobility: Controlling edge angle requires fine-tuned ankle dorsiflexion and plantar flexion. Limited ankle mobility restricts your ability to engage the edge effectively, particularly on the toe side. Include ankle mobility exercises in every warm-up.
15.4 Halfpipe Training
The halfpipe demands the most comprehensive fitness profile of any snowboarding discipline. Riders must generate speed through pumping, launch above the lip for aerial maneuvers, maintain body control through complex rotations, and absorb high-impact landings—all while maintaining balance in a confined space.
Key Training Focus Areas:
- Rotational Power: Halfpipe riding involves complex multi-axis rotations (flips, corked spins, combinations). Medicine ball rotational throws, cable wood chops, and plyometric rotational exercises build the explosive rotational power needed for these maneuvers.
- Lower Body Power: Box jumps, squat jumps, and depth jumps develop the vertical power needed to boost above the lip of the pipe. The emphasis should be on maximum height, not just power.
- Eccentric Strength: Landing in the pipe from 10+ feet above the lip generates enormous impact forces. Deep eccentric squats, Nordic hamstring curls, and single-leg box jumps train the eccentric strength needed to absorb these forces safely.
- Core Stability: Maintaining body position during complex aerial maneuvers requires exceptional core strength. Planks, hollow holds, and anti-rotation exercises build the deep core stability needed for air awareness and control.
- Cardiovascular Fitness: Halfpipe runs are short but intense, typically lasting 45-60 seconds of maximum effort. Interval training in Zone 4-5 builds the anaerobic capacity needed for repeated high-intensity runs.
Chapter 16: Beginner’s Training Guide—Starting from Zero
If you are new to fitness or returning after a long break, the training programs in Chapter 7 may feel overwhelming. This chapter provides a simplified, progressive program designed specifically for beginners. The goal is to build a basic level of fitness and movement competency before progressing to more advanced training. This program is also ideal for riders who are new to snowboarding and want to build the specific fitness needed for their first season.
16.1 Weeks 1-4: Building the Habit
The first four weeks are about establishing the habit of regular exercise and learning fundamental movement patterns. Do not worry about intensity or volume—just focus on showing up and performing the movements with good form. Consistency is more important than intensity at this stage.
Training Schedule: 3 days per week (e.g., Monday, Wednesday, Friday), with each session lasting 30-40 minutes.
| Exercise | Sets x Reps | Notes |
|---|---|---|
| Bodyweight Squat | 3 x 10 | Sit back, knees track over toes, full depth |
| Incline Push-Up | 3 x 8 | Hands on bench or wall, body straight |
| Glute Bridge | 3 x 12 | Squeeze glutes at top, hold 2 seconds |
| Dead Bug | 3 x 8 each side | Lower back pressed into floor |
| Plank Hold | 3 x 20-30 seconds | Build gradually to 60 seconds |
| Walking | 20-30 minutes | Moderate pace, 2-3 times per week |
16.2 Weeks 5-8: Building Strength
Once you can perform the basic exercises with good form, it is time to start adding resistance. This phase introduces weights and more challenging bodyweight variations to build the strength needed for snowboarding.
| Exercise | Sets x Reps | Notes |
|---|---|---|
| Goblet Squat | 3 x 10 | Hold dumbbell at chest, squat deep |
| Dumbbell Romanian Deadlift | 3 x 10 | Hinge at hips, feel hamstring stretch |
| Dumbbell Push Press | 3 x 8 | Leg drive into overhead press |
| Bulgarian Split Squat | 3 x 8 each | Rear foot on bench, bodyweight or light dumbbells |
| Band Pull-Apart | 3 x 12 | Rear deltoid and upper back activation |
| Side Plank | 3 x 20 seconds each | Build gradually to 45 seconds |
| Balance Board (or Single-Leg Stand) | 3 x 30 seconds each | Progress to Vew-Do board when ready |
16.3 Weeks 9-12: Building Endurance and Sport-Specific Fitness
Now that you have a basic strength foundation, it is time to build the endurance and sport-specific fitness needed for snowboarding. This phase introduces cardiovascular training, plyometrics, and isometric holds that directly transfer to the mountain.
| Exercise | Sets x Reps/Duration | Notes |
|---|---|---|
| Barbell or Dumbbell Squat | 4 x 8 | 4-second eccentric, full depth |
| Romanian Deadlift | 3 x 10 | Progressive overload—add weight weekly |
| Box Jumps | 3 x 6 | Start low (12-16 inches), progress height |
| Lateral Bound | 3 x 6 each | Land soft and balanced |
| Wall Sit | 3 x 45-60 seconds | Build to 90+ seconds over time |
| Pallof Press | 3 x 10 each side | Resist rotation, core tight |
| 20-30 Minute Zone 2 Cardio | 2-3 times per week | Running, cycling, swimming, or rowing |
| Yoga or Stretching | 15-20 minutes | Daily, especially hip and hamstring work |
Progress Gradually
The most important principle for beginners is progressive overload—gradually increasing the demands on your body over time. Increase weight by 5-10% per week, add one rep to each set per week, or increase duration by 10-15% per week. This gradual progression allows your body to adapt without being overwhelmed. If you feel excessively sore or fatigued, take an extra rest day. Remember, the goal is to build a sustainable fitness habit that supports your snowboarding for years to come—not to achieve dramatic results in four weeks.
Chapter 17: Common Training Mistakes Snowboarders Make
Even well-intentioned training can be counterproductive if done incorrectly. This chapter identifies the most common training mistakes made by snowboarders and provides clear guidance on how to avoid them. Learning from these mistakes can save you months of wasted effort and reduce your risk of training-related injury.
17.1 Mistake #1: Ignoring the Posterior Chain
The posterior chain—hamstrings, glutes, and lower back—is the engine of snowboarding. Yet many riders focus almost exclusively on their quadriceps (the muscles on the front of the thigh) because they are the most visible and most commonly trained muscle group. This creates a dangerous imbalance: strong quads overpower weak hamstrings, increasing the risk of ACL tears and lower back injuries.
The Fix: For every quad-dominant exercise (squats, leg extensions), include an equal volume of posterior chain work (Romanian deadlifts, hamstring curls, glute bridges). A balanced program includes at least as much hip-hinge training (deadlifts, RDLs, kettlebell swings) as knee-dominant training (squats, leg press). If you are unsure whether your program is balanced, count the total sets for quad-dominant and hip-dominant exercises—they should be roughly equal.
17.2 Mistake #2: Skipping Cardio
Many strength-focused riders view cardiovascular training as unnecessary or even counterproductive. This is a significant error. Snowboarding demands both strength AND endurance. Without adequate cardiovascular fitness, even the strongest rider will fatigue quickly, leading to poor form, increased injury risk, and shortened days on the mountain. Research shows that fatigue is the primary risk factor for injury in snowboarding.
The Fix: Include 2-3 cardiovascular sessions per week in your training program. These do not need to be long or intense—even 30 minutes of Zone 2 activity (moderate-intensity running, cycling, or swimming) provides significant benefits. The cardio sessions outlined in Chapter 8 are designed to complement your strength training without compromising recovery.
17.3 Mistake #3: Neglecting Balance and Proprioception
Snowboarding is fundamentally a balance sport, yet many riders never train balance outside of riding. This is a missed opportunity. Balance training strengthens the small stabilizer muscles in the ankles, knees, and hips that are difficult to target with traditional gym exercises. It also improves proprioception—your body’s ability to sense its position in space—which directly improves reaction time and reduces fall risk.
The Fix: Include balance training in every workout. Simple options include single-leg stands (30-60 seconds each side), single-leg deadlifts, and balance board squats on a Vew-Do or similar device. More advanced options include Bosu ball squats, single-leg box jumps, and plyometric drills performed on unstable surfaces. Even 5-10 minutes of balance work per session provides significant benefits over time.
17.4 Mistake #4: Too Much Too Soon
The desire to see rapid results often leads beginners to train too hard, too frequently, or too intensely. This approach backfires: the body cannot adapt to training stress quickly enough, leading to excessive soreness, fatigue, overtraining, and injury. Research shows that it takes 4-6 weeks for the body to fully adapt to a new training stimulus—rushing this process only delays progress and increases risk.
The Fix: Follow the progressive training programs outlined in this guide. Start with Phase 1 (Foundational Strength) and do not advance to Phase 2 until you have completed at least 6-8 weeks of consistent training. Increase weight, volume, and intensity gradually—no more than 5-10% per week. Listen to your body: if you feel excessively sore or fatigued, take an extra rest day or reduce your training volume for a week.
17.5 Mistake #5: Poor Recovery Habits
Training creates the stimulus for adaptation, but recovery is when the adaptation actually occurs. Many riders train hard but neglect recovery, which limits their progress and increases injury risk. The most common recovery mistakes include insufficient sleep, inadequate nutrition, no flexibility work, and no deload weeks.
The Fix: Treat recovery as seriously as training. Prioritize 7-9 hours of sleep per night, consume adequate protein (0.7-1 gram per pound of body weight), stretch for 15 minutes daily, and take a deload week every 3-4 weeks. If you are consistently fatigued despite adequate sleep and nutrition, you may be overtraining—reduce your training volume by 30-40% for two weeks and reassess.
17.6 Mistake #6: Training in Isolation
Many riders train specific body parts or movement patterns in isolation, ignoring the integrated, whole-body nature of snowboarding. While isolation exercises (bicep curls, leg extensions) have their place, they should not dominate your program. Snowboarding requires coordinated, multi-joint movements that challenge multiple muscle groups simultaneously.
The Fix: Build your program around compound, multi-joint exercises (squats, deadlifts, lunges, push-ups, rows) that train multiple muscle groups simultaneously. These exercises are more time-efficient and more closely replicate the movement patterns of snowboarding. Include isolation exercises only as accessories to address specific weaknesses or imbalances.
17.7 Mistake #7: Ignoring Flexibility
Strength without flexibility is a recipe for injury. Tight muscles restrict your range of motion, forcing your joints to compensate with movements they were not designed for. Many riders are strong but inflexible, which limits their riding stance and increases injury risk. Hip flexor tightness, hamstring inflexibility, and thoracic stiffness are the three most common mobility restrictions in snowboarders.
The Fix: Dedicate 15-20 minutes daily to stretching and mobility work. Focus on the areas most relevant to snowboarding: hip flexors, hamstrings, adductors, thoracic spine, and ankles (see Chapter 9 for specific stretches). Yoga (Chapter 10) is an excellent way to combine flexibility, balance, and core strength in a single practice. Make stretching a non-negotiable part of your daily routine.
17.8 Mistake #8: Not Training Unilaterally
Snowboarding is a unilateral sport—you stand sideways on a single board, and your body is constantly making asymmetric adjustments. Yet many riders train exclusively with bilateral exercises (barbell squats, bench press), which can mask and even reinforce imbalances between the left and right sides of the body.
The Fix: Include unilateral exercises in every workout. Single-leg squats, Bulgarian split squats, single-arm rows, single-leg deadlifts, and single-arm presses all train the body unilaterally, revealing and correcting imbalances. Aim for at least 30-40% of your total training volume to be unilateral exercises.
17.9 Mistake #9: Forgetting the Warm-Up
Skiing straight to the lift without warming up is the most common and preventable mistake in snowboarding. Cold muscles are stiff, slow to react, and far more susceptible to strains and tears. A proper 10-15 minute warm-up activates the specific muscles used in snowboarding, increases blood flow, and primes your nervous system for reactive movements.
The Fix: Perform the warm-up routine outlined in Chapter 6 before every session—both gym sessions and on-snow sessions. The routine takes only 10-15 minutes and significantly reduces injury risk while improving performance. Make it a non-negotiable habit.
17.10 Mistake #10: Training for Appearance Instead of Function
Snowboarding rewards function, not aesthetics. Training for visible muscles (chest, biceps, abs) at the expense of functional muscle (glutes, hamstrings, deep core, calves) creates a physique that looks strong but performs poorly on the mountain. The most effective snowboarders are not necessarily the most muscular—they are the most functional.
The Fix: Train movements, not muscles. Build your program around exercises that develop functional strength, power, and endurance—squats, deadlifts, lunges, rows, overhead presses, and carries. If an exercise does not improve your ability to ride, it does not belong in your snowboard-specific program. Save the bodybuilding-style isolation work for the off-season if you want to improve aesthetics, but never let it replace functional training during your preparation for the season.
Quality Over Quantity
Two sets of perfect repetitions are worth more than five sets of sloppy ones. Focus on mastering each movement before adding weight or volume. Record yourself performing exercises and compare your form to online demonstrations. Consider working with a qualified trainer for even one or two sessions to get feedback on your form. The investment in movement quality pays dividends in both performance and injury prevention.
Chapter 18: Mental Preparation and Sports Psychology for Snowboarding
Physical fitness is only half the equation. The mental game is equally important—and often more neglected. Fear, anxiety, poor focus, and negative self-talk can undermine even the best physical preparation. The greatest riders in the world are not just physically elite—they are mentally resilient, focused, and confident. This chapter provides practical mental training techniques that complement your physical preparation and help you perform at your best when it matters most.
18.1 Visualization and Mental Rehearsal
Visualization, also known as mental imagery or mental rehearsal, is the practice of vividly imagining yourself performing a movement or navigating a scenario. Research has shown that mental rehearsal activates many of the same neural pathways as physical practice, making it a powerful tool for skill development and confidence building.
How to Practice Visualization:
- Find a quiet space and close your eyes. Take several deep breaths to relax.
- Imagine yourself on the mountain. See the snow, feel the cold air, hear the sound of your board on the snow.
- Visualize a specific run or maneuver in vivid detail. See yourself approaching the feature, executing the movement, and landing successfully.
- Engage all your senses. Feel the board under your feet, the wind on your face, the pull of gravity. Hear the scrape of your edge. Feel the satisfaction of a clean landing.
- Repeat the visualization 3-5 times, making each repetition more vivid and detailed than the last.
- Practice 2-3 times per week, particularly before challenging riding sessions or competitions.
Visualization is particularly effective for overcoming fear. If you are nervous about a specific feature or terrain, visualize yourself riding it successfully several times. This builds neural pathways that make the actual performance feel familiar and achievable, reducing anxiety and improving confidence.
18.2 Goal Setting
Effective goal setting provides direction and motivation for your training and riding. However, poorly structured goals can be counterproductive. The key is to set goals that are specific, measurable, achievable, relevant, and time-bound (SMART).
Types of Goals:
- Outcome Goals: Results-based goals (e.g., “Land a 360 by end of season”). These provide long-term motivation but are partially outside your control.
- Performance Goals: Personal standards (e.g., “Hold a wall sit for 120 seconds”). These are within your control and provide clear benchmarks for progress.
- Process Goals: Action-based goals (e.g., “Complete 3 training sessions per week”). These are entirely within your control and focus on the daily behaviors that lead to results.
The most effective approach is to set one outcome goal for the season, 2-3 performance goals for each training phase, and 3-5 process goals for each week. Review your goals weekly and adjust as needed.
18.3 Fear Management
Fear is a natural and healthy response to perceived danger. However, excessive fear can prevent you from progressing, cause you to hesitate at critical moments, and actually increase your risk of injury (because hesitation often leads to catching an edge or landing awkwardly). Learning to manage fear is a critical skill for snowboarders.
Strategies for Managing Fear:
- Recognize the Signal: Fear manifests physically (racing heart, shallow breathing, muscle tension) and mentally (catastrophic thinking, self-doubt). Recognizing these signals allows you to intervene before fear becomes overwhelming.
- Breathe: When you feel fear rising, take 3-5 deep, slow breaths. Inhale through your nose for 4 counts, hold for 4 counts, exhale through your mouth for 6 counts. This activates the parasympathetic nervous system, reducing heart rate and promoting calm.
- Reframe the Fear: Instead of thinking “I’m going to crash,” reframe the thought: “I’m excited to try this. I’ve prepared for this, and I’m capable.” This cognitive reframing transforms fear from a paralyzing emotion into an energizing one.
- Progressive Exposure: Don’t attempt the biggest jump on your first day. Start small and progressively increase the difficulty as your confidence builds. Each successful attempt builds a foundation of positive experience that reduces fear of the next progression.
- Focus on What You Can Control: You cannot control the snow, the weather, or other riders. You CAN control your preparation, your technique, and your decision-making. Focus your attention on these controllable factors and let go of the rest.
18.4 Pre-Ride Mental Routine
Developing a consistent pre-ride mental routine primes your mind for optimal performance. Just as a physical warm-up prepares your body, a mental warm-up prepares your mind. Here is a simple, effective pre-ride routine:
5 Minutes Before Your First Run:
- Review Your Goals: Remind yourself of your riding goals for the day. What do you want to accomplish? What specific skills do you want to practice?
- Visualize Success: Spend 1-2 minutes visualizing yourself riding well. See yourself making clean turns, riding with confidence, and enjoying the experience.
- Set Your Intention: Choose a single word or phrase that captures your focus for the day (e.g., “smooth,” “powerful,” “present”). Return to this word throughout the day when you feel your focus drifting.
- Breathe and Relax: Take 3-5 deep breaths, releasing any tension in your body and mind. Step onto the mountain feeling calm, focused, and ready.
18.5 In-Ride Mental Strategies
Once you are riding, maintaining mental focus is just as important as physical performance. Here are strategies for staying mentally sharp throughout the day:
Process Focus: Instead of worrying about the outcome (“Will I make it to the bottom?”), focus on the process (“Keep my knees bent, weight centered, eyes looking ahead”). Process focus keeps your attention in the present moment and on the actions you can control.
Positive Self-Talk: Replace negative internal dialogue (“I can’t do this,” “This is too steep”) with positive, instructional self-talk (“I’ve got this,” “Stay low and centered”). Research shows that positive self-talk improves performance and reduces anxiety.
Chunking: Instead of thinking about the entire run (which can be overwhelming), break it into small segments. Focus on getting through the next 10 turns, then the next 10, and so on. This makes challenging terrain feel manageable and keeps your focus sharp.
Recovery Breaths: Between runs, take 3-5 deep recovery breaths to reset your nervous system. This is particularly important after a challenging run or a near-miss. It brings your heart rate down and clears your mind for the next run.
The Mental Game is Trainable
Just like physical fitness, mental skills improve with practice. Spend 5-10 minutes each day on mental training—visualization, breathing exercises, or goal review. The investment pays enormous dividends on the mountain. Remember, confidence is not the absence of fear—it is the belief that you can handle whatever comes your way. Build that belief through preparation, visualization, and progressive challenge. Whether you are preparing for your first season at beginner resorts or competing at an advanced level, the mental game matters.
Chapter 19: The Complete Annual Training Calendar for Snowboarders
A well-structured annual training plan ensures that you arrive at the start of each season in peak condition. This chapter provides a month-by-month training calendar that aligns your off-season preparation with the on-snow season. The calendar is designed for a typical North American snowboarding season (November-April) with the off-season running from May-October. Adjust the timing based on your local season and personal goals.
May-June: Active Recovery and Foundation (Off-Season Phase 1)
Training Focus: Recovery from the previous season, addressing injuries and mobility restrictions, building a general fitness foundation.
- Strength Training: 2-3 sessions per week, full body. Focus on movement quality and correcting imbalances. Use moderate weights and higher reps (10-15) to build a base without excessive stress.
- Cardio: 2-3 sessions per week, 30-45 minutes of Zone 2 activity. Light running, cycling, swimming, or hiking. Focus on rebuilding aerobic base.
- Flexibility/Mobility: 15-20 minutes daily. Focus on areas that were tight or restricted during the season—typically hips, hamstrings, and thoracic spine.
- Balance: Begin balance board training 2-3 times per week. Start with simple balance holds and progress to squats and movements on the board.
- Recovery: This is the time to address any lingering injuries. See a physical therapist, get sports massage, and allow your body to fully recover from the season.
July-August: Building Strength and Power (Off-Season Phase 2)
Training Focus: Building raw strength and developing explosive power. This is the most intense training phase—push yourself to build the strength reserve that will carry you through the season.
- Strength Training: 3-4 sessions per week, split between lower body emphasis (2 sessions) and upper body/core (1-2 sessions). Use heavy weights (3-5 rep range for main lifts) and include plyometrics in every lower body session.
- Cardio: 2-3 sessions per week. Include one long Zone 2 session and one interval session (Zone 4) per week. This builds both aerobic base and anaerobic capacity.
- Plyometrics: 2 sessions per week. Box jumps, squat jumps, lateral bounds, and medicine ball throws. These develop the explosive power needed for jumps and quick edge transitions.
- Flexibility/Mobility: Continue daily stretching and yoga. Add more dynamic mobility work to complement the increased training intensity.
- Balance: Progress to more challenging balance board exercises—squatting, single-leg work, and dynamic movements on the board.
September-October: Power Endurance and Ride-Specific Conditioning (Off-Season Phase 3)
Training Focus: Converting strength and power into ride-specific endurance. This phase includes more HIIT, isometric holds, and sport-specific circuits that mimic the demands of riding.
- Strength Training: 3 sessions per week. Reduce heavy lifting volume and increase circuit-style training with moderate weights and shorter rest periods. Include more unilateral and balance-challenging exercises.
- Cardio: 2-3 sessions per week. Focus on high-intensity intervals and sustained tempo efforts that simulate the cardiovascular demands of riding.
- Sport-Specific Circuits: 1-2 sessions per week. Combine strength exercises, plyometrics, balance work, and cardio in circuits that mimic the demands of a day on the mountain.
- Isometric Endurance: Include wall sits, static holds, and balance board holds of 60-120 seconds. These directly translate to the sustained muscular effort of riding.
- Flexibility/Mobility: Continue daily work. Pay special attention to hip and ankle mobility, which are essential for achieving a deep, balanced riding stance.
November-April: On-Snow Maintenance (In-Season)
Training Focus: Maintaining the fitness gains from off-season training while prioritizing recovery from riding. The goal is to sustain strength and endurance without creating excessive fatigue that compromises riding performance.
- Strength Training: 2 sessions per week, full body. Use moderate weights and focus on maintaining strength rather than building it. Avoid heavy lifting within 24 hours of a big riding day.
- Cardio: 1-2 sessions per week. Light Zone 2 activity on rest days. Riding itself provides significant cardiovascular training, so additional cardio should be minimal.
- Flexibility/Mobility: Daily stretching and yoga, particularly after riding days. Focus on the muscles that are most taxed by riding—quads, hip flexors, and calves.
- Balance: Continue balance board training 2-3 times per week. This maintains proprioception and ankle stability throughout the season.
- Recovery: Prioritize sleep, nutrition, and rest. Consider a mid-season deload week (reduced training volume) to allow accumulated fatigue to dissipate.
Consistency is the Key to Success
The best training plan in the world is useless if you don’t follow it consistently. Commit to your training schedule, track your workouts, and hold yourself accountable. Remember, every training session is an investment in your riding. The riders who perform best on the mountain are not necessarily the most talented—they are the most prepared. Follow this calendar, stay consistent, and you will arrive at the start of each season in the best shape of your life. Whether you are preparing for a trip to Colorado, the European Alps, or your local resort, this calendar ensures you are ready.
Chapter 20: Tracking Progress and Adjusting Your Program
What gets measured gets managed. Tracking your training progress allows you to identify what is working, what is not, and when to adjust your approach. This chapter provides practical tools and strategies for monitoring your fitness development and making data-driven adjustments to your training program.
20.1 Key Performance Indicators (KPIs) for Snowboarders
Strength Metrics:
- Back Squat 5RM: Test every 8-12 weeks. A strong squat is the foundation of snowboard fitness. Aim to squat at least 1.5x body weight for performance.
- Romanian Deadlift 8RM: Test every 8-12 weeks. A strong posterior chain protects your knees and back. Aim to RDL at least 1x body weight.
- Single-Leg Squat Quality: Assess monthly. Can you perform a full-depth single-leg squat without your knee caving inward? This is a key indicator of functional balance and knee stability.
- Plank Hold Duration: Test monthly. A strong core is indicated by a 90+ second plank hold with perfect form.
Endurance Metrics:
- Resting Heart Rate: Measure daily, first thing in the morning. A decreasing resting heart rate indicates improving cardiovascular fitness. A sudden increase may signal overtraining or illness.
- Mile Run Time: Test every 8-12 weeks. Improvement indicates improving aerobic fitness.
- Wall Sit Duration: Test monthly. Aim for 120+ seconds. This is the most snowboard-specific endurance metric.
Flexibility Metrics:
- Toe Touch Test: Assess monthly. Can you touch your toes with straight legs? This indicates adequate hamstring and lower back flexibility.
- Deep Squat Hold: Assess monthly. Can you hold a deep squat for 60+ seconds with heels on the ground? This indicates adequate hip, ankle, and thoracic mobility.
- Single-Leg Balance Time: Test monthly. Time how long you can stand on one leg with eyes closed. Aim for 30+ seconds. This indicates proprioceptive fitness.
20.2 Training Log
Keep a simple training log that records the following for each session:
- Date and time
- Exercises performed (sets, reps, weight)
- Cardio duration and intensity
- Perceived exertion (1-10 scale)
- Energy level (1-10 scale)
- Sleep quality and duration (from previous night)
- Any aches, pains, or concerns
This log reveals patterns that are invisible in the moment. For example, you might notice that your performance drops on days after poor sleep, or that your energy levels consistently dip during weeks 3-4 of a training block (indicating the need for a deload). The log also provides a record of your progress, which is motivating during challenging training periods.
20.3 When to Adjust Your Program
Signs You Need to Reduce Volume:
- Performance is declining despite consistent training
- Resting heart rate is elevated by 5+ beats per minute
- Sleep quality has deteriorated
- Motivation to train has dropped significantly
- Persistent muscle soreness that does not resolve with rest
Signs You Need to Increase Volume:
- Workouts feel easy and you recover quickly
- Performance plateaus for more than 2-3 weeks
- You are no longer sore after training sessions
- Your energy levels are consistently high
Signs You Need to Adjust Exercise Selection:
- You develop pain during a specific exercise (stop the exercise and consult a professional)
- A particular muscle group is consistently weak or tight (add targeted exercises for that area)
- You are not progressing in a specific movement despite consistent practice (try a regression or variation)
Listen to Your Body
While data-driven decisions are valuable, your body provides the most important feedback. If something feels wrong—pain, excessive fatigue, unusual stiffness—trust that signal and investigate. Pushing through pain is not toughness; it is foolishness. The riders who sustain long careers are the ones who listen to their bodies and adjust accordingly. This applies equally to training and riding—if your body is telling you something is wrong, it probably is.
Chapter 21: Building a Home Gym for Snowboard Training
Not everyone has access to a gym, and not everyone wants to pay for a membership. The good news is that you can build an effective snowboard training setup at home with minimal equipment. This chapter provides guidance on building a home gym that covers all four pillars of snowboard fitness—strength, power, balance, and cardio—without breaking the bank.
21.1 Essential Equipment (Under $200)
Resistance Bands: A set of looped resistance bands and a tube band with door anchor provides options for hundreds of exercises. They are portable, versatile, and inexpensive. Use them for glute activation (banded walks), core training (Pallof press), upper body work (band pull-aparts, rows), and warm-up activation. See our recommended resistance band set.
Adjustable Dumbbells: A pair of adjustable dumbbells (5-50 lbs) replaces an entire rack of fixed-weight dumbbells. They allow you to progress loads gradually and perform all major compound exercises. Look for a quick-change mechanism that allows fast weight transitions during circuits.
Pull-Up Bar: A doorway pull-up bar provides one of the most effective upper body and core exercises available. Pull-ups, chin-ups, hanging leg raises, and muscle-ups all build the pulling strength and core stability needed for snowboarding. Choose a bar that can be mounted without screws to avoid damaging door frames.
Balance Board: A balance board is the single most snowboard-specific piece of equipment you can own. It trains balance, ankle stability, and proprioception in a way that directly transfers to riding. The Vew-Do board is specifically designed for snowboard training. See our recommended balance board.
Foam Roller: Essential for recovery and mobility work. A high-density foam roller provides deep tissue massage that releases muscle tension, breaks up fascial adhesions, and improves range of motion. See our recommended foam roller.
21.2 Upgraded Equipment (Under $500)
Barbell and Weight Plates: An Olympic barbell with 300 lbs of weight plates allows you to perform all the heavy compound lifts (squats, deadlifts, bench press, overhead press) that build raw strength. This is the single most impactful upgrade for a home gym. Look for a bar with good knurling and sleeves that accept standard Olympic plates.
Adjustable Bench: An adjustable bench allows you to perform incline and decline variations of pressing and rowing exercises. Look for a bench that adjusts from flat to at least 70 degrees and can handle heavy loads.
Kettlebell: A single kettlebell (35-53 lbs for most riders) provides a unique training stimulus that complements barbell and dumbbell work. Kettlebell swings, Turkish get-ups, and goblet squats build the functional hip power and core stability that snowboarding demands. See our recommended kettlebell.
Plyometric Box: A sturdy plyo box (20-24 inches) allows you to perform box jumps, step-ups, and deficit lunges. Look for a foam or soft-sided box that reduces the risk of shin injuries during missed jumps.
21.3 Premium Setup (Under $1500)
Squat Rack: A squat rack with safety arms allows you to safely perform heavy squats and bench press without a spotter. This is the centerpiece of any serious home gym. Look for a rack that can handle 500+ lbs and has adjustable J-cups and safety arms.
Rowing Machine: A rowing machine provides one of the most effective cardiovascular workouts available, targeting the entire posterior chain while building aerobic and anaerobic capacity. The Concept2 RowErg is the gold standard—it is durable, accurate, and used by competitive athletes worldwide.
Assault Bike (Air Bike): An assault bike provides total-body cardiovascular training with scalable resistance. It is ideal for high-intensity interval training and provides a unique training stimulus that complements other cardio modalities.
Yoga Mat and Accessories: A thick yoga mat, yoga blocks, and a yoga strap provide the foundation for a complete flexibility and mobility practice. The mat also serves as a comfortable surface for floor exercises, stretching, and core work.
Start Simple, Build Over Time
You do not need a fully equipped gym to start training effectively. Begin with the essentials—resistance bands, dumbbells, and a balance board—and add equipment as your budget and training needs evolve. The most important investment is not equipment—it is consistency. A rider who trains consistently with minimal equipment will outperform a rider who has a fully equipped gym but rarely uses it. Start where you are, use what you have, and build from there. Remember, when is the best time to buy snowboarding gear? The same answer applies to training equipment: the best time is now.
Chapter 22: Snowboard-Specific Fitness Tests—Are You Ready for the Season?
How do you know if your training has been effective? These fitness tests provide objective measures of the physical qualities that matter most for snowboarding. Perform these tests at the beginning, middle, and end of your training program to track your progress. Compare your results to the benchmarks below to identify strengths and weaknesses.
Test 1: The Wall Sit Test (Quadriceps Endurance)
Protocol: Sit against a wall with your thighs parallel to the floor and your knees at 90 degrees. Hold this position as long as possible without sliding down or resting your hands on your legs. Record your time.
| Rating | Time | Interpretation |
|---|---|---|
| Excellent | 120+ seconds | You have exceptional quadriceps endurance. Ready for long days on the mountain. |
| Good | 90-119 seconds | Solid endurance. Focus on maintaining this level throughout the season. |
| Average | 60-89 seconds | Adequate for casual riding. Increase training volume to improve. |
| Below Average | 30-59 seconds | Significant limitation. Extended riding will cause early fatigue and increased injury risk. |
| Poor | Under 30 seconds | Critical weakness. Prioritize quadriceps endurance training before riding. |
Test 2: The Single-Leg Balance Test (Proprioception)
Protocol: Stand on one leg with your eyes closed. Time how long you can maintain balance without opening your eyes or touching down. Record your time for each leg.
| Rating | Time | Interpretation |
|---|---|---|
| Excellent | 45+ seconds | Exceptional balance and proprioception. You have a strong foundation for edge control. |
| Good | 30-44 seconds | Solid balance. Continue balance training to maintain and improve. |
| Average | 15-29 seconds | Adequate for basic riding. Balance training should be a priority in your program. |
| Below Average | 5-14 seconds | Significant balance deficit. This increases fall risk and reduces edge control. |
| Poor | Under 5 seconds | Critical balance weakness. Prioritize balance training before riding. |
Test 3: The Push-Up Test (Upper Body Endurance)
Protocol: Perform as many push-ups as possible with perfect form (full range of motion, body straight, no sagging). Rest as needed but do not stop for more than 10 seconds. Record your total.
| Rating | Repetitions | Interpretation |
|---|---|---|
| Excellent | 40+ | Exceptional upper body endurance. Strong foundation for all riding styles. |
| Good | 25-39 | Solid upper body fitness. Adequate for most riding demands. |
| Average | 15-24 | Adequate for casual riding. Include more upper body training in your program. |
| Below Average | 8-14 | Weakness that may affect balance and self-arrest capability. |
| Poor | Under 8 | Significant upper body weakness. Prioritize push-up training in your program. |
Test 4: The Plank Test (Core Endurance)
Protocol: Hold a forearm plank with perfect form (body straight from head to heels, core engaged, glutes squeezed). Time how long you can hold the position. Stop when your form breaks (hips sag or pike up).
| Rating | Time | Interpretation |
|---|---|---|
| Excellent | 120+ seconds | Exceptional core endurance. Your core can sustain the demands of aggressive riding. |
| Good | 90-119 seconds | Solid core endurance. Continue core training to maintain. |
| Average | 60-89 seconds | Adequate for basic riding. Increase core training volume. |
| Below Average | 30-59 seconds | Weakness that increases lower back injury risk during riding. |
| Poor | Under 30 seconds | Critical core weakness. Prioritize core training before riding. |
Test 5: The Mile Run Test (Aerobic Fitness)
Protocol: Run one mile (1.6 km) as fast as possible on a flat surface. Record your time. This tests aerobic capacity, which directly affects your ability to ride all day without fatigue.
| Rating | Time | Interpretation |
|---|---|---|
| Excellent | Under 7:00 | Exceptional aerobic fitness. You have the endurance for extended riding at altitude. |
| Good | 7:00-8:30 | Solid aerobic fitness. Adequate for most riding conditions. |
| Average | 8:30-10:00 | Adequate for casual riding at moderate altitude. Increase cardio training. |
| Below Average | 10:00-12:00 | Limited endurance. Riding at altitude will be particularly challenging. |
| Poor | Over 12:00 | Significant aerobic weakness. Prioritize cardio training before riding. |
Use Tests to Guide Training
These tests reveal your strengths and weaknesses. If your wall sit time is excellent but your plank time is poor, shift your training emphasis toward core endurance. If your mile time is poor but your strength metrics are strong, increase your cardiovascular training. The goal is balanced fitness across all five tests—no single quality should be a significant weakness. Re-test every 6-8 weeks to track progress and adjust your program accordingly.
Chapter 23: Stretching Routines for Different Scenarios
Different situations call for different stretching approaches. A pre-ride warm-up requires dynamic stretches that prepare the body for movement. A post-ride cooldown requires static stretches that promote recovery. A rest-day routine focuses on deep, sustained stretching to improve long-term flexibility. This chapter provides specific routines for each scenario, ensuring you are always doing the right type of stretching at the right time.
23.1 The 5-Minute Pre-Ride Dynamic Stretch
When to Use: Before your first run of the day, or after sitting on the chairlift for an extended period.
Duration: 5 minutes
- Leg Swings (Front-to-Back): 10 each leg. Hold a pole or fence for balance. Swing one leg forward and backward in a controlled manner, gradually increasing range of motion. This dynamically stretches the hip flexors and hamstrings.
- Leg Swings (Side-to-Side): 10 each leg. Swing one leg across your body and out to the side. This dynamically stretches the adductors and abductors.
- Walking Lunges with Rotation: 5 each side. Perform a walking lunge and rotate your torso toward the front leg at the bottom. This stretches the hip flexors, activates the glutes, and mobilizes the thoracic spine.
- Bodyweight Squats: 10 reps. Perform deep bodyweight squats with a 2-second pause at the bottom. This mobilizes the hips, knees, and ankles while activating the quadriceps and glutes.
- Ankle Circles: 10 each direction, each foot. This mobilizes the ankle joint and prepares the calf muscles for riding.
23.2 The 15-Minute Post-Ride Static Stretch
When to Use: After your last run of the day, while your muscles are still warm.
Duration: 15 minutes
- Standing Quad Stretch: 45 seconds each side. Pull your heel toward your glute, keeping your knees together. This stretches the quadriceps, which are heavily used during riding.
- Standing Calf Stretch: 45 seconds each side. Place your hands on a wall, step one foot back, and press the heel toward the floor. This stretches the gastrocnemius.
- Seated Hamstring Stretch: 60 seconds. Sit on the floor with one leg extended, the other bent with the sole of the foot against the inner thigh. Reach toward the extended foot.
- Butterfly Stretch: 60 seconds. Sit with soles of feet together, knees dropped to the sides. Gently press knees toward the floor.
- Figure-4 Stretch: 45 seconds each side. Lie on your back, cross one ankle over the opposite knee, and pull the bottom knee toward your chest. This stretches the glutes and piriformis.
- Child’s Pose: 60 seconds. Kneel on the floor, sit back on your heels, and reach your arms forward on the floor. This stretches the back, hips, and shoulders.
- Cat-Cow: 10 slow cycles. On hands and knees, alternate between arching your back (cow) and rounding your back (cat). This mobilizes the entire spine.
23.3 The 30-Minute Rest Day Deep Stretch
When to Use: On rest days from training, or in the evening before bed.
Duration: 30 minutes
- Downward Dog: 60 seconds. Push your hips up and back, pressing your heels toward the floor. This stretches the calves, hamstrings, and shoulders simultaneously.
- Pigeon Pose: 90 seconds each side. Bring one knee forward and extend the back leg behind you. Lower your torso over the front leg. This is the deepest hip opener and targets the external rotators.
- Kneeling Hip Flexor Stretch with Overhead Reach: 60 seconds each side. Kneel on one knee, push hips forward, and reach the same-side arm overhead and toward the opposite side.
- Supine Hamstring Stretch with Strap: 60 seconds each side. Lie on your back, loop a strap around one foot, and straighten the leg toward the ceiling.
- Seated Forward Fold: 90 seconds. Sit with legs extended and fold forward from the hips, reaching for your toes.
- Frog Pose: 90 seconds. On hands and knees, spread your knees as wide as possible and lower your hips toward the floor. This stretches the adductors deeply.
- Open Book Stretch: 60 seconds each side. Lie on your side, knees stacked and bent. Rotate your top arm toward the floor behind you.
- Neck Stretches: 30 seconds each direction. Gently tilt your ear toward your shoulder, then turn your chin toward your shoulder. Hold each position.
- Supine Twist: 60 seconds each side. Lie on your back, bring one knee across your body toward the floor, and look in the opposite direction.
- Savasana: 3 minutes. Lie flat on your back and focus on deep, relaxed breathing. Allow your body to fully relax and absorb the benefits of the stretching session.
23.4 The 10-Minute Office/Desk Stretch
When to Use: During the workday, to counteract the effects of prolonged sitting. Tight hip flexors and hamstrings from sitting are a major contributor to snowboarding injuries.
Duration: 10 minutes
- Standing Hip Flexor Stretch: 30 seconds each side. From a standing position, step one foot back into a lunge and push hips forward.
- Standing Hamstring Stretch: 30 seconds each side. Place one heel on a desk or chair, straighten the leg, and hinge forward at the hips.
- Doorway Chest Stretch: 30 seconds. Stand in a doorway with arms on the door frame at 90 degrees. Step through until you feel a stretch in your chest and front shoulders.
- Seated Spinal Twist: 30 seconds each side. Sit in a chair, cross one leg over the other, and twist your torso toward the crossed leg.
- Standing Calf Stretch: 30 seconds each side. Place your hands on a wall, step one foot back, and press the heel toward the floor.
- Neck Rolls: 30 seconds. Slowly roll your head in a full circle, 5 times in each direction.
- Wrist Circles: 30 seconds each direction. Extend your arms and rotate your wrists in circles. This counters the wrist stiffness from typing.
- Deep Breathing: 60 seconds. Close your eyes and take 10 slow, deep breaths. Inhale for 4 counts, hold for 4, exhale for 6.
Stretching Consistency Beats Intensity
A 10-minute daily stretching routine provides more flexibility benefit than a 60-minute session once a week. The body adapts to consistent, gentle stimulus over time. Make stretching a non-negotiable part of your daily routine—just like brushing your teeth. The 10-minute desk stretch takes less time than a coffee break but provides benefits that last all day. For riders who struggle with tight hips, hamstrings, or ankles, daily stretching is the single most impactful thing you can do off the mountain to improve your riding (why snowboarding is fun).
Chapter 24: Home Training vs. Gym Training—Which Is Better for Snowboarders?
The debate between home training and gym training is not about which is objectively better—it is about which is better for your specific situation, goals, and constraints. Both approaches can produce excellent results for snowboard preparation. This chapter provides an honest comparison, helping you make an informed decision about where to invest your training time and resources.
24.1 The Case for Home Training
Convenience: The biggest advantage of home training is convenience. No commute, no waiting for equipment, no gym membership fees. You can train in your pajamas at 6 AM or 10 PM—whenever fits your schedule. This convenience removes the most common barrier to consistent training: not having time to get to the gym.
Cost: A basic home gym (resistance bands, dumbbells, balance board) costs $150-300. Compare this to a gym membership that costs $30-100 per month—after 3-10 months, the home gym has paid for itself and continues to provide value indefinitely.
Privacy: Some people are intimidated by gym environments or prefer to train without an audience. Home training eliminates this barrier entirely.
Snowboard-Specific Training: Ironically, home training may be more snowboard-specific than gym training. Balance board work, yoga, bodyweight exercises, and resistance band training all closely mimic the demands of snowboarding. Many gyms lack the equipment and space for these activities.
Limitations: Heavy compound lifts (back squats, deadlifts) require significant equipment. Cardio options are limited without machines. Motivation can be harder to maintain without the social environment of a gym.
24.2 The Case for Gym Training
Equipment Access: A gym provides access to barbells, squat racks, cable machines, cardio equipment, and specialized training tools that would cost thousands of dollars to replicate at home. This equipment allows for more diverse and progressive training.
Heavy Lifting: Building maximum strength requires heavy compound lifts with progressive overload. While adjustable dumbbells provide some capacity for heavy lifting, a gym’s barbells and squat racks are superior for this purpose.
Atmosphere: The gym environment provides motivation, accountability, and social support. Training alongside other athletes can push you to work harder than you would alone.
Classes and Coaching: Many gyms offer group fitness classes, personal training, and coaching that can accelerate your progress and teach proper technique.
Limitations: Commute time, membership costs, equipment availability during peak hours, and gym etiquette rules can all reduce training efficiency and consistency.
24.3 The Hybrid Approach
For most riders, the optimal solution is a hybrid approach: a home gym for daily training (flexibility, balance, bodyweight exercises, resistance band work) supplemented by 1-2 gym sessions per week for heavy compound lifts and specialized equipment. This combines the convenience and consistency of home training with the progressive overload and equipment variety of gym training.
| Day | Location | Focus |
|---|---|---|
| Monday | Home | Bodyweight strength + balance board + stretching |
| Tuesday | Home | Cardio + yoga |
| Wednesday | Gym | Heavy compound lifts (squats, deadlifts, press) |
| Thursday | Home | Resistance band training + core + stretching |
| Friday | Gym | Plyometrics + unilateral strength + cardio |
| Saturday | Home or Outdoors | Active recovery (walk, hike, yoga) |
| Sunday | Home | Rest + stretching + foam rolling |
The Best Gym is the One You Actually Use
The “best” training location is the one that maximizes your consistency. If you live 30 minutes from the gym and struggle to find time, a home gym is better—even if it has less equipment. If you thrive on the energy of a gym environment and have easy access, the gym may be your better choice. Neither option is inherently superior. What matters is that you train consistently, with appropriate intensity and progression, regardless of location. The riders who improve most are the ones who show up regularly—not the ones with the fanciest equipment.
Chapter 25: Common Snowboarding Injuries and Rehabilitation Guidelines
Despite best prevention efforts, injuries can still occur. Knowing how to respond to common snowboarding injuries—and when to return to training—can prevent minor issues from becoming chronic problems. This chapter covers the most common snowboarding injuries, initial first aid, and rehabilitation guidelines. Note: This information is for educational purposes. Always consult a qualified healthcare professional for diagnosis and treatment of injuries.
25.1 Wrist Sprains and Fractures
Mechanism: Falling onto an outstretched hand (FOOSH). The impact force travels up the wrist, causing either a sprain (ligament damage) or fracture (bone break).
Immediate Response: Stop riding. Apply ice (15-20 minutes on, 20 minutes off). Splint the wrist if a fracture is suspected (immobilize and seek medical attention). Do not attempt to “shake it off”—wrist fractures are often misdiagnosed as sprains.
Rehabilitation:
- Phase 1 (Weeks 1-2): RICE protocol (Rest, Ice, Compression, Elevation). Gentle range of motion exercises (wrist circles, fist making) as pain allows.
- Phase 2 (Weeks 2-4): Progressive resistance training with light resistance bands. Grip strengthening with therapy putty.
- Phase 3 (Weeks 4-8): Progressive loading with dumbbells. Sport-specific movements (push-ups, planks) with gradual increase in load.
- Return to Riding: Typically 6-8 weeks for sprains, 8-12 weeks for fractures. Must be pain-free with full range of motion and strength before returning. Wrist guards are mandatory upon return.
25.2 Knee Ligament Sprains (MCL/LCL)
Mechanism: Catching an edge and being thrown into a valgus (knees caving inward) or varus (knees bowing outward) position. MCL sprains are more common than LCL sprains in snowboarding.
Immediate Response: Stop riding. Apply ice. Assess stability—if the knee feels unstable or “gives way,” seek medical attention. Grade I sprains (mild) can often be self-managed; Grade II and III sprains require professional evaluation.
Rehabilitation:
- Phase 1 (Weeks 1-2): RICE protocol. Gentle range of motion (heel slides, quad sets). Anti-inflammatory measures.
- Phase 2 (Weeks 2-6): Progressive strengthening. Wall sits, leg extensions (limited range), hamstring curls, step-ups. Balance training on stable surfaces.
- Phase 3 (Weeks 6-12): Advanced strengthening. Single-leg squats, lateral lunges, plyometric progressions. Balance training on unstable surfaces.
- Return to Riding: Grade I: 2-4 weeks. Grade II: 4-8 weeks. Grade III: 8-12+ weeks. Must demonstrate full range of motion, strength within 10% of uninjured side, and functional test completion before returning.
25.3 ACL Tears
Mechanism: Sudden deceleration, pivoting, or landing from a jump with the knee extended and internally rotated. ACL tears often occur with an audible “pop” and immediate swelling.
Immediate Response: Stop riding immediately. Apply ice. Use crutches if weight-bearing is painful. Seek medical evaluation—ACL tears typically require MRI confirmation and may require surgical reconstruction.
Rehabilitation:
- Phase 1 (Weeks 0-2): RICE protocol. Gentle range of motion. Quad activation exercises (quad sets, straight leg raises). Weight-bearing as tolerated with crutches.
- Phase 2 (Weeks 2-6): Progressive strengthening. Leg press (limited range), hamstring curls, calf raises. Pool-based exercise if available. Stationary cycling when range of motion allows.
- Phase 3 (Weeks 6-12): Advanced strengthening. Single-leg exercises, balance training, elliptical or cycling for cardio. Begin sport-specific movements.
- Phase 4 (Months 3-6): Return to sport preparation. Plyometrics, agility drills, running progression. Sport-specific testing.
- Return to Riding: Non-surgical: 3-6 months. Surgical reconstruction: 6-12 months. Must pass return-to-sport testing (strength, hop tests, functional movement screening) before returning.
25.4 Shoulder Dislocations and AC Separations
Mechanism: Falling onto an outstretched hand or direct impact to the shoulder. Dislocations involve the humerus coming out of the glenoid socket. AC separations involve damage to the acromioclavicular ligament.
Immediate Response: Do not attempt to relocate a dislocated shoulder—seek emergency medical care. For AC separations, apply ice and use a sling for comfort. Medical evaluation is recommended to determine the grade of separation.
Rehabilitation:
- Phase 1 (Weeks 1-2): Sling use for comfort. Gentle pendulum exercises. Ice and anti-inflammatory measures.
- Phase 2 (Weeks 2-6): Progressive range of motion exercises. Isometric rotator cuff strengthening. Scapular stabilization exercises.
- Phase 3 (Weeks 6-12): Progressive resistance training. Shoulder press, rowing, and pulling exercises with gradual load increase. Sport-specific upper body movements.
- Return to Riding: AC separation (Grade I-II): 2-4 weeks. AC separation (Grade III+): 6-12 weeks. Dislocation: 3-6 months. Must have full range of motion, strength within 10% of uninjured side, and confidence in the shoulder before returning.
25.5 Concussions
Mechanism: Impact to the head from a fall, collision, or striking an object. Concussions can occur even with helmet use, though helmets reduce severity.
Immediate Response: Stop riding immediately. Remove from the slope. Do not allow the rider to continue riding. Seek medical evaluation. Watch for symptoms: headache, dizziness, nausea, confusion, memory problems, sensitivity to light/noise.
Rehabilitation:
- Phase 1 (Days 1-3): Complete cognitive and physical rest. No screens, reading, or mental exertion. Dark, quiet environment. Sleep as much as needed.
- Phase 2 (Days 3-7): Light activity that does not exacerbate symptoms. Short walks. Gradual return to normal activities as symptoms allow.
- Phase 3 (Weeks 1-4): Progressive increase in cognitive and physical activity. Symptom-guided progression. Formal concussion testing may be required before return to sport.
- Return to Riding: Minimum 1-2 weeks symptom-free before returning. Must be symptom-free at rest and during exertion. Medical clearance recommended. Helmet use is mandatory upon return.
When in Doubt, Sit It Out
Returning to riding too soon after an injury dramatically increases the risk of re-injury and chronic problems. Be patient with rehabilitation, follow your healthcare provider’s guidance, and do not rush back. The mountain will be there next season—your career as a rider depends on taking care of your body now. Remember, protective gear like impact shorts and helmets cannot prevent all injuries, but they significantly reduce the severity when accidents happen.
Chapter 26: Maintaining Fitness During the Snowboard Season
The in-season period (November-April) presents a unique training challenge. Riding itself provides significant physical stimulus, but it is not a substitute for structured training. Without maintenance workouts, you will gradually lose the strength and power you built during the off-season, leading to declining performance as the season progresses. This chapter provides a practical guide to maintaining your fitness throughout the season without compromising recovery or riding enjoyment.
26.1 The In-Season Training Philosophy
The goal during the season is maintenance, not improvement. You are not trying to set new strength records or build new cardiovascular capacity—you are trying to preserve the fitness you built during the off-season while allowing adequate recovery for riding. This means training less frequently, at lower volumes, and with reduced intensity compared to your off-season program.
Key Principles:
- Reduce Volume: Cut your training volume by 30-50% compared to your off-season program. Fewer sets, fewer exercises, fewer sessions per week.
- Maintain Intensity: Keep the weights relatively heavy (80-85% of your off-season maxes) to maintain strength. Dropping intensity too low causes strength loss.
- Frequency: 2-3 strength sessions per week is sufficient for maintenance. This allows adequate recovery between sessions and riding days.
- Flexibility: Daily stretching and mobility work is more important than ever during the season. Riding creates significant muscular tension that must be addressed to maintain range of motion and prevent injury.
- Listen to Your Body: If you are exceptionally tired from riding, skip the gym session and rest instead. Recovery always takes priority during the season.
26.2 Sample In-Season Weekly Schedule
| Day | Activity | Duration | Focus |
|---|---|---|---|
| Monday | Strength Training | 30-40 min | Full body compound lifts (squats, deadlifts, presses, rows) |
| Tuesday | Riding + Stretching | Full day | 15-minute pre-ride warm-up, 15-minute post-ride stretch |
| Wednesday | Active Recovery | 30-45 min | Light yoga, foam rolling, stretching |
| Thursday | Strength Training | 30-40 min | Lower body emphasis (squats, lunges, single-leg work) + core |
| Friday | Riding + Stretching | Full day | 15-minute pre-ride warm-up, 15-minute post-ride stretch |
| Saturday | Riding + Stretching | Full day | Extended pre-ride warm-up, thorough post-ride stretch |
| Sunday | Rest | — | Complete rest. Light stretching if desired. Prioritize sleep. |
26.3 In-Season Strength Workout Template
This template provides a full-body strength workout that can be completed in 30-40 minutes. Perform this workout 2 times per week during the season.
| Exercise | Sets x Reps | Notes |
|---|---|---|
| Barbell Back Squat | 3 x 5 | 80-85% of off-season max |
| Romanian Deadlift | 3 x 8 | Moderate weight, focus on form |
| Dumbbell Push Press | 3 x 6 | Powerful, controlled |
| Single-Leg Glute Bridge | 3 x 10 each | Activation and stability |
| Pallof Press | 3 x 10 each side | Core stability |
| Band Pull-Apart | 2 x 15 | Posture maintenance |
Season-Long Fitness
The riders who perform best in March and April are the ones who maintained their training throughout the season. While their peers are getting progressively more fatigued and injury-prone, they arrive at the end of the season still strong, still fast, and still riding with confidence. The 2-3 hours per week invested in maintenance training during the season pays enormous dividends in performance and injury prevention. Even when you are tired, even when conditions are poor, even when motivation is low—show up for your maintenance sessions. Your body will thank you.
Chapter 27: Special Considerations for Different Populations
Snowboarding is for everyone, but different populations have specific needs and considerations that affect their training approach. This chapter provides guidance for riders with specific conditions, limitations, or circumstances.
27.1 Female Snowboarders
Female riders face specific physiological considerations that affect training and injury risk. Women have a wider pelvis, which creates a greater Q-angle (the angle between the quadriceps and the patellar tendon), increasing the risk of patellofemoral pain and ACL injuries. Women also tend to have lower absolute strength, less muscle mass, and greater joint laxity than men.
Training Considerations:
- ACL Prevention: Female riders should prioritize ACL prevention exercises: single-leg squats, lateral band walks, and plyometric landing drills. These exercises train the neuromuscular control that prevents the knee collapse pattern that causes ACL tears.
- Strength Training: Women should not avoid heavy lifting due to fear of “bulking up.” Strength training is essential for injury prevention and performance. Focus on compound movements with progressive overload.
- Menstrual Cycle Considerations: Training performance may fluctuate with the menstrual cycle. Many women experience reduced strength and increased injury risk during the luteal phase (days 15-28). Listen to your body and adjust training intensity as needed.
- Nutrition: Female athletes are at higher risk for Relative Energy Deficiency in Sport (RED-S), which occurs when caloric intake is insufficient to support training demands. Ensure adequate caloric intake, particularly during heavy training periods.
27.2 Youth Snowboarders (Ages 12-17)
Young riders are still developing physically, which requires specific training considerations. The primary goal for youth riders is to build general athleticism and movement competency—not to maximize strength or power. Long-term athlete development (LTAD) principles should guide youth training programs.
Training Considerations:
- Movement Quality First: Master bodyweight movements before adding external resistance. Squats, lunges, push-ups, and planks should be performed with perfect form before progressing to weighted variations.
- General Athleticism: Play multiple sports, develop coordination, and challenge the body in varied ways. Specialization in snowboarding should not occur until late adolescence.
- Supervision: Youth athletes should train under the guidance of a qualified coach or trainer who understands adolescent development.
- Growth Plate Considerations: Avoid heavy loading of the spine (heavy back squats, deadlifts) during periods of rapid growth. Focus on moderate loads with higher repetitions.
- Fun Factor: Training should be enjoyable. Include games, challenges, and varied activities to maintain motivation and engagement.
27.3 Riders with Previous Injuries
Riders returning from injury face the challenge of rebuilding fitness while protecting the injured area. The key principle is to work around the injury, not through it. Modify exercises to avoid painful movements while maintaining as much training volume as possible.
General Guidelines:
- Follow Medical Guidance: Work with a physical therapist or sports medicine professional to develop a rehabilitation program. Do not self-diagnose or self-treat serious injuries.
- Modify, Don’t Eliminate: If an injury prevents a specific exercise, find a modification that works around the injury. For example, if squats are painful due to a knee injury, try leg press, split squats, or isometric holds at a pain-free range.
- Strengthen the Surrounding Areas: While the injured area heals, train the surrounding muscles aggressively. For example, if you have a wrist injury, train your legs, core, and cardiovascular system at full intensity.
- Patience: Rushing back from injury is the fastest way to re-injure and create chronic problems. Follow your rehabilitation timeline and do not return to riding until cleared by your healthcare provider.
27.4 Riders with Chronic Conditions
Riders with chronic conditions like asthma, diabetes, or heart disease can safely participate in snowboarding with appropriate precautions. Consult your healthcare provider before starting any training program, and ensure your condition is well-managed before riding.
Asthma: Cold, dry air is a common asthma trigger. Use your prescribed inhaler 15-30 minutes before riding. Breathe through your nose to warm and humidify the air before it reaches your lungs. Carry your inhaler on the mountain at all times. Avoid riding in extremely cold conditions if your asthma is poorly controlled.
Diabetes: Monitor blood sugar before, during, and after riding. Carry fast-acting carbohydrates (glucose tablets, juice) on the mountain. The physical exertion of riding can cause blood sugar to drop, particularly in Type 1 diabetics. Stay hydrated and avoid alcohol, which can mask hypoglycemia symptoms.
Heart Disease: Riders with heart disease should obtain medical clearance before riding. Start slowly and gradually increase intensity. Avoid extreme cold, which can constrict blood vessels and increase cardiac workload. Carry identification and emergency contact information on the mountain at all times.
Snowboarding Is for Everyone
Regardless of age, gender, injury history, or chronic condition, snowboarding can be enjoyed safely with appropriate preparation and precautions. The training principles in this guide are adaptable to virtually any population. The key is to start where you are, progress gradually, and listen to your body. If you have specific health concerns, work with qualified professionals (physicians, physical therapists, certified trainers) who can tailor a program to your needs. Remember, the goal is not perfection—it is participation. Every day on the mountain is a good day, regardless of how fast, how high, or how stylishly you ride.
Chapter 28: The Connection Between Fitness and Technique—Why Stronger Riders Are Better Riders
There is a common misconception that technique and fitness are separate domains—that you can have one without the other. In reality, they are deeply interconnected. Physical fitness enables proper technique, and proper technique maximizes the effectiveness of your fitness. A rider with poor fitness will struggle to execute proper technique, no matter how many lessons they take. A rider with excellent fitness will learn technique faster and execute it more consistently. Understanding this connection is essential for optimizing both your training and your riding.
28.1 How Strength Enables Technique
The Low Stance: Proper snowboarding technique requires a low, athletic stance with knees bent, hips hinged, and weight centered over the board. This stance positions your center of gravity low and centered, providing maximum stability and control. However, maintaining this stance for extended periods requires significant quadriceps, glute, and core endurance. A rider with weak legs cannot maintain the proper stance—their legs fatigue, their stance rises, and their control deteriorates. This is why snowboard lessons are often most effective when combined with off-season fitness training—you need the physical capacity to execute the techniques being taught.
Edge Control: Proper edge control requires the ability to apply precise, sustained pressure to the board’s edge through the entire turn. This requires isometric leg strength (to maintain the edge angle), core stability (to transfer force from the upper body to the edge), and balance (to maintain position over the edge). A rider with weak legs will not be able to maintain edge pressure through the entire turn, resulting in skidded turns rather than carved turns.
Absorption: Proper technique requires absorbing terrain variations through flexion and extension of the legs—acting as a human shock absorber. This requires eccentric leg strength (to absorb impacts), hip mobility (to achieve full flexion range), and reactive balance (to maintain position while absorbing). A rider with poor eccentric strength will stiffen up in choppy terrain, transferring every bump to their spine and losing control.
28.2 How Cardiovascular Fitness Enables Technique
Decision Making: Research shows that cognitive function—including decision-making, reaction time, and spatial awareness—declines significantly with fatigue. A fatigued rider makes poor decisions (choosing terrain beyond their ability, failing to notice obstacles, misjudging speed) that lead to crashes and injuries. Maintaining cardiovascular fitness delays the onset of fatigue, allowing you to make good decisions throughout the entire day.
Consistency: Technical skill requires consistent practice to develop. If you fatigue after two hours and spend the rest of the day on the lift or in the lodge, you are getting significantly less practice than a rider who rides all day. Cardiovascular fitness extends your practice time, accelerating skill development.
Recovery Between Runs: A rider with good cardiovascular fitness recovers faster between runs, allowing them to maintain high-quality riding throughout the day. A rider with poor fitness takes longer to recover and accumulates more fatigue with each run, leading to a progressive decline in technique quality.
28.3 How Flexibility Enables Technique
Range of Motion: Proper technique often requires ranges of motion that tight muscles cannot achieve. Deep carves require significant hip flexion and abduction. Powder riding requires deep knee and hip flexion to maintain balance in soft snow. Freestyle maneuvers require full hip and thoracic rotation. A rider with limited flexibility literally cannot perform these movements, regardless of their strength or skill level.
Injury Prevention During Technique Execution: When a rider attempts a movement that exceeds their flexibility range, the body compensates by moving in patterns that stress vulnerable structures. For example, a rider with tight hip flexors who attempts a deep carve will compensate by rounding their lower back, placing enormous stress on the lumbar discs. Flexibility training ensures that your body can execute proper technique without compensation.
Fitness Is the Foundation of Technique
The best snowboarders in the world are not just technically skilled—they are physically exceptional. Their technique is enabled by their fitness: strong legs that can maintain a low stance for hours, powerful cores that can transfer force to the edge, flexible hips that can achieve deep carving positions, and cardiovascular endurance that allows them to ride all day at a high level. If you want to improve your technique, start by improving your fitness. The physical foundation you build in the gym directly translates to better riding on the mountain. This is why the most successful snowboarders treat off-season fitness as seriously as on-snow practice.
Chapter 29: Advanced Nutrition Timing—Fueling for Specific Training Adaptations
Beyond eating the right foods, when you eat matters just as much. Nutrient timing—the strategic placement of carbohydrates, protein, and other nutrients around your training sessions—can significantly enhance performance, recovery, and body composition. This chapter provides evidence-based guidelines for optimizing your nutrition timing to maximize the benefits of your training.
29.1 Pre-Workout Nutrition
The goal of pre-workout nutrition is to ensure your muscles have adequate fuel (glycogen) and that your blood amino acid levels are elevated to minimize muscle breakdown during training.
2-3 Hours Before Training: A balanced meal containing 1-2 grams of carbohydrate per pound of body weight, 20-30 grams of protein, and minimal fat. Fat slows digestion, which can cause gastrointestinal distress during intense exercise. Example: oatmeal with banana and protein powder, or chicken with rice and vegetables.
30-60 Minutes Before Training: A small, easily digestible carbohydrate snack. 30-50 grams of simple carbohydrates (fruit, sports drink, white rice) provides quick energy without causing digestive issues. If your pre-training meal was more than 2 hours ago, this top-up ensures your glycogen stores are fully stocked.
Pre-Ride Nutrition (On-Snow): The same principles apply. Eat a balanced meal 2-3 hours before your first run, and carry a carbohydrate snack (banana, energy bar, dates) for the lift ride if your first run is particularly long or intense.
29.2 Intra-Workout Nutrition
For training sessions lasting longer than 60-90 minutes, intra-workout nutrition (consuming nutrients during training) can significantly improve performance and reduce muscle breakdown.
Carbohydrates: Consume 30-60 grams of carbohydrates per hour during extended training sessions. This can be in the form of a sports drink, energy gels, or easily digestible foods (dates, banana, rice cakes). Intra-workout carbohydrates maintain blood glucose levels and spare muscle glycogen.
Protein: Consuming 10-15 grams of fast-digesting protein (whey, BCAAs) during extended training sessions can reduce muscle breakdown and improve recovery. This is particularly valuable during strength training sessions lasting longer than 90 minutes.
Hydration: Drink 16-24 ounces of fluid per hour during training, more in hot conditions. Include electrolytes (sodium, potassium) in your fluid if the session is intense or lasts longer than 60 minutes.
29.3 Post-Workout Nutrition
The post-workout period is when your body is most receptive to nutrient uptake. Consuming the right nutrients at the right time maximizes recovery and adaptation.
Immediately Post-Workout (0-30 minutes): Consume 20-40 grams of fast-digesting protein (whey protein shake, Greek yogurt) and 40-80 grams of fast-digesting carbohydrates (fruit, sports drink, white rice). This combination maximizes muscle protein synthesis and glycogen replenishment. The “anabolic window” is widest in the first 30 minutes post-exercise and gradually narrows over the next 2-3 hours.
1-2 Hours Post-Workout: A balanced meal containing protein, carbohydrates, and healthy fats. This continues the recovery process and provides sustained nutrients for ongoing repair. Example: grilled salmon with sweet potato and vegetables, or chicken stir-fry with rice.
Post-Ride Nutrition (On-Snow): After your last run of the day, consume a recovery meal or shake within 60 minutes. This is particularly important if you plan to train again the next day or if you rode at high intensity. Carry a protein bar or shake in your bag for immediate post-ride consumption.
29.4 Nutrition for Muscle Growth vs. Fat Loss
Muscle Growth (Hypertrophy): To build muscle, you need a caloric surplus (consuming more calories than you burn) combined with adequate protein (0.7-1 gram per pound of body weight). Time your largest meals around your training sessions, and ensure consistent protein intake throughout the day (every 3-4 hours). This provides the raw materials and energy needed for muscle growth.
Fat Loss: To lose fat while maintaining muscle, you need a moderate caloric deficit (300-500 calories below maintenance) combined with high protein intake (1-1.2 grams per pound of body weight). Maintain your training intensity to signal your body to preserve muscle, and focus on nutrient-dense, filling foods to manage hunger. Do not crash diet—extreme caloric restriction causes muscle loss, performance decline, and metabolic adaptation that makes future fat loss harder.
Body Recomposition: It is possible to simultaneously build muscle and lose fat, particularly for newer trainees or those returning from a break. This requires a small caloric deficit, high protein intake, consistent strength training, and patience. Results are slower than pure muscle gain or pure fat loss, but the overall body composition change is often more desirable.
Fueling for the Mountain
Snowboarding is one of the most physically demanding activities most people do all year. Treat it like the athletic event it is. Fuel properly before, during, and after riding. A well-fueled rider makes better decisions, maintains form longer, recovers faster between runs, and enjoys the day more. The small investment in proper nutrition pays enormous dividends in performance and enjoyment. And remember, proper nutrition supports not just your riding but also your training—it is the foundation that makes everything else possible.
Chapter 30: Sleep, Stress, and Recovery—The Hidden Performance Multipliers
If training is the stimulus for adaptation, sleep is when adaptation occurs. Yet sleep is the most neglected aspect of most athletes’ programs. Research consistently shows that sleep deprivation impairs strength, power, endurance, reaction time, decision-making, and immune function—all of which directly affect snowboarding performance. This chapter provides a comprehensive guide to optimizing sleep and managing stress for maximum recovery and performance.
30.1 The Science of Sleep and Recovery
During sleep, your body undergoes critical recovery processes that cannot occur during waking hours:
- Growth Hormone Release: The majority of growth hormone—which drives muscle repair, bone growth, and fat metabolism—is released during deep sleep (stages 3-4). Reducing sleep by even 2 hours can cut growth hormone release by 50-70%.
- Muscle Protein Synthesis: While protein synthesis occurs throughout the day, the balance between protein synthesis and breakdown is most favorable during sleep. This is when your muscles repair the damage created by training and grow stronger.
- Motor Learning Consolidation: The neural pathways that encode new skills (like a technique you learned in a lesson or a new trick you practiced) are consolidated during sleep. This is why you often perform better at a skill the day after practicing it—your brain literally integrated the learning overnight.
- Immune Function: Sleep is when your immune system is most active. Reducing sleep increases inflammation, impairs immune cell function, and increases susceptibility to illness. A single night of poor sleep can reduce immune function by 40-50%.
- Hormonal Regulation: Sleep regulates cortisol (stress hormone), testosterone, and insulin—all of which affect training adaptation, recovery, and body composition. Chronic sleep deprivation elevates cortisol, reduces testosterone, and impairs insulin sensitivity.
30.2 Sleep Optimization Strategies
Sleep Duration: Most adults need 7-9 hours of sleep per night for optimal performance. Athletes may need 8-10 hours, particularly during heavy training periods. Track your sleep for two weeks using a sleep tracker or journal to determine your personal optimal duration.
Sleep Consistency: Going to bed and waking up at the same time every day (including weekends) is more important than total sleep duration. Consistent sleep timing regulates your circadian rhythm, improving sleep quality and making it easier to fall asleep and wake up naturally.
Sleep Environment:
- Darkness: Make your bedroom as dark as possible. Use blackout curtains, cover LED lights, and remove electronic devices. Even small amounts of light suppress melatonin production.
- Temperature: The ideal sleep temperature is 65-68°F (18-20°C). A cool environment promotes deeper sleep.
- Noise: Use a white noise machine or earplugs if your environment is noisy. Consistent background noise (like a fan) can help mask disruptive sounds.
- Comfort: Invest in a comfortable mattress and pillows. Your sleep surface should support neutral spinal alignment.
Pre-Sleep Routine:
- Screen Curfew: Stop using electronic devices 60-90 minutes before bed. Blue light suppresses melatonin production and delays sleep onset.
- Relaxation Technique: Practice a relaxation technique before bed—deep breathing, progressive muscle relaxation, or meditation. This activates the parasympathetic nervous system and promotes calm.
- Avoid Stimulants: Avoid caffeine after 2 PM (5-6 hour half-life) and avoid alcohol within 3 hours of bedtime. While alcohol may help you fall asleep faster, it disrupts sleep architecture and reduces sleep quality.
- Light Reading: Read a physical book (not on a screen) for 15-30 minutes before bed. This promotes relaxation and sleep onset.
30.3 Stress Management for Athletes
Chronic stress impairs recovery, disrupts sleep, elevates cortisol, and increases injury risk. Managing stress is not a luxury—it is an essential component of peak performance.
Daily Stress Management Practices:
- Meditation: Even 10 minutes of daily meditation reduces cortisol, improves sleep quality, and enhances focus. Apps like Headspace or Calm provide guided meditations specifically designed for athletes.
- Deep Breathing: Practice 4-7-8 breathing (inhale for 4 counts, hold for 7, exhale for 8) for 5 minutes daily. This activates the parasympathetic nervous system and reduces stress hormones.
- Nature Exposure: Spending time in nature (walking, hiking, simply sitting outside) significantly reduces cortisol levels and improves mood. Combine this with your active recovery sessions for double benefits.
- Social Connection: Positive social interactions reduce stress hormones and improve overall well-being. Ride with friends, train with a partner, or simply spend quality time with people you enjoy.
- Journaling: Writing down your thoughts, concerns, and gratitude for 5-10 minutes before bed can reduce anxiety, improve sleep onset, and provide perspective on stressful situations.
Recovery Is Not Optional
Sleep and stress management are not “nice to have”—they are essential components of performance. The most disciplined athletes in the world prioritize sleep and stress management as seriously as their training. You cannot out-train poor sleep or unmanaged stress. The 7-9 hours you spend sleeping are when your body adapts to your training, repairs damaged tissue, and prepares for the next day. Invest in your sleep, manage your stress, and your training will yield dramatically better results. This applies to every aspect of your life—not just snowboarding.
Chapter 31: How Fitness Affects Gear Performance—The Underrated Connection
Your physical fitness directly affects how your gear performs. This is a connection that most riders overlook, focusing entirely on gear specifications while ignoring the human engine that drives it. A well-conditioned rider extracts more performance from less expensive gear, while a poorly conditioned rider struggles with even the highest-end equipment. Understanding this connection helps you make smarter gear decisions and get more out of every piece of equipment you own.
31.1 Boots and Fitness
Snowboard boots are the most critical interface between your body and the board. A boot that fits perfectly for a strong rider may feel completely different for a weak rider. Here is why:
Stiff Boots vs. Leg Strength: Stiff boots provide maximum response and control, but they require significant leg strength to flex. A rider with weak legs cannot properly flex a stiff boot, which means they cannot engage the boot’s full range of motion. The result is reduced control, increased fatigue, and often foot pain. A well-conditioned rider can use a stiffer boot effectively, extracting maximum performance from the equipment. A less conditioned rider may be better served by a medium-flex boot that they can actually control.
Boot Fit and Foot Strength: Boot fit is affected by foot strength. Riders with weak intrinsic foot muscles tend to have collapsing arches, which changes the shape of their foot inside the boot. This can create pressure points, hot spots, and heel lift that a stronger foot would not experience. Strengthening the foot through balance board training and barefoot exercises can dramatically improve boot fit and comfort (why do my feet hurt when i snowboard).
Lacing Systems and Hand Strength: The type of lacing system you prefer may be influenced by your hand and forearm strength. Traditional laces provide the most customizable fit but require significant hand strength to tighten properly. Speed laces and BOA systems are easier to operate but may not provide the same level of customization. Riders with weak grip strength may find traditional laces frustrating to use, while those with strong hands may prefer the precision of traditional lacing.
31.2 Boards and Fitness
Snowboard stiffness and flex pattern interact directly with rider strength. A stiff, aggressive board (like many DC snowboards or Yes snowboards) requires significant leg and core strength to control. A rider with weak legs will be overpowered by a stiff board, unable to initiate turns cleanly or maintain edge pressure through the entire arc.
Conversely, a rider with exceptional strength may find a soft, playful board limiting—they can overpower it, making it feel washy and imprecise at speed. This is why Gilson snowboards and other brands offer multiple flex ratings—the right flex for you depends on your strength level as much as your riding style.
Board Weight and Rider Strength: Heavier boards (often with metal laminates or additional dampening) are more stable at speed but require more strength to maneuver. Lighter boards are easier to manipulate but less stable in choppy conditions. Your strength level should influence your board weight choice—stronger riders can handle heavier, more stable boards, while lighter riders may prefer lighter, more maneuverable options.
31.3 Bindings and Fitness
Snowboard bindings transfer your movements to the board. Binding response (how quickly and directly they translate your input to the board) is affected by both binding stiffness and rider strength. A stiff binding provides maximum response but requires strong legs to operate effectively. A softer binding is more forgiving but less responsive.
Highback Stiffness: The highback is the part of the binding that supports your calf and transfers heel-side pressure to the board. Stiffer highbacks provide more leverage for heel-side turns but require more calf and hamstring strength to engage. If your calves fatigue quickly on heel-side runs, a slightly softer highback may be more appropriate until you build more calf endurance.
Strap Tension: Your ability to maintain consistent strap tension throughout the day is affected by foot and ankle strength. Weak feet tend to swell and fatigue inside boots, changing the fit of the straps. Riders with strong, stable feet can maintain consistent strap tension, ensuring consistent performance from first run to last.
31.4 Protective Gear and Fitness
Fitness affects your relationship with protective gear in subtle but important ways:
Helmet Fit and Head Position: A well-conditioned rider maintains proper head position (looking ahead, chin up) throughout the day. A fatigued rider tends to drop their head, which changes how the helmet sits on the head and may reduce its protective effectiveness. Maintaining proper posture through core and neck strength training ensures your helmet stays properly positioned.
Impact Shorts and Hip Strength: Impact shorts provide protection during falls, but strong hips and glutes reduce the frequency and severity of falls. A rider with excellent balance and strength falls less often and with less force, making protective gear a safety net rather than a necessity.
Back Protectors and Core Strength: Back protectors shield the spine from impact, but a strong core provides intrinsic spinal protection. The deep stabilizer muscles (transverse abdominis, multifidus) create a natural corset around the spine that supplements the protection provided by external back protectors. The combination of strong core muscles and a quality back protector provides maximum spinal protection.
Your Body Is Your Most Important Piece of Gear
Before spending hundreds or thousands of dollars on new gear, invest in your fitness. A stronger, more conditioned body will extract more performance from your current equipment, delay the need for upgrades, and reduce the risk of injury. The most cost-effective performance upgrade available to any snowboarder is not a new board, boots, or bindings—it is a stronger, more resilient body. Train consistently, recover properly, and watch your riding improve without spending a dime on new gear. When you do invest in gear, your fitness will ensure you can use it to its full potential.
Conclusion: Your Journey to Off-Season Domination
You now have a comprehensive roadmap for transforming your body and elevating your snowboarding to its highest potential. The chapters in this guide have covered everything from muscle anatomy and biomechanics to detailed training programs, nutrition protocols, recovery strategies, mental preparation, and the critical connection between fitness and gear performance.
The key principles to remember are:
- Consistency beats intensity. Showing up regularly for moderate training produces better long-term results than occasional intense sessions. Make training a non-negotiable part of your weekly routine.
- Progressive overload is the key to adaptation. Gradually increase the demands on your body over time. This drives continuous improvement and prevents plateaus.
- Recovery is where adaptation occurs. Sleep 7-9 hours per night, eat adequate protein, manage stress, and take deload weeks. Without recovery, training is just damage.
- Flexibility enables technique. A strong body that cannot move through the required range of motion is a body that cannot execute proper technique. Stretch daily.
- The mind-body connection is real. Mental preparation, visualization, and fear management are just as important as physical training. Train your mind alongside your body.
- Protective gear complements fitness, but does not replace it. Wear a helmet, consider wrist guards and impact shorts, but invest primarily in your body’s ability to protect itself.
- Fitness enables gear performance. Your physical condition determines how effectively you can use your equipment. A stronger body extracts more performance from every piece of gear you own.
The three-phase training program in this guide is designed to take you from off-season base building through power development to ride-specific conditioning. Follow the progression, adjust the loads and volumes to your current fitness level, and be patient with the process. Results come from months of consistent effort, not weeks of frantic training.
Remember, the goal is not to become a bodybuilder or a marathon runner—it is to become a better snowboarder. Every exercise in this program has a specific purpose that transfers directly to the mountain. Train with intention, recover with discipline, and arrive at the start of each season stronger, more resilient, and more capable than ever before.
Snowboarding is a gift. The ability to glide across snow, carve through powder, and feel the rush of speed and freedom is a privilege that millions of people around the world cherish. Your physical preparation is an investment in that gift—an investment that pays dividends in every run, every turn, and every moment of stoke on the mountain.
Train hard. Recover smart. Ride well.
The Final Word
Your fitness journey does not end when the snow melts—it begins. Use the off-season to build the body that will carry you through the next season of unforgettable riding. Whether you are chasing powder in Colorado, carving groomers in the Alps, hitting the park at your local resort, or exploring backcountry terrain, your physical preparation is the foundation that makes it all possible. Start today, stay consistent, and the mountain will reward you with the ride of your life.
Quick Reference: Essential Resources
| Category | Resource |
|---|---|
| Gear Reviews | Best Snowboard Boots | K2 Snowboard Boots Review | Vans Sizing Guide |
| Board Reviews | Yes Snowboards | DC Snowboards | Gilson Snowboards |
| Safety and Protection | Best Helmets | Impact Shorts | Why Snowboarding is Dangerous |
| Destinations | Colorado | European Resorts | Best Destinations | Beginner Resorts |
| Style and Gear | Mittens vs Gloves | Baggy Pants | Snowboard Bags |
| Getting Started | Are Lessons Worth It? | Best Time to Buy Gear | Backcountry Guide |
| Why Snowboarding? | Why It’s Fun | Best Winter Sport | Better Than Skiing |
| Troubleshooting | Foot Pain | Boot Laces |
| Homepage | snowboardbible.com — Your complete guide to everything snowboarding |


