
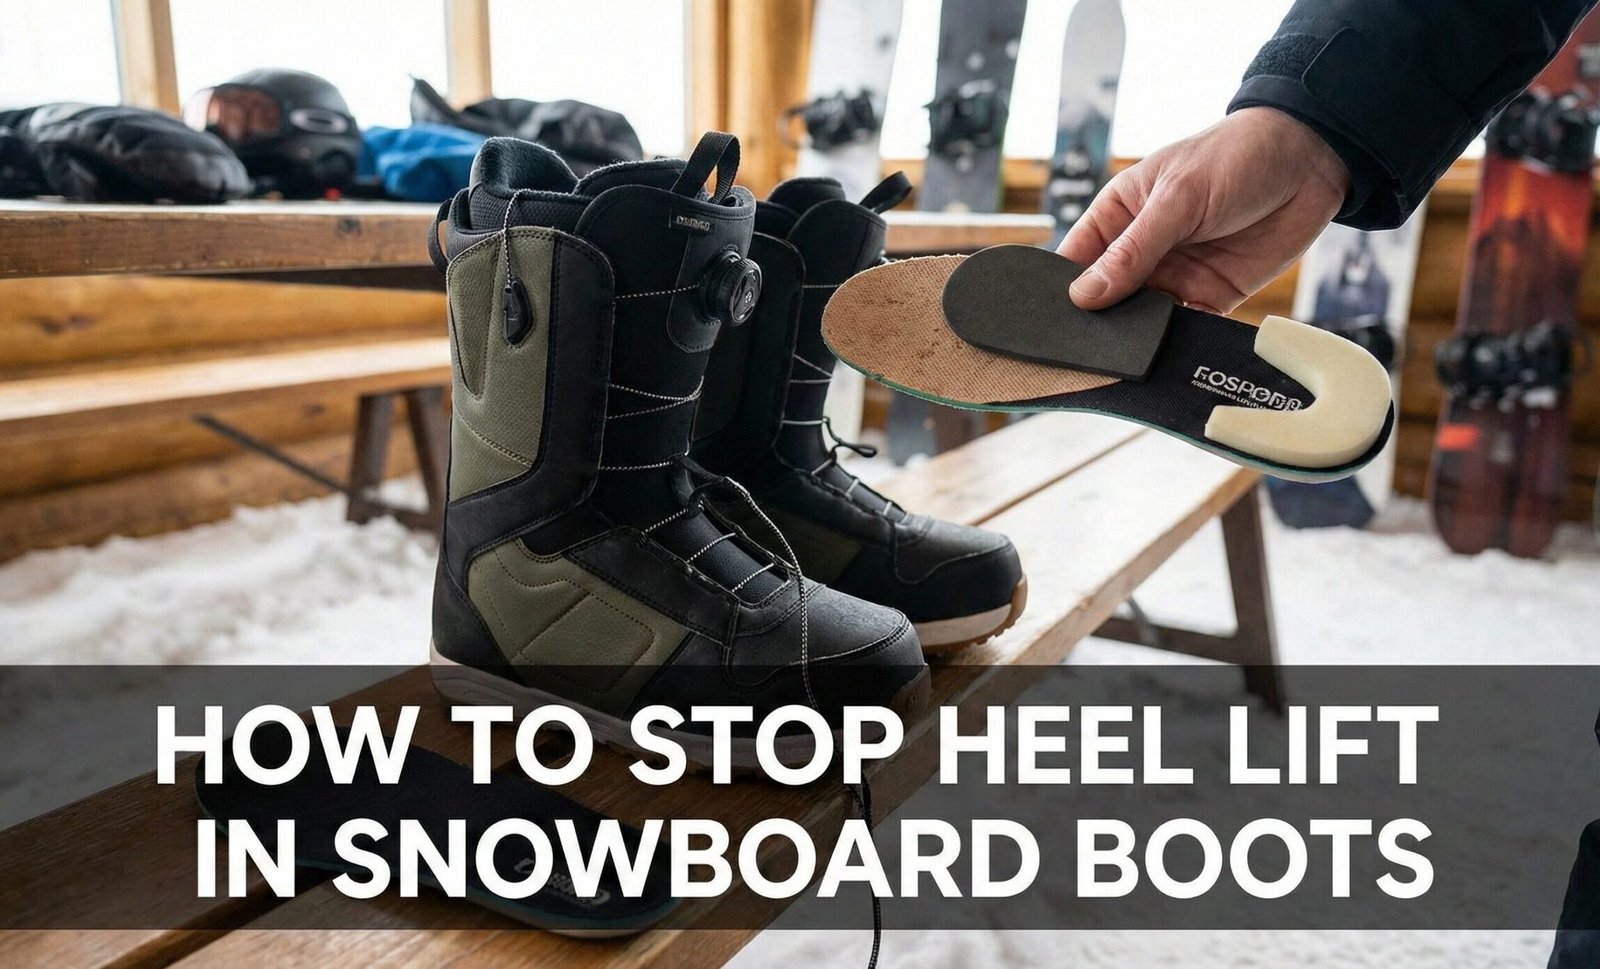
How to Stop Heel Lift in Snowboard Boots: The Complete Master Guide
In the world of snowboarding, precision is the difference between a perfect carve and a painful fall. Heel lift is the silent performance killer that haunts both beginners and seasoned pros. When your heel detaches from the footbed of your boot, you lose the direct mechanical link between your brain and your board’s edge. This guide dives deep into the physics, biomechanics, and technical gear solutions required to achieve a true “locked-in” feel.
Whether you are a beginner struggling through your first season or a veteran rider chasing cleaner carves, heel lift is a problem that demands a systematic, informed approach. This guide will walk you through every conceivable cause, every proven solution, and every piece of gear that matters. By the end, you will understand your boot, your foot, and your binding system at a level that most riders never reach.
Achieving zero heel lift requires a multi-layered approach. First, internalize that your boots should feel tighter than any footwear you have ever owned. Second, utilize modern volumetric filler technology like high-density J-bars. Third, ensure your bindings are adjusted to pull the boot down and back simultaneously. If your heel moves even 2 millimeters, your response time is lagging by nearly 15 percent — a massive deficit in technical terrain.
Understanding Heel Lift: The Physics Behind the Problem
Before jumping into solutions, it is worth understanding the fundamental physics that cause heel lift. Snowboarding relies on a kinetic chain that starts at your brain, travels through your nervous system to your muscles, passes through your foot and ankle, transfers through the boot shell, crosses into the binding interface, and finally reaches the board’s edge. Every link in this chain must be rigid and precise for the system to work. Heel lift breaks the chain at the boot-to-foot interface, creating a gap where energy is lost, response is delayed, and control is compromised.
When you initiate a toe-side turn, your body weight shifts forward. Your ankle dorsiflexes (toes pull toward the shin), and your heel should remain firmly planted in the heel pocket of the boot. If the heel rises, the boot shell tilts forward before the board responds, creating a delay. This delay is called “response lag,” and even a fraction of a second can mean the difference between carving a clean arc and catching an edge. On steep terrain or at high speeds, this lag becomes dangerous.
The physics are straightforward: heel lift occurs when the upward force on the heel exceeds the downward force holding it in place. The downward forces include gravity, boot shell tension, binding strap pressure, and friction between the foot and liner. The upward forces include the mechanical leverage created by ankle flexion, the compression of liner foam (which pushes the foot upward as it compresses), and the natural tendency of the foot to elongate and narrow when the arch collapses under load.
Understanding these forces is key to solving the problem. Every solution in this guide targets one or more of these forces, either by increasing the downward retention forces or by reducing the upward forces that lift the heel.
Why Does Heel Lift Happen? (Deep Technical Diagnosis)
Understanding the “why” is essential before applying the “how.” Heel lift is not just about a loose lace; it is a complex interaction between boot volume, foot anatomy, and material degradation. We categorize these issues into four primary technical failures: Kinetic Breakdown, Volumetric Mismatch, Biomechanical Instability, and Equipment Mismatch.
1. Kinetic Breakdown (The Pack Out)
Every snowboard boot liner is an engineered foam component designed to compress. However, the “pack out” process is often misunderstood. As the EVA (Ethylene Vinyl Acetate) foam is subjected to body heat and the repetitive mechanical stress of carving, the air pockets within the foam collapse permanently. A liner that provides 15mm of cushioning on day one might only provide 8mm on day twenty. This 7mm difference is exactly where heel lift begins. In professional circles, we call this “volumetric loss.” Without intervention, your boot becomes a hollow shell that fails to translate your movements into board pressure.
The pack out process is accelerated by several factors. Riders who generate significant heat through their feet (often due to poor circulation or overly thick socks) will compress foam faster. Riders who ride aggressively — heavy carving, frequent jumps, and hard landings — subject the foam to greater mechanical stress. The temperature differential between the warm interior of the boot and the cold exterior environment also causes thermal cycling that weakens the foam’s cellular structure over time.
On average, a quality snowboard boot liner will lose 20 to 30 percent of its original volume over 50 to 80 riding days. This means that a boot that fits perfectly at the start of a season may develop significant heel lift by mid-season if no corrective measures are taken. Understanding this timeline is essential for proactive maintenance.
2. Volumetric Mismatch
Most riders have an “average” foot shape, but snowboard brands design for specific “lasts” (the 3D mold of a foot). If you have a low-volume ankle — meaning the area around your Achilles tendon is thin — even a perfectly sized boot in length will have too much “dead space” around the heel. This creates a vertical vacuum. When you lean forward to engage your toe-side edge, the vacuum allows the heel to rise before the boot shell begins to tilt. This lag is the root of most calf fatigue, as the muscle must work twice as hard to pull the board up.
Volumetric mismatch is further complicated by the fact that foot volume does not correlate with foot length. A rider with a size 27 foot might have a low-volume ankle with a wide forefoot, or a high-volume ankle with a narrow forefoot. Standard boot sizing only accounts for length, leaving volume as a hidden variable that determines whether a boot locks in or lets go. This is why two boots from different brands in the same Mondo Point size can feel completely different around the heel.
The concept of “last shape” is critical here. Each manufacturer designs their boots around a specific last that represents an idealized foot shape. Some lasts are narrow and elongated, others are wide and round, and others feature a pronounced heel cup with a tapered forefoot. If your foot does not match the last shape of the boot you have purchased, no amount of lacing or aftermarket modification will fully compensate for the fundamental mismatch.
3. Biomechanical Instability
This is where the foot itself is the culprit. When you apply pressure to your toes, your arch naturally wants to collapse (pronate). As the arch drops, the foot actually elongates and the heel narrows. This “foot spread” creates a gap at the back of the boot. Without a structured footbed to hold the arch in place, the foot becomes a shape-shifter inside the boot, making it impossible to maintain a consistent heel lock. High-quality aftermarket insoles are no longer optional for serious riders; they are a fundamental structural component of the boot system.
Biomechanical instability is especially pronounced in riders with flat feet or low arches. These riders experience greater pronation under load, which means their heel tends to narrow and lift more than riders with higher arches. The severity of this effect increases with fatigue — as the muscles that support the arch weaken over the course of a riding day, pronation increases, and heel lift becomes worse in the afternoon than it was in the morning.
Riders with hypermobile joints (loose ligaments) are also more susceptible to biomechanical instability. The increased range of motion in the ankle joint allows the heel to lift through a greater arc, and the lack of passive ligamentous support means the muscles must work harder to maintain heel position. For these riders, rigid or semi-rigid footbeds are not just recommended — they are essential for safe riding.
4. Equipment Mismatch (Boot-Binding-Board)
The fourth cause of heel lift is often overlooked: equipment mismatch between boot, binding, and board. A boot that fits perfectly in a shop may develop heel lift when paired with a specific binding because the binding’s ankle strap geometry does not align with the boot’s flex pattern. Similarly, a soft-boot rider on a stiff board may experience more perceived heel lift because the board’s resistance creates greater forces at the boot-binding interface.
Binding highback angle is another critical factor. If the highback is set too far forward (positive lean), it pushes the boot’s cuff outward, which can lever the heel up. Conversely, a highback with insufficient lean may not provide enough support to keep the boot shell compressed during aggressive toe-side turns. The relationship between boot flex, binding highback angle, and binding strap position creates a triangle of forces that must be balanced to eliminate heel lift.
Board width also plays a role. A narrow board forces the boot to overhang on both sides, which can cause the binding straps to sit at suboptimal angles. This misalignment reduces the downward force that the ankle strap applies to the boot, allowing the heel to lift more easily. Ensuring that your board width matches your boot size is a frequently overlooked step in eliminating heel lift.
Boot Anatomy: Understanding Every Layer That Affects Heel Lock
A modern snowboard boot is not a single piece — it is an assembly of multiple layers, each of which contributes to or detracts from heel hold. Understanding these layers is essential for diagnosing heel lift and selecting the right solutions.
The Outer Shell
The outer shell is the rigid or semi-rigid exterior of the boot, typically made from thermoplastic polyurethane (TPU), synthetic leather, or a combination of materials. The shell provides the structural framework that holds the boot’s shape and transfers force from the binding to the liner. The heel counter — the stiff cup at the back of the shell — is the primary structural element responsible for heel retention. A well-designed heel counter wraps around the heel with a precise curvature that matches the anatomy of the calcaneus (heel bone), creating a cradle that prevents lateral and vertical heel movement.
The stiffness of the shell varies by boot model. Freestyle boots have softer shells that allow more flex and maneuverability, while freeride and carving boots have stiffer shells that maximize response. Shell stiffness directly affects heel hold: a stiffer shell maintains its shape under load, keeping the heel counter pressed firmly against the heel. A softer shell may deform under load, allowing the heel counter to flex outward and release the heel. This is why heel lift is more common in soft-flex boots than in stiff-flex boots.
Shell construction also matters. Some shells use a “wrap-around” design where a single piece of material wraps from one side of the boot to the other, creating a continuous surface that distributes binding pressure evenly. Others use a “split” design where the shell is divided into upper and lower sections, which can create a hinge point that reduces heel hold. When shopping for boots, pay attention to the shell construction method, as it has a direct impact on long-term heel retention.
The Liner
The liner is the soft, padded interior of the boot that directly contacts your foot. Liners are typically made from EVA foam, Thermo-moldable EVA (which can be custom-shaped using heat), or multi-density foam composites. The liner serves three purposes: comfort (padding between the foot and the rigid shell), thermal insulation (trapping warm air around the foot), and fit customization (conforming to the unique shape of the rider’s foot).
For heel hold, the liner’s most important feature is the heel pocket — the contoured cup at the back of the liner that cradles the heel. In premium boots, the heel pocket is sculpted with a specific radius that matches the average heel anatomy. The foam in the heel pocket is typically denser than the foam elsewhere in the liner, providing more structural support and slower compression over time. This density differential is why the heel pocket maintains its shape longer than the rest of the liner.
Heat-moldable liners represent the highest tier of fit customization. These liners use a special EVA formulation that softens when heated to approximately 175°F (80°C) and re-hardens as it cools. When heated and worn, the foam flows into the exact contours of the rider’s foot, creating a custom-molded interior that eliminates dead space. For riders with volumetric mismatch, heat-moldable liners are often the single most effective solution because they eliminate the gap between foot and liner that standard liners cannot address.
The Footbed (Insole)
The footbed is the removable insole that sits inside the liner and supports the bottom of the foot. Factory footbeds are typically thin, flat pieces of foam that provide minimal support. Aftermarket footbeds from companies like Remind, Superfeet, and Sole feature contoured shapes with arch support, heel cups, and forefoot padding that fundamentally change how the foot sits inside the boot.
For heel hold, the footbed’s heel cup is the most important feature. A deep heel cup cradles the heel from below, preventing it from sliding laterally and providing a platform that keeps the heel pressed down into the boot. The arch support is the second most important feature: by preventing the arch from collapsing, the footbed prevents the foot from elongating and narrowing, which maintains the heel’s width and keeps it locked in the heel pocket.
The Tongue and Cuff
The tongue is the padded strip that runs up the front of the boot, between the lacing system and the rider’s shin. The tongue distributes lacing pressure evenly across the top of the foot and shin. A well-designed tongue has a slight curve that matches the shape of the shin, preventing pressure points and ensuring that lacing tension is transmitted evenly to the entire boot.
The cuff is the upper portion of the boot that wraps around the lower leg. Cuff height and stiffness affect how the boot interacts with the binding highback. A taller cuff provides more leverage for heel-side turns but may restrict ankle mobility. A shorter cuff allows more ankle flex but may reduce heel hold. The cuff’s flex pattern — how it bends under load — also affects heel lift. A cuff that flexes progressively (getting stiffer as it bends further) provides better heel hold than one that flexes linearly (same stiffness throughout the range of motion).
Step-by-Step Solutions to Fix Heel Lift
-
The J-Bar and L-Pad Revolution
J-bars are the most effective mechanical intervention available. These are essentially “C” or “J” shaped pieces of adhesive foam that are placed on the liner of the boot. They are designed to sit right behind the ankle bones (malleolus), creating a physical shelf that the ankle bone cannot move past. Using variable-density foam is recommended. Place the J-bar on the outer shell of the liner, not against your skin. This ensures the pressure is distributed across the boot shell, locking the liner into the shell and your foot into the liner simultaneously. It effectively reduces the “volume” of the ankle pocket without restricting blood flow to the rest of the foot.
The placement of J-bars is critical for effectiveness. The pad should be positioned so that its upper edge sits approximately 1 centimeter below the top of the ankle bone. If placed too high, the pad will press against the ankle bone itself, causing pain and potentially restricting blood flow. If placed too low, the pad will not create the shelf needed to prevent heel lift. The pad should cover the full width of the liner at the ankle area, wrapping from one side of the ankle to the other in a continuous arc.
For riders with moderate heel lift, a single J-bar on each side of the ankle is usually sufficient. For severe heel lift, a combination of J-bars and L-pads may be necessary. L-pads are similar to J-bars but extend further forward along the sides of the foot, providing additional lateral stability. The combination of J-bars (preventing vertical heel lift) and L-pads (preventing lateral heel slide) creates a comprehensive retention system that addresses heel lift from multiple angles.
When applying J-bars, clean the liner surface with rubbing alcohol first to ensure the adhesive bonds properly. Press the pad firmly into place and allow 24 hours for the adhesive to fully cure before riding. Check the pad position after your first ride and adjust if necessary — the liner foam will compress slightly under the pad, which may shift its position.
-
Advanced Butterfly Wrapping
For those with severe heel lift, a Butterfly Wrap is the “heavy artillery.” This is a single, large piece of foam that wraps around the entire back of the heel and extends forward toward the midfoot. It serves two purposes: it pushes the heel forward into the front of the heel pocket and narrows the width of the heel cup. This is particularly effective for riders with narrow heels but wide forefeet who are forced to buy wider boots. By “filling the void” in the rear, you maintain the comfort in the toe box while achieving a race-like lock in the back. Always ensure the wrap does not pinch the Achilles, which can lead to tendonitis.
The Butterfly Wrap technique requires more careful application than simple J-bars. Start by placing the center of the wrap at the back of the heel, directly over the Achilles tendon area. Then wrap each side forward, pressing the adhesive firmly against the liner. The wrap should extend to approximately the midpoint of the foot on each side, creating a continuous cup that surrounds the heel from behind and both sides.
The thickness of the wrap material matters. Thicker wraps (8-10mm) provide more aggressive heel retention but may feel uncomfortable for riders with average or high-volume heels. Thinner wraps (4-6mm) provide a more subtle adjustment that is comfortable for all-day riding. Start with a thinner wrap and move to a thicker one only if the thinner version does not eliminate the heel lift.
One advanced technique is the “double wrap,” where two layers of thin foam are applied in overlapping arcs. The first layer addresses lateral heel movement, and the second layer addresses vertical heel lift. This layered approach distributes pressure more evenly than a single thick wrap and allows finer adjustment of the retention force.
-
Structured Footbeds (The Foundation)
A boot is only as good as the floor it is built on. Standard factory insoles are flat, providing zero support. When your arch collapses, your heel moves. By installing a rigid or semi-rigid footbed (like Remind or Superfeet), you lock the heel into a “cup.” This cup prevents lateral (side-to-side) and vertical movement. Furthermore, a proper footbed realigns your kinetic chain. If your foot is stable, your ankle is stable, which means your heel stays where it belongs. This also mitigates the “burning calf” sensation by allowing the skeletal system to take the load instead of the muscles.
The science behind footbeds and heel hold is rooted in biomechanics. When the arch is unsupported, the foot functions as a “loose bag of bones” — the 26 bones, 33 joints, and over 100 muscles, tendons, and ligaments in the foot move independently, causing the foot to change shape under load. A structured footbed converts the foot into a “rigid lever” by supporting the arch and locking the bones into a fixed position. In this rigid state, the foot maintains a consistent shape inside the boot, and the heel pocket can maintain its grip on the heel without interference from shape-changing.
When selecting an aftermarket footbed, look for three key features: a deep heel cup (at least 15mm deep), pronounced arch support (matching your foot’s natural arch height), and a semi-rigid chassis (stiff enough to prevent arch collapse but flexible enough to absorb vibration). Avoid fully rigid footbeds (like hard plastic orthotics) unless prescribed by a medical professional, as these can create pressure points and discomfort in a snowboard boot environment.
Footbed thickness also affects boot volume. A thick aftermarket footbed reduces the internal volume of the boot, which can be beneficial for riders with low-volume feet (additional heel hold) or detrimental for riders with high-volume feet (too tight in the forefoot). If you have a high-volume foot, look for a thinner footbed profile that provides arch support without significantly reducing boot volume.
-
Zonal Lacing and BOA Tensioning
Modern lacing systems like Double BOA or Zonal Speed Lacing allow you to isolate the tension. To stop heel lift, you need the “upper” zone of the lower foot (the instep) to be tight. This is the area that pushes the heel back into the corner of the boot. Many riders make the mistake of overtightening the very top of the boot (around the shin), which actually encourages heel lift by creating a pivot point. Instead, focus on the tension over the top of the foot. This “downward” pressure is what keeps the heel seated during aggressive toe-side carves.
The biomechanics of zonal lacing are worth understanding in detail. The boot has two primary flex zones: the ankle zone (where the boot bends when you flex forward) and the forefoot zone (where the boot flexes as you push through your toes). Heel lift occurs primarily in the ankle zone, where the boot’s cuff pivots around the ankle. By concentrating tension in the ankle zone (the area over the instep and around the ankle), you increase the downward force on the heel without affecting the forefoot’s comfort or mobility.
For BOA systems, the optimal configuration for heel lock is to set the ankle zone dial to a tension that is noticeably tighter than what feels “comfortable” in the shop. The boot should feel almost uncomfortably tight around the ankle when new — this initial tightness accounts for the 10-15 percent pack-out that will occur over the first few rides. If the ankle zone feels “just right” in the shop, it will be too loose after break-in.
For Speed Lace systems, the upper lace should be tightened aggressively while the lower lace maintains a moderate, comfortable tension. The pull direction matters: pull the upper lace handle up and back (toward your calf) rather than straight up. This directional pull seats the heel more effectively than a vertical pull.
For traditional laces, the technique is to tie the lower eyelets moderately, then progressively increase tension as you move up the boot, with the tightest tension at the two eyelet pairs directly over the ankle. Use a surgeon’s knot at the ankle-level eyelets to lock in the increased tension before continuing to the upper eyelets, which can be tied at a moderate tension for cuff comfort.
-
Binding Geometry Optimization
Bindings are the final link in the chain. If your binding’s ankle strap is too thin or positioned too low, it will not exert the necessary force to keep the boot seated. Adjust your strap length so the “sweet spot” (the thickest part of the padding) is centered over the boot’s tongue. If your bindings allow for it, move the ankle strap mounting points to a higher position on the heel hoop. This changes the pull angle from “forward” to “down and back,” which is the gold standard for heel retention.
The geometry of your binding’s ankle strap determines how effectively it can hold your heel down. A wide, padded ankle strap distributes force over a larger area of the boot’s tongue, creating more consistent downward pressure. A narrow or thin strap concentrates force in a smaller area, which can create a pressure point without providing adequate heel hold. When evaluating bindings for heel retention, prioritize models with wide, plush ankle straps over those with narrow, minimalist designs.
The angle at which the ankle strap pulls is equally important. A strap that pulls straight forward (parallel to the ground) compresses the boot’s tongue but does not push the heel down. A strap that pulls at a downward angle (approximately 30 to 45 degrees below horizontal) simultaneously compresses the tongue and seats the heel into the back of the boot. This compound force is far more effective at preventing heel lift than pure forward compression.
The highback rotation angle also affects heel hold. Most bindings allow you to rotate the highback to match the angle of your boot’s cuff. When the highback is aligned with the cuff, it provides even support across the entire back of the boot. When the highback is misaligned, it creates uneven pressure that can push the heel to one side or lever it upward. Take the time to adjust your highback rotation to match your boot — this five-minute adjustment can significantly improve heel hold.
Binding forward lean is another adjustable parameter that affects heel hold. Increasing forward lean angles the highback forward, which pushes your shin into the boot’s tongue and creates a pre-loaded tension system. This pre-load keeps the boot compressed even when you are not actively leaning forward, reducing the opportunity for the heel to lift during transitions between turns. However, excessive forward lean can restrict ankle mobility and cause shin pain, so find a balance that improves heel hold without creating new comfort issues.
Understanding Boot Flex Ratings and Their Impact on Heel Lift
Boot flex rating is one of the most important specifications to understand when diagnosing or preventing heel lift. Flex rating measures how much force is required to bend the boot forward, typically on a scale of 1 (softest) to 10 (stiffest). The relationship between flex and heel lift is direct and significant.
Park, jib, beginners
All-mountain, freestyle
All-mountain, freeride
Freeride, racing, alpine
Soft-flex boots (rating 1-3) are the most susceptible to heel lift because their shells deform more easily under load. When you apply force through your ankle during a turn, a soft boot shell flexes outward, allowing the heel counter to pull away from the heel. This deformation is inherent to the soft material and cannot be fully compensated for through lacing or aftermarket modifications. Riders who choose soft boots for park riding should expect to use J-bars, footbeds, and careful binding setup to minimize heel lift.
Medium-flex boots (rating 4-6) offer a balance between comfort and heel hold. The shell is stiff enough to maintain its shape under moderate loads, but will still flex slightly during aggressive riding. This flex range is where most riders can achieve excellent heel hold through proper fit and lacing technique without needing extensive aftermarket modifications. Medium-flex boots are the most versatile choice for riders who want good heel hold across a variety of conditions.
Stiff-flex boots (rating 7-8) provide excellent heel hold because their rigid shells resist deformation under load. The heel counter maintains its shape even during aggressive carving, keeping the heel firmly locked in place. The trade-off is reduced comfort and mobility — stiff boots are less forgiving of fit imperfections and require a more precise initial fit to avoid pressure points. Riders who prioritize performance over comfort should consider stiff-flex boots, as they virtually eliminate heel lift through structural rigidity alone.
Very stiff boots (rating 9-10) are designed for competitive alpine riding and big-mountain freeriding. These boots have rigid shell construction that provides maximum heel hold and response. Heel lift is essentially nonexistent in properly fitted very stiff boots, as the shell does not deform under any load that a human rider can generate. The downside is that these boots are uncomfortable for casual riding and require a significant break-in period.
How Boot Brands Differ in Heel Lock Design
Not all boot brands approach heel lock the same way. Understanding these brand-specific differences can help you choose a boot that naturally matches your foot shape and heel retention needs.
Burton
Burton boots typically feature a medium-width heel cup with a focus on overall comfort and progression. Their Imprint liners are heat-moldable and feature a heel-specific density zone. Burton’s heel hold is good for average-volume feet but may require J-bars for riders with narrow heels. The Total Comfort Construction design prioritizes out-of-box comfort, which sometimes means a slightly roomier heel pocket than performance-focused brands.
Salomon
Salomon boots are known for their precise, European-influenced fit with narrower heel cups and more contoured ankle pockets. Salomon’s Custom Flex Action Panels allow the shell to be heat-molded for a custom fit. For riders with narrow to average heels, Salomon boots often provide superior heel hold out of the box. The Gold heat-moldable liner technology creates a particularly secure heel pocket after custom fitting.
ThirtyTwo
ThirtyTwo boots emphasize comfort and freestyle performance. Their heel cups tend to be slightly wider to accommodate the natural foot splay that occurs during park riding. ThirtyTwo’s STI Evolution Foam outsole provides excellent shock absorption, which reduces the impact forces that contribute to liner pack-out. For riders with wider feet, ThirtyTwo offers some of the best-fitting options on the market.
Nitro
Nitro boots feature a precision-molded heel counter with an aggressive wrap-around design. The Cloud 9 liner with Thermogel heat-moldable foam provides excellent heel pocket customization. Nitro’s heel hold is consistently rated among the best in the industry, making their boots a strong choice for riders who struggle with heel lift. The TLS lacing system integrates well with their shell design for comprehensive heel retention.
Ride
Ride boots use an Intuition foam liner that is heat-moldable and provides a premium custom fit. Ride’s heel counters feature a slightly narrower profile that works well for riders with narrow to average heels. The Intuition liner is one of the highest-quality liners available in stock boots, providing both excellent heel hold and long-term durability. Ride boots are an excellent choice for riders who want premium heel retention without aftermarket modifications.
K2
K2 boots feature a narrower, more structured heel pocket design with reinforced heel counters. The Conda BOA heel-lock system available on select models provides mechanical heel retention that supplements the shell and liner. K2 boots tend to run slightly narrower through the heel, making them excellent for riders with low-volume ankles. The Harshmellow dampening system in premium models reduces vibration-induced liner breakdown.
Women-Specific Heel Lock Considerations
Women riders face unique heel lift challenges that require specific solutions. Anatomical differences between male and female feet mean that generic boot fitting advice does not always apply.
Women typically have narrower heels relative to their forefoot width, a lower calf muscle insertion point, and a wider Q-angle (the angle between the quadriceps tendon and the patellar ligament) due to wider hips. These differences create a specific set of heel hold challenges. The narrower heel means more dead space in the heel pocket. The lower calf insertion means the calf muscle interferes less with cuff flex but also provides less natural downward pressure on the heel. The wider Q-angle creates slightly different force vectors during turns that can exacerbate heel lift.
Women-specific boots address these issues through narrower heel counters, lower cuff heights, softer flex profiles, and anatomically contoured liners. When shopping for women’s boots, prioritize models that are specifically designed for women rather than smaller versions of men’s boots. The heel counter geometry is the most important differentiator — a women-specific heel cup will wrap the heel more precisely than a scaled-down men’s heel cup.
For women who experience heel lift in women-specific boots, the same solutions apply: J-bars, structured footbeds, and binding optimization. However, the placement and sizing of J-bars may differ. Women generally need smaller J-bars positioned slightly lower on the ankle due to the smaller heel anatomy. Using men’s-sized J-bars in women’s boots can create excessive pressure that causes pain and restricts blood flow.
Step-On Bindings and Heel Lift
The emergence of step-on binding systems has introduced new considerations for heel lift. Step-on bindings eliminate the ankle strap entirely, relying instead on toe and heel cleats that lock the boot directly to the binding. This fundamental design change alters the dynamics of heel hold.
In strap bindings, the ankle strap provides continuous downward pressure on the boot’s tongue, which indirectly seats the heel. In step-on bindings, there is no ankle strap — the heel is held by a mechanical cleat that engages with a corresponding receptor on the boot’s heel. This mechanical connection is inherently more secure than strap pressure for preventing heel lift, as the cleat physically prevents the heel from rising regardless of lacing tension, boot flex, or liner compression.
However, step-on systems introduce a different problem: the boot must be specifically designed to work with the step-on binding. Not all boots are compatible, and the boot’s heel geometry must precisely match the binding’s cleat receptor. If the boot develops liner pack-out that changes the heel’s position relative to the cleat receptor, the engagement may become loose or inconsistent. This is why step-on users must be especially diligent about replacing packed-out liners and maintaining proper boot volume.
The trade-off between strap and step-on heel hold is nuanced. Strap bindings provide adjustable, progressive heel hold that can be fine-tuned by adjusting strap tension. Step-on bindings provide fixed, mechanical heel hold that is either engaged or not. For riders with consistent foot volume and well-maintained boots, step-on bindings provide superior heel hold. For riders whose foot volume fluctuates (due to swelling, sock thickness changes, or liner pack-out), strap bindings offer more adaptability.
Splitboarding and Backcountry Heel Hold
Splitboarders face unique heel lift challenges because their boots must function in both walk mode (touring uphill) and ride mode (descending). During the uphill tour, the boot’s cuff is typically unlocked to allow natural ankle articulation for walking. This unlocked state inherently reduces heel hold because the cuff no longer provides structural support around the ankle.
Many splitboard-specific boots address this issue through a “walk mode / ride mode” switch that locks and unlocks the cuff. When the cuff is locked for the descent, heel hold returns to resort-boot levels. However, the transition between modes requires the rider to consciously re-engage heel retention — a step that is sometimes forgotten in the excitement of a descent, leading to heel lift on the first few turns.
The weight penalty of additional heel hold features is a critical consideration for splitboarders. Every gram matters on the ascent, so splitboard-specific heel hold solutions must be lightweight. J-bars made from lightweight EVA foam are popular among splitboarders because they provide effective heel hold without adding significant weight. Structured footbeds with carbon-fiber-reinforced arch support offer another lightweight option that improves heel hold while adding minimal mass.
Cold-weather performance is another factor. In backcountry conditions, temperatures can drop well below resort conditions, causing boot liners to stiffen and lacing systems to become less responsive. A heel hold solution that works in the warm fitting room may fail in the field if the materials become rigid in extreme cold. Test any heel hold modifications in cold conditions before relying on them in the backcountry.
Ankle Strengthening and Injury Prevention
While mechanical solutions address the equipment side of heel lift, strengthening the muscles and tendons that control the ankle provides a biological solution that complements gear modifications. A strong ankle is more stable, more resistant to pronation, and better able to maintain heel position inside the boot.
Pre-Season Ankle Strengthening Program
Perform these exercises three times per week during the off-season to build ankle stability that reduces heel lift:
- Single-Leg Balance: Stand on one foot on an unstable surface (pillow, balance pad, or BOSU ball) for 30 to 60 seconds per leg. Progress by closing your eyes or adding head turns. This strengthens the proprioceptive system that controls ankle stability.
- Resistance Band Inversion/Eversion: Loop a resistance band around the ball of your foot and anchor it to a fixed point. Turn your foot inward (inversion) and outward (eversion) against the resistance for 15 repetitions per direction. This strengthens the peroneal muscles that prevent ankle rolling and heel slide.
- Calf Raises: Stand on the edge of a step with your heels hanging off. Rise onto your toes, hold for 2 seconds, and lower slowly for 3 seconds. Perform 15 repetitions for 3 sets. This strengthens the gastrocnemius and soleus muscles that control ankle plantarflexion and provide downward force on the heel.
- Arch Raises (Short Foot Exercise): While seated, try to raise your arch by drawing the ball of your foot toward your heel without curling your toes. Hold for 10 seconds for 10 repetitions. This strengthens the intrinsic foot muscles that prevent arch collapse and the associated heel narrowing.
Beyond strength, flexibility matters. A stiff ankle that cannot dorsiflex sufficiently forces the heel to lift during toe-side turns because the ankle joint runs out of range of motion before the boot is fully flexed. Stretching the calf muscles (gastrocnemius and soleus) through regular stretching improves ankle dorsiflexion range and reduces the tendency for the heel to lift at the end range of motion.
Temperature, Weather, and Environmental Factors
Environmental conditions affect heel lift in ways that most riders never consider. Temperature, humidity, and altitude all influence how your boot, liner, and lacing system perform.
Cold temperatures cause boot liner foam to become stiffer and less compliant. This can be both helpful and harmful. A stiffer liner maintains its shape better, which improves heel hold. However, a stiff liner also conforms less to the foot’s shape, which can create dead space if the foot shrinks slightly in the cold (due to reduced blood flow). The net effect depends on the specific foam formulation and the severity of the cold.
Warm temperatures and high humidity cause the liner foam to soften and become more pliable. This increased pliability allows the liner to conform better to the foot (good for heel hold) but also accelerates the pack-out process (bad for long-term heel hold). Spring riders who ride in warm conditions should be especially vigilant about liner condition and may need to replace liners more frequently than cold-weather riders.
Altitude affects boot fit through a combination of reduced air pressure and increased physical exertion. At high altitude, reduced air pressure causes trapped air pockets in the liner foam to expand slightly, which can change the boot’s internal volume. Increased exertion at altitude causes feet to swell more than at sea level, further altering the fit. Riders at high-altitude resorts should consider these factors when choosing heel hold solutions and may need to loosen their lacing slightly compared to sea-level settings.
Boot Break-In: What to Expect and How to Manage It
New snowboard boots require a break-in period during which the liner foam compresses and conforms to the rider’s foot. During this period, the boot’s fit and heel hold characteristics will change. Understanding this process helps you set up your heel hold solutions correctly from day one.
Most quality snowboard boots require 5 to 10 full days of riding to fully break in. During this period, the liner will compress by approximately 10 to 15 percent in volume. This compression is most pronounced in the areas of highest pressure — the heel, the ball of the foot, and the ankle bones. As the liner compresses, the boot feels progressively looser, and heel lift may increase if no corrective measures are taken.
The correct approach is to set up your heel hold solutions to account for break-in from the start. When fitting new boots, the boot should feel almost uncomfortably tight with all heel hold modifications installed. This “over-tight” feeling is correct because it accounts for the 10 to 15 percent volume reduction that will occur during break-in. If the boot feels “just right” when new, it will be too loose after break-in.
Heat-molding accelerates the break-in process significantly. A heat-molded liner conforms to the foot in a single session rather than over 5 to 10 days of riding. However, heat-molded liners may also reach their final compressed state faster, meaning that the long-term heel hold trajectory is similar whether you heat-mold or rely on natural break-in.
Common Rider Mistakes That Cause Heel Lift
Many heel lift problems are caused by rider error rather than equipment deficiency. Avoiding these common mistakes can eliminate heel lift without any gear purchases.
Buying boots too large: This is the single most common cause of heel lift. Riders buy boots that feel comfortable in the store (standing still, in thin socks, at room temperature) and are surprised when the boots feel loose on the mountain (riding, in thick socks, in cold temperatures). Always buy boots one half to one full size smaller than your street shoe size, and always try them on with the socks and footbeds you will ride in.
Overtightening the wrong zone: Many riders crank the top of the boot (the cuff area) thinking it will hold the heel down. In reality, overtightening the cuff creates a pivot point that encourages heel lift. Focus lacing tension on the ankle zone (the area over the instep), not the cuff.
Ignoring liner condition: A packed-out liner cannot hold the heel regardless of lacing tension. If your boots are more than two seasons old and you ride regularly, the liners have likely compressed enough to cause heel lift. Replacing the liners (rather than the entire boot) is a cost-effective solution.
Using thick cotton socks: Cotton socks absorb moisture and become slippery when wet, which actually increases heel lift. They also add unnecessary volume that compresses the liner unevenly. Use thin, moisture-wicking merino wool or synthetic snowboard socks.
Neglecting binding setup: Even perfectly fitted boots with proper heel hold modifications will develop heel lift if the bindings are not adjusted correctly. Take the time to center your ankle strap, adjust your highback angle, and set your forward lean to optimize heel retention.
Not removing the factory insole: Many riders install aftermarket footbeds on top of the factory insole, which doubles the insole thickness and can create fit issues. Always remove the factory insole before installing an aftermarket footbed.
When to See a Professional Boot Fitter
Some heel lift problems cannot be solved with DIY solutions. A professional boot fitter has the tools, experience, and expertise to diagnose and address complex fit issues that are beyond the scope of this guide. Consider seeing a professional if:
- You have tried J-bars, footbeds, and binding adjustments but still experience significant heel lift
- You have foot anatomical irregularities (bunions, hammertoes, bone spurs) that create fit challenges
- You have one foot significantly larger than the other (asymmetrical fit)
- You experience chronic foot, ankle, or knee pain while riding
- You need custom orthotics for medical reasons
- You are investing in premium boots and want to ensure a perfect fit from day one
A professional boot fitting session typically costs between $50 and $150 and includes foot measurement, shell assessment, liner evaluation, heat molding, J-bar installation, and binding adjustment. This investment can save you hundreds of dollars in wrongly purchased equipment and prevent seasons of discomfort and poor performance.
When choosing a boot fitter, look for shops that specialize in snowboard boot fitting (not just general ski boot fitting, which involves different techniques). Ask about the fitter’s experience, certifications, and approach to solving heel lift specifically. A good fitter will spend 30 to 60 minutes with you, evaluating your foot anatomy, riding style, and current equipment before making recommendations.
Essential Gear to Banish Heel Lift
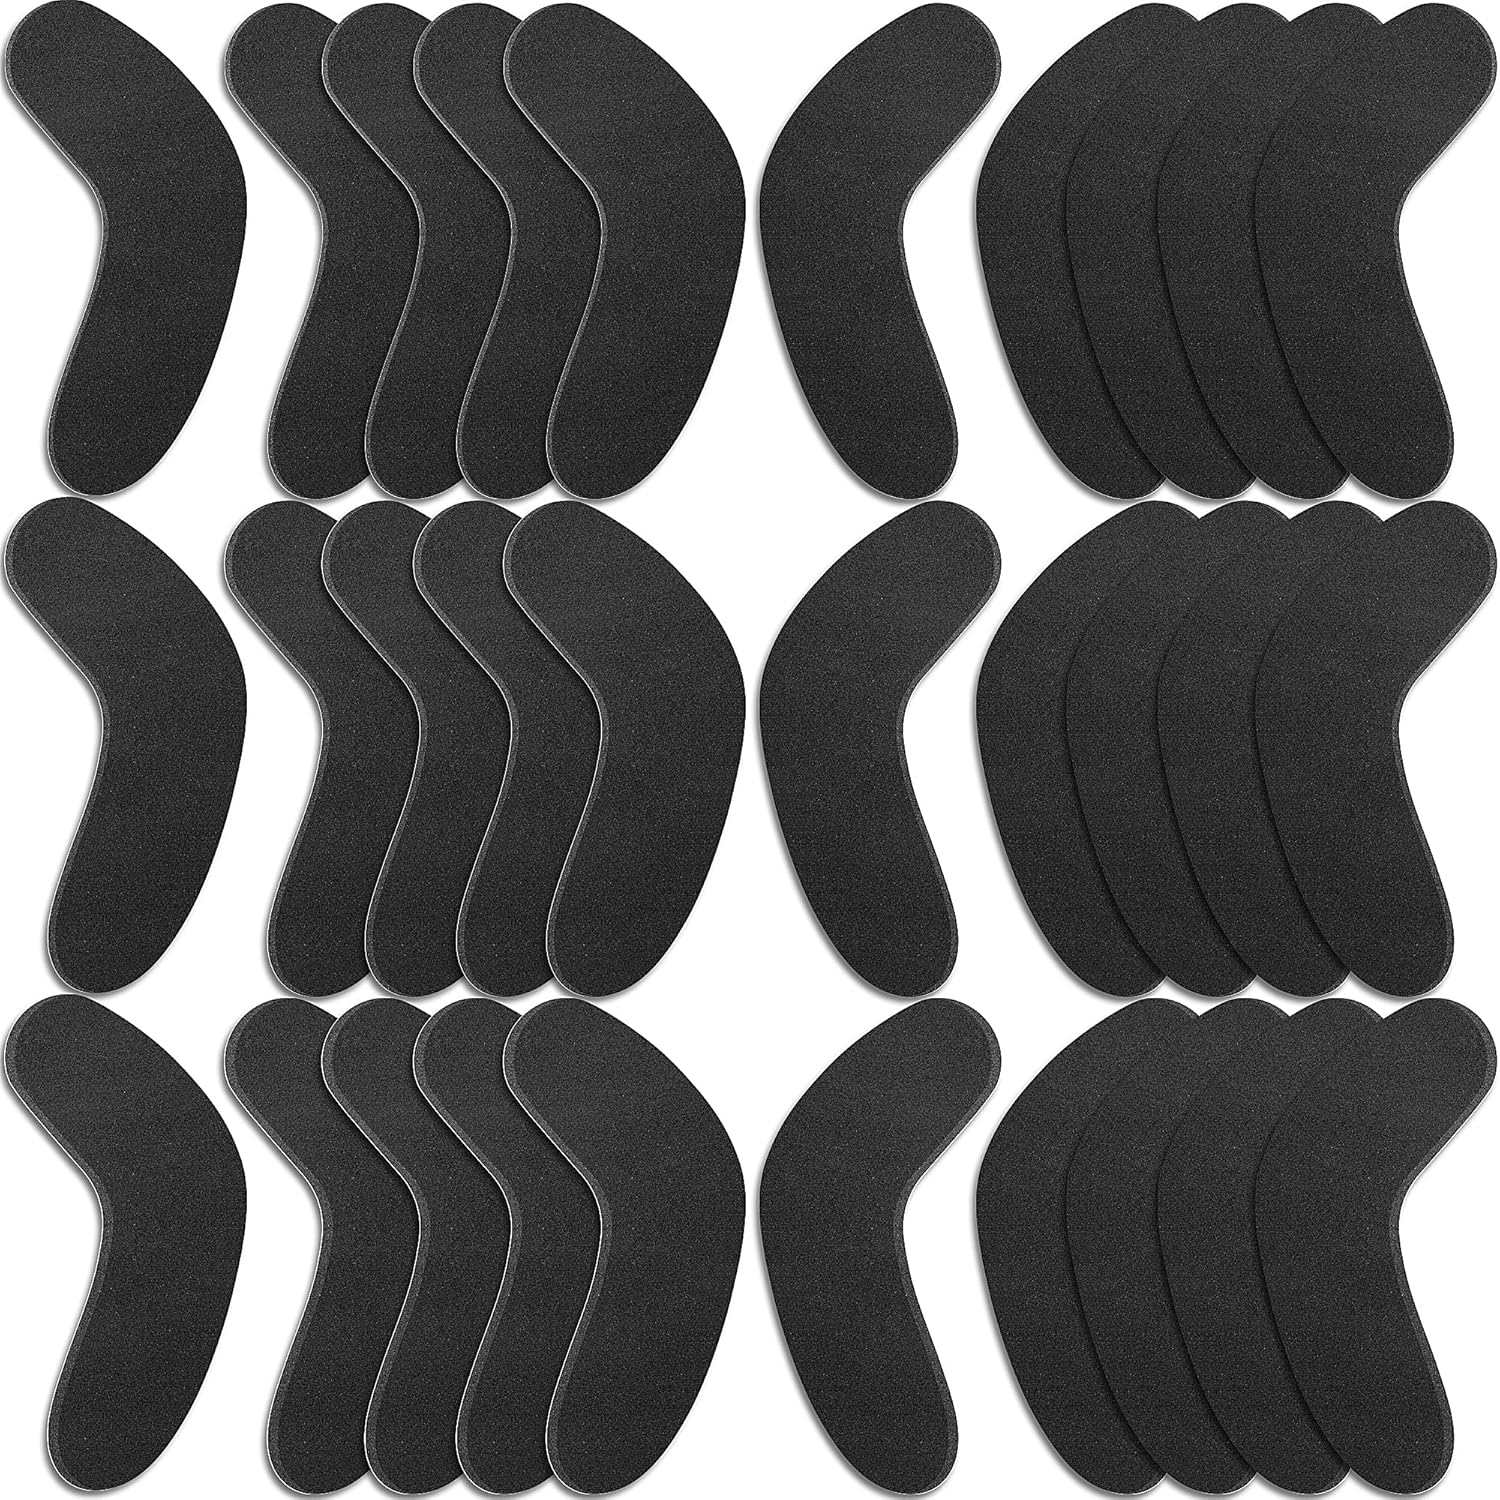
Precision Foam Kit
The ultimate DIY solution for custom boot fitting. Includes varied J-bar thicknesses to customize your heel hold perfectly.
View on Amazon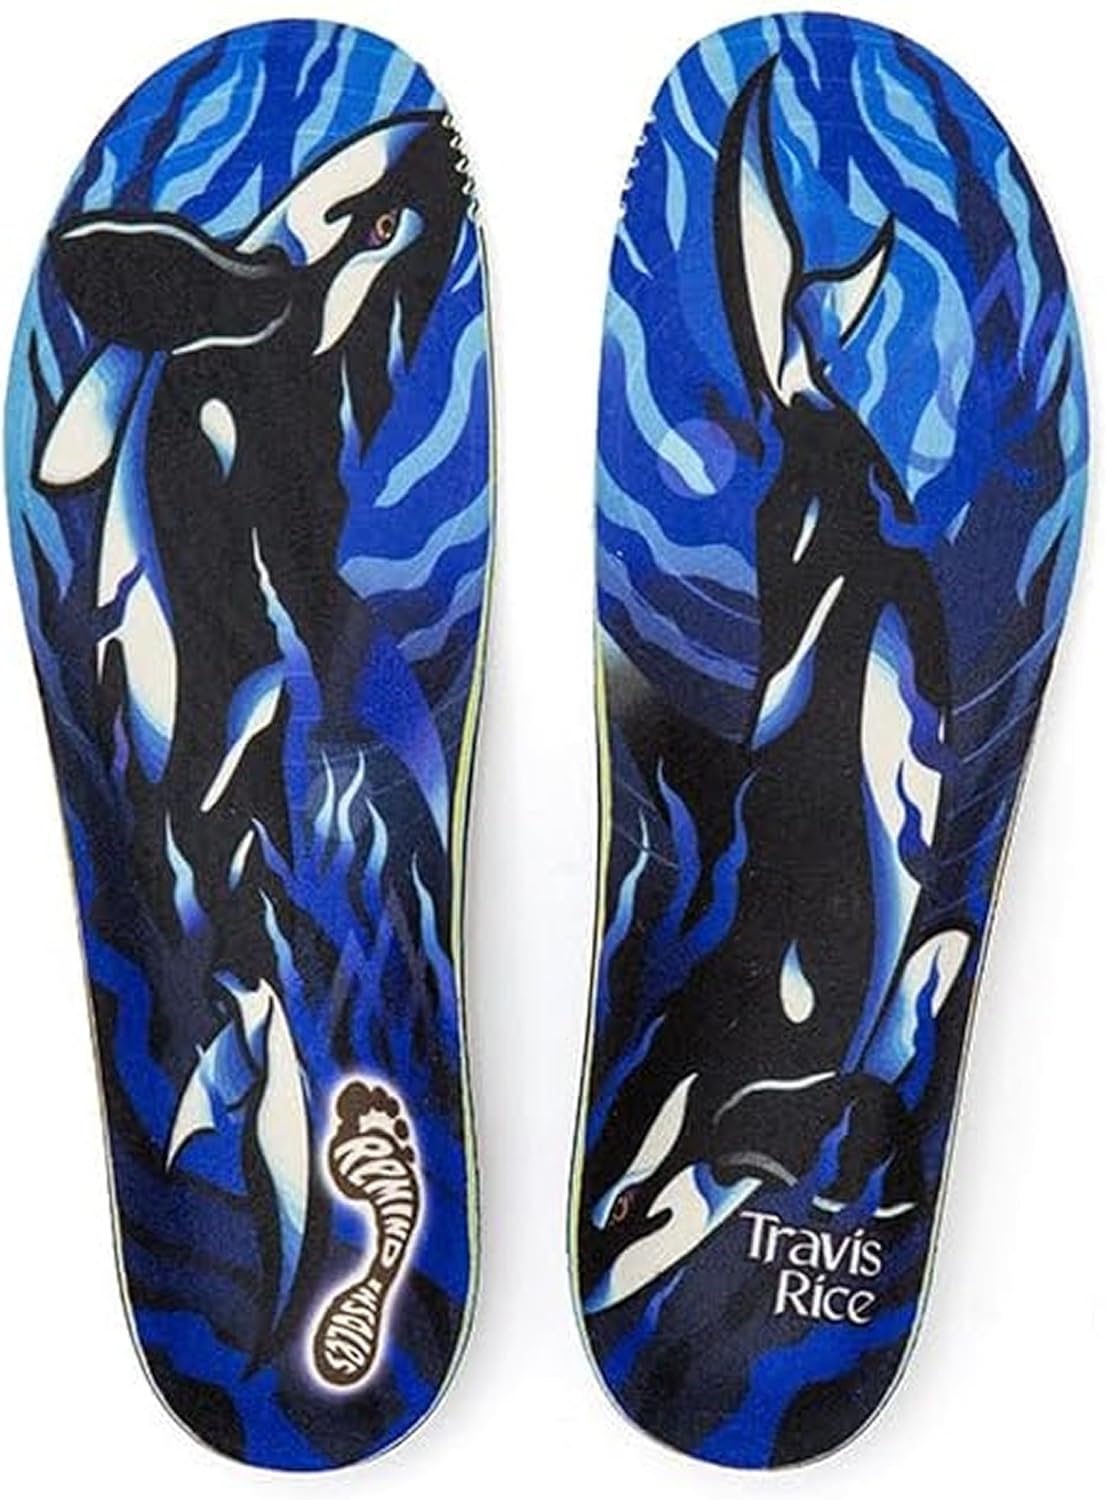
Remind “Cush” Insoles
The choice for pro riders. Bio-mechanical arch support that prevents foot elongation and secures the heel cup.
View on Amazon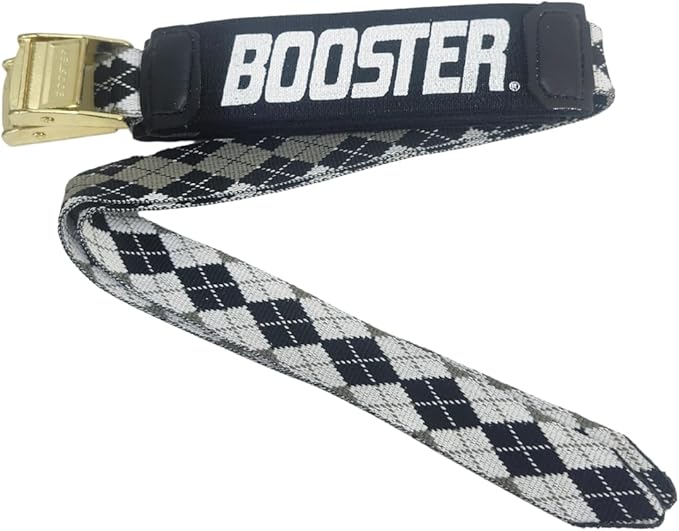
Dynamic Booster Strap
Eliminate the gap between your shin and the boot tongue. This ensures every movement is instantly transmitted to the board.
View on AmazonHeel Lift Solutions Comparison: What Works Best for Your Situation
| Solution | Effectiveness | Cost | Difficulty | Best For |
|---|---|---|---|---|
| J-Bars | High | $10-$30 | Easy | Moderate heel lift, all riders |
| Butterfly Wrap | Very High | $15-$40 | Moderate | Severe heel lift, narrow heels |
| Aftermarket Footbed | High | $30-$60 | Easy | Flat feet, biomechanical instability |
| Lacing Optimization | Medium-High | Free | Easy | All riders, quick fix |
| Binding Adjustment | Medium | Free | Easy | All riders, equipment mismatch |
| Heat Molded Liner | Very High | $50-$100 | Professional | Volumetric mismatch, all riders |
| Liner Replacement | High | $80-$200 | Moderate | Packed-out liners |
| Booster Strap | Medium | $25-$45 | Easy | Shin bang, tongue gap |
| Professional Boot Fitting | Very High | $50-$150 | Professional | Complex fit issues, all levels |
| Stiffer Boot Upgrade | High | $200-$600 | N/A | Chronic heel lift, performance riders |
Material Science: What Your Boot Is Made Of (And Why It Matters)
Understanding the materials in your boot helps you make informed decisions about heel hold solutions. Each material behaves differently under load, temperature, and time — and these behaviors directly affect heel retention.
EVA Foam (Ethylene Vinyl Acetate): The most common liner material, EVA is a closed-cell foam that provides cushioning and thermal insulation. Its primary drawback for heel hold is compressive set — the tendency of the foam cells to permanently collapse under sustained load. Higher-density EVA resists compressive set better than lower-density EVA, which is why premium boots use dual-density foam with firmer EVA in the heel pocket and softer EVA elsewhere. When shopping for boots or replacement liners, ask about the EVA density — a higher density rating (measured in kilograms per cubic meter) indicates better long-term heel hold.
TPU (Thermoplastic Polyurethane): The most common shell material, TPU provides rigidity, abrasion resistance, and thermal stability. TPU shells maintain their shape across a wide temperature range, making them reliable for heel hold in both cold and warm conditions. The downside is that TPU is heavier than alternative shell materials like carbon-fiber-reinforced composites, which matters for weight-conscious riders.
Dyneema and UHMWPE (Ultra-High-Molecular-Weight Polyethylene): Used in lacing cables and some liner reinforcements, these materials offer extreme tensile strength with minimal weight. Dyneema is 15 times stronger than steel by weight and has virtually zero stretch, making it ideal for lacing systems that must maintain consistent tension for heel hold. Boots with Dyneema-reinforced lacing or liner panels tend to maintain heel hold better over time.
Carbon Fiber Composites: Found in premium boot shells and footbeds, carbon fiber provides exceptional rigidity at minimal weight. Carbon-fiber-reinforced heel counters resist deformation under extreme loads, making them the gold standard for heel hold in performance boots. Carbon-fiber footbeds provide arch support without adding significant weight or thickness. The downside is cost — carbon fiber components significantly increase boot prices.
Memory Foam: Some liners incorporate memory foam layers that conform to the foot’s shape under body heat. While comfortable, memory foam has a faster compressive set than EVA, meaning it loses its shape and heel hold characteristics more quickly. Boots that rely primarily on memory foam for heel pocket shaping may develop heel lift sooner than boots with EVA-based heel pockets.
Rider Weight and Its Effect on Heel Lift
Rider body weight is a frequently overlooked variable in heel lift dynamics. Heavier riders generate proportionally greater forces during every turn, jump, and landing. These increased forces accelerate liner pack-out, increase the upward leverage on the heel, and place greater demands on every component of the heel retention system.
Riders under 150 pounds (68 kg) generally experience less heel lift because the forces they generate are moderate enough that standard boot construction and fit can contain them. A medium-flex boot with proper lacing and a structured footbed is usually sufficient for lighter riders.
Riders between 150 and 200 pounds (68-91 kg) generate moderate forces that require attention to heel hold. At this weight range, aftermarket J-bars and a structured footbed are typically necessary for reliable heel lock, especially in soft to medium-flex boots. Stiff-flex boots at this weight range often provide adequate heel hold without additional modifications.
Riders over 200 pounds (91 kg) generate significant forces that can overwhelm standard heel retention systems. Heavier riders should prioritize stiff-flex boots with reinforced heel counters, heavy-duty J-bars, and rigid footbeds. Liner replacement may be needed more frequently due to accelerated pack-out. Some manufacturers offer “extended size” boots with reinforced construction specifically designed for heavier riders — these are worth investigating if you are in this weight category.
Weight distribution also matters. Riders who carry their weight primarily in their upper body generate different forces at the boot-binding interface than riders who carry their weight in their legs. Upper-body-dominant riders tend to push the boot cuff forward more aggressively, which can lever the heel up. Lower-body-dominant riders generate more direct downward force on the footbed, which helps keep the heel seated. Understanding your personal weight distribution can help you tailor your heel hold setup.
Terrain-Specific Heel Hold Strategies
Different terrain types place different demands on heel hold. Tailoring your approach to the terrain you ride most often ensures that your heel hold solutions are optimized for your primary use case.
Groomed Runs and Carving: High-speed carving generates sustained, progressive forces on the heel that test the limits of heel retention. The key is consistency — the heel must be held in the same position throughout a long, loaded turn. Stiff boots with aggressive lacing tension in the ankle zone provide the best heel hold for groomed carving. Avoid soft boots on groomers, as their flex allows too much heel movement under sustained load.
Powder: Deep powder riding involves floating rather than edging, which generates less lateral force on the heel. However, the deep knee flexion required for powder riding increases ankle dorsiflexion, which can lever the heel up. A medium-flex boot with moderate lacing tension is usually sufficient for powder. The primary concern in powder is keeping snow out of the boot (which creates slippery conditions inside the liner) rather than aggressive heel retention.
Park and Terrain Features: Park riding involves high-impact landings that generate momentary peak forces far greater than carving. These impact forces can momentarily lift the heel even in well-fitted boots. The key is a boot with a resilient liner that recovers quickly from impact compression. J-bars and structured footbeds help maintain heel position during landings by providing structural support that does not compress as easily as foam alone.
Ice and Hardpack: Riding on ice requires maximum edge control because there is no margin for error. Even a small amount of heel lift on ice can cause an edge to catch or release unpredictably. Stiff boots with triple-BOA or aggressive traditional lacing provide the most consistent heel hold on ice. Binding strap tension should be maximized to eliminate any play in the boot-binding interface.
Trees and Bumps: Riding through trees and bumps involves rapid, dynamic movements that require quick edge changes. Heel lift during rapid transitions creates a lag that can cause you to miss a line or catch an edge. A medium to stiff boot with responsive lacing provides the best heel hold for dynamic terrain. The key is that the heel must be held consistently through a wide range of ankle positions, not just during sustained turns.
Boot Liner Replacement: When and How
Replacing your boot liner is one of the most cost-effective ways to restore heel hold in aging boots. A new liner restores the foam’s original volume and heel pocket shape, effectively returning the boot to its out-of-box condition while retaining the broken-in shell that already matches your foot’s shape.
Most major boot manufacturers sell replacement liners that are compatible with their current and recent boot models. The replacement process is straightforward: remove the old liner from the shell, insert the new liner, and heat-mold if desired. The entire process takes less than 30 minutes.
Replacement liners typically cost between $80 and $200, which is significantly less than a new pair of boots ($250 to $600). If your boot shells are in good condition (no cracked soles, intact shell structure, functional lacing system), replacing the liner is the smartest investment you can make for heel hold.
Some aftermarket liner companies (like Intuition) produce universal-fit liners that can be trimmed and heat-molded to fit a wide range of boot shells. These premium liners often feature better foam quality and more precise heel pocket shaping than stock liners, providing an upgrade in both heel hold and comfort. The downside is that universal liners require more skill to fit correctly and may not match the specific geometry of your boot shell as precisely as manufacturer-specific replacements.
Budget vs. Premium: Where to Invest for Maximum Heel Hold
Not every rider needs to spend top dollar to eliminate heel lift. Understanding where to invest and where to save ensures that your budget is allocated effectively.
These solutions provide the most heel hold improvement per dollar spent:
- Lacing technique ($0): Learning to properly tension your lacing system is free and immediately effective.
- Binding adjustment ($0): Properly positioning your ankle strap and highback costs nothing and can significantly improve heel hold.
- J-bars ($10-$30): The single most cost-effective aftermarket modification for heel lift.
- Aftermarket footbed ($30-$60): Provides heel hold and comfort benefits that justify the investment many times over.
Premium investments make sense when you have exhausted low-cost solutions and still experience heel lift, or when you are committed to riding regularly and want the best possible performance. Premium investments include heat-moldable liners ($50-$100), professional boot fitting ($50-$150), and higher-end boots with better heel counter design ($350-$600). These investments provide diminishing returns compared to low-cost solutions, but they are worthwhile for dedicated riders who demand maximum performance.
Seasonal Boot Care to Maintain Heel Hold
Proper boot care extends the life of your heel hold solutions and ensures consistent performance throughout the season and across multiple seasons.
After every ride: Remove your insoles and open your boot tongues wide to allow the liners to dry completely. Wet liners lose their shape faster and develop odor. Never store wet boots in a sealed bag or car trunk. Place them in a warm, ventilated area overnight.
Weekly (during active season): Inspect your J-bars and foam modifications for compression or displacement. Check your lacing system for fraying, stiffness, or damage. Ensure your binding straps are not showing signs of wear that could reduce their effectiveness.
End of season: Clean your boots thoroughly, remove insoles and footbeds, and store the boots in a cool, dry place with the tongues open and laces loose. Do not store boots in a hot car or attic, as extreme heat degrades liner foam and shell materials. Loosely stuff the boots with newspaper to absorb any residual moisture and maintain shape.
Start of season: Before your first ride, inspect all heel hold components: J-bars (still adhered?), footbeds (still contoured?), laces (still flexible?), bindings (straps intact?). Replace anything that shows signs of degradation. This pre-season check prevents you from discovering heel lift problems on the mountain.
Troubleshooting: Diagnosing Persistent Heel Lift
If you have tried the solutions in this guide and still experience heel lift, use this diagnostic approach to identify the root cause.
Check Boot Size
Remove the insole from your boot and stand on it. Your heel should be centered on the heel cup, and your toes should reach the end of the insole with no more than 5mm of overhang. If your heel hangs off the back or your toes extend more than 10mm past the front, your boots are the wrong size.
Check Liner Condition
Remove the liner from the shell and inspect the heel pocket. Press your thumb into the foam at the back of the heel pocket. If the foam compresses easily and does not spring back quickly, the liner is packed out and needs replacement. A healthy heel pocket should feel firm and springy, with the foam returning to its original shape within 1 second of releasing pressure.
Check Footbed Support
Stand in your boots (without lacing them) and feel for arch support through the insole. If you cannot feel the arch support contacting the arch of your foot, the footbed is either positioned incorrectly or does not provide adequate support for your foot shape. Reposition or replace the footbed.
Check Binding Strap Position
Lace your boots and strap into your bindings. Look at the binding ankle strap from the side. The widest part of the strap should be centered over the boot’s tongue at the ankle level. If the strap is positioned too high (near the shin) or too low (near the forefoot), adjust the strap mounting position or length.
Test Different Lacing Tensions
On a gentle slope, try riding with your ankle zone at maximum tightness while keeping the rest of the boot at moderate tightness. If the heel lift disappears, the problem was insufficient ankle-zone tension. If the heel lift persists even at maximum ankle tension, the problem is likely a fit issue that requires J-bars, liner replacement, or professional fitting.
Heel lift is a solvable problem with a systematic approach. Start with free solutions (lacing technique, binding adjustment), move to low-cost modifications (J-bars, footbeds), and escalate to premium solutions (heat-molding, liner replacement, professional fitting) only if needed. The key is to diagnose the specific cause of your heel lift before throwing money at solutions that may not address the root problem. A locked-in heel provides the confidence to charge harder, carve deeper, and stay on the mountain longer.
Frequently Asked Questions (FAQs)
Ideally, zero. However, in a soft-flex freestyle boot, 1-2mm is acceptable. In a stiff freeride or carving boot, any perceptible movement will degrade performance and should be addressed immediately. If you can feel the heel move inside the boot, the lift is significant enough to affect your riding.
No. This is a common myth. Thicker socks actually reduce “board feel” and can cause your foot to sweat, making the inside of the liner slippery, which actually increases heel lift. Stick to thin, moisture-wicking snowboard socks made from merino wool or synthetic materials.
While duct tape works in an emergency, the adhesive often fails due to the heat generated by your feet. Use the pressure-sensitive adhesive provided with the pads or a high-grade contact cement for a permanent bond. 3M VHB tape is another reliable option for securing foam modifications.
If you find yourself tightening your BOA or laces 3-4 times a day just to feel secure, or if there is a visible gap between your foot and the liner that was not there when new, your liners have likely reached their end of life. Another sign is that your heel lifts even with maximum lacing tension — this suggests the foam has lost its ability to hold the heel in place.
It can be. Beyond the lack of control, heel lift causes your toes to “claw” the footbed to maintain balance. This leads to foot cramps and premature fatigue, which increases the risk of injury during the final runs of the day. On steep terrain or in trees, heel lift can cause a loss of edge control that leads to falls.
Heat molding is best for removing pressure points (widening), not for shrinking a boot. If your boot is too big, heat molding again might actually make the foam more compressed and worsen the lift. However, if the liner has lost its molded shape due to pack-out, a second heat molding session can temporarily restore some of the original heel pocket contour.
Yes. Brands like Vans often have a wider heel cup, while brands like Salomon or K2 tend to have narrower, more contoured heel pockets. Always choose the brand that matches your foot’s “volume.” Trying boots from multiple brands is essential for finding the best heel hold for your specific foot shape.
Shin bang occurs when there is a gap between your leg and the boot tongue. When you lean forward, your shin slams into the tongue. This usually happens in boots that are too large, which is the same root cause as heel lift. Solving heel lift often resolves shin bang simultaneously because both problems stem from excessive boot volume.
It is difficult because you cannot permanently modify the liners. However, using your own high-quality insoles and wearing proper socks can significantly improve the fit of a generic rental boot. J-bars can also be temporarily installed using removable adhesive for a single day of rental use.
If you have added J-bars, upgraded insoles, tightened your bindings, and optimized your lacing, yet your heel still moves more than 5mm, the boot is fundamentally the wrong size or shape for your foot. It is time for a professional fitting and likely a new pair of boots.
Yes. Women-specific boots feature narrower heel cups, lower cuff heights, and different foam densities designed for the female foot anatomy. Using a men’s boot in a smaller size is not a substitute for a women-specific boot, as the heel counter geometry will not match the typical female heel shape. Women riders should always start with women-specific models.
Absolutely. When the heel lifts, the knee compensates by dropping inward (valgus collapse) to maintain balance. This misalignment places excessive stress on the medial (inner) knee ligaments and can cause or worsen conditions like patellofemoral pain syndrome and IT band syndrome. Fixing heel lift often resolves associated knee pain.
Heavier riders generate more force during turns, which accelerates liner pack-out and increases the upward force on the heel. Heavier riders should prioritize stiff-flex boots, heavy-duty J-bars, and reinforced footbeds to counteract the increased forces. Liner replacement may also be needed more frequently for heavier riders.
Step-on bindings provide superior mechanical heel retention compared to strap bindings because the heel cleat physically prevents upward heel movement. However, step-on systems require compatible boots and proper maintenance. If the boot’s heel cleat receptor wears or the liner packs out, the step-on connection can become loose. Regular liner replacement is essential for maintaining heel lock in step-on systems.
Yes. Heel lift is vertical movement (the heel rises upward). Heel slip is lateral or forward-backward movement (the heel slides side to side or forward and back). Both reduce control, but they have different causes and solutions. Heel lift is addressed through ankle-zone tension and heel pocket modifications. Heel slip is addressed through narrower heel counters, J-bars, and wider binding straps.
For regular riders (30+ days per season), plan to replace liners every 2 to 3 seasons. For occasional riders (fewer than 15 days per season), liners may last 4 to 5 seasons. Replace sooner if you notice increased heel lift, visible foam compression, or a loss of the original heel pocket shape. Many riders find that replacing liners mid-season restores their boot’s performance for the remainder of the season and beyond.
Yes, and in many cases you should. The most effective heel hold setup typically combines two or more solutions: J-bars plus a structured footbed, or a heat-molded liner plus optimized lacing. Start with the least invasive solution and add additional modifications only if needed. Stacking too many modifications can make the boot overly tight and uncomfortable.
Dramatically. Park riders who spend most of their time on flat terrain and small features are less affected by heel lift than freeride riders who carve at high speeds on steep terrain. Carving riders are the most sensitive to heel lift because even small amounts of heel movement create noticeable edge control problems at high speeds. Match the urgency of your heel lift fix to your riding style and terrain.
Check your lacing tension first, specifically in the ankle zone. Tighten the area over your instep (the top of your foot) and see if the heel lift diminishes. If it does, your lacing technique was the issue. If it does not, move to J-bars and a structured footbed. These two modifications solve heel lift for the majority of riders.
Yes, if the boot does not match your foot’s volume or shape. A brand-new boot from the wrong brand for your foot type can have significant heel lift from the first ride. This is why trying on multiple brands and models is essential before purchasing. Even the most expensive boot will perform poorly if it does not match your anatomy.
Conclusion
Heel lift is a solvable engineering problem. By systematically addressing volume, stability, and tension, you can transform your riding experience. A locked-in heel provides the confidence to charge harder, carve deeper, and stay on the mountain longer. Do not let a few millimeters of foam stand between you and your best riding season yet.
Start with the free solutions: check your lacing technique and binding setup. Move to affordable modifications: J-bars and aftermarket footbeds. If those are not enough, invest in heat-molded liners or professional boot fitting. And if all else fails, recognize that the boot itself may be the wrong match for your foot and seek out a model with a heel counter that fits your anatomy.
The most important takeaway from this guide is that heel lift is not a single problem with a single cause. It is the result of multiple interacting factors — boot fit, liner condition, foot biomechanics, lacing technique, binding setup, and riding style. Addressing each factor systematically will produce better results than any single modification in isolation. Take the time to diagnose your specific situation, and apply the solutions that target your root cause. Your heels — and your riding — will thank you.


