
Why Wax Your Snowboard? The Ultimate Guide to a Faster, Healthier Board
Every experienced rider knows the “catwalk crawl”—that agonizing moment on a flat section where your board begins to grab the snow, your momentum dies, and you’re forced to unstrap and skate while skiers breeze past you effortlessly. While many beginners view waxing as an optional luxury or a “pro-only” ritual, it is actually the most fundamental aspect of snowboard maintenance. In this masterclass, we will explore the microscopic science behind base friction, the preservation of expensive P-Tex materials, and how a properly tuned board fundamentally changes your carving mechanics. Waxing is the difference between fighting your equipment and flowing with the mountain. Understanding why snowboarding can be dangerous starts with maintaining your gear properly.
The “Why”: What Does Wax Actually Do?
To understand the necessity of wax, we must first look at a snowboard base under a microscope. A common misconception is that a snowboard base is a solid, plastic sheet. In reality, modern bases are comprised of millions of tiny pores and channels. Without wax, these pores are empty, creating a high-friction surface that behaves like a dry sponge against the snow. Here is the deep technical breakdown of why wax is non-negotiable.
1. Hydrophobic Performance and Friction Reduction
Contrary to popular belief, you aren’t actually sliding on ice or snow crystals. As your board moves across the surface, the pressure and kinetic energy generate a microscopic layer of water. You are essentially “hydroplaning.” Wax is a hydrophobic hydrocarbon; it repels water. For more on how this affects your riding, see our guide to why snowboarding is the best winter sport. When your base is saturated with wax, it prevents the microscopic water layer from “suctioning” to your board. Unwaxed bases create a vacuum effect, pulling against the snow rather than gliding over it. By applying temperature-specific wax, you optimize this water-repellency, ensuring the board stays on top of the moisture film regardless of whether the snow is a dry powder or a wet spring slush.
2. Structural Integrity and Oxidation Prevention
P-Tex (polyethylene) is susceptible to a process called “base burn” or oxidation. When a base is left dry, the plastic is exposed to oxygen and friction-generated heat. Over time, the material becomes brittle, white, and “fuzzy.” This isn’t just a cosmetic issue; oxidized P-Tex loses its ability to ever hold wax again, effectively killing the board’s performance. Learn more about why snowboarding is so fun when your board is running at peak performance. Waxing fills these pores, acting as a sealant that prevents oxygen from reaching the plastic. Think of it as a protective sacrificial layer—instead of the mountain grinding away your board’s core material, it grinds away the wax, which can easily be replaced. This is one of the key reasons why snowboarding can be dangerous if you neglect your gear.
3. Dynamic Turn Initiation and Edge Control
A waxed board is more predictable. When you initiate a turn, you are transitioning from the flat base onto your metal edges. If the base is “sticky,” this transition is jerky and requires more muscular effort to break the friction. A properly waxed board allows for a smooth, progressive “roll” onto the edge. This is particularly critical in technical terrain like tight trees or steep icy couloirs, where a split-second delay in board response can lead to a caught edge. Master the fundamentals with our guide to snowboard stopping techniques. Professional racers and park riders wax frequently not just for speed, but for the consistency of the board’s slide-to-grip ratio. Understanding why snowboarding is the best winter sport means understanding how maintenance affects every aspect of your ride.
Sintered vs. Extruded: Does Your Base Type Matter?
Understanding your base type is essential for your maintenance schedule. Extruded bases are created by melting polyethylene pellets and punching them into a sheet. They are less porous and “harder,” making them durable and low-maintenance, but they have a lower speed ceiling. Sintered bases are created by crushing pellets under high pressure without melting them, leaving massive amounts of “empty” space between molecules. These pores are designed to drink wax. A sintered base is much faster when waxed, but becomes a liability when dry—dropping in speed significantly more than an extruded base would. If you own a high-end board, you likely have a sintered base that demands frequent attention. For help choosing the right board for your riding style, see our guide to choosing your first snowboard.
The “When”: How Often Should You Wax?
The frequency of your waxing schedule depends on your “Snowboarding DNA”—how often you ride, where you ride, and how fast you want to go. While the 3-5 day rule is standard, environmental factors can shorten this window considerably. Man-made snow is much more abrasive than natural snow; it acts like sandpaper on your base. If you ride on hard-pack eastern ice, you may need to wax every two days to keep your edges hydrated. For more on why edge control matters, see our guide to snowboard turns for beginners.
Keep a close eye on the “Contact Points” (the widest parts of your board near the tip and tail). These areas experience the most friction during turns and will be the first to show signs of dryness. If the black base of your board starts to look grey or ash-colored, you have already waited too long. Many riders are now adopting “Hot Scraping”—a technique used to clean the base while simultaneously hydrating it—as a weekly ritual during the height of the season. Think of it like brushing your teeth: the consequence of skipping a session isn’t catastrophic in isolation, but the cumulative neglect compounds quickly. This is one of the key reasons why snowboarding can be dangerous if you neglect your gear.
Snow Condition Waxing Guide
Different snow types don’t just affect which wax you choose; they affect how quickly that wax wears off. Use this as your seasonal planning framework:
| Snow Condition | Wax Hardness | Color Code | Temp Range | Wax Duration |
|---|---|---|---|---|
| Sub-zero powder | Very Hard | Green / Blue | Below 15°F / -9°C | 4–6 days |
| Cold groomed | Hard | Blue | 15–25°F / -9 to -4°C | 3–5 days |
| All-mountain typical | Medium | Violet / Purple | 23–32°F / -5 to 0°C | 3–4 days |
| Wet / spring | Soft | Yellow / Red | Above 30°F / -1°C+ | 1–2 days |
| Man-made / icy | Hard | Blue | Any | 1–2 days (abrasive) |
The Fluorocarbon Revolution: Eco Wax Is Now the Standard
One of the most significant shifts in snowboard maintenance culture in recent years has been the global ban on high-fluorocarbon (HF) and low-fluorocarbon (LF) waxes in competitive skiing and snowboarding. The FIS (Fédération Internationale de Ski) implemented this ban at competition level because PFAS (per- and polyfluoroalkyl substances) are persistent environmental toxins that contaminate mountain watersheds. Once introduced to water systems, these “forever chemicals” do not break down and have been linked to health concerns in humans and wildlife alike.
For recreational riders, this shift has a practical benefit: modern fluoro-free hydrocarbon waxes have improved dramatically in performance and are now fully competitive with the old fluorinated options in all but the most extreme racing conditions. Brands like MountainFLOW, Purl Wax, and Dominator now offer waxes using plant-derived esters and refined hydrocarbons that provide excellent glide, superior eco-credentials, and a noticeably less harsh chemical smell during application. If your wax kit still contains older fluoro-based waxes, transition to a fluoro-free alternative—both for the environment and because some resorts are now restricting the use of HF waxes in their wax rooms. Learn more about why snowboarding is the best winter sport and how to keep it sustainable.
🌱 Eco Tip: When scraping and brushing, collect your wax shavings in a newspaper or sheet of cardboard rather than letting them fall into the snow or drain. Used hydrocarbon wax shavings should be disposed of in your household waste bin, not rinsed into drains. Small habits add up across a riding community of millions.
The “What”: Tools You Need for Hot Waxing
Professional results require professional tools. While you can “hack” a wax job, investing in a dedicated kit prevents damage and ensures your wax penetrates deeply into the P-Tex structure. Modern wax irons are designed with thick baseplates that hold heat longer, preventing the “cycling” effect of a clothing iron that causes uneven absorption.
Temperature-Regulated Waxing Iron
This is your most important tool. A dedicated iron has a precise thermostat that keeps the wax at its melting point without hitting the “smoke point” which destroys the wax’s chemical polymers. It ensures the heat reaches the board base without delaminating the core. Entry-level models start around $40–50; professional irons with digital readouts run $100–200.
Hydrocarbon or Fluoro-Free Wax
Environmentally friendly waxes are the current standard. Choose “All-Temp” for versatility, or “Cold” wax (blue) for mid-winter and “Warm” wax (red/yellow) for spring. Each has a different hardness level to match the snow crystal shape. A quality wax brick costs $10–25 and lasts many sessions.
6″ Plexiglass Scraper
A sharp scraper is the difference between a 10-minute job and an hour of frustration. Use a plastic scraper (not metal!) to remove surface wax. Remember: the wax that makes you fast is inside the board, not the thick layer on top. Keep a scraper sharpener in your kit to maintain a clean 90° edge.
Multi-Brush System (Brass, Nylon, Horsehair)
Brushes create “structure” in the wax. A brass brush cleans old dirt; a nylon brush removes excess wax from the base’s micro-channels; a horsehair brush provides a high-speed polish for the final finish. Roto-brushes (drill-attached) are faster but not necessary for recreational use.
Base Cleaner / Citrus Degreaser
Isopropyl alcohol or a citrus-based cleaner removes old wax residue, tree sap, lift grease, and grit before you apply fresh wax. Applying wax over a dirty base traps contaminants inside the P-Tex, reducing performance and accelerating base wear. A bottle lasts a full season for most riders.
Scraper Sharpener
A dull scraper drags and smears instead of cutting cleanly. A simple acrylic or metal sharpening block—costing less than $10—restores your scraper’s 90° edge in seconds. Sharpen before every waxing session for the cleanest possible wax removal.
Setting Up Your Home Waxing Workspace
One of the most underrated aspects of quality waxing is the environment in which you work. A poorly configured workspace leads to inconsistent results, damaged floors, and unnecessary frustration. The good news is that a functional home tuning station requires almost no permanent investment.
The first rule is temperature control. Your board needs to be at room temperature before waxing. A board that is cold from being stored in a garage will cause the wax to “shock cool” too quickly during application, preventing deep penetration into the pores. Bring your board indoors at least two hours before a wax session. The ideal workspace temperature is between 60–70°F (15–21°C). If you’re in a garage, a space heater will do the job.
For a work surface, you need something sturdy at roughly waist height. Professional snowboard tuning vises are ideal and clamp to a workbench, but stacks of books, a sawhorse, or a sturdy coffee table all work. The key requirement is stability—the board must not rock or slide when you’re applying pressure with the scraper. Protect your floor with a sheet of cardboard or an old tarp; wax drips and shavings will go everywhere. Work in a ventilated space, particularly when using an iron; even fluoro-free wax produces fumes when overheated. Our guide to snowboard stance setup covers how proper equipment positioning affects your overall performance.
Lighting matters more than you’d think. A good angle lamp or a head torch pointed at the base allows you to see the subtle “wet trail” the iron leaves as you work, and to identify any missed dry spots or remaining wax after scraping. Many amateur wax jobs are undone by poor lighting that prevents the rider from seeing they’ve left a thick wax layer on the surface.
Iron Temperature Settings: The Complete Reference
Incorrect iron temperature is the single most common cause of both wax failure and board damage. Too cold and the wax won’t penetrate the pores; too hot and you’ll scorch the base, produce toxic smoke, and potentially delaminate the board’s core construction. Most wax packaging includes a recommended iron temperature, but this reference table covers the standard ranges:
| Wax Type | Hardness | Recommended Iron Temp | Visual Cue |
|---|---|---|---|
| Very Hard (Green/Cold) | Hardest | 230–250°F / 110–120°C | Wax drips slowly; leaves thin stream |
| Hard (Blue) | Hard | 220–240°F / 104–115°C | Wax flows steadily when pressed to iron |
| Medium (Violet) | Medium | 210–225°F / 99–107°C | Wax melts within 1–2 seconds of contact |
| Soft (Red/Yellow) | Soft | 200–215°F / 93–102°C | Wax drips quickly; runs off iron |
| All-Temp | Blend | 215–230°F / 102–110°C | Follow package instructions specifically |
🚨 Smoke = Stop Immediately
If your wax begins to smoke on the iron or on the board, the temperature is too high. This destroys the wax’s chemical structure, renders it ineffective, and produces toxic fumes. Lift the iron, reduce the temperature, and let the board cool before continuing. Never exceed 250°F / 120°C for any recreational wax application.
The “How”: A Step-by-Step Guide to Hot Waxing
Critical Warning: Overheating the Base
Your snowboard is a sandwich of wood, fiberglass, and epoxy. If you leave a hot iron in one place for more than 2 seconds, you risk a “core bubble”—where the internal glues fail. Always keep the iron moving!
- Base Preparation & Cleaning: Start by securing your board in vises or on two sturdy blocks. Use your brass brush to scrub from tip to tail; this opens the pores and pulls out embedded dirt. Wipe the board with a citrus base cleaner or rubbing alcohol on a clean rag, then let it dry for 15–20 minutes. If you see white “base burn,” spend extra time brushing to remove the dead plastic fibers before proceeding.
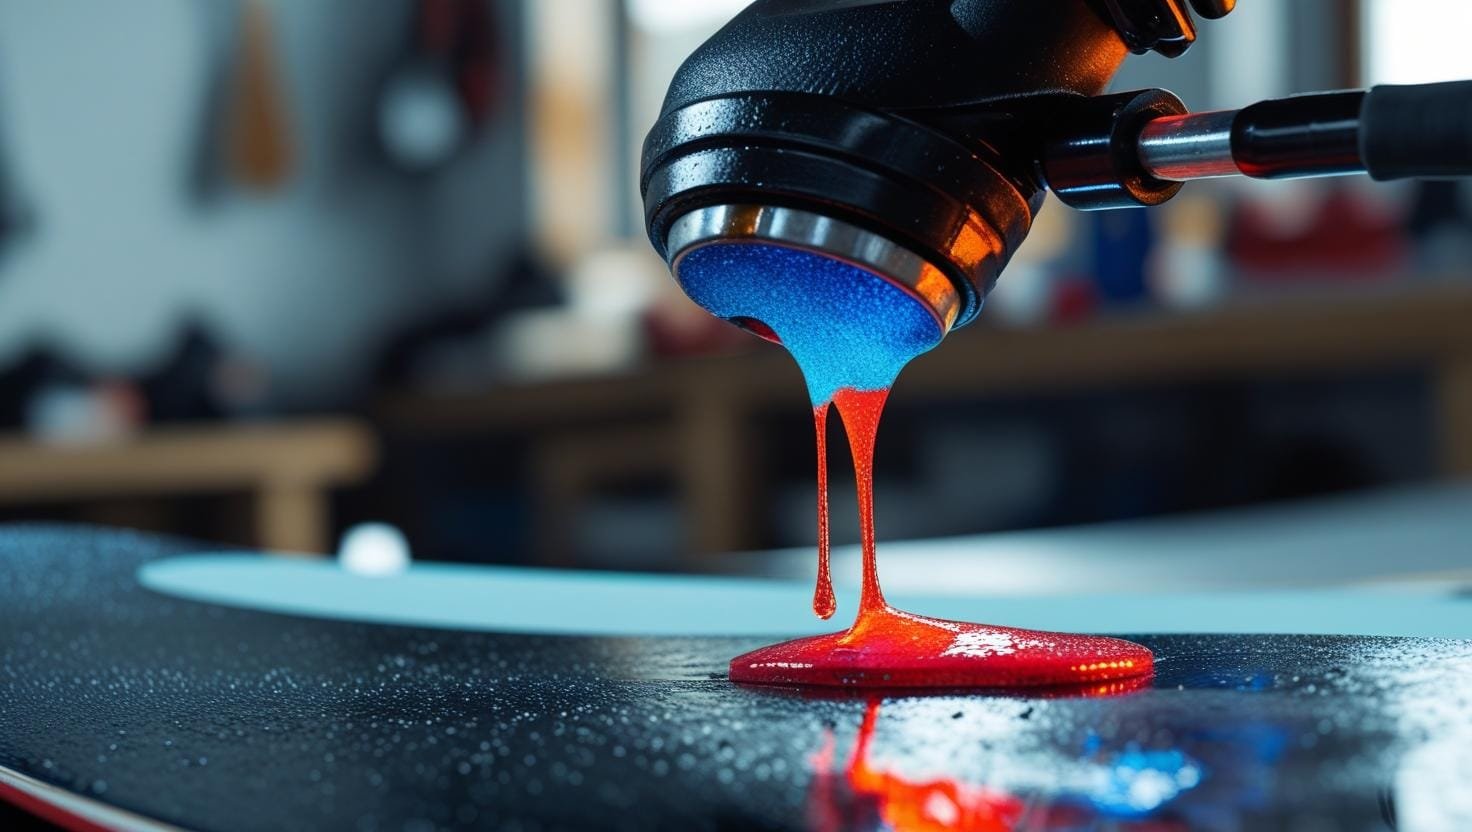
- The Drip Method: Hold the iron vertically over the board. Press your wax bar against the iron plate, letting the molten wax drip onto the base. Create a “snake” pattern or zig-zag along the length of the board. You don’t need a puddle; a steady line of drips spaced 2–3 inches apart is enough. Be generous toward the tip and tail contact zones.
- Thermal Distribution (Ironing): Place the iron on the base and slowly spread the wax. You should see a “wet trail” about 3–4 inches long following the iron. Move constantly and never pause. Your goal is to heat the P-Tex so it expands, allowing it to “drink” the liquid wax. The topsheet of the board should feel lukewarm to the touch, indicating the heat has fully penetrated the core.
- The 45-Minute Cure: This is where most beginners fail. As the wax cools, the P-Tex pores contract, “locking” the wax inside. If you scrape while the board is still warm, you pull the wax right back out of the pores. Let it sit at room temperature—not outside in the cold—until the board is cold to the touch. Cooling outside causes rapid contraction that pushes wax back to the surface rather than sealing it in.
- Precision Scraping: Sharpen your scraper first. Hold your plexiglass scraper at a 45-degree angle. Push with both thumbs away from you, working from tip to tail. Use the scraper’s corner notch (if it has one) to scrape wax out of the groove along the metal edges. Scrape until the base looks like it has no wax on it at all. Underscraping is the most common beginner mistake—too much surface wax creates suction and slows you down.
- Structuring (Brushing): Use your nylon brush with significant downward pressure, working tip to tail, 15–20 strokes minimum. This removes the “micro-excess” from the base’s structure lines. Follow with a horsehair brush for a mirror-like finish. Your board is now a hydrophobic weapon ready for the mountain. Read more about why snowboarding is so fun when your board is running perfectly.
Hot Scraping: The Weekly Base Reset
Hot scraping is a technique borrowed from professional race technicians that is gaining popularity among passionate recreational riders. Instead of applying a fresh layer to a dirty base, you perform a “sacrificial” wax: apply a generous coat of your cheapest all-temp wax, immediately iron it across the board at slightly higher than normal temperature, and then scrape while the wax is still hot (or within 30 seconds of the iron passing). The heated wax acts as a solvent, lifting embedded dirt, old wax residue, and grit out of the base’s pores. The whole process takes less than 10 minutes. After hot scraping, your base is clean and primed to accept a proper performance wax application. Many serious riders begin every waxing session this way, effectively combining the cleaning and preparation steps into a single, efficient process. For a complete overview of snowboard maintenance, see our guide to snowboard comparison to understand different base types.
Edge Tuning: The Skill Most Riders Overlook
Waxing gets all the attention, but edge tuning is equally important to your board’s performance—and far more overlooked by intermediate and casual riders. Your metal edges are the primary contact point with the snow during carving, and their condition directly determines your ability to hold on ice, initiate turns precisely, and scrub speed with control. Master the fundamentals with our guide to snowboard stopping techniques. A waxed board with dull or burr-covered edges is like a sharp chef’s knife on a wet cutting board: it looks right but won’t do what you need it to do. Understanding snowboard fall safety includes understanding how edge maintenance prevents accidents.
Understanding Edge Angles and Bevels
Edges have two tuneable angles: the base bevel (the angle of the edge relative to the base of the board) and the side bevel (the angle of the edge relative to the sidewall). These are measured in degrees. The factory standard for most snowboards is a 1° base bevel and a 90° side bevel (meaning the side edge is filed to perfectly perpendicular to the base).
More advanced tuning involves intentionally adjusting these angles. A larger base bevel (2–3°) “detuned” the edge slightly, making it more forgiving for park and freestyle riders who don’t want to catch edges on lip tricks. A sharper side bevel (88° or 87°) creates an extremely “grippy” edge that bites into hard-pack and ice with authority—popular with carvers and freeride riders. Understanding your riding style helps you decide if the factory bevel is right for you or if tuning toward a sharper or more forgiving setup would improve your experience. See our snowboard comparison guide for more on how different boards perform.
| Riding Style | Base Bevel | Side Bevel | Character |
|---|---|---|---|
| Park / Jib | 2–3° | 90° | Forgiving, catches less on rails |
| All-Mountain | 1° | 90° | Balanced grip and forgiveness |
| Freeride / Powder | 0.5–1° | 88–89° | Reliable edge hold in variable terrain |
| Hardpack / Carving | 0.5° | 87–88° | Maximum edge grip on ice and groomed |
Step-by-Step Edge Tuning at Home
- Inspection — Finding Burrs and Rust: Run your fingernail down the length of the edge. If it catches anywhere, you have a burr. A burr is a microscopic fold in the metal caused by impact (rocks, rail contact, or aggressive scraping). Visually inspect for surface rust; light rust appears as an orange tinge, while heavy rust creates pitting that requires professional grinding to repair.
- Deburring with a Diamond Stone: Use a fine grit diamond stone (200–400 grit) and run it lightly along the base edge at a flat angle. This removes surface burrs and oxidation. Always work tip to tail. Repeat on the side edge. After deburring, the edge should feel smooth with no catching points. This step alone, even without full sharpening, dramatically improves edge grip.
- Side Edge Filing: Use an edge file guide set to your desired bevel angle (87°, 88°, or 90° for most recreational riders). Mount your file in the guide, apply even downward pressure with both thumbs directly over the edge, and use long, smooth strokes from tip to tail. Overlap each stroke slightly. Continue until a consistent scratch pattern runs the full length of the edge—this indicates even metal removal. Do not file the tip and tail “contact zone” (approximately 10–15 cm from each end) if you want a forgiving freestyle setup; leave these sections intentionally “detuned” to prevent catching.
- Base Edge Beveling: Use a dedicated base edge guide set to your desired angle (typically 0.5–1°). Working from base side, run a diamond stone or file along the entire base edge. This is a subtler adjustment than side beveling; typically 5–10 light passes is sufficient to refine the angle without dramatically removing metal.
- Polishing: After filing, run a fine ceramic stone (1000+ grit) along both edges to remove any micro-scratches left by the file. This creates a polished surface that is actually sharper than a rough-filed edge because it has a cleaner metal-to-snow contact area. Finish with a couple of strokes from a deburring stone to remove any metal filings.
- Final Check: Your edge should shave a thin curl of fingernail when lightly dragged across it—this is the technician’s test for adequate sharpness. Don’t cut yourself; a light stroke is sufficient. Then wax your board; always wax after tuning edges, as the filing process leaves bare, unprotected metal that will rust quickly if not sealed.
💡 Pro Tip: Deburr your edges after every trip involving rails or rocky terrain, even if you don’t do a full wax. A single rock strike that creates a burr will ruin the smooth carving feel of an otherwise excellent edge tune. Keeping a pocket diamond stone in your kit bag for quick mountain-side touch-ups takes 90 seconds and can save an entire run. For a deeper understanding of why edge control matters, see our guide to snowboard stopping techniques.
P-Tex Base Repair: Fixing Gouges and Scratches
No matter how carefully you ride, your base will eventually sustain damage beyond what wax can fill. Rocks, exposed rails, and hard landings create gouges that compromise glide and, if deep enough, compromise structural integrity. P-Tex candle repair is a skill every serious rider should learn; it saves significant shop fees and can be performed on the road with minimal equipment.
Assessing the Damage: What Can You Fix at Home?
Not all damage is equal. Shallow surface scratches (less than 1mm deep) can usually be filled by a regular wax cycle, which slightly fills minor abrasions. Moderate gouges (1–3mm deep, not touching the wood core) are ideal for P-Tex candle repair at home. A core shot is a gouge that penetrates fully through the base and exposes the wood core underneath—typically identifiable by a beige or tan color visible at the bottom of the gouge. Core shots require professional base weld repair using a heated base extruder or professional iron, as a candle repair will not bond adequately to the exposed fiberglass and wood. For more on board construction and durability, see our snowboard comparison guide.
P-Tex Candle Repair: Step-by-Step
- Clean and Prepare: Use rubbing alcohol to thoroughly clean and dry the damaged area. Any moisture or wax contamination will prevent the P-Tex from bonding. Use a sharp knife to trim any raised or “fuzzy” polyethylene fibers around the gouge edges until the walls of the gouge are clean and defined.
- Light the Candle: Use a match or lighter to ignite the tip of the P-Tex candle. The ideal flame is small and blue. If it turns orange or sooty, the candle is burning too hot and depositing carbon into your repair. To prevent carbon formation, hold a metal scraper or coin just below the flame; this captures soot before it drops into the gouge. Keep the area well-ventilated—P-Tex burns at over 970°F and produces smoke.
- Fill the Gouge: Hold the candle close to the base and allow the melted P-Tex to drip into the gouge. Slightly overfill the gouge—the material shrinks as it cools. For deeper gouges, fill in multiple thin layers, allowing each to cool before adding the next; a single thick pour will trap air bubbles.
- Allow Full Cooling: Let the repair cool completely to room temperature. Do not rush this with cold water or ice, as thermal shock can cause the repair to crack or pull away from the base material.
- Scrape and Sand: Use a metal scraper (the one time you use metal, not plastic) to shave the repair flush with the base. Work at a very low angle to avoid creating a depression. Follow with 320-grit sandpaper and then a fine fibertex pad to blend the repair into the surrounding base.
- Wax Immediately: A P-Tex repair leaves a slightly rough surface. Waxing immediately after repair seals the new material and integrates it into the board’s base structure. The repair will be fully load-bearing and perform comparably to the original base material after one or two wax cycles. For more on why maintenance matters, see our guide to why snowboarding is the best winter sport.
End-of-Season Storage Waxing: The Off-Season Protocol
The most damaging thing most riders do to their boards has nothing to do with riding—it’s how they store them during the off-season. Eight to nine months of dry storage in an un-waxed state causes more cumulative base oxidation than an entire season of aggressive riding. The solution is storage waxing: a specific end-of-season technique that keeps the base saturated and protected while the board is stashed until next winter.
The Storage Wax Process
Storage waxing follows the same hot wax application process as a standard wax job, with one critical difference: you do not scrape it off. Apply a thick, generous coat of a hard all-temp or cold wax, iron it in thoroughly, and then allow the board to cool completely. Leave the full wax layer on the base for the duration of storage. This thick surface wax acts as a physical barrier between the P-Tex and the oxygen in the air, completely preventing oxidation. When you retrieve the board at the start of next season, your first task will be to scrape and brush away the storage wax, revealing a perfectly hydrated, oxidation-free base underneath. Read more about why snowboarding is so fun when your board is properly maintained.
Before applying storage wax, perform a complete pre-storage maintenance cycle: clean the base with citrus cleaner, touch up your edges with a diamond stone, perform any P-Tex repairs needed, and dry the edges completely to prevent rust formation. A light application of rust inhibitor on the metal edges (a thin wipe with a clean cloth lightly touched with WD-40, then wiped dry) provides additional protection against the humidity that inevitably builds in garages and storage spaces over summer months.
Storage Conditions and Board Health
Where you store your board matters as much as how you prepare it. The ideal storage environment is cool, dry, and dark. Avoid:
- Cars and garages in summer heat: Temperatures can reach 150°F+ inside a vehicle or sun-exposed garage. These temperatures will soften the epoxy resins in the board’s construction and can cause delamination of the topsheet or base.
- Concrete floors: Concrete wicks moisture. A board stored directly on concrete will have the moisture drawn into the base edges, accelerating rust formation. Store the board on hooks, a rack, or a foam pad.
- Direct sunlight: UV exposure degrades both the topsheet graphics and the epoxy, causing discoloration and brittleness over time. A board bag or cloth cover provides adequate UV protection. Our guide to the best snowboard bags can help you protect your investment.
- Compressed storage: Don’t stack heavy items on top of your board during storage. Sustained pressure on a cambered board can permanently alter its profile. For more on board profiles, see our snowboard comparison guide.
DIY Waxing vs. Shop Tune: The Real Cost Breakdown
One of the most common objections to home waxing is the upfront cost of tools. Let’s do the honest math. A standard shop wax at most resorts costs between $25–50, with a full tune (wax + edge work) running $50–100. A rider who visits the mountain 20 days per season and waxes every 3 days needs approximately 6–7 wax jobs. At $30 average per shop wax, that’s $180–210 per season in waxing costs alone.
A complete beginner waxing kit (iron, scraper, brush, wax) can be assembled for $75–100. Professional kits with edge tuning tools run $150–200. The tool investment pays for itself within one season for any rider who rides more than 10 days annually. The wax cost per application at home is typically $2–5 per session versus $30+ at a shop—a savings that compounds dramatically over multiple seasons since your tools last years. Learn more about why snowboarding is better than skiing for more on the cost advantages.
🎿 Beginner Home Kit (~$75–100)
What you need:
- Entry-level wax iron
- All-temp wax bar
- 6″ plastic scraper
- Nylon brush
- Base cleaner
Best for: Riders who go out 5–10 days/season and want basic protection without edge work.
🏔️ Intermediate Kit (~$150–200)
What you need:
- Mid-range iron with digital display
- Cold, all-temp, and warm wax
- Scraper + sharpener
- Brass, nylon, and horsehair brushes
- Diamond stone for deburring
- Citrus base cleaner
Best for: Dedicated riders who want full waxing and basic edge maintenance.
🏆 Full Tune Kit (~$200–300)
What you need:
- Professional iron with thermostat
- Full wax range (green through yellow)
- Edge file guides (87°, 88°, 90°)
- Diamond stones (coarse & fine)
- Ceramic finishing stone
- Full brush set
- P-Tex candles (clear & black)
- Fibertex polishing pads
Best for: Serious riders who want professional-level results at home, including edge tuning and base repair.
Splitboard Waxing: Special Considerations for Backcountry Riders
Splitboarders operate in a different performance environment than resort riders, and their waxing protocol reflects this. A splitboard has two distinct functional surfaces: the glide base (used when descending) and the climbing skins (applied for ascent). Most of the waxing knowledge covered in this guide applies directly to the glide base—you wax a splitboard’s base exactly as you would a solid snowboard. For a complete overview of snowboard types, see our snowboard comparison guide. However, there are critical additional considerations that splitboard-specific riders must understand.
Skin Interface and Wax Contamination
The most important rule for splitboarders: never get wax on your climbing skins. Skins adhere to the board via a glue layer that must contact the P-Tex base directly. Any wax contamination of the skin’s glue layer dramatically reduces adhesion, creating a dangerous situation on steep ascents where skin blow-offs can cause falls. When hot waxing a splitboard, pay particular attention to the split line—the edges of the board where the two halves meet. Wax that migrates into this zone can prevent the board from snapping together cleanly. Wipe the split line and the binding channel areas clean with base cleaner after each wax job.
Glide Wax for Touring: Harder is Better
In a touring context, where you may spend 3–4 hours ascending before a single descent, you want a wax that lasts as long as possible on the glide base. Cold, hard waxes (blue or green) are preferable for splitboard applications even when snow temperatures might typically call for a softer wax, because they are more durable and less likely to wear off during the tour or during skin-on skating sections. Save the soft spring waxes for resort boards where the speed benefit of a soft wax outweighs the shorter durability. For more on gear selection, see our guide to the best snowboard socks and other essential accessories.
Skin Maintenance
While not a waxing task, skin care is an integral part of splitboard maintenance. After each tour, clean your skins with a skin-specific cleaner to remove snow crystals and dirt that accumulate in the plush and reduce glide efficiency. Store skins in a warm, dry place with the glue sides together (or with their protective mesh covering); cold storage can permanently alter the adhesive properties. For more on storage solutions, see our guide to the best snowboard bags. Apply a skin conditioner or glide treatment to the plush once per season to maintain the mohair or nylon fibers’ water-repelling properties. For a complete overview of backcountry riding gear, see our guide to choosing your first snowboard.
Professional Snowboard Maintenance FAQ
1. Do I need to wax a brand-new snowboard?
Yes, absolutely. Manufacturers apply a “factory wax” which is actually a cheap paraffin designed to prevent the base from drying out in a warehouse or during shipping. It is not meant for performance. A proper hot wax before your first day will saturate the pores and provide a much better baseline for the rest of the board’s life. If you’re still shopping for your first board, see our guide to choosing your first snowboard.
2. What happens if I use a clothing iron?
Clothing irons have wide temperature fluctuations and “steam holes” that trap wax. More dangerously, they can easily exceed 300°F, which is the point where P-Tex begins to distort and the board’s epoxy starts to fail. A $40 wax iron is dramatically cheaper than a $500 replacement board. Learn more about snowboard comparison to understand the different board types and their maintenance needs. If you absolutely must use a clothing iron in an emergency, use the lowest “wool” setting and keep it moving constantly—but invest in a dedicated iron before your next session.
3. Can I “over-wax” my board?
You cannot over-wax in terms of frequency—the base can only absorb so much, and excess simply sits on the surface. However, you can over-wax by not scraping enough. Too much surface wax creates a “sticky” feeling, attracts dirt, and actually slows you down by creating suction against the snow. Always scrape until you think you’ve scraped too much—then scrape a bit more.
4. Why is my base turning white even after I waxed it?
This is base burn. It occurs when the base has been dry for too long and the plastic fibers have been physically damaged by friction and oxidation. The white “hairs” you see are delaminated polyethylene fibers. You may need to have your board stone-ground at a professional shop to shave off the damaged layer and expose fresh, healthy P-Tex. A stone grind essentially resets the base to factory condition and is typically worth doing once every 2–3 seasons for frequently ridden boards.
5. Should I remove my bindings before waxing?
It is recommended. The binding screws pull the base slightly inward, creating subtle dimples that prevent perfectly flat wax penetration. If you wax with bindings on, you won’t achieve a consistent surface, and you risk the heat expanding the metal inserts against the core. At the very minimum, loosen all binding screws 3–4 turns before waxing, then retighten after the board has cooled. Always photograph your binding positions first, in case you need a reference for reinstalling. If you need help with binding setup, check our snowboard bindings guide.
6. What is “All-Temperature” wax?
All-temp wax is a blend of hard and soft hydrocarbons designed to perform in the most common range (approximately 15°F to 35°F). It’s perfect for most resort riders who don’t want to manage a wax collection. However, if you ride in consistent sub-zero temperatures or 50°F spring slush, temperature-specific wax will be noticeably faster. The performance gap between all-temp and specific wax widens as conditions become more extreme. See our guide to why snowboarding is the best winter sport for more on how conditions affect your ride.
7. Is “rub-on” wax as good as hot waxing?
No. Rub-on wax only sits on the very surface and usually wears off within 1–2 runs. It’s a great emergency fix when your board goes dry mid-trip and a proper wax job isn’t possible, but it does nothing to hydrate the base or provide long-term structural protection. Think of rub-on wax as chapstick and hot wax as a proper moisturizer—one is a temporary surface treatment, the other delivers active ingredients beneath the surface.
8. How do I know when I’ve scraped enough?
Keep scraping until you literally cannot see any more wax shavings coming off the board. The base should look smooth and matte—not shiny or “wet.” You are trying to get down to the level where the only wax remaining is the wax inside the P-Tex pores. If you hold the board at an angle to a light source, you should see the base structure (small parallel lines running tip to tail) clearly, with no filling of wax between the lines.
9. Does waxing help with scratches and gouges?
Only very minor surface scratches. Wax can fill tiny abrasions and temporarily smooth a roughened surface, but for anything deeper than approximately 1mm, you need P-Tex repair. Wax will not stay inside a meaningful gouge for more than a few turns; once it’s scraped away by snow, the gouge is exposed and collecting dirt again. Identify and fill any significant gouges with P-Tex before each wax session.
10. Why do my edges rust if I wax my board?
Wax doesn’t prevent edge rust—drying does. After waxing, ensure you wipe your metal edges completely dry with a clean cloth. If you store your board in a damp bag after riding, the moisture trapped against the steel will cause oxidation regardless of how much wax is on the base. A light touch of a rust inhibitor on bare metal, or ensuring complete drying before storage, is the only reliable prevention for edge rust. For safety tips related to edge maintenance, see our snowboard fall safety guide.
11. How do I sharpen my wax scraper?
A dedicated scraper sharpener (essentially a small metal guide with a harder surface) is the best tool—run the scraper’s edge across it 5–10 times to restore a clean 90° corner. In the field, you can use a smooth metal file, a diamond stone, or even the back of a hacksaw blade to refresh the edge. A properly sharpened scraper cuts cleanly through the wax layer in thin, ribbon-like curls. A dull scraper smears and drags, leaving a cloudy residue on the base. Sharpen your scraper before every waxing session.
12. When should I take my board to a professional shop instead of tuning at home?
Professional shop service is warranted in four situations: (1) when your board shows significant core shots or delamination that requires a base weld; (2) when the base has become severely concave or convex (visible by placing a true-bar across the base), which requires a stone grind to restore a flat surface; (3) when edges are heavily rusted or damaged and require machine grinding to restore profile; and (4) at the start of a new season as an annual deep-service, even for riders who wax regularly at home. A seasonal professional stone grind and full tune typically costs $50–100 and resets the board to an excellent baseline for the self-service maintenance that follows. Read more about why snowboarding is so fun when your board is running at peak performance.
The Complete Seasonal Snowboard Maintenance Checklist
Use this as your master reference for keeping a board in peak condition across every phase of the season. For more on why maintenance matters, see our guide to why snowboarding is so fun — a well-tuned board is the key to maximizing that fun.
🏁 Start of Season
- Scrape and discard previous season’s storage wax
- Inspect base for delamination or severe damage
- Repair any gouges with P-Tex candle
- Deburr edges with diamond stone
- Full edge tune (file + polish)
- Hot wax with season-appropriate wax
- Check and tighten all binding screws
- Inspect binding straps and buckles
🏂 Every 3–5 Riding Days
- Hot wax with temperature-appropriate wax
- Deburr edges if needed (after rocks or rails)
- Check for new gouges requiring P-Tex
- Wipe edges dry before storage
🔧 Monthly During Active Season
- Full base clean with citrus cleaner
- Hot scrape to remove accumulated dirt
- Edge tune (file + ceramic polish)
- Check binding screw torque
- Inspect highback forward lean settings
📦 End of Season
- Deep clean base with citrus cleaner
- Full P-Tex repair of all gouges
- Edge tune and polish
- Apply rust inhibitor to edges, wipe dry
- Apply thick storage wax coat — do NOT scrape
- Store in cool, dry, dark place on wall hooks
- Place silica gel packet inside board bag
Quick Reference: Waxing Troubleshooting Guide
Even experienced riders encounter waxing problems. Here’s how to diagnose and fix the most common issues. For more on troubleshooting your riding, see our guide to snowboard turns for beginners.
| Symptom | Likely Cause | Fix |
|---|---|---|
| Board feels slow immediately after waxing | Insufficient scraping; too much surface wax | Rescrape aggressively until base looks dry and matte |
| Wax wears off after 1–2 runs | Board not fully cooled before scraping; warm conditions; soft wax choice | Let cure 45+ min; switch to harder wax for conditions |
| Wax won’t stick to base | Base burn / oxidation; contaminated surface | Hot scrape to clean, consider shop stone grind |
| Board feels “sticky” rather than fast | Using warm/soft wax in cold snow; wax not scraped enough | Use temperature-correct wax; scrape more thoroughly |
| Base looks milky white after waxing | Iron temperature too low; wax cooled before penetrating | Increase iron temp slightly; work faster between dripping and spreading |
| Iron smoking during application | Iron temperature too high | Stop immediately; reduce temp; let board cool before restarting |
| Edges catching unexpectedly on groomed snow | Edges too sharp (especially tip/tail); need detuning | Lightly file tip and tail 10–15cm with a diamond stone to dull |
| Edge grip poor on ice despite fresh wax | Burrs or dull edges | Deburr and file edges; check for visible rust |


