
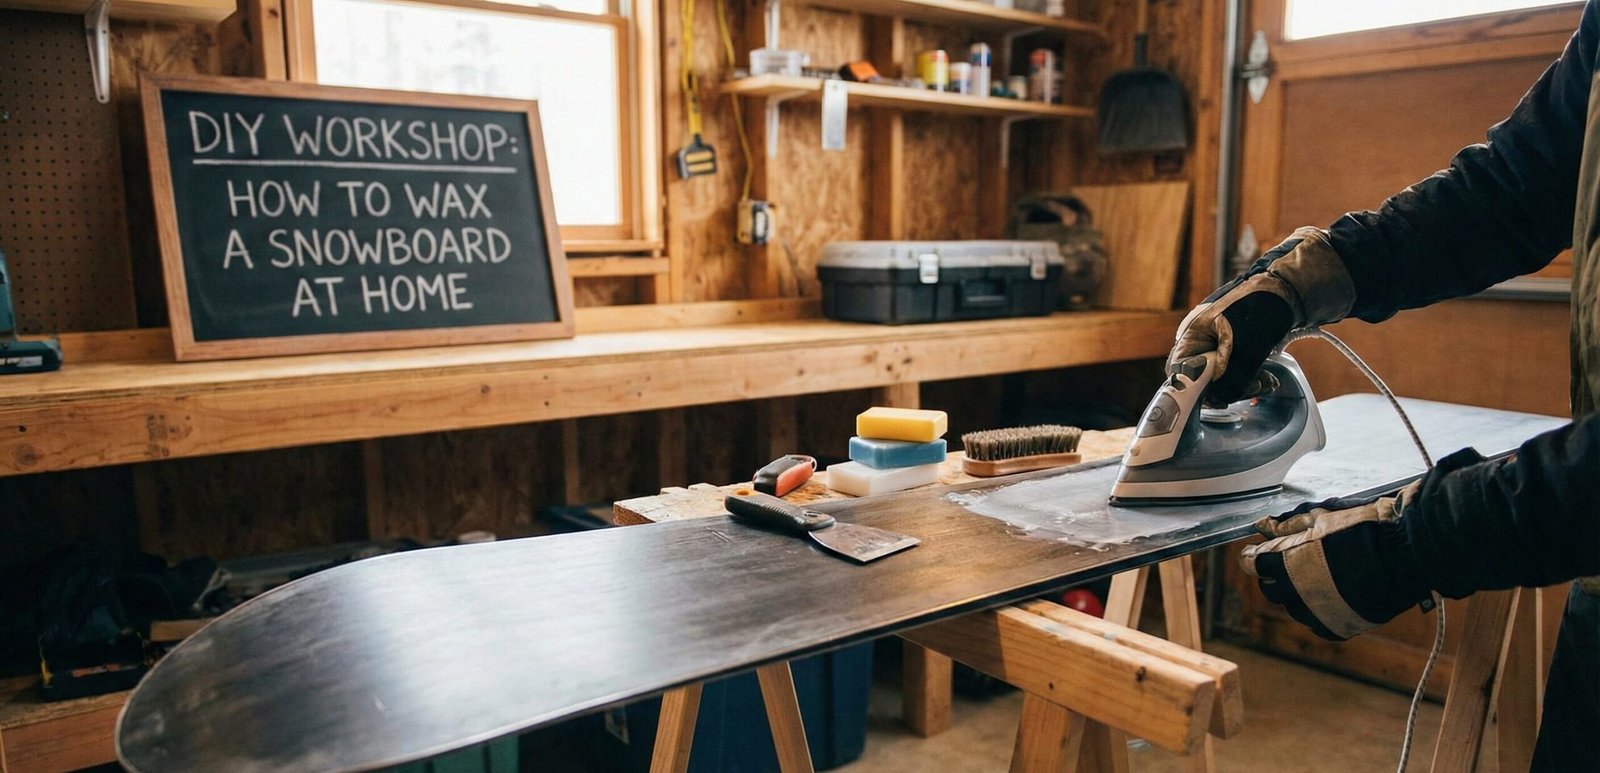
Mastering the Glide: The Ultimate Guide on How to Wax a Snowboard at Home
There is a specific feeling that every snowboarder chases. It isn’t just the adrenaline of a steep drop or the satisfaction of landing a jump; it’s the silence of the glide. That moment when your board moves so effortlessly across the snow that it feels like you’re defying friction completely. To achieve that, you don’t need a brand new board every season, but you do need to know how to wax a snowboard at home.
Many riders assume that factory wax lasts forever, or that waxing is a dark art best left to shop technicians. Neither is true. Learning to maintain your own gear not only saves you money in the long run, but it also connects you deeper to the sport. It helps you understand why you should wax your snowboard regularly and how it impacts your performance.
Table of Contents
- The Economics of DIY Waxing
- Essential Gear: Your Home Waxing Kit
- Understanding Snowboard Wax Types and Temperature Ratings
- Sintered vs. Extruded Snowboard Bases: What You Need to Know
- How to Tell When Your Snowboard Needs Wax
- How Often Should You Wax Your Snowboard
- Step-by-Step Waxing Tutorial (Steps 1–7)
- Snowboard Wax Iron Temperature Guide
- How to Remove Old Wax from a Snowboard
- How to Clean a Snowboard Base Properly
- Snowboard Base Repair: Fixing Scratches and Gouges with P-Tex
- Snowboard Edge Tuning and Sharpening at Home
- Rub-On Wax vs. Hot Wax: Which Is Better?
- Best Snowboard Wax for Cold Weather Riding
- Best Snowboard Wax for Warm Weather and Spring Conditions
- Waxing Your Snowboard for Powder Days
- Snowboard Wax for Icy and Hardpack Conditions
- Park Riding Wax: What Freestyle Riders Should Know
- Advanced Waxing: Race Waxing and Graphite Wax
- How to Wax a Snowboard Without an Iron
- Snowboard Maintenance Schedule: Pre-Season, Mid-Season, End-of-Season
- How to Store Your Snowboard for Summer
- Snowboard Tuning at Home: Complete DIY Tune-Up Guide
- Professional Wax vs. DIY Wax: Cost Comparison
- Snowboard Wax Brands Compared
- Common Waxing Mistakes and How to Avoid Them
- Snowboard Maintenance Checklist
- Snowboard Base Structure: Why It Matters and How to Add It
- How to Detune Snowboard Edges
- Snowboard Edge Angle Guide: What Angle Should Your Edges Be
- Best Snowboard Waxing Kits for Beginners
- Eco-Friendly and Natural Snowboard Wax Options
- How Wax Affects Snowboard Speed and Performance
- Snowboard Wax for Racing and Competitive Riding
- Troubleshooting Common Waxing Issues
- Frequently Asked Questions (FAQ)
- Conclusion: Ready to Ride
The Economics of DIY Waxing
Let’s talk numbers. A typical shop wax costs between $20 and $40. If you ride 10-15 days a season, you should be waxing at least 3 or 4 times. That adds up quickly. By building a simple home kit, you can wax your board whenever you want for pennies per application. Plus, you won’t have to wait in line or drive to the shop the night before a powder day. This is particularly useful if you are saving money for big trips to the best snowboarding destinations.
Furthermore, understanding your equipment is crucial. Whether you are riding budget gear or have invested in one of the best Yes snowboards, the maintenance process remains largely the same. The base material (sintered vs. extruded) may hold wax differently, but the application process is universal.
Consider the math over a five-year period. A rider who visits the shop four times per season at $30 per wax pays $600 over five years. A rider who invests $80 in a one-time kit and buys wax in bulk spends roughly $50 over the same period. That is a savings of over $500, which is enough to fund an entire extra day on the mountain or contribute toward new boots or bindings. When you think about it that way, learning how to wax a snowboard at home is one of the smartest investments a snowboarder can make.
There is also the time savings to consider. Driving to the shop, waiting in line, dropping off your board, coming back to pick it up — that can eat up half a day. In the age of same-day wax services, some shops charge even more for the convenience. At home, you can wax your board in the evening and have it ready for the morning. No appointments, no waiting, no extra trips. You simply plug in your iron, lay out your gear, and get to work on your own schedule.
And then there is the benefit of familiarity. When you work on your own board regularly, you start to notice small changes. You might spot a small base gouge before it becomes a problem. You will learn how your specific base takes wax, how long it takes to cool, and how much scraping pressure works best. This kind of hands-on knowledge is what separates a rider who truly understands their equipment from someone who just straps in and hopes for the best.
Essential Gear: Your Home Waxing Kit
Before we start melting anything, you need the right tools. Don’t use your household clothes iron — it fluctuates in temperature too much and the steam holes ruin the wax distribution. Here are the essentials available on Amazon:

Demon Complete Tune Kit
Includes iron, wax, scraper, and brushes. The perfect starter set for home mechanics.
View on Amazon
Hertel Super Hot Sauce Wax
An all-temperature wax that is forgiving for beginners and works in almost all conditions.
View on Amazon
Swix Plexi Scraper
Sharp and durable. A good scraper is the difference between a 10-minute job and an hour of struggle.
View on AmazonWhat to Look for in a Waxing Iron
Not all waxing irons are created equal. The most important feature is temperature control. A good waxing iron has an adjustable thermostat or digital temperature display. This lets you set the exact temperature your wax requires. Cheaper irons without temperature control can easily overheat, which burns the wax and releases toxic fumes while also potentially damaging your board’s base.
The plate on the bottom of the iron should be flat and smooth, with no steam holes. Steam holes are designed to release moisture onto fabric, which is the opposite of what you want when melting wax. A flat plate ensures even heat distribution and a smooth glide across the base. Some premium irons have a slight bevel on the edges of the plate, which helps prevent the iron from catching on the board’s edges as you move it along the base.
Weight matters too. A slightly heavier iron (around 800 grams to 1 kilogram) applies natural pressure to the wax, helping it spread more evenly without you having to press down. This reduces hand fatigue during longer waxing sessions and gives you more control over the process. If the iron is too light, you may find yourself pressing too hard, which can lead to uneven wax distribution or even base damage.
Essential Brushes for Snowboard Maintenance
A complete waxing kit should include at least three types of brushes, each serving a distinct purpose in the maintenance process.
- Nylon Brush: This is your workhorse brush. Use it after scraping to remove the last remnants of wax from the base structure. The stiff nylon bristles dig into the tiny grooves of the base and pull out wax that the scraper cannot reach. Always brush from tip to tail in long, even strokes. Apply moderate pressure and overlap each stroke to ensure complete coverage. A good nylon brush will last for years if you clean it after each use.
- Brass Brush: A brass brush is stiffer than nylon and is ideal for deep cleaning a dirty base before waxing. If your board has been ridden through spring slush, tree sap, or has accumulated grime from the lift lines, a brass brush will help lift that debris out of the base pores. It is also useful for refreshing the structure of the base after a particularly heavy scraping session. Use it sparingly on sintered bases, as excessive use can wear down the base material over time.
- Horsehair Brush: This is your finishing brush. The soft horsehair bristles polish the base to a high sheen and help distribute the final thin layer of wax evenly. After you have scraped and used the nylon brush, a quick pass with the horsehair brush gives the base a smooth, fast surface that glides effortlessly on snow. Many professional tuners consider the horsehair brush the secret weapon for achieving race-level base finishes.
Additional Tools You Might Need
Beyond the basics, there are several additional tools that can upgrade your home waxing setup from functional to professional-grade.
- Base Cleaner: A citrus-based or environmentally friendly base cleaner helps remove dirt, old wax residue, and oils from the base before you apply fresh wax. While you can technically wax over old wax, a clean base ensures better adhesion and more effective results. Spray it on, let it sit for a moment, and wipe it off with a lint-free cloth.
- P-Tex Candles: These are repair sticks used to fill in gouges and scratches in your board’s base. If you ride rocky terrain or经常 hit features in the park, P-Tex repairs are inevitable. Keep a pack of both black and transparent P-Tex candles in your kit. Black works well for dark bases, while transparent is better for colorful or die-cut bases where you want the graphics to show through.
- Edge File and Guide: A small edge file with a plastic guide lets you sharpen and maintain your edges between full tune-ups. Edge files come in different grits — coarser files remove more material for damaged edges, while finer files are for regular maintenance and polishing.
- Multi-Tool: A compact snowboard multi-tool is invaluable for adjusting bindings, tightening hardware, and making on-the-fly repairs at the mountain. Many multi-tools include a screwdriver, hex keys, and even a small file.
Understanding Snowboard Wax Types and Temperature Ratings
Not all wax is created equal, and understanding the different types of snowboard wax available can make a significant difference in your on-snow performance. The most important factor when choosing wax is temperature. Snow behaves differently at different temperatures, and your wax needs to match those conditions to work effectively.
Temperature-Specific Wax
Temperature-specific waxes are designed to perform optimally within a narrow temperature range. They are formulated with different molecular structures and additives that affect how they interact with snow crystals at specific temperatures.
- Cold Wax (Below -10°C / 14°F): Cold wax is harder and more durable than warm wax. At very cold temperatures, snow crystals are sharp and abrasive. Cold wax is designed to resist this abrasion while still providing a low-friction surface. It is typically more paraffin-heavy and contains harder hydrocarbons that do not soften as easily. If you are riding in places like Colorado, Utah, or the Canadian Rockies during midwinter, cold wax is your best friend.
- Warm Wax (Above 0°C / 32°F): Warm wax is softer and more pliable. At warmer temperatures, the water film between your board and the snow is thicker, and warm wax is designed to work with that thicker water layer. It has a higher oil content that helps it spread evenly and maintain its properties in slushy conditions. Spring riders and those heading to coastal resorts with wetter snow will benefit most from warm wax.
- Universal / All-Temperature Wax: As the name suggests, universal waxes are designed to work reasonably well across a broad temperature range. They are a great option for riders who do not want to buy and store multiple types of wax. While they may not perform as well as a specialized wax in extreme conditions, they are a reliable choice for most recreational riders who encounter varied conditions throughout the season.
Hydrocarbon Wax vs. Fluorinated Wax
Beyond temperature ratings, waxes also differ in their chemical composition. The two main categories are hydrocarbon waxes and fluorinated waxes.
Hydrocarbon wax is the most common and affordable type. It is made from petroleum-based paraffin and works well for everyday riding. Most of the waxes you will find at your local shop or on Amazon are hydrocarbon waxes. They are easy to apply, easy to scrape, and provide good all-around performance. For the vast majority of recreational riders, hydrocarbon wax is all you need.
Fluorinated wax contains fluorine compounds that make the wax extremely hydrophobic — meaning it repels water very effectively. This can provide a noticeable speed advantage, especially in wet or slushy conditions where the water film between the board and snow is thick. However, fluorinated waxes are more expensive, require more careful application (including using a dedicated iron), and have raised environmental concerns due to the persistence of fluorinated compounds in the environment. Many racing organizations have begun restricting or banning fluorinated waxes. For most riders, the performance gains do not justify the added cost and environmental impact.
Graphite Wax
Graphite wax is a specialty wax that contains graphite particles. Graphite has two main benefits: it reduces static electricity that builds up between your board and the snow, and it helps prevent the base from attracting dirt and debris. In extremely cold and dry conditions, static charge can cause your base to attract snow particles, which increases friction. Graphite wax neutralizes this effect. Many high-end sintered bases are already infused with graphite, and adding graphite wax on top can further enhance their performance. This is particularly relevant for riders who frequent high-altitude, cold, dry resorts.
Natural and Eco-Friendly Wax Options
As environmental awareness grows in the snowboarding community, more riders are looking for eco-friendly wax alternatives. Traditional waxes are petroleum-based and can contain perfluorinated chemicals (PFCs) that persist in the environment and accumulate in waterways and ecosystems. Several companies now offer plant-based or biodegradable waxes that use natural waxes like beeswax, tree resin, or plant oils as their base.
These eco-friendly options have come a long way in terms of performance. While early natural waxes were often criticized for wearing off quickly, modern formulations can hold up well for several days of riding. They may not match the absolute peak performance of the best synthetic waxes, but for riders who prioritize environmental responsibility, they offer a compelling alternative. Brands like Swix, Dakine, and various smaller companies now have natural wax lines that perform well in real-world conditions.
Sintered vs. Extruded Snowboard Bases: What You Need to Know
Your snowboard’s base material plays a huge role in how it accepts wax, how fast it glides, and how much maintenance it requires. There are two main types of bases: sintered and extruded. Understanding the differences between them will help you get the most out of your waxing efforts.
Sintered Bases
Sintered bases are made by compressing polyethylene powder under high pressure and heat. This process creates a dense but porous material with tiny channels that absorb wax effectively. Sintered bases are found on mid-range to high-end snowboards because they offer superior speed, better wax retention, and improved durability. The porous structure means that wax penetrates deeper into the base, providing longer-lasting glide and better protection against oxidation.
The downside of sintered bases is that they require more maintenance. Because they are porous, they can dry out and oxidize if not waxed regularly. A dry, oxidized sintered base will feel rough to the touch and look whitish or chalky. If you see these signs, your base is desperate for wax. Regular waxing — ideally every 3 to 5 days of riding — keeps sintered bases healthy and performing at their best. Riders who invest in boards with sintered bases should be prepared for the commitment of regular maintenance.
High-end boards like the Capita Mercury, Jones Mountain Twin, and many other performance-oriented models use sintered bases. If you own one of the best Yes snowboards, chances are it has a sintered base as well. The investment in regular waxing pays off in noticeable speed and responsiveness gains.
Extruded Bases
Extruded bases are made by melting polyethylene and pushing it through a die to form a sheet. The resulting material is smooth, durable, and low-maintenance. Extruded bases do not have the porous structure of sintered bases, so they do not absorb wax as deeply. However, they are more resistant to damage from rocks, rails, and other hazards, and they do not require as frequent waxing to stay in good condition.
For beginners and casual riders, extruded bases are a practical choice. They are forgiving, easy to maintain, and still benefit from occasional waxing. While they will never be as fast as a well-waxed sintered base, a fresh coat of wax on an extruded base will noticeably improve glide and protect the base from drying out. Budget-friendly boards and入门-level models typically use extruded bases.
Which Base Type Needs More Waxing?
Sintered bases benefit the most from frequent waxing because their porous structure actively absorbs and then releases wax over time. If you ride a sintered-base board and skip waxing, you will notice a significant drop in performance. Extruded bases, while they still benefit from wax, are more forgiving if you miss a waxing session. The wax sits more on the surface of an extruded base rather than penetrating deeply into it, so it can wear off faster but is also easier to reapply.
If you are unsure what type of base your board has, check the manufacturer’s specifications. Most boards list the base material in their product description. As a general rule, if your board is priced above $400, it likely has a sintered base. Below that price point, extruded bases are more common.
How to Tell When Your Snowboard Needs Wax
One of the most common questions riders ask is how to know when it is time to wax. There are several clear indicators that your board is overdue for a fresh coat of wax. Learning to recognize these signs will help you maintain your board’s performance and avoid riding on a slow, dry base.
Visual Signs
The most obvious indicator is the appearance of your base. A freshly waxed board has a smooth, shiny surface that looks almost wet. As the wax wears off, the base starts to look dull and matte. If you see white, chalky patches — especially near the edges — that is called base burn. Base burn occurs when the base material is exposed to air and begins to oxidize. It is a sign that the wax has completely worn off in those areas and the base is deteriorating.
Check the edges of your board specifically. The edges are where the most friction occurs, especially when you are learning how to carve on a snowboard. Wax tends to wear off the edges first, so white or gray discoloration along the steel edges is an early warning sign that a full base wax is needed.
Performance Signs
Even without looking at your board, you can feel when it needs wax. A well-waxed board glides smoothly and feels fast on all snow types. When the wax wears off, you will notice several performance changes:
- Increased friction on flats: The most noticeable sign. If you find yourself pushing with your back foot more often or getting stuck on flat sections, your board is slow and needs wax.
- Sticky feeling in slow sections: When riding at slower speeds, a dry base will feel like it is sticking to the snow rather than gliding over it. This is especially noticeable on groomed runs and in flat areas.
- Reduced edge hold in turns: A well-waxed board transitions smoothly from edge to edge. When the base is dry, turns can feel choppy and less responsive.
- More effort required: If you feel like you are working harder than usual to maintain speed, your board’s base is likely dried out.
The Fingernail Test
A quick and easy way to check your base is the fingernail test. Run your fingernail across the base. If you can scrape off any wax residue, there is still some wax on the board. If your nail glides over a dry, rough surface without catching on anything, the base is bare and needs wax. This is not a scientific measurement, but it gives you a quick assessment when you are not sure whether a wax is necessary.
The Water Drop Test
Another useful test is the water drop test. Place a small drop of water on your base. On a well-waxed board, the water will bead up and roll off quickly, much like water on a freshly waxed car. On a dry, unwaxed base, the water will spread out and soak in, sitting flat on the surface. If your base fails the water drop test, it is time to wax.
How Often Should You Wax Your Snowboard
The frequency with which you should wax your snowboard depends on several factors, including how often you ride, the type of base your board has, the conditions you ride in, and your personal performance goals. There is no one-size-fits-all answer, but there are clear guidelines that will help you establish a waxing schedule that keeps your board performing at its best.
General Waxing Frequency
For most riders, waxing every 3 to 5 days of riding is the sweet spot. This frequency keeps the base healthy, maintains good glide, and prevents the wax from wearing completely off. If you ride primarily groomed runs at a resort, waxing every 4 to 5 days is usually sufficient. If you ride in varied conditions — switching between groomers, powder, and park — waxing every 3 days is a better target.
| Riding Style | Recommended Frequency | Notes |
|---|---|---|
| Resort / Groomed Runs | Every 4-5 days | Consistent conditions mean wax lasts longer |
| All-Mountain / Varied | Every 3-4 days | Different snow types accelerate wax wear |
| Park / Freestyle | Every 2-3 days | Rail and box contact strips wax quickly |
| Powder / Backcountry | Every 3-5 days | Dry snow is less abrasive, wax lasts longer |
| Racing / Competitive | Before every race | Maximum performance requires fresh wax |
Factors That Affect Waxing Frequency
Snow conditions: Wet, heavy snow is more abrasive than dry powder and will strip wax from your base faster. If you are riding in spring conditions or coastal resorts with wet snow, you may need to wax more frequently than the general guidelines suggest.
Temperature fluctuations: If you ride in conditions where the temperature varies significantly throughout the day — warm afternoons and freezing mornings — the expansion and contraction of the base can push wax out of the pores more quickly. In these conditions, waxing every 2 to 3 days is advisable.
Your weight and riding style: Heavier riders and aggressive riders who carve hard and ride fast put more pressure on their bases, which accelerates wax wear. Lighter, more casual riders can often extend the time between waxes.
Base material: As discussed earlier, sintered bases absorb wax more deeply but also release it more quickly. They generally need more frequent waxing than extruded bases. If you have a sintered base and want to maintain peak performance, aim for the lower end of the frequency range.
Altitude: Higher altitude means drier, colder snow, which is less abrasive. However, the intense UV radiation at altitude can also accelerate base oxidation. If you ride at high-altitude resorts regularly, waxing every 4 to 5 days is a good practice to protect your base.
Step 1: Preparation and Safety
Set up in a well-ventilated area like a garage or a room with open windows. Melting wax releases fumes that you don’t want to inhale for an hour. If you’re wondering why snowboarding is dangerous, it usually involves hitting trees, not waxing fumes, but safety first is always the rule.
Secure your board. If you don’t have a vise, you can use two stacks of books covered in rubber matting or even old yoga mats to create friction. The board needs to be stable.
Retract Your Bindings
This is a step many beginners miss. You don’t necessarily have to remove your bindings completely, but you should loosen the screws. Why? When you heat the board with an iron, the materials expand. The metal inserts pull against the wood core. If the screws are tight, this can create “dimples” on your base. While you are at it, check your laces. If they are looking frayed, check how long your snowboard boot laces should be and replace them.
Workspace Setup Tips
Your workspace matters more than you might think. A cluttered or cramped area increases the risk of knocking your iron off the board or stepping on freshly scraped wax shavings. Lay down a tarp, old sheet, or cardboard to catch wax drips and scrapings. This makes cleanup dramatically easier and protects your floor from wax stains.
If you are working in a garage, make sure the floor is level. A board that wobbles on an uneven surface is harder to work on and can lead to uneven wax application. Use shims or folded towels under the board if needed to create a stable, level working surface.
Lighting is also important. You want to be able to see the surface of the base clearly so you can identify areas that need more wax, spots where the scraper missed, or damage that needs repair. A headlamp or a portable work light aimed at the board can make a big difference, especially if your workspace does not have overhead lighting.
Step 2: Cleaning the Base
Never wax over a dirty base. It seals the dirt into the pores of the board, slowing you down. Use a citrus-based base cleaner and a lint-free rag (old t-shirts work great) to wipe down the board. If the base looks dry and white (chalky), it is desperately thirsty for wax.
If you have been riding in the spring, you might have tree sap or grease from the lifts on your board. Scrub this off thoroughly. A clean base ensures the wax bonds to the P-Tex material effectively.
How to Clean a Snowboard Base Properly
Proper base cleaning is more than just a quick wipe. Here is a detailed process for getting your base truly clean before waxing:
- Start with a dry wipe: Use a clean, dry cloth to remove loose dirt, snow residue, and debris. This prevents you from smearing dirt around during the wet cleaning phase.
- Apply base cleaner: Spray a generous amount of citrus-based cleaner onto the base, working in sections from tip to tail. Let the cleaner sit for 30 seconds to a minute. This gives it time to dissolve old wax residue and lift embedded dirt.
- Scrub with a brass brush: Use a brass brush to scrub the base in long strokes from tip to tail. The stiff bristles will help lift dirt out of the base structure. Pay extra attention to the edges and any areas with visible discoloration.
- Wipe clean: Use a fresh, lint-free cloth to wipe away the cleaner and dissolved dirt. You should see the dirt transfer onto the cloth. Repeat steps 2 through 4 if the base is still visibly dirty.
- Let it dry: Give the base a few minutes to air dry completely before applying wax. Any remaining moisture can interfere with wax adhesion.
If your base has heavy contamination — such as pine sap, brake fluid from lifts, or stubborn grease stains — you may need to use a stronger solvent. Mineral spirits or dedicated base prep solutions can tackle these tougher contaminants. However, use these sparingly and always in a well-ventilated area, as the fumes can be strong.
Step 3: The Drip (Applying the Wax)
Plug in your waxing iron. A good temperature setting is usually around 130°C to 140°C (check your wax packaging). You want the wax to melt easily but not smoke. If the wax is smoking, the iron is too hot, and you are burning off the essential chemical properties of the wax.
Hold the iron vertically over the board and touch the block of wax to the hotplate. Let the wax drip in a zigzag pattern down the length of the board. Don’t go overboard; you only need enough to cover the surface. Using too much wax just means more physical labor scraping it off later.
How Much Wax Should You Apply?
A common beginner mistake is using way too much wax. You do not need to cover every square inch of the base with a thick layer of wax. The goal is to apply just enough wax to create a thin, even coating when you iron it in. A good rule of thumb is to drip wax in a zigzag pattern with about 2 to 3 inches between each pass of the iron. When you spread this with the iron, it should cover the entire base with a thin, wet layer.
If you apply too much wax, you will spend significantly more time scraping it off. While this does not damage the board, it is wasted effort. On the other hand, applying too little wax means some areas of the base may not get adequate coverage. When in doubt, slightly err on the side of too much rather than too little — it is easier to scrape off excess than to reapply wax to dry spots.
Step 4: Ironing It In
This is the most critical step. Place the iron flat on the base and move it in slow, circular motions or long strokes from tip to tail. The goal is to spread the wax evenly and heat the base enough so the pores open up and absorb the liquid.
Never let the iron sit in one spot. This can burn the base (sintered P-Tex) or even delaminate the board, separating the base from the core. Keep the iron moving at all times. You should see a trail of molten wax behind the iron that stays wet for a few seconds before hardening.
Ironing Technique Tips
The speed at which you move the iron matters. Move too fast, and the base does not get hot enough for the pores to open and absorb the wax. Move too slow, and you risk overheating the base. A good pace is about 2 to 3 inches per second — slow enough that you can see the wax melting and flowing behind the iron, but fast enough that the iron never stays in one spot for more than a second or two.
Cover the entire base systematically. Start at the nose and work your way to the tail in overlapping strokes. Make sure to get the wax right up to the edges without letting the iron ride up onto the steel edge itself, which can damage the iron’s plate. The edges are where the most friction occurs, so thorough coverage in these areas is especially important.
After the initial pass, go back over the entire base one more time to ensure even distribution. You are looking for a consistent, wet sheen across the entire surface. If you see any dry spots or areas where the wax has already hardened, pass the iron over them again.
Step 5: The Waiting Game
Patience is key here. Let the board cool completely at room temperature. This usually takes about 30 to 45 minutes. Do not put the board outside in the snow to cool it down faster. Rapid cooling closes the pores too quickly, squeezing the wax out before it sets. Use this time to organize your other gear, perhaps checking if your Vans snowboard boots fit true to size or organizing your snowboard bag for the next trip.
Why Cooling Time Matters
The cooling process is not just about waiting for the wax to harden. During cooling, the wax undergoes a crystallization process that affects its final properties. When the base is heated, the pores of the P-Tex open up and absorb the liquid wax. As the base cools, the pores slowly contract, trapping the wax inside. If you cool the board too quickly — by placing it outside in freezing temperatures or in a cold car — the pores contract rapidly and can push some of the wax back out before it has fully bonded with the base material.
Room temperature cooling allows the wax to bond properly with the base and ensures maximum absorption. This is why experienced riders never rush the cooling process, even when they are eager to get on the mountain. The 30 to 45 minutes of patience during cooling translates directly to better performance and longer-lasting wax on the snow.
How to Know When the Board Is Fully Cooled
The board is fully cooled when the wax surface feels hard and dry to the touch. If you press your finger against the wax and it leaves an indentation or feels tacky, it needs more time. A fully cooled board will have a matte, opaque layer of wax that scrapes off in clean, thin shavings. If the wax is still slightly warm, it will be gummy and difficult to scrape cleanly.
Step 6: The Scrape
Once the board is cool to the touch, it’s time to scrape. This requires some elbow grease. If you haven’t been keeping up with your fitness guide for snowboarding, you’re about to get a workout.
- Take your plastic scraper (never use metal, you might gouge the base).
- Hold it at a 45-degree angle.
- Scrape from nose to tail in long, overlapping strokes.
- Remove all visible wax. Yes, all of it.
Many people think a thick layer of wax makes the board fast. It does not. Wax works by impregnating the pores of the base. Wax sitting on top of the base actually creates drag and friction. You want the base to feel smooth and look shiny, but you shouldn’t be able to scrape any more material off with your fingernail.
Scraping Technique in Detail
Start scraping at the nose of the board and work toward the tail. Apply firm, even pressure. The scraper should remove thin, curly shavings of wax. If you are getting thick chunks, you are pressing too hard or the wax is too thick. If you are getting dust-like particles, the wax may not have fully cooled, or you are holding the scraper at too steep an angle.
Work in overlapping strokes, covering the entire width of the base with each pass. Pay special attention to the edges, where wax tends to accumulate. Use the corners of the scraper to get right up to the edge without scratching the steel. For bindings areas, you may need to scrape around the inserts carefully.
After the initial scrape, do a second pass with lighter pressure to remove any remaining thin layers. Then run your fingernail across the base — if it catches on any wax, scrape that area again. The base should feel completely smooth to the touch.
Step 7: Structuring and Brushing
Scraping leaves the surface smooth, but to really fly, you need structure. Structure helps break the suction of the water layer created by friction between your board and the snow.
- Nylon Brush: Brush from tip to tail firmly. This removes any remaining wax from the structure (the tiny grooves) of the base.
- Horsehair Brush: (Optional) For a high-polish finish, follow up with a softer horsehair brush. This polishes the base and creates a fast, hydrophobic surface.
The brushing process is often overlooked by beginners, but it is essential for achieving maximum speed. Scraping removes the bulk of the excess wax, but microscopic amounts of wax still remain in the base structure. The nylon brush pulls this residual wax out of the tiny grooves and pores, leaving a clean, structured surface. The horsehair brush then polishes this surface to a smooth finish that reduces friction with the snow.
Brush each section of the base three to four times, using firm, consistent strokes from tip to tail. After brushing, wipe the base with a clean, dry cloth to remove any loose wax particles. Your base should now have a slight sheen and feel smooth and fast to the touch.
Snowboard Wax Iron Temperature Guide
Getting the temperature right is one of the most important aspects of waxing your snowboard. Too cold, and the wax will not melt properly, leading to poor adhesion and uneven coverage. Too hot, and you risk burning the wax, damaging the base, or even causing delamination. Here is a comprehensive temperature guide to help you dial in the perfect setting.
Temperature Ranges by Wax Type
| Wax Type | Recommended Iron Temperature | Notes |
|---|---|---|
| Hydrocarbon / All-Temp | 120°C – 140°C (248°F – 284°F) | Most common wax; forgiving temperature range |
| Cold Temperature Wax | 110°C – 130°C (230°F – 266°F) | Harder wax; slightly lower temps prevent burning |
| Warm Temperature Wax | 130°C – 150°C (266°F – 302°F) | Softer wax; needs more heat to flow evenly |
| Graphite Wax | 120°C – 140°C (248°F – 284°F) | Similar to standard hydrocarbon; follow manufacturer |
| Fluorinated Wax | Check manufacturer specs (varies widely) | Some fluorinated waxes require specific temperatures |
Signs Your Iron Is Too Hot
- Smoke: If you see wisps of smoke rising from the wax, your iron is too hot. Immediately lower the temperature or unplug the iron. Smoke indicates that the wax is burning, which destroys its chemical properties and releases potentially harmful fumes.
- Bubbling: Wax should melt smoothly into a liquid. If you see bubbles forming in the molten wax, the temperature is too high. This can also indicate that impurities in the wax are boiling off, which degrades the wax quality.
- Discoloration: If the wax changes color (darkens or yellows) while on the iron, it is being burned. Fresh wax should maintain its original color when melted.
- Base damage: In extreme cases, an overheated iron can cause the base to bubble, discolor, or even delaminate. If you see any of these signs on the base, stop immediately and let the board cool before assessing the damage.
Signs Your Iron Is Too Cold
- Wax does not flow: If the wax melts sluggishly and does not spread easily across the base, the temperature is too low. You should see the wax flow smoothly behind the iron in a wet, liquid state.
- White, chalky wax: If the wax turns white and opaque as soon as it hits the base, it is cooling too quickly because the iron is not hot enough to keep it molten during application.
- Uneven coverage: Cold wax tends to clump and create thick spots rather than spreading evenly. If you notice this, increase the temperature slightly and re-iron the affected areas.
How to Test Your Iron Temperature
If your iron does not have a built-in thermometer or digital display, you can test the temperature by dripping a small amount of wax onto a piece of aluminum foil or a scrap piece of wood. The wax should melt immediately upon contact and flow smoothly without smoking. If it does not melt, increase the temperature. If it smokes, decrease it. This simple test gives you a quick calibration check before you start working on your actual board.
How to Remove Old Wax from a Snowboard
Before applying a fresh coat of wax, it is often necessary to remove the old wax from your base. While you can technically apply new wax over old wax — and many riders do this regularly — there are times when a complete wax removal is beneficial. Old wax can accumulate dirt, lose its effectiveness, and prevent fresh wax from bonding properly with the base material.
When to Remove Old Wax
- At the start of the season: After months of storage, the old wax on your board has likely dried out and lost its properties. A fresh start with a clean base ensures the season begins with optimal glide.
- When switching wax types: If you have been using a warm-temperature wax and want to switch to a cold-temperature formula, removing the old wax first ensures the new wax performs as intended.
- When the base is dirty: If your base has accumulated dirt, grime, or discolored wax, a full removal and cleaning restores the base to a like-new condition.
- Before a major tune-up: If you are doing a full tune that includes edge work and base repair, starting with a clean, wax-free base gives you an accurate view of the base condition.
Methods for Removing Old Wax
Method 1: Iron and Scrape: The simplest method is to re-iron the board with a clean iron (no wax on the plate) set to a moderate temperature. Move the iron over the base to soften the old wax, then immediately scrape it off while it is still warm and soft. This method works well for removing a thin layer of old wax. Repeat the process if needed until the base looks clean.
Method 2: Base Cleaner: Apply a generous amount of citrus-based or dedicated wax remover to the base. Let it soak for a few minutes to dissolve the old wax, then wipe it off with a clean cloth. For stubborn areas, use a brass brush to scrub while the cleaner is still wet. This method is more effective for removing thicker layers of old wax and works well in combination with the iron and scrape method.
Method 3: Hot Wax Scrape (Hot Scrape): This is a technique used by professional tuners. Apply a thin layer of wax to the base, iron it in, and then immediately scrape it off while it is still warm. The fresh wax dissolves and mixes with the old wax, pulling it out of the base pores. Follow up with base cleaner and a final scrape for a thoroughly clean base. The hot scrape method is the most thorough way to remove old wax and is recommended before applying a completely different type of wax.
How Often Should You Do a Full Wax Removal?
For most riders, a full wax removal and deep cleaning is not necessary every time you wax. A quick clean with base cleaner followed by a fresh coat of wax is sufficient for routine maintenance. Save the full wax removal for the start of the season, when switching wax types, or when the base is visibly contaminated. Doing a full removal too frequently is unnecessary and adds time to the waxing process without significant benefit.
How to Clean a Snowboard Base Properly
Base cleaning is the foundation of a good wax job. A dirty base will not absorb wax effectively, leading to poor glide and wasted effort. While we covered the basics of cleaning in Step 2, this section provides a deeper look at the cleaning process and addresses some common challenges.
Common Contaminants and How to Remove Them
Pine sap and tree resin: Riding through the trees is one of snowboarding’s great pleasures, but it comes with a price — sticky sap on your base. Pine sap is soluble in alcohol or mineral spirits. Apply a small amount to a cloth and rub the affected area until the sap dissolves. Follow up with base cleaner to remove any remaining residue.
Lift grease: The chairs and gondolas at ski resorts often drip grease onto your board. This dark, oily substance can be stubborn to remove. Apply a degreaser or mineral spirits to the affected area, let it sit for a minute, then scrub with a brass brush. Wipe clean and follow with base cleaner.
Iron marks and burnt wax: If you accidentally overheated your iron and left marks on the base, these can be difficult to remove with standard cleaning. In severe cases, you may need to sand the affected area with very fine sandpaper (800 grit or higher) before cleaning and re-waxing. Be extremely careful with this — sanding removes base material and should only be done as a last resort.
Dirt and grime from spring riding: Spring riding often means wet, dirty snow that can leave a film of grime on your base. A thorough cleaning with base cleaner and a brass brush should remove most spring grime. For particularly dirty bases, the hot scrape method described above is the most effective approach.
Cleaning Tips and Best Practices
- Always clean in a well-ventilated area, especially when using solvents like mineral spirits.
- Use lint-free cloths to avoid leaving fibers embedded in the base.
- Work in sections for large boards — clean the nose, then the middle, then the tail.
- Inspect the base under good lighting after cleaning to ensure all contaminants are removed.
- Let the base dry completely before applying wax.
Snowboard Base Repair: Fixing Scratches and Gouges with P-Tex
Even the most careful riders eventually end up with scratches and gouges in their snowboard base. Rocks, rails, boxes, and other hazards can damage the P-Tex material, creating channels that disrupt the smooth flow of the base and reduce performance. Fortunately, most base damage can be repaired at home with P-Tex repair candles.
Understanding P-Tex
P-Tex is the brand name for the ultra-high molecular weight polyethylene (UHMWPE) material used in snowboard and ski bases. It is incredibly durable and resistant to abrasion, but it is not indestructible. P-Tex comes in two main forms: extruded (used in lower-end boards) and sintered (used in higher-end boards). Both types can be repaired with P-Tex candles, though the repair process differs slightly.
Types of Base Damage
- Scratches: Light scratches that do not reach the core are cosmetic and do not affect performance significantly. These can be filled with P-Tex for a smooth finish but are not urgent repairs.
- Gouges: Deeper damage that exposes the core material. These should be repaired promptly to prevent water from reaching the wood core, which can cause swelling and delamination.
- Core shots: The most severe type of damage where the base is completely penetrated, exposing the core. These require immediate repair and may need professional attention for deep or extensive damage.
How to Repair Base Damage with P-Tex
- Clean the damaged area: Use base cleaner and a brass brush to remove any dirt or debris from the gouge. The repair material will not bond properly to a dirty surface.
- Dry the area thoroughly: Any moisture in the gouge will cause the P-Tex to bubble and fail to adhere. Use a cloth to absorb moisture, and if necessary, let the area air dry for an hour or more.
- Light the P-Tex candle: Hold the candle at a 45-degree angle and light the tip with a lighter. Let it burn for a few seconds until the P-Tex begins to drip. The initial drips may be discolored — discard these as they contain combustion byproducts.
- Apply the P-Tex: Once the dripping P-Tex runs clear, carefully drip it into the gouge, filling it slightly above the surrounding base surface. Move slowly and steadily to avoid creating air bubbles. For larger gouges, you may need to build up the P-Tex in layers.
- Let it cool: Allow the P-Tex to cool completely, which usually takes 15 to 30 minutes. The material will harden and bond with the surrounding base.
- Scrape flush: Use a plastic scraper or a sharp razor blade held flat against the base to scrape the P-Tex flush with the surrounding surface. Work carefully to avoid gouging the undamaged base material.
- Sand smooth: For a perfectly smooth finish, sand the repaired area with progressively finer sandpaper, starting with 100 grit and working up to 400 grit or higher. Wipe away dust and then wax the base to seal the repair.
Preventing Base Damage
While some base damage is inevitable, you can minimize it by riding carefully in rocky areas, avoiding exposed rocks in shallow snow, and using edge guards during transport. Regular waxing also helps protect the base by keeping it hydrated and flexible, making it more resistant to impact damage.
Snowboard Edge Tuning and Sharpening at Home
Sharp edges are essential for controlling your snowboard, especially on hardpack and ice. Dull edges make it difficult to carve, reduce your ability to stop quickly, and can make your board feel unpredictable. Edge tuning is a critical part of snowboard maintenance that is often overlooked by home mechanics. Here is how to keep your edges sharp and performing at their best.
When to Sharpen Your Edges
Most riders benefit from an edge sharpening every 5 to 10 days of riding, depending on the terrain they ride. Park riders who hit rails and boxes may need more frequent edge work, as metal-on-metal contact dulls edges quickly. Riders who stick primarily to groomed runs can often go longer between sharpenings.
You should also sharpen your edges if you notice any of the following: difficulty holding an edge on hardpack, a “clicking” or “chattering” sound when turning, visible nicks or burrs on the edge, or a loss of confidence in your board’s ability to grip the snow.
Edge Sharpening Tools
- Edge File: A flat file designed specifically for snowboard edges. Available in different grits — coarser files (80-120 grit) remove more material and are used for damaged edges, while finer files (200+ grit) are for regular maintenance and polishing.
- Edge Guide: A plastic guide that holds the file at the correct angle relative to the base. This is essential for maintaining consistent edge angles and preventing you from accidentally filing the base.
- Diamond Stone: A fine abrasive stone used for polishing edges after filing. It removes the tiny burrs left by the file and creates a smooth, sharp edge that grips the snow effectively.
- Gummy Stone: A soft, rubber-bonded abrasive stone used for removing rust and light burrs. It is also useful for detuning (dulling) specific sections of the edge, such as the contact points.
How to Sharpen Your Edges
- Secure the board: Place the board in a vise or on a stable surface with the base facing up.
- Attach the edge guide: Clip the edge guide onto the file, setting it to your desired angle (most riders use 88° to 90°).
- File from tip to tail: Place the file against the edge with the guide and push it along the edge from tip to tail in smooth, even strokes. Apply moderate pressure and keep the file flat against the edge. Do 3 to 5 passes, then check your progress.
- Repeat on the other side: Flip the board and repeat the process on the other edge.
- Polish with a diamond stone: After filing, run a diamond stone along each edge to remove burrs and polish the surface. This step is crucial for achieving a truly sharp edge.
- Deburr with a gummy stone: Finally, run a gummy stone along the edge to remove any remaining micro-burrs. This gives the edge a clean, finished feel.
Rub-On Wax vs. Hot Wax: Which Is Better?
One of the most debated topics in snowboard maintenance is whether rub-on wax is a viable alternative to traditional hot waxing. Both methods have their place, and understanding the differences between them will help you choose the right approach for your needs.
What Is Rub-On Wax?
Rub-on wax (also called cold wax or rub-on glide wax) is a solid block of wax that you apply by rubbing it directly onto the base of your board. After rubbing it on, you use a cork or a brush to buff the wax into the base. The friction from buffing generates a small amount of heat that helps the wax adhere to the base surface.
Advantages of Rub-On Wax
- Convenience: Rub-on wax requires no iron, no heat source, and minimal setup. You can apply it at the base of the mountain, in the parking lot, or anywhere else you have a few minutes.
- Speed: A rub-on application takes 5 to 10 minutes, compared to 30 to 45 minutes for a full hot wax including cooling time.
- Portability: A block of rub-on wax weighs almost nothing and fits easily in a jacket pocket or backpack. It is the ultimate travel-friendly wax solution.
- Emergency use: If your board is slow and you do not have access to your home waxing setup, rub-on wax provides a quick performance boost.
Disadvantages of Rub-On Wax
- Less durable: Rub-on wax sits mostly on the surface of the base rather than penetrating deeply into the pores. It wears off much faster than hot wax, often lasting only a half day to a full day of riding.
- Less effective: Without the heat from an iron to open the base pores, rub-on wax cannot penetrate as deeply. This means it provides less glide improvement compared to a properly applied hot wax.
- Build-up potential: Repeatedly applying rub-on wax without removing old layers can create a thick, uneven coating that actually increases drag rather than reducing it.
When to Use Rub-On Wax
Rub-on wax is best used as a supplementary product rather than a replacement for hot waxing. It is ideal for quick touch-ups between hot wax sessions, for travelers who do not have access to an iron, or for emergency performance boosts on the mountain. For regular maintenance and maximum performance, hot waxing remains the gold standard.
When to Use Hot Wax
Hot waxing should be your primary waxing method. It provides deeper penetration, longer-lasting results, and better overall performance. If you ride regularly and want to get the most out of your board, there is no substitute for a proper hot wax. Use rub-on wax as a supplement between hot wax sessions, not as a replacement.
Best Snowboard Wax for Cold Weather Riding
When temperatures drop below -10°C (14°F), the snow changes character significantly. Cold snow is composed of tiny, sharp crystals that act like sandpaper against your board’s base. The water film between your board and the snow is very thin in cold conditions, so your wax needs to be hard enough to resist abrasion while still providing a low-friction surface.
Characteristics of Cold Weather Wax
Cold weather wax is formulated with harder hydrocarbons that maintain their structure in low temperatures. It typically has a lower oil content than warm wax, making it more resistant to the abrasive action of cold snow crystals. The harder formulation also means it does not absorb as much water, which is beneficial in cold, dry conditions where the water film is minimal.
When shopping for cold weather wax, look for products that specify a temperature range below -10°C or -15°C. Many brands color-code their waxes by temperature — blue or purple typically indicates cold-temperature formulas. Always check the packaging for the specific temperature range the wax is designed for.
Application Tips for Cold Wax
Cold wax is harder than all-temperature wax, which means it requires slightly more heat to melt and spread evenly. Set your iron to the lower end of the recommended range (around 110°C to 130°C) and be patient as the wax melts. Apply a slightly thicker layer than you would with all-temperature wax, as the harder formulation does not spread as easily.
After ironing, let the board cool for the full 30 to 45 minutes. Cold wax takes slightly longer to fully harden than warmer formulas. Be especially thorough during the scraping and brushing phases — cold wax is harder and more brittle, so it scrapes cleanly but requires more pressure to remove completely.
Top Cold Weather Wax Recommendations
Some of the best cold weather waxes on the market include Swix CH8X (blue), Toko HF Cold (blue), and Dakine Cold Temperature Wax. These products have been tested extensively in extreme cold and consistently deliver excellent performance. For budget-conscious riders, the Hertel Super Hot Sauce wax included in the product grid above also performs well in cold conditions, though it may not match the peak performance of a dedicated cold-temperature formula.
Best Snowboard Wax for Warm Weather and Spring Conditions
Warm weather and spring conditions present a very different challenge than cold weather riding. When temperatures rise above 0°C (32°F), the snow becomes wetter and heavier. The water film between your board and the snow is much thicker, and your wax needs to work with this thicker water layer to provide effective glide.
Characteristics of Warm Weather Wax
Warm weather wax is softer and more pliable than cold wax. It has a higher oil content that helps it spread evenly and maintain its properties in wet conditions. The softer formulation allows the wax to create a smooth, hydrophobic surface that repels the thicker water film encountered in warm conditions. This prevents the “suction” effect that occurs when your board sticks to wet snow.
Warm wax is typically color-coded yellow or red by most manufacturers. Look for products that specify a temperature range above 0°C or above -5°C. Some warm waxes are also designed specifically for spring conditions, with additives that improve performance in slushy, variable snow.
Application Tips for Warm Wax
Warm wax melts more easily than cold wax, so use a slightly lower iron temperature to avoid overheating. Set your iron to around 120°C to 140°C and watch for smooth, even melting. The softer wax spreads more easily, so you may find that you need less wax per application compared to cold wax.
Warm wax cools more slowly than cold wax, so be patient during the cooling phase. The board may need the full 45 minutes to cool completely, especially if your workspace is warm. When scraping, warm wax comes off more easily than cold wax, but it can be gummy if the board is not fully cooled. Make sure the wax is completely hard before scraping for the cleanest results.
Spring Riding Wax Strategy
Spring riding often involves a wide range of conditions in a single day — frozen snow in the morning that softens into slush by afternoon. For these variable conditions, many riders use a warm-temperature wax as their base and then apply a thin layer of all-temperature or cold wax on top. This dual-wax approach provides the best of both worlds: the warm wax handles the wet afternoon conditions, while the top layer provides protection during the frozen morning hours.
Another spring riding tip is to wax more frequently. Spring conditions are more abrasive than mid-winter conditions because the wet snow is heavier and the UV radiation is stronger. Aim to wax every 2 to 3 days during spring riding to maintain optimal performance.
Waxing Your Snowboard for Powder Days
Powder days are what snowboarders dream about — deep, dry snow that feels like floating on a cloud. But even in powder, your wax choice matters. The right wax can make the difference between floating effortlessly on top of the snow and sinking and struggling through deep snow.
What Makes Powder Different
Powder snow is composed of large, fluffy crystals with a lot of air between them. Unlike groomed snow, which creates a consistent water film, powder creates more variable contact with your base. The key to performing well in powder is maintaining a smooth, hydrophobic base that does not grab or stick to the snow crystals.
Wax Recommendations for Powder
For powder days, a warm-temperature or all-temperature wax is typically the best choice. The softer wax creates a smooth surface that helps your board plane on top of the snow rather than digging in. Graphite wax can also be beneficial in powder, as the graphite particles reduce static charge that can cause snow to stick to your base.
Apply a generous coat of warm or all-temperature wax the night before a powder day. Make sure to scrape and brush thoroughly — a well-structured base glides better in powder than a base with residual wax filling the structure. The goal is a smooth, polished surface that allows the board to plane across the top of the snow.
Powder Day Preparation Tips
- Wax the night before, not the morning of. This gives the wax ample time to cool and bond with the base.
- Use a warm or all-temperature wax for maximum glide in soft snow.
- Scrape and brush thoroughly — leftover wax in the base structure creates drag in powder.
- Consider your stance: setting your bindings back slightly helps keep the nose up in deep snow.
Snowboard Wax for Icy and Hardpack Conditions
Ice and hardpack are the most challenging conditions for snowboarders. The snow is hard, fast, and unforgiving. Your edges are your primary tool for maintaining control, but your wax choice can also make a significant difference in how your board handles on hard surfaces.
Wax for Ice and Hardpack
In icy conditions, a cold-temperature wax is the best choice. The hard formulation resists the abrasive action of ice crystals and provides a smooth surface that glides well on hard snow. Some riders also use fluorinated waxes in icy conditions, as the extreme hydrophobicity of fluorinated wax helps repel the thin water film that forms on ice.
Graphite wax is particularly effective on ice. The graphite particles reduce static charge and help prevent the base from attracting ice particles, which can increase drag. If you ride primarily on hardpack and ice, investing in a quality graphite wax is worth the extra cost.
Edge Preparation for Ice
In icy conditions, your edges are even more important than your wax. Make sure your edges are freshly sharpened and free of burrs before heading out on an icy day. A sharp edge grips ice effectively, while a dull edge slides unpredictably. Consider sharpening your edges to a slightly more aggressive angle (88° instead of 90°) for better ice performance.
Riding Technique on Ice
While this is primarily a waxing guide, it is worth noting that technique matters as much as equipment on ice. Keep your weight centered over the board, avoid sudden movements, and use smooth, progressive edge changes. Trust your edges and let them do the work — trying to force a turn on ice usually leads to a washout.
Park Riding Wax: What Freestyle Riders Should Know
Park riders have unique waxing needs that differ from all-mountain or freeride riders. The combination of jumps, rails, boxes, and halfpipe features creates specific demands on your wax and base. Understanding these demands will help you get the most out of your park sessions.
How Park Riding Affects Wax
Park riding is hard on wax. Rail and box features strip wax from the base quickly due to the metal-on-base or plastic-on-base contact. Jumps and landings create high-impact zones that can chip or gouge the base. Halfpipe riding involves repeated edge engagement on hard, icy walls. All of these factors mean that park riders need to wax more frequently than other types of riders.
Wax Strategy for Park Riders
For park riding, an all-temperature wax is usually the best choice. You want a wax that performs well in a variety of conditions, since park sessions often involve different features with different snow conditions. Apply wax before each park session or every 2 to 3 days of park riding.
Some park riders also use a harder wax on the base between the bindings (the “flat” section) and a softer wax on the nose and tail. The harder wax in the middle resists the abrasion from rails and boxes, while the softer wax on the nose and tail provides better glide on the approaches and landings.
Base Repair for Park Riders
Park riders should keep P-Tex candles and a basic repair kit in their gear bag. Rail and box contact can create small gouges that should be repaired promptly to prevent water from reaching the core. Most park-related base damage is minor and can be repaired at home with P-Tex. For deeper damage, such as core shots from bad landings, professional repair may be necessary.
Advanced Waxing: Race Waxing and Graphite Wax
For riders who want to extract every last bit of performance from their boards, advanced waxing techniques can make a measurable difference. Race waxing, in particular, is a specialized discipline that goes beyond the basics covered in this guide.
What Is Race Waxing?
Race waxing is the practice of applying specialized, high-performance waxes to maximize board speed. Race waxes often contain fluorinated compounds, graphite, or other additives that reduce friction to the absolute minimum. The application process is more precise than standard waxing, with careful attention to temperature, cooling time, and brushing technique.
At the competitive level, racers often use a combination of waxes — a base wax for durability and a top coat for maximum speed. The base wax is ironed in and allowed to cool normally. The top coat is then applied over the base, ironed in at a slightly lower temperature, and given an extended cooling period. This layered approach provides both durability and peak performance.
Graphite Wax in Detail
Graphite wax deserves special attention because of its unique properties. Graphite is a form of carbon that has several beneficial characteristics for snowboard performance:
- Static reduction: Graphite neutralizes the static charge that builds up between your board and the snow. This is particularly beneficial in cold, dry conditions where static is most pronounced.
- Dirt resistance: The graphite particles help prevent dirt and debris from adhering to the base, keeping it cleaner for longer.
- Friction reduction: Graphite has inherently low friction properties that contribute to a faster glide, especially on hard snow and ice.
Many high-end sintered bases already contain graphite infused into the P-Tex material. Adding graphite wax on top of a graphite-infused base creates a synergistic effect that further enhances performance. This is why graphite wax is often the go-to choice for racers and advanced riders who demand the best possible glide.
When to Use Advanced Waxing Techniques
Advanced waxing techniques are most beneficial for competitive riders, backcountry enthusiasts who want maximum glide, and anyone who simply enjoys optimizing their equipment. For casual resort riders, the performance gains from advanced waxing may be noticeable but are not necessary for an enjoyable experience. However, understanding these techniques can deepen your knowledge of snowboard maintenance and help you make more informed decisions about your equipment.
How to Wax a Snowboard Without an Iron
Not everyone has access to a waxing iron, especially when traveling or staying at a mountain lodge. Fortunately, there are several methods for waxing a snowboard without an iron. While these methods are not as effective as a proper hot wax, they can provide a meaningful performance boost when a traditional wax setup is not available.
Method 1: Rub-On Wax
As discussed earlier, rub-on wax is the simplest iron-free waxing method. Rub the wax block directly onto the base in a thin, even layer, then buff it with a cork or brush. The friction from buffing generates heat that helps the wax adhere to the base. This method is quick, easy, and provides a temporary improvement in glide.
Method 2: Hair Dryer or Heat Gun
If you have access to a hair dryer or heat gun, you can melt wax into the base without a dedicated waxing iron. Apply the wax to the base as you would for a rub-on, then use the hair dryer on a medium setting to melt the wax into the base. Keep the dryer moving to avoid overheating any single area. This method provides better penetration than rub-on wax but is less precise than using a dedicated iron.
Be careful with heat guns — they can get very hot and damage the base if held in one spot too long. Use a hair dryer for safer results, and always keep it moving.
Method 3: Wax Warmers
Some companies sell wax warmers — small, portable devices that heat wax to the correct temperature for application. These are popular with race teams and traveling riders who need a consistent wax application without a full iron setup. Wax warmers are more expensive than a standard iron but offer excellent portability and precision.
Method 4: The “Hot Scrape” with a Lodge Iron
If you are staying at a lodge or hotel, you may have access to a standard clothes iron. While clothes irons are not ideal for waxing (they have steam holes and fluctuating temperatures), they can work in a pinch. Turn off the steam function, set the iron to a low-to-medium temperature, and test it on a small area first. The steam holes can create uneven wax distribution, so this should only be used as a temporary solution until you can do a proper hot wax at home.
Snowboard Maintenance Schedule: Pre-Season, Mid-Season, End-of-Season
A comprehensive maintenance schedule ensures that your board is always in top condition and extends its lifespan significantly. Here is a detailed schedule to follow throughout the year.
Pre-Season Maintenance (Before First Ride)
Before the snow starts flying, give your board a thorough once-over to ensure it is ready for the season. Pre-season maintenance is your opportunity to catch any issues before they become problems on the mountain.
- Inspect the base: Look for any damage that may have occurred during storage. Check for gouges, scratches, or areas of oxidation (white, chalky appearance). Repair any damage with P-Tex before the first ride.
- Check the edges: Look for rust, nicks, or burrs on the edges. Remove rust with a gummy stone and sharpen edges if needed. Rust is common after summer storage and should be removed before riding.
- Clean and wax: Even if the board was waxed before storage, the wax has likely dried out over the summer. Clean the base with base cleaner, then apply a fresh coat of wax. This hydrates the base and protects it from oxidation.
- Inspect bindings: Check all screws, bolts, and straps for tightness and damage. Replace any worn or damaged parts. Make sure the binding angles and stance width are set to your preference.
- Check hardware: Inspect all mounting hardware, including the screws that attach the bindings to the board. Tighten any loose screws and replace any that are stripped or damaged.
Mid-Season Maintenance (During the Season)
During the season, regular maintenance keeps your board performing at its best. Here is what you should do on a regular basis:
- Wax every 3 to 5 days: Follow the waxing schedule outlined earlier in this guide. More frequent waxing for park riders or those in abrasive conditions.
- Sharpen edges every 5 to 10 days: Check your edges regularly and sharpen them as needed. A quick pass with a diamond stone can extend the time between full sharpenings.
- Inspect for damage after each ride: Take a quick look at the base and edges after each day of riding. Catching small problems early prevents them from becoming big problems later.
- Clean the base regularly: Wipe down the base with a dry cloth after each ride to remove snow, dirt, and debris. A quick cleaning takes only a minute and helps keep the base in good condition.
End-of-Season Maintenance (Before Summer Storage)
Proper end-of-season maintenance is crucial for ensuring your board is ready for the next season. Here is a step-by-step guide for storing your board for the summer:
- Clean the base thoroughly: Use base cleaner and a brass brush to remove all dirt, grime, and old wax. A clean base is less likely to oxidize during storage.
- Repair any damage: Fix any scratches, gouges, or other base damage with P-Tex before storing. Repairing damage now prevents it from worsening during the off-season.
- Apply a storage wax: Apply a thick coat of wax to the base but do not scrape it off. The thick wax layer protects the base from oxidation during storage. Scrape and brush it off at the start of the next season.
- De-tune the edges slightly: Run a gummy stone along the edges to remove any sharpness. This prevents the edges from rusting and protects you from accidental cuts when handling the board during storage.
- Loosen the bindings: Back off the binding screws a few turns to relieve pressure on the board’s inserts. This prevents the inserts from pulling against the wood core during the months of storage.
- Store in a cool, dry place: Keep the board in a snowboard bag or sleeve, stored horizontally in a cool, dry area. Avoid storing it in direct sunlight, near heat sources, or in damp environments like a damp basement.
How to Store Your Snowboard for Summer
Proper summer storage is one of the most important aspects of snowboard maintenance. A board that is stored correctly will be ready to ride when the next season starts, while a board that is stored improperly may develop problems that require costly repairs.
The Storage Wax Method
The most important step in summer storage is applying a thick coat of wax to the base — commonly called “storage wax.” This wax layer acts as a protective barrier, sealing the base material from air and moisture. Without this protection, the base can oxidize and dry out over the summer months, leading to a chalky, rough surface that requires extensive restoration before the next season.
Apply the wax generously using a standard hot wax technique. Do not scrape the wax off — leave it thick on the base. When you are ready to ride at the start of the next season, simply scrape and brush the storage wax off and apply a fresh coat of riding wax. The storage wax will have protected the base throughout the summer, and the fresh coat will provide optimal glide for your first day back on the mountain.
Storage Environment
The ideal storage environment for a snowboard is cool, dry, and dark. A closet or shelf in a climate-controlled room is perfect. Avoid garages that experience extreme temperature fluctuations, attics that get hot in summer, and basements that may be damp. UV light can degrade the base material and graphics, so keeping the board out of direct sunlight is important.
If you must store your board in a garage or other non-climate-controlled space, consider wrapping it in a board bag or cover for additional protection. The bag helps insulate the board from temperature swings and keeps dust and debris off the base.
Board Position During Storage
Store your board horizontally, not vertically. Leaning a board against a wall for months can create pressure points that may cause the board to develop a slight warp. Horizontal storage on a flat surface distributes the weight evenly and prevents any deformation. If you are storing multiple boards, stack them with padding between them to prevent scratching.
Binding Storage
If you remove your bindings for storage, keep the screws and hardware in a labeled bag taped to the board or stored with the bindings. Losing a single binding screw can turn the start of the next season into a frustrating hunt for replacements. If you leave the bindings on the board, make sure to loosen the screws as described in the end-of-season maintenance section.
Snowboard Tuning at Home: Complete DIY Tune-Up Guide
A complete snowboard tune-up goes beyond just waxing. It includes edge sharpening, base repair, structure work, and a thorough inspection of the board’s overall condition. While many riders take their boards to a shop for a full tune, the entire process can be done at home with the right tools and knowledge.
What Does a Full Tune-Up Include?
A complete snowboard tune-up typically includes the following steps:
- Base inspection and repair: Check for scratches, gouges, and other damage. Repair any damage with P-Tex.
- Base cleaning: Remove old wax, dirt, and grime with base cleaner.
- Edge sharpening: File and polish the edges to restore sharpness.
- Edge detuning: Slightly dull the contact points to prevent catchiness (optional, depending on rider preference).
- Hot wax: Apply a fresh coat of temperature-appropriate wax.
- Scraping and brushing: Remove excess wax and brush the base to reveal the structure.
- Final inspection: Check the base, edges, and overall condition of the board.
How Long Does a Full Tune-Up Take?
A complete tune-up takes approximately 1 to 2 hours, depending on the amount of base repair needed and your experience level. The majority of the time is spent waiting for the wax to cool (30 to 45 minutes). The active work — cleaning, repairing, sharpening, waxing, scraping, and brushing — typically takes 30 to 60 minutes.
DIY Tune-Up vs. Shop Tune-Up
A professional shop tune-up costs between $40 and $80, depending on the shop and the level of service. A basic tune includes wax and edge sharpening, while a full tune adds base repair and structure work. Over the course of a season, the cost of shop tune-ups can easily exceed $200 for a rider who tunes their board 3 to 4 times.
By investing in a home tuning kit (typically $80 to $150 for a quality setup), you can perform the same maintenance for a fraction of the cost. The initial investment pays for itself within the first season, and you gain the satisfaction of maintaining your own equipment.
There are situations where a shop tune is worth the investment. If your board has significant base damage that requires professional-grade P-Tex repair, if your edges need to be completely re-ground, or if you simply do not have the time or inclination to do the work yourself, a professional tune-up is a perfectly valid choice.
Professional Wax vs. DIY Wax: Cost Comparison
Understanding the true cost comparison between professional waxing and DIY waxing helps you make an informed decision about how to maintain your board.
Professional Waxing Costs
| Service | Average Cost | Frequency (per season) | Annual Cost |
|---|---|---|---|
| Basic Hot Wax | $20 – $30 | 4 times | $80 – $120 |
| Full Tune-Up | $40 – $80 | 2 times | $80 – $160 |
| Edge Sharpening Only | $10 – $20 | 3 times | $30 – $60 |
| Base Repair (P-Tex) | $15 – $30 | As needed | $15 – $30 |
DIY Waxing Costs
| Item | Initial Cost | Consumable Cost Per Season |
|---|---|---|
| Waxing Iron | $40 – $80 | $0 (lasts years) |
| Wax (1 kg block) | $15 – $25 | $15 – $25 |
| Scraper | $5 – $15 | $0 (lasts years) |
| Brushes (set) | $15 – $30 | $0 (lasts years) |
| Base Cleaner | $8 – $15 | $8 – $15 |
| Edge File + Guide | $15 – $25 | $0 (lasts years) |
The initial investment in a home waxing kit is approximately $100 to $200, depending on the quality of the tools you choose. After the first season, the ongoing cost drops to just wax and base cleaner — approximately $25 to $40 per season. Compare this to the $100 to $200+ per season you would spend at a shop, and the savings are clear.
Beyond the financial savings, there are intangible benefits to DIY waxing. You learn to understand your equipment, you can wax on your own schedule (including the night before a powder day), and you develop a deeper connection to your board. Many riders find the waxing process meditative and enjoyable — a ritual that enhances their overall snowboarding experience.
Snowboard Wax Brands Compared
The snowboard wax market is crowded with options, and choosing the right brand can be overwhelming. Here is a comparison of some of the most popular and well-regarded wax brands to help you make an informed choice.
Swix
Swix is one of the oldest and most respected names in wax technology. Founded in Norway in 1946, Swix has decades of experience developing waxes for cross-country skiing, alpine skiing, and snowboarding. Their product line ranges from affordable hydrocarbon waxes to high-end race waxes with fluorinated compounds. Swix waxes are known for their consistent quality and clear temperature ratings, making them easy to choose for specific conditions.
Toko
Toko is another Swiss company with a long history in wax production. They are particularly well-known for their high-fluorinated race waxes, which are used by professional racers around the world. Toko also makes excellent all-temperature and temperature-specific waxes for recreational riders. Their wax line is well-organized by color coding, making it easy to select the right product for your conditions.
Hertel
Hertel is an American wax company that has developed a loyal following among snowboarders and skiers. Their Super Hot Sauce wax, featured in the product grid above, is an all-temperature wax that works well in virtually all conditions. It is particularly popular with beginners and intermediate riders who want a reliable, no-fuss wax that performs consistently. Hertel waxes are affordable and widely available.
Dakine
Dakine is best known for their bags and accessories, but they also produce a solid line of snowboard waxes. Their waxes are designed with the snowboarder in mind and are available in temperature-specific and all-temperature formulas. Dakine waxes are a good mid-range option that balances performance and value.
One Ball Jay
One Ball Jay is a snowboard-specific brand that has been producing waxes and tuning products since the 1990s. They are known for their fun packaging and snowboard-focused approach. Their wax line includes temperature-specific options and an all-temperature formula that is popular with park riders. One Ball Jay waxes are affordable and effective, making them a great choice for budget-conscious riders.
Choice Recommendations by Rider Type
- Beginner on a budget: Hertel Super Hot Sauce or One Ball Jay All-Temperature
- Intermediate all-mountain: Swix CH series or Dakine All-Temperature
- Advanced / performance-focused: Swix or Toko temperature-specific line
- Racing / competitive: Toko HF series or Swix Cera-F line
- Eco-conscious: Dakine Eco Wax or Swix Bio series
Common Waxing Mistakes and How to Avoid Them
Even experienced riders make waxing mistakes from time to time. Here are the most common errors and how to avoid them.
Mistake 1: Using Too Much Wax
This is the most common beginner mistake. Applying too much wax does not make the board faster — it actually makes it slower because the excess wax on the surface creates drag. It also means more scraping work for you. Apply a thin, even layer that covers the base without thick puddles.
Mistake 2: Letting the Iron Sit in One Spot
Leaving the iron stationary on the base can burn the P-Tex material, causing permanent damage. Always keep the iron moving in slow, smooth strokes. If you need to pause, lift the iron off the base completely.
Mistake 3: Scraping Before the Wax Is Fully Cooled
Impatient riders who scrape too early get a poor result. The wax needs to be completely hard before scraping. If the wax is still slightly soft, it will be gummy and difficult to remove cleanly. Wait the full 30 to 45 minutes, or until the wax is rock-hard to the touch.
Mistake 4: Not Brushing After Scraping
Many riders skip the brushing step, thinking that scraping is sufficient. Scraping removes the bulk of the wax, but brushing is what reveals the base structure and removes the residual wax from the tiny grooves. Always brush after scraping for the best results.
Mistake 5: Waxing Over a Dirty Base
Applying fresh wax over dirt and grime seals the contaminants into the base, reducing the effectiveness of the wax and potentially damaging the base material. Always clean the base before waxing.
Mistake 6: Using a Clothes Iron
Clothes irons are designed for fabric, not wax. They have steam holes that create uneven wax distribution, and their temperature fluctuates unpredictably. Invest in a dedicated waxing iron — the cost is modest and the improvement in results is significant.
Mistake 7: Forgetting to Loosen Bindings
Tight binding screws can create dimples in the base when the board is heated. Always loosen the screws before waxing and tighten them back up afterward.
Mistake 8: Not Matching Wax to Temperature
Using warm wax in cold conditions (or vice versa) significantly reduces its effectiveness. Always check the temperature rating on the wax packaging and choose the appropriate product for the conditions you will be riding in.
Mistake 9: Storing the Board Without Wax
Storing a bare board over the summer allows the base to oxidize and dry out. Always apply a thick coat of storage wax before putting the board away for the season.
Mistake 10: Neglecting Edge Maintenance
Waxing is only half of snowboard maintenance. Dull edges make even a freshly waxed board difficult to control. Keep your edges sharp and burr-free for the best overall performance.
Snowboard Maintenance Checklist
Use this checklist to keep track of your snowboard maintenance tasks throughout the season. Print it out and post it in your waxing area for easy reference.
Before Each Ride
- Wipe down the base with a dry cloth
- Check edges for visible damage or rust
- Inspect bindings for tight screws and secure straps
- Verify binding angles and stance width
Every 3-5 Days of Riding
- Clean the base with base cleaner
- Apply fresh wax (temperature-appropriate)
- Scrape and brush the base thoroughly
- Inspect the base for new damage
Every 5-10 Days of Riding
- Sharpen edges with a file and guide
- Polish edges with a diamond stone
- Deburr edges with a gummy stone
- Perform a full base inspection
Start of Season
- Remove storage wax
- Clean the base thoroughly
- Inspect and repair any base damage
- Sharpen and tune edges
- Apply fresh riding wax
- Check all binding hardware
- Verify board condition overall
End of Season
- Clean the base thoroughly
- Repair any damage with P-Tex
- Apply thick storage wax (do not scrape)
- De-tune edges with a gummy stone
- Loosen binding screws
- Store in a cool, dry, dark location
Snowboard Base Structure: Why It Matters and How to Add It
Base structure refers to the pattern of tiny grooves or lines in the surface of your snowboard’s base. These grooves are machined into the base at the factory and serve an important purpose: they break the suction created by the thin water film between your board and the snow.
Why Structure Matters
When your board slides across snow, friction generates heat that melts a thin layer of snow into water. This water film creates suction that can slow your board down. The tiny grooves in the base structure break this water film into smaller channels, reducing suction and improving glide. Without structure, the water film would create a vacuum effect between the board and the snow, significantly increasing drag.
The ideal structure depends on the snow conditions. In cold, dry snow, a fine structure with narrow grooves works best because the water film is thin. In warm, wet snow, a coarser structure with wider grooves is more effective because it needs to handle a thicker water film. Some high-end boards come with temperature-specific structures, while most boards have a universal structure that works reasonably well across a range of conditions.
How to Maintain Base Structure
Proper waxing and brushing maintain the base structure over time. When you wax, the wax fills the grooves. When you scrape and brush, the excess wax is removed from the grooves while a thin layer remains inside them. This is why brushing is so important — it reveals the structure by removing wax from the surface while leaving wax in the grooves.
If you wax regularly and brush thoroughly, the structure will remain in good condition for the life of the board. However, over time, the structure can wear down, especially on the edges where the most friction occurs. If you notice that your board is slower than it used to be despite regular waxing, the structure may be worn and could benefit from re-structuring at a shop with the proper equipment.
DIY Structure Options
For advanced riders who want to add or modify their base structure, stone grinding is the gold standard. This requires specialized equipment found at professional tuning shops. However, there are some DIY options for adding basic structure:
- Structured nylon brush: After waxing and scraping, use a nylon brush with a specific bristle pattern to create light structure lines in the base. This is not as precise as stone grinding, but it can improve glide in specific conditions.
- Roto-brush: A powered brush that attaches to a drill and can create more consistent structure than hand brushing. Roto-brushes are available in different bristle patterns for different structures.
For most riders, relying on the factory structure and maintaining it through proper waxing and brushing is sufficient. DIY structure modification is best left to advanced riders who understand the relationship between structure and snow conditions.
How to Detune Snowboard Edges
Detuning is the process of slightly dulling your snowboard’s edges at specific points along the board. While sharp edges are essential for carving and edge hold on hardpack, overly sharp edges at certain locations can cause problems — especially for park riders and beginners.
Why Detune?
The most common reason to detune is to prevent “catchy” edges. The contact points of a snowboard — the areas near the tip and tail where the board’s effective edge begins — are the most likely spots to catch on the snow and throw you off balance. By slightly dulling these contact points, you make the board more forgiving and less likely to catch unexpectedly.
Park riders also detune to protect rails and boxes. Sharp edges can scratch and damage park features, which is bad etiquette and can result in being banned from the park. Many resorts require riders to detune their edges before using park features.
Where to Detune
- Contact points: The most common location for detuning. These are the points near the tip and tail where the edge first contacts the snow during a turn. Detuning these areas makes the board less catchy without significantly affecting edge hold.
- Between the bindings (flat section): Some park riders detune the flat section between the bindings for smoother rail and box sliding.
- Full edge detuning: Some beginners choose to detune the entire edge for maximum forgiveness, though this significantly reduces edge hold on hardpack.
How to Detune
- Identify the detune zone: Mark the area you want to detune with a piece of tape or a marker.
- Use a gummy stone or diamond stone: Run the stone along the edge at a slightly higher angle than you would for sharpening. This removes the sharpness without removing much material.
- Check the result: Run your fingernail along the detuned area. A properly detuned edge will not catch your nail. Compare it to the sharp sections of the edge to feel the difference.
Detuning is easily reversible. If you decide you want sharper edges again, a few passes with a file will restore the sharpness. Start conservatively with detuning — you can always remove more material, but you cannot add it back.
Snowboard Edge Angle Guide: What Angle Should Your Edges Be
The angle at which your edges are beveled affects how the board grips the snow, how easily it initiates turns, and how it performs in different conditions. Understanding edge angles helps you customize your board’s performance to match your riding style and the conditions you typically encounter.
Standard Edge Angles
| Edge Angle | Description | Best For |
|---|---|---|
| 90° (0° bevel) | Fully vertical edge; maximum contact with the snow | Ice racing, hardpack riding |
| 88° (2° bevel) | Slight inward bevel; balances grip and forgiveness | All-mountain riding, most conditions |
| 87° (3° bevel) | Moderate bevel; easier turn initiation, less catch | Freestyle, park, beginners |
| 85° (5° bevel) | Aggressive bevel; very forgiving, reduced grip | Flatland tricks, rail riding |
Choosing Your Edge Angle
Most snowboards come from the factory with a 90° edge (no bevel). This is a good starting point for most riders. If you find that your board is too “catchy” or you are riding primarily in the park, consider detuning to 88° or 87°. If you ride a lot of ice and hardpack and want maximum edge hold, keep the edges at 90° or even add a slight side bevel for extra grip.
Some advanced riders use different edge angles on different parts of the board. For example, keeping the edges sharp between the bindings for carving grip while detuning the contact points near the tip and tail for forgiveness. This customization requires some experimentation to find what works best for your riding style.
Base Edge vs. Side Edge
The edge angle discussion involves two different angles: the side edge angle and the base edge angle. The side edge angle is what most people think of when they discuss edge angles — it is the angle of the edge face relative to the base. The base edge angle is the angle of the edge relative to the snow surface when the board is flat. Most riders focus on the side edge angle, as this is what primarily affects edge hold and turn initiation. Base edge bevel is typically set at 1° to 2° to prevent the edge from catching when the board is flat on the snow.
Best Snowboard Waxing Kits for Beginners
If you are just getting started with home waxing, a complete kit is the easiest way to ensure you have everything you need. Here are some of the best beginner-friendly waxing kits available.
What to Look for in a Beginner Kit
A good beginner kit should include the essentials: a waxing iron with temperature control, a block of all-temperature wax, a plastic scraper, and at least one brush (nylon). Additional nice-to-haves include base cleaner, a tuning guide, and a storage bag to keep everything organized.
When choosing a kit, prioritize the quality of the iron. A cheap iron without temperature control will give you inconsistent results and may damage your board. It is worth spending a few extra dollars on an iron with adjustable temperature, even if the other components of the kit are basic.
Recommended Starter Kits
The Demon Complete Tune Kit, featured in the product grid above, is one of the most popular beginner kits. It includes an iron, wax, scraper, brushes, and edge tools — everything you need to get started. For riders who want a slightly more premium experience, the Swix Starter Kit offers higher-quality components in a compact package.
If you prefer to build your own kit piece by piece, start with a good iron, a block of all-temperature wax, a plastic scraper, and a nylon brush. These four items are all you need to perform a basic hot wax. You can add base cleaner, edge tools, and additional brushes as your skills and needs grow.
Eco-Friendly and Natural Snowboard Wax Options
Environmental responsibility is increasingly important to the snowboarding community. As riders who spend their time in beautiful mountain environments, many feel a responsibility to minimize their impact. One area where this responsibility can be exercised is in the choice of wax.
The Environmental Concern with Traditional Wax
Traditional snowboard waxes are petroleum-based and often contain perfluorinated chemicals (PFCs) that are extremely persistent in the environment. These chemicals do not break down naturally and can accumulate in waterways, soil, and even living organisms. As wax is scraped off boards and enters the snowmelt, these chemicals find their way into the ecosystem.
Several ski resorts and environmental organizations have begun advocating for fluorine-free wax alternatives. Some competitions have already banned fluorinated waxes. The trend is clear: the industry is moving toward more environmentally responsible options.
What to Look for in Eco-Friendly Wax
When shopping for eco-friendly wax, look for products that are labeled as fluorine-free, plant-based, or biodegradable. These waxes use natural waxes like beeswax, carnauba, or plant oils as their base instead of petroleum-derived paraffin. They avoid the use of PFCs and other persistent chemicals.
Modern eco-friendly waxes have improved dramatically in performance. While early natural waxes wore off quickly and did not provide the same glide as synthetic options, today’s formulations can hold up for several days of riding and provide competitive performance. The slight performance trade-off is worth it for many riders who prioritize environmental responsibility.
Eco-Friendly Wax Brands
Several brands have committed to producing environmentally responsible waxes. Dakine offers an Eco Wax line made from plant-based ingredients. Swix has introduced bio-based waxes that reduce petroleum content. Various smaller companies specialize exclusively in natural waxes. As demand grows, more options are becoming available each season.
How Wax Affects Snowboard Speed and Performance
Understanding the physics behind how wax works helps you appreciate why regular waxing is so important and how different waxes can affect your riding experience.
The Science of Glide
When your snowboard slides across snow, friction between the base and the snow generates heat. This heat melts a microscopic layer of snow into water. The water film acts as a lubricant between the board and the snow, reducing friction and allowing the board to glide. This is the same principle that allows an ice skater to glide across ice — the pressure and friction create a thin water layer that reduces drag.
Wax enhances this process in two ways. First, it creates a hydrophobic surface that helps manage the water film more effectively. A well-waxed base repels water evenly, preventing the suction effect that occurs when water pools under the board. Second, wax fills the microscopic imperfections in the base material, creating a smoother surface with less friction.
How Different Waxes Affect Performance
Different waxes interact with the water film differently. Cold waxes are harder and repel water more effectively in thin-film conditions (cold, dry snow). Warm waxes are softer and manage thicker water films (warm, wet snow). Fluorinated waxes are extremely hydrophobic and excel in wet conditions where the water film is thick. Graphite waxes reduce static charge and prevent the base from attracting snow particles in cold, dry conditions.
The key takeaway is that wax does not make your board “slippery” in the way that oil makes a machine slippery. Instead, it optimizes the interaction between your base and the water film, ensuring that the lubricating effect of the water is maximized while minimizing any negative effects like suction or drag.
Measurable Speed Differences
The speed difference between a well-waxed board and a dry, unwaxed board is significant. In side-by-side tests, a freshly waxed board can be 15% to 25% faster than an unwaxed board on groomed runs. On flat sections, the difference is even more pronounced — a waxed board can glide 50% farther on a flat surface than an unwaxed one. These differences are not just theoretical; they translate directly into a more enjoyable and less tiring day on the mountain.
Snowboard Wax for Racing and Competitive Riding
Competitive snowboarders have unique waxing needs that go beyond standard recreational maintenance. In racing, every fraction of a second matters, and wax selection and application can make the difference between finishing on the podium and finishing in the middle of the pack.
Types of Race Wax
Race waxes are typically categorized into base waxes and top coats. Base waxes provide durability and a foundation for the top coat. They are usually harder, more durable formulas that can withstand the high speeds and aggressive riding of competitive snowboarding. Top coats are applied over the base wax and are designed for maximum speed. They often contain fluorinated compounds or other friction-reducing additives.
Some race waxes are designed for specific temperature ranges, just like recreational waxes. Racers will select a base wax and top coat combination that matches the expected conditions on race day. In extremely cold conditions, a hard base wax with a cold-specific top coat is typical. In warm, wet conditions, a softer base with a fluorinated top coat provides the best glide.
Race Wax Application Process
Race waxing is a multi-step process that is more involved than standard waxing:
- Clean and prepare the base: Use the hot scrape method to thoroughly clean the base and remove any old wax or contaminants.
- Apply the base wax: Iron in the base wax according to the manufacturer’s temperature specifications. Allow to cool completely.
- Scrape and brush: Remove excess base wax and brush the base to prepare it for the top coat.
- Apply the top coat: Iron in the top coat at a slightly lower temperature than the base wax. Some top coats are designed to be applied with a cork or roto-brush instead of an iron.
- Extended cooling: Allow the top coat to cool for an extended period — sometimes overnight — for maximum crystal formation and bonding.
- Final scrape and brush: Scrape and brush the top coat, paying extra attention to the base structure. Use a horsehair brush for a final polish.
Rules and Regulations
It is important to note that many competitive organizations have rules about wax use. The International Ski Federation (FIS) and various national governing bodies have banned fluorinated waxes in many competitions due to environmental concerns. Always check the rules for your specific competition before using any wax containing fluorinated compounds.
Troubleshooting Common Waxing Issues
Why is my wax turning white immediately?
Your iron might be too cold, or the board itself is freezing cold. Make sure the board is at room temperature before you start. Cold base material causes the wax to solidify too quickly, preventing proper absorption. Let the board warm up indoors for at least an hour before waxing.
Can I wax over old wax?
Generally, yes, but you should clean the board every few waxes to prevent dirt buildup. If your base looks dirty (black streaks on a colored base), clean it first. Applying fresh wax over old wax is fine for routine maintenance, but periodic deep cleaning ensures optimal performance.
Extruded vs. Sintered Bases
If you are riding a high-end board, like the Capita Mercury or Jones Mountain Twin, you likely have a sintered base. These are porous and hold wax very well, but require waxing more often. Cheaper boards often have extruded bases; they are durable and low maintenance but don’t absorb wax as deeply. However, waxing an extruded base still improves the glide significantly.
My board is still slow after waxing. What went wrong?
Several things could cause this: the wax may not have been hot enough to penetrate the base, the base may need cleaning before the next wax, the structure may be clogged with old wax, or the edges may be dull. Try a full cleaning with base cleaner, followed by a fresh hot wax with proper temperature control. If the board is still slow, check the edges and consider a full tune-up.
The wax is flaking off my board. Why?
Wax flaking usually occurs when the wax did not bond properly with the base. This can happen if the base was dirty or wet when the wax was applied, if the iron was too hot (burning the wax), or if the wax type is not compatible with the base material. Clean the base thoroughly and reapply wax at the correct temperature.
Can I use a hair dryer to wax my board?
A hair dryer can work in a pinch for melt-in applications, but it does not provide the consistent, controlled heat that a dedicated waxing iron offers. Hair dryers can also blow wax around, creating a mess. If you must use a hair dryer, use it on a medium setting and keep it moving to avoid overheating.
How do I know if my iron temperature is correct?
The best indicator is the wax itself. At the correct temperature, the wax should melt smoothly and flow easily across the base without smoking. If you see smoke, the iron is too hot. If the wax is thick and sluggish, the iron is too cold. Most wax packaging includes a recommended temperature range — start there and adjust based on how the wax behaves.
Should I wax a brand new board?
Most new boards come with a factory wax application. However, this factory wax is often a generic, all-purpose formula applied during manufacturing. For optimal performance, many riders choose to strip the factory wax and apply their own wax before the first ride. This ensures the base is properly prepared for the specific conditions you will be riding in.
Is it possible to over-wax a snowboard?
Not really. Waxing too frequently does not damage the board. In fact, more waxing generally means better base protection and performance. The only downside of over-waxing is the time and wax investment. If you wax every day, you are spending more time and wax than necessary, but you are not harming the board. Most riders find that every 3 to 5 days provides the best balance of performance and efficiency.
Can different wax brands be mixed?
In general, yes. Most hydrocarbon waxes are compatible with each other and can be layered or mixed without issues. However, it is best to avoid mixing hydrocarbon waxes with fluorinated waxes, as the different chemical compositions may not bond well. When in doubt, stick with the same brand and product line for base and top coat waxes.
Frequently Asked Questions (FAQ)
How often should I wax my snowboard?
Ideally, every 3 to 5 days of riding. If you see white, chalky patches near the edges (known as base burn), you are overdue for a wax.
Can I use candle wax?
No. Candle wax is paraffin but lacks the specific additives and durability required for snow friction. It will flake off almost immediately. Stick to proper ski/snowboard wax.
Is waxing messy?
It can be. The scrapings create a mess on the floor. Lay down a tarp or vacuum immediately after. It helps to wear work clothes or impact shorts if you don’t want wax flakes on your nice jeans.
Can I use a regular clothes iron for waxing?
You can in an emergency, but it is not recommended. Clothes irons have steam holes that create uneven wax distribution, and their temperature fluctuates unpredictably. A dedicated waxing iron with temperature control provides much better results. If you must use a clothes iron, turn off the steam function and test the temperature carefully.
What temperature should my waxing iron be?
Most all-temperature waxes work best at 120°C to 140°C (248°F to 284°F). Always check the wax packaging for specific temperature recommendations. Cold waxes typically require slightly lower temperatures, while warm waxes may need slightly higher settings.
How long does a wax job last?
A hot wax job typically lasts 3 to 5 days of riding, depending on the conditions, your riding style, and the type of wax used. In harsh conditions (wet snow, frequent riding on rails), wax may wear off more quickly. In ideal conditions (cold, dry powder), wax can last longer.
Do I need to remove my bindings before waxing?
You do not need to remove them completely, but you should loosen the screws. Heating the board causes the materials to expand, and tight screws can create dimples in the base. Loosen each binding screw by a few turns before waxing and tighten them back up afterward.
What is the difference between ski wax and snowboard wax?
There is virtually no difference. Ski wax and snowboard wax are the same product. The same hydrocarbon formulas, temperature ratings, and application techniques apply to both. If you see a wax labeled for skiing, it will work perfectly on your snowboard.
How do I know what type of base my board has?
Check the manufacturer’s specifications. Most boards list the base material in their product description or on the manufacturer’s website. As a general rule, boards priced above $400 typically have sintered bases, while budget boards usually have extruded bases. You can also tell by touch — sintered bases feel slightly rougher and more porous, while extruded bases feel smoother and more waxy.
Can I wax my board the night before riding?
Absolutely. In fact, waxing the night before is ideal. It gives the wax ample time to cool and bond with the base, ensuring maximum absorption and performance. Many experienced riders wax the night before every riding day for the best results.
What happens if I never wax my snowboard?
Your board will become increasingly slow as the base dries out and oxidizes. The base material will degrade, becoming rough and chalky. Performance will suffer significantly — you will struggle on flats, find it harder to maintain speed, and the board will be less responsive in turns. Over time, an unwaxed base can develop permanent damage that requires professional repair or even base replacement.
Is it worth waxing an extruded base?
Yes. While extruded bases do not absorb wax as deeply as sintered bases, waxing still improves their glide significantly. Wax also protects the base from drying out and oxidizing. Even budget boards benefit from regular waxing.
Can I wax my board in the summer?
You can, but the purpose would be different. Summer waxing is typically done for storage protection (storage wax) rather than for riding performance. Apply a thick coat of wax without scraping to protect the base during summer storage. Do not bother with a full scrape and brush job in the summer — the wax will dry out before you ride again.
How do I remove wax from my clothes?
Wax on clothing can be removed by placing the garment in the freezer until the wax hardens, then scraping off the solid wax with a dull knife. Follow up with an iron and paper towel to absorb any remaining residue. For stubborn stains, rubbing alcohol or a commercial wax remover can help.
What temperature wax should I use?
Choose your wax based on the temperature at which you will be riding. Check the temperature range on the wax packaging and match it to the expected conditions. If you ride in a variety of conditions, an all-temperature wax is the most practical choice. If you ride mostly in one temperature range, a temperature-specific wax will provide better performance.
Conclusion: Ready to Ride
Waxing your snowboard at home is a ritual. It’s a time to inspect your gear, check your bindings, and get hyped for the next trip. Whether you are heading to Colorado or exploring European ski resorts, a freshly waxed board is the best travel companion you can have.
Remember, the goal is to have fun. Nothing kills the vibe faster than getting stuck on the flats while skiers push past you. Take care of your board, and it will take care of you. Now, grab your iron, put on some music, and get that board ready for the season.
The information in this guide covers everything from the basics of wax application to advanced topics like race waxing, base structure, and edge tuning. Whether you are a first-time rider just learning how to wax a snowboard at home or an experienced rider looking to refine your technique, the key principles remain the same: keep your base clean, match your wax to the conditions, apply it with the correct temperature, and be patient during the cooling process.
Your snowboard is an investment, and like any investment, it performs best when properly maintained. The small amount of time and money you invest in regular maintenance pays dividends in performance, durability, and riding enjoyment. A well-maintained board is faster, more responsive, and lasts longer than a neglected one. And the satisfaction of knowing that you maintain your own gear adds an extra layer of pride to every run.
So take what you have learned from this guide, set up your home waxing station, and start taking care of your board. Your future self — the one carving effortlessly through fresh powder while everyone else struggles on slow, dry boards — will thank you.
Disclaimer: This guide contains affiliate links. Always follow manufacturer instructions for your specific snowboard gear.


