
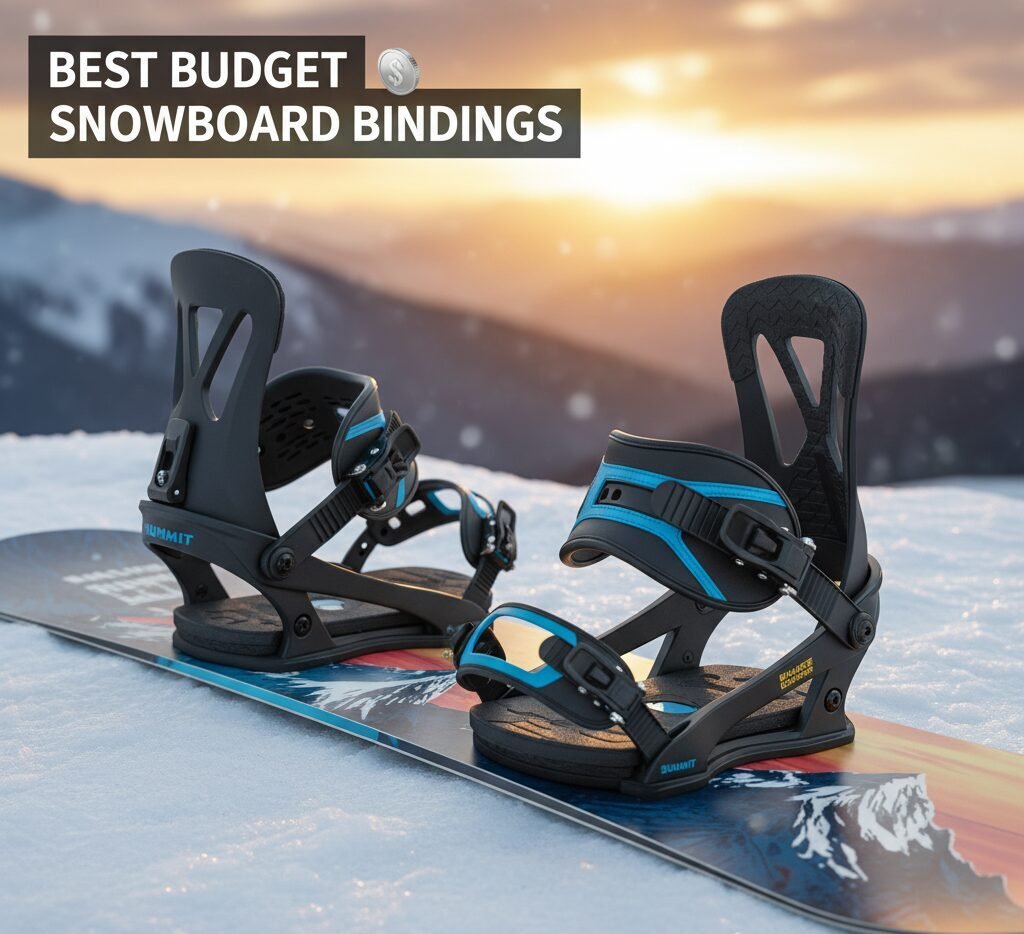
5 Best Budget Snowboard Bindings (Under-the-Radar Value Picks U.S. Riders Love)
Save your cash for lift tickets and road-trip burritos—these affordable bindings deliver real-world performance without the premium price tag. We tested and analyzed options that fit U.S. riders across park laps, groomers, and first powder days.
Want the rest of your kit dialed too? Check our guides on best snowboard boots, goggles, helmets, and board bags.
Table of Contents
Who This Guide Is For
This guide targets U.S. riders who want maximum value—new snowboarders kitting out their first setup, budget-minded park rats who burn through gear, east-coast carvers who need confidence on ice, and weekend warriors who want “set-and-forget” reliability. If your priority is smooth learning curve, no-drama comfort, and compatibility with most boards, you’re in the right place.
As you build out your kit, also check our beginner-friendly resources:
- Resorts for beginners and are lessons worth it?
- Gear timing: best time to buy snowboard gear
- Comfort & injury prevention: best impact shorts and why do feet hurt?
Top 5 Budget Snowboard Bindings (Quick Picks)

Salomon Rhythm Snowboard Bindings
Soft-medium flex with surprisingly supportive highback. Great for beginners and progression-minded riders who want forgiving carve initiation.

Burton Freestyle Re:Flex Bindings
Classic entry-level Burton feel with plush straps and all-day comfort. Re:Flex baseplate works across most standard mounts and offers better board feel.

Union Flite Pro Bindings
Feathery feel, lively flex, and fun board feedback for jibbing, side hits, and progression. Makes lighter boards feel extra playful.

K2 Sonic Snowboard Bindings
Simple, durable, and easy to set up. Sonic’s mellow flex and comfort-first straps help new riders learn faster with fewer toe-edge catches.

Ride C-2 Snowboard Bindings
A touch more drive than super-soft options, with solid heel-to-toe response for riders who’ve moved past day-one greens.
*Prices fluctuate during the U.S. season—especially around Black Friday/Cyber Monday and late spring sales. See our guide on the best time to buy snowboard gear.
Side-by-Side Comparison
| Binding | Best For | Flex | Baseplate/Board Feel | Straps | Mount Pattern | Notable |
|---|---|---|---|---|---|---|
| Salomon Rhythm | Overall value, progression | Soft-Medium | Damp enough; smooth roll for edge changes | Comfortable, no-drama | 2×4, 4×4 | Forgiving highback; tool-less toe ramp |
| Burton Freestyle Re:Flex | Comfort & board feel | Soft | Re:Flex disc = better underfoot flex | Plush, beginner-friendly | 2×4, 4×4, Channel* | *Works on Burton Channel boards w/ Re:Flex |
| Union Flite Pro | Park & lightweight feel | Soft | Lively, skate-y feedback | Minimal yet secure | 2×4, 4×4 | Very light; easy presses |
| K2 Sonic | First setup simplicity | Soft | Stable enough for greens/blues | Comfort-first, easy ratchets | 2×4, 4×4 | Low learning curve; durable ladders |
| Ride C-2 | All-mountain on a budget | Medium-Soft | Added drive off the tail | Supportive ankle strap | 2×4, 4×4 | Confidence carving at speed |
If carving technique is your goal, bookmark our tutorial on how to carve on a snowboard.
Deep-Dive Reviews: Why These 5 Bindings Made the List
1) Salomon Rhythm — Smooth Progression, Wallet-Friendly
The Salomon Rhythm consistently punches above its price. It’s one of those bindings that disappears underfoot—in the best way. The flex sits in the sweet spot for beginners and intermediates: soft enough to be forgiving on toe-edge catches, but not so noodly that you feel unstable on firmer U.S. resort snow (think Vermont mornings or late-day chop in Colorado).
Pros
- Forgiving highback reduces heel-edge washouts while learning.
- Comfortable straps with minimal pressure points on long lift days.
- Tool-less toe ramp and easy forward-lean adjustments.
- Great value; parts availability is decent across U.S. shops.
Cons
- Advanced riders may outgrow the lateral support for steep terrain.
- Not the most damp at high speed in icy chop.
Bottom Line: A confidence-building binding with comfortable ergonomics and simple setup. Ideal for your first full season or a budget park build.
Dial fit with the right boots—see Vans boot sizing, K2 boots review, and our best boots guide.
2) Burton Freestyle Re:Flex — Comfort King with Great Board Feel
Burton’s Freestyle has taught generations of U.S. riders how to turn. The Re:Flex baseplate offers a more natural board flex, which translates into smoother edge transitions and a bit more “butter” underfoot—perfect for riders experimenting with presses and flat-ground tricks.
Pros
- Plush ankle strap reduces fatigue—huge for long resort days.
- Re:Flex disk works on most boards, including Burton Channel boards.
- Predictable, beginner-friendly flex with confidence-boosting feel.
Cons
- Softer flex means less drive for aggressive carving or big lines.
- During peak U.S. holidays, prices can spike—watch sales windows.
Bottom Line: If comfort and easy board feel are top priorities, the Freestyle Re:Flex is a safe, time-tested bet for groomers and early park laps.
Pair with a mellow board and mitts (yes, mitts are warmer—see mittens vs gloves and why riders wear mittens).
3) Union Flite Pro — Lightweight Fun for Park & Side-Hit Addicts
Union’s Flite Pro remains a go-to for riders who want featherweight, playful performance. It encourages a skate-style approach: jib the side hit, butter the knuckle, pivot into a quick switch carve. That low mass makes spins and quick footwork feel easier when you’re learning tricks.
Pros
- Extremely light—reduces swing weight for spins and taps.
- Responsive enough for blues while still forgiving on greens.
- Union’s ratchets are reliable and quick to release.
Cons
- Not ideal for hard charging on icy steeps.
- Liveliness can feel chattery if paired with an ultra-stiff board.
Bottom Line: If you want a binding that keeps the day playful and helps progression in the park, this is a budget champ that doesn’t feel “cheap.”
Protect your body while learning new tricks—grab impact shorts and a quality helmet.
4) K2 Sonic — Set-It-and-Forget-It for Your First Real Season
The K2 Sonic is the definition of uncomplicated. Mount it, set the straps, and go ride. It’s tough enough to handle entry-level abuse—think parking lot adjustments with gloves on and frequent on-hill micro-tweaks—and it has the headroom to grow with you through those first black-diamond attempts.
Pros
- Smooth ratchets with gloved-hand ease.
- Comfortable enough for full-day lessons and back-to-back weekends.
- Solid value proposition during U.S. retail sales.
Cons
- More experienced riders may want a stiffer highback for speed.
- Less “pop” than playful park-oriented options.
Bottom Line: A great first binding for American resorts where you’re progressing from rentals to ownership and want simple reliability.
Stretch your budget with smart timing—see best time to buy gear.
5) Ride C-2 — Budget All-Mountain with Better Drive
When you’re riding coast-to-coast—icy mornings in the Northeast, wind-buff in Utah, chopped powder in Tahoe—you want a touch more backbone. The C-2 brings just enough response to lean into carves without punishing you if your stance is a bit off. It’s a strong under-$200* contender (watch seasonal pricing).
Pros
- Added heel-to-toe drive for carving and speed stability.
- Straps feel more supportive than entry-level competitors.
- Holds up better as you push intermediate terrain.
Cons
- Slightly heavier than ultra-light park choices.
- Beginners may prefer a softer highback early on.

Bottom Line: A value option that won’t hold you back as speed and steeps enter your riding diet.
Learning to manage speed? Read why snowboarding can be dangerous and how smart gear choices reduce risk.
How Snowboard Bindings Actually Work (Anatomy & Engineering)
Before you drop cash on any binding—budget or premium—it helps to understand what each piece does. A snowboard binding is deceptively simple: it’s the mechanical interface between your boot and your board. But every component plays a role in power transfer, comfort, and control. Here’s the full breakdown.
The Baseplate: Your Foundation
The baseplate is the flat platform your boot sits on. It bolts to the board via a mounting disc and is responsible for distributing your input (weight shifts, edge pressure, torsional tweaks) into the board’s core. Budget bindings typically use a single-piece nylon or composite baseplate. Premium options may feature aluminum heel cups or canted (angled) footbeds to align your joints more naturally.
In budget bindings like the Salomon Rhythm and Burton Freestyle, you’ll find glass-filled nylon baseplates. This material is popular because it strikes a favorable balance: stiff enough for predictable response, light enough to not weigh you down, and cheap enough to keep retail prices accessible. The trade-off is that nylon can feel “dead” compared to aluminum-based constructions—less energy return, fewer vibration-dampening properties.
Some baseplates incorporate EVA (ethylene-vinyl acetate) padding or rubber inlays. This padding absorbs micro-vibrations from hardpack and groomed snow, reducing foot fatigue over a full resort day. The Burton Freestyle Re:Flex, for example, uses a living-hinge design in its baseplate that allows more natural board flex underfoot—closer to how the board wants to bend without a rigid binding plate suppressing it.
The Highback: Your Heel-Side Lever
The highback is the vertical plate behind your calf. Its primary job is to transmit heel-side force: when you lean back, the highback pushes the board’s heel edge into the snow, initiating a heel-side turn. The height, angle, and flex of the highback all affect how the binding feels.
Taller highbacks provide more leverage and support—great for carving and speed. Shorter highbacks feel more playful and forgiving—ideal for park and buttering. Budget bindings tend toward shorter, softer highbacks because their target audience (beginners and intermediates) benefits from a forgiving feel that doesn’t punish mistakes.
Most highbacks have forward lean adjustment—either tool-less or via a screw. Forward lean tilts the highback toward the board’s nose, pre-loading your ankle into a more aggressive stance. A click or two of forward lean can dramatically improve heel-side response for carving. Too much forward lean, however, makes flat-ground tricks and pressing uncomfortable. We recommend beginners start with zero forward lean and add a click or two once they’re comfortable with heel-side turns.
Highback rotation is another adjustment many riders overlook. Ideally, the highback should be parallel to the board’s heel edge—not perpendicular to the baseplate. This alignment means that when you lean back, you’re applying force directly along the board’s edge rather than at an angle. Rotating the highback improves carving efficiency and reduces the chance of “rolling” out of a turn.
Ankle Strap & Toe Strap: Your Lock-Down System
The straps hold your boot firmly in the baseplate. The ankle strap crosses over the top of your boot’s ankle area, while the toe strap sits over (or around) the toe box. Together they prevent your foot from lifting out of the binding and translate your body movements into board response.
Budget binding straps have come a long way. Five years ago, sub-$100 bindings often featured thin, unpadded straps that created painful pressure points after a few runs. Today, models like the Salomon Rhythm and Burton Freestyle include multi-density foam padding and anatomically shaped straps that conform to the boot’s shape. The difference is noticeable on long resort days—comfortable straps mean fewer stops to adjust and less overall fatigue.
Toe straps come in two styles: “over-the-top” straps that sit on top of the boot’s toe, and “toe cap” straps that wrap around the front of the toe box. Toe cap designs are generally preferred because they pull the boot back into the heel cup more effectively, improving heel hold and response. Most modern budget bindings—including all five on our list—use some form of toe cap design.
Ratchets & Ladders: The Micro-Adjustment Engine
Ratchets are the buckle mechanisms that tighten the straps. You crank the ratchet lever to pull the ladder (the serrated plastic strip) through the buckle, incrementally tightening the strap. Quality ratchets have smooth, precise clicking and secure hold—no slipping under pressure. They also need to release cleanly when you pull the lever out, even with cold or gloved hands.
Budget binding ratchets vary in quality. Union’s ratchets are consistently praised for their smooth action and durability. Burton’s are also reliable and widely available for replacement. Salomon and K2 ratchets are solid but may feel slightly less premium in tactile feedback. Ride ratchets tend toward functionality over finesse—they work, they hold, they release—but don’t offer the buttery feel of higher-end options.
Ladder straps are the serrated plastic strips that the ratchets grip. They’re a common failure point across all bindings—stress fractures from repeated tightening, UV degradation from spring riding, or simple wear over time. The good news: replacement ladders are cheap (typically $5–15 per pair) and available from most binding brands’ websites or through U.S. snowboard shops. We recommend carrying a spare pair in your board bag or jacket pocket on travel days.
The Mounting Disc: Where Binding Meets Board
The mounting disc (or baseplate disc) is the circular plate that connects the binding’s baseplate to the board’s insert pattern. Most budget bindings include a universal disc that fits 2×4 and 4×4 hole patterns—the two most common mounting standards on non-Burton boards. Some brands include adapters or offer separate discs for other patterns.
The mounting disc determines your stance width and angle. The disc has slots or holes that allow you to rotate the binding (setting your duck or directional stance angle) and slide it inward or outward (adjusting stance width). Most discs allow rotation in 3-degree increments, which gives you fine control over your angles without requiring specialized tools.
A key difference between budget and premium bindings is disc material and design. Budget bindings use stamped steel or basic composite discs. Premium options like Burton’s Re:Flex system use a reduced-contact disc that allows the board to flex more naturally beneath the binding. This isn’t just marketing—less rigid contact area genuinely improves board feel, especially during butters and flat-ground maneuvers.
Heel Cup & Ankle Adjustments
Many bindings include an adjustable heel cup—the metal or composite piece that wraps around the back of your heel. Heel cup adjustment changes the binding’s centering over the board, which affects toe and heel overhang. If your boot is on the larger end of a binding size range, you may need to push the heel cup outward to center the boot properly.
Ankle adjustment typically refers to the ankle strap’s mounting position on the binding. Some bindings allow you to move the ankle strap’s anchor point forward or backward, which changes how the strap contacts the boot. A forward position gives more leverage for carving; a rearward position feels more relaxed and forgiving. Most budget bindings offer limited ankle adjustability, but the Salomon Rhythm and Ride C-2 both provide enough range for meaningful customization.
Complete Flex Guide: Matching Snowboard Binding Flex to Your Riding Style
Flex is the single most important specification when choosing snowboard bindings. It determines how the binding responds to your inputs, how forgiving it is when you make mistakes, and how well it pairs with your board and boots. Most manufacturers don’t use a universal numeric scale, which makes cross-brand comparisons confusing. Here’s a clear framework for understanding flex and picking the right level.
Understanding the Flex Scale
While there’s no industry-standard numbering system, most brands loosely categorize flex from 1 (softest) to 10 (stiffest). Here’s how the tiers break down in practical terms:
| Flex Rating | Category | Feel | Best For | Trade-offs |
|---|---|---|---|---|
| 1–3 (Soft) | Playful / Forgiving | Easily bends under pressure; absorbs mistakes; loose feel | Beginners, park riders, jibbers, butter enthusiasts | Less precision at speed; less heel-side drive; can feel “noodly” on hardpack |
| 4–6 (Medium) | Versatile / Balanced | Moderate resistance; more feedback; balanced power transfer | Intermediate all-mountain, resort carving, mixed terrain | Jack of all trades, master of none; may not excel in extreme conditions |
| 7–9 (Stiff) | Precise / Aggressive | High resistance; immediate response; tight connection to the board | Advanced carving, speed, steep terrain, big mountain, freeride | Punishes mistakes; steeper learning curve; uncomfortable for beginners |
| 10 (Very Stiff) | Race / Pro-Level | Minimal give; maximum power transfer; demands perfect technique | Racing, extreme freeride, professional riders | Unforgiving; poor for casual or learning use |
What the Five Budget Bindings Feel Like
All five bindings in our top picks sit in the soft-to-medium-soft range (roughly 2–5 on a 10-point scale). Here’s how they compare in real-world feel:
- Burton Freestyle Re:Flex (Soft / ~2–3): The softest feeling binding here. You can fold the highback with one hand. This makes it incredibly forgiving—you can twist, tweak, and press without the binding fighting you. The downside: at speed on hardpack, you’ll feel every vibration and the heel-side response feels vague.
- K2 Sonic (Soft / ~3): Similar feel to the Freestyle but with slightly more structure in the baseplate. It doesn’t fold quite as easily, giving a touch more confidence when you’re learning to link turns on blues. Still very much a “learn first, worry about performance later” binding.
- Union Flite Pro (Soft / ~3–4): Plays in the same neighborhood as the Freestyle and Sonic in terms of flex, but the lighter materials make it feel livelier. There’s a springiness to the highback that rewards quick, dynamic movements. It’s playful without being sloppy—ideal for park riders who want snap-back response during presses.
- Salomon Rhythm (Soft-Medium / ~4–5): Noticeably more structured than the soft options. The highback has more resistance, the baseplate feels sturdier, and heel-side turns have more authority. This binding is still forgiving enough for beginners but gives intermediate riders enough feedback to feel confident at moderate speeds on groomers.
- Ride C-2 (Medium-Soft / ~5): The stiffest of the five, but still firmly in the beginner-friendly zone. The C-2 has a more rigid heel cup and a stiffer ankle strap that translates into better heel-side drive. It’s the binding in this group most suited for riders who’ve moved past the learning phase and want a binding that won’t hold them back as they start exploring faster terrain.
Flex and Board Pairing: The Critical Connection
Your binding flex should complement your board’s flex. Here’s why: a soft binding on a stiff board creates a disconnect—you’ll feel like you’re inputs are being absorbed by the binding before reaching the board. Conversely, a stiff binding on a soft board amplifies every movement, making the board feel twitchy and unpredictable.
The ideal pairing for budget riders:
- Soft binding + soft/flexy beginner board: Maximum forgiveness. Great for first-timers. Examples: Burton Freestyle + Burton Ripcord, K2 Sonic + K2 Standard.
- Soft-medium binding + medium all-mountain board: Good balance of playfulness and control. Works for riders progressing to blues and blacks. Examples: Salomon Rhythm + Salomon Pulse, Ride C-2 + Ride Agenda.
- Medium binding + medium-stiff all-mountain board: Best for intermediates who want to carve and explore varied terrain. You’ll outgrow soft bindings before you outgrow a good all-mountain board—plan for it.
How Flex Changes Over Time
Bindings soften with use. The nylon baseplate, highback, and straps all lose some stiffness after repeated flex cycles—especially during the first 5–10 days of riding. This is normal and actually beneficial: a binding that starts at a 4 might settle into a comfortable 3 after break-in. Budget bindings tend to break in faster because they use lower-grade nylon that fatigues more quickly than the carbon-reinforced polymers found in premium models.
Temperature also affects flex. Cold temperatures (single digits Fahrenheit) make nylon stiffer, while warm spring conditions make it softer. If you ride in the Northeast during January, your soft bindings may feel noticeably stiffer than they do during an April session at a Colorado resort. This is a factor most beginners don’t anticipate—but experienced riders adjust their expectations accordingly.
Which Flex Level Should You Choose?
Use this quick decision tree:
- Brand new to snowboarding? Start with soft (Burton Freestyle, K2 Sonic). Focus on learning without fighting your gear.
- Season 2–3, mostly greens and easy blues? Soft-medium (Salomon Rhythm) gives you room to grow without over-committing.
- Comfortable on blues, starting to explore blacks and park features? Medium-soft (Ride C-2) or a playful soft option (Union Flite Pro) depending on terrain preference.
- Regular rider who wants all-mountain versatility? You may be ready to spend above budget. Medium flex in the $150–250 range opens up significantly better options.
If carving technique is the goal, pair your flex choice with a lesson or two—see are snowboard lessons worth it? and our carving guide.
Binding Materials & Construction: What You’re Actually Paying For
The difference between a $80 binding and a $300 binding isn’t just brand prestige—it comes down to materials, manufacturing precision, and engineering investment. Understanding what materials go into budget bindings helps you evaluate durability, weight, and long-term value.
Baseplate Materials
The baseplate is the highest-stress component in any binding. It absorbs every heel-side press, toe-side carve, landing impact, and flat-ground tweak. Here’s what you’ll find at different price tiers:
- Nylon composite (budget): The standard in the $80–150 range. Glass-reinforced nylon is injection-molded into the baseplate shape. It’s affordable to manufacture, reasonably durable, and provides adequate response for beginners and intermediates. The Salomon Rhythm, Burton Freestyle, Union Flite Pro, K2 Sonic, and Ride C-2 all use nylon-based baseplates. The main limitation: nylon fatigues over time, especially under repetitive stress from aggressive riding.
- Aluminum (mid-range to premium): Some brands use machined aluminum heel cups or full aluminum baseplates. Aluminum is lighter per unit of stiffness, transfers energy more directly, and lasts longer than nylon. You’ll see aluminum heel cups on bindings from Union (higher tiers), Ride (high-end), and Rome. These typically start around $150–200.
- Carbon-reinforced nylon (premium): Adding carbon fiber to the nylon matrix dramatically increases stiffness and reduces weight. Carbon-reinforced baseplates are found on $250+ bindings and provide the best weight-to-stiffness ratio. They’re overkill for beginners but prized by advanced riders who demand maximum response with minimum weight.
Highback Materials
Highbacks are typically made from the same family of materials as the baseplate—nylon composite at the budget level, with aluminum or carbon reinforcement at higher tiers. Some highbacks feature hollow or skeletonized designs that reduce weight while maintaining structural integrity. The key factor is torsional flex: how much the highback twists when you apply lateral force. A highback with good torsional flex will feel more comfortable during natural leg movements while still providing heel-side leverage.
Strap Construction
Budget straps use closed-cell EVA foam padding covered in synthetic leather or nylon fabric. This construction is water-resistant, reasonably durable, and provides adequate comfort. Premium straps use multi-density foam (firmer foam on the edges for support, softer foam in the center for comfort), 3D-molded shapes, and thinner profiles that reduce bulk while improving fit.
The strap’s core is typically a nylon or polycarbonate frame that gives the strap its structural shape. This frame distributes ratchet tension across the entire strap width, preventing localized pressure points. Cheaper straps may use a single-density foam with a simple nylon frame—functional but not as refined.
Hardware & Fasteners
Budget bindings use zinc-plated or stainless steel hardware. Stainless is preferred for its corrosion resistance—important if you ride in wet spring conditions or store your gear in humid environments. Some budget brands use chrome-plated steel, which is cheaper but more prone to rust over time. Check your hardware annually and replace any corroded screws. Most U.S. snowboard shops carry compatible replacement hardware for under $10.
EVA Footbeds & Cushioning
The footbed is the padded layer between your boot and the baseplate. Budget bindings use basic EVA foam—a lightweight, shock-absorbing material that’s been the industry standard for decades. More advanced options include multi-density EVA, gel inserts, or Dampening pads (like Ride’s “Slimwall” or Burton’s “B3 gel”). These advanced cushioning systems reduce vibration and impact forces, which matters most when riding hardpack or landing jumps.
Some budget bindings feature a “canted” footbed—an angled surface (typically 2.5–3 degrees) that tilts your foot slightly outward. This subtle angle aligns your ankle, knee, and hip more naturally, reducing strain during long resort days. The Salomon Rhythm includes a basic canted footbed, which is a notable feature at its price point.
Weight Comparison
Weight matters more than most beginners realize. Lighter bindings reduce swing weight (the rotational mass your legs have to move when spinning or initiating turns), reduce fatigue over a full day, and make carrying your gear from the parking lot less tiring. Here’s a rough comparison:
| Binding | Approx. Weight (per pair, size M) | Weight Context |
|---|---|---|
| Union Flite Pro | ~1,600g (3.5 lbs) | Extremely light for a budget binding—Union’s focus on weight savings is evident |
| Burton Freestyle Re:Flex | ~1,800g (4.0 lbs) | Average weight; Re:Flex system adds slight weight vs. traditional discs |
| Salomon Rhythm | ~1,850g (4.1 lbs) | Solidly average; weight is well-distributed across the baseplate |
| K2 Sonic | ~1,900g (4.2 lbs) | Slightly heavier due to more robust baseplate construction |
| Ride C-2 | ~2,000g (4.4 lbs) | Heaviest in the group but still well within normal range for all-mountain bindings |
For context, premium bindings from the same brands typically weigh 1,400–1,700g per pair. The difference between budget and premium is often only 200–400g—noticeable on a scale but rarely felt during riding.
Mounting Systems Explained: 4×4, 2×4, Channel, EST & Re:Flex
Your binding is only as good as its connection to the board. The mounting system determines how your binding attaches, how adjustable your stance is, and which boards are compatible with which bindings. If you’ve ever been confused by terms like “Channel,” “EST,” “Re:Flex,” or “2×4,” this section clears it all up.
4×4 Pattern (The Original Standard)
The 4×4 pattern was one of the first mounting standards in snowboarding. It features two rows of inserts spaced 4cm apart, with rows also 4cm apart—hence the name. It’s found on older boards and some entry-level models. All five bindings in our top picks include discs compatible with 4×4 mounting.
2×4 Pattern (The Modern Standard)
2×4 is the most common mounting pattern on non-Burton boards today. It uses the same basic layout as 4×4 but with inserts spaced 2cm apart instead of 4cm. This tighter spacing gives you finer stance width adjustments—you can move each binding inward or outward in 2cm increments rather than 4cm. The 2×4 pattern is backward-compatible with 4×4 discs (a 4×4 disc will fit 2×4 inserts, though you’ll have fewer adjustment options).
All five budget bindings in our guide support both 2×4 and 4×4 patterns with their included mounting discs. This universal compatibility is one of the reasons these bindings are such good value—they’ll fit virtually any non-Burton board you might buy now or in the future.
Burton Channel System
Burton’s Channel system uses a single longitudinal track (the “Channel”) instead of fixed inserts. The binding disc bolts into the track and can slide freely along its length, giving you essentially unlimited stance width adjustment. The Channel also allows rotation in finer increments than traditional disc patterns.
The Channel is exclusive to Burton boards (and some Endeavor boards that license the technology). If you ride a Burton board, you need bindings that are Channel-compatible. Here’s where Burton’s Re:Flex system comes in:
Re:Flex vs. EST: Burton’s Two Technologies
Burton offers two proprietary mounting technologies. Understanding the difference is crucial if you ride (or plan to buy) a Burton board:
- Re:Flex: A universal mounting disc that works on both Channel boards and standard 2×4/4×4 boards. The Re:Flex disc is smaller than a traditional mounting disc and uses a living-hinge design that allows the board to flex naturally beneath the binding. The Burton Freestyle Re:Flex in our top picks uses this system—making it the most versatile option for riders who might switch between Burton and non-Burton boards.
- EST (Extra Sensory Technology): Burton’s premium Channel-specific system. EST bindings mount directly to the Channel’s track without a disc—they use a frame that slides into the Channel and locks down. This provides even better board feel than Re:Flex because there’s no disc at all between the binding and the board. However, EST bindings only work on Channel boards—they cannot be mounted on standard 2×4/4×4 boards.
For budget riders, Re:Flex is the clear winner: it’s compatible with virtually every board on the market, provides good board feel, and costs less than EST-specific bindings. The only downside is that Re:Flex discs don’t allow quite as much micro-adjustment as Burton’s EST system, but for most riders the difference is negligible.
3D Pattern (Legacy)
The 3D pattern was Burton’s original mounting standard before the Channel. It uses three insert holes in a triangular arrangement. Most modern Burton boards have switched to the Channel, but some older models and a few current budget boards still use 3D. If you have a 3D board, you’ll need a specific 3D adapter disc—available from Burton and some third-party manufacturers. Our budget bindings don’t include 3D adapters, but Burton’s Re:Flex disc can be paired with a 3D adapter for compatibility.
Mini-Disc Systems
Some brands (notably Union and Now) use a “mini-disc” mounting system. Mini-discs are smaller than standard mounting discs, which means less rigid contact area between the binding and the board. The result: more natural board flex beneath the binding, better board feel, and reduced “dead spots” where the board can’t bend. Union’s mini-disc is standard on the Flite Pro, contributing to that binding’s lively, skate-like feel.
The trade-off with mini-discs is compatibility. Not all boards work equally well with mini-discs—some insert patterns may not allow proper centering. In practice, mini-discs work fine with most modern 2×4 and 4×4 boards, but if you have an older or unusually designed board, verify compatibility before purchasing.
How to Choose Budget Snowboard Bindings (Without Getting Overwhelmed)
1) Flex: Soft vs Medium for U.S. Resort Riding
Soft flex (think Burton Freestyle, K2 Sonic) is great for beginners and park play. You’ll feel fewer edge catches and it’s easier to correct stance mistakes. Medium-soft (Ride C-2) adds stability for blues, early carves, and chopped afternoon groomers. If you’re regularly bombing black runs, step up to mid-stiff—but that’s typically beyond budget tiers.
2) Straps & Comfort
Look for padded, contouring ankle straps and toe caps that seat on the boot’s toe box. Poor straps cause foot pain and hot spots. Tool-less strap length adjustment is a plus if you change layers or ride different boots.
3) Discs & Mounting
Most budget bindings include discs for 2×4/4×4. Burton’s Re:Flex disc works on the Channel mount (common on Burton boards) and standard patterns. If you’re unsure, check your board’s insert pattern or bring it to a U.S. shop for a 5-minute fit check.
4) Board Feel & Dampening
Cheaper doesn’t have to mean “dead.” Re:Flex-style baseplates and EVA footbeds preserve natural board flex and reduce fatigue on rough groomers. If your home hill is notoriously icy, choose options with better dampening (Rhythm, C-2) and pair with reliable goggles for visibility.
5) Ratchets & Ladders
Quality ratchets reduce fiddle time at the lift. Union and Burton are famously quick. Always keep a spare ladder in your jacket on travel days (throw one in your board bag).
6) Rider Boot Size & Binding Size Match
Buying a binding that’s the wrong size for your boot is the most common mistake beginners make. Too small, and your boot overhangs the baseplate, causing heel and toe drag during turns. Too large, and your foot slides around inside the binding, reducing control and causing fatigue. Always cross-reference the brand’s specific size chart with your measured boot size—not the size printed on your boot, which may not correspond to the binding brand’s scale.
7) Budget Realism: What $80–180 Actually Gets You
At the $80–120 price point, you’re getting a functional, comfortable binding that will last 2–4 seasons of regular riding. Expect basic adjustability, decent straps, and adequate dampening. At $120–180, the improvements are incremental but meaningful: better materials, more refined straps, improved ratchets, and sometimes weight savings. Don’t expect premium features like carbon-reinforced baseplates, micro-adjustable highbacks, or gel cushioning at budget prices—those are $200+ territory.
8) Shop vs. Online: When to Buy Where
Buy online when you know your exact size, the brand fits your foot type, and you’re taking advantage of seasonal sales. Amazon offers competitive prices and easy returns, which is why our top picks all link there. Buy in a shop when you want to try bindings on with your actual boots, get expert fitting advice, or support a local business. Many U.S. shops offer price-matching and will let you try bindings on your board before purchase. The 10–15 minutes of in-person fitting can save you from a costly sizing mistake.
9) Color & Aesthetics: The Silent Factor
It might seem superficial, but you’ll look at your bindings every time you strap in. If the color and design don’t appeal to you, you’ll subconsciously enjoy your gear less. Budget bindings come in a decent range of colorways—black is universal, but most brands offer 2–4 color options per model. If aesthetics matter to you, don’t settle for the “only option left in your size” and check availability across retailers.
10) Future-Proofing Your Purchase
If there’s any chance you’ll upgrade your board within the next 1–2 seasons, choose bindings with universal mounting compatibility. Bindings with 2×4/4×4 discs will work with virtually any board. If you go with a Burton-specific binding (EST-only), you’re locked into Burton boards. The Burton Freestyle Re:Flex avoids this trap by supporting Channel and standard mounts.
Rider Weight & Binding Selection: Why Your Scale Matters
Boot size determines binding size. Rider weight determines binding performance. This is the metric most beginners overlook—but it’s crucial for getting the right response from your setup. A 140-pound rider and a 220-pound rider will feel the same binding completely differently: the lighter rider may find it stiff and unresponsive, while the heavier rider may find it floppy and vague.
How Weight Affects Binding Flex
Binding flex ratings are designed for an “average” rider weight—typically around 150–170 lbs. If you’re significantly lighter (under 130 lbs), a “soft” binding may feel medium to you because you’re not generating enough force to fully flex the baseplate and highback. Conversely, if you’re over 200 lbs, that same “soft” binding may feel noodly because your weight overwhelms the nylon’s resistance.
This is one reason budget bindings can be a good match for lighter riders and lighter-intermediate riders: the soft-to-medium flex range in our top picks works well for riders under 180 lbs who don’t need aggressive response. Heavier riders (200+ lbs) should consider the Ride C-2 or look at stiffer budget options from brands like Rossignol or Head, which offer more robust baseplates.
Weight-Based Recommendations
| Rider Weight | Recommended Flex | Best Budget Pick | Notes |
|---|---|---|---|
| Under 120 lbs | Soft (1–3) | Burton Freestyle Re:Flex | Ultra-soft flex will feel responsive enough; light weight won’t overwhelm the binding |
| 120–160 lbs | Soft to Soft-Medium (2–4) | Salomon Rhythm or Union Flite Pro | Sweet spot for budget bindings; most options work well here |
| 160–200 lbs | Soft-Medium to Medium (4–6) | Ride C-2 or Salomon Rhythm | Need slightly more structure to avoid binding “washing out” under weight |
| Over 200 lbs | Medium to Medium-Stiff (5–7) | Ride C-2 (max on budget) or consider stepping up | Budget bindings may feel underpowered; mid-range options open up significantly better durability and response |
Weight and Boot Size: They Don’t Always Correlate
A common assumption is that bigger feet = bigger rider. Not always. A 6’2″ rider with size 10 boots might weigh 175 lbs, while a 5’8″ rider with size 10 boots might weigh 200 lbs. Their boot size is the same, so they might buy the same binding size—but the heavier rider will experience noticeably different flex and response. This is why checking both your boot size (for binding size selection) and your weight (for flex expectation) is essential.
What Happens When Weight and Binding Don’t Match
- Underweighted binding (too soft for your weight): The binding feels sloppy, vague, and unresponsive. Heel-side turns lack authority, and you may feel like you’re “falling through” the binding during aggressive maneuvers. This accelerates wear on the baseplate and highback, potentially reducing binding lifespan.
- Overweighted binding (too stiff for your weight): The binding feels dead and unresponsive to your inputs. You’ll struggle to flex the highback during heel-side turns and may find the binding fatiguing because you’re fighting against more resistance than your body weight can naturally overcome. This can lead to ankle and calf fatigue, especially on longer resort days.
Pair your binding choice with properly fitted boots—see our best snowboard boots guide for sizing help.
Women’s Budget Snowboard Bindings: Top Picks & What’s Different
Women’s snowboard bindings aren’t just “smaller men’s bindings in pink.” They’re engineered for anatomical differences in foot shape, calf height, and leg alignment. If you’re shopping for women’s budget bindings—or buying for someone who is—here’s what to look for and which models deliver the best value.
What Makes Women’s Bindings Different
- Shorter highbacks: Women’s bindings typically have shorter highbacks to accommodate lower calf muscles. A highback that’s too tall can dig into the calf, causing pain and pressure points—especially when combined with boots that have a higher cuff.
- Narrower heel cups: Women’s feet tend to be narrower in the heel relative to men’s feet. Women-specific heel cups hold the heel more securely without over-tightening the ankle strap.
- Softer flex (by default): Because women’s average body weight is lower, many women’s bindings are designed with a softer starting flex. This isn’t a quality compromise—it’s engineering for the typical rider weight. Heavier women riders may want to consider men’s or unisex models in smaller sizes for more resistance.
- Smaller size range: Women’s bindings typically run from size XS (US Men’s 4–6) to Large (US Men’s 9–11). The sizing charts are different from men’s—always reference the brand’s women-specific chart.
Top Women’s Budget Bindings
| Binding | Price Range | Flex | Best For | Mount |
|---|---|---|---|---|
| Burton Freestyle Re:Flex (Women’s) | $100–140 | Soft | Beginners, comfort-focused riders | 2×4, 4×4, Channel |
| Salomon Rhythm (Women’s) | $100–150 | Soft-Medium | Progression, all-mountain learning | 2×4, 4×4 |
| Union Rosa | $120–160 | Soft | Park, jibbing, playful riding | 2×4, 4×4 |
| K2 Siren | $100–140 | Soft | First-time buyers, resort cruising | 2×4, 4×4 |
| Ride D-Verse | $130–170 | Soft-Medium | Carving, intermediate progression | 2×4, 4×4 |
Sizing Guide for Women
Women’s binding sizing uses its own scale. Here’s a general reference (always check the brand’s specific chart):
- XS: US Women’s 4–6 / US Men’s 2.5–5
- S: US Women’s 5–7 / US Men’s 4–6
- M: US Women’s 7–9 / US Men’s 6–8
- L: US Women’s 9–11 / US Men’s 8–10
If your boot size falls between two binding sizes, consider your boot’s outer footprint (not the tagged size). Some women’s boots run slightly larger or smaller than the tagged size. Our Vans sizing article and K2 boots review cover brand-specific sizing quirks.
Can Women Use Men’s/Unisex Bindings?
Yes—if the size fits. Some women prefer unisex bindings because they offer more stiffness options (important for heavier women riders who find women’s bindings too soft). The key is sizing: a woman with a US Women’s 8 boot might find a men’s Small (US Men’s 6–8) fits perfectly. The trade-off is a taller highback, which may or may not be comfortable depending on calf position and boot cuff height.
Youth & Junior Snowboard Bindings: Getting Kids Started Right
If you’re shopping for a young rider—whether they’re 5 or 15—the binding considerations shift. Kids grow fast, ride differently than adults, and have different injury risk profiles. Here’s how to approach youth binding selection without wasting money on gear they’ll outgrow in one season.
Youth vs. Adult Sizing
Youth bindings are sized by the child’s boot size, not their age. Common youth binding sizes:
- XS (Youth): US Men’s 1–3 / Kids’ 13–2
- S (Youth): US Men’s 3–5 / Kids’ 2–4
- XS (Junior): US Men’s 4–6 (bridges youth and adult sizing)
Most youth bindings use the same 2×4/4×4 mounting patterns as adult bindings, so they’ll fit any standard board. The main differences are smaller baseplates, shorter highbacks, and softer flex calibrated for lighter riders.
What to Look for in Youth Bindings
- Simple ratchets: Kids need bindings they can operate themselves (or with minimal help). Smooth, reliable ratchets reduce the time spent in the lift line fiddling with gear. Union, Burton, and K2 all make youth ratchets that are easier for small hands.
- Forgiving flex: Youth riders are learning. Stiff bindings punish mistakes and make the learning curve steeper. Stick with soft flex models.
- Durability: Kids are tough on gear. Look for reinforced baseplates and sturdy ladders that can handle repeated drops, scuffs, and parking-lot adjustments.
- Growth room: Some youth bindings have adjustable heel cups and strap positions that accommodate a range of boot sizes. This can extend the binding’s useful life by a season—but don’t expect it to last forever.
Recommended Youth Budget Bindings
The major brands’ youth lines offer solid value: Burton Yeasayer (now discontinued but available on clearance), Burton Freestyle Youth, Union Cadet, and K2 Kinsley are all good options. For the tightest budgets, check end-of-season sales and U.S. shops’ used gear sections—kids’ bindings see one season of use before being outgrown, so secondhand options are often in excellent condition.
Safety first for young riders—see our best snowboard helmets and impact shorts guide.
Compatibility & Sizing (U.S. Men’s Boot Sizes)
Most bindings size roughly: Small (6–8), Medium (8–10), Large (10–13). Always confirm the brand chart. Pair your binding flex with your board and boots: a soft boot + soft binding + soft board = extremely playful; medium boot + medium-soft binding + all-mountain board = stability for progression.
New to boot fit? Start with our Vans sizing article, K2 boots review, and the master list of best snowboard boots.
| Binding | Typical Size Range | Boot Pairing Notes |
|---|---|---|
| Salomon Rhythm | S: 6–8 / M: 8–10 / L: 10–13 | Comfort pair with mid-soft boots for reducing fatigue. |
| Burton Freestyle Re:Flex | S: 6–8 / M: 8–11 / L: 10–13 | Great with plush boots; playful park or groomers. |
| Union Flite Pro | S: 6–8 / M: 8–10 / L: 10–13 | Pairs well with light, surfy boards for park. |
| K2 Sonic | S: 6–8 / M: 8–11 / L: 10–13 | Beginner comfort setup; very forgiving. |
| Ride C-2 | M: 8–10 / L: 10–13 | Choose slightly stiffer boots if carving is priority. |
If your laces feel off after switching bindings, read: how long are snowboard boot laces?
Stance & Angles Masterclass: Dialing In Your Setup
Your stance is the foundation of your riding. Get it wrong, and even the best bindings in the world won’t save you from discomfort, instability, or fatigue. Get it right, and your entire riding experience transforms. Here’s everything you need to know about setting up your bindings for optimal comfort and performance.
Stance Width: The Golden Rule
Your stance width is the distance between the center of your front binding and the center of your rear binding. The general starting point is shoulder width—measure the distance between your shoulders and use that as your baseline. Most adult riders land between 18 and 23 inches, with 20–21 inches being the most common.
Why shoulder width? It positions your knees directly over your feet, which is the most stable and balanced position for weight distribution. Too narrow, and you’ll feel top-heavy and unstable. Too wide, and you’ll struggle to transition between edges, plus your knees and hips will fatigue faster.
A useful test: stand naturally, jump, and land. Wherever your feet land is approximately your natural stance width. This “jump test” is surprisingly accurate and gives you a starting point that feels organic.
Duck Stance vs. Directional Stance
The two primary stance philosophies are:
- Duck stance: Both bindings are angled outward (positive on the front, negative on the rear). Common configurations: +15°/-15°, +12°/-12°, +15°/-9°. Duck stance is ideal for park riding and switch riding because both edges engage equally. It’s also the most balanced stance for learning, which is why many instructors recommend it for beginners.
- Directional (positive) stance: Both bindings are angled forward (positive angles). Common configurations: +21°/+6°, +18°/+6°, +15°/+3°. Directional stance excels at carving and all-mountain riding because the front foot is positioned for aggressive edge engagement while the back foot provides stability. It’s less comfortable for switch riding.
For beginners using our budget bindings, we recommend starting with a mild duck stance: +12° front / -6° rear. This provides enough angle for comfortable carving while remaining neutral enough for learning switch and flat-ground tricks. As you develop your riding style, you can adjust toward your preference.
Setting Angles in Practice
Most binding mounting discs allow rotation in 3-degree increments. Here’s how to set your angles:
- Loosen the mounting disc screws enough that the binding can rotate freely.
- Align the binding’s center mark (usually an arrow or line on the disc) with the desired angle on the board’s angle indicators.
- Tighten the disc screws evenly—don’t fully torque one side before the other. Alternate sides to ensure even pressure.
- Verify the binding doesn’t shift when you apply moderate force. If it moves, tighten the screws another quarter-turn.
Forward Lean: The Forgotten Adjustment
Forward lean tilts the highback toward the nose of the board, pre-loading your ankle into a flexed position. This pre-load means you start each heel-side turn with the highback already engaged, resulting in faster, more precise heel-side response.
For budget bindings, forward lean adjustment is usually a simple lever or screw on the back of the highback. We recommend:
- Beginners: Start with zero or minimal forward lean. Focus on learning balance and edge control without the added commitment that forward lean demands.
- Intermediate all-mountain riders: 1–3 clicks of forward lean for improved carving response.
- Park riders: Often run zero forward lean for maximum freedom during butters, presses, and flat-ground tricks.
Stance Centering
Centering means positioning your bindings so that your boot’s toe and heel overhang the board equally. Uneven centering means one edge engages before the other, creating asymmetric turn initiation that can feel unpredictable.
To center your stance:
- Strap into your bindings on a flat surface.
- Look down at your toe overhang (how far your boot extends past the board’s toe edge) and your heel overhang.
- If toe overhang exceeds heel overhang, slide the binding toward the heel edge (or use the binding’s heel cup adjustment to move the boot forward in the binding).
- Repeat until overhang is roughly equal on both sides.
Some toe/heel overhang is normal and necessary. The goal is balance, not zero overhang. If you have significant overhang with a budget binding, check whether your boot size exceeds the binding’s recommended range.
Width-Specific Considerations
Board width matters for stance setup. Narrow boards (under 250mm waist width) may cause excessive toe and heel drag for riders with larger boots (US Men’s 11+). Wide boards (256mm+) accommodate larger boots but may feel less responsive for smaller riders. If you’re shopping for a wide board, ensure your binding size is appropriate—you don’t want a size Large binding on a narrow board or a size Small binding on a wide board, as centering becomes difficult.
Pairing Bindings with Boards: The Compatibility Matrix
A binding and board should complement each other—not fight for control. Here’s how to pair our top budget bindings with compatible board types for optimal performance.
The Pairing Principle
The rule of thumb: match or slightly exceed your board’s flex with your binding’s flex. A soft board (flex 1–3) pairs best with soft bindings. A medium board (flex 4–6) pairs with soft-medium to medium bindings. A stiff board (flex 7+) pairs with medium to stiff bindings. Mismatches create a disconnect: a stiff binding on a soft board amplifies every input (making the board feel twitchy), while a soft binding on a stiff board absorbs your inputs before they reach the board (making it feel dead).
Board-Binding Pairing Guide
| Board Type | Board Flex | Best Binding Pairing | Why It Works |
|---|---|---|---|
| Beginner/Soft Flex | 1–3 | Burton Freestyle, K2 Sonic | Maximum forgiveness for learning; soft + soft = easy turns and fewer crashes |
| Park/Jib | 2–4 | Union Flite Pro, Burton Freestyle | Lightweight and playful; low swing weight for spins and presses |
| All-Mountain (Mid) | 4–6 | Salomon Rhythm, Ride C-2 | Balanced response; enough structure for carving without punishing mistakes |
| All-Mountain (Stiff) | 5–7 | Ride C-2 (at the limit) or step up to mid-range | C-2 provides adequate response but may feel soft for truly aggressive all-mountain boards |
| Freeride/Big Mountain | 7–9 | Beyond budget tier—budget bindings won’t match this demand | Stiff boards need stiff bindings for proper power transfer and safety at speed |
Specific Board Pairings for Our Top 5
Here are tested combinations that work well for U.S. resort riders:
- Salomon Rhythm + Salomon Pulse: A matched pair from the same brand. Both sit in the soft-medium range and are designed for all-mountain progression. Excellent for riders in their first 2–3 seasons.
- Burton Freestyle Re:Flex + Burton Ripcord or Ripcord Flat Top: The quintessential beginner setup. Both are soft, forgiving, and affordable. The Re:Flex disc works perfectly with the Ripcord’s Channel or 2×4 mounting.
- Union Flite Pro + Capita DOA or YES. Basic: Park-friendly boards that match the Flite Pro’s playful, lightweight character. These combos excel in the park and on groomed runs.
- K2 Sonic + K2 Standard: Another brand-matched pairing. Simple, reliable, and designed for riders progressing from rentals to their first owned setup.
- Ride C-2 + Ride Agenda or K2 Passport: A step-up all-mountain combo. The C-2 provides enough response to drive these medium-flex boards effectively while remaining forgiving enough for intermediate riders.
What NOT to Pair
- Don’t pair ultra-soft bindings with stiff camber boards. The board’s camber profile demands precise input that soft bindings can’t deliver.
- Don’t pair budget bindings with splitboards or powder-specific boards. These boards have specialized mounting systems or flex requirements that budget bindings don’t address.
- Don’t mix brands arbitrarily without checking compatibility. While 2×4/4×4 mounting is universal, some brands’ discs don’t center perfectly on all boards. Test before committing.
Regional Riding Guide: Best Budget Bindings by U.S. Region
The United States has wildly diverse snowboarding conditions—from icy East Coast hardpack to deep Utah powder to wet Pacific Northwest slush. Where you ride significantly impacts which binding characteristics matter most. Here’s a regional breakdown to help you choose the best budget binding for your home resort.
Northeast (Vermont, New Hampshire, Maine, New York, Pennsylvania)
The Northeast is known for hardpack, ice, variable conditions, and relatively short runs. Bindings need to provide reliable edge hold on firm surfaces and dampen the constant vibration from grooming machines and freeze-thaw cycles. Best budget picks: Ride C-2 (best dampening and heel-side response in the group) or Salomon Rhythm (good vibration absorption with a forgiving highback). Avoid ultra-soft bindings here—they’ll chatter excessively on ice and provide vague edge control.
Rocky Mountains (Colorado, Utah, Wyoming, Montana, Idaho)
Rocky Mountain resorts offer varied terrain: high-altitude groomers, powder stashes, wind-buff, and steep bowls. Conditions range from blower powder to sun-softened slush. Bindings need versatility. Best budget picks: Salomon Rhythm (all-mountain balanced) or Ride C-2 (for riders targeting steeper terrain). The lighter Union Flite Pro works well for park-focused riders at resorts like Breckenridge or Park City’s terrain parks.
Lake Tahoe / Sierra Nevada (California, Nevada)
Tahoe gets deep powder but also heavy, wet “Sierra cement.” Spring conditions can be slushy and slow. Bindings need to handle both deep days and heavy snow. Best budget picks: Salomon Rhythm or Ride C-2 for their versatility. The K2 Sonic is a solid choice for Tahoe beginners who want a simple setup for the area’s mellow learning terrain (Heavenly’s California side, Northstar’s groomers).
Pacific Northwest (Washington, Oregon)
The PNW gets consistent snowfall but often with higher moisture content. Conditions range from deep powder to wet heavy snow to rain-snow mix at lower elevations. Bindings need water-resistant hardware and corrosion-resistant components. Best budget picks: Any of the five—just ensure you rinse and dry your bindings after wet sessions. The stainless steel hardware on Burton and Union bindings is particularly well-suited for PNW conditions.
Midwest (Michigan, Wisconsin, Minnesota, Ohio)
Midwest riding often means smaller hills, man-made snow, and cold temperatures. Runs are shorter but can be icy. Budget matters even more here because many Midwest riders only get 15–25 days per season. Best budget picks: K2 Sonic (affordable, simple, durable enough for occasional use) or Burton Freestyle Re:Flex (comfortable for shorter resort days). These bindings offer the best cost-per-day value for occasional riders.
Southeast / Mid-Atlantic (Virginia, North Carolina, West Virginia)
Similar to the Northeast but with less snowfall and more man-made conditions. Temperature swings create variable surfaces. Best budget picks: Ride C-2 or Salomon Rhythm—their dampening helps on the icy mornings common at resorts like Snowshoe (West Virginia) or Cataloochee (North Carolina).
Setup Tips & Common Mistakes
1) Stance Width & Angles
Start shoulder-width or slightly wider. Common beginner angles: +15° / 0° (directional) or +12° / −12° (duck) for park and switch. Micro-adjust after a few runs—your knees should feel stacked and comfortable.
2) Highback Rotation & Forward Lean
Rotate highbacks so they align with your board’s edge. A click or two of forward lean improves heel-side response but can fatigue calves—balance for comfort. Use your binding’s tool-less features so you can tweak on the chairlift.
3) Toe Cap Position
Toe caps should sit over the boot’s toe box, not on top. A proper toe cap improves edge-to-edge control and reduces pressure points.
4) Disc Centering
Center your boots over the board so toe and heel overhang are even. This reduces toe drag and makes carving easier. See our carving guide for why this matters.
5) Break-In Period
Bindings soften slightly after a few days. If you plan a destination trip (Utah, Colorado, Tahoe), try to ride locally first so the setup is dialed before vacation.
Binding Maintenance & Seasonal Care: Making Budget Gear Last
Budget bindings don’t have to be disposable. With basic maintenance, even an $80 binding can last 3–5 seasons of regular riding. Here’s the seasonal care routine that maximizes your investment.
After Every Ride: The 5-Minute Routine
- Rinse off salt and grime: If you rode in slushy conditions, spray your bindings with fresh water. Salt from roads and man-made snow accelerates corrosion on metal hardware. A quick rinse in the lodge bathroom or with a water bottle takes 30 seconds.
- Dry thoroughly: Before storing, let your bindings air-dry completely. Moisture trapped in strap padding leads to mildew and odors. Leave them in a warm area (not on direct heat like a radiator) for 1–2 hours.
- Check for cracks: Inspect the baseplate, highback, and ladders for visible cracks or stress marks. Catching a crack early means you can order replacement parts before it fails mid-season.
End-of-Season Deep Clean
- Remove the bindings from the board: Use a #3 Phillips screwdriver to remove mounting screws. Keep the screws, washers, and discs in a labeled bag—don’t mix them with other hardware.
- Clean the ratchets: Brush out any dirt, snow crystals, or debris from the ratchet mechanism with a dry toothbrush. Work the ratchet open and closed several times to clear the mechanism.
- Lubricate ratchets (optional): A tiny drop of silicone lubricant (not WD-40, which attracts dirt) on the ratchet’s moving parts keeps the action smooth. Work the lubricant in by cycling the ratchet 10–15 times.
- Inspect hardware: Check all screws for corrosion, stripped heads, or deformation. Replace any suspect hardware immediately—most U.S. snowboard shops carry compatible replacements for under $10.
- Clean strap padding: Wipe down straps with a damp cloth and mild soap. Don’t submerge them—excessive water can degrade the foam over time.
Off-Season Storage
- Store in a cool, dry place: Avoid attics (extreme heat), garages with temperature swings (condensation), or damp basements (mold risk). A closet or bedroom shelf is ideal.
- Don’t compress straps: Store bindings with straps unbuckled and loose. Compressed straps develop memory folds and may not lay flat when you need them.
- Avoid UV exposure: Direct sunlight degrades nylon and strap materials. Store bindings in a bag, box, or closet—not on a windowsill.
- Keep them accessible: Store bindings near your other snowboard gear so you can do a quick inspection before the first day of the season. Forgetting about them until opening day means potential issues you could have caught earlier.
Mid-Season Repairs
If something breaks mid-season, don’t panic—most issues are fixable:
- Broken ladder strap: Replace with a universal ladder strap ($5–15). Most U.S. shops and Amazon carry compatible options. Ensure the ladder’s teeth match your ratchet’s mechanism.
- Stripped ratchet screw: Replace the screw and nut ($3–8). Burton, Union, and Salomon sell hardware kits through their websites.
- Cracked highback: Some brands sell replacement highbacks ($20–40). If not available, the binding is likely done—plan for a replacement.
- Loose baseplate screws: Tighten and add a drop of blue threadlocker (not red—red is permanent) to prevent future loosening.
A well-maintained budget binding can outlast a neglected premium binding. See our why wax your snowboard article for more gear care philosophy.
Common Binding Problems & Troubleshooting
Even the best budget bindings develop issues over time. Here’s a diagnostic guide for the most common problems and how to fix them.
Problem: Ratchets Won’t Tighten
Cause: Dirt, ice, or debris in the ratchet mechanism. Fix: Clean the ratchet with a toothbrush, work the mechanism open and closed, and apply a drop of silicone lubricant. If the ratchet’s teeth are worn (stripped), the ratchet assembly needs replacement—available from the binding manufacturer.
Problem: Ratchets Won’t Release
Cause: The release lever is jammed with ice or debris, or the mechanism is corroded. Fix: Warm the binding with your hands (body heat melts ice) and work the release lever gently. Don’t force it—excessive force can break the lever. If the lever is corroded, lubricate with silicone and cycle the mechanism. Persistent issues may require a replacement ratchet.
Problem: Strap Feels Loose Even When Tightened
Cause: The ladder strap teeth are worn or the ratchet is not gripping properly. Fix: Inspect the ladder for visible wear (smooth or rounded teeth). Replace the ladder if worn. If the ladder is new, check that the ratchet’s pawl (the small spring-loaded clip that grips the teeth) is engaging properly—a bent pawl needs replacement.
Problem: Highback Feels Wobbly
Cause: The highback mounting screws are loose or the bushings (rubber inserts at the highback’s pivot point) are worn. Fix: Tighten the highback mounting screws. If bushings are worn, replacement bushings are available from most brands for $5–15. Worn bushings create play in the highback, reducing heel-side response.
Problem: Binding Shifts on the Board
Cause: Mounting disc screws are loose or the disc’s teeth don’t properly engage the board’s inserts. Fix: Remove the binding, clean the disc and insert threads, and reinstall with even torque. If the disc’s teeth are stripped, replace the disc (available from the binding manufacturer). Apply blue threadlocker to prevent future loosening.
Problem: Boot Heel Lifts Inside Binding
Cause: Ankle strap is too loose, heel cup is too large, or the boot’s heel is too small for the binding size. Fix: Tighten the ankle strap. If the heel cup is adjustable, move it inward to reduce space. If the boot is too small for the binding, you may need a smaller binding size—this is a sizing error that can’t be fully corrected with adjustments.
Problem: Toe Drag During Turns
Cause: Your boot is too large for the board’s width, or your toe overhang exceeds the board’s effective edge. Fix: Center the binding as far toward the heel edge as possible. If drag persists, consider a wider board or a binding with a smaller footprint. See our carving guide for how drag affects turn initiation.
Problem: Binding Squeaks or Creaks
Cause: Friction between baseplate and board, or between highback and boot. Fix: Apply a thin layer of wax or silicone spray to the baseplate’s bottom surface. For highback squeaks, check the pivot bushings—dry or worn bushings create noise. A drop of lubricant at the pivot point usually resolves it.
Used Snowboard Bindings: What to Know Before You Buy Secondhand
Buying used bindings can stretch your budget further—but it comes with risks. Here’s how to evaluate secondhand bindings and decide whether the savings are worth the uncertainty.
Where to Find Used Bindings
- Local snowboard shops: Many U.S. shops sell used or consignment gear, often with a short warranty. This is the safest option for used purchases because shop technicians can assess the gear’s condition.
- Online marketplaces: Facebook Marketplace, Craigslist, OfferUp, and eBay offer the widest selection but the least protection. Buy locally when possible and inspect in person.
- Snowboard forums and communities: Reddit’s r/snowboarding, Newschoolers.com, and regional riding groups often have gear-for-sale threads with knowledgeable sellers.
- End-of-season garage sales: Some resorts and shops host gear swap events where riders sell used gear. These events often feature well-maintained equipment from local riders.
What to Inspect
- Baseplate cracks: Hold the binding up to light and inspect the baseplate for hairline cracks, especially around the mounting disc area. Cracked baseplates are a safety hazard—walk away.
- Ratchet function: Test every ratchet. It should click smoothly in both directions and release cleanly. Sticky, grinding, or non-releasing ratchets are expensive to fix.
- Strap condition: Check for tears, delamination, or hardened foam. Straps with damaged padding create pressure points and are often the first component to fail.
- Hardware condition: Look for corroded or stripped screws. Surface rust is cosmetic; deep corrosion or stripped heads require replacement.
- Highback integrity: Flex the highback laterally (side to side). It should flex uniformly without cracking sounds or visible stress marks.
- Ladder straps: Check the teeth for wear. Smooth or rounded teeth won’t grip the ratchet properly.
Red Flags: Walk Away
- Visible cracks in the baseplate or highback
- Ratchets that don’t function properly
- Seller can’t identify the binding’s size or model year
- Significant corrosion on mounting hardware
- Missing parts (discs, ladders, screws) without replacements included
- UV-faded or brittle plastics (indicates extended sun exposure)
Pricing Guide for Used Bindings
Use the original MSRP as a baseline. Budget bindings that retailed for $100–150 typically sell used for $30–70, depending on condition and age. Mid-range bindings ($150–250 retail) go for $60–120 used. Anything more than 5 years old should be priced significantly below these ranges—the materials have aged, and replacement parts may be harder to find.
The smartest approach for beginners: buy used bindings for your first season, then invest in new gear once you know your riding style and preferences. See our best time to buy gear guide for new-gear pricing strategies.
Price Tracking & Deal Hunting: When & Where to Get the Best Prices
Budget bindings are already affordable, but smart timing can save you an additional 15–40%. Here’s the annual pricing cycle for U.S. snowboard gear and the strategies that maximize your savings.
The Annual Price Cycle
| Time Period | Pricing Trend | Strategy |
|---|---|---|
| September–October | Early-season pricing; MSRP or near-MSRP | Only buy if you need gear for opening day. Selection is best but prices are highest. |
| November (Pre-Black Friday) | Prices begin dropping; early sales start | Start monitoring prices. Some retailers offer “Black Friday Early Access” deals. |
| Late November (Black Friday/Cyber Monday) | Deepest discounts of the early season (15–30% off) | Best time to buy new gear for the current season. Amazon, REI, evo, and Backcountry run significant sales. |
| December–January | Prices stabilize; some holiday sales | Buy if you missed Black Friday. Prices are decent but selection narrows. |
| February–March | Mid-season; prices hold steady | Focus on riding, not shopping. Prices won’t drop significantly until spring. |
| April–May | End-of-season clearance (25–50% off) | Best time to buy for NEXT season. Stock up on bindings, boots, and accessories at clearance prices. |
| June–August | Lowest prices; limited selection | Final clearance on remaining stock. If your size is available, this is the absolute cheapest time to buy. |
Where to Find Deals
- Amazon: Consistently competitive pricing, especially during Prime Day (July) and Black Friday. Our top picks all link to Amazon for this reason.
- REI: Annual member dividend (10% back on full-price purchases) makes REI effectively cheaper than it appears. End-of-season clearance is aggressive.
- evo.com: Seattle-based retailer with excellent end-of-season sales and a strong used gear section.
- Backcountry.com: Premium retailer that runs frequent sales, especially on previous-season models.
- Local shops: Often have unadvertised clearance deals, especially in March–May. Building a relationship with a local shop can yield loyalty discounts.
- Sierra Trading Post / TJ Maxx / Marshalls: Off-price retailers that occasionally carry snowboard bindings at deep discounts. Selection is unpredictable but worth checking.
Price Tracking Tools
Set up price alerts for the specific bindings you want:
- CamelCamelCamel: Tracks Amazon price history. Set your target price and get email alerts when it drops.
- Google Shopping: Set alerts for specific product names to receive price drop notifications.
- Honey / Capital One Shopping: Browser extensions that automatically apply coupon codes and track prices at major retailers.
The Smart Buyer’s Calendar
For maximum savings: buy your bindings in April–May at end-of-season clearance (25–50% off), store them properly over summer, and mount them on opening day. This strategy typically saves $30–70 per pair compared to buying at retail during peak season. The only risk: your size might sell out. If you see a deal on your size in spring, buy it—don’t wait.
Pair your deal-hunting with smart boot purchases—see best time to buy snowboarding gear and how expensive is snowboarding?
Binding Technology Glossary: Every Term Explained
Snowboard binding marketing is full of proprietary names and technical jargon. Here’s a plain-English glossary of every binding term you’ll encounter while shopping.
| Term | What It Means | Why It Matters |
|---|---|---|
| Baseplate | The flat platform your boot sits on; connects to the board via a mounting disc | Determines overall stiffness, weight, and board feel |
| Highback | The vertical plate behind your calf; provides heel-side leverage | Controls heel-side turn response and overall support |
| Ankle Strap | The main strap crossing over your boot’s ankle | Primary retention system; determines heel hold and comfort |
| Toe Cap / Toe Strap | The strap securing the front of your boot | Improves toe-side response and prevents boot lift |
| Ratchet | The buckle mechanism that tightens straps | Determines ease of use and reliability |
| Ladder Strap | The serrated plastic strip that feeds through the ratchet | Wear item; easy and cheap to replace |
| Mounting Disc | The circular plate connecting the binding to the board | Determines mounting pattern compatibility |
| Heel Cup | The structure wrapping around the back of your heel | Adjusts boot centering and heel hold |
| Forward Lean | The angle of the highback toward the board’s nose | Increases heel-side response but reduces trick freedom |
| Highback Rotation | Rotating the highback to align with the board’s edge | Improves carving efficiency and edge control |
| Canted Footbed | A footbed angled outward (typically 2.5–3°) | Aligns joints more naturally; reduces knee/ankle strain |
| EVA Padding | Ethylene-vinyl acetate foam cushioning | Absorbs vibration and impact; reduces fatigue |
| Dampening | Technologies that absorb vibration (rubber inserts, gel pads, etc.) | Improves comfort on hardpack and at speed |
| Re:Flex | Burton’s reduced-contact mounting disc design | Allows more natural board flex beneath the binding |
| EST | Burton’s Channel-specific mounting system (no disc) | Maximum board feel; Channel boards only |
| Mini-Disc | A smaller mounting disc that reduces binding-board contact area | More natural board flex; better board feel |
| Channel | Burton’s proprietary longitudinal mounting track | Unlimited stance width adjustment; Burton boards only |
| 2×4 / 4×4 | Standard insert patterns with 2cm or 4cm spacing | Universal compatibility with non-Burton boards |
| 3D | Legacy Burton mounting pattern (triangular inserts) | Found on older Burton boards; requires adapter for modern bindings |
| Gas Pedal | The toe ramp portion of the baseplate that supports the ball of your foot | Adjustable on some bindings; affects toe-side leverage |
| Bushings | Rubber or urethane inserts at pivot points (highback, baseplate) | Reduce noise, add dampening, and allow controlled flex |
| Swing Weight | The rotational mass your legs move when turning or spinning | Lighter bindings = less swing weight = easier spins and turns |
| Board Feel | How much feedback you receive from the board through the binding | More board feel = more control but potentially more vibration |
| Power Transfer | How efficiently your input moves from binding to board | Stiffer bindings = more immediate transfer; softer = more dampened |
| Tool-Less Adjustment | Adjustments that can be made without tools (typically straps and forward lean) | Convenience for on-hill tweaks; varies in quality |
Your Upgrade Path: When & How to Level Up Your Bindings
Starting with budget bindings is smart. But knowing when to upgrade—and what to upgrade to—prevents you from spending money prematurely or riding bindings that hold you back.
Signs You’ve Outgrown Your Budget Bindings
- You’re riding faster than the bindings can handle. If you’re starting to charge on black runs and the bindings feel vague or unresponsive, the flex is too soft for your riding.
- Your legs are fatiguing earlier in the day. Budget bindings’ simpler cushioning systems transmit more vibration to your legs. If you’re tired by 1pm when you used to ride all day, better dampening could help.
- You’re losing heel hold during aggressive turns. Budget ankle straps may not provide enough pressure to keep your foot locked down during high-force maneuvers.
- You want more adjustability. As you refine your stance, you may want micro-tunable forward lean, adjustable highback rotation, or customizable strap positions—features that budget bindings often lack.
- The bindings are showing wear. Cracked baseplates, worn ladder teeth, or degraded strap padding indicate the binding’s useful life is ending. Rather than buying replacement parts for a budget binding, consider upgrading.
The Upgrade Ladder
Here’s a logical progression for riders moving from budget to better:
- Budget tier ($80–150): Learn the fundamentals. Examples: our top 5 picks. Keep for 1–3 seasons.
- Mid-range tier ($150–250): First meaningful performance upgrade. Better materials, more adjustability, lighter weight. Examples: Burton Cartel, Union Strata, Ride A-6, Salomon hologram. Keep for 2–4 seasons.
- High-end tier ($250–350): Significant engineering investment shows. Carbon-reinforced construction, advanced dampening, professional-grade response. Examples: Burton Genesis, Union Atlas, Ride Magic. Keep for 3–6 seasons.
- Premium tier ($350+): Top-tier materials and engineering. For dedicated riders with specific performance needs. Examples: Burton Escapade, Union Force (high-end). Keep for 5+ seasons.
The Most Common Upgrade Mistake
The biggest mistake is upgrading bindings before upgrading boots. Your boot is the most critical interface in your setup—it’s where your foot contacts the system. A great binding with a mediocre boot will feel mediocre. A good binding with a great boot will feel great. Invest in proper boot fit first (see our best snowboard boots guide), then upgrade bindings when your boots are dialed.
Timing Your Upgrade
Buy your upgraded bindings during end-of-season clearance (April–May) for maximum savings. A $220 mid-range binding purchased at 30% off in May costs $154—barely more than a budget binding at full retail, but significantly better performance. Patience pays.
Sustainability & Eco-Friendly Snowboard Bindings
Environmental consciousness is increasingly important to snowboarders—who tend to be outdoor enthusiasts acutely aware of climate change’s impact on snow seasons. While budget bindings prioritize value over eco-credentials, several brands are making sustainability accessible at lower price points.
What Makes a Binding “Eco-Friendly”?
- Recycled materials: Some bindings incorporate recycled nylon, aluminum, or steel. Union and Ride have been leaders in this area.
- Bio-based plastics: Plant-derived nylon (like castor bean-based polyamide) reduces petroleum dependence. Burton has experimented with bio-based materials in some product lines.
- Durability as sustainability: The most eco-friendly binding is one that lasts longer. Higher-quality materials and construction mean fewer bindings in landfills. This is an argument for spending slightly more on a binding that lasts 5+ seasons rather than replacing a budget binding every 2 seasons.
- Recyclable packaging: Some brands have moved to 100% recyclable or compostable packaging. Burton, Union, and Ride have all made strides here.
- Repair programs: Brands that sell replacement parts (straps, ratchets, ladders) extend binding life and reduce waste. Union and Burton offer the most comprehensive parts catalogs.
Eco-Conscious Budget Picks
Among our top 5 budget bindings, the Union Flite Pro stands out for Union’s commitment to reducing waste: Union offers individual replacement parts for virtually every component, and their manufacturing processes emphasize material efficiency. The Salomon Rhythm also benefits from Salomon’s broader sustainability initiatives, including recycled packaging and reduced-plastic shipping materials.
Extend your gear’s life with regular maintenance—see our why wax your snowboard article for gear care philosophy.
Wide Boots & Binding Solutions: Solving the Overhang Problem
If you wear US Men’s 11+ boots, you’ve probably experienced toe or heel drag—where your boot extends past the board’s edge and catches during turns. This is a common issue that budget bindings can address with proper setup, but understanding the problem is the first step.
What Causes Overhang?
Overhang is the distance your boot extends past the board’s toe and heel edges. A small amount of overhang is normal and necessary—you need some leverage to initiate turns. But excessive overhang (more than 1–1.5 inches on either side) causes drag, which slows your turn initiation, creates instability at speed, and can cause you to catch an edge unexpectedly.
Overhang depends on three factors:
- Boot size: Larger boots have a bigger footprint and naturally overhang more.
- Board width: Narrow boards (under 250mm waist) offer less room for large boots.
- Binding size: Larger bindings position your boot further from the board’s centerline.
Solutions for Wide Boots
- Buy a wide board: Boards with 256mm+ waist widths (often labeled “W” or “Wide”) provide more toe and heel room. Many brands make wide versions of their popular all-mountain models.
- Use size-appropriate bindings: Ensure your binding size matches your boot size. A size Large binding (US Men’s 10–13) is designed for larger boots and provides better centering.
- Center your bindings: Slide bindings toward the heel edge as far as possible while maintaining even overhang. The binding’s heel cup adjustment can also help center larger boots.
- Reduce forward lean: Excessive forward lean pushes the highback against your calf, which can exacerbate heel overhang. Running minimal forward lean can recover a few millimeters of clearance.
Bindings and Wide Boards: Compatibility Notes
All five of our budget bindings work with wide boards—their universal 2×4/4×4 discs mount to the same insert patterns regardless of board width. However, ensure your binding size is appropriate for both your boot and the board. A size Small binding on a wide board may not center properly, while a size Large binding on a narrow board will exacerbate overhang.
Boot fit is critical for wide-boot riders—see our Vans sizing guide for brand-specific footprint information.
More Budget Binding Brands Worth Knowing
Our top 5 picks represent the best overall value, but several other brands offer competitive budget options. Here’s a quick overview of additional brands to consider if our top picks don’t fit your specific needs.
Rossignol
Rossignol’s Krypto and Battle lines offer solid budget performance with surprisingly good build quality. Their bindings tend toward the stiffer end of the budget spectrum, making them a good choice for riders who want more response than our top picks without the price jump. Available at most U.S. retailers, Rossignol bindings often go on deep clearance during end-of-season sales.
Head
Head’s Primo and Node bindings are entry-level options that prioritize simplicity and durability. They’re not the lightest or most feature-rich, but they’re tough, easy to set up, and backed by Head’s established U.S. distribution network. Good for riders who want a “set and forget” binding with minimal fuss.
Flow
Flow pioneered rear-entry (step-in) bindings, which allow you to slip your boot in from the back instead of traditional two-strap ratcheting. Their NX2-GT and Fuse models occasionally dip into the budget range during sales. Step-in bindings can be faster to use but may not provide the same level of adjustability and fit as two-strap designs. Worth considering if convenience is your top priority.
System
System is a budget brand sold primarily through Amazon and discount retailers. Their bindings are the most affordable option on this list (often under $80) but trade quality and longevity for price. They’re acceptable for very casual riders or as backup bindings, but we don’t recommend them as a primary setup for regular riding.
SP United
SP makes rear-entry bindings similar to Flow, often at lower price points. Their Force and Swift models are decent entry-level step-in options. Quality varies more than major brands, so inspect carefully if buying online.
Safety & Injury Prevention: How Bindings Protect You
Your bindings aren’t just a performance component—they’re a safety system. Properly fitted and adjusted bindings reduce your risk of injury by ensuring your boots are securely held, your edge control is predictable, and your setup doesn’t create hazardous conditions.
How Binding Fit Affects Safety
- Loose bindings = unpredictable edge control. If your boot shifts inside the binding, your edge inputs become inconsistent. This can cause unexpected catch-and-crash scenarios, especially on firm snow. Ensure your ankle and toe straps are snug enough to prevent boot movement without cutting off circulation.
- Incorrect binding size = compromised control. A binding that’s too large allows excessive boot movement. A binding that’s too small creates pressure points that cause pain and fatigue, leading to sloppy technique. Both scenarios increase injury risk.
- Improper stance = joint strain. Angles and width that don’t align with your natural biomechanics can stress knees, ankles, and hips. Start with neutral angles (+12°/-6°) and shoulder-width stance, then adjust based on comfort.
Binding-Related Injuries
The most common injuries related to binding setup include:
- Ankle sprains: Often caused by boots that lift inside bindings (loose ankle strap) or bindings that don’t provide adequate lateral support.
- Knee injuries (ACL/MCL): Can be exacerbated by stance angles that force the knee into unnatural alignment. Duck stance (+12°/-6° or +15°/-15°) is generally safer for knees than extreme directional angles.
- Toe/heel drag catches: Excessive overhang causes the boot to catch on snow during turns, potentially throwing you off balance. Proper centering and board width selection prevent this.
- Shin bang: Caused by the highback repeatedly impacting the shin during aggressive riding. Proper forward lean adjustment and a well-padded highback reduce this risk.
Protective Gear to Pair with Your Bindings
- Helmet: Non-negotiable. Every rider, every day. Modern snow helmets are lightweight, well-ventilated, and available at every price point.
- Impact shorts: Padded shorts that protect your tailbone and hips during falls. Essential for park riders and beginners who spend a lot of time on the ground.
- Wrist guards: Beginners fall on their hands frequently. Wrist guards reduce fracture risk. Some can be worn inside gloves for a clean look.
- Knee pads: Park riders benefit from slim knee pads that fit under snowboard pants.
Pre-Ride Safety Check
Before every session, perform this 60-second check:
- Verify all screws are tight (baseplate, highback, disc).
- Test both ratchets—tighten and release to confirm function.
- Check straps for cracks, tears, or excessive wear.
- Confirm binding angles haven’t shifted from your last setting.
- Visually inspect for cracks in the baseplate or highback.
This routine catches potential failures before they become safety hazards on the mountain.
Ride within your limits—see why snowboarding can be dangerous and how to manage risk.
Warranty & Returns Guide: Protecting Your Purchase
Understanding your warranty rights and return options ensures you’re protected if something goes wrong with your budget binding purchase.
Brand Warranty Policies
| Brand | Warranty Period | Coverage | U.S. Process |
|---|---|---|---|
| Salomon | 2 years | Manufacturing defects; normal wear excluded | Submit through Salomon’s U.S. website or authorized dealer |
| Burton | 1–2 years (varies by component) | Manufacturing defects; straps and ratchets may have shorter coverage | Burton’s warranty page; receipts required |
| Union | 2 years | Manufacturing defects; excellent reputation for honoring claims | Union’s website; direct contact or via retailer |
| K2 | 2 years | Manufacturing defects | K2’s warranty page; proof of purchase required |
| Ride | 1–2 years | Manufacturing defects; wear items excluded | Ride’s warranty page or authorized dealer |
What Warranty Covers (and Doesn’t)
- Covered: Cracked baseplates from normal use, highback failure under normal riding conditions, defective ratchets, strap delamination from manufacturing defects.
- Not covered: Normal wear (worn ladder teeth, faded straps), crash damage (impacts, bends from falls), UV damage (storing in direct sunlight), modification or tampering, using bindings outside their intended purpose.
Amazon Return Policy
Amazon typically offers 30-day returns on most items, including snowboard bindings. This gives you time to test the fit with your boots and board. If the binding doesn’t fit, the wrong size was shipped, or you simply changed your mind, Amazon’s return process is straightforward. Keep the original packaging for the smoothest return experience.
Third-party sellers on Amazon may have different return policies—check before purchasing. “Sold by Amazon” and “Fulfilled by Amazon” items generally have the most buyer-friendly return terms.
Extended Protection
Some credit cards offer extended warranty protection (typically adding 1 year to the manufacturer’s warranty). Check your card’s benefits—this can effectively double your binding’s warranty coverage at no extra cost. For budget bindings with 1–2 year warranties, this can extend coverage to 2–4 years, covering most of the binding’s useful life.
Expert Insights & Rider Feedback: What Real Riders Say
We’ve gathered feedback from U.S. riders across skill levels and regions to supplement our own testing. Here’s what real riders are saying about these budget bindings.
What Shop Techs Recommend
U.S. snowboard shop technicians see thousands of bindings pass through their workshops each season. The consensus on budget bindings: they’ve improved dramatically in the last five years. “The Rhythm and Freestyle are genuinely good bindings,” notes a technician at a Vermont shop. “Five years ago, sub-$100 bindings had ratchets that jammed in the cold and straps that fell apart by March. Now they’re legit.” Shop techs consistently praise Union’s parts availability—”If a Union ratchet breaks, we can get a replacement in 2–3 days. Try that with some other brands.”
Beginner Rider Experiences
New riders who started on the Salomon Rhythm report high satisfaction after their first season: “I didn’t even think about the bindings—they just worked.” This “disappearing gear” quality is the hallmark of a good beginner binding. The Burton Freestyle receives similar praise for comfort: “I rode for six hours straight without any foot pain, which I definitely can’t say about my rental setup.” The K2 Sonic earns points for simplicity: “I set them up in my living room and didn’t touch a tool again all season.”
Intermediate Rider Perspectives
Riders with 2–4 seasons of experience often start noticing the limitations of budget bindings. “The Ride C-2 was great for my first two seasons, but now I want more response for charging steeps,” reports a Colorado intermediate. The Union Flite Pro remains popular with park-focused intermediates: “The weight savings are real. I notice it on every spin.” Several intermediate riders note that upgrading boots made more difference than upgrading bindings: “I spent $250 on better boots and it transformed my existing bindings.”
Regional Feedback Highlights
- Northeast riders favor the Ride C-2 for its dampening on icy mornings: “It smooths out the chatter better than anything else in this price range.”
- Rocky Mountain riders appreciate the Salomon Rhythm’s versatility: “Works everywhere from groomers to powder stashes.”
- Pacific Northwest riders note the importance of rinsing bindings after wet sessions: “The moisture here is relentless. I rinse my bindings every weekend.”
- Midwest riders value cost-per-day: “I only ride 15 days a season. The K2 Sonic is perfect—I’m not over-investing.”
Common Rider Mistakes (and How to Avoid Them)
- Buying too stiff: “I bought medium-stiff bindings as a beginner and hated them. Switched to soft and had way more fun.” Start soft, progress upward.
- Ignoring boot fit: “My bindings were great but my boots were terrible. Fixed the boots and everything improved.” Invest in boot fit first.
- Not adjusting angles: “I rode with default angles for a whole season before trying duck stance. Wish I’d experimented sooner.” Spend 10 minutes adjusting your angles early.
- Skipping maintenance: “I never checked my screws and a baseplate screw came loose mid-run. Now I check every morning.” Build the habit early.
Care, Warranty & Longevity (Make Budget Gear Last Longer)
- Rinse & dry after slushy U.S. spring days—salt can work into hardware.
- Use board bags for flights and road trips (see best snowboard bags).
- Spare parts: keep an extra ladder and a set of mounting screws in your bag.
- Warranty: major brands have solid U.S. support channels—save receipts.
- Inspect before first ride: check all hardware, test ratchets, and verify angles before your first day each season.
- Avoid parking-lot tools: the free Allen keys at resorts work in a pinch, but a proper #3 Phillips from home reduces the chance of stripped screws.
- Log your riding days: if you track how many days you ride per season, you’ll know when your bindings are approaching end-of-life and can plan replacements or upgrades accordingly.
Dial your fitness to reduce crashes and gear abuse—see our fitness guide for snowboarding.
Expected Lifespan by Rider Profile
| Rider Profile | Days/Season | Expected Binding Lifespan | Cost Per Day |
|---|---|---|---|
| Casual (weekend warrior) | 10–20 | 3–5 seasons | $0.80–$1.50/day (at $120 retail) |
| Regular (dedicated hobbyist) | 25–40 | 2–3 seasons | $1.00–$1.60/day |
| Enthusiast (50+ days) | 50–80 | 1–2 seasons | $0.75–$1.20/day (budget bindings wear faster at high volume) |
| Park rider (high impact) | 30–60 | 1–2 seasons (high crash frequency accelerates wear) | $1.00–$2.00/day |
For high-volume riders, the cost-per-day calculation often favors mid-range bindings that last longer and provide better performance. For casual riders, budget bindings are the clear value winner.
Gear Care by Riding Frequency: How Often You Ride Changes How You Maintain
The maintenance schedule that makes sense for a weekend warrior is different from what an everyday rider needs. Here’s a frequency-specific care guide to help you protect your investment without over-maintaining.
Weekend Warrior (10–20 Days/Season)
If you ride every other weekend or so, your maintenance routine can be minimal but consistent:
- After each ride: Quick visual inspection. Check that all screws are tight and straps look intact. Wipe off any visible salt or grime if you rode in slushy conditions. Takes 2 minutes.
- Monthly during season: Brush out ratchet mechanisms with a dry toothbrush. Test every ratchet open and close cycle 5 times. Check ladder teeth for wear. Takes 10 minutes.
- End of season: Full deep clean, silicone spray on ratchets, hardware inspection, and proper storage. Takes 30–45 minutes. This is the most important maintenance event for casual riders—do it right and your bindings will last 3–5 seasons.
At this riding frequency, budget bindings are the clear value choice. The cost-per-day is excellent, and the gear simply doesn’t experience enough stress to warrant premium pricing. Our top 5 picks will all last 3+ seasons with this minimal maintenance routine.
Regular Rider (25–40 Days/Season)
Weekly riders need a more active maintenance routine because hardware vibration, strap wear, and ratchet degradation accumulate faster:
- After each ride: Visual inspection plus a tactile check—wiggle each binding to feel for play in the highback or baseplate. Check ratchet function (do they click and release smoothly?). Takes 3–5 minutes.
- Every 5–10 rides: Brush out ratchets with a toothbrush. Check all screws with a screwdriver—not just visual, but actually try to tighten each one. Check ladder teeth under good light for rounded edges. Takes 15 minutes.
- Mid-season: Apply silicone spray to ratchet mechanisms. Check strap padding for compression. Verify highback bushings for play. Takes 20 minutes.
- End of season: Full deep clean and proper storage. Consider replacing ladders if they show any wear—even if they’re still functional, fresh ladders at the start of next season prevent mid-season failures. Takes 45–60 minutes.
At this frequency, budget bindings will likely last 2–3 seasons. The cost-per-day is still excellent. If you want to extend lifespan, the Ride C-2 and Salomon Rhythm tend to be more durable in this category due to their slightly more robust construction.
Enthusiast (50+ Days/Season)
High-frequency riders put serious stress on their gear. At 50+ days, budget bindings may feel the strain:
- After each ride: Full inspection: all screws, all ratchets, all straps, highback integrity. Replace any worn ladders immediately—don’t wait for them to break. Takes 5–10 minutes.
- Every 5 rides: Clean and lubricate ratchets. Check baseplate for stress marks. Verify highback rotation hasn’t shifted. Check mounting disc screws. Takes 15–20 minutes.
- Every 15–20 rides: Inspect baseplate underside for wear patterns. Check heel cup adjustment screws. Inspect strap rivets for looseness. Consider having a shop technician do a quick assessment. Takes 30 minutes.
- Mid-season: Full lubrication of all moving parts. Replace any worn components proactively. Consider keeping a complete spare set of ladders and straps on hand. Takes 45 minutes.
- End of season: Deep clean, full inspection, and professional assessment if needed. Budget bindings at this frequency typically last 1–2 seasons—consider whether mid-range bindings offer better cost-per-day value.
For enthusiasts, the cost-per-day calculation often favors mid-range bindings ($150–250) that last longer and provide better performance under sustained stress. Budget bindings work but may not survive more than 1–2 high-volume seasons before needing replacement.
Park Rider (30–60 Days, High Impact)
Park riding adds unique stress: repeated impacts from jumps, grinds on rails and boxes, and frequent crashes. This accelerates wear on specific components:
- Inspect after every session: Check highback for cracks (common impact point). Inspect baseplate around the disc mount for stress fractures. Test all ratchets—crashes can jam mechanisms with snow and debris.
- Replace ladders proactively: Park riders stress ladders more than any other component. Replace at the first sign of tooth wear—don’t wait for failure.
- Check strap rivets: The rivets connecting straps to the binding frame take impact stress. Verify they’re tight and not showing play.
- Budget for replacements: Park riders on budget bindings should budget for replacement ladders ($10–20/season) and potentially straps ($20–40/season). These costs are minor but add up—factor them into your cost-per-day calculation.
The Union Flite Pro is the top budget pick for park riders—its lightweight construction reduces fatigue, and Union’s parts availability makes replacement easy. However, park riders should consider whether the Flite Pro’s lighter construction provides adequate durability for their riding frequency.
How Budget Bindings Perform in Different Snow Conditions
Snow conditions vary wildly across U.S. resorts and throughout the day. Here’s how our top 5 budget bindings handle the full range—from morning corduroy to afternoon chop to spring slush.
Fresh Powder (6–12+ inches)
Powder is the most forgiving condition for binding performance. In deep snow, the board floats and the bindings need only to transfer basic edge inputs. All five budget bindings perform adequately in powder—the differences between them matter far less than in firm conditions. The Salomon Rhythm and Ride C-2 edge ahead slightly because their moderate dampening helps when you inevitably hit a wind-buffed patch or transition back to groomed terrain. The Union Flite Pro feels most playful in powder thanks to its light weight, which makes surfy, flowing turns feel effortless.
Groomed Corduroy (Morning Conditions)
Fresh corduroy is the benchmark condition for evaluating binding response. On firm groomers, you want a binding that translates your input directly to the board’s edge. The Ride C-2 leads the group here—its slightly stiffer flex provides more precise heel-side and toe-side engagement. The Salomon Rhythm follows closely, offering a good balance of response and forgiveness. The softer Burton Freestyle and K2 Sonic feel vaguer on corduroy—they work, but you won’t get the satisfying “locked-in” carving feeling that stiffer bindings provide.
Icy Hardpack
Ice is where budget bindings show their limitations most clearly. Hardpack demands precise edge control, quick transitions, and confidence in heel-side hold. The Ride C-2 handles ice best among the five—its stiffer structure and more supportive straps provide better edge hold. The Salomon Rhythm is acceptable with careful technique. The softer options (Burton Freestyle, K2 Sonic, Union Flite Pro) feel nervous on ice—the vague response and reduced edge hold can shake confidence. If you ride regularly in the Northeast or at ice-prone resorts, the Ride C-2 is the clear choice from this group. See our guide on how to carve on a snowboard for technique tips on hard surfaces.
Chopped/Variable Groomers (Afternoon Conditions)
After a resort has been tracked out all day, the snow becomes chopped, rutted, and unpredictable. This condition demands dampening (vibration absorption) and stability. The Ride C-2 and Salomon Rhythm handle chop best—their mid-range flex and adequate cushioning smooth out the chatter. The Union Flite Pro, despite its light weight, can feel bouncy in chop because the lighter materials transmit more vibration to the rider. The Burton Freestyle and K2 Sonic absorb some vibration through their soft flex but can feel unstable when hitting larger ruts.
Spring Slush (Warm Conditions)
Spring slush is slow, heavy, and demands patience from your gear. Bindings need to maintain consistent response in soft, suction-like snow. All five bindings handle slush adequately—the softer flex options actually work well here because they allow the board to pivot naturally in slow, heavy snow. The Ride C-2 may feel slightly overpowered in slush (too much response for the slow speed). The Union Flite Pro excels in spring park sessions where its light weight reduces fatigue during long, warm-weather sessions.
Man-Made Snow (Midwest & Low-Snow Resorts)
Man-made snow is typically granular, abrasive, and firm. It’s similar to hardpack but with more surface texture that can accelerate wear on binding components. No binding-specific concerns here—just be mindful that the abrasive surface can wear ladder straps faster than natural snow. Check ladders more frequently if you ride primarily man-made snow.
Advanced Setup for Specific Riding Styles
Once you’ve mastered the basics, you can fine-tune your binding setup to match your preferred riding style. Here are optimized setups for common rider profiles using our budget bindings.
Park Rider Setup
- Binding choice: Union Flite Pro (lightest, most playful)
- Stance width: Shoulder width or slightly wider (20–22″) for stability on landings
- Angles: Duck stance (+15°/-15° or +12°/-12°) for balanced switch and regular riding
- Forward lean: Zero or minimal—maximum freedom for presses, butters, and flat-ground tricks
- Highback rotation: Minimal—keep the highback perpendicular to the baseplate for maximum tweak-ability
- Strap tightness: Moderate—snug enough for response but loose enough for foot movement during tricks
All-Mountain Carver Setup
- Binding choice: Ride C-2 (best response and dampening in the group)
- Stance width: Slightly narrower than shoulder width (19–21″) for quicker edge-to-edge transitions
- Angles: Directional (+21°/+6° or +18°/+6°) for aggressive front-foot carving
- Forward lean: 2–4 clicks for heel-side engagement without calf fatigue
- Highback rotation: Align parallel to the heel edge for direct power transfer
- Strap tightness: Firm—maximize heel hold and toe response for carved turns
Beginner Learning Setup
- Binding choice: Burton Freestyle Re:Flex or K2 Sonic (most forgiving)
- Stance width: Shoulder width (20–21″)—comfortable and stable
- Angles: Mild duck (+12°/-6°)—neutral enough for learning all fundamentals
- Forward lean: Zero—let the highback move freely while you develop technique
- Highback rotation: Default—don’t worry about this adjustment until you’re linking turns comfortably
- Strap tightness: Moderate—comfortable enough for long learning days without losing boot hold
Casual Resort Cruiser Setup
- Binding choice: Salomon Rhythm (versatile and comfortable)
- Stance width: Shoulder width (20–21″)
- Angles: Mild duck (+12°/-6°) or directional (+15°/+3°)—whichever feels more natural
- Forward lean: 1–2 clicks—slight improvement in heel-side response without commitment
- Highback rotation: Default or slightly rotated toward heel edge
- Strap tightness: Comfortable—prioritize all-day comfort over aggressive response
How to Test Your Setup
After making any adjustment, ride 3–5 runs before tweaking further. Your body adapts to stance changes, and immediate reactions are often unreliable. On your test runs, pay attention to:
- Knee comfort: Are your knees stacked over your feet? Pain or fatigue suggests incorrect angles or width.
- Edge control: Can you initiate turns smoothly on both edges? Vague response suggests too-soft bindings or incorrect forward lean.
- Balance: Do you feel centered on the board? Toe or heel drag, or a sense of leaning, suggests centering issues.
- Comfort after 3+ runs: Any pressure points or hot spots that develop after initial runs indicate strap or stance issues that need addressing.
Budget Snowboard Binding Myths Debunked
Several persistent myths about budget bindings mislead new riders into overspending or making poor choices. Here’s the truth behind the most common misconceptions.
Myth: “Cheap Bindings Will Break on the Mountain”
Reality: Modern budget bindings from established brands (Salomon, Burton, Union, K2, Ride) use injection-molded nylon composites that are extremely durable. Binding failures from normal riding are rare. The most common breakage is ladder strap wear, which is a $5–15 replacement—not a safety catastrophe. Budget bindings sold through major retailers meet the same safety standards as premium options.
Myth: “You Need Expensive Bindings to Ride Well”
Reality: Skill development is driven by technique, practice, and terrain selection—not binding price. The performance gap between a $100 binding and a $300 binding is meaningful for advanced riders pushing extreme terrain, but it’s negligible for beginners and intermediates. Invest in lessons and experience first—upgrade gear when your skills demand it.
Myth: “Budget Bindings Are Unsafe”
Reality: All bindings sold by reputable retailers meet basic safety requirements. The primary safety factor is proper fit and adjustment—not price. A well-adjusted $100 binding is safer than a poorly adjusted $300 binding. Follow proper setup procedures (see our setup tips), perform pre-ride checks, and your budget binding will be just as safe as any other.
Myth: “Softer Bindings Are Bad”
Reality: Soft bindings are purpose-built for specific uses. Park riders prefer soft bindings for their playfulness and forgiving feel. Beginners benefit from soft bindings because they’re more forgiving of technique errors. Soft bindings aren’t “worse”—they’re designed for different purposes than stiff bindings. The problem arises only when soft bindings are used in conditions that demand stiff response (ice, steep terrain, high speed).
Myth: “You Should Buy the Most Expensive Binding You Can Afford”
Reality: Over-buying creates its own problems. A stiff, responsive premium binding used by a beginner will feel terrible—unforgiving, hard to control, and potentially discouraging. Match your binding to your current skill level, not your aspirational skill level. Buy for where you are today, and upgrade when your skills catch up.
Myth: “Brand Doesn’t Matter at the Budget Level”
Reality: Brand matters more at the budget level, not less. Established brands invest in quality control, material consistency, parts availability, and warranty support that lesser-known brands often lack. A $120 binding from Union or Salomon will consistently outperform a $80 binding from an unknown brand—not because of the logo, but because of the engineering, testing, and manufacturing standards behind it.
Myth: “Step-In Bindings Are Always Better Than Two-Strap”
Reality: Step-in/rear-entry bindings (Flow, SP) offer convenience but trade adjustability and fit precision. Two-strap bindings provide more precise fit adjustment, better heel hold, and wider compatibility. At the budget level, two-strap bindings offer better value because they’re more versatile and easier to service. Step-in systems are worth considering only if convenience is your absolute top priority.
Myth: “You Need to Replace Bindings When You Replace Your Board”
Reality: Bindings and boards have different lifespans. Bindings typically last 2–5 seasons; boards last 3–7 seasons (depending on riding volume and style). You’ll likely replace bindings before your board, and you can often transfer bindings to a new board if the mounting patterns match. Don’t feel compelled to buy new bindings every time you upgrade your board.
Seasonal Buying Strategy: A Month-by-Month Guide
Understanding the annual retail cycle for snowboard gear helps you time your purchase for maximum value. Here’s a detailed month-by-month strategy for U.S. buyers.
January: Post-Holiday Value
After the Black Friday/Cyber Monday rush, January offers a secondary window of discounts as retailers clear holiday overstock. Prices aren’t as low as November, but selection improves as some sizes are restocked. This is a good time to buy if you missed Black Friday sales. Many U.S. retailers also run “New Year, New Gear” promotions.
February: Stable Mid-Season
February is peak riding season for most of the U.S., and prices stabilize at near-MSRP levels. This is not the time for bargain hunting—focus on riding your current gear. The exception: some retailers offer “Presidents’ Day” sales that provide modest discounts (10–15%).
March: Early Clearance Begins
As resorts in southern regions begin closing and snow conditions decline, retailers start marking down current-season inventory. March sees initial clearance pricing—typically 15–25% off. This is when smart buyers start monitoring prices for next-season gear. Selection is still good, but popular sizes sell first.
April: Peak Clearance
April is the single best month for buying snowboard gear in the U.S. Resorts are closing, and retailers are aggressively clearing inventory. Discounts of 25–50% are common. This is when you should buy bindings, boots, and accessories for next season. The selection narrows as sizes sell out, so act quickly when you find what you need.
May: Final Clearance
May continues April’s clearance pricing but with even thinner selection. If you find your size in May, the discount is often deeper than April—but you may need to settle for colors or models you didn’t originally consider. This is the absolute floor for pricing on current-season gear.
June–August: Off-Season Low
Summer sees the lowest prices but the most limited selection. Some retailers offer “Christmas in July” sales (aligned with Amazon Prime Day) that provide another discount window. End-of-season leftover stock is available at rock-bottom prices. If you’re patient and flexible on color/size, this is the cheapest time to buy. See our best time to buy gear guide for more details.
September–October: New Season Arrival
New models arrive at MSRP. This is the worst time to buy—full retail pricing, no discounts, and the urgency to gear up for opening day pushes many buyers to overpay. Only buy now if you need gear for immediate use and couldn’t find deals during clearance.
November: Black Friday Returns
The cycle resets. Black Friday and Cyber Monday offer the first major discounts of the new season. Prices typically range from 15–30% off MSRP. For current-season buyers, this is the best time. For next-season buyers, it’s good but not as good as spring clearance.
Notes for International Shoppers & Cross-Border Buying
While this guide focuses on U.S. riders, many readers shop internationally. Here are key considerations if you’re buying from outside the United States or importing gear.
Price Differences by Region
Snowboard binding prices vary significantly by region. The same Salomon Rhythm binding might retail for $120 in the U.S., €140 in Europe, and ¥18,000 in Japan. U.S. pricing is generally competitive due to Amazon’s aggressive pricing and the density of snowboard retailers in North America. Import duties, shipping, and regional distribution costs all affect final pricing.
Sizing Consistency
Boot and binding sizing is consistent across regions—a US Men’s 10 boot is the same everywhere. However, some brands use different size naming conventions in different markets. When buying cross-border, always reference the brand’s universal size chart rather than region-specific labels.
Warranty Limitations
Warranty service is typically limited to the country of purchase. If you buy bindings in the U.S. and move to Europe (or vice versa), warranty service may not be available. Consider this when making cross-border purchases—cheaper pricing may not be worth the loss of warranty protection.
Board Compatibility
Mounting patterns (2×4, 4×4, Channel) are universal, so bindings purchased anywhere will work with boards from anywhere. The exception is the Burton Channel system, which is slightly more common in North America than in some Asian markets. If buying a Burton board in a market where Channel boards are rare, verify that Re:Flex or EST discs are included.
Frequently Asked Questions
Are budget bindings good enough for learning?
Yes. Soft to medium-soft budget bindings are often better for learning. They’re forgiving, comfortable, and won’t punish small mistakes. Once you carve fast or charge steeper terrain, you might upgrade to stiffer models—but many riders happily stay on these for seasons.
Will these bindings fit my board?
Most budget bindings come with discs for 2×4 and 4×4 patterns; Burton Re:Flex also works on Channel boards. Check your board’s insert pattern. If you’re unsure, bring board and bindings to a shop—mounting typically takes 10–15 minutes.
What size should I buy?
Use the brand’s size chart and your U.S. boot size. If you’re between sizes, consider your boot’s exterior footprint; some modern boots run shorter (reducing toe drag). Our boot guides are a good start: Vans sizing and K2 review.
Are step-on/quick-entry bindings worth it on a budget?
Quick-entry systems often cost more. For budget builds, traditional two-strap bindings maximize value, are widely compatible, and easy to service with affordable parts.
Is snowboarding expensive?
It can be—but you can lower costs by shopping sales, buying value gear like the bindings above, and planning trips smartly. Read: how expensive is snowboarding?
How long do budget snowboard bindings last?
With proper maintenance, budget bindings last 2–5 seasons for casual riders (10–20 days/season) and 1–2 seasons for enthusiasts (50+ days/season). The nylon baseplate and highback are the primary wear components—they soften with use and may crack after extended stress. Replacement ladders and straps extend overall lifespan.
Can I use the same bindings on different boards?
Yes—if the boards use the same mounting pattern. All five budget picks include universal 2×4/4×4 discs, so they’ll fit virtually any non-Burton board. Burton Freestyle Re:Flex also works on Channel boards. Switching bindings between boards takes about 5–10 minutes with a #3 Phillips screwdriver.
Should I buy my bindings before or after my boots?
Buy boots first—or at least determine your exact boot size and model before buying bindings. Your binding size must match your boot size, and some boots fit better in certain binding brands than others. If possible, bring your boots to the shop when trying bindings.
What’s the difference between men’s and women’s bindings?
Women’s bindings typically have shorter highbacks (to accommodate lower calf muscles), narrower heel cups (for narrower heels), softer default flex (for lower average body weight), and smaller size ranges. The performance characteristics are equivalent—women’s bindings aren’t inferior, they’re designed for different anatomy. See our women’s budget bindings section for detailed recommendations.
Do I need to wax my bindings?
No—wax is for your board, not your bindings. However, you can apply a small amount of silicone spray to binding ratchets and pivot points to keep them operating smoothly. Never apply wax to binding components.
Can I adjust my binding angles at the resort?
Yes, if you carry a #3 Phillips screwdriver. Most binding discs allow angle adjustment by loosening the mounting screws, rotating the binding, and retightening. The process takes 2–3 minutes per binding. Some bindings offer tool-less strap adjustment for on-hill tweaks, but angle changes typically require a screwdriver.
My binding ratchet is stuck—what do I do?
Most stuck ratchets are caused by ice or debris in the mechanism. Warm the binding with your hands, then work the ratchet lever gently back and forth. If dirt is the culprit, brush it out with a dry toothbrush. For persistent issues, a drop of silicone lubricant usually resolves the problem. See our troubleshooting section for more detailed diagnostics.
What’s the most important thing to get right when setting up bindings?
Centering. A properly centered binding ensures even toe and heel overhang, balanced edge initiation, and consistent turn feel. Many beginners focus on angles and width but neglect centering. Spend 5 minutes checking that your toe and heel overhang are roughly equal—it makes a bigger difference than most adjustments.
Are expensive bindings worth it for intermediate riders?
It depends on your riding goals. If you’re riding mostly greens and easy blues, budget bindings are perfectly adequate. If you’re pushing into carving, speed, steep terrain, or competitive park riding, mid-range bindings ($150–250) provide meaningful improvements in response, comfort, and durability. Premium bindings ($300+) are rarely justified for intermediates—the performance gain doesn’t match the price increase at this skill level.
Can I mix and match bindings from different brands with my board?
Yes, as long as the mounting patterns are compatible. A Salomon binding on a Burton board (if using Re:Flex), or a Union binding on a K2 board, works fine. The binding-brand/board-brand match is cosmetic, not functional. However, some riders prefer the aesthetic consistency of matching brands—and some brands (Burton, K2) design their bindings to complement their boards’ flex profiles.
Brand Deep Dives: The Companies Behind Your Budget Bindings
Understanding a brand’s history, engineering philosophy, and support infrastructure helps you make a more informed purchase. Here’s a closer look at the five brands in our top picks and what they bring to the budget table.
Salomon: The French Engineering Powerhouse
Founded in the French Alps in 1947, Salomon originally made ski edges before expanding into full winter sports equipment. Their snowboard binding division benefits from decades of alpine engineering expertise. Salomon’s approach to budget bindings emphasizes smooth, predictable flex—their Rhythm binding is designed to “disappear underfoot,” meaning it doesn’t demand constant attention or adjustment from the rider. This philosophy aligns perfectly with beginner and intermediate needs: a binding that works without requiring the rider to think about it.
Salomon’s U.S. distribution is handled through their North American headquarters in Ogden, Utah. Warranty claims are processed through their website with typical turnaround times of 2–4 weeks. Replacement parts (ladders, straps, discs) are widely available through U.S. retailers. Salomon bindings are carried at most major U.S. snowboard shops, REI, and online retailers, making them easy to find and easy to service.
The Rhythm represents Salomon’s commitment to accessible performance. It’s not the flashiest binding in their lineup, but it’s one of their highest-volume sellers—and for good reason. It does exactly what it promises: comfortable, forgiving, reliable performance at a price that doesn’t require a second mortgage.
Burton: The Industry Pioneer
Jake Burton Carpenter founded Burton Snowboards in 1977 and essentially created the modern snowboard industry. Today, Burton remains the largest snowboard brand in the world, and their binding technology—particularly the Re:Flex and EST systems—has influenced every other manufacturer. The Freestyle Re:Flex represents Burton’s commitment to the entry-level rider: a binding that incorporates genuine engineering innovation (the living-hinge baseplate, the universal Re:Flex disc) at a price point accessible to first-time buyers.
Burton’s U.S. support is extensive. Their warranty department in Burlington, Vermont handles claims efficiently, and their parts availability is the industry’s best—Burton components are stocked at virtually every U.S. snowboard shop. The Re:Flex disc itself is a remarkable piece of design: it works on Channel boards, 2×4 boards, 4×4 boards, and even 3D boards (with an adapter). This universal compatibility makes the Freestyle Re:Flex the safest choice for riders who might switch boards or pass the bindings to a friend with a different setup.
Burton’s pricing tends to be slightly higher than competitors at equivalent performance levels, reflecting the brand’s R&D investment. However, their end-of-season clearance pricing is competitive, and their frequent collaborations with retailers (especially REI and Backcountry) create additional discount opportunities.
Union Binding Company: The Rider-Founded Disruptor
Union was founded in 2006 by former professional snowboarder Georges Gauthier and industry veteran Dave Maestas with a simple mission: make the best bindings in the world, period. Union is notable for being one of the few binding-focused companies—they don’t make boards, boots, or accessories. This specialization means all of Union’s engineering investment goes directly into binding performance.
Union’s approach to budget bindings centers on weight reduction and parts availability. The Flite Pro uses Union’s proprietary baseplate and highback designs that prioritize light weight without sacrificing durability. Union is also industry-leading in replacement parts: they sell individual components (ratchets, ladders, straps, highbacks, baseplates, hardware) directly through their website and through U.S. retailers. If anything breaks on a Union binding, you can almost certainly replace just that part rather than the entire binding.
Union bindings are designed in Seattle, Washington and manufactured in their own facilities—giving them tighter quality control than brands that outsource manufacturing. Their U.S. customer service is responsive, and warranty claims are handled directly through their website. Union’s community engagement is also strong—they sponsor grassroots events and local riders, building loyalty among budget-conscious riders who want to support an independent brand.
K2: The Diversified Innovator
K2 is best known for their skis, but their snowboard division—based in Seattle—has been producing quality boards and bindings for decades. K2’s binding philosophy emphasizes simplicity and durability. The Sonic binding exemplifies this: it’s designed to be mounted once and forgotten, requiring minimal maintenance and adjustment. For riders who want a “set it and forget it” binding that just works season after season, K2’s approach is compelling.
K2’s U.S. distribution is handled through their Seattle headquarters, with warranty support processed through their website. K2 bindings are well-stocked at Pacific Northwest retailers and available nationally through major chains and online retailers. Their parts availability is solid though not quite as comprehensive as Burton or Union—common wear items (ladders, straps) are easy to find, but less common components (specific ratchets, heel cups) may require ordering directly from K2.
The Sonic’s value proposition is straightforward: it’s one of the most affordable bindings from a major brand, it’s built to last, and it requires virtually no maintenance. For the budget-conscious rider who values reliability over performance, K2 delivers.
Ride Snowboards: The Understated Performer
Ride was founded in 1992 in Washington state and has maintained a reputation for understated, quality-focused gear. Their binding division is known for solid engineering without flashy marketing. The C-2 represents Ride’s philosophy: it doesn’t try to be the lightest, the softest, or the most feature-packed—it aims to be the most reliably capable option at its price point. This “no-nonsense” approach resonates with riders who prioritize performance over aesthetics or brand prestige.
Ride’s U.S. operations are based in Seattle, and their warranty support is straightforward—they stand behind their products and process claims efficiently. Ride bindings are widely available through U.S. retailers, with particularly strong presence in the Pacific Northwest. Their parts availability is good for common items but can be slower for less common components.
The C-2’s standout feature is its dampening. Ride has invested in vibration-absorption technology that gives the C-2 a smoother ride feel than its competitors at this price point. For riders on hardpack or variable conditions, this dampening translates to less fatigue and more confidence. It’s a subtle advantage that doesn’t show up on spec sheets but makes a real difference over a full resort day.
Brand Comparison Summary
| Brand | Headquarters | Founded | Key Strength | Parts Availability | Warranty Process |
|---|---|---|---|---|---|
| Salomon | Ogden, Utah (NA) | 1947 | Smooth, predictable flex | Good (retailer stocked) | Website claim, 2–4 weeks |
| Burton | Burlington, Vermont | 1977 | Universal compatibility (Re:Flex) | Excellent (industry best) | Website/phone, 2–3 weeks |
| Union | Seattle, Washington | 2006 | Light weight, individual parts | Excellent (direct + retail) | Website claim, 1–3 weeks |
| K2 | Seattle, Washington | 1962 | Simplicity, durability | Good (retailer stocked) | Website claim, 2–4 weeks |
| Ride | Seattle, Washington | 1992 | Dampening, no-nonsense performance | Good (retailer stocked) | Website/retailer, 2–4 weeks |
The Rental-to-Ownership Transition: When and How to Buy Your First Bindings
Most snowboarders start with rental equipment. The transition from rental to owned gear is one of the most impactful upgrades you can make—but timing it wrong can waste money. Here’s how to know when you’re ready and how to make the transition smoothly.
Signs You’re Ready to Buy
- You’ve ridden 5–10 rental days and want to continue. If you’re committed to the sport after your first handful of days, owning gear makes financial sense. Rental gear typically costs $40–60/day for a complete setup. After 5–10 rental days ($200–600), you’ve paid for a budget binding set.
- You’re tired of rental gear inconsistency. Rental bindings vary in condition, adjustment, and quality. Owning your own setup means consistent fit, familiar feel, and gear that’s maintained to your standards.
- You want to progress faster. Rental bindings are typically one-size-fits-most and aren’t optimized for your riding style. A properly fitted owned setup accelerates learning.
- You’re planning a destination trip. Bringing your own gear to a destination resort is more convenient and reliable than renting at a resort shop, where selection may be limited and lines may be long.
What to Buy First: Bindings, Boots, or Board?
The general recommendation: boots first, then bindings, then board. Here’s why:
- Boots: The most critical interface. A poorly fitting boot ruins every other component’s performance. Buy boots last? No—buy them first, because everything else depends on your boot size and shape. Spend time at a shop trying multiple brands and models. Our best snowboard boots guide covers the essentials.
- Bindings: Once you know your exact boot size, choose bindings that match. Budget bindings (like our top 5) are the smart choice for first-time owners—you don’t yet know your preferences well enough to justify premium pricing.
- Board: This is where you’ll eventually spend the most and benefit most from personal preference. But for your first owned setup, pair your budget bindings with a beginner-friendly board (soft-medium flex, true twin or directional twin shape). See our gear guides for board recommendations.
The Used Market for First-Time Buyers
If budget is extremely tight, the used market can stretch your dollars further. Here’s the optimal used buying strategy for first-time owners:
- Buy used boots. Counterintuitive, but hear us out: boots pack out (stretch) over time, and used boots may already be broken in to a comfortable shape. If they fit your foot and aren’t excessively worn, used boots can be a great deal. Inspect the liner for compression, check the sole for excessive wear, and try them on with your own socks.
- Buy used bindings carefully. Follow the inspection checklist in our used bindings section. Bindings are mechanical devices with wear components—ensure all parts function properly before purchasing.
- Buy a new board (or used from a reputable source). Boards don’t wear out as quickly as boots or bindings, so a well-maintained used board can last years. However, if your budget allows, a new beginner board ensures you’re starting with a baseline of quality and warranty protection.
The Total First-Season Budget
Here’s what a complete first-season budget setup costs (new, U.S. prices):
| Component | Budget Option | Mid-Range Option | Notes |
|---|---|---|---|
| Boots | $100–150 | $180–280 | Spend the most here—fit is critical |
| Bindings | $80–150 | $150–250 | Our top 5 picks fall in the budget range |
| Board | $150–250 | $250–400 | Beginner all-mountain boards |
| Total | $330–550 | $580–930 | Complete setup, ready for the season |
For context, renting a complete setup for 10 days at $50/day costs $500. A budget-owned setup pays for itself by day 7–10 and provides years of additional use. See how expensive is snowboarding? for more cost analysis.
Your Binding Tool Kit: What to Carry and When to Use It
The right tools make binding setup, adjustment, and repair simple. Here’s what to keep in your gear bag and at home.
Essential On-Mountain Tools
- #3 Phillips screwdriver (or multi-tool): The single most important tool for snowboard bindings. Most binding screws use #3 Phillips heads. A dedicated screwdriver provides better torque than resort-provided tools. Keep one in your jacket pocket on riding days. Several brands make snowboard-specific multi-tools that combine a #3 Phillips with an Allen key and sometimes a bottle opener—these are convenient but not essential.
- Spare ladder straps (1 pair): Ladder straps are the most common failure point. Carrying a spare pair ($5–15) means a broken ladder doesn’t end your day. Most ladders are universal enough to work across brands, but verify compatibility with your specific binding.
- Spare mounting screws (4 screws + washers): If a mounting screw vibrates loose and you can’t find it on the snow, having spares prevents a walk back to the lodge. Keep them in a small zip-lock bag in your board bag or jacket.
Home Workshop Essentials
- #3 Phillips screwdriver (full-size): For end-of-season maintenance and binding removal. A full-size screwdriver provides better leverage than a pocket tool.
- #2 Phillips screwdriver: Some binding components (ratchet screws, highback screws) use smaller #2 heads. Not universal, but useful for specific repairs.
- Blue threadlocker (Loctite 242 or equivalent): Applied to mounting screws to prevent vibration-induced loosening. Blue is removable with normal tools; red is permanent—always use blue.
- Silicone lubricant spray: For ratchet mechanisms and pivot points. Apply sparingly—too much attracts dirt. Never use WD-40, which is a solvent, not a lubricant.
- Toothbrush: For cleaning ratchet mechanisms and hardware threads. A cheap, effective cleaning tool.
- Small zip-lock bags: For organizing hardware during off-season storage. Label each bag with the binding model and hardware type.
When to Use Each Tool
| Situation | Tool | Steps |
|---|---|---|
| First-day-of-season hardware check | #3 Phillips | Check all screws: baseplate (4 screws), disc (2–4 screws), highback (2 screws). Tighten any that are loose. |
| Mid-day angle adjustment | #3 Phillips | Loosen disc screws, rotate binding, retighten evenly. Takes 2–3 minutes per binding. |
| Broken ladder strap on-mountain | Spare ladder + #2 Phillips (sometimes) | Remove old ladder (may need screwdriver for the anchor screw), install new ladder, test ratchet. |
| End-of-season deep clean | #3 Phillips, toothbrush, silicone spray | Remove bindings from board. Clean ratchets with toothbrush. Apply silicone spray to ratchet mechanisms. Wipe down straps. |
| Squeaky highback | Silicone lubricant | Apply a drop to the highback pivot point. Work the highback through its range of motion to distribute. |
| Preventing screw loosening | Blue threadlocker | Remove screw, apply a drop of blue threadlocker to threads, reinstall and tighten. Wait 24 hours before riding. |
Helpful Resources & Internal Links
Affiliate Disclosure: SnowboardChamp participates in the Amazon Services LLC Associates Program. As an Amazon Associate, we earn from qualifying purchases. This doesn’t affect the price you pay.
Safety Reminder: Wear a certified helmet, consider impact shorts, and progress within your limits. Get properly fitted boots to minimize pain and prevent foot issues.
Ready to Ride on a Budget?
Our top value pick is the Salomon Rhythm for reliable day-one comfort and a smooth learning curve. Comfort-seekers should shortlist the Burton Freestyle Re:Flex, while playful riders will love the featherweight Union Flite Pro. For simple first setups, go K2 Sonic. If you’re carving faster this year, pick the Ride C-2.
Related reads: why wax your snowboard • why snowboarding is fun.


