
Photochromic vs Polarized Snowboard Goggles: The Ultimate Lens Showdown
Introduction: Why Goggle Lens Technology Matters
There is nothing worse than riding “blind.” You drop into a run, the light goes flat, and suddenly you can’t tell a mogul from a hole. Or conversely, you step out on a bluebird day, and the glare off the snow feels like needles in your eyes. Visibility isn’t just a luxury in our sport; it’s a safety requirement.
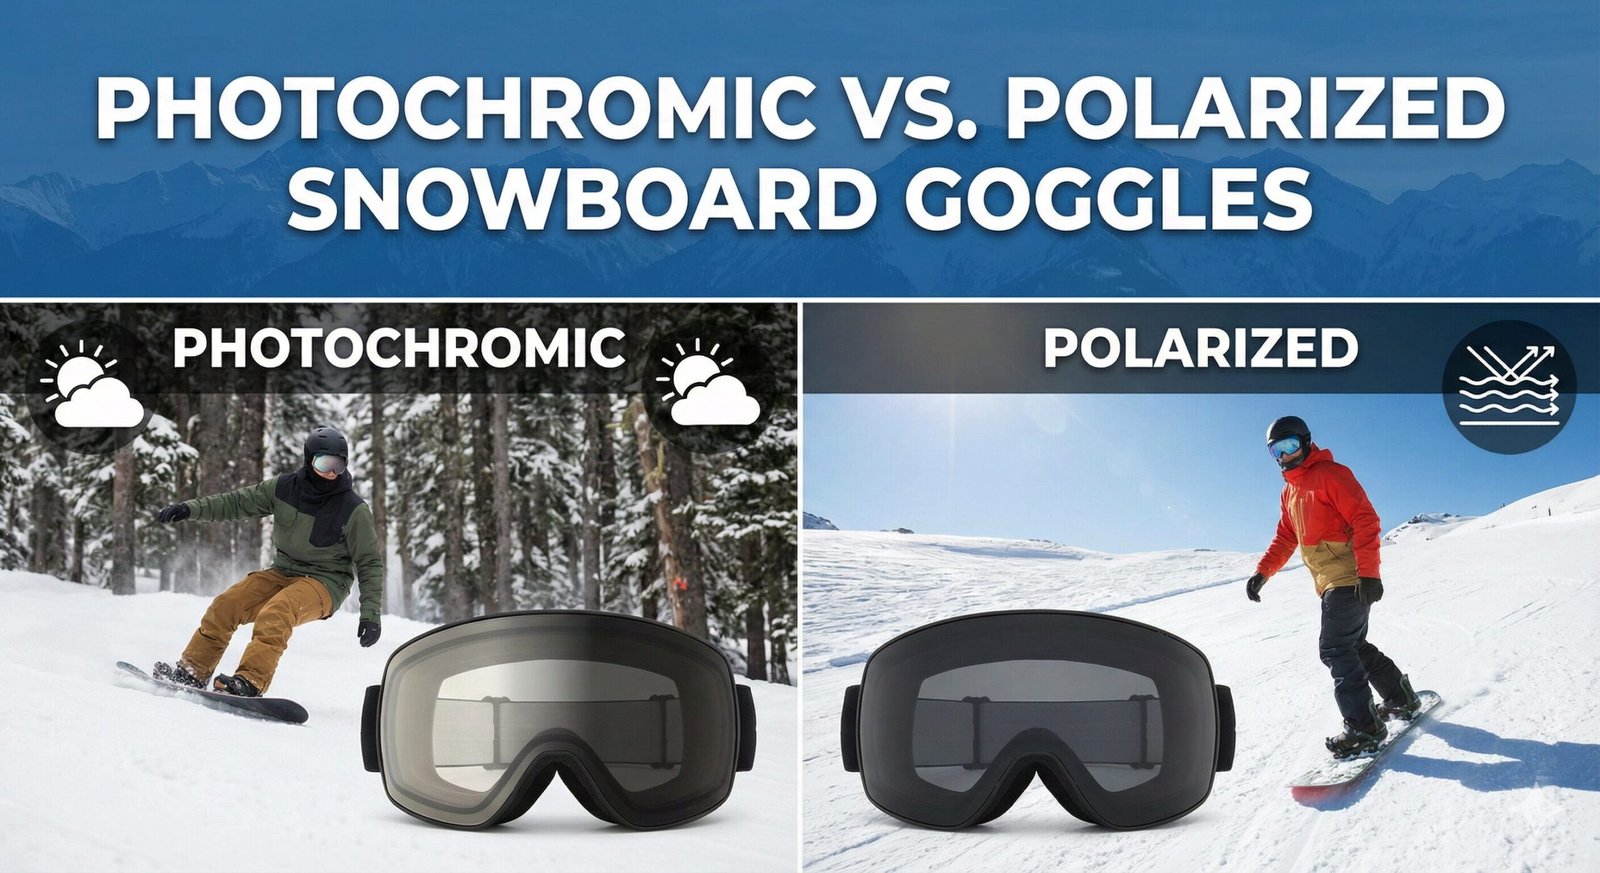
When upgrading your kit, the lens technology is arguably more critical than the frame itself. Two terms dominate the high-end market: Photochromic and Polarized. Both promise superior vision, but they achieve it in radically different ways. One adapts to the light; the other filters it.
If you’ve been reading our guide on best snowboard goggles, you know the options can be overwhelming. In this comprehensive comparison, we are stripping away the marketing jargon to pit Photochromic vs. Polarized technology against each other. We’ll help you decide which one deserves a spot in your gear bag.
But we’re going far beyond the basic comparison. In this ultimate guide, we’ll also dive deep into VLT (Visible Light Transmission) ratings, lens shapes, anti-fog technology, lens tints, goggle sizing, helmet compatibility, brand-specific lens technologies, maintenance tips, and much more. Whether you’re a seasoned rider or buying your very first pair of goggles, this guide will give you the knowledge to make a confident, informed decision.
At a Glance: The Core Differences
Don’t have time for the deep dive? Here is the cheat sheet.
| Feature | Photochromic Lenses | Polarized Lenses |
|---|---|---|
| Primary Function | Automatically darkens or lightens based on UV intensity. | Filters out horizontal light waves (glare) from snow. |
| Best For | Variable weather, all-day riding without lens swaps. | Bright, sunny “Bluebird” days and high altitudes. |
| Weakness | Can be slow to transition in extreme cold; less effective in cars. | Can hide ice patches; makes phone screens hard to read. |
| Price Point | High ($150 – $300+) | Mid to High ($100 – $250) |
| Convenience | Maximum (set it and forget it). | Medium (may need to swap for low-light lens). |
Contender 1: Photochromic Lenses (The Chameleon)
Imagine owning one pair of goggles that works perfectly during a snowy morning, a sunny lunch break, and a shadowy afternoon run. That is the promise of photochromic technology.
How It Works
Photochromic lenses contain special molecules (typically silver halide or organic molecules) embedded in the lens. When exposed to Ultraviolet (UV) radiation from the sun, these molecules undergo a chemical reaction that causes them to change shape and absorb light, effectively darkening the tint.
When the UV source is removed (you go indoors or a cloud rolls in), the molecules return to their original state, and the lens becomes clear or lighter.
The Advantages
- The “Quiver Killer”: You don’t need to carry a spare lens in your pocket. This is ideal for places with rapidly changing weather, like snowboarding in Colorado where storms roll in fast.
- Continuous Adjustment: They don’t just flip between dark and light; they offer a full spectrum of tints (VLT ranges often span from 15% to 50%).
- Convenience: Less fumbling with lens-change mechanisms means more time riding.
- Cost Efficiency Over Time: While the upfront cost is higher, you’re essentially getting multiple lenses in one. A single photochromic lens can replace a dark lens for sunny days and a high-VLT lens for overcast conditions, potentially saving you money compared to buying separate lenses.
- Reduced Gear Load: For backcountry riders, splitboarders, and anyone who travels light, carrying one lens instead of two or three makes a meaningful difference in pack weight and bulk.
The Disadvantages
- Reaction Time: The transition isn’t instant. It usually takes 20-60 seconds to darken, but can take longer to lighten. If you bomb into a dark forest from a sunny slope, you might be blind for a minute.
- Temperature Sensitivity: Ironically, extreme cold can sometimes affect how fast the chemical reaction occurs. At very low temperatures (below -20°F), photochromic molecules can slow down, meaning the lens may not darken as quickly or as much as it would in milder conditions.
- Inside the Car: Because car windshields block UV rays, your photochromic goggles won’t darken inside your car, which isn’t a huge deal unless you’re trying to look cool on the drive up.
- Degradation Over Time: The photochromic molecules have a finite lifespan. After 2-3 years of regular use, you may notice that the lens doesn’t get as dark as it used to in bright sun, or doesn’t lighten as much in low light. The degradation is gradual and often goes unnoticed until you compare your current goggles to a brand-new pair.
- Limited Performance in Extreme Conditions: While photochromic technology has improved dramatically, it still struggles in truly extreme conditions — very rapid transitions from bright sun to deep shadow, or riding in temperatures well below zero.
Photochromic Lens Technology Deep Dive
Understanding the chemistry behind photochromic lenses helps explain their strengths and limitations. There are two primary types of photochromic molecules used in snow goggle lenses today:
Silver Halide-Based Photochromics: The original photochromic technology, silver halide crystals are embedded in glass lenses. These are extremely durable and offer excellent darkening performance. However, they’re heavier than organic alternatives and are typically only used in higher-end goggles. Silver halide photochromic lenses can achieve a VLT range from about 8% to 45%, which is a significant swing that covers nearly every condition you’ll encounter on the mountain.
Organic (Naphthopyran) Photochromics: Most modern snow goggle lenses use organic photochromic molecules, specifically naphthopyran compounds. These are lighter, cheaper to produce, and can be applied to polycarbonate (plastic) lenses, which is why they dominate the market. The trade-off is that organic photochromics generally have a slightly narrower VLT range and may degrade a bit faster than silver halide. However, the latest generation of organic photochromics has closed the gap considerably.
Pro Tip: Photochromic Lenses and Car Windshields
Most car windshields have a UV-blocking layer built in. Since photochromic lenses react specifically to UV light, they won’t darken while you’re driving to the mountain. If you need tinted lenses for the drive, consider a separate pair of sunglasses. This is a common source of confusion for first-time photochromic buyers.
How Cold Affects Photochromic Performance
This is one of the most misunderstood aspects of photochromic lenses. The chemical reaction that causes darkening is a molecular process, and like all chemical reactions, it’s affected by temperature. Here’s the real story:
In Cold: The molecules move slower in extreme cold, which means the darkening reaction takes longer and may not reach full tint depth. If you’re riding at a high-altitude resort in January when temperatures are well below 0°F, your photochromic lens might only darken to a medium tint instead of its maximum darkness. The lightening reaction (returning to a clear state) is also slower in cold.
In Heat: The molecules react faster, which is why photochromic lenses often seem to work perfectly on spring skiing days. The trade-off is that they can sometimes over-darken in very hot, high-UV environments, but this is rare for snow goggles since the ambient air temperature at a ski resort is typically cool even on sunny days.
The Practical Impact: For 90% of riders in 90% of conditions, the temperature effect is negligible. It only becomes truly noticeable in extreme cold at very high altitudes. If you frequently ride in Arctic or high-alpine conditions, this is a factor worth considering.
Best Photochromic Snowboard Goggles: Our Top Picks

Top Pick: Julbo Aerospace Photochromic
Julbo is the industry leader in reactivity speed and range. The Aerospace features a Reactiv lens that transitions from Category 1 to Category 3 (VLT 16-75%), making it the widest-range photochromic on the market. Perfect for riders who encounter everything from fog to full sun in a single day.
Check Price on AmazonOther top-tier photochromic options worth considering include the Smith I/O Mag ChromaPop Photochromic (which combines photochromic tech with Smith’s excellent color-enhancement system), the Oakley Flight Deck with Prizm Photochromic lenses (offering Oakley’s signature optical clarity), and the Giro Contour with VIVID photochromic lenses (excellent value with solid performance). Each of these represents a different approach to the same goal: one lens that adapts to everything.
When Photochromic Is the Right Choice
Photochromic lenses are the ideal choice for several types of riders:
- All-Mountain Riders: If you ride the entire mountain from first chair to last call, and you encounter sun, shade, storms, and everything in between, photochromic lenses mean you never have to stop to swap.
- Traveling Riders: If you’re flying to a destination and can only bring limited gear, one pair of photochromic goggles covers all conditions.
- Backcountry/Splitboarders: When you’re earning your turns and can’t easily stop to swap lenses, the adaptability of photochromic technology is invaluable. The ascent and descent often have completely different lighting conditions.
- Casual/Weekend Riders: If you only get to the mountain a few times a year, the “set it and forget it” convenience means you don’t need to stress about bringing the right lens.
Contender 2: Polarized Lenses (The Glare Killer)
If you are a fisherman, you know polarization lets you see through the water. On the mountain, it lets you see through the blinding white haze.
How It Works
Light from the sun scatters in all directions. But when it bounces off a flat, reflective surface like snow, it becomes “polarized” horizontally. This creates intense glare.
Polarized lenses act like a vertical Venetian blind. They block those horizontal light waves while letting vertical light through. The result is a drastic reduction in “visual noise.”
The Advantages
- Eye Fatigue Reduction: Glare causes you to squint, which leads to headaches and tired eyes. Polarized lenses are significantly more relaxing on bright days.
- Contrast and Saturation: Colors look richer, and the sky looks deeper blue. The visual experience is high-definition.
- Bluebird Perfection: On those bright spring days at top European ski resorts, nothing beats a dark polarized lens.
- Superior Detail on Bright Days: Polarized lenses don’t just reduce overall brightness — they specifically cut the horizontal glare that washes out surface detail. This means you can see the texture and contours of the snow with remarkable clarity, even in the brightest conditions.
- Reduced Headaches: Glare-induced squinting is a leading cause of headaches on the mountain. By eliminating the source of the squint, polarized lenses keep you comfortable longer and reduce end-of-day fatigue.
- UV Blocking: Most polarized lenses also block 100% of UV radiation, giving you comprehensive eye protection on top of glare reduction.
The Disadvantages
- Fixed Tint: Unlike photochromic lenses, polarized lenses have a fixed tint. This means they’re optimized for a specific range of light conditions. If clouds roll in, you may need to swap to a higher-VLT lens.
- The Ice Patch Controversy: As we discuss in detail below, polarization can hide ice patches by removing the glare cue that helps riders identify dangerous surface conditions.
- Reduced Visibility of Digital Screens: Your phone, GPS device, and car dashboard use polarized displays. Looking at them through polarized goggles can cause the screen to appear dark or black, which can be frustrating when checking messages on the lift.
- Less Effective in Flat Light: Polarization is specifically designed to cut glare, which is most prominent in bright, direct sunlight. In flat light or overcast conditions, there’s less glare to cut, so the polarization offers minimal benefit while the tint reduces overall visibility.
- Higher Price for Quality: Good polarized lenses are more expensive to manufacture than standard tinted lenses, putting quality polarized goggles in the mid-to-high price range.
The Ice Patch Controversy: Why This Matters
This is the biggest argument against polarized lenses for snowsports. Ice is essentially a flat, reflective surface. Polarization filters the glare off the ice. While this sounds good, that glare is often the visual cue that tells a snowboarder, “Warning: Ice ahead!”
With polarized lenses, an ice patch might look just like matte snow. If you hit it expecting grip, you might wash out. This is why many competitive racers avoid polarization. On the East Coast, where hardpack and ice are common, this can be a genuine safety concern. On the West Coast and in Europe, where softer snow is more common, the risk is lower.
The reality is more nuanced than “polarized hides ice.” In practice, experienced riders learn to read other visual cues — subtle color differences, changes in snow texture, and even the sound of their board on different surfaces. But for beginners or riders in ice-heavy terrain, the reduced glare cue can be a real disadvantage.
Understanding Polarization Types
Not all polarized lenses are created equal. There are several types of polarization technology used in snow goggles, each with different performance characteristics:
Linear Polarization: The most common and affordable type. Linear polarizers block horizontal light waves effectively, but they can cause some color distortion and reduce the brightness of LCD displays. Most mid-range polarized goggles use linear polarization.
Circular Polarization: More expensive but optically superior. Circular polarizers use a linear polarizer backed by a quarter-wave plate, which converts the light to a circular pattern before blocking it. This eliminates the display-visibility issue and produces more natural color perception. High-end polarized goggles from brands like Oakley and Smith often use circular polarization.
Polarized + Color-Enhancement: Some manufacturers combine polarization with their proprietary color-enhancement technology. For example, Smith’s ChromaPop Polarized lenses pair polarization with their color-clarity system for arguably the best visual experience available in a snow goggle. These are premium-priced but deliver exceptional performance.

Top Pick: Oakley Flight Deck (Prizm Options)
While Prizm isn’t always polarized, their specific polarized options offer incredible clarity. The Oakley Flight Deck Prizm Polarized combines Prizm color technology with glare-reducing polarization for a visual experience that’s hard to beat on sunny days.
Check Price on AmazonWhen Polarized Is the Right Choice
Polarized lenses excel in specific scenarios:
- Sunny Day Specialists: If you ride primarily on clear, bright days — whether by choice or because you live in a consistently sunny climate — polarized lenses provide the best possible visual experience.
- Spring Riders: Spring skiing brings intense UV radiation (higher sun angle + snow reflection), making glare reduction essential for comfort.
- Eye Fatigue Sufferers: If you consistently end your days with headaches or tired eyes, the glare reduction from polarized lenses can make a dramatic difference.
- High-Altitude Riders: The higher you go, the stronger the UV radiation and the brighter the glare. Polarized lenses are particularly valuable above treeline.
- East Coast Hardpack Riders: If you’re riding groomed terrain where the snow is consistent and predictable, the ice-detection concern is less relevant because you already know where the hardpack is.
Head-to-Head: Which One Wins?
Round 1: Versatility
Winner: Photochromic.
A polarized lens has a fixed tint (usually dark). If the clouds roll in or the sun sets, a polarized lens becomes too dark to use safely. A photochromic lens adapts. For the rider who doesn’t want to check the forecast, photochromic wins.
Round 2: Visual Clarity in Sun
Winner: Polarized.
On a bright, high-UV day, a photochromic lens will get dark, but it won’t cut the glare. The polarized lens cuts the reflections, allowing you to see the texture of the snow much better in high-light conditions.
Round 3: Safety (Seeing Terrain)
It’s a Tie (Context Dependent).
If you are riding powder or slush, polarized lenses help you see contours better. However, if you are riding hardpack where ice is a concern (common on the East Coast), the inability to spot ice “glare” with polarized lenses is a safety risk. Photochromic lenses leave the glare intact, helping you spot the slide zones.
Round 4: Price
Winner: Polarized (Slightly).
Generally, photochromic technology is more expensive to manufacture. However, if buying one photochromic lens prevents you from buying two separate standard lenses (one for sun, one for low light), the cost might even out. Read our guide on how expensive is snowboarding to budget accordingly.
Round 5: Durability and Longevity
Winner: Polarized.
Polarized lenses don’t have photochromic molecules that degrade over time. A quality polarized lens will maintain its performance for many years, while photochromic lenses gradually lose some of their range after 2-3 years of heavy use. This doesn’t mean photochromic lenses become useless — they just lose some of the extremes of their light/dark range.
Round 6: Low-Light Performance
Winner: Photochromic (by default).
Neither technology is specifically designed for low-light performance. However, photochromic lenses automatically lighten in low light to let more light in, while a dark polarized lens becomes a liability. Photochromic wins here simply because it adapts, though a dedicated low-light lens (non-polarized, high VLT) would outperform both.
Round 7: Ease of Use
Winner: Photochromic.
Photochromic goggles are true “set it and forget it” technology. You put them on in the morning and they work all day regardless of conditions. Polarized goggles require you to judge conditions in the morning and commit to a tint. If conditions change, you either ride with compromised vision or stop to swap lenses.
Round 8: Weight
Winner: Polarized (marginally).
Photochromic molecules add a negligible amount of weight to the lens. In practice, the difference is imperceptible. Frame design, lens size, and strap construction have a far greater impact on overall goggle weight than the polarization or photochromic treatment.
The Overall Winner?
Our Verdict
For the average rider who encounters a variety of conditions, photochromic edges out polarized as the more practical choice. The convenience of automatic adaptation, combined with the ability to handle everything from flat light to bluebird sun, makes it the “do-everything” lens technology.
However, if you’re a dedicated bluebird rider, an eye-fatigue sufferer, or someone who primarily rides bright conditions and wants the absolute best visual clarity, polarized lenses deliver a superior experience within their optimal conditions.
The best advice? If budget allows, own both. Use photochromic as your daily driver and keep a polarized lens in your bag for those epic bluebird days when you want maximum visual punch.
Understanding VLT: The Most Important Number You’re Ignoring
Whether you choose photochromic or polarized, understanding VLT (Visible Light Transmission) is crucial. VLT is the percentage of visible light that passes through your goggle lens. It’s the single most important specification for determining how your goggles will perform in different conditions.
Think of VLT like the aperture on a camera. A low VLT number means less light gets through (darker lens for bright conditions). A high VLT number means more light gets through (lighter lens for low-light conditions).
The Complete VLT Chart for Snowboard Goggles
| VLT Range | Lens Category | Best Conditions | Typical Lens Colors | Ideal For |
|---|---|---|---|---|
| 5% – 10% | Category 4 | Intense sun, high altitude, glacier | Dark mirrored (dark grey, dark bronze) | High-altitude alpine touring, glacier riding |
| 10% – 18% | Category 3 | Bright sun, clear bluebird days | Grey, bronze, dark rose, mirrored | Sunny resort riding, spring skiing |
| 18% – 30% | Category 2 | Partly cloudy, variable conditions | Medium rose, copper, persimmon, amber | All-around use, most popular range |
| 30% – 40% | Category 1 | Overcast, flat light, light snow | Rose, yellow, light amber | Storm days, low-light visibility |
| 40% – 55% | Category 0-1 | Heavy overcast, snowstorms, night | Clear, yellow, light rose | Night riding, heavy storms, tree runs in flat light |
| 55% – 75% | Clear / Night | Night riding, extremely dark conditions | Clear, light yellow | Night sessions only |
Why VLT Matters More Than You Think
Most beginner riders don’t pay attention to VLT, and it’s the number one reason riders struggle with visibility. Here’s what happens when VLT doesn’t match conditions:
Too Low VLT (Lens Too Dark): When you wear a low-VLT lens in flat light or overcast conditions, your goggles block too much light. The world appears dim and low-contrast. You can’t see terrain features, bumps blend together, and depth perception suffers. This is genuinely dangerous — it’s how riders end up hitting unexpected obstacles.
Too High VLT (Lens Too Light): Wearing a high-VLT lens on a bright bluebird day means too much light floods your eyes. You squint, your eyes ache, and the glare is overwhelming. You’ll fatigue quickly and the bright light can cause temporary visual impairment (snow blindness in extreme cases).
Just Right: The ideal VLT matches the ambient light conditions, providing enough tint to reduce glare and eye strain while allowing enough light through to see terrain detail clearly. This is why the 18-30% range is the most popular — it handles the widest variety of typical resort riding conditions.
How Photochromic Lenses and VLT Work Together
This is where photochromic technology really shines. A quality photochromic lens might have a VLT range of 15% to 50%. At its darkest, it functions like a Category 3 lens for bright sun. At its lightest, it opens up like a Category 1 lens for flat light and overcast. This single lens covers what would normally require two or three separate lenses.
However, not all photochromic lenses cover the full VLT spectrum. Budget photochromic lenses might only swing from 20% to 35%, which is useful but doesn’t cover the extremes. Premium photochromic lenses (like the Julbo Reactiv) can swing from 8% to 75%, essentially covering every condition from glacier bright to night riding.
VLT and Polarized Lenses
Polarized lenses typically have a fixed VLT. Most polarized snow goggle lenses fall in the 10-18% range, optimized for bright conditions. This is both their strength and their limitation — they perform brilliantly when the VLT matches the conditions, but they’re a poor choice when conditions don’t align with their fixed tint.
How to Read VLT Ratings
Most goggle manufacturers list the VLT percentage on the lens or packaging. If it’s not listed, here’s a quick rule of thumb: look at the lens tint darkness. If it looks like sunglasses, it’s probably 10-18% VLT. If it looks like reading glasses with a slight tint, it’s probably 25-40% VLT. If it looks almost clear, it’s 40%+ VLT.
European goggles often use the EN 174 “Filter Category” system instead of VLT percentages. Categories 1-3 map to VLT ranges roughly as: Cat 1 (43-80% VLT), Cat 2 (18-43% VLT), Cat 3 (8-18% VLT). This is less precise but useful if you’re buying European brands.
Spherical vs Cylindrical vs Toric: Lens Shape Explained
Before choosing between photochromic and polarized, you should also understand lens shapes. The shape of your lens affects optical clarity, peripheral vision, and how your goggles look on your face.
Cylindrical Lenses
Cylindrical lenses curve horizontally (left to right across your face) but remain flat vertically (top to bottom). Think of it like a section of a cylinder. This is the most traditional and affordable lens shape.
- Pros: More affordable, classic look, less prone to fogging due to the flat interior surface being further from your face.
- Cons: Slight optical distortion at the edges of your field of view, reduced peripheral vision compared to spherical lenses, and the flat surface can create more reflections.
- Best For: Budget-conscious riders, park riders who prioritize a low-profile look, and riders who don’t notice or care about marginal optical differences.
Spherical Lenses
Spherical lenses curve both horizontally and vertically, creating a dome-like shape that mimics the curvature of the human eye. This is the premium lens shape used in most high-end goggles.
- Pros: Superior optical clarity with less distortion, wider peripheral vision, more interior volume (reduces fogging), and better light transmission due to reduced surface reflections.
- Cons: More expensive, slightly bulkier appearance, and the increased interior volume can feel large on smaller faces.
- Best For: Most riders, especially those who spend long days on the mountain and value visual clarity.
Toric Lenses
Toric lenses are the newest category, and they’re gaining popularity fast. A toric lens has different radii of curvature in the horizontal and vertical axes, creating a shape that’s somewhere between cylindrical and spherical. Think of it as a “flattened sphere.”
- Pros: Optical clarity approaching spherical lenses, lower profile than spherical (less “bug-eyed” look), reduced optical distortion, and excellent peripheral vision.
- Cons: Newer technology so fewer options available, can be more expensive than cylindrical lenses, and may not fit all face shapes equally well.
- Best For: Riders who want spherical-level optical performance without the bulk, and anyone looking for the latest in lens technology.
| Feature | Cylindrical | Spherical | Toric |
|---|---|---|---|
| Optical Clarity | Good | Excellent | Excellent |
| Peripheral Vision | Good | Excellent | Excellent |
| Fog Resistance | Good | Very Good | Very Good |
| Profile (Bulk) | Low | High | Medium |
| Price | $$ | $$$ | $$$ |
| Available With Photochromic? | Yes | Yes (most common) | Growing selection |
| Available With Polarized? | Yes | Yes (most common) | Limited |
Complete Guide to Snowboard Goggle Lens Tints
Beyond photochromic vs polarized, the base tint color of your lens plays a huge role in how you perceive the mountain. Different tints filter different wavelengths of light, affecting contrast, depth perception, and color accuracy.
Grey / Smoke Tint
Grey tints reduce overall brightness without altering color perception. They’re the most “neutral” tint, meaning what you see looks like what you’d see without goggles — just darker. Grey tints are ideal for bright, sunny days when you want true color accuracy. They don’t enhance contrast, however, so they’re not the best choice for flat light or low-visibility conditions.
Brown / Bronze Tint
Brown and bronze tints are among the most versatile options. They reduce glare while enhancing contrast, making terrain features more visible. Brown tints are particularly effective in partly cloudy to sunny conditions, offering a good balance between brightness reduction and contrast enhancement. They also tend to reduce eye fatigue by filtering blue light.
Rose / Pink Tint
Rose tints enhance contrast and depth perception while filtering blue light. They’re excellent for flat light and overcast conditions because they help define terrain features that would otherwise blend together. Rose tints also work surprisingly well in mixed conditions, making them one of the most popular all-around tints. Many photochromic lenses use a rose base because it performs well across a wide light range.
Yellow / Gold Tint
Yellow tints are legendary for flat-light performance. They dramatically enhance contrast and depth perception by filtering blue light, making bumps, dips, and terrain features “pop” even in the most overcast conditions. Yellow tints are less ideal for bright sunny days (they can make everything too bright and yellow-tinted), but for storm riding and flat light, they’re unmatched. Many night-riding lenses use yellow or amber tints for the same reason.
Amber / Persimmon Tint
Amber tints are similar to yellow but with more warmth and slightly less contrast enhancement. Persimmon (a reddish-amber) is a popular choice for variable conditions because it offers moderate glare reduction with good contrast enhancement. Persimmon lenses are often found in the “all-around” category and work well from partly cloudy to light sun.
Blue / Green Tint
Blue and green tints are primarily aesthetic choices in snow goggles. They reduce yellow light and can make the environment appear cooler. While they look stylish, they don’t offer the same contrast benefits as rose or yellow tints. They’re more common in fashion-oriented goggles and casual-use eyewear.
Clear Tint
Clear lenses are used for night riding or extremely dark conditions. They offer no brightness reduction and typically only serve as UV protection and wind/debris barriers. Some clear lenses have anti-fog coatings and other treatments to maximize visibility in wet, cold conditions.
Mirrored / Flash Lenses
Mirrored coatings are applied on top of the base tint to reflect additional light away from the lens. A mirrored grey lens blocks more light than a plain grey lens of the same VLT, making mirrored tints excellent for the brightest conditions. The mirror coating doesn’t change the tint color but does reduce the amount of light passing through. Note: mirrored coatings can scratch more easily than non-mirrored surfaces.
Tint Color Quick Reference
- Bright sun: Grey, dark bronze, dark rose, mirrored
- Partly cloudy: Bronze, copper, persimmon, medium rose
- Overcast / flat light: Yellow, amber, light rose, persimmon
- Storm / heavy snow: Yellow, clear-yellow, light rose
- Night riding: Clear, light yellow
- All-around: Rose, persimmon, copper (medium VLT)
Anti-Fog Technology: The Science of Clear Vision
Fog is the enemy of every snowboarder. It forms when warm, moist air (from your breath or body heat) contacts the cold inner surface of your goggle lens. Understanding anti-fog technology helps you choose goggles that stay clear and maintain your visibility in all conditions.
Why Goggles Fog: The Physics
Fogging occurs through a simple physical process called condensation. Your face generates heat and moisture. This warm, humid air rises and contacts the cold lens surface. When the air temperature drops below the dew point at the lens surface, the water vapor condenses into tiny droplets — fog.
The temperature differential between your warm face and the cold mountain air creates a constant battle against fog. The greater the temperature difference, the more aggressive the fogging tendency. This is why fogging is worst when you first step outside on a cold day, or when you stop for a break and your body heat builds up inside the goggles.
How Anti-Fog Coatings Work
Anti-fog coatings work by changing the surface tension of the lens. Instead of forming tiny, light-scattering droplets (which is what fog is), the moisture spreads into a thin, transparent film of water that doesn’t obstruct vision.
Most anti-fog coatings are hydrophilic (water-attracting) rather than hydrophobic (water-repelling). This seems counterintuitive, but it’s the key: by attracting moisture and spreading it thin, the coating prevents the formation of opaque droplets. Think of it like the difference between water beading up on a waxed car (hydrophobic) vs spreading out on a clean glass window (hydrophilic).
Anti-Fog Technologies by Brand
- Oakley F3 Anti-Fog: Uses a chemical compound applied to the inner lens surface that absorbs moisture and spreads it into a thin film. Reapply over time as it wears off.
- Smith Fog-X: A hydrophilic coating that Smith applies to the inner surface of their lenses. Works well initially but can wear off with aggressive cleaning.
- Giro VIVID: Combines anti-fog coating with lens construction designed to maximize airflow between the double lens.
- Dragon Lumalens: Uses an ionized coating that has anti-fog properties built into the lens treatment rather than applied as a separate coating.
- Julbo REACTIV: Combines anti-fog coating with their photochromic technology, using a oleophobic (oil-repelling) outer coating and hydrophilic inner coating.
Critical Warning: Never Wipe the Inside of Your Lens
Never wipe the inside of your goggle lens, even if it fogs up. The inner lens has an anti-fog coating that is easily scratched or removed by wiping. Instead, let the goggles air dry, or gently shake them to circulate air. If fogging is persistent, check your ventilation and face foam seal.
Anti-Fog Best Practices
- Never touch the inside of your lens. Oils from your fingers can damage the anti-fog coating.
- Store your goggles in a dry bag or case. Don’t leave them in your car where temperature fluctuations cause condensation.
- Apply anti-fog spray periodically. Most brands sell anti-fog spray that can restore or enhance the coating over time.
- Ensure proper ventilation. Don’t let your helmet or hat block the ventilation ports on top of your goggles.
- Keep your face dry. Use a balaclava or neck gaiter to channel breath away from the goggles. Sweat dripping onto the lens also contributes to fogging.
- Let your goggles acclimate. If you’re coming from a warm building into cold air, give your goggles a few minutes to equalize temperature before putting them on.
Double Lens vs Single Lens: Which Construction is Better?
Understanding goggle lens construction is essential for making an informed choice. The difference between single and double lenses directly impacts fog resistance, optical clarity, and thermal insulation.
Single Lens Construction
A single-lens goggle has one piece of polycarbonate or glass that forms both the outer and inner surfaces. Single lenses are lighter, cheaper, and offer a lower profile. However, they’re more prone to fogging because there’s no insulating air gap between the outer and inner surfaces. When the outer surface gets cold and your face generates heat, the single lens conducts that temperature difference directly, creating ideal conditions for condensation.
Single-lens goggles are typically found in lower-priced models or specific competition goggles where weight is a primary concern. Some high-end competition goggles use single lenses with aggressive venting systems to compensate for the reduced fog resistance.
Double Lens Construction
Double-lens goggles have two separate lens elements — an outer lens and an inner lens — separated by a sealed air gap. This air gap acts as insulation, preventing the cold outer surface from chilling the inner surface as effectively. The result is significantly better fog resistance.
The air gap also creates a thermal barrier that reduces the temperature differential between your warm face and the cold exterior. Most quality snowboard goggles use double-lens construction. The trade-off is slightly more weight, increased bulk, and a higher price point.
Triple and Quadruple Layer Lenses
Some premium goggles now offer triple or even quadruple layer lens construction. These add additional lens elements with sealed air gaps for even better thermal insulation and fog resistance. Oakley’s Prizm technology, for example, can be found in triple-lens configurations in their top-tier goggles. These are typically the most expensive goggles on the market but offer the best fog resistance available.
Double Lens = Anti-Fog Foundation
While anti-fog coatings and ventilation systems help, the single most effective anti-fog feature in any goggle is double-lens construction. If you’re choosing between a single-lens goggle with anti-fog coating and a double-lens goggle without it, the double-lens will perform better in most conditions. The air gap does the heavy lifting.
The Complete Goggle Fit & Sizing Guide
The best lens technology in the world is useless if your goggles don’t fit properly. A poor fit creates gaps that let wind and snow in, causes pressure points that lead to headaches, and can prevent the goggles from sealing properly against your face — leading to fogging.
Goggle Sizing: S, M, L, and What They Mean
Most goggle manufacturers categorize their products into three sizes: Small, Medium, and Large. However, these aren’t universal standards. A “Medium” from Oakley might fit differently than a “Medium” from Smith. The most reliable way to determine fit is by measuring your face and comparing it to the goggle’s stated dimensions.
| Size Category | Typical Width | Best For | Common Users |
|---|---|---|---|
| Small / Youth | 15-16 cm | Narrow faces, youth riders, women with smaller features | Youth, petite adults |
| Medium | 16-18 cm | Average faces, most adults | Most riders — the “one size fits most” option |
| Large / Oversized | 18-21 cm | Large faces, wide field of view preference | Large adults, riders wanting maximum peripheral vision |
How to Measure for Goggle Fit
- Measure the distance between your temples (the widest part of your face at eye level) using a flexible measuring tape. This is your face width.
- Measure from the bridge of your nose to just above your eyebrows. This helps determine vertical fit.
- If possible, try on goggles with your helmet to check compatibility (more on this below).
- The goggles should fit snugly against your face without pressure points. You should be able to fit one finger between the strap and your helmet at the back.
The Nose Bridge: The Most Overlooked Fit Factor
Your nose bridge is critical for goggle fit. If the goggles rest too low on your nose, they’ll slide down during riding. If they’re too high, they’ll leave a gap at the bottom that lets cold air in. Most goggles have a foam-padded nose bridge that should rest comfortably on the bridge of your nose without pressing down.
Riders with lower or flatter nose bridges may need specific “Asian Fit” or “Low Bridge Fit” goggles, which have thicker face foam at the nose area to compensate. More on this in the Asian Fit section below.
The Strap: More Than Just Elastic
A quality goggle strap should be wide enough to distribute pressure evenly across the back of your helmet, silicone-lined to prevent slipping, and adjustable for different helmet sizes. The strap attachment points (where the strap connects to the frame) should allow the goggles to sit level on your face without pulling up or down on one side.
Some premium goggles feature “outriggers” — extended strap attachment points that angle the strap outward. This helps the goggles conform to a wider range of face shapes and works particularly well with helmets.
Helmet and Goggle Compatibility: Avoiding the Gaper Gap
The “gaper gap” — the visible space between the top of your goggles and the brim of your helmet — is more than just a fashion faux pas. It’s a functional problem that lets cold air, snow, and wind directly onto your forehead and eyes, causing discomfort and fogging.
What Causes the Gaper Gap?
The gaper gap occurs when your goggles and helmet aren’t designed to work together. It’s most common when you buy a goggle and helmet from different brands, or when you use a helmet that has a prominent brim that pushes the goggles down on your face. The gap can also occur if your goggles are too small for your helmet or vice versa.
How to Achieve Seamless Integration
- Buy from the same brand ecosystem: Many manufacturers design their helmets and goggles to integrate seamlessly. Oakley helmets are designed to fit Oakley goggles, Smith helmets fit Smith goggles, and so on.
- Check the “helmet compatible” label: Most quality goggles are marketed as “helmet compatible,” but this is a general claim. Always try them together before buying if possible.
- Adjust the strap position: The strap should sit at the widest point of the helmet, not too high (which pulls the goggles up) or too low (which pushes them down).
- Consider adjustable outriggers: Goggles with outrigger-style strap attachments tend to work with a wider range of helmets.
The #1 Helmet/Goggle Mistake
The most common mistake is putting on your goggles first, then your helmet. This almost always creates a gap. Instead, put on your helmet first, then position your goggles so they overlap the helmet’s lower edge. The goggle strap should sit on the helmet, not on your head underneath it.
Compatible Brand Pairings
While any goggle can work with any helmet in theory, these brand pairings are specifically designed for seamless integration:
- Oakley goggles + Oakley helmets (Aero, MOD5, MOD3)
- Smith goggles + Smith helmets (Mission, Vantage, Maze)
- Giro goggles + Giro helmets (Emerge, Range, Ledge)
- Anon goggles + Anon helmets (M4, M3, M2)
- POC goggles + POC helmets (Obex, Fornix)
Cross-brand compatibility is usually fine — just try before you buy or buy from retailers with good return policies.
OTG Goggles: The Best Options for Prescription Glass Wearers
If you wear prescription glasses, finding goggles that fit over them is a common challenge. OTG (Over The Glasses) goggles are specifically designed with extra interior volume and wider frames to accommodate eyeglasses.
How OTG Goggles Work
OTG goggles have two key design features that differentiate them from standard goggles:
- Increased lens volume: The lens is positioned further from your face to create space for your glasses underneath.
- Wider frame: The frame is designed to sit over the temples (arms) of your glasses without pressing them into your head.
- Notches or channels: Many OTG goggles have small notches in the frame where the glasses’ temples pass through, preventing pressure points.
OTG vs Prescription Inserts vs Contact Lenses
There are three main approaches for riders who need vision correction:
| Method | Pros | Cons | Best For |
|---|---|---|---|
| OTG Goggles | No extra purchases needed, works with existing glasses | Can feel bulky, limited goggle options, potential fogging between lenses | Casual riders, budget-conscious, occasional use |
| Prescription Inserts | Best optical clarity, no fogging between lenses, full goggle selection | Requires custom lenses, upfront cost, may need adjustment | Frequent riders, prescription strength >±3.00 |
| Contact Lenses | Unlimited goggle options, no fit issues, best peripheral vision | Dry eyes in cold/wind, risk of losing contacts, not for all prescriptions | Active riders, those with moderate prescriptions |
Top OTG Goggle Recommendations
When shopping for OTG goggles, look for these features: labeled as “OTG” or “Over Glasses” in the product name or description, wide frame design (check the interior width), compatibility notes from the manufacturer, and double-lens construction (to minimize fogging between the goggle lens and your glasses).
Some of the best OTG goggles currently available include models from Smith (several of their I/O line are OTG-compatible), Oakley (the Flight Deck OTG and Crowbar), and Giro (the Contour OTG and Blok). These offer the best combination of fit, optical clarity, and fog resistance for glasses wearers.
Magnetic vs Traditional Lens Swap Systems Compared
The ability to quickly swap lenses is increasingly important as riders recognize the value of matching their lens to current conditions. Several systems exist, each with different trade-offs.
Magnetic Lens Swap
Magnetic lens swap systems use strong magnets to hold the lens to the frame. To swap, you simply pull the lens off and snap a new one on. The process takes seconds and can even be done while wearing gloves.
- Pros: Fastest swap time (seconds), easy to use with gloves on, most user-friendly system.
- Cons: Magnets add weight, potential for lens detachment in severe impacts (extremely rare with modern systems), and typically the most expensive option.
- Best examples: Smith I/O Mag, Anon M4/M3, Oakley Flight Deck with Switchlock.
Traditional Pin/Latch Systems
Traditional systems use plastic pins, clips, or latches to secure the lens to the frame. You physically unclip the lens, remove it, and clip in the new one.
- Pros: Mechanically secure (the lens physically can’t come off without intentional release), generally cheaper, proven technology.
- Cons: Slower swap time (30-60 seconds), can be difficult with gloves, more moving parts to potentially break.
- Best examples: Giro Contour, Dragon DXS, most budget-to-mid-range goggles.
Roll-Off and Tear-Off Systems
These aren’t lens swaps but rather systems for maintaining visibility during heavy snow or rain. Roll-offs are thin plastic sheets that advance across the lens like a film reel. Tear-offs are thin plastic sheets layered on the lens that you peel off when they get snow-covered.
- Roll-offs: Used primarily in racing, roll-offs provide a fresh, clear surface with each pull. They’re expensive per-use and not practical for casual riding.
- Tear-offs: More common in motocross, tear-offs are occasionally used in snowboard racing. They’re environmentally unfriendly and rarely used recreationally.
Which System Is Best?
For most riders, magnetic swap systems offer the best balance of convenience and security. The ability to swap lenses in seconds — while wearing gloves, on a chairlift, or between runs — makes a real difference in matching your lens to changing conditions. The slight premium in price is worth it for riders who own multiple lenses.
If you’re buying a single lens and don’t plan to swap, the swap system is irrelevant. If you’re investing in multiple lenses (a dark lens for sun, a light lens for flat light), a magnetic system pays for itself in convenience over time.
Face Foam Technology: Comfort, Moisture Management, and Seal
Face foam is one of the most underrated components of a snowboard goggle. It’s responsible for three critical functions: creating a comfortable seal against your face, managing moisture (sweat and breath), and determining how well the goggles fit different face shapes.
Foam Layers
Quality goggles use multi-layer face foam, typically with 2-3 distinct layers:
- Outer layer (against frame): Dense, structural foam that gives the goggle its shape and holds the lens at the correct distance from your face.
- Middle layer: Softer foam that provides cushioning and comfort. This is often the thickest layer and determines the overall feel of the goggle against your face.
- Inner layer (against skin): Moisture-wicking fleece or microfiber that sits directly on your skin. This layer pulls sweat away from your face and helps prevent moisture from reaching the lens (which would cause fogging).
Foam Density and Comfort
Softer foam isn’t always better. Ultra-soft foam may feel luxurious initially but can compress too much under the goggle strap tension, creating a poor seal. Moderately firm foam maintains its shape better over long days and provides a more consistent seal. The best goggles balance softness for comfort with firmness for sealing.
Moisture Management
The inner fleece layer is critical for moisture management. Quality moisture-wicking fleece has a high surface area that absorbs sweat and allows it to evaporate into the ventilation channels. Poor-quality fleece can become saturated quickly, leading to moisture wicking toward the lens (causing fogging) or dripping onto your face.
Face Foam and Fit
Foam thickness directly affects fit. Thicker foam pushes the lens further from your face, which can improve ventilation and reduce fogging but may feel bulky. Thinner foam brings the lens closer for a tighter feel but can reduce ventilation space. Most manufacturers tune their foam thickness to balance these factors for their target audience.
UV Protection in Snowboard Goggles: What You Really Need to Know
UV protection is non-negotiable for snow goggles. Snow reflects up to 80% of UV radiation (compared to about 25% for sand and 10% for grass), meaning your eyes are bombarded with UV from above AND below. Here’s what you need to know about UV protection in goggle lenses.
UVB vs UVA: The Two Threats
- UVA (315-400nm): Penetrates deep into the eye, contributing to cataracts, macular degeneration, and photoaging of the eye. UVA is present year-round and penetrates clouds.
- UVB (280-315nm): More energetic and damaging than UVA, UVB is responsible for photokeratitis (snow blindness), corneal sunburn, and increased cataract risk. UVB intensity increases with altitude.
100% UV Protection: The Standard
All quality snowboard goggles should block 100% of UVA and UVB radiation. This is typically achieved through the lens material itself — polycarbonate (the most common lens material) naturally blocks UV radiation. The tint color, mirroring, or photochromic/polarized treatment is an additional layer on top of this baseline UV protection.
Look for goggles that are labeled “100% UV400” or “UV400 protection.” UV400 means the lens blocks all UV wavelengths up to 400 nanometers, which covers the entire UVA and UVB spectrum.
Don’t Be Fooled by “UV Coating”
Some cheap goggles apply a UV-blocking coating to the lens rather than using UV-blocking lens material. These coatings can wear off over time, especially with aggressive cleaning or scratching. Always choose goggles where the UV protection is inherent in the lens material (polycarbonate or glass) rather than applied as a coating.
Altitude and UV Intensity
UV radiation increases by approximately 4-5% for every 1,000 feet of elevation gain. At 10,000 feet (typical for many Western US ski resorts), UV intensity is about 30-40% stronger than at sea level. At 14,000 feet (Colorado’s highest peaks), it’s over 50% stronger. Combined with snow reflection, high-altitude UV exposure is intense enough to cause photokeratitis (snow blindness) in as little as 30-60 minutes without proper eye protection.
This is why UV protection in goggles isn’t just a nice feature — it’s a critical safety requirement. Even on cloudy days at altitude, UV levels can be dangerous.
Goggle Ventilation Systems: How Airflow Prevents Fog
Ventilation is the second line of defense against fogging (after double-lens construction). A well-designed ventilation system allows air to circulate through the goggle, carrying away moisture before it can condense on the lens.
Top Venting
Most goggles have ventilation ports along the top of the frame. These allow warm, moist air to escape upward (since warm air naturally rises). The vents should be open and unobstructed — this is why it’s important that your helmet doesn’t cover the top of your goggles.
Bottom Venting
Some goggles have ventilation ports along the bottom of the frame as well. These allow cooler, drier air to enter the goggle from below, creating a circulation pattern. Bottom venting is particularly effective when riding (as opposed to sitting on the lift) because the forward motion of riding forces air through the lower vents.
Fog-Free Ventilation Design
The most effective ventilation systems use channels and baffles to direct airflow across the inner lens surface. Instead of just having holes in the frame, quality goggles have internal channels that guide air across the lens in a way that maximizes moisture removal. Think of it as the difference between an open window (basic venting) and an HVAC system with directed airflow.
Venting and Weather Conditions
Some goggles have adjustable venting — open vents for warm weather (more airflow, less fogging) and closed or reduced vents for cold/stormy weather (less cold air entering, but potentially more fogging if you’re generating a lot of moisture). This is a useful feature for riders who encounter a wide range of conditions.
Quick Ventilation Check
Before each ride, take 10 seconds to check that your goggle vents are clear of snow, ice, or debris. Stuffing a neck gaiter or balaclava into the top vents is one of the most common causes of fogging. Ensure the ventilation path from bottom to top is completely unobstructed.
Lens Coatings Explained: Mirror, Hydrophobic, and Anti-Scratch
Modern snowboard goggle lenses often come with multiple coatings that enhance performance, durability, and visual clarity. Understanding these coatings helps you make a more informed purchasing decision and maintain your lenses properly.
Mirror Coatings
Mirror coatings are thin metallic layers applied to the outer lens surface. They reflect a portion of incoming light, effectively reducing the amount of light passing through the lens. Mirror coatings serve two purposes: they reduce VLT (making the lens darker) and they add a reflective, stylish appearance. Different mirror colors reflect different wavelengths, so a blue mirror reflects more blue light and a gold mirror reflects more red/yellow light. Mirror coatings can scratch more easily than non-mirrored surfaces, so they benefit from anti-scratch treatment.
Anti-Scratch Coatings
Anti-scratch coatings are hard, protective layers applied to the outer lens surface (and sometimes the inner surface) to resist scratching from normal use. No coating makes a lens completely scratch-proof, but quality anti-scratch treatments significantly extend lens life. This is particularly important for polycarbonate lenses, which are naturally soft and scratch-prone compared to glass.
Anti-scratch coatings degrade over time with cleaning, so avoid using abrasive materials (paper towels, shirt tails) to clean your lenses. Always use a microfiber cloth and lens-specific cleaning solution.
Hydrophobic Coatings
Hydrophobic (water-repelling) coatings cause water, snow, and moisture to bead up and roll off the lens surface rather than spreading and sticking. This is particularly useful in wet, snowy conditions where moisture on the lens can obstruct vision. Hydrophobic coatings also make the lens easier to clean, as dirt and oils don’t adhere as strongly to the treated surface.
Note: hydrophobic coatings are typically applied to the OUTER lens surface. The inner surface uses a hydrophilic (water-attracting) anti-fog coating instead.
Oleophobic Coatings
Oleophobic (oil-repelling) coatings prevent fingerprints, skin oils, and other oily substances from adhering to the lens surface. Since oils are a common cause of smearing and reduced clarity, oleophobic coatings keep the lens cleaner for longer. They’re often combined with hydrophobic coatings into a single treatment.
Contrast-Enhancement Coatings
Some manufacturers apply proprietary coatings that selectively filter certain wavelengths of light to enhance contrast and color perception. These aren’t traditional “coatings” in the traditional sense — they’re integral to the lens tint. Oakley’s Prizm, Smith’s ChromaPop, and Dragon’s Lumalens all fall into this category. They work by filtering overlapping wavelengths that cause visual “noise,” allowing your brain to process colors and contrasts more efficiently.
How to Clean, Maintain, and Store Your Snowboard Goggles
Proper maintenance extends the life of your goggles and ensures consistent performance season after season. Most goggle failures are actually maintenance failures — fogging from damaged anti-fog coatings, scratched lenses from improper cleaning, and degraded foam from poor storage.
Cleaning Your Goggle Lens
- Always use a microfiber cloth. Never use paper towels, tissues, shirt tails, or any rough material. These will scratch the lens and damage the anti-fog coating.
- Use lens-specific cleaning solution. Water alone can leave mineral deposits. Mild soap and water works in a pinch, but dedicated lens cleaning spray is better. Never use glass cleaner, ammonia-based cleaners, or household chemicals.
- Never wipe the inside of the lens. The inner lens has an anti-fog coating that is easily damaged by wiping. If the inside gets wet or foggy, let it air dry or gently shake the goggles.
- Start from the center and work outward. This prevents dragging debris across the main viewing area.
Storing Your Goggles
- Always use a goggle bag or hard case. This prevents scratches and protects the lens coating.
- Store in a cool, dry place. Avoid leaving goggles in your car, where temperature extremes and UV exposure degrade the lens coating, foam, and strap elasticity.
- Don’t stack items on top of your goggles. Pressure can distort the frame and damage the lens.
- Remove snow and moisture before storage. Let your goggles air dry completely before putting them in a bag. Storing wet goggles promotes mold and mildew growth on the foam.
Off-Season Storage Tips
At the end of the season, give your goggles a thorough cleaning before storage. Check the foam for any damage or deterioration. Store the goggles in their original packaging or a hard case in a closet or drawer — not in the garage or attic where temperatures fluctuate dramatically.
When to Replace Your Goggles
Even with perfect maintenance, goggles don’t last forever. Replace your goggles when:
- The lens coating is visibly peeling, bubbling, or scratched through
- The face foam has lost its shape and no longer seals against your face
- The anti-fog coating has completely worn off and fogging is constant
- The strap has lost its elasticity and can’t hold the goggles in place
- The frame is cracked or distorted
Most quality goggles last 3-5 seasons with proper care. Budget goggles may only last 1-2 seasons before foam degradation becomes an issue.
Prescription Goggle Inserts: An Alternative to OTG Goggles
For riders who wear prescription glasses, prescription goggle inserts offer a more elegant solution than OTG goggles. These custom-made lens inserts sit inside the goggle frame, providing vision correction without the bulk and fogging issues of wearing glasses under goggles.
How Prescription Inserts Work
A prescription insert is a small, lightweight frame that holds your prescription lenses. It clips into the inside of the goggle frame, positioning the corrective lenses directly in front of your eyes. The insert is custom-made to match your specific prescription, ensuring accurate vision correction.
The insert sits behind the goggle’s main lens and in front of your eyes, creating a three-layer system: goggle lens, insert lens, and your eye. Quality inserts are designed to minimize the distance between layers to reduce optical distortion.
Benefits of Prescription Inserts Over OTG
- Better optical clarity: The insert is positioned at the correct distance from your eyes, providing more accurate vision correction than glasses that may shift or sit at odd angles.
- No fogging between lenses: Since the insert sits close to the goggle lens with minimal air gap, fogging between the two lenses is much less common than with OTG setups.
- Full goggle selection: Prescription inserts work with almost any goggle, so you’re not limited to OTG-specific models.
- More secure: The insert clips firmly into the frame and won’t shift or fall during aggressive riding.
- Lighter and less bulky: No glasses temples pressing against your head or poking through the foam.
Where to Get Prescription Inserts
Several companies specialize in prescription goggle inserts. You can order them online by providing your prescription details, or visit an optician who can fit them for you. Prices typically range from $50-$150 depending on your prescription complexity and lens options (anti-reflective coating, photochromic insert lenses, etc.).
Some goggle manufacturers (like Smith and Oakley) offer their own prescription insert systems designed specifically for their goggle frames, ensuring perfect compatibility.
Women’s Snowboard Goggles: Fit, Size, and Style Differences
Women’s snowboard goggles aren’t just smaller versions of men’s goggles with different colors. They’re specifically designed to accommodate the anatomical differences in women’s faces, providing better fit, comfort, and performance.
Anatomical Differences
On average, women have narrower faces, lower nose bridges, and closer-set eyes than men. Women’s goggles account for these differences with:
- Narrower frame width: Typically 5-10mm narrower than men’s equivalent models.
- Lower nose bridge foam: Thicker foam at the nose area to prevent the goggles from sliding down.
- Softer face foam: Many women’s goggles use softer, more plush foam for comfort.
- Narrower strap: Proportionally narrower strap that distributes pressure evenly across a smaller head.
Style and Color Options
Beyond fit, women’s goggles often offer different colorways and design aesthetics. Many manufacturers collaborate with female athletes and designers to create goggle designs that reflect women’s style preferences. However, the underlying technology (lens quality, ventilation, fog resistance) is typically identical to the men’s version of the same goggle.
Photochromic and Polarized Options for Women
All major photochromic and polarized lens technologies are available in women’s-specific frames. Smith’s I/O Mag ChromaPop, Oakley’s Flight Deck, and Giro’s Contour all come in women’s versions with full access to their respective lens technology lineups. Don’t settle for a women’s goggle that compromises on lens technology — the best manufacturers offer their full tech stack in women’s-specific frames.
Kids and Youth Snowboard Goggles: What Parents Need to Know
Choosing goggles for kids involves the same considerations as adult goggles, plus some unique factors related to developing eyes, active play, and the likelihood of rough handling.
Kids’ Eyes Are More Vulnerable
Children’s eyes are more susceptible to UV damage than adults’ eyes because their lenses are clearer and allow more UV radiation to reach the retina. This makes UV protection in kids’ goggles even more critical than in adult goggles. Always ensure kids’ goggles provide 100% UV400 protection.
Durability Matters More
Kids are rough on gear. Look for kids’ goggles with:
- Flexible frames: TPU (thermoplastic polyurethane) frames bend without breaking.
- Anti-scratch coatings: Essential for surviving drops, tosses, and the general chaos of childhood.
- Easy lens swap: Simple mechanisms that kids can operate themselves, building their independence on the mountain.
- Helmet compatibility: Ensure the goggles fit with the kid’s helmet. The gaper gap is even more problematic for kids because their smaller faces make fit more challenging.
Kids’ Lens Tints
Kids benefit from high-contrast, medium-VLT lenses (rose, persimmon, or yellow) because they’re still developing their terrain-reading skills. These tints enhance contrast and help kids see bumps and changes in terrain more clearly. Dark, low-VLT lenses should generally be avoided for kids because they reduce visibility in the shade and tree runs that kids often enjoy.
Photochromic for Kids: Worth It?
Photochromic lenses can be excellent for kids because they eliminate the need for parents to judge conditions and select the right lens. Kids are less likely to notice or communicate that their lenses are too dark or too light, so a self-adjusting lens ensures they always have adequate visibility. The premium price is often justified by the convenience and safety benefits.
Brand Showdown: Oakley vs Smith vs Giro vs Dragon vs Anon
The snowboard goggle market is dominated by a handful of brands, each with unique strengths, technologies, and philosophies. Understanding what each brand does best helps you narrow your search.
Oakley
Flagship Technology: Prizm Lens Technology
Strengths: Industry-leading optical clarity, innovative lens swap (Switchlock), excellent polarization options, wide range of frame sizes and styles.
Weaknesses: Premium pricing across the board, some models have a “bug-eyed” look that not everyone loves.
Best For: Riders who prioritize optical clarity and don’t mind paying for it. Excellent photochromic and polarized options.
Smith
Flagship Technology: ChromaPop
Strengths: ChromaPop color enhancement is arguably the best in the business, excellent helmet integration, strong photochromic lineup, AirEvac ventilation system.
Weaknesses: Some models have slightly less peripheral vision than competitors, mid-range models feel less premium.
Best For: Riders who want vibrant, high-contrast color perception and seamless helmet compatibility.
Giro
Flagship Technology: VIVID Lens Technology
Strengths: Excellent value for money, VIVID lenses (developed with Zeiss) offer superb optical clarity, strong anti-fog performance, good fit range.
Weaknesses: Less brand cachet than Oakley or Smith, smaller selection of premium options, fewer magnetic swap options.
Best For: Budget-conscious riders who want quality optics without the premium price tag. Also excellent for women’s-specific fit.
Dragon
Flagship Technology: Lumalens
Strengths: Lumalens offers excellent color optimization, good value, Ionized lens coatings for enhanced clarity, modern frame designs.
Weaknesses: Smaller market presence, fewer replacement lens options, less extensive retail availability.
Best For: Riders looking for an alternative to the “big two” (Oakley/Smith) who want excellent optics at a slightly lower price point.
Anon (Burton)
Flagship Technology: M-Fusion Magnetic Lens Swap, Perceive Lens Technology
Strengths: Industry-leading magnetic lens swap (the M4 and M3 are exceptionally easy to swap), excellent integration with Burton helmets, Perceive lenses offer outstanding contrast.
Weaknesses: Primarily associated with Burton (which some riders view as limiting), fewer photochromic options than competitors.
Best For: Riders who prioritize fast lens swaps, Burton loyalists, and anyone who values the convenience of magnetic systems.
Honorable Mentions
Julbo: The photochromic specialist. If photochromic is your priority, Julbo’s Reactiv lenses offer the widest and fastest photochromic range available.
POC: Scandinavian design meets excellent optics. POC goggles offer a distinctive aesthetic with solid performance.
Electric: Known for stylish designs and solid mid-range performance. Good value with a fashion-forward aesthetic.
Zeal Optics: One of the few brands offering both photochromic and polarized in the same lens. Niche but excellent for riders who want both technologies.
Exclusive Lens Technologies: Prizm, ChromaPop, Lumalens, and More
Beyond the photochromic vs polarized question, every major brand has developed proprietary lens technologies that enhance vision in unique ways. Understanding these technologies helps you choose the right goggle for your visual preferences.
Oakley Prizm
Prizm is a lens tint technology that fine-tunes individual wavelengths of color to enhance detail and contrast in specific environments. Oakley offers several Prizm variants:
- Prizm Snow: Optimized for snow environments, enhances contrast between white snow and terrain features.
- Prizm Sapphire: A versatile tint for bright to partly cloudy conditions with blue-purple mirror.
- Prizm Rose: Excellent for flat light and overcast, with enhanced pink/rose contrast.
- Prizm Torch: High-VLT for low-light conditions with an iridium mirror coating.
- Prizm Daily: For everyday use, good in mixed conditions.
Prizm is available in polarized, photochromic, and standard versions, making it one of the most versatile lens platforms available.
Smith ChromaPop
ChromaPop works by filtering two specific wavelengths of light where colors overlap on the visual spectrum. By eliminating this “color confusion,” ChromaPop lenses allow your brain to process colors more accurately, resulting in more vibrant, true-to-life color perception. Smith also offers ChromaPop Photochromic (combining color enhancement with automatic tint adjustment) and ChromaPop Polarized (color enhancement with glare reduction).
Dragon Lumalens
Lumalens uses ionized lens technology to optimize color and clarity across the entire lens surface. Unlike some technologies that work best in the center of the lens, Lumalens maintains consistent color optimization from edge to edge. This means your peripheral vision benefits from the same color enhancement as your central vision.
Giro VIVID
Developed in partnership with optical giant Zeiss, VIVID lenses optimize contrast and enhance the depth of field. VIVID technology is particularly effective in flat light conditions, where it helps distinguish terrain features that would otherwise be invisible.
Julbo REACTIV
Julbo’s Reactiv technology is purely photochromic — it doesn’t add color enhancement — but it offers the widest and fastest photochromic range available. Reactiv lenses can transition from nearly clear (75% VLT) to Category 3 dark (16% VLT) in seconds, covering virtually every condition from dawn to dusk.
Perceive (Anon)
Anon’s Perceive lens technology enhances contrast and definition across a wide range of light conditions. Available in multiple tints, Perceive lenses are designed to provide high-contrast vision without sacrificing color accuracy. Combined with Anon’s magnetic lens swap, Perceive lenses offer both excellent optics and convenience.
Night Riding Goggles: Everything You Need for After Dark
Night riding offers a unique experience — the mountain is quiet, the crowds are gone, and the lights create an otherworldly atmosphere. But visibility is dramatically different, and your daytime goggles won’t cut it.
What Makes Night Goggles Different?
Night riding goggles have two primary requirements: maximum light transmission (high VLT) and enhanced contrast. At night, the only light sources are artificial slope lights and moonlight, which are a fraction of the intensity of daylight. Your goggles need to let as much of this limited light as possible reach your eyes.
Optimal VLT for Night Riding
For night riding, you want the highest VLT possible — ideally 50% or higher. Clear lenses (70-80% VLT) or light yellow lenses (55-70% VLT) are ideal. The yellow tint enhances contrast under artificial lighting, helping you see terrain features that would be invisible through a clear or dark lens.
Photochromic Lenses at Night
Most photochromic lenses will open to their maximum VLT at night, making them decent night-riding options. However, they may not reach as high a VLT as a dedicated clear or light-yellow lens. If night riding is a regular part of your season, a dedicated night lens is worth the investment.
Polarized Lenses at Night
Polarized lenses are generally NOT recommended for night riding. Since there’s minimal glare at night, the polarization provides no benefit while the dark tint reduces already-limited visibility. Save your polarized lenses for sunny days.
Night Riding Tips Beyond Goggles
- Wear a helmet with a visor or brim to block overhead lights from causing lens flare.
- Slow down — your depth perception is reduced at night.
- Ride familiar terrain — new terrain is much harder to read at night.
- Keep your goggles clean — any smudges are amplified in low-light conditions.
Flat Light Goggles: Conquering Low-Visibility Conditions
Flat light — when overcast skies eliminate shadows and terrain definition — is the most dangerous visibility condition on the mountain. Without shadows, you can’t see bumps, dips, or changes in terrain. Flat light goggles use specialized tints and technologies to artificially enhance contrast and help you read the terrain.
What Causes Flat Light?
Flat light occurs when thick cloud cover diffuses sunlight evenly across the landscape. Without direct sunlight creating shadows, the terrain appears as a uniform white/grey surface. This is most common during storms, in heavy fog, and in early morning/late afternoon when the sun is low and obscured by clouds. Tree-covered runs are slightly less affected because trees create artificial shadows, which is why flat light is worse above treeline.
Best Tints for Flat Light
- Yellow: The classic flat-light tint. Yellow filters blue light and enhances contrast between white snow and terrain features. Yellow lenses can make a significant difference in flat-light visibility.
- Rose/Pink: Rose tints also enhance contrast while providing a slightly more neutral color perception than yellow. Rose is more versatile because it works well in both flat light and partly cloudy conditions.
- Amber/Persimmon: Similar to yellow but with more warmth and a slightly different contrast profile. Amber tints are particularly good at enhancing depth perception.
- High-VLT photochromic: Quality photochromic lenses will automatically lighten in flat light to let more light in, though dedicated high-contrast tints (yellow, rose) often outperform them in severe flat-light conditions.
What Doesn’t Work in Flat Light
- Dark, low-VLT lenses: These make flat light worse by reducing already-limited visibility.
- Polarized lenses: Polarization cuts glare, but in flat light there’s minimal glare to cut. The dark tint of polarized lenses makes flat light conditions more difficult.
- Mirrored lenses: Mirror coatings reduce light transmission, which is counterproductive in low-light conditions.
Altitude and UV: Why Mountain Riding Demands Better Eye Protection
Understanding the relationship between altitude and UV radiation is crucial for choosing the right goggles and protecting your eyes at the mountain.
How Altitude Affects UV
The atmosphere filters UV radiation. At higher altitudes, there’s less atmosphere above you to absorb UV, so more reaches your eyes. UV intensity increases by approximately 4-5% for every 1,000 feet (300 meters) of elevation gain. At 10,000 feet — a typical elevation for Western US ski resorts — UV levels are about 30-40% higher than at sea level.
Snow Reflection Multiplier
Snow reflects 80-90% of UV radiation (fresh snow reflects even more than packed snow). This means your eyes receive UV from above (direct sunlight) and from below (snow reflection). The total UV exposure at altitude on a sunny day can be two to three times what you’d experience at sea level on a beach.
Implications for Goggle Choice
At high altitude, you need:
- 100% UV400 protection: Non-negotiable. Every quality goggle offers this, but verify it.
- Lower VLT for bright conditions: The combination of altitude UV and snow reflection means even moderate sun feels intense. A darker lens (lower VLT) is appropriate at altitude.
- Polarization benefits: At high altitude, glare is more intense, making polarization more valuable for comfort.
- Side coverage: UV can enter from the sides through gaps between the goggles and your face. Look for goggles with good side coverage or foam that seals well against your temples.
High-Altitude Goggle Tips
- Carry a spare high-VLT lens for when you descend into clouds or shadows.
- Apply sunscreen to any exposed skin around your goggles — UV reflects off snow onto the skin around your eyes.
- Take breaks from the sun when possible — even with goggles, prolonged high-altitude UV exposure is taxing.
- Consider photochromic goggles at altitude for automatic adjustment between bright ridges and shadowed bowls.
Spring Skiing Goggles: Warm Weather Lens Selection Guide
Spring skiing brings unique challenges: higher sun angles, slushy snow, warmer temperatures, and rapidly changing conditions throughout the day. Your goggle lens choice should reflect these specific conditions.
Why Spring Conditions Are Different
In spring, the sun is higher in the sky (closer to perpendicular to the snow surface), which means more UV radiation and more glare. Snow is softer and wetter, creating more reflective surfaces. Temperature swings are dramatic — mornings can be freezing, afternoons can be 50°F+. These conditions demand versatile lens technology.
Best Lens Choices for Spring
- Photochromic: The ultimate spring lens. The wide temperature and light range of spring makes photochromic lenses particularly valuable. They handle the morning freeze and afternoon heat without a swap.
- Polarized: Excellent for spring’s intense glare. The high sun angle and wet snow create more glare than mid-winter conditions, making polarization more valuable.
- Medium VLT tints (20-30%): If you prefer fixed tints, persimmon, copper, or medium rose work well in spring’s variable conditions.
Spring Goggle Maintenance
Spring conditions are harder on goggles. Wet snow sticks to lenses more readily, and warmer temperatures increase the risk of fogging. Clean your lenses more frequently in spring, ensure ventilation is clear, and consider applying hydrophobic coating to help repel water.
Backcountry Snowboard Goggles: Special Considerations for Off-Piste
Backcountry riding demands different performance from your goggles compared to resort riding. When you’re miles from the lodge, your goggles need to handle rapidly changing conditions, extended wear, and the physical demands of earning your turns.
Backcountry-Specific Requirements
- Extreme versatility: You might start in predawn darkness, climb through morning fog, break above treeline into blazing sun, and descend through afternoon storms — all in one day. Photochromic lenses are particularly valuable here.
- Durability: You can’t easily replace damaged goggles in the backcountry. Look for robust construction, quality materials, and scratch-resistant coatings.
- Lightweight: Every gram matters when you’re skinning up a mountain. Lighter goggles reduce fatigue over long ascents.
- Ventilation management: You generate significant body heat during the climb (causing fogging), then cool down rapidly during the descent. Adjustable venting or excellent passive ventilation is essential.
- Low-light capability: Early morning starts, tree runs, and stormy conditions all demand high-VLT lenses. Having a lens that can handle low light is critical for safety.
Backcountry Goggle Packing Strategy
Most backcountry riders carry two lenses: a photochromic as their primary (covering 80% of conditions) and a high-VLT clear or yellow lens for night approaches, predawn starts, or heavy storm conditions. This two-lens strategy covers virtually all conditions while keeping pack weight minimal.
Impact Resistance and Safety Standards for Snow Goggles
While optical clarity and visibility are primary concerns, the impact resistance of your goggles is a critical safety feature. Goggles protect your eyes from branches, ice chunks, pole tips, and in worst-case scenarios, crashes.
ANSI Z87.1 Standard
The American National Standards Institute (ANSI) Z87.1 standard is the primary safety rating for eyewear in the United States. It tests lenses for impact resistance by firing a steel ball at the lens at high velocity. Goggles that meet Z87.1 provide meaningful protection against impacts.
EN 166 / EN 174 (European Standards)
European goggles are tested to EN 166 (general eye protection) and EN 174 (ski goggles specifically). These standards cover impact resistance, optical quality, and UV protection. EN 174 is more specific to snow sports and includes testing for resistance to penetration by sharp objects.
CE Marking
CE marking indicates that the product meets EU safety, health, and environmental requirements. All goggles sold in Europe must carry CE marking. However, CE is a broad standard and doesn’t specifically test for the impact resistance levels of ANSI Z87.1 or EN 166.
What to Look For
Look for goggles that carry ANSI Z87.1 and/or EN 166/174 certification. Most quality goggles from major brands meet these standards. The certification is typically printed on the lens or frame, or listed in the product specifications.
Polycarbonate: The Impact-Resistant Lens Material
Polycarbonate is the most common lens material in snowboard goggles because it’s lightweight, optically clear, naturally UV-blocking, and highly impact-resistant. Polycarbonate is the same material used in bulletproof windows and astronaut helmet visors. It’s virtually shatterproof, making it the ideal safety material for goggle lenses. Glass lenses offer slightly better optical clarity but are heavier, more expensive, and shatter in impacts — making them rare and inadvisable for snow sports.
Asian Fit Snowboard Goggles: Finding the Right Fit for Every Face
“Asian Fit” (also called “Low Bridge Fit” or “Universal Fit”) goggles are designed for riders with flatter nose bridges and higher cheekbones. Standard goggles can leave gaps at the nose area for these face shapes, causing fogging, discomfort, and poor seal.
What Makes Asian Fit Different?
- Thicker nose foam: The face foam at the nose area is significantly thicker (typically 3-5mm more), filling the gap between the goggle and a flatter nose bridge.
- Curved nose piece: Some Asian Fit models have a differently shaped nose piece that conforms better to lower nose bridges.
- Adjusted frame angle: The frame may be angled slightly differently to sit properly on flatter facial features.
- Wider face foam at cheeks: Additional foam at the cheek area helps create a complete seal across the face.
Do You Need Asian Fit?
You may need Asian Fit goggles if: standard goggles leave a visible gap at the nose, your goggles slide down your nose while riding, you experience fogging that you can’t resolve through other means (the gap at the nose lets warm air in), or the goggles feel like they’re pressing on your cheekbones rather than resting against your face.
Try on standard goggles first — many riders with Asian features find that standard goggles fit fine. Asian Fit is specifically for riders who can’t get a proper seal with standard designs.
Which Brands Offer Asian Fit?
Oakley, Smith, Giro, Dragon, and Anon all offer Asian Fit versions of their most popular goggles. These typically cost the same as their standard-fit counterparts and use the same lens technology — the only difference is the fit geometry.
Goggles and Face Mask/Neck Gaiter Compatibility
The interface between your goggles, face mask, and helmet is critical for both comfort and fog prevention. Poor integration between these three elements is one of the most common causes of fogging and cold-air intrusion.
The Fogging Connection
When you wear a neck gaiter or face mask, your warm, moist breath has to go somewhere. If the mask channels breath upward into the goggles, you’ll fog up rapidly. The goal is to create a seal that directs breath downward, away from the goggles.
Proper Integration Strategy
- Helmet first, goggles second, mask third. Put on your helmet, then your goggles (positioned to overlap the helmet’s lower edge), then your neck gaiter or mask (tucked under the goggles, against your face, not over the goggles).
- Ensure the mask covers the gap. The mask should seal against your face below the goggles, not ride up over the goggle’s lower edge.
- Use a balaclava for best results. A balaclava provides the most complete coverage and the best breath direction. Pull the balaclava over your nose and under the goggles, creating a seal that channels breath downward.
Types of Face Coverings and Compatibility
- Balaclava: Best for cold conditions and fog prevention. Covers the entire face and directs breath down.
- Neck gaiter (pulled up): Good for mild conditions but can channel breath upward into goggles if not positioned correctly.
- Half-face mask: Provides warmth without covering the nose, which helps prevent fogging but offers less cold protection.
- Buff/lightweight gaiter: Best for mild conditions. Lightweight materials don’t trap as much moisture, reducing fogging risk.
Goggle Technology Trends: What’s New in 2026
Snowboard goggle technology continues to evolve rapidly. Here are the most significant trends shaping the industry in 2026 and beyond.
Electrochromic Lenses
Electrochromic technology takes photochromic a step further by using electric current to adjust lens tint. Instead of relying on UV-triggered chemical reactions (which can be slow and temperature-dependent), electrochromic lenses change tint almost instantly when you press a button or when sensors detect changing light conditions. This technology is still in its early stages for snow goggles but promises to solve the speed and temperature issues that plague photochromic lenses.
Heated Lenses
Some manufacturers are introducing electrically heated goggle lenses that actively prevent fogging by warming the inner lens surface. A small rechargeable battery powers a heating element embedded in the lens, maintaining a temperature differential that prevents condensation. This is particularly valuable for riders in extreme cold or those who generate significant body heat during aggressive riding.
Smart Goggles
Connected goggles with integrated displays, Bluetooth audio, and heads-up displays are becoming increasingly sophisticated. While still a niche product, smart goggles can display speed, altitude, navigation, and even incoming calls without requiring you to remove your goggles or look at your phone.
Sustainable Materials
Environmental consciousness is driving goggle manufacturers to adopt sustainable materials. Bio-based frame plastics, recycled strap materials, and eco-friendly lens coatings are becoming more common. Some brands are also offering lens recycling programs where you can return old lenses for proper recycling.
Customizable Tint Profiles
Advanced photochromic and electrochromic technologies are enabling customizable tint profiles where riders can set preferred tint levels for different conditions. Instead of a fixed darkening/lightening curve, riders could potentially fine-tune how dark or light their lenses get at different UV levels.
Improved Ventilation AI
While not yet mainstream, some prototype goggles are incorporating sensor-driven ventilation systems that automatically adjust airflow based on temperature, humidity, and riding intensity. This represents the next frontier in fog prevention.
Common Mistakes When Buying Snowboard Goggles (And How to Avoid Them)
After analyzing thousands of goggle purchases and rider feedback, we’ve identified the most common mistakes that lead to regret and wasted money.
Mistake 1: Buying Based on Brand Name Alone
Brand loyalty is fine, but every brand makes budget models that may not meet your needs. A premium Oakley goggle is excellent, but an entry-level Oakley may be outperformed by a mid-range Smith or Giro. Compare specifications and features, not just logos.
Mistake 2: Ignoring VLT
This is the #1 mistake we see. Buyers focus on lens color and technology but ignore the VLT rating. A gorgeous mirrored lens with 8% VLT is useless in flat light. Always check VLT and match it to your typical riding conditions.
Mistake 3: Not Trying Goggles with Your Helmet
The gaper gap is real and problematic. Always try goggles with your helmet before buying, or at least research compatibility. Online purchases should be from retailers with good return policies.
Mistake 4: Choosing the Wrong Size
Bigger isn’t always better. Oversized goggles on a small face create gaps, pressure points, and poor seals. Match goggle size to your face size, not to fashion trends.
Mistake 5: Cleaning with the Wrong Materials
Using your shirt, a paper towel, or anything other than a microfiber cloth to clean your lens will damage the coatings. This is the #1 cause of premature lens degradation. Invest in a quality microfiber cloth and lens cleaning solution.
Mistake 6: Expecting Photochromic to Work Like Sunglasses
Photochromic goggles aren’t sunglasses. They react to UV light, not visible light. On overcast days with high UV, they may darken more than you expect. Inside a car, they won’t darken at all. Understanding the UV-reaction mechanism prevents unrealistic expectations.
Mistake 7: Buying Only for Sunny Days
Many riders buy goggles optimized for bluebird days and then struggle on the 60% of days that aren’t perfectly sunny. For most riders, a versatile all-around lens is more valuable than a specialized bright-sun lens. Consider your actual riding conditions, not your idealized vision of them.
Mistake 8: Neglecting Anti-Fog Maintenance
Even the best anti-fog coating wears off over time. If your goggles are fogging more than they used to, apply anti-fog spray before assuming the goggles are defective. A $10 spray can extend the life of your goggles by a season or more.
Mistake 9: Storing Goggles Improperly
Throwing your goggles in a gear bag, leaving them in the car, or tossing them on a shelf without a case all accelerate degradation. Temperature extremes, UV exposure, and physical contact all damage lens coatings and foam. A $5 goggle bag is the best investment you can make.
Mistake 10: Buying Goggles Without Checking the Return Policy
Goggle fit is highly individual. What works for one person may not work for another. Always buy from retailers who allow returns or exchanges, especially if purchasing online. Trying goggles at home with your helmet is the only way to ensure proper fit.
A Brief History of Snow Goggles: From Bark to Tech Marvels
The evolution of snow goggles is a fascinating journey from survival tool to high-tech accessory. Understanding this history gives you appreciation for the incredible technology in today’s goggles.
Prehistoric Origins (5000+ Years Ago)
The earliest known snow goggles were carved from wood, bone, or antler by Inuit and Yup’ik peoples in the Arctic. These goggles featured narrow slits that reduced the amount of light entering the eyes while still allowing the wearer to see. The slit design was remarkably effective at preventing snow blindness — a condition caused by UV radiation reflecting off snow and ice. These ancient goggles represent one of humanity’s earliest examples of specialized protective eyewear.
The 20th Century: From Aviator to Athlete
Modern snow goggles emerged in the early 20th century, heavily influenced by aviator goggle design. Early models were simple: a single glass or plastic lens in a leather or rubber frame. They provided wind protection and basic tinting but offered poor optical clarity and virtually no fog prevention.
The 1960s and 1970s saw the introduction of polycarbonate lenses (which were lighter, more impact-resistant, and naturally UV-blocking) and double-lens construction (which dramatically improved fog resistance). These innovations transformed snow goggles from crude eye shields into functional optical instruments.
The Modern Era: Technology Explosion
The 1990s through present day has seen an explosion of goggle technology: spherical and toric lenses for improved optics, anti-fog coatings for better visibility, photochromic and polarized lenses for adaptive tinting, magnetic lens swap systems for versatility, proprietary lens technologies (Prizm, ChromaPop, Lumalens) for enhanced contrast, and smart goggle prototypes with heads-up displays.
Today’s premium snow goggles are marvels of optical engineering — they combine multiple lens elements, advanced coatings, precision ventilation, and ergonomic design to provide vision that’s arguably better than naked-eye vision in challenging conditions. The Inuit who carved wooden goggles 5,000 years ago would be astounded at how far the technology has come.
Scenario Guide: Which Should You Buy?
The “All-Mountain Cruiser”
Recommendation: Photochromic.
You arrive at the lift at 9 AM and ride until 4 PM. You ride through shadows, open bowls, and maybe a little flat light. You don’t want to carry a backpack with spare lenses. The adaptability is key for you.
The “Spring Breaker” / Fair Weather Rider
Recommendation: Polarized.
You only ride when the sun is out. You enjoy the aprés-ski as much as the riding. You want your eyes to feel rested and the view to look spectacular. Glare reduction is your best friend.
The “Backcountry Explorer”
Recommendation: High-Contrast (Non-Polarized) or Photochromic.
In backcountry snowboarding, reading the snowpack is life or death. You need to see wind slabs and ice crusts. While some backcountry riders love photochromic for the changing weather of an ascent, many avoid polarization to ensure they don’t miss icy cues on critical lines.
The “Park Rat”
Recommendation: Non-Polarized (Standard).
If you are hitting rails and jumps, you need to see the metal and the icy landings clearly. Transitions in lighting in the park are less drastic than on big mountain faces. Standard lenses or high-contrast tech (like Oakley Prizm or Smith ChromaPop) are usually preferred over photochromic or polarized.
The “Storm Chaser”
Recommendation: High-VLT Lens + Photochromic as Backup.
If you actively seek out storm days and heavy snow, your primary need is maximum light transmission. A yellow or clear lens (50-70% VLT) will give you the best visibility in falling snow and flat light. If you also ride sunny days, a photochromic as your second lens covers the rest.
The “Commuter Rider” (Midwest / East Coast)
Recommendation: Photochromic + Separate Low-Light Lens.
Eastern and midwestern resorts often have flat light, ice, and rapidly changing conditions. A photochromic lens handles the variability, but you may want a dedicated high-VLT lens for the most overcast days. Polarized lenses can be risky on ice-heavy terrain.
The “Gaper” (First-Time Buyer)
Recommendation: Mid-Range, Versatile Tint (Rose or Persimmon).
If you’re buying your first pair of goggles, don’t overthink it. A quality mid-range goggle with a medium-VLT tint (rose, persimmon, or copper) in the 20-30% range will handle most conditions you’ll encounter. As you develop your riding and preferences, you can invest in more specialized lenses.
The “High-Altitude Explorer” (Colorado, Utah, European Alps)
Recommendation: Polarized or Low-VLT + Photochromic.
At high altitude, UV intensity and glare are amplified. A polarized lens provides excellent comfort on bright days, while a photochromic lens handles the rapid changes common in mountain weather. Both should provide 100% UV400 protection.
The “Night Owl” (Night Rider)
Recommendation: Dedicated Clear or Yellow Lens (50%+ VLT).
Night riding requires maximum light transmission. A dedicated clear or light-yellow lens with 50%+ VLT is essential. Don’t try to use your daytime photochromic or polarized goggles at night — they won’t let enough light through.
The “Quiver of One” (Budget-Conscious, One Goggle for Everything)
Recommendation: Quality Photochromic in a Versatile Frame.
If you can only buy one goggle, photochromic gives you the most coverage. Pair it with a frame that accepts swappable lenses, so you can add a night lens or a dedicated high-VLT lens later if needed. This approach maximizes your investment.
The Third Option: High-Contrast Tech
It is important to note that many modern lenses (Oakley Prizm, Smith ChromaPop, Dragon Lumalens) are neither photochromic nor polarized. They use light-filtering dye technology to boost specific colors (contrast) while muting others.
For many riders, this is the “Goldilocks” solution. They offer better definition than standard lenses without the ice-hiding issues of polarization or the transition lag of photochromic lenses. If you are struggling with Oakley Flight Deck vs Flight Path, usually it’s the Prizm tech doing the heavy lifting.
When High-Contrast Tech Wins
- Park and pipe riding: Where terrain features are predictable and you need to see edges and transitions clearly.
- Tree runs: High-contrast lenses help you distinguish between snow, bark, and shadows in dense forests.
- Mixed conditions: Many high-contrast tints work well across a range of lighting conditions without the extreme specialization of photochromic or polarized.
- Riders who want “just works” simplicity: No transition delays, no ice-hiding concerns — just consistent, enhanced contrast.
Can You Combine Technologies?
Yes! Many modern goggles offer combinations:
- Photochromic + High-Contrast: Smith ChromaPop Photochromic combines automatic tint adjustment with color enhancement.
- Polarized + High-Contrast: Oakley Prizm Polarized combines glare reduction with enhanced color perception.
- Photochromic + Polarized: Julbo and Zeal Optics offer lenses that are both photochromic AND polarized — the ultimate combination, but at a premium price.
Frequently Asked Questions
Can a snowboard lens be both photochromic and polarized?
Yes, some high-end manufacturers like Julbo and Zeal Optics produce lenses that are both. They are the “Rolls Royce” of lenses, offering glare reduction AND light adaptability, but they come with a hefty price tag.
Why do some snowboarders avoid polarized lenses?
The main argument is the “ice patch” issue. Polarization removes glare, and glare is often how riders identify ice. Without that shine, ice looks like snow, leading to unexpected slip-outs.
Do photochromic goggles work in flat light?
Yes. High-quality photochromic lenses (look for a VLT range that goes up to 50% or higher) will lighten significantly to let more light in, helping visibility in flat light.
What VLT lens is best for snowboarding?
For all-around use, a VLT between 18-30% covers most conditions. Lower VLT (5-18%) is better for bright sunny days, while higher VLT (30-50%) is ideal for flat light and overcast conditions. Photochromic lenses that span a wide VLT range offer the most versatility.
Are spherical or cylindrical lenses better for snowboarding?
Spherical lenses curve both horizontally and vertically, offering better peripheral vision and reduced optical distortion compared to cylindrical lenses, which only curve horizontally. However, cylindrical lenses are more affordable. Toric lenses offer the optical clarity of spherical with a lower profile.
How do I stop my snowboard goggles from fogging?
To prevent fogging: always use double-lens goggles, ensure proper ventilation by not blocking vents with helmets or balaclavas, apply anti-fog spray, store goggles in a dry bag, and never wipe the inside of the lens. If fogging persists, check that your face foam seals properly against your face.
Can I wear snowboard goggles over prescription glasses?
Yes, OTG (Over The Glasses) goggles are designed with extra interior volume to fit over prescription eyeglasses. Alternatively, prescription inserts clip inside the goggle frame for a more integrated solution.
How often should I replace my snowboard goggles?
Replace your goggles when the lens coating starts peeling or scratching significantly, when the foam loses its shape and no longer seals against your face, or when the strap loses elasticity. Most quality goggles last 3-5 seasons with proper care.
What is the best snowboard goggle brand?
Top brands include Oakley (best lens technology with Prizm), Smith (excellent ChromaPop lenses and photochromic options), Giro (great value and fit), Dragon (Lumalens technology), and Anon (magnetic lens swap). The best brand depends on your specific needs, face shape, and budget.
Should I buy photochromic or polarized goggles?
Choose photochromic if you want one lens that adapts to all conditions and value convenience. Choose polarized if you primarily ride in bright sun and want the best glare reduction and visual comfort. For maximum versatility, consider owning both.
Do I need different goggles for day and night riding?
It’s highly recommended. Night riding requires lenses with 50%+ VLT to let enough ambient light through. Your daytime goggles are likely too dark for safe night riding. A clear or light-yellow lens is ideal for after-dark sessions.
How much should I spend on snowboard goggles?
Expect to spend $80-$200 for quality goggles that will serve you well. Budget goggles ($30-$80) work for beginners or casual riders, while premium goggles ($200-$350+) offer the best optical technology and features. The mid-range ($100-$180) typically offers the best value for money.
Do expensive goggles make a difference?
Yes, to a point. Premium goggles offer better optical clarity, superior anti-fog performance, more comfortable face foam, and longer-lasting construction. However, the difference between a $100 goggle and a $200 goggle is smaller than the difference between a $30 goggle and a $100 goggle. Diminishing returns set in at the premium level.
Can I use ski goggles for snowboarding?
Absolutely. Ski and snowboard goggles are essentially the same product. The differences are minor — some snowboard goggles have slightly wider frames for better peripheral vision (useful when looking downhill while riding), and some ski goggles have more aerodynamic profiles. For most riders, the distinction is irrelevant.
What does “anti-fog” actually mean?
Anti-fog technology prevents water vapor from forming tiny droplets (fog) on the inner lens surface. It works through either a hydrophilic coating that spreads moisture into a transparent film, or through ventilation systems that circulate air to carry moisture away. No anti-fog system is perfect — double-lens construction, proper ventilation, and correct fit are all needed together for optimal fog prevention.
Are photochromic goggles worth the extra cost?
For most riders, yes. The convenience of automatic tint adjustment means you never have to stop to swap lenses or ride with compromised vision. If you ride in variable conditions (which is most riders), the versatility of photochromic lenses eliminates the need to buy and carry multiple lenses. The upfront premium typically pays for itself in convenience and coverage.
How do polarized goggles affect my phone screen?
Polarized lenses can make LCD screens (phones, GPS units, car dashboards) appear dark or invisible when viewed at certain angles. This is because most LCD screens emit polarized light. To use your phone while wearing polarized goggles, you may need to tilt your phone or remove your goggles. This is a known trade-off of polarization.
Can fogged goggles damage my eyes?
Fogged goggles don’t directly damage your eyes, but they create a serious safety hazard by reducing visibility. Riding with fogged goggles can lead to collisions, falls, and injuries. If your goggles fog up, stop riding in a safe area and wait for them to clear before continuing.
Do I need UV protection in my snowboard goggles?
Absolutely. UV protection is non-negotiable for snow goggles. Snow reflects up to 80% of UV radiation, and UV intensity increases with altitude. All quality goggles provide 100% UV400 protection, but always verify this specification before purchasing.
What’s the difference between ski goggles and snowboard goggles?
The core technology (lenses, anti-fog, UV protection) is identical. The main differences are frame shape (snowboard goggles tend to be slightly wider for better downward peripheral vision) and some brand-specific features. For 99% of riders, either type works perfectly for both sports.
Final Verdict
Choosing between photochromic vs polarized snowboard goggles comes down to where and how you ride.
If you value convenience and ride in changing weather conditions, Photochromic is the clear winner. It simplifies your gear and ensures you are never stuck with a dark lens in a storm.
If you value visual comfort and primarily ride on bright, sunny days, Polarized will give you a high-definition experience that is hard to beat.
But remember, the photochromic vs polarized decision is just one piece of the puzzle. The right VLT range, lens shape (spherical, cylindrical, or toric), goggle fit, helmet compatibility, and maintenance practices all contribute to your overall visibility and safety on the mountain.
Whichever you choose, ensure it fits seamlessly with your helmet. Check out our guide on best snowboard helmets to ensure you don’t end up with the dreaded “gaper gap.”
And whatever you do, don’t cheap out on your goggles. Your eyes are irreplaceable, and the difference between a $30 goggle and a $150 goggle is the difference between riding with compromised vision and riding with crystal-clear sight. See the mountain clearly, ride safely, and enjoy every moment on the snow.
Ready to upgrade your vision?
Browse Top Rated Snowboard Goggles on Amazon


