
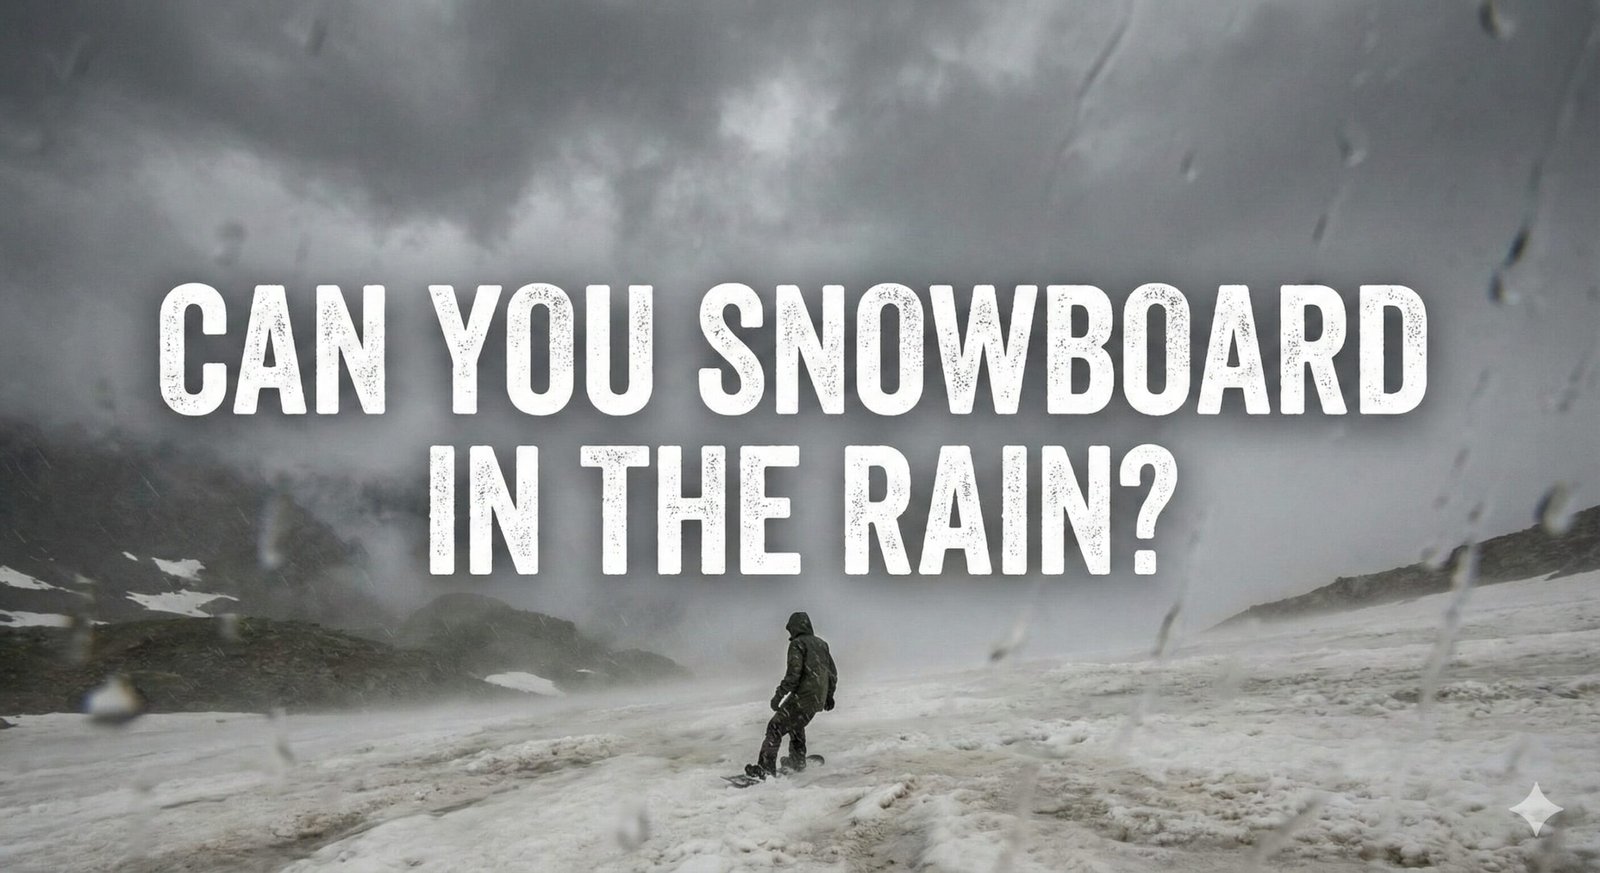
Can You Snowboard in the Rain? The Brutal Truth About Wet Riding
It is the scenario every snowboarder dreads. You booked your trip months ago, requested the time off work, and spent weeks hyping yourself up for waist-deep powder. You wake up on the first morning, look out the window of your condo, and instead of the silent, magical falling of snowflakes, you hear the pitter-patter of raindrops against the glass. It is a sinking feeling, one that leads many riders to pull the covers back up and sleep in until checkout.
But the short answer to the question “Can you snowboard in the rain?” is a resounding YES. In fact, for dedicated riders in the Pacific Northwest (PNW), New England, and even Japan, riding in the rain is just another Tuesday. While fair-weather riders flock to the lodge for hot cocoa, the die-hards are out on the hill, finding unique conditions that you simply cannot experience on a bluebird day. Snowboarding in the rain changes the fundamental physics of the sport, altering everything from how your board interacts with the snow surface to how your body regulates temperature.
However, successful rain riding requires a massive shift in mindset and preparation. You cannot simply wear your usual kit and expect to have a good time. If you go out unprepared, you will be soaked, freezing, and miserable within 45 minutes. The moisture seeps into cotton base layers, fog blinds your goggles, and the suction of the wet snow can make it feel like your board has the parking brake on. But, if you dial in your gear—think Gore-Tex, rubber gloves, and specific wax—you can unlock a day of soft, edge-able snow with absolutely zero lift lines. This guide is your survival manual for the wettest days on the mountain, ensuring you get your money’s worth out of that expensive lift ticket.
According to data from major resorts in the Pacific Northwest, rainy days account for approximately 15-25% of the total operating season. That means if you only ride on bluebird days, you are potentially missing out on weeks of available terrain time. Learning to embrace wet conditions does not just make you a more versatile rider—it makes you a more resilient one. Riders who can handle rain, fog, and flat light develop superior edge control, better balance, and enhanced board awareness that translates directly to improved performance when conditions are perfect.
This comprehensive guide covers everything you need to know about snowboarding in the rain, from the science behind rain-snow transitions to the specific gear, wax, and technique adjustments that separate a miserable day from an epic one. We will explore regional differences in rain riding, from the notoriously wet slopes of Washington State to the spring slush of the Colorado Rockies. You will learn about the thermodynamics of why water conducts heat away from your body 25 times faster than air, how to waterproof your entire kit on a budget, and why some riders actually prefer wet conditions for learning new tricks. Whether you are a seasoned backcountry rider or a beginner on your first season pass, this guide will transform your approach to the rainiest days on the mountain.
Understanding the Rain-Snow Transition Zone
Before we dive into gear and technique, it helps to understand the meteorology behind why it rains at a ski resort instead of snowing. The answer lies in the temperature profile of the atmosphere, not just the temperature at ground level. A ski resort might sit at 32°F (0°C) at the base area while warm air sits 2,000 feet above it, causing precipitation to melt before it reaches the ground. This creates the dreaded “rain-snow line”—an invisible boundary on the mountain where rain turns to snow.
The rain-snow line is rarely a clean, visible boundary. It shifts throughout the day as temperatures fluctuate, and it can vary dramatically across the mountain. You might have rain at the base lodge, wet heavy snow at mid-mountain, and actual powder at the summit. This is why riders in the PNW often say “just go higher”—sometimes riding to the top of the mountain is all it takes to switch from rain to snow. Understanding this dynamic helps you make strategic decisions about which lifts to ride and which runs to prioritize.
Wet-Bulb Temperature: The Real Measure
Meteorologists use something called wet-bulb temperature to predict whether precipitation falls as rain or snow. This measurement accounts for both temperature and humidity. In simple terms, wet-bulb temperature is the lowest temperature that can be reached through evaporative cooling. When the wet-bulb temperature is above 32°F (0°C), precipitation falls as rain. When it is below 32°F, it falls as snow.
This is why humidity matters so much for snowboarders. In a dry climate like Colorado, a temperature of 34°F can still produce snow because the low humidity keeps the wet-bulb temperature below freezing. In a humid climate like the Pacific Northwest, the same 34°F temperature produces rain because the high moisture content in the air keeps the wet-bulb temperature above freezing. This phenomenon explains why “32 degrees in Colorado” feels completely different from “32 degrees in Seattle”—the moisture content changes everything.
For snowboarders, the practical takeaway is this: don’t just check the temperature—check the humidity and dew point. A day forecasted at 35°F with 90% humidity will be a rain day. The same 35°F with 30% humidity might produce light, dry snow. Apps like Weather Underground and Mountain-Forecast provide humidity data that can help you predict conditions more accurately than a simple temperature reading.
Rain vs. Sleet vs. Freezing Rain: Knowing What You Will Face
Not all wet precipitation is created equal. Understanding the differences between rain, sleet, and freezing rain helps you prepare more effectively and adjust your expectations.
Rain (Above Freezing)
True rain occurs when the entire atmospheric column is above 32°F (0°C). The precipitation falls as liquid water from cloud to ground. On the mountain, this creates the classic “rain on snow” scenario where the snow surface becomes saturated, heavy, and slushy. Rain is the most common wet condition snowboarders face, and while it is inconvenient, it is relatively predictable and manageable with the right gear.
Sleet (Ice Pellets)
Sleet occurs when snow melts into rain in a warm layer of air aloft, then refreezes into ice pellets before reaching the ground. Sleet is less common than rain at ski resorts but more dangerous because the ice pellets create a surface that is simultaneously wet and abrasive. Riding in sleet is like riding in sandpaper rain—the tiny ice pellets sting exposed skin and can damage goggle lenses. Sleet also accumulates differently than rain, creating a thin crust that can catch edges unexpectedly.
Freezing Rain (The Most Dangerous)
Freezing rain is the worst-case scenario for snowboarders. It occurs when rain falls through a shallow layer of freezing air near the ground. The rain remains liquid until it contacts a surface, where it instantly freezes. On a ski mountain, freezing rain coats everything—trees, lifts, chairs, and the snow surface—in a layer of ice. This is extremely dangerous for several reasons: chairlifts may shut down due to ice accumulation on cables, the snow surface becomes an unskiable sheet of ice, and the ice buildup on your gear can add significant weight. Most resorts will close operations during freezing rain due to safety concerns.
The Good, The Bad, and The Soggy
Before you brave the elements, it is crucial to understand the trade-offs. Riding in the rain is a polarizing experience; you will either love the solitude or hate the moisture. Let us break down why you might want to head out, and why you might want to stay in.
The Pros: Why Bother?
1. Empty Slopes: This is the biggest selling point. The moment raindrops start falling, 90% of the resort population disappears. The lift lines vanish instantly. You can lap the mountain continuously without waiting, and the trails are wide open. If you hate crowds, a rainy day is your paradise. Many seasoned riders actually plan their trips around rain forecasts specifically for this reason.
2. Hero Snow: Rain transforms the snowpack. It melts the icy top layer, creating a soft, dense surface often referred to as “hero snow” or “cream cheese.” This snow is incredibly forgiving. Your edges sink in deep, allowing you to lay out massive carves without the fear of skidding out on ice. It is soft enough to cushion falls but firm enough to hold a line. If you are learning how to carve on a snowboard, this texture makes you feel like a pro.
3. Soft Landings: If you are a park rider or trying to learn new tricks, rain softens the landings significantly. The snow becomes heavy and slushy, which absorbs impact much better than hard-packed winter snow. It is a great time to practice that list of snowboarding tricks you have been working on, provided you have waterproof pants. Many professional snowboarders use rainy conditions specifically for learning new tricks because the penalty for failure is dramatically reduced.
4. Improved Edge Control: Here is something most riders do not realize: rain-softened snow is actually easier to carve than icy or hard-packed snow. The softened surface allows your edges to engage more deeply, which means you have more control over your turns. Many intermediate riders find that their carving actually improves in wet conditions because they can trust their edges to bite. This is particularly beneficial for riders working on their transition from skidded turns to carved turns.
5. Better for Learning: Rain snow is perhaps the best learning surface for beginners. It is soft enough to cushion falls, forgiving enough to allow for mistakes, and slow enough to build confidence. The heaviness of the snow naturally controls speed, which means new riders can focus on technique without worrying about runaway speed. Many snowboard schools actually prefer teaching in light rain conditions because students fall less often and learn faster.
6. Unique Aesthetic and Experience: There is something magical about being on a mountain when everyone else has left. The fog creates an otherworldly atmosphere, the trees drip with moisture, and the silence of an empty mountain is profound. Many riders describe rainy days as some of their most memorable experiences—not because of the conditions, but because of the solitude and the sense of accomplishment that comes from riding when others would not.
The Cons: The Soggy Reality
1. The Wetness Factor: Water is relentless. Unlike snow, which sits on top of your gear, rain actively tries to penetrate it. Once your base layers get wet, your body temperature drops rapidly. Hypothermia is a genuine risk, even in temperatures above freezing, because water conducts heat away from the body 25 times faster than air. This is not an exaggeration—it is physics. A wet cotton base layer can turn a mild 40°F day into a hypothermia emergency in under an hour.
2. The “Suction” Effect: Wet snow has high water content, which creates a vacuum seal against the base of your snowboard. This is known as “suction.” On flat sections or cat tracks, it can feel like someone grabbed your leash and yanked you backward. You need to maintain speed constantly, or you will be unstrapping and walking. This effect is particularly pronounced on older bases that have not been waxed recently or that have lost their factory structure.
3. Visibility Issues: Rain creates a unique visibility challenge. It does not just block your view like falling snow; it sticks to your goggle lens. Wiping it often smears the water, creating a blurry mess. Additionally, rain usually comes with flat light and fog, making it difficult to see bumps and terrain changes. The combination of water on your lens and flat ambient light can reduce visibility to just a few feet in extreme cases.
4. Gear Degradation: Rain days are hard on equipment. Water can penetrate bindings, causing rust on screws and ratchets. Boot liners become saturated and heavy. Board bases can develop surface rust on edges within hours of exposure. Over time, repeated rain days without proper maintenance can significantly reduce the lifespan of your equipment. Budget an extra 30 minutes after every rain day for thorough gear maintenance.
5. Physical Exhaustion: Riding in heavy slush is significantly more physically demanding than riding on groomed runs. The wet snow creates resistance against your board, requiring more effort to initiate turns and maintain momentum. Your legs will fatigue faster, your core will work harder, and you will likely feel more exhausted after a half day of rain riding than a full day of normal conditions. This increased physical demand can lead to sloppy technique and increased injury risk if you are not properly conditioned.
6. Cold and Wet Descent: The chairlift ride up is often the worst part of a rain day. You are sitting still, exposed to the rain, with wet gear acting as a conductor for heat loss. Many riders describe the lift ride as the moment when misery peaks—your goggles fog, your gloves drip, and the wind chill amplifies the cold. This is why smart rain riders bring extra insulation specifically for lift rides, removing it when they reach the top and need mobility.

Regional Rain Riding Guide: Where Wet Days Are the Norm
Rain riding is not created equal across different mountain ranges. The frequency, intensity, and character of wet conditions vary dramatically based on geography, elevation, and local climate patterns. Understanding your region’s specific rain characteristics helps you prepare more effectively and set realistic expectations for what you will face on the hill.
Pacific Northwest: The Rain Capital of Snowboarding
If there is a holy land of rain riding, it is the Pacific Northwest. Resorts like Stevens Pass, Crystal Mountain, Mt. Baker, and Timberline experience rain at varying elevations throughout the season with remarkable frequency. The PNW’s unique geography—mountains rising directly from the Pacific Ocean—creates a conveyor belt of moist maritime air that dumps precipitation on the slopes. On average, PNW resorts experience measurable rain 20-40 days per season, with some lower-elevation areas seeing even more.
The character of PNW rain riding is distinct from other regions. The snow tends to be heavy, wet, and dense—often called ” Cascade Concrete.” This snow has a high water content, which means it is slow, suctiony, and physically demanding to ride. However, it is also incredibly forgiving and edge-able when properly waxed. PNW riders have developed a culture around rain riding that embraces the conditions rather than fighting them. You will see riders at Mt. Baker wearing garbage bags as ponchos, rubber gloves on their hands, and grins on their faces.
The key to PNW rain riding is layering strategy. Because temperatures hover in the mid-30s to low-40s Fahrenheit, you need less insulation than a cold Montana day but significantly more waterproofing. Most experienced PNW riders use a shell-and-layer system rather than an insulated jacket. This allows them to regulate temperature more effectively—adding layers for the lift ride, stripping down for the descent. The shell blocks rain while the layers underneath provide adjustable warmth.
Best PNW resorts for rainy day riding: Crystal Mountain has the highest elevation, so you can sometimes escape the rain by riding to the top. Stevens Pass has extensive tree skiing that provides some shelter from direct rain. Mt. Baker receives the most snowfall in North America, so even on rain days, the upper mountain often receives snow. Timberline on Mt. Hood offers year-round riding, including rainy summer days when the glacier provides reliable snow at higher elevations.
Japan: When Ocean Moisture Meets Cold Air
Japan’s snowboarding regions—particularly Niseko, Hakuba, Nozawa Onsen, and Myoko Kogen—experience a unique meteorological phenomenon called the Siberian Express. Cold air from Siberia picks up moisture as it crosses the Sea of Japan and dumps enormous quantities of snow on the Japanese Alps. This same mechanism can produce rain, particularly at lower elevations and during transition periods between winter and spring.
Japanese rain riding differs from North American rain riding in several important ways. First, the snow quality in Japan is legendary—the famous “Japow” is light, dry, and incredibly deep. When rain occurs, it tends to be at lower elevations while the upper mountain continues to receive snow. This creates a distinct stratification where the base area might be wet and rainy while the summit is powder paradise. Savvy riders in Japan learn to use the gondola to bypass the rain zone entirely.
Second, Japanese resorts tend to have better infrastructure for dealing with wet conditions. Many onsen (hot spring) resorts have indoor drying rooms, boot warmers, and gear storage areas designed for wet equipment. The cultural norm of visiting an onsen after riding means that getting wet is less of a concern—there is a hot bath waiting at the end of the day. This infrastructure makes rain riding in Japan more comfortable than in many North American destinations.
The biggest challenge for international visitors riding in Japanese rain is the combination of wetness and cold. Japan’s coastal mountains can experience temperatures that hover right at the rain-snow boundary, creating periods of mixed precipitation that are confusing to navigate. One run might be snow, the next rain, and the third sleet. Layering becomes critical, and the ability to add or remove insulation quickly is essential for comfort.
New England & East Coast: The Wild Card
East Coast skiing and snowboarding is defined by its variability. Resorts like Killington, Stowe, Sunday River, Jay Peak, and Sugarloaf experience dramatic temperature swings that can produce rain, snow, ice, and everything in between—sometimes within the same day. New England riders are perhaps the most adaptable in North America because they have no choice. When your season pass costs $1,500 and winter only lasts three months, you ride whatever the mountain gives you.
Rain on the East Coast is different from rain in the PNW. East Coast rain events tend to be warmer (temperatures in the 40s and 50s Fahrenheit) and more associated with weather systems that bring dramatic temperature changes. A day might start with rain, transition to snow as a cold front passes, and then produce ice as temperatures plummet. East Coast riders call this “the roller coaster” and have learned to check weather radar obsessively throughout the day.
The snow quality on the East Coast after rain is notoriously variable. If rain is followed by a hard freeze, the mountain can transform into an ice rink overnight. This creates the dreaded “bulletproof” conditions that East Coast riders both fear and respect. However, if the temperature stays warm after the rain, the snow becomes a soft, heavy slush that is surprisingly fun to ride. The key is timing—riding during or immediately after the rain (before a freeze) often produces the best conditions.
East Coast rain riding tip: Many East Coast resorts have extensive snowmaking capabilities. When rain washes out natural snow, resorts can often rebuild the base with man-made snow within 24-48 hours. This means that even after a devastating rain event, conditions can recover quickly. Check your resort’s snowmaking report before writing off the day entirely.
Europe & The Alps: Altitude is Your Friend
European alpine resorts like Chamonix, Verbier, Zermatt, St. Anton, and Courchevel benefit from high base elevations that often keep precipitation as snow rather than rain. However, climate change has increasingly pushed the rain-snow line higher, and lower-elevation European resorts now experience rain more frequently than they did a generation ago. Southern European resorts in Spain, Italy, and Greece are particularly affected.
The European approach to rain riding differs from North America in terms of infrastructure. Many Alpine resorts have invested heavily in gondola and cable car systems that can operate in wet conditions. The enclosed cabins provide a warm, dry refuge between runs—a luxury that open chairlifts cannot match. European riders also tend to favor more technical, narrow terrain that provides natural shelter from rain through tree cover and mountain terrain.
One unique aspect of European rain riding is the prevalence of “föhn” winds—warm, dry winds that descend the leeward side of mountains. These winds can create pockets of clear, warm conditions even during widespread rain events. Experienced European riders learn to identify which aspects and elevations are sheltered from rain by studying wind patterns and aspect. South-facing slopes tend to warm up faster and can transition from rain to soft slush more quickly than north-facing aspects.
Essential Waterproof Gear: The Garbage Bag Defense
Your standard cold-weather kit will not suffice in a downpour. Insulation like down feathers collapses when wet, losing all heat-retention properties. Cotton acts like a sponge and is famously nicknamed “the death fabric” in the outdoors. You need a dedicated wet-weather strategy.
The Perfect Layering System for Rain Days
The foundation of rain riding comfort is a properly configured layering system. Unlike cold-weather layering, which prioritizes warmth, rain layering prioritizes moisture management and waterproofing. The system consists of three distinct layers, each serving a specific purpose.
Layer 1: Base Layer (Moisture Wicking)
Your base layer sits directly against your skin and is responsible for moving sweat away from your body. In rain conditions, this layer becomes even more critical because you are fighting moisture from two directions: rain from outside and sweat from inside. Never wear cotton. Cotton absorbs moisture and holds it against your skin, creating a cooling effect that accelerates heat loss. Instead, choose synthetic materials like polyester or polypropylene, or natural alternatives like merino wool.
Merino wool is particularly effective for rain riding because it can absorb up to 30% of its weight in moisture before feeling wet, and it retains insulating properties even when damp. Synthetic base layers dry faster and are more affordable, making them a practical choice for riders on a budget. The ideal base layer for rain riding is thin enough to wick moisture quickly but substantial enough to provide some insulation when the temperature drops.
Layer 2: Mid Layer (Insulation)
The mid layer provides warmth and can be adjusted based on conditions. For rain riding, avoid down insulation entirely—down loses all insulating properties when wet and takes forever to dry. Instead, choose synthetic insulation like PrimaLoft or fleece. These materials maintain warmth even when damp and dry significantly faster than down.
The key innovation in modern rain riding is the removable mid layer system. Rather than a single insulated jacket, many riders now use a thin shell jacket over a separate insulated vest or pullover. This allows you to remove the mid layer on warmer days or when you are working hard, then add it back for lift rides or when the temperature drops. This modular approach provides maximum flexibility in variable conditions.
Layer 3: Shell (Waterproof Barrier)
The shell is your primary defense against rain. This is where you should invest the majority of your gear budget. A high-quality waterproof shell jacket and pants form a complete barrier between you and the elements. Look for a minimum waterproof rating of 20,000mm (20k) for sustained rain conditions, though 30,000mm (30k) or higher is preferable for extended wet-weather riding.
The construction of the shell matters as much as the waterproof rating. 3-Layer (3L) construction bonds the waterproof membrane directly between the outer fabric and an inner lining, creating a single, unified material that is more durable, more breathable, and lighter than 2-Layer construction. 2L shells have a separate hanging liner that can trap moisture and reduce breathability. For serious rain riding, 3L construction is worth the premium price.
Understanding Hydrostatic Head Ratings
When shopping for rain gear, you will encounter “hydrostatic head” ratings measured in millimeters (mm). This number indicates how much water pressure a fabric can withstand before it leaks through. Think of it as a measure of waterproofness—the higher the number, the more waterproof the fabric.
| Rating | Protection Level | Best For |
|---|---|---|
| 5,000mm – 10,000mm | Light Rain | Dry conditions with occasional showers; short exposure |
| 10,000mm – 15,000mm | Moderate Rain | Light to moderate rain for several hours; most resort riders |
| 15,000mm – 20,000mm | Heavy Rain | Sustained rain for full days; Pacific Northwest riders |
| 20,000mm – 30,000mm | Severe Rain | All-day exposure in heavy rain; professional guides |
| 30,000mm+ | Extreme Conditions | Expedition-level waterproofing; multi-day wet exposure |
It is important to understand that hydrostatic head rating is not the only factor in waterproof performance. Breathability is equally important, especially for active riders who generate significant body heat. A jacket with a 30,000mm rating but poor breathability will trap sweat inside, leaving you just as wet as if the rain had penetrated. Look for jackets that specify both waterproof and breathability ratings, ideally with both numbers in the 20,000+ range.
The most common waterproof technologies include Gore-Tex, eVent, Dermizax, and proprietary brand systems like Burton’s Dryride or Volcom’s V-Science. Gore-Tex remains the gold standard, particularly their 3L Pro and Active lines, which offer the best balance of waterproofness and breathability. However, proprietary systems have narrowed the gap significantly, and some offer comparable performance at lower price points.
A critical maintenance tip: waterproof ratings degrade over time as the DWR (Durable Water Repellent) coating on the outer fabric wears off. When water stops beading on your jacket and starts “wetting out” (soaking into the outer fabric), it is time to re-apply DWR treatment. This can be done at home with wash-in treatments like Nikwax TX.Direct or spray-on treatments like Revivex. Maintaining your DWR coating is the single most important thing you can do to extend the life and performance of your rain gear.
Gloves & Hand Protection: The Battle Against Wet Fingers
Your hands are often the first casualty of rain riding. Wet, cold hands are not just uncomfortable—they are dangerous. Numb fingers cannot grip properly, which affects your ability to adjust bindings, hold poles (if you use them), and maintain balance. Worse, severe cold exposure can cause permanent nerve damage in extreme cases.
The fundamental problem with snowboard gloves in rain is that they are designed to trap warmth, not repel water. Most standard snowboard gloves use leather or synthetic leather palms for grip and warmth, but these materials absorb water over time. Even “waterproof” gloves eventually saturate because water enters through seams, wrist openings, and the fabric itself. The solution is to choose gloves specifically designed for wet conditions or to use a multi-layer approach.
Rubber Gloves: The Secret Weapon
Many professional snowboard guides and instructors in the PNW use heavy-duty rubber gloves as their primary hand protection. These are the same type of gloves used by commercial fishermen and crabbers—they are completely waterproof, surprisingly warm, and extremely durable. The trade-off is reduced dexterity and no breathability, but for rain riding, waterproofness trumps everything.
The most popular rubber gloves for snowboarding are the Showa 282 gloves, which cost around $15-20 and are virtually indestructible. Some riders add a thin fleece liner underneath for warmth. Others use the gloves over their regular snowboard gloves for a two-layer system that provides both warmth and complete waterproofing. The bright orange color of many rubber gloves also makes them easy to find if you drop them in the snow.
The Multiple Pair Strategy
If you prefer traditional snowboard gloves, the simplest solution is to bring multiple pairs. Pack two or three pairs of gloves in a waterproof bag, and swap them out as they become saturated. By the time your third pair is wet, your first pair may have partially dried. This rotation system keeps your hands functional throughout the day. Store wet gloves near a heat source during lunch to accelerate drying.
Glove Care and DWR Treatment
Before the season starts, treat your gloves with a waterproofing agent like Sno-Seal, Nikwax, or Obenauf’s. These products restore the DWR coating on leather and synthetic materials, significantly improving water resistance. Re-apply treatment every 10-15 days of riding, or whenever water stops beading on the surface. Properly maintained gloves can last two to three times longer than untreated ones.
Keeping Your Boots Dry: The Foundation of Comfort
Wet boots are arguably worse than wet gloves. Once water penetrates your boot liner, it creates a cold, heavy mass around your foot that ruins the day. Wet liners also take multiple days to dry completely, which can end a multi-day trip if you only brought one pair of boots. Prevention is far easier than recovery.
The first line of defense is your outerwear. Make sure your snowboard pants have internal gaiters that seal around the top of your boots. These gaiters prevent water from running down your pant legs and into your boots—a common entry point that many riders overlook. Tuck your pant gaiters inside your boots or secure them with the built-in hooks to create a complete seal.
Boot-specific waterproofing products can also help. Silicone-based sprays applied to the outer shell create a hydrophobic barrier that causes water to bead and run off. Wax-based treatments applied to leather shells provide similar protection. For the liner itself, consider using waterproof boot bags or covers during transport to prevent water from penetrating before you even reach the mountain.
The most important habit for dry boots is the post-ride drying routine. Remove liners from shells immediately after riding. Pull out the insoles and tongue inserts. Stuff the liners with newspaper or specialized boot dryers to absorb internal moisture. Place everything in a warm, dry area—but not directly on a heater, as excessive heat can warp shells and melt liner foam. Some resorts offer boot drying services or have communal drying rooms; use them whenever available.

Rain-Specific Snowboard Pants
While jackets get most of the attention, your pants are equally important for rain riding. Water running down your jacket drips onto your waist and hips, and your legs are constantly exposed to spray from your board. Rain-specific pants need to be at least as waterproof as your jacket, with reinforced seams and sealed zippers to prevent water intrusion.
The most important feature in rain-specific pants is the ventilation system. Because rain riding often occurs at temperatures above freezing, you will generate significant body heat. Without adequate ventilation, sweat accumulates inside your pants, creating the same wet-cold problem that rain causes. Look for pants with zippered thigh vents or mesh-backed vents that allow air circulation without compromising waterproofness.
Ankle gaiters are another critical feature. These internal fabric seals wrap around your boot tops and prevent water from entering through the pant cuffs. In heavy rain, water can run down your legs and pool at your ankles—without gaiters, this water flows directly into your boots. Make sure your pants have adjustable gaiters with secure hooks or Velcro closures.
The fit of rain-specific pants also matters more than in cold conditions. Tight pants trap moisture against your body and restrict movement, while overly loose pants can catch on lift equipment and tree branches. Aim for a “relaxed fit” that allows layering underneath without being baggy. Many brands now offer pants specifically designed for PNW conditions, with features like reinforced seat panels (for sitting on wet chairlifts), waterproof pockets (for phones and wallets), and articulated knees (for better mobility).
Goggle Management: Seeing Through the Storm
If you cannot see, you cannot ride. Managing your eyewear is arguably the most annoying part of rain riding. Unlike snow, which can be brushed off, rain smears. The interaction between water, lens coatings, and temperature creates a complex optical challenge that requires specific strategies to overcome.
Lens Selection: Brighter is Better
Rainy days are dark. The clouds are thick and heavy, reducing ambient light to a fraction of what you experience on a clear day. You absolutely need a high-VLT (Visible Light Transmission) lens. Clear, Yellow, or Rose tints are your best friends. Do not wear your dark “blacked out” sunny lenses; you will be riding blind. Cylindrical lenses (flat) are sometimes better than spherical (bubble) lenses in the rain because they are easier to wipe clean without distorting the view.
Understanding VLT ratings helps you choose the right lens. VLT is measured as a percentage, with higher numbers allowing more light through the lens. For rain riding, you want a VLT of at least 50%, and ideally 70% or higher. Clear lenses (VLT 80-100%) are the ultimate choice for heavy rain and fog, as they allow maximum light transmission. Yellow lenses (VLT 55-75%) enhance contrast in flat light, making it easier to see terrain features that would otherwise blend together.
Lens technology has advanced significantly in recent years, and several new technologies specifically address rain-riding challenges. Photochromic lenses automatically adjust their tint based on light conditions, darkening in bright light and lightening in dim conditions. While they cannot match the light transmission of a dedicated clear lens, they provide a versatile option for days when conditions change frequently. Mirrored coatings should be avoided for rain riding because they reduce light transmission and can create additional glare when wet.
The “No-Wipe” Rule
Once your goggles get wet, your instinct is to wipe them with your glove. DO NOT DO THIS. Your glove is wet and abrasive. You will smear the water into a blurry film and potentially scratch the lens. Instead, carry a dry microfiber cloth in a waterproof internal pocket. Dab the lens dry; do not rub. If the inside of the lens gets wet, head to the bathroom hand dryer (use cool air only) to dry it out. Once moisture is inside the dual-pane lens, it will fog continuously.
The anti-fog coating on goggle lenses is a thin chemical treatment that reduces surface tension, preventing water vapor from forming droplets. This coating is extremely fragile and can be destroyed by a single wipe with a wet glove. Once the coating is damaged, the lens will fog regardless of conditions. The only solution is to replace the lens entirely. This is why the no-wipe rule is so critical—it protects an irreplaceable coating that is essential for clear vision.
The Visor Hack
This is a secret of the trade. If you wear your goggles under your helmet, the helmet brim acts as a small umbrella. Even better, wear a baseball cap under your helmet (remove the padding if needed) so the bill sticks out. This physical overhang keeps a significant amount of rain off your lens and keeps the top vents of the goggles dry, preventing fog.
The physics behind the visor hack is simple: rain falls at an angle, and a protruding brim intercepts the rain before it reaches your goggle lens. This can reduce water accumulation on the lens by 60-80%, dramatically improving visibility throughout the day. Some helmet brands now offer integrated visors or brim extensions specifically designed for this purpose. If your helmet does not have a brim, aftermarket visors are available that clip onto most helmet designs.
Goggle Vents and Fog Management
Fog is the enemy of rain riding. It forms when warm, moist air from your face contacts the cold inner surface of the goggle lens. Rain exacerbates this problem because water on the outer lens cools the glass further, creating a larger temperature differential that accelerates fog formation. Managing fog requires understanding how airflow works within your goggles.
Most snowboard goggles have ventilation ports along the top and bottom of the frame. These ports allow air to circulate through the goggle, carrying away moisture before it can condense on the lens. In rain conditions, these vents can become blocked by water, reducing airflow and increasing fog. The visor hack helps protect the top vents from direct rain, but you should also periodically check and clear the vents throughout the day.
A common mistake is wearing a scarf, balaclava, or neck gaiter that covers the bottom vents of your goggle. This blocks the exhaust path for moist air, causing it to recirculate and fog the lens. Make sure any face protection you wear sits below the goggle frame or has a channel that allows air to escape from the bottom of the goggle. Some riders trim their balaclavas to create a dedicated vent channel, though this reduces the warmth of the garment.
For recommendations on eyewear that handles ventilation well, see our guide to the best snowboard goggles.
Backup Goggle Strategy
For dedicated rain riders, carrying a backup pair of goggles is essential. Even with perfect technique, moisture can eventually penetrate the lens seal or the anti-fog coating can degrade. A backup pair provides insurance against equipment failure. Many riders carry a clear lens as a backup, storing it in a waterproof pouch in their jacket. If your primary lens fogs beyond recovery or gets scratched, switching to the backup pair takes less than a minute and can save the rest of your day.
Some riders also carry a spare lens (just the lens, not the full goggle) that can be swapped in if conditions change. Most modern goggles feature magnetic or clip-in lens systems that allow quick swaps without removing the goggle from your face. This versatility is particularly valuable on days when conditions shift from rain to snow or when fog clears and sun breaks through.
Rain Day Board Setup: Tuning for Wet Conditions
As mentioned, wet snow creates suction. The water film creates a vacuum seal against your base. To break this, you need to adjust your setup. Your board’s base condition, wax, and edge tuning all play critical roles in how it performs in wet conditions.
Waxing for Wet Snow: The Hydrophobic Solution
Standard “Universal” wax is okay, but specific “Warm” or “Spring” wax (usually yellow or red in color) is formulated with softer paraffin and more hydrophobic additives. These additives (like molybdenum or graphite) repel water more aggressively than cold-temp waxes. Applying a fresh coat before a rain day is mandatory if you want to maintain speed.
The science behind warm-temperature wax involves the melting point and surface energy of the wax. Cold waxes are harder and designed to repel snow crystals in dry, cold conditions. Warm waxes are softer and designed to create a hydrophobic surface that repels liquid water. When you apply warm wax, the softer paraffin fills the microscopic pores in your base more completely, creating a smoother surface that water cannot cling to. The result is a board that glides smoothly through wet snow rather than suctioning to it.
For rain day waxing, apply two to three coats of warm-temperature wax rather than the standard single coat. Each coat builds upon the last, creating a thicker hydrophobic barrier. Allow each coat to cool completely before applying the next, and scrape the final coat when the wax is still slightly warm—this prevents the scraper from skipping and creating an uneven surface. The extra time invested in multiple coats pays dividends in glide performance throughout the day.
If you are DIY-ing this, check out our guide on how to wax a snowboard at home and consider buying a structuring tool.
Edge Tuning & Base Structure for Wet Conditions
If you look closely at a race board, the base is not smooth; it has tiny grooves cut into it. This is called “structure.” In cold, dry snow, you want a fine structure. In wet, heavy rain-snow, you want a coarse, deep structure. These grooves act like the treads on a tire, channeling the water away from the base and breaking the suction seal. If you ride in the PNW often, ask your local shop for a “stone grind with a wet structure.” It makes a massive difference on the cat tracks.
Base structure works by breaking the surface tension of the water film between your base and the snow. Without structure, the water forms a continuous film that creates a vacuum seal—the suction effect. With structure, the grooves provide channels for water to escape, preventing the vacuum from forming. The deeper and wider the structure pattern, the more effective it is at preventing suction. However, deep structure creates more friction in cold, dry snow, so it should only be used when conditions warrant it.
Edge tuning for wet conditions involves a different approach than cold-weather tuning. In cold conditions, sharp edges provide maximum grip on ice. In wet conditions, edges that are too sharp can catch unpredictably in the soft snow, leading to sudden stops and falls. Many rain riders slightly detune their edges—reducing the sharpness by a degree or two—to create a smoother release that is less likely to catch in variable snow. A good rule of thumb is to have edges sharp enough to grip on hardpack but not so sharp that they grab aggressively in soft snow.
The edge bevel angle also affects performance in wet conditions. A standard 1-degree base bevel with a 2-degree edge bevel provides a good balance for mixed conditions. For dedicated rain riding, some riders increase the base bevel to 1.5 or 2 degrees, which lifts the edge slightly off the snow and reduces the tendency to catch. This modification reduces grip on ice but improves smoothness in wet snow.
DIY Structure Tips
While stone grinding requires specialized equipment, you can add basic structure at home using a structure tool or a brass brush. A brass brush held at a 45-degree angle and dragged across the base creates diagonal grooves that provide basic water channeling. While not as effective as a professional stone grind, this technique can meaningfully improve wet-weather performance. For best results, apply structure after your final wax coat and before the final scrape.
Best Board Types for Wet Conditions
Not all snowboards perform equally in wet conditions. The board’s shape, flex, profile, and construction all influence how it handles heavy, saturated snow. While you can ride any board in the rain, certain characteristics provide meaningful advantages.
Directional Shapes and Tapered Profiles
Directional boards—those designed to be ridden primarily in one direction—tend to perform better in wet conditions than true twin shapes. The setback stance and directional profile shift weight toward the tail, which helps prevent the nose from diving into heavy snow. Tapered shapes, where the nose is wider than the tail, further improve performance by allowing the nose to float on top of wet snow while the narrower tail sinks and provides control.
Flex Rating Considerations
Moderate to slightly stiffer flex works best in wet conditions. Very soft boards can get bogged down in heavy snow, requiring more effort to initiate turns. Very stiff boards can feel unforgiving when hitting unexpected piles of heavy snow. A mid-stiff flex (around 6-7 out of 10) provides enough response to handle wet conditions without being overly demanding on the rider.
Base Material and Construction
Sintered bases absorb more wax than extruded bases, making them better suited for rain riding. A properly waxed sintered base will outperform an extruded base in wet conditions by a significant margin. If you ride in wet conditions regularly, investing in a board with a sintered base is worthwhile for the improved wax retention and glide performance.
Profile Selection
Hybrid profiles that combine camber underfoot with rocker at the tips tend to work well in wet conditions. The camber section provides edge hold and responsiveness, while the rocker tips help prevent the nose from catching in heavy snow. Full camber profiles can work but require more aggressive technique, while full rocker profiles may lack the edge hold needed for variable wet conditions.

Adjusting Your Riding Technique
Slush and rain-soaked snow are heavy. It weighs roughly three times as much as powder. This means your board will react differently, and you need to adjust your body mechanics. The techniques that work perfectly on groomed corduroy will feel awkward and inefficient in wet conditions. Here is how to adapt.
Slush Riding Mastery: The Fundamentals
The most important technique adjustment for slush riding is maintaining momentum. Wet snow creates tremendous drag, and your speed decays much faster than on groomed runs. You need to enter every section with more speed than you think necessary, because by the time you reach the flat section, you will have already lost significant velocity. Think of it as riding through invisible molasses—the snow is constantly trying to slow you down.
Weight Distribution
In powder, you lean back. In rain slush, you generally want to stay centered, but be ready to shift weight aft quickly if you hit a deep puddle of slush. If you put too much weight on the nose, the heavy snow can grab it and throw you over the handlebars (a “scorpion” crash). Keep your knees bent more than usual to absorb the uneven piles of “chunder” that form.
The ideal stance for slush riding is slightly more forward than your typical stance. This positions your center of gravity over the sweet spot of the board, where it can best resist the drag forces created by wet snow. Many riders find that moving their front binding forward by half an inch to one inch improves slush performance by shifting the effective contact point of the board forward, helping it plane on top of heavy snow rather than sinking into it.
Aggressive Edging
Because the snow is soft, you cannot be lazy with your turns. A lazy turn in heavy slush will catch an edge. You need to be dynamic. Use “jump turns” or unweight the board aggressively between turns to lift it out of the heavy snow before initiating the next edge. It takes more physical energy, so be prepared for your quads to burn.
Jump turns are particularly effective in slush because they allow you to temporarily escape the drag of the wet snow. By unweighting the board and lifting it off the surface, you can reposition it for the next turn without fighting against the suction effect. The technique involves a slight hop at the transition point between turns, combined with a shift of weight from one edge to the other. It looks effortless when done well but requires coordination and practice.
The “Surf” Technique
Many experienced slush riders describe their technique as “surf-like.” Rather than driving the board through turns with aggressive edge pressure, they allow the board to flow across the surface, using subtle weight shifts and body rotation to guide direction changes. This approach is more energy-efficient and produces smoother, more predictable turns in variable slush conditions. It requires a relaxed stance and a willingness to let the board find its own path through the snow.
Navigating Flat Sections: The Slush Killer
This is critical. Wet snow is slow. Always carry more speed than you think you need when approaching flat sections. If you see a puddle or a dark spot in the snow, that is water saturation—it will slow you down instantly. Try to ride around it or flat-base over it with your weight back. If you get stuck on a flat in the rain, unstrapping and skating is a miserable experience.
The physics of flat sections in wet conditions are unforgiving. On groomed snow, a flat section might cost you 10-15% of your speed. On wet slush, the same section can reduce your speed by 40-60% or more. The high water content creates a suction effect that acts like a brake on your base. The longer the flat section, the more speed you lose, and if you do not carry enough momentum to clear it, you will come to a complete stop in the middle of a wet, soggy expanse.
Strategy for flat sections begins with route planning. Before you drop in, identify the flat sections on the run and plan your line to either avoid them or approach them with maximum speed. If a flat section is unavoidable, position yourself to hit it with as much velocity as possible. Weight should be centered or slightly back to keep the nose from catching. Avoid any turning or edging on the flat itself—maintain a flat base and ride it out straight.
If you do get stuck, resist the urge to push with your back foot while still strapped in. This creates drag and rarely provides enough force to get moving again. Instead, unstrap your back foot, place it on the ground, and push off with strong, deliberate strokes. Once you have enough momentum, re-strap and continue. Some riders carry a small wax stick or rub-on wax in their pocket for emergencies—applying a quick coat of warm wax to your base before a flat section can provide just enough glide to make it through.
Park Riding in the Rain: A Different Beast
Rain transforms snowboard parks in ways that can be both beneficial and challenging. On the positive side, wet snow softens landings dramatically, reducing impact force and making it easier to try new tricks without fear of injury. The forgiving surface encourages progression and experimentation. However, the same wet snow that softens landings also makes features slippery and unpredictable, and the reduced speed from slush can make clearing gaps and jumps more difficult.
Box and Rail Adjustments
Metal and plastic features become extremely slick when wet. The combination of rain and the inherent smoothness of park features creates a friction-free surface that can send you sliding off the side before you reach the end. Approach features with a lower center of gravity and more forward weight than you would in dry conditions. This helps maintain balance on the feature and provides better control when exiting.
The snow around features also changes character in wet conditions. Take-offs become soft and slushy, which can reduce your launch speed. You may need to approach jumps with more speed than usual to clear the same distance. Landings become heavy and can grab your board if you do not maintain speed through the landing zone. Plan your line to carry speed through the entire feature, from approach to landing to run-out.
Halfpipe in the Rain
A halfpipe in rain conditions is a unique challenge. The walls become soft and slushy, which cushions falls but makes carving up the walls more physically demanding. The flat bottom of the pipe collects water, creating puddles that can slow you down between walls. The coping (the metal edge at the top of the pipe) becomes extremely slippery when wet, making lip tricks and handplants significantly more difficult.
The key to riding a pipe in the rain is maintaining speed through the flat bottom. Pump the transitions aggressively and keep your weight forward through the flat section. If the pipe has puddles, try to ride through them with a flat base rather than edging, which can catch unexpectedly. For aerial tricks, remember that your launch speed will be lower due to the slush, so adjust your trick selection accordingly.
Speed Management in Wet Conditions
Managing speed in wet snow is a delicate balance. You need enough speed to overcome the drag created by the water-saturated snow, but not so much that you lose control. The sweet spot varies based on the specific conditions—heavier, wetter snow requires more speed, while lighter, slushy snow requires less. Learning to read the snow and adjust your speed accordingly is a skill that develops with experience.
A helpful technique for speed management is the “pump and glide” rhythm. Between turns, allow the board to glide naturally while maintaining a centered stance. At the transition point between turns, actively pump the board—applying pressure and releasing—to generate bursts of speed that counteract the drag. This rhythmic approach is more efficient than constant aggressive riding and helps conserve energy throughout the day.
Another consideration is the “speed check” in wet conditions. On groomed runs, a quick edge check can reduce your speed dramatically. In slush, the same edge check produces less deceleration because the soft snow cannot provide the same resistance. Plan your speed checks earlier and use more exaggerated movements to achieve the same reduction in velocity. Overestimating the effectiveness of speed checks in wet conditions is a common mistake that leads to loss of control.
Temperature & Conditions Guide: What to Expect at Every Degree
The temperature at the mountain dictates everything from your gear choices to your technique adjustments. Understanding how different temperatures affect snow conditions helps you prepare more effectively and set realistic expectations for the day.
| Temperature Range | Conditions | Challenges | Strategy |
|---|---|---|---|
| 28°F – 32°F (-2°C to 0°C) | Heavy, wet snow; borderline rain | Mixed precipitation; variable conditions across mountain | Check altitude—higher elevations may have snow while base has rain |
| 33°F – 38°F (1°C to 3°C) | Rain at base, wet snow above; heavy slush | Maximum suction effect; fastest gear saturation | Warm wax essential; ride higher elevations when possible |
| 39°F – 45°F (4°C – 7°C) | Full rain; snow turns to slush and eventually melts | Rapid snow deterioration; exposed dirt and rocks | Focus on upper mountain; avoid thin cover areas |
| 46°F – 50°F (8°C – 10°C) | Heavy rain; slush only on highest aspects | Extreme snow loss; limited terrain; warm and wet | Spring gear approach; light layers; maximum waterproofing |
| 50°F+ (10°C+) | Warm rain; snow rapidly disappearing | Near-summer conditions; limited rideable terrain | Consider whether riding is worth it; focus on slush bumps and corn snow |
The “freeze-thaw cycle” is particularly important to understand. When temperatures fluctuate around 32°F (0°C), the snow surface goes through repeated cycles of melting and refreezing. During the day, the surface softens and becomes slushy. At night, it refreezes into a hard, icy surface. The next morning, before the sun softens the surface again, you get “bulletproof” ice that is extremely difficult and dangerous to ride. This cycle is responsible for some of the best and worst conditions in snowboarding—it creates soft, forgiving slush in the afternoon but dangerous ice in the morning.
Understanding the freeze-thaw cycle helps you time your rides for optimal conditions. If the temperature dropped below freezing overnight and is warming in the morning, wait for the sun to soften the surface before heading out. Most resorts see the best conditions between 10 AM and 2 PM on freeze-thaw days, when the surface has softened but before it becomes too slushy. Riding too early on a freeze-thaw day is a common mistake that leads to frustrating, icy conditions.
Temperature also affects how you should configure your layering system. In the 28-35°F range, you need substantial insulation under your shell. In the 35-45°F range, a thin mid layer or even just a base layer under your shell may be sufficient. Above 45°F, many riders find that a shell over a base layer is too warm, and opt for a lightweight shell or even a waterproof hoodie. The key is to be able to add or remove layers quickly, which is why the layering system is so important.
Safety Considerations: Staying Alive in Wet Conditions
Rain riding introduces safety risks that do not exist in cold, dry conditions. Understanding these risks and how to mitigate them is essential for every rider who ventures out in wet weather.
Hypothermia Prevention: The Silent Killer
Hypothermia is the most serious risk associated with rain riding, and it is frequently underestimated. Many riders assume that hypothermia only occurs in extreme cold, but wet conditions at temperatures well above freezing can produce hypothermia faster than most people realize. The reason is simple: water conducts heat away from the body 25 times faster than air. A wet base layer at 40°F removes heat from your body more rapidly than dry clothing at 20°F.
Hypothermia progresses through three stages. The first stage is mild hypothermia, characterized by shivering, difficulty with fine motor tasks (like buckling bindings), and impaired judgment. The second stage involves violent shivering, confusion, and loss of coordination. The third stage is severe hypothermia, which can be life-threatening. The critical thing to understand is that judgment impairment occurs early in the process. By the time you feel dangerously cold, you may already be too impaired to make good decisions about seeking shelter or removing yourself from the mountain.
Prevention strategies include the layering system described earlier, regular warming breaks at the lodge, and the buddy system—riding with a partner who can watch for signs of hypothermia in you while you watch for them. Carry high-calorie snacks (chocolate, energy bars) because your body burns more calories in wet conditions as it works to maintain core temperature. Dehydration accelerates hypothermia, so drink water regularly even if you do not feel thirsty.
The post-ride period is also critical for hypothermia prevention. Your body temperature continues to drop after you stop riding, especially if you are still wearing wet clothing. Change into dry clothes as soon as possible after leaving the mountain. A hot shower or bath helps restore core temperature, but avoid excessive heat immediately after prolonged cold exposure, as it can cause blood pressure to drop suddenly. Warm, gradual heating is safest.
Lightning & Thunderstorms: When to Get Off the Mountain
Rain at ski resorts is often associated with thunderstorm activity, particularly in spring and at lower elevations. Lightning is extremely dangerous on a mountain because you are the tallest object on the terrain. Chairlifts, exposed ridges, and open bowls are particularly hazardous during thunderstorm activity.
Most resorts have specific lightning safety protocols. If lightning is detected within a certain distance (usually 10-15 miles), resorts will halt lift operations and instruct riders to seek shelter. Follow these instructions immediately—do not try to get “one more run in.” Lightning can strike from storms miles away, and the electrical charge can travel through the ground (ground current) to reach you even if you are not directly under the storm.
If you are caught on the mountain during a thunderstorm, seek shelter in a building or vehicle if possible. If no shelter is available, avoid ridgelines, isolated trees, and bodies of water. Crouch low with your feet together and your head tucked—do not lie flat, as this increases your contact with the ground. Remove metal objects (bindings, belt buckles) if possible, as they can conduct electricity.
The “30-30 rule” provides a useful guideline: if the time between seeing lightning and hearing thunder is 30 seconds or less, seek shelter immediately. After the last thunder, wait 30 minutes before resuming activities. In mountainous terrain, these distances can be misleading because sound bounces off terrain features. When in doubt, err on the side of caution and get off the mountain.
Visibility Challenges: Flat Light and Fog
Rain rarely comes alone—it usually brings fog, low clouds, and “flat light” conditions that make it nearly impossible to see terrain features. Flat light occurs when uniform cloud cover eliminates shadows, removing the visual cues that help your brain interpret the shape and steepness of the terrain. In extreme flat light, you literally cannot see the snow surface, making every turn a leap of faith.
Several strategies help in flat light conditions. First, stay in the trees. Tree skiing and riding provides reference points that help your brain interpret speed and terrain shape, even in the worst visibility. The trees break up the uniform white field and give your visual system something to focus on. Many experienced riders consider flat-light tree riding to be some of the most enjoyable conditions on the mountain.
Second, slow down. When you cannot see terrain features, your reaction time to unexpected obstacles is dramatically reduced. Riding at reduced speed gives you more time to react to bumps, piles, and changes in terrain. This is particularly important on unfamiliar terrain where you do not know what features to expect.
Third, use your feet. In flat light, your feet become your primary sensory organs for terrain interpretation. Focus on the feedback from your board through your feet—feel for changes in snow texture, bumps, and transitions. This “feeling” approach to riding is a skill that develops with experience and becomes invaluable in low-visibility conditions.
Finally, use high-contrast goggle lenses. Yellow, rose, or persimmon lenses enhance contrast in flat light by filtering specific wavelengths of light. Some riders carry multiple lens options and switch based on conditions. A lens that works well in bright light may actually make flat light worse, so choose your lens based on the actual conditions, not what you hope they will be.
Rain Riding for Beginners: Turning a Bad Day into a Learning Opportunity
If you are new to snowboarding and find yourself facing a rain day, your first instinct might be to skip it and wait for better conditions. While that is a reasonable choice, there are compelling reasons to ride in the rain as a beginner—and specific techniques that can make the experience surprisingly productive.
Why Rain Can Be Good for Learning
Rain-softened snow is arguably the best learning surface for new riders. The softness cushions falls, reducing both pain and fear. The slower speed of slushy snow gives you more time to process and execute techniques. The forgiving surface allows you to experiment with edge angles and body positions without the severe consequences that ice or hardpack impose. Many snowboard instructors actually prefer teaching in light rain conditions because students progress faster and build confidence more quickly.
The reduced crowd on rainy days is another benefit for beginners. With fewer people on the mountain, you have more space to practice without worrying about collisions. The pressure to perform is lower, and the relaxed atmosphere can help ease the anxiety that many new riders experience. You can take your time, fall as many times as needed, and focus on technique without the social pressure of a crowded beginner area.
Essential Tips for Beginner Rain Riders
Start with the basics. Do not try to learn new advanced techniques on a rain day. Focus on fundamental skills like heel-side and toe-side turns, speed control, and stopping. The wet conditions make everything more challenging, so mastering the basics first builds a foundation that will serve you well when conditions improve.
Keep sessions short. Plan for 60-90 minute sessions with warm-up breaks in between. Wet conditions are physically demanding, and fatigue leads to poor technique and increased injury risk. A short, focused session with proper rest is more productive than a long, exhausting one.
Invest in proper gear. Even if you are renting equipment, make sure your outerwear is genuinely waterproof. A wet beginner who is cold and miserable will not learn effectively. The small investment in proper rain gear pays dividends in comfort and learning outcomes.
Ride with a friend. Having a riding partner provides safety, motivation, and someone to share the experience with. They can also provide feedback on your technique and help you identify areas for improvement. If you are taking lessons, a private lesson on a rainy day can be particularly valuable because the instructor’s full attention is on you.
Celebrate small victories. Riding in the rain as a beginner is an accomplishment in itself. Every successful turn, every recovered balance, every run completed without falling is worth celebrating. The mental toughness you develop by riding in adverse conditions will serve you throughout your snowboarding journey.
Spring & Warm Weather Riding: The Transition Season
Spring riding occupies a unique space in snowboarding culture. It is simultaneously loved and dreaded—loved for its warm temperatures, sunny skies, and festive atmosphere, and dreaded for its slushy conditions, variable snow, and the painful realization that the season is ending. Spring rain is a common occurrence, and understanding how to navigate spring conditions is essential for maximizing your end-of-season riding.
The Corn Snow Cycle
One of the most rewarding spring conditions is “corn snow”—a type of granular snow that forms through repeated melt-freeze cycles. During the day, the top layer melts into a soft, granular texture that is incredibly fun to ride. At night, it refreezes into a firm base. In the morning, before the sun reaches the slope, the surface is icy and firm. As the sun warms the slope, the top inch or so softens into perfect corn snow. This window—usually from mid-morning to early afternoon—provides some of the best riding of the entire season.
Rain complicates the corn snow cycle because it adds moisture to the surface without the natural drainage that melting provides. Rain-soaked corn snow becomes heavy and slushy, losing its characteristic granularity. However, if the rain is light and temperatures remain above freezing, the corn snow can actually improve—the additional moisture creates a smoother, more consistent surface that is easier to ride. The key is monitoring conditions and timing your runs to catch the optimal window.
Spring Gear Adjustments
Spring riding requires significant gear adjustments. The heavy insulation needed for mid-winter is replaced by lighter, more breathable layers. Many spring riders use a single base layer under a shell, relying on the warmer temperatures for insulation. Waterproofing remains critical because spring rain is common, but breathability becomes equally important because you will be generating more heat in warmer temperatures.
Spring also brings increased UV exposure. The combination of sun, reflection off the snow, and thinner atmosphere at altitude creates intense UV radiation that can cause severe sunburn even on cloudy days. Apply high-SPF sunscreen to all exposed skin, and consider UV-protective goggles or sunglasses. Lip balm with SPF protection is essential—chapped, sunburned lips are a common spring riding complaint.
The snow surface in spring is often dirty, with debris from trees, rocks, and dirt exposed as the snow melts. This debris can scratch bases and dull edges, so spring is a good time to apply a fresh coat of wax and sharpen your edges before the final push of the season. A structured base with warm wax helps maintain glide on the dirty, wet surface.
Night Riding in the Rain: The Ultimate Challenge
Night riding is already an advanced skill due to reduced visibility, and rain makes it exponentially more challenging. The combination of darkness, water on your goggles, flat light from resort lighting, and reduced terrain visibility creates conditions that push even experienced riders to their limits. However, for those who master it, night rain riding offers an otherworldly experience that few people ever witness.
Visibility in the Dark
Resort lighting creates pockets of brightness and shadow that change constantly as you move through the terrain. Rain on your goggles interacts with these light sources to create glare, halos, and blind spots that make it nearly impossible to read the terrain. The light poles themselves become reference points, but the spaces between them can be pitch black, hiding bumps and changes in terrain.
Strategy for night rain riding involves sticking to familiar terrain where you know every bump and transition. New terrain is extremely dangerous at night in the rain because you cannot anticipate features. Ride at reduced speed, maintain a low center of gravity, and use the light poles as visual anchors to maintain orientation. If conditions become too challenging, there is no shame in heading to the lodge—night rain riding is not the time for heroics.
Equipment Considerations
Goggle lens selection is critical for night rain riding. Clear lenses with anti-fog coating are the only viable option. Tinted lenses reduce light transmission too much for night conditions, and mirrored lenses create additional glare from resort lighting. Some riders carry a dedicated pair of night-rain goggles with clear lenses and anti-fog treatment specifically for these conditions.
Waterproofing becomes even more critical at night because temperatures drop after sunset. The combination of wet gear and cooler temperatures accelerates heat loss, making hypothermia a greater risk than during daytime rain riding. Layer up more aggressively for night sessions and carry extra insulation for the lift ride, which is typically longer at night due to reduced lift capacity.
Backcountry Considerations: Rain in the Wilderness
Rain in the backcountry is a qualitatively different experience from rain at a resort. Without the safety net of groomed runs, patrol services, and easy access to shelter, rain in the backcountry introduces serious risks that require careful planning and preparation. This section is for experienced backcountry riders who understand avalanche safety and wilderness travel—rain riding in the backcountry is not for beginners or casual riders.
Avalanche Implications
Rain is one of the most dangerous triggers for wet slab avalanches. Water infiltrates the snowpack, lubricating weak layers and adding significant weight to the snow surface. Wet slab avalanches are particularly dangerous because they can release hours after the rain begins, making timing prediction difficult. The “intensity-duration” relationship is key—short, light rain may have minimal effect, but sustained heavy rain dramatically increases avalanche risk.
Wet loose avalanches (sluffs) are also common during rain events. These are typically smaller than slab avalanches but can still bury or injure a rider, particularly in terrain traps like gullies and creek beds. Wet loose slides often start as point releases on steep, sun-affected slopes and gain mass as they descend. Riding below steep, rain-affected slopes requires constant awareness of the terrain above you.
Theavalanche danger rating system includes “wet” avalanche problems that specifically address rain-related instability. Before heading into the backcountry during or after rain, check the current avalanche forecast and be prepared to adjust your plans based on conditions. When in doubt, choose conservative terrain with low-consequence options.
Navigation and Shelter
Rain reduces visibility in the backcountry much more severely than at a resort. Without trail markers, groomed runs, and other riders as reference points, navigation becomes challenging. Carry a GPS device, map, and compass, and know how to use them. Mark key waypoints (trail junctions, hazard areas, shelter locations) before entering the backcountry so you can navigate even in near-zero visibility.
Shelter options in the backcountry are limited but critical. Identify potential shelter locations before your trip—dense tree clusters, rock overhangs, or natural windbreaks can provide temporary refuge from rain. Carry an emergency bivy or space blanket for unexpected overnight situations. In extreme cases, digging a snow trench and covering it with branches or a tarp can create a surprisingly effective shelter.
Equipment for Backcountry Rain
Backcountry rain gear must be both waterproof and lightweight. Unlike resort riding, where you can retreat to the lodge, backcountry riding requires you to be self-sufficient for the duration of your trip. Carry a lightweight, packable rain shell that you can don quickly when conditions change. Pack all electronics (GPS, phone, camera) in waterproof cases or bags. Bring extra dry layers in a waterproof stuff sack for emergency changes.
Boot management becomes critical in the backcountry. Without access to boot dryers or warm shelters, wet boots can ruin a multi-day trip. Carry waterproof boot covers for transitions (walking to/from the trailhead) and consider using vapor barrier liners (VBL) inside your boots to prevent moisture from reaching the insulation. After riding, remove boots from packs and allow them to air dry if conditions permit.
Resort Policies & Operations: What Happens When It Rains
Rain affects resort operations in ways that riders should understand before heading to the mountain. Lift operations, terrain availability, and service levels all change during rain events, and knowing what to expect helps you plan a more productive day.
Lift Operations During Rain
Most resorts continue lift operations during rain, but some lifts may close due to high winds that often accompany rainstorms. Gondolas and enclosed chairlifts are typically the most reliable in wet conditions because they protect riders from the elements. Open chairlifts may slow down or stop temporarily during heavy rain or lightning activity. Check the resort’s lift status before arriving, and be prepared for reduced lift capacity.
The loading and unloading experience on chairlifts changes significantly in the rain. Wet seats are cold and uncomfortable, and the loading process is more challenging because your goggles fog as you approach the loading zone. Many experienced rain riders use a specific technique: approach the lift with goggles down, flip them up just before sitting, and pull them back down once seated. This minimizes the time your goggles are exposed to the warm, moist air of the lift line, reducing fog formation.
Terrain Availability
Resorts may close certain terrain during rain for several reasons. Exposed terrain without snowmaking capabilities may have thin cover that rain accelerates. Terrain parks may close if features become unsafe due to wet snow conditions. Steep terrain may close if rain increases avalanche risk. Check the terrain status report before planning your day, and have backup options in case your preferred runs are closed.
Conversely, some resorts open additional terrain during rain events because lower attendance means less wear on popular runs. The reduced crowd can make even limited terrain feel spacious and uncrowded. Focus on what is open rather than lamenting what is closed, and you may discover new favorite runs that you would not have explored on a busy day.
Services and Amenities
Food service, rentals, and other resort services typically continue during rain, but may have reduced capacity or modified hours. The lodge becomes a popular refuge during rain, so expect crowds in dining areas and warming rooms. Pack your own lunch and snacks to avoid long lines, and bring a thermos of hot drink to enjoy on the lift or during breaks.
Some resorts offer special rain-day amenities, such as discounted lift tickets, indoor activities, or guided rain-riding tours. Check your resort’s website or social media for rain-day specials. Many resorts recognize that rain can deter visitors and offer incentives to encourage riding despite the weather.
Aftercare: Saving Your Gear from Mold
The most important part of a rain day happens when you get back to the car or the condo. If you leave wet gear in a board bag overnight, it will start to mildew and smell within 24 hours. Rust will form on your edges in less than 6 hours. Proper aftercare is not optional—it is essential for preserving your investment and ensuring your gear performs well on future rides.
The Boot Procedure
You MUST take the inner liners out of your snowboard boots. The shell holds water, and the liner acts as a sponge. If you leave the liner in the shell, it will not dry for days. Pull the liners, remove the footbeds (insoles), and place them near a gentle heat source (not directly on a heater, or the foam will melt). Stuffing them with newspaper helps absorb internal moisture.
The drying process typically takes 12-24 hours depending on the boot’s construction and ambient conditions. In humid climates, drying can take even longer. Plan accordingly—if you are riding multiple days in a row, consider bringing a second pair of boots or investing in a boot dryer. Electric boot dryers that use warm air can reduce drying time to 4-6 hours and are a worthwhile investment for regular rain riders.
Odor prevention is another important consideration. Wet boots create an ideal environment for bacteria growth, which produces the distinctive “boot smell” that plagues many riders. After drying, sprinkle baking soda or use specialized boot deodorizer inside the liners. Some riders also use UV shoe sanitizers that kill bacteria and neutralize odors. Prevention is easier than treatment—address odor before it develops.
Board Maintenance
Wipe your board down with a dry towel immediately. Pay special attention to the metal edges. Water creates rust incredibly fast. If you leave your board wet in a bag, you will wake up to orange, rusted edges that will need a full tune to fix. Dry the bindings as well, especially the screws and ratchets, to prevent corrosion. Learn more about removing rust from snowboard edges here.
After drying, inspect your board for any damage that the rain may have revealed. Wet conditions can expose base gouges that were previously sealed by wax, allowing water to penetrate the core. If you find deep gouges, apply a P-Tex repair immediately to prevent water damage. Small surface scratches are cosmetic and can be addressed during your next tune-up.
Apply a light coat of wax to your base after drying. This protective layer prevents oxidation (which causes bases to turn gray and dry out) and keeps the base conditioned during storage. You do not need a full hot wax—a rub-on or liquid wax is sufficient for storage protection. Scrape the storage wax off before your next ride and apply a fresh coat appropriate for the expected conditions.
Gore-Tex Care
Hang your jackets and pants separately; do not bunch them up. Once they are dry, throw them in the dryer on medium heat for 20 minutes. This heat reactivates the DWR (Durable Water Repellent) coating on the exterior of the fabric, ensuring it beads water the next time you go out.
For deep cleaning, use a technical wash specifically designed for waterproof garments. Regular detergent contains additives that can damage waterproof coatings and clog breathable membranes. Nikwax Tech Wash or Grangers Performance Wash are industry standards. Wash your gear in a front-loading machine (top-loaders with agitators can damage waterproof membranes) on a gentle cycle with cool water. Follow with a DWR re-treatment while the gear is still damp.
Storage between seasons requires attention as well. Make sure all gear is completely dry before storing. Hang jackets and pants in a cool, dry closet rather than cramming them into plastic bags (which can trap moisture and promote mold). Store boots with cedar shoe trees or moisture-absorbing packets to maintain shape and prevent odor. Board storage should be in a temperature-controlled environment—extreme heat or cold can damage bases and delaminate topsheets.
Long-Term Gear Care: Maximizing Your Investment
Rain riding accelerates gear wear more than any other condition. The constant exposure to moisture, the abrasive nature of wet snow, and the increased physical demands of slush riding all take their toll on equipment. Understanding how to maintain your gear properly can extend its lifespan significantly and save you hundreds of dollars in replacement costs.
Binding Maintenance
Snowboard bindings are particularly vulnerable to rain damage because they combine metal components (screws, ratchets, highbacks) with plastic parts and fabric straps. Water can penetrate screw threads, causing rust that makes adjustments difficult. Ratchet mechanisms can corrode, leading to stiff or stuck levers. Fabric straps absorb water and can develop mildew if not dried properly.
After every rain day, disassemble your bindings and dry each component separately. Pay special attention to the ratchet mechanism—work the lever back and forth several times while dry to clear any moisture from the internal springs. Apply a light lubricant (like silicone spray or bicycle chain lube) to the ratchet mechanism to prevent corrosion and maintain smooth operation.
Inspect binding screws for rust at the start of each season and replace any that show corrosion. Rust weakens screws and can cause them to strip or break during riding, which is both dangerous and expensive to repair. Carry a spare set of binding screws in your repair kit—this simple precaution can save a day on the mountain.
Helmet Care
Helmets absorb moisture through their padding and ventilation systems. After rain riding, remove the liner pads (most helmets have removable, washable pads) and air dry them separately. Wipe the helmet shell with a dry cloth and allow it to dry at room temperature. Do not place a wet helmet near direct heat, as excessive heat can compromise the EPS foam that provides impact protection.
Inspect your helmet for any cracks or damage after rain events. Water can penetrate small cracks and freeze, expanding the crack further. If you find any damage, replace the helmet immediately—compromised helmets cannot be repaired and provide reduced protection. Most manufacturers recommend replacing helmets every 3-5 years regardless of visible damage, as the EPS foam degrades over time.
Storing Gear for Summer
End-of-season storage is critical for gear longevity. Complete a thorough cleaning and maintenance session before storing anything. Wax your board (with storage wax), dry and deodorize your boots, wash and DWR-treat your outerwear, and clean and lubricate your bindings. Store everything in a cool, dry environment away from direct sunlight, which can fade colors and degrade materials.
Mental Preparation: Embracing the Wet
The psychological aspect of rain riding is often overlooked but equally important as gear and technique. Your mindset determines whether a rain day becomes a miserable ordeal or an unexpected adventure. Developing a positive relationship with wet conditions requires a fundamental shift in expectations and priorities.
Reframing the Experience
The most important mental shift is to stop comparing rain days to bluebird days. They are fundamentally different experiences that offer different rewards. A bluebird day provides perfect conditions, stunning views, and effortless riding. A rain day provides solitude, challenge, and the satisfaction of overcoming adversity. Neither is inherently better—they are simply different.
Successful rain riders develop what psychologists call a “challenge mindset” rather than a “threat mindset.” Instead of viewing rain as an obstacle to enjoyment, they view it as an opportunity for growth. Every challenge encountered in wet conditions—managing fog, maintaining speed, staying warm—builds skills and resilience that translate to better overall riding ability.
The Gratitude Approach
Practice gratitude for the opportunity to ride at all. Many people around the world would love to have access to a ski resort, regardless of conditions. You have the gear, the fitness, and the access to be on the mountain today. The rain is simply a variable that you get to navigate—an adventure that most people will never experience. This perspective transforms rain from an annoyance into a privilege.
Setting Rain-Specific Goals
Rain days are not the time to work on your most ambitious goals. Instead, set smaller, more achievable objectives that match the conditions. Maybe today is the day you master a specific turn technique, or perhaps you focus on improving your flatland balance. Setting appropriate goals prevents frustration and ensures you come away from the day with a sense of accomplishment.
The Social Aspect
Riding with friends in the rain can be significantly more enjoyable than riding alone. Shared experiences—whether positive or negative—create bonds and memories that last longer than any perfect powder day. The camaraderie of suffering together in wet conditions creates stories that become legendary in friend groups. Many riders report that their most memorable days were not the best conditions, but the most challenging ones shared with friends.
If you do not have riding friends who embrace rain, consider joining online communities of rain-riding enthusiasts. Forums, social media groups, and local meetups connect like-minded riders who can provide tips, encouragement, and companionship for wet-weather adventures. The rain-riding community is surprisingly large and passionate—finding your tribe can transform your relationship with wet conditions.
Photography Tips: Capturing the Rain Day Magic
Rain days produce some of the most dramatic and atmospheric photographs in snowboarding. The combination of fog, wet snow, and moody lighting creates opportunities for images that are impossible to capture on clear days. With a few specific techniques, you can turn your rain day into a photographic adventure.
Protecting Your Camera
Water and electronics do not mix, but with proper protection, you can safely photograph in rain. A rain sleeve—a lightweight plastic cover that fits over your camera—is the most affordable protection option. For more serious protection, consider a weather-sealed camera body and lenses, which can withstand light rain and splashes. Always carry a microfiber cloth to wipe moisture from your lens and a waterproof bag to store your camera when not in use.
Smartphone cameras have become remarkably capable in wet conditions, but they require protection too. A waterproof phone case or pouch allows you to keep your phone accessible while protecting it from rain. Some riders mount waterproof phone cases to their helmets or chest harnesses to capture point-of-view footage while riding. The convenience of smartphone photography makes it ideal for rain day documentation.
Composition Techniques
Fog creates natural separation between foreground and background, allowing you to isolate subjects in a way that is difficult in clear conditions. Use this to your advantage by positioning yourself to capture riders emerging from or disappearing into the fog. The mysterious, ethereal quality of fog-shrouded images can be stunning.
Wet surfaces create reflections that are absent in dry conditions. Look for puddles, wet rocks, and saturated snow surfaces that can reflect the sky, trees, or riders. These reflections add depth and interest to compositions and can transform ordinary scenes into extraordinary images.
The flat, diffused light of rainy days eliminates harsh shadows and creates even illumination across the scene. This is ideal for portrait-style shots of riders and for capturing the texture and detail of wet snow surfaces. Use a slightly underexposed setting to preserve the mood and drama of the scene.
Video Tips
Slow-motion video captures the unique dynamics of rain riding beautifully. The heavy spray from turns, the slow motion of slush being displaced, and the atmospheric fog all benefit from slowed playback. Most modern smartphones and action cameras can shoot at 60fps or higher, which provides smooth slow motion when played back at 24 or 30fps.
Audio in rain conditions creates a distinctive soundtrack. The patter of rain on your helmet, the swoosh of wet snow under your board, and the ambient sounds of the mountain all contribute to an immersive viewing experience. If you are recording video, consider keeping the audio intact rather than replacing it with music—the authentic sound of rain riding adds a layer of realism that enhances the viewing experience.
Different Types of Rain Conditions: A Detailed Breakdown
Not all rain is created equal, and understanding the specific characteristics of different rain conditions helps you prepare more effectively. The intensity, duration, and temperature of rain events vary significantly, and each variation presents unique challenges and opportunities.
Light Drizzle (0.1-0.25 inches/hour)
Light drizzle is the most manageable rain condition for snowboarding. The precipitation is light enough that it does not immediately soak through quality gear, and visibility remains relatively good. Many experienced riders enjoy light drizzle because it creates the soft, hero snow conditions described earlier without the discomfort of heavy rain. A light drizzle can actually improve riding conditions by softening the surface without creating the suction effect that heavier rain produces.
Strategy for light drizzle: Use your standard rain gear setup, but you may not need the full heavy-duty protection. Goggles with clear or yellow lenses provide adequate visibility. Wax your board with warm-temperature wax to prevent suction, but you may not need the deep structure that heavier conditions require. Focus on enjoying the soft snow and empty slopes.
Moderate Rain (0.25-0.5 inches/hour)
Moderate rain is where rain riding starts to become challenging. The precipitation is heavy enough to saturate gear over time, reduce visibility, and create significant suction on the snow surface. This is the most common rain condition at most resorts and requires the full rain riding toolkit described in this guide.
Strategy for moderate rain: Full waterproof shell system, warm wax, and goggle management become essential. Plan for shorter sessions with warming breaks. Focus on terrain that provides some shelter (trees, leeward aspects) and maintain higher speed to combat the suction effect. Carry extra gloves and a dry microfiber cloth for goggle management.
Heavy Downpour (0.5+ inches/hour)
Heavy downpour is the most challenging rain condition and is typically when most riders choose to stay inside. The precipitation is intense enough to overwhelm even high-quality gear, create near-zero visibility in fog, and rapidly deteriorate snow conditions. Riding in a heavy downpour requires advanced skills, top-tier gear, and a genuine love for adversity.
Strategy for heavy downpour: Only attempt this if you have 3L Gore-Tex or equivalent gear, warm wax with structure, clear goggles, and a willingness to accept reduced visibility and comfort. Focus on lower-speed, tree-sheltered terrain and plan for significantly reduced session lengths. The physical and mental demands of heavy rain riding are substantial—know your limits and do not push beyond them.
Intermittent Showers
Intermittent showers are perhaps the most enjoyable rain condition because they provide periods of clear weather between rain events. The snow surface alternates between wet and soft (during rain) and drying (between showers). This creates varied conditions that keep riding interesting and allow for natural breaks in the weather.
Strategy for intermittent showers: Use the dry periods to ride without rain protection, then add layers when the rain returns. This dynamic approach keeps you comfortable and dry throughout the day. Watch the sky and weather radar to anticipate incoming showers and position yourself near shelter or the lodge when heavy rain approaches.
Mixed Precipitation
Mixed precipitation—rain and snow falling simultaneously—is common at the rain-snow line and creates uniquely challenging conditions. The mix of liquid and frozen precipitation creates a surface that is simultaneously wet and crusty, with unpredictable variations across the mountain. One run might be soft slush, the next icy crust, and the third a mix of both.
Strategy for mixed precipitation: Stay alert and adaptable. The conditions change rapidly, and what works on one run may not work on the next. Maintain a slightly higher level of caution than you would in consistent conditions, and be prepared to adjust your technique, speed, and line choice for each run. The variability of mixed precipitation demands a flexible approach and keen observation.
Riding with Kids in the Rain: Making It Fun Despite the Weather
Getting kids to enjoy snowboarding in the rain requires a different approach than riding with adults. Children are more sensitive to cold and wet conditions, have shorter attention spans, and require more frequent breaks. However, with proper preparation and the right mindset, rain days can become some of the most memorable family adventures.
Kid-Specific Gear Considerations
Children lose body heat faster than adults due to their higher surface-area-to-mass ratio. This means they need proportionally more insulation and better waterproofing than adult riders. Invest in high-quality kids’ rain gear rather than relying on hand-me-downs or budget options. The cost difference is minimal compared to the comfort and safety benefits.
Kids’ gloves are particularly important because children are less likely to notice or communicate cold, wet hands until they are already uncomfortable. Use waterproof mittens rather than gloves when possible—they provide better warmth and are easier for small hands to put on and take off. Carry at least two pairs of backup gloves and rotate them as needed.
Layering is critical for kids. Children often refuse to wear heavy layers because they feel restrictive, so focus on thin, effective layers rather than bulky ones. Merino wool base layers are excellent for kids because they are soft, warm, and naturally odor-resistant. A thin synthetic mid layer and a high-quality waterproof shell provide complete protection without excessive bulk.
Keep It Short and Sweet
Plan for shorter sessions than you would with adults. An hour to 90 minutes is plenty for young riders in wet conditions. Focus on quality over quantity—a happy child who rides for an hour and wants to come back is better than a miserable child who rides for three hours and never wants to snowboard again. Build in frequent breaks at the lodge for warming, snacking, and restroom visits.
Make It an Adventure
Reframe the rain as part of the adventure rather than an obstacle to fun. Kids respond well to imaginative narratives—”We are rain warriors!” or “Today we are exploring the cloud forest!”—that transform wet conditions from a negative into a positive. Let them splash in puddles, catch snowflakes on their tongues, and explore the sensory experience of riding in rain.
Focus on Fun, Not Progress
Rain days are not the time for intensive skill development with kids. Focus on fun activities like gentle runs through the trees, building small snow features, or simply cruising at a comfortable pace. If the child is having fun, they are learning—even if the specific skills being practiced are not what you planned. A positive association with snowboarding in all conditions builds a lifelong love of the sport.
The Hot Chocolate Rule
Always have hot chocolate waiting at the end of the session. This simple reward creates positive associations with rain riding and gives kids something to look forward to. Make it special—add marshmallows, whipped cream, or sprinkles. The hot chocolate ritual becomes part of the rain day tradition and helps kids remember the experience positively, even if the conditions were challenging.


