
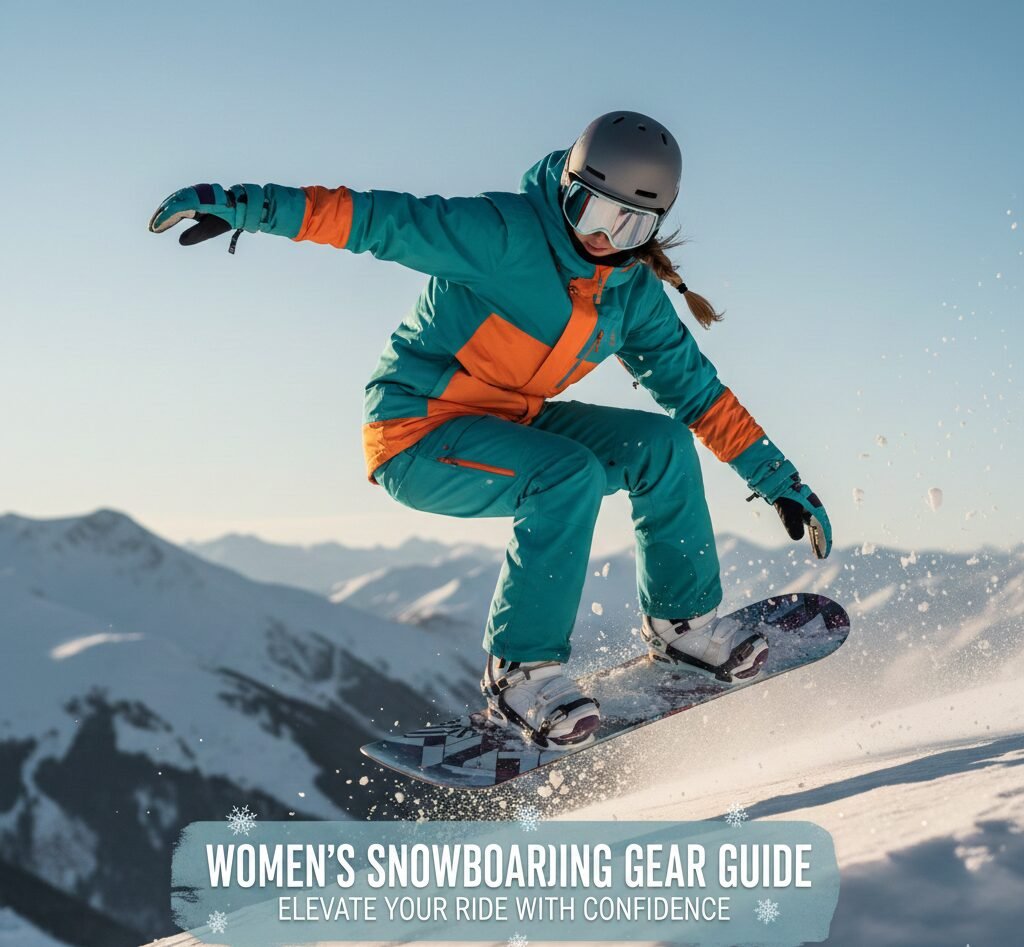
Women’s Snowboarding Gear Guide: Elevate Your Ride with Confidence
Forget unisex fits that miss the mark. This guide focuses on gear engineered for women’s anatomy, ensuring comfort, warmth, and performance so you can focus on the ride.
1. Fit-First Philosophy: Anatomy Matters
Women’s-specific gear isn’t a marketing gimmick. It accounts for differences in shoulder width, hip-to-waist ratio, calf positioning, and center of mass. A proper fit eliminates bulk, reduces fatigue, and increases mobility. Prioritize gear designed for the female form—it will keep you warmer, drier, and more responsive on the mountain.
The fundamental differences between men’s and women’s bodies directly impact how snowboarding gear should fit and perform. Women typically have narrower shoulders relative to their hips, a different center of gravity, shorter torsos in proportion to leg length, and distinct muscle mass distribution. These aren’t minor details—they’re the reasons why ill-fitting gear causes discomfort, restricts movement, and ultimately diminishes your experience on the slopes.
When manufacturers design women’s-specific snowboarding equipment, they’re not simply scaling down men’s products. They’re rethinking the entire design from the ground up. This includes repositioning seams to avoid chafing points, adjusting flex patterns to account for different muscle mass, reshaping boot liners to accommodate narrower heels and lower calf profiles, and modifying binding highbacks to align with women’s calf muscle positioning.
Pro Fit Tip: The Three-Finger Rule
For jackets and bibs, you should be able to fit three fingers between your base layer and the shell when standing. This allows for essential air circulation without being baggy. For boots, your heel must be locked in with zero lift.
Why Unisex Gear Falls Short
Unisex or “shrink it and pink it” approaches fail because they ignore biomechanical differences. A unisex jacket designed for a male torso will bunch at the shoulders while pulling tight across the hips. A unisex binding highback won’t properly distribute pressure across a woman’s calf, leading to discomfort and reduced response. Even seemingly minor differences—like the distance between your knee and ankle—can significantly affect how a binding or boot performs.
Research consistently shows that gear designed specifically for women leads to better performance outcomes. When you’re not fighting against your equipment, you can focus on technique, terrain navigation, and—most importantly—having fun. The confidence that comes from knowing your gear fits perfectly translates directly into better riding.
The Science Behind Women’s Gear Design
Modern women’s snowboarding gear incorporates research from biomechanics, materials science, and ergonomics. Manufacturers use motion capture technology to understand how women move differently on a snowboard. They analyze pressure distribution, range of motion, and thermal regulation patterns specific to female riders. This data drives design decisions that result in gear that works with your body, not against it.
For example, women’s boots are designed with a narrower heel pocket because women typically have narrower heels relative to their forefoot. This eliminates the heel lift that plagues many women riding in men’s or unisex boots. Similarly, women’s jackets are cut with a higher armhole to accommodate typically narrower shoulders, allowing for better range of motion when reaching for grabs or maintaining balance.
The thermal properties of women’s gear are also different. Women generally have less muscle mass and different fat distribution patterns, which affects how they generate and retain heat. Women’s-specific insulation is engineered to provide warmth without bulk, using body-mapped insulation that concentrates warmth where women need it most—extremities, core, and lower back.
How to Assess Your Individual Fit Needs
Every woman’s body is unique, and understanding your specific fit requirements will help you make better purchasing decisions. Start by measuring your key dimensions: shoulder width, bust, waist, hips, inseam, and calf circumference. Note any areas where you typically experience discomfort with athletic gear—do you tend to have cold hands? Are your calves sensitive to pressure? Do you run warm or cold?
Consider your riding style and intensity. Aggressive riders who spend all day on the mountain need gear that performs under high-intensity conditions, while casual riders may prioritize comfort and ease of use. Your local climate also matters—riders in the Pacific Northwest face different challenges than those in Colorado or Utah.
2. Understanding Women’s-Specific Gear
The snowboarding industry has evolved significantly over the past two decades, moving away from a one-size-fits-all approach to recognizing that women deserve equipment designed specifically for their bodies and riding styles. Understanding what makes gear “women’s-specific” helps you make informed purchasing decisions and avoid products that simply repurpose men’s designs.
What Defines Women’s-Specific Gear
True women’s-specific gear goes beyond color and size. It incorporates design elements that account for anatomical differences in multiple dimensions. In outerwear, this means narrower shoulders, roomier hips, adjusted sleeve and pant lengths, and repositioned seams. In boots, it means narrower heel pockets, lower cuff heights, softer flex patterns, and shaped footbeds. In bindings, it means shorter and narrower highbacks, adjusted ankle strap positioning, and modified baseplates.
The most reliable way to identify genuinely women’s-specific gear is to look for brands that have dedicated women’s design teams. Companies like Burton, Ride, and Jones invest heavily in women’s-specific R&D, ensuring that their women’s products are designed from the ground up rather than adapted from men’s models.
Key Anatomical Differences That Matter
Shoulder Width: Women typically have narrower shoulders than men, even when accounting for overall size differences. This affects how jacket sleeves hang, how backpack straps distribute weight, and how bib straps sit. Women’s-specific jackets address this with narrower shoulder panels and adjusted sleeve angles.
Hip-to-Waist Ratio: Women generally have a more pronounced difference between waist and hip measurements. This means that gear designed for a straight torso-to-hip profile won’t fit correctly. Women’s pants and bibs feature shaped waistbands, articulated knees, and hip panels that accommodate this curve without excess material.
Calf Positioning and Muscle Profile: Women’s calf muscles are typically positioned lower on the leg and have a different shape than men’s. This directly affects how binding highbacks and boot cuffs interact with the leg. Women’s bindings feature highbacks that distribute pressure more evenly across the calf, while women’s boots have cuffs shaped to avoid pressure points on the shin and calf.
Center of Gravity: Women typically have a lower center of gravity due to differences in hip and torso proportions. This affects balance and weight distribution on the snowboard, which is why women’s boards often have slightly different sidecut radii, setback positions, and flex patterns to optimize for this lower center of gravity.
Hand and Foot Size: Women’s hands are generally smaller, affecting glove fit and dexterity. Women’s feet, while smaller on average, also tend to have narrower heels and different arch profiles. This is why women’s boots use different last shapes and internal padding configurations.
The Evolution of Women’s Snowboard Gear
The early days of snowboarding saw women riding gear designed for men, often in “small” sizes with no consideration for female anatomy. The first women’s-specific products appeared in the late 1990s and early 2000s, primarily as marketing exercises with little genuine design differentiation. However, as women’s participation in snowboarding grew, manufacturers recognized the demand for truly women-specific products.
Today’s women’s snowboard gear represents decades of research and refinement. Major brands employ dedicated women’s design teams who test products extensively with female riders of all abilities and body types. The result is gear that not only fits better but performs better, allowing women to ride with confidence and comfort regardless of their skill level.
Women’s Gear by the Numbers
Women make up approximately 38% of all snowboarders worldwide. The women’s snowboard gear market has grown by over 40% in the past decade. Studies show that women who use properly fitted, women’s-specific gear report 25% higher satisfaction with their riding experience. Investment in women’s gear design has increased by more than 60% since 2015 across major snowboard brands.
3. Women’s Snowboard Sizing Guide
Choosing the right snowboard size is one of the most important decisions you’ll make as a snowboarder. A properly sized board will feel comfortable, responsive, and forgiving as you progress. An improperly sized board will fight you at every turn, making learning harder and riding less enjoyable. For women, sizing considerations include height, weight, boot size, and riding style.
The Height-Based Starting Point
The traditional method of sizing a snowboard is to stand the board on its tail and check where the nose reaches on your body. For beginners, the nose should reach somewhere between your chin and nose. Intermediate riders often prefer the nose at nose height, while advanced riders may go shorter for park riding or longer for powder. This method provides a starting point, but weight is actually the more important factor.
Weight: The Most Important Factor
Your weight determines how much the board will flex under you, which directly affects how it turns and responds. A board that’s too long for your weight will feel stiff and unresponsive, while a board that’s too short will feel unstable at speed and lack float in powder. Every manufacturer provides weight ranges for their boards, and these should be your primary reference.
| Height (ft/in) | Height (cm) | Weight Range (lbs) | Beginner Board Length | Intermediate/Advanced |
|---|---|---|---|---|
| 4’10” – 5’0″ | 147 – 152 | 85 – 110 | 138 – 143 cm | 133 – 143 cm |
| 5’0″ – 5’2″ | 152 – 157 | 100 – 125 | 141 – 146 cm | 136 – 148 cm |
| 5’2″ – 5’4″ | 157 – 163 | 110 – 135 | 143 – 148 cm | 138 – 150 cm |
| 5’4″ – 5’6″ | 163 – 168 | 120 – 150 | 145 – 150 cm | 140 – 152 cm |
| 5’6″ – 5’8″ | 168 – 173 | 130 – 160 | 148 – 153 cm | 143 – 155 cm |
| 5’8″ – 5’10” | 173 – 178 | 140 – 170 | 151 – 156 cm | 146 – 158 cm |
| 5’10” – 6’0″ | 178 – 183 | 150 – 180 | 154 – 159 cm | 149 – 161 cm |
Boot Size Considerations
Your boot size determines the waist width you need on your snowboard. Women’s boot sizes typically range from 5 to 11 in US sizing. A general guideline is that if your boots overhang significantly on a board’s edges, you’ll experience toe and heel drag during turns, which can catch an edge and cause a fall. Conversely, a board that’s too wide for your boot size will feel sluggish and unresponsive.
Most women’s snowboards are designed with waist widths between 235mm and 250mm, which accommodates women’s boot sizes from approximately 6 to 10. If you have exceptionally large feet for your height (US size 10+), you may need to look at boards with slightly wider waist widths or consider unisex models that offer wider options.
Board Width Quick Reference
| Women’s Boot Size (US) | Recommended Waist Width | Notes |
|---|---|---|
| 5 – 6 | 230 – 238 mm | Standard women’s width |
| 6 – 7.5 | 236 – 244 mm | Most common women’s range |
| 7.5 – 9 | 242 – 250 mm | Consider mid-wide options |
| 9 – 10.5 | 248 – 256 mm | Wide boards recommended |
| 10.5+ | 254+ mm | Wide or unisex boards |
Riding Style Adjustments
Your preferred riding style should influence your board size choice. If you spend most of your time in the terrain park, you may prefer a board 2-4 cm shorter than your height-based recommendation for increased maneuverability. If you ride primarily in deep powder, adding 2-4 cm to your recommended length provides better float. All-mountain riders generally stick to the recommended range.
Weight Range: The Detailed Breakdown
Weight ranges matter more than height because they determine how the board responds under your specific load. A 120-lb rider on a 155cm board will experience it as quite stiff, while a 160-lb rider on the same board will find it more responsive and playful. Always check the manufacturer’s weight range for each specific board model, as these vary significantly even within the same length.
Most manufacturers publish weight ranges that span 30-40 lbs for each board size. If you’re at the top of a weight range for a particular size, consider whether you’d prefer the slightly stiffer feel of the longer board or the more forgiving nature of sizing down. Your riding style and ability level should guide this decision.
4. Camber Profiles Explained
The camber profile of a snowboard—how it’s shaped when viewed from the side—fundamentally affects how it rides. Understanding camber profiles helps you choose a board that matches your skill level, riding style, and the conditions you typically encounter. For women riders, certain camber profiles may be particularly well-suited depending on your weight, strength, and preferences.
Traditional Camber
Traditional camber is the original snowboard profile, where the board arches upward between the contact points when viewed from the side, with the tips and tails touching the ground. When weighted, the entire edge contacts the snow, providing maximum edge hold, pop, and responsiveness. Traditional camber boards offer the most precise turning and the best energy return for ollies and jumps.
However, traditional camber requires more precise technique and can be less forgiving of mistakes. It’s most popular among advanced riders and those who prioritize performance over ease of use. For lighter women riders, traditional camber boards may feel stiffer than intended because they require adequate weight to properly engage the camber profile.
Rockered (Reverse Camber)
Rockered boards curve upward at the tips and tails, with the center of the board making contact with the snow. This profile is more forgiving, easier to turn, and provides better float in powder. The upturned tips and tails help prevent catching edges, making rockered boards excellent for beginners and park riders.
For women who are learning to ride, rockered profiles offer a significant advantage because they’re more forgiving of weight shifts and balance errors. The natural tendency of a rockered board to initiate turns makes progression faster and more enjoyable. However, rockered boards offer less edge hold on hardpack and ice compared to cambered designs.
Flat Profile
Flat boards have no camber or rocker—the entire base contacts the snow when weighted. This provides a middle ground between camber and rocker, offering predictable behavior and moderate edge hold. Flat profiles are versatile and work well for riders who want a board that behaves consistently across different conditions.
Hybrid Profiles
Most modern snowboards use some form of hybrid profile, combining camber and rocker elements to achieve specific performance characteristics. The most common hybrid profiles include:
Camber-Rocker-Camber: Camber underfoot with rocker between the feet and at the tips. This provides edge hold where you need it while maintaining float and playfulness. This is perhaps the most popular profile for all-mountain women riders.
Rocker-Camber-Rocker: Rocker at the tips with camber between the feet. This offers the float of rocker with the edge hold of camber, creating a versatile board that performs well in varied conditions.
Directional Hybrid: Different profiles at the nose and tail, typically more rocker at the nose for float and more camber at the tail for response. This is ideal for riders who primarily ride in one direction and want optimized performance for that orientation.
Traditional Camber
Best For: Advanced riders, groomers, park jumps
Pros: Maximum pop, edge hold, precision
Cons: Less forgiving, harder to learn on
Women-Specific: Look for softer flex versions to accommodate lighter weight
Rockered
Best For: Beginners, powder, park rails
Pros: Forgiving, easy turns, great float
Cons: Less edge hold, less pop
Women-Specific: Ideal for women learning to ride
Hybrid
Best For: All-mountain, varied conditions
Pros: Versatile, balanced performance
Cons: May not excel in any single area
Women-Specific: Most popular choice for women all-mountain riders
How Camber Affects Women Differently
Women’s lower average weight means that camber profiles engage differently. A traditional camber board that requires 140+ lbs to fully engage may never achieve its intended performance for a 110-lb rider. This is why many women-specific boards use modified camber profiles with lower initiation forces, allowing lighter riders to access the full performance of the board.
Additionally, women who are learning or progressing may benefit from more forgiving profiles that allow for mistakes without penalty. As skills develop, you can move to more aggressive profiles that reward precise technique. The beauty of modern hybrid profiles is that they often provide enough forgiveness for learning while still offering the performance characteristics that advanced riders demand.
5. Flex Ratings & What They Mean
Flex rating is one of the most important specifications of any snowboard, binding, or boot. It determines how the equipment responds to your inputs, how forgiving it is of mistakes, and how it performs in different conditions. Understanding flex ratings helps you match your equipment to your skill level, riding style, and personal preferences.
The Flex Rating Scale
Most manufacturers use a 1-10 scale for flex ratings, though the exact meaning can vary between brands. As a general guideline:
- 1-3 (Soft): Very forgiving, easy to turn, great for beginners and park jibbing
- 4-5 (Medium-Soft): Good balance of forgiveness and response, ideal for intermediate riders and all-mountain riding
- 5-6 (Medium): Versatile, responsive enough for aggressive riding while still forgiving, great for all-mountain and freestyle
- 7-8 (Medium-Stiff): More responsive, better edge hold at speed, ideal for advanced all-mountain and freeride
- 9-10 (Stiff): Maximum response and edge hold, best for expert riders, racing, and big mountain
Women-Specific Flex Considerations
Women generally have less muscle mass than men, which means they need equipment with appropriately matched flex ratings. A board with a flex rating of 6 for a 180-lb man might feel like an 8 for a 120-lb woman. This is why women’s-specific boards, bindings, and boots are designed with flex patterns calibrated for the weight and strength ranges of typical female riders.
When shopping for gear, pay attention to whether the flex rating is calibrated for a typical rider weight range. Some manufacturers specify that their flex ratings are based on a certain weight range, which helps you understand how the equipment will feel for your specific weight.
Board Flex by Riding Style
Park & Freestyle
Recommended Flex: 2-5
Softer boards are easier to press, butter, and manipulate on rails and boxes. They’re also more forgiving when landing jumps slightly off-balance.
All-Mountain
Recommended Flex: 4-7
Medium flex provides versatility across different terrain types and conditions. This is the most common choice for recreational riders.
Freeride & Powder
Recommended Flex: 5-8
Stiffer boards provide stability at speed and better float in deep snow. They reward aggressive riding and precise technique.
Carving & Groomers
Recommended Flex: 6-9
Stiff boards hold edges better on hardpack and provide maximum response for carved turns at speed.
Boot Flex
Boot flex is equally important and follows a similar scale. Soft boots (1-4) are comfortable and forgiving but provide less control at speed. Medium boots (4-6) offer a balance of comfort and performance. Stiff boots (7-10) provide maximum response but can be uncomfortable if they don’t match your riding style.
For women, boot flex is particularly important because lighter riders may find that stiff boots don’t break in properly, leading to pressure points and discomfort. A medium-soft to medium flex boot is often ideal for women riders who want comfort without sacrificing too much performance.
Binding Flex
Binding flex works in conjunction with boot and board flex to create the overall feel of your setup. Soft bindings (1-4) are forgiving and comfortable, making them ideal for beginners and park riders. Medium bindings (4-6) provide balanced performance for all-mountain riding. Stiff bindings (7-10) offer maximum response for aggressive riding.
The key to a good setup is matching the flex ratings of your board, boots, and bindings. A stiff board with soft bindings will feel unbalanced, while a soft board with stiff bindings will be difficult to control. Aim for consistent flex ratings across all three components, or bias slightly softer for beginners and slightly stiffer for advanced riders.
6. Base Layers: Your Second Skin
This is your moisture management system. Avoid cotton at all costs. Opt for merino wool or synthetic fabrics. Women’s-specific cuts offer longer torso lengths and contoured seams to prevent chafing. Consider a merino wool vs synthetic base layer comparison to choose based on your sensitivity and budget.
 Check Price on Amazon
Why Base Layers Matter
Your base layer is the foundation of your entire layering system. It sits directly against your skin and is responsible for wicking moisture away from your body to keep you dry and warm. When you’re snowboarding, you generate a lot of sweat even in cold temperatures. If that moisture stays against your skin, it rapidly cools you down and can lead to hypothermia in extreme conditions. A good base layer moves that moisture to the outer surface where it can evaporate.
Merino Wool: The Gold Standard
Merino wool is widely considered the best material for snowboard base layers. It’s naturally temperature-regulating, meaning it keeps you warm when it’s cold and cool when you’re working hard. It’s naturally odor-resistant, so you can wear it multiple days without washing. It’s soft and non-itchy, unlike traditional wool. And it continues to insulate even when wet, which is crucial for snow sports.
The main drawback of merino wool is that it’s more expensive than synthetic alternatives and can be slower to dry. However, the comfort and performance benefits make it worth the investment for most riders. Look for base layers with at least 80% merino content for the best performance.
Synthetic Base Layers
Synthetic base layers made from polyester or polypropylene offer excellent moisture-wicking at a lower price point. They dry faster than merino wool and are more durable, making them a good choice for riders who prioritize practicality over luxury feel. The downside is that synthetics tend to retain odor more than merino wool and don’t provide the same temperature regulation.
Many riders find that a blend of merino and synthetic fibers offers the best of both worlds—good temperature regulation and odor resistance with improved durability and faster drying times. These blended base layers are increasingly popular and offer excellent performance for the price.
Women’s-Specific Base Layer Features
Women’s base layers are designed with specific features that improve comfort and performance. Longer torso lengths prevent the base layer from riding up during movement. Contoured seams are positioned to avoid chafing points, particularly around the bust and hips. Some brands offer body-mapped construction with different fabric weights in different zones to optimize warmth and moisture management.
Fit is crucial for base layers. They should be snug against your skin without being tight enough to restrict movement or circulation. A loose base layer won’t wick moisture effectively, while an overly tight one can be uncomfortable and limit your range of motion.
Base Layer Weight Options
- Lightweight (150 g/m²): Best for high-output riding in mild conditions or as a summer layering option
- Midweight (200-250 g/m²): The most versatile option, suitable for most winter conditions and riding intensities
- Heavyweight (250+ g/m²): Best for very cold conditions and riders who run cold, provides maximum warmth
7. Complete Layering System: Staying Warm and Dry
The layering system is the most effective way to manage your body temperature and moisture while snowboarding. Unlike a single insulated jacket, a layering system allows you to adjust your insulation based on the day’s conditions, your activity level, and your personal temperature preferences. For women, understanding how to layer effectively is particularly important because of differences in how men and women generate and retain heat.
The Three-Layer System
The foundation of effective snow sports layering is a three-layer system: base layer, mid-layer, and outer shell. Each layer serves a specific purpose, and together they create a versatile system that can be adjusted for virtually any condition.
Layer 1 – Base Layer: This layer sits against your skin and is responsible for moisture management. It wicks sweat away from your body to keep you dry. As discussed in the previous section, merino wool or synthetic fabrics are the best choices. The base layer should fit snugly to work effectively.
Layer 2 – Mid-Layer: This layer provides insulation by trapping warm air close to your body. Common mid-layer options include fleece jackets, lightweight down or synthetic puffy jackets, and softshell layers. The mid-layer should fit comfortably over your base layer without being so tight that it compresses the insulation or restricts movement.
Layer 3 – Outer Shell: This layer protects you from wind, snow, and moisture. It should be waterproof and breathable, allowing internal moisture to escape while keeping external moisture out. The shell should be roomy enough to fit over your mid-layer without being so large that it creates excess material that can catch wind or get in the way.
Mid-Layer Options in Detail
The mid-layer is where you have the most flexibility in your system. Different mid-layer options provide different levels of warmth, breathability, and versatility.
Fleece: Fleece jackets are lightweight, breathable, and quick-drying. They’re ideal for high-output riding where you’re generating a lot of body heat. Fleece doesn’t provide as much warmth as insulated options, but it excels at moisture management. For women, look for fleece jackets with a fitted cut that follows your body’s contours without restricting movement.
Down Jackets: Down provides the best warmth-to-weight ratio of any insulation material. It compresses well for packing and provides exceptional warmth in dry conditions. However, down loses its insulating ability when wet, so it’s not ideal as a standalone layer in snowy conditions. Down is best used under a waterproof shell. For women, down jackets with a cinched waist provide better heat retention and a more flattering fit.
Synthetic Insulated Jackets: Synthetic insulation (like PrimaLoft or Coreloft) provides warmth that continues to work even when wet. It’s heavier and bulkier than down for the same amount of warmth, but it’s more versatile in varying conditions. Synthetic insulation is also hypoallergenic, making it a good choice for riders with sensitivities to down.
Softshell Layers: Softshell jackets offer wind resistance and light water resistance while being highly breathable. They’re ideal for mild conditions or high-intensity riding where waterproofness isn’t critical. Softshells are typically more comfortable and mobile than hardshell alternatives.
Women’s Layering Considerations
Women generally have different thermal needs than men. Studies show that women tend to have colder extremities—hands, feet, and ears—even when their core temperature is comfortable. This means women may benefit from a slightly warmer base layer and more attention to extremity protection.
Women also tend to have more variable body temperatures throughout their cycle, which can affect layering needs. Having options—like the ability to easily add or remove a mid-layer—is particularly valuable for women who may need to adjust their layering more frequently.
Layering for Different Conditions
Cold & Dry (-10°F to 20°F)
- Heavyweight merino base layer
- Insulated mid-layer (down or synthetic)
- Insulated shell or shell + extra mid-layer
- Face mask or balaclava
Moderate (20°F to 35°F)
- Midweight base layer
- Fleece or lightweight insulated mid-layer
- Waterproof shell
- Neck gaiter
Warm (35°F+)
- Lightweight base layer
- Light fleece (optional)
- Ventilated shell
- No face covering needed
8. Outerwear Shells: Waterproof & Breathable
Your jacket and pants/bibs are your primary defense. Look for a minimum of 10k/10k waterproof/breathability ratings. Bibs are highly recommended for deep powder days and preventing snow down your back. Women’s cuts feature narrower shoulders, roomier hips, and shorter sleeve/leg lengths. Features like powder skirts, wrist gaiters, and venting zippers are game-changers.
 Shop Bibs on Amazon
Understanding Waterproofing Ratings
Waterproofing is measured in millimeters (mm) and indicates how much water pressure the fabric can withstand before moisture penetrates. Higher numbers mean better waterproofing. For snowboarding, you want at least 10,000mm (10k) for dry conditions, 15,000mm (15k) for wet snow, and 20,000mm (20k) or higher for the wettest conditions. Premium shells often feature ratings of 28,000mm or higher.
Understanding Breathability Ratings
Breathability is measured in grams (g) and indicates how much moisture vapor can pass through the fabric in 24 hours. Higher numbers mean better breathability. A rating of 10,000g (10k) is adequate for moderate activity, while 20,000g (20k) or higher is better for high-output riding. The ideal is a shell that’s both highly waterproof and highly breathable, but these properties often trade off against each other.
Jackets vs. Anoraks
Traditional snowboard jackets offer full zip-front access and are easy to put on and take off. Anoraks (pullover-style jackets) are lighter and often more packable, making them popular among backcountry and freeride riders. For resort riding, a traditional jacket is generally more practical, while anoraks excel in situations where weight and packability matter.
Pants vs. Bibs
This is one of the most important outerwear decisions. Pants are easier to put on and take off, but bibs provide superior protection against snow entering your clothing during falls and deep powder days. Bibs also distribute the weight of the garment more evenly across your shoulders rather than relying on a waistband, which can be more comfortable for all-day wear.
For women, bibs are particularly recommended because they eliminate the waist gap that can occur when bending and twisting on the snowboard. Many women find that bibs stay in place better than pants, especially during aggressive riding. The trade-off is that bibs are less convenient for bathroom breaks, though many modern designs incorporate zippers or panels to address this issue.
Women-Specific Shell Features
Women’s shells are designed with features that address the specific needs of female riders. Narrower shoulders prevent excess material from bunching up. Roomier hips allow for comfortable movement without pulling the shell tight. Shorter sleeve and leg lengths prevent drag and bunching. Adjustable hoods designed to fit over helmets while maintaining visibility are standard on quality women’s shells.
Additional features like powder skirts (an elastic gaiter at the waist that seals out snow), wrist gaiters (elastic cuffs that prevent snow from entering your sleeves), and mesh-lined venting zippers (which allow you to dump heat during intense riding) are particularly valuable for women who ride in varied conditions.
Key Shell Features Checklist
- Waterproof rating: 10k minimum, 15k+ preferred
- Breathability rating: 10k minimum, 15k+ preferred
- Sealed seams (fully taped for maximum waterproofing)
- Powder skirt or bib construction
- Wrist gaiters on jacket
- Venting zippers (pit zips or thigh vents)
- Adjustable hood compatible with helmet
- Multiple pockets including internal goggle pocket
- Women-specific fit and proportions
Insulated vs. Shell Systems
Some jackets come with built-in insulation, while others are shells designed to be used with separate layering systems. Shell systems offer more versatility because you can adjust your insulation based on conditions. An insulated jacket is simpler but can be too warm on mild days or insufficient on very cold days. For most riders, a shell system with separate layers provides the most flexibility and value.
9. Snowboard Boots: The Most Critical Purchase
Ill-fitting boots ruin your day. Women’s boots have a narrower heel pocket, a lower calf profile, and different flex patterns to match lower muscle mass. Always try on with your snowboard socks. They should feel snug like a firm handshake, with no pressure points or heel lift. Consider BOA vs speed lace systems for heel lock and flex based on your preference.
Why Boots Matter Most
Your boots are the direct connection between your body and your snowboard. Every input you give—every weight shift, every heel press, every toe turn—goes through your boots. A board that’s slightly the wrong size can still be ridden. Bindings that aren’t perfect can be adjusted. But boots that don’t fit will cause pain, fatigue, and loss of control every single run.
The importance of boot fit cannot be overstated. Studies show that boot-related issues account for over 60% of all comfort complaints among snowboarders. The good news is that modern women’s snowboard boots are designed specifically to address the fit challenges that women face, and taking the time to find the right pair will dramatically improve your riding experience.
Lacing Systems
Modern snowboard boots use three main lacing systems, each with its own advantages and disadvantages:
Traditional Laces: The original lacing system, traditional laces offer the most customization and the widest range of tightening options. They’re easy to replace in the field and provide a familiar feel. The downside is that they can loosen during riding and take longer to adjust. Traditional laces are often preferred by riders who want precise control over different zones of tightness.
Speed Lace Systems: Speed laces use a cable-and-pulley system that allows you to tighten the boot with a single pull. They’re faster than traditional laces and maintain tension better throughout the day. Many systems offer dual-zone tightening, allowing you to adjust the upper and lower sections independently. Speed laces are popular among women who want convenience without sacrificing fit.
BOA Systems: BOA uses a dial-based system that tightens steel cables with a simple twist. They’re the fastest and easiest to adjust, even with gloves on. BOA systems provide consistent tension and are virtually maintenance-free. Some riders feel that BOA doesn’t provide the same zone-specific customization as traditional laces, but the convenience factor is significant. For women who prioritize ease of use and quick adjustments, BOA is an excellent choice.
Boot Flex
Boot flex is rated on a scale of 1-10, similar to boards and bindings. Softer boots (1-4) are more comfortable and forgiving, making them ideal for beginners and park riders. Medium boots (4-6) offer a balance of comfort and performance for all-mountain riding. Stiffer boots (7-10) provide maximum response for aggressive riding and high speeds.
For women, boot flex is particularly important. Lighter riders may find that stiff boots don’t flex properly under their weight, leading to a board that feels unresponsive. It’s better to err on the side of a slightly softer boot than to buy boots that are too stiff for your weight and strength. You can always progress to stiffer boots as your skills and confidence develop.
Women’s Boot Fit Characteristics
Women’s snowboard boots are designed with several key differences from men’s boots. The heel pocket is narrower to prevent heel lift, which is one of the most common fit issues for women in men’s or unisex boots. The cuff height is lower to accommodate typically shorter legs and lower calf muscles. The footbed is shaped to support women’s typically narrower arches. And the overall last shape is narrower, particularly in the heel and ankle area.
Boot Break-In Period
New snowboard boots require a break-in period of approximately 5-10 full days of riding. During this time, the liner molds to your foot and the boot becomes more comfortable and responsive. This means that boots that feel slightly too tight when new may fit perfectly after break-in. However, boots that are significantly too large will never fit properly, so it’s better to start slightly tight than too loose.
To speed up the break-in process, you can wear your boots around the house for a few hours before your first day on the mountain. Some boot fitters also offer heat-molding services that customize the liner to your foot shape, reducing the break-in period significantly.
Boot Fit Red Flags
- Heel lift when flexing forward – boots are too large
- Pain on the top of your foot – boots are too tight or wrong shape
- Numbness in toes – boots are too tight or lacing too tight
- Pressure points on ankle or shin – boots are wrong shape for your foot
- Excessive room in toe box – boots may be too large
10. Boot Sizing & Fit Guide
Proper boot sizing is essential for comfort, performance, and injury prevention. Snowboard boots use Mondopoint sizing, which measures your foot length in centimeters. This is different from regular shoe sizing and is more accurate because it’s based on actual foot measurements rather than arbitrary sizing standards.
How to Measure Your Foot
To get an accurate Mondopoint measurement, place a piece of paper against a wall and stand on it with your heel touching the wall. Mark the point where your longest toe reaches and measure the distance from the wall to the mark in centimeters. This measurement is your Mondopoint size. Measure both feet, as most people have one foot slightly larger than the other, and use the larger measurement.
Sizing Conversion Chart
| US Women’s | EU | Mondopoint (cm) | UK |
|---|---|---|---|
| 5 | 35.5 | 22.5 | 2.5 |
| 5.5 | 36 | 23 | 3 |
| 6 | 36.5 | 23.5 | 3.5 |
| 6.5 | 37.5 | 24 | 4 |
| 7 | 38 | 24.5 | 4.5 |
| 7.5 | 38.5 | 25 | 5 |
| 8 | 39 | 25.5 | 5.5 |
| 8.5 | 40 | 26 | 6 |
| 9 | 40.5 | 26.5 | 6.5 |
| 9.5 | 41 | 27 | 7 |
| 10 | 42 | 27.5 | 7.5 |
The Fit Process
Always try on snowboard boots with the socks you’ll be riding in. Snowboard socks are thicker than regular socks and can significantly affect fit. Stand up and check that your toes lightly touch the front of the boot. Then flex forward into a riding stance—your toes should pull back slightly. If your toes are jammed into the front when flexed forward, the boots are too small. If there’s significant room in front of your toes when standing, they’re too large.
Check for heel lift by flexing forward aggressively. Your heel should stay firmly planted with zero movement. Even small amounts of heel lift will translate to significant discomfort and loss of control on the mountain. If you experience heel lift, try a smaller size, a different brand, or look for boots with specialized heel-lock systems.
Width Considerations
Beyond length, boot width is crucial for comfort. Most women’s boots are designed for a standard-width foot. If you have particularly wide or narrow feet, look for brands that offer different width options. Some manufacturers offer “wide” versions of their women’s boots, while others have naturally wider or narrower last shapes across their product lines.
Width issues often manifest as pressure points on the sides of the foot, numbness in the toes, or a general feeling of being squeezed. If you experience these symptoms, try a different brand or look for boots with specific width options. Don’t try to compensate for width issues by going up in size, as this will create length problems.
Custom Footbeds and Insoles
Most snowboard boots come with basic insoles that provide minimal support. Upgrading to a custom footbed or aftermarket insole can dramatically improve comfort, reduce fatigue, and improve board control. Custom footbeds are molded to your foot shape and provide arch support, heel cupping, and forefoot cushioning that the stock insoles don’t offer.
Many boot fitters offer custom footbed services, or you can purchase aftermarket insoles from brands like Superfeet or Remind. This is one of the most cost-effective upgrades you can make to your snowboard setup.
11. Women’s Bindings: Responsive & Lightweight
Women’s bindings aren’t just smaller; they’re engineered with different highbacks and ankle straps to accommodate lower calf muscles and boot sizes. They offer progressive flex for lighter riders. Don’t just buy a smaller men’s binding. Our dedicated guide to the best women’s snowboard bindings breaks down the top models for all riding styles.
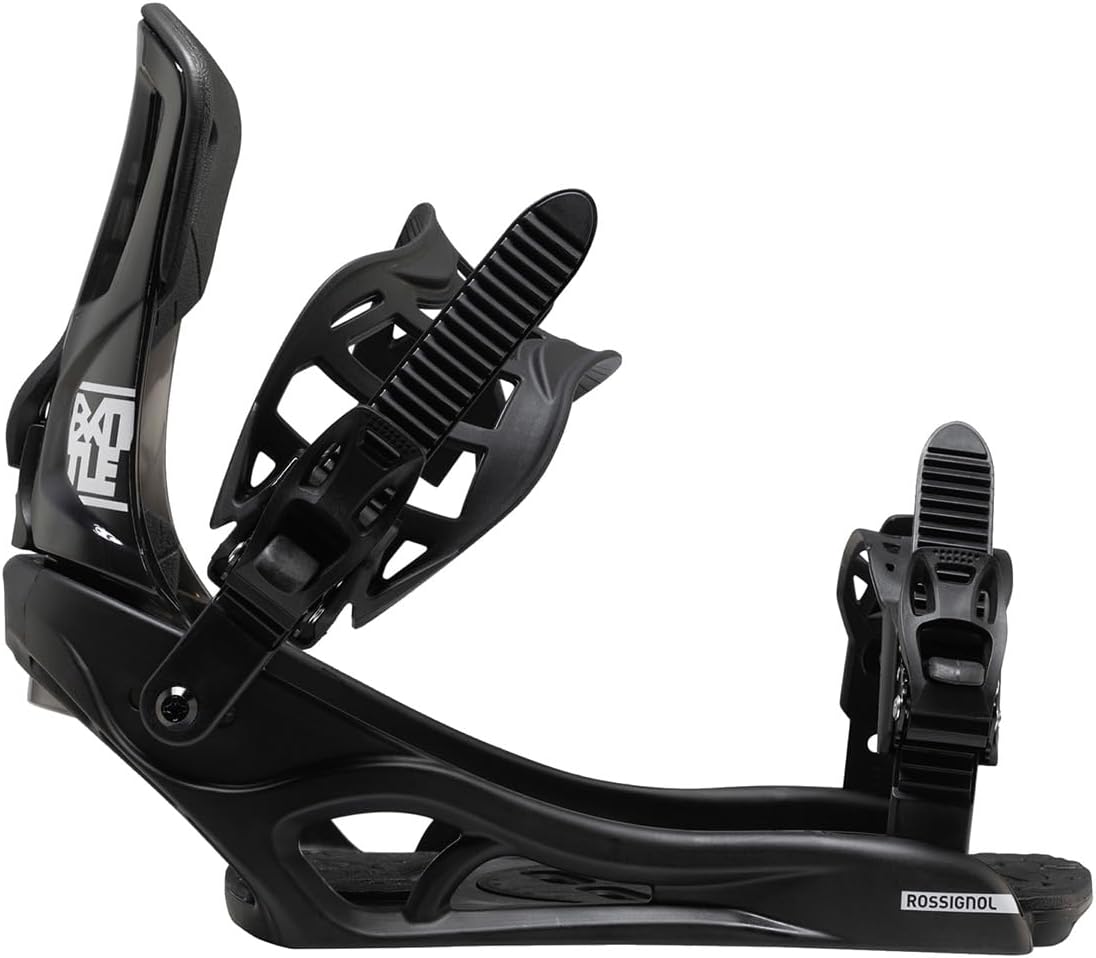 View Bindings on Amazon
Why Women’s Bindings Matter
Women’s bindings are not simply scaled-down versions of men’s bindings. They’re designed from the ground up to account for anatomical differences that significantly affect performance and comfort. The highback shape, strap positioning, baseplate angle, and flex characteristics are all tuned for women’s boot shapes, calf positions, and weight ranges.
Using men’s bindings—even in the correct size—can lead to several issues for women. The highback may not align properly with the calf muscle, causing pressure points and reducing response. The ankle strap may be positioned too high or too low, affecting how power is transferred from your leg to the board. And the overall flex may be too stiff for lighter riders, making the board feel unresponsive.
Highback Design
The highback is the vertical plate that supports your calf and provides leverage for heel-side turns. Women’s highbacks are typically shorter and narrower than men’s, matching the lower calf position and smaller boot sizes of women. They also often have a more rounded top edge to avoid pressure points on the calf muscle.
The angle of the highback—known as the highback rotation—also differs between men’s and women’s bindings. Women’s highbacks are typically set at a more forward angle to match the natural stance angle of women riders, who often prefer a slightly more ducked (toes-out) stance than men.
Strap Systems
Modern binding straps come in several styles, each offering different levels of comfort and response. The two main strap types are the ankle strap and the toe strap.
Ankle Straps: The ankle strap wraps around the top of your boot and provides the primary connection between your boot and the binding. Women’s ankle straps are typically positioned slightly lower than men’s to accommodate the different ankle-to-calf ratio. They also tend to be softer and more padded for comfort.
Toe Straps: The toe strap secures the front of your boot to the binding. Modern toe straps use a “cap” design that wraps over the toe of the boot rather than sitting on top of it. This provides better hold and prevents the boot from lifting out of the binding. Women’s toe straps are sized to fit the narrower toe box of women’s boots.
Baseplates
The baseplate is the platform that your boot sits on and connects to the board. Women’s baseplates are typically narrower to match women’s boot widths and have a slightly different mounting hole pattern to optimize stance width for women. Some brands offer baseplates with adjustable cant (the angle of the baseplate relative to the board) to further customize the fit and feel.
Women’s Binding Features to Look For
- Shorter, narrower highback designed for women’s calves
- Ankle strap positioned for women’s ankle-to-calf ratio
- Softer flex calibrated for lighter riders
- Narrower baseplate for women’s boot widths
- Padded footbed for comfort and vibration dampening
- Tool-free adjustment for easy on-mountain tweaks
- Responsive heel cup for efficient energy transfer
12. Binding Sizing & Compatibility
Choosing the right binding size is straightforward but critical. Bindings are sized to match your boot size, not your shoe size. Using the wrong size binding affects comfort, response, and can even damage your equipment. Understanding binding sizing and compatibility ensures your setup works as intended.
Binding Size Chart
| Binding Size | Women’s Boot Size (US) | Mondopoint (cm) | Notes |
|---|---|---|---|
| XS | 4 – 5.5 | 22 – 23.5 | Available from select brands |
| S | 5.5 – 7.5 | 23.5 – 25 | Most common women’s size |
| M | 7.5 – 9.5 | 25 – 26.5 | For larger women’s feet |
| L | 9.5 – 11 | 26.5 – 28 | May need unisex options |
Binding-to-Boot Fit
Your boot should fit snugly in the binding with minimal overhang. If the boot hangs over the edges of the binding baseplate, it can cause drag during turns and reduce response. If the binding is too large, the boot will move around inside, reducing control. The ideal fit has the boot filling the binding platform with minimal overhang on any side.
Mounting Compatibility
Snowboard bindings mount to the board using a hole pattern. The two main patterns are the 4×4 pattern (four holes in a square) and the channel system (a single slot). Most modern boards use one of these systems, and most bindings are compatible with both. However, some older or specialty boards may use proprietary patterns, so always check compatibility before purchasing.
When mounting bindings, the angle and position of the binding on the board significantly affect how the board rides. Most women prefer a slightly ducked stance (toes angled out) with a shoulder-width stance width. Experiment with different angles and positions to find what feels most comfortable and natural for your body and riding style.
Stance Width and Angles
Your stance width is the distance between your bindings on the board. A good starting point is approximately shoulder width, which for most women is between 18 and 21 inches. Too narrow a stance reduces stability, while too wide a stance can make it difficult to initiate turns. Most boards have recommended stance width ranges printed on them.
Binding angles determine how your feet are angled on the board. Common setups include:
- Ducked stance: Both bindings angled outward equally (e.g., +15°/-15°). This is versatile and comfortable for most riders.
- Forward stance: Both bindings angled forward (e.g., +15°/+6°). This is more aggressive and better for carving.
- Mixed stance: Front binding angled forward, back binding flat or slightly negative (e.g., +18°/-6°). This is a popular all-mountain setup.
13. Women’s Snowboards: Designed for Your Stance
Women’s snowboards have a softer flex, narrower waist widths, and stance positions set back to accommodate a typically lower center of gravity. This makes them easier to turn and control. A hybrid camber profile is often the most forgiving for beginners and intermediates. If you’re curious about other innovative shapes, learn about the benefits of asymmetrical snowboards which can enhance edge control.
What Makes a Board “Women’s-Specific”
Women’s snowboards differ from men’s boards in several important ways. They typically have a softer flex pattern calibrated for lighter riders, narrower waist widths to accommodate smaller boot sizes, and different sidecut radii that account for women’s typically shorter stature and different turning mechanics. The stance options are often set back slightly further to help with powder float, and the overall construction uses materials and core profiles optimized for lighter riders.
Board Construction
Understanding snowboard construction helps you make informed decisions about which board is right for you. The main components of a snowboard include:
Core: The core is the heart of the snowboard, typically made from wood (often a blend of different wood species). Women’s boards often use lighter core constructions to reduce overall weight while maintaining performance. Popular core materials include poplar, birch, bamboo, and paulownia.
Laminates: Fiberglass and other composite materials are layered over the core to provide strength, torsional stiffness, and flex characteristics. Women’s boards may use different fiberglass weaves or additional materials like carbon fiber stringers to optimize flex and response for lighter riders.
Base: The base is the bottom surface that contacts the snow. It’s typically made from sintered or extruded polyethylene. Sintered bases are faster and more durable but require more maintenance. Extruded bases are lower maintenance but slower. For most women riders, a sintered base provides the best performance.
Edges: Steel edges run along the sides of the board and provide the grip needed for carving turns on hardpack and ice. The edge bevel (angle) affects how the board initiates and holds turns. Most women’s boards come with a factory-tuned edge that’s ready to ride.
Board Shapes
Snowboards come in several shapes, each optimized for different riding styles:
Twin Tip: Symmetrical nose and tail, identical in shape and flex. This is the most versatile shape and ideal for park riding and switch (riding backward) maneuvers. Most beginner and intermediate women’s boards are twin tips.
Directional: A longer, often more pointed nose with a shorter, stiffer tail. This shape is optimized for riding in one direction and provides better float in powder. Directional boards are popular among freeride and all-mountain riders.
Directional Twin: A hybrid shape with a twin tip outline but different flex patterns in the nose and tail. This provides the versatility of a twin with the directional performance benefits. This is the most popular shape for all-mountain women riders.
Volume-Shifted: A newer design concept that uses a shorter, wider board with the same surface area as a traditional board. These boards provide better float in powder and are more maneuverable in tight terrain. They’re gaining popularity among women who ride in varied conditions.
Women’s Board Selection Guide
- Beginner: Soft flex, twin tip, hybrid camber, shorter length
- Intermediate All-Mountain: Medium flex, directional twin, hybrid camber, standard length
- Freestyle/Park: Soft-medium flex, twin tip, flat or rocker profile, shorter length
- Freeride/Powder: Medium-stiff flex, directional, camber or hybrid, longer length
- Carving/Groomers: Stiff flex, directional, camber, standard to longer length
14. Board by Riding Style
Your preferred riding style should be the primary factor in your board selection. Different riding styles demand different performance characteristics, and a board optimized for one style may perform poorly in another. Understanding what each style requires helps you narrow your options and find the perfect board.
All-Mountain Riding
All-mountain riders want a board that performs well across the entire resort—groomers, powder, trees, park, and everything in between. All-mountain boards typically have medium flex, directional twin or directional shapes, and hybrid camber profiles. They’re the most versatile option and the best choice for riders who don’t want to specialize.
For women all-mountain riders, look for boards with flex ratings between 4-6, waist widths appropriate for your boot size, and a profile that provides both edge hold and float. The ideal all-mountain board should feel comfortable at both slow and fast speeds and handle varied snow conditions.
Freestyle and Park
Freestyle riders spend their time in the terrain park, hitting jumps, rails, boxes, and other features. Park boards are typically softer flexing, twin-tipped, and often have flat or rocker profiles. The softer flex makes them easier to press and butter, while the twin tip allows for switch riding.
Women who ride park should look for boards with flex ratings between 2-5, twin tip shapes, and profiles that are forgiving of mistakes. Shorter boards are easier to spin and manipulate in the air, while slightly longer boards provide more stability on landings.
Freeride and Powder
Freeride riders seek out untracked snow, steep terrain, and natural features. Their boards are typically longer, stiffer, and directional with a pronounced nose for float. These boards are designed to handle high speeds and variable conditions while providing maximum float in deep snow.
For women who ride freeride, look for boards with flex ratings between 6-8, directional shapes with set-back stance options, and profiles that provide both float and edge hold. The board should feel stable at speed and responsive in challenging terrain.
Carving and Groomers
Carving riders focus on making clean, carved turns on groomed runs. Their boards are typically stiff, cambered, and designed to hold an edge at high speeds. Carving boards provide maximum response and precision but can be less forgiving in other conditions.
Women who prioritize carving should look for boards with flex ratings between 6-9, camber or camber-hybrid profiles, and sidecut radii that match their preferred turn shape. These boards reward precise technique and provide the most satisfying on-groomer experience.
All-Mountain
Flex: 4-6
Shape: Directional Twin
Profile: Hybrid Camber
Best For: Versatile resort riding
Freestyle/Park
Flex: 2-5
Shape: Twin Tip
Profile: Flat or Rocker
Best For: Jumps, rails, butter
Freeride/Powder
Flex: 6-8
Shape: Directional
Profile: Camber/Hybrid
Best For: Deep snow, steep terrain
Carving
Flex: 6-9
Shape: Directional
Profile: Camber
Best For: Groomed runs, high speed
15. Helmets & Goggles: Safety & Vision
Always wear a helmet. Many brands offer women’s-specific fits with different interior shapes. Look for MIPS technology for rotational impact protection. Goggles should fit seamlessly with your helmet. Consider lens versatility—a low-light lens for cloudy days and a sun lens for bluebird days is ideal. Photochromic lenses that adjust automatically are a fantastic investment.
 Find Helmet & Goggles
Why Helmets Are Non-Negotiable
Snowboarding carries inherent risks, and head injuries are among the most serious consequences of a fall or collision. Modern helmets are lightweight, well-ventilated, and designed to be comfortable enough to wear all day. There’s no reason not to wear one. The protection a helmet provides far outweighs any minor inconvenience.
Helmets work by absorbing and distributing the force of an impact across a larger area, reducing the peak force transmitted to your skull and brain. They also provide protection against puncture injuries from tree branches, lift towers, and other objects. Even at slow speeds, a fall on hard-packed snow or ice can cause a serious head injury without a helmet.
MIPS Technology
MIPS (Multi-directional Impact Protection System) is a helmet technology that reduces rotational forces during angled impacts. Traditional helmets protect well against direct impacts, but most real-world falls involve some rotational component. MIPS adds a low-friction layer inside the helmet that allows the helmet to rotate slightly relative to the head during an impact, reducing the rotational forces transmitted to the brain.
MIPS helmets are slightly more expensive than standard helmets, but the additional protection is worth the investment. Many women’s helmets now include MIPS as a standard feature, making it easy to choose this important safety technology.
Women’s Helmet Fit
Women’s helmets are designed with different interior shapes to accommodate typically smaller head sizes and different head shapes. They often feature more padding in certain areas and different ventilation patterns. When fitting a helmet, it should sit level on your head, covering your forehead without blocking your vision. The chin strap should be snug enough that you can fit only one finger between the strap and your chin.
Goggle Selection
Good goggles protect your eyes from wind, snow, UV radiation, and debris while providing clear vision in varying light conditions. Goggle selection involves several factors: lens tint, lens shape, frame size, and ventilation.
The most important factor in goggle selection is lens tint, which affects how you see in different light conditions. Darker tints (lower VLT – Visible Light Transmission) are better for bright, sunny conditions, while lighter tints (higher VLT) are better for cloudy or low-light conditions. For versatile performance, consider goggles with interchangeable lenses or photochromic technology that automatically adjusts to changing light.
Goggle-Helmet Compatibility
Your goggles and helmet should work together seamlessly. The bottom of the goggle frame should sit against the top of the helmet without a gap. A gap creates a “gaper” effect that looks awkward and allows cold air to reach your forehead. Most major manufacturers design their helmets and goggles to work together, so staying within a brand ecosystem can simplify this compatibility issue.
Helmet & Goggle Checklist
- Helmet fits snugly without pressure points
- Helmet sits level, covering forehead
- MIPS or similar rotational protection technology
- goggles fit seamlessly with helmet (no gap)
- Appropriate lens tint for your typical conditions
- Anti-fog coating or ventilation system
- UV protection (UV400 or 100% UV protection)
- Comfortable strap that stays in place
16. Goggle Lens Guide
Your goggle lens is the most important factor in your visual experience on the mountain. The right lens helps you see terrain features, snow conditions, and obstacles clearly, while the wrong lens can make it difficult to navigate safely. Understanding lens technology and selection helps you choose the right option for your riding conditions.
Understanding VLT (Visible Light Transmission)
VLT measures the percentage of light that passes through the lens. Lower VLT values mean less light passes through, making the lens darker. Higher VLT values mean more light passes through, making the lens lighter. The VLT you need depends on your typical riding conditions:
- 0-25% VLT: Dark lenses for bright, sunny conditions. Best for bluebird days and high-altitude riding where UV intensity is highest.
- 25-50% VLT: Medium lenses for partly cloudy to sunny conditions. Good all-around choice for variable conditions.
- 50-75% VLT: Light lenses for overcast and low-light conditions. Essential for cloudy days, tree riding, and flat light.
- 75-100% VLT: Very light or clear lenses for night riding and extremely low-light conditions.
Lens Tints and Their Uses
Different lens tints serve different purposes beyond just light transmission. Some tints enhance contrast, making it easier to see terrain features. Others reduce glare or improve depth perception.
Rose/Pink Tints: Enhance contrast and depth perception in flat light and overcast conditions. These are excellent all-around tints for women who ride in variable conditions.
Amber/Brown Tints: Enhance contrast in partly cloudy conditions while providing good visibility in both bright and low-light situations. A versatile choice for all-mountain riders.
Gray/Green Tints: Provide true color perception and reduce eye fatigue in bright conditions. Good for sunny days when you want accurate color representation.
Yellow/Orange Tints: Excellent for flat light and overcast conditions. They enhance contrast and make terrain features more visible. Popular among riders who frequently encounter cloudy conditions.
Photochromic and ChromaPop Technology
Photochromic lenses automatically adjust their tint based on UV exposure. They’re darker in bright conditions and lighter in low-light conditions, providing versatility without needing to change lenses. While they don’t adjust as quickly as dedicated light or dark lenses, they offer excellent convenience for riders who encounter varying conditions throughout the day.
ChromaPop and similar contrast-enhancing technologies use specialized filters to enhance color and contrast. These lenses make snow conditions more visible and help you see terrain features that might be difficult to spot with standard lenses. They’re particularly valuable in flat light conditions where contrast is low.
Interchangeable Lens Systems
Many high-end goggles feature interchangeable lens systems that allow you to swap lenses based on conditions. This is the most versatile option, providing optimized vision for any condition. Look for systems that are easy to use even with gloves on, and consider carrying an extra lens in your jacket pocket for changing conditions.
Anti-Fog Technology
Fogging is one of the most common goggle problems, and it can significantly impair your vision. Quality goggles use double-pane lenses, anti-fog coatings, and ventilation systems to prevent fogging. Double-pane lenses create an insulating air gap that reduces temperature differences between the inside and outside of the lens, which is the primary cause of fogging.
If your goggles fog up while riding, avoid wiping the inside of the lens, as this can damage the anti-fog coating. Instead, let them air dry or use the ventilation system to clear the fog. Carrying a spare lens or a second pair of goggles is a good backup plan for persistent fogging issues.
17. Gloves & Accessories: Protect Your Extremities
Cold hands and feet end the day early. For gloves, prioritize waterproofing and dexterity. Mittens are warmer than gloves. Wear thin liner gloves underneath for extra warmth. Don’t forget a neck gaiter or balaclava, and quality snowboard socks (merino blend, no cotton).
Gloves vs. Mittens
The gloves vs. mittens debate is one of the most personal decisions in snowboarding gear. Mittens are generally warmer because your fingers share a single compartment, creating more collective warmth. However, mittens provide less dexterity, making it harder to adjust bindings, use your phone, or handle zippers.
Gloves offer better dexterity because each finger moves independently. This makes tasks like adjusting gear, taking photos, or eating lunch much easier. However, gloves are generally less warm than mittens because each finger has its own cold surface area. The best choice depends on your personal priorities and how cold your hands typically get.
Many women find that glove-mittens (mittens with a fold-away finger compartment) offer the best of both worlds. You can use the individual fingers when you need dexterity and fold them together for warmth when you don’t.
Glove Features to Look For
- Waterproofing: Essential for keeping hands dry. Look for gloves with at least 10,000mm waterproof rating.
- Insulation: Down or synthetic insulation provides warmth. Thinsulate and PrimaLoft are popular choices.
- Breathability: Allows moisture to escape, keeping hands dry from the inside.
- Tough palms: Reinforced palms withstand abrasion from chairlifts and edges.
- Wrist leashes: Prevent gloves from falling off on the mountain.
- Touchscreen compatibility: Allows phone use without removing gloves.
- Removable liners: Allow for drying and temperature adjustment.
Socks: The Forgotten Essential
Quality snowboard socks are crucial for comfort and warmth. Cotton socks are the worst choice for snowboarding because they absorb moisture and take a long time to dry, leading to cold, wet feet. Instead, choose merino wool or synthetic socks specifically designed for snow sports.
Snowboard socks should be midweight (not too thick, not too thin) and long enough to reach just below your knee. Thicker socks aren’t necessarily warmer—they can restrict circulation and create pressure points inside your boots. A single pair of quality midweight socks is usually sufficient.
Some women prefer to wear a thin liner sock under their snowboard socks for additional moisture management and to prevent blisters. If you choose this option, make sure both socks are thin enough that they don’t affect your boot fit.
Neck Gaiters and Balaclavas
A neck gaiter or balaclava protects your face and neck from wind, cold, and sun. Neck gaiters are more versatile and easier to adjust, while balaclavas provide more coverage for very cold conditions. Both should be made from moisture-wicking, breathable fabric.
For women, fit is particularly important with face protection. Look for gaiters and balaclavas designed for smaller faces that don’t bunch up or create pressure points. Many brands offer women’s-specific face protection with appropriate sizing and shaping.
18. Impact Protection: Ride Longer, Fear Less
Crashing is part of learning. Impact shorts protect your tailbone and hips. Wrist guards are arguably the most important piece for beginners to prevent the most common fracture. This isn’t about being weak—it’s about being smart and staying on the hill instead of in the clinic.
Wrist Guards: Your #1 Priority
Wrist fractures are the most common snowboarding injury, especially for beginners. When you fall, your natural instinct is to put your hands out to break the fall, which puts tremendous force on your wrists. Wrist guards distribute this force across a larger area and prevent the hyperextension that causes fractures.
Modern wrist guards are designed to be comfortable enough to wear all day without restricting movement. Some are built into gloves, while others are separate inserts that slide into glove pockets. For women, look for wrist guards designed for smaller hands that provide protection without being bulky.
Impact Shorts
Impact shorts protect your tailbone, hips, and coccyx during falls. They’re particularly valuable for beginners who spend a lot of time sitting down and for park riders who may fall on hard features. Modern impact shorts use D3O or similar impact-absorbing materials that are flexible during normal movement but harden on impact.
Women’s impact shorts are designed with different padding patterns to account for anatomical differences. They’re typically more comfortable and less bulky than men’s versions, making them easier to wear under snowboard pants without affecting your riding.
Knee Pads
Knee injuries are common in snowboarding, especially among riders who frequently fall on their knees or ride park features. Knee pads protect against impact and abrasion, allowing you to ride longer and more confidently. Look for knee pads that are flexible enough to move with your legs but provide adequate protection for your typical riding conditions.
Back Protection
Back protectors are worn under your jacket and protect your spine from impact. They’re particularly important for park riders, racers, and anyone who rides aggressively in challenging terrain. Modern back protectors are lightweight and flexible, providing protection without significantly restricting movement.
Impact Protection Priority List
- Wrist Guards – Essential for beginners, recommended for all levels
- Impact Shorts – Highly recommended for beginners and park riders
- Knee Pads – Recommended for park riders and those with knee issues
- Back Protector – Recommended for aggressive riding and park
- Elbow Pads – Optional, useful for park and freestyle
The right impact protection gives you the confidence to push your limits and progress faster. When you’re not afraid of getting hurt, you’re more willing to try new things and ride more aggressively. This is particularly valuable for women who may be more hesitant to push their boundaries due to fear of injury.
19. Packing Essentials: The Day Bag Checklist
Be prepared for changing conditions. Your resort day bag should include: a spare base layer top, an extra pair of socks, sunscreen and lip balm (SPF 30+), a compact tool for binding adjustments, a small snack, a hydration pack or water bottle, and a portable phone charger.
The Essential Checklist
A well-packed day bag makes the difference between a great day and a miserable one. Here’s a comprehensive checklist of items every woman should have in her snowboard bag:
Clothing & Accessories
- Spare base layer top (in case you get wet)
- Extra pair of merino wool socks
- Extra pair of liner gloves
- Backup hand warmers (especially for cold days)
- Buff or extra neck gaiter
- Helmet (essential safety equipment)
- Goggles (with spare lens for changing conditions)
Sun & Skin Protection
- Sunscreen SPF 30+ (reapply every 2 hours)
- Lip balm with SPF protection
- Facial moisturizer (altitude and wind dry skin quickly)
- Hand cream for break times
Tools & Technology
- Multi-tool for binding adjustments
- Phone with fully charged battery
- Portable phone charger (10,000+ mAh recommended)
- Earbuds for lift rides (one ear only for safety)
- GoPro or camera (optional but fun)
Nutrition & Hydration
- Water bottle or hydration pack (stay hydrated at altitude)
- High-energy snacks (nuts, energy bars, dried fruit)
- Electrolyte packets for hydration
- Hot beverage in an insulated mug (luxury item but worth it)
Pack Organization Tips
Use packing cubes or zip-lock bags to organize your bag. Keep items you’ll need quickly (phone, lip balm, snacks) in easily accessible pockets. Store backup clothing in waterproof bags in case something spills. Keep your multi-tool in a consistent place so you can find it quickly when needed.
For women, bag size and style matter. Look for bags with padded shoulder straps that distribute weight evenly across your shoulders. A bag with a hip belt can help if you’re carrying a lot of gear. Internal organization pockets help keep small items from getting lost in the bottom of the bag.
Apres-Ski Essentials
Don’t forget items for after riding. A change of clothes, comfortable shoes, and toiletries for freshening up will make your post-ride experience much more enjoyable. Many riders bring a small towel for wiping down gear and drying off before changing.
20. Seasonal Care & Maintenance
At season’s end, clean and dry all gear thoroughly. Apply a storage wax to your board. Loosen all boot and binding straps to prevent material fatigue. Store everything in a cool, dry place out of direct sunlight. Proper care adds years to your gear’s life.
End-of-Season Care
Proper storage of your snowboard gear during the off-season is essential for maintaining performance and extending the life of your equipment. Here’s a comprehensive guide to end-of-season care:
Board Care: Clean your board with a damp cloth to remove dirt, salt, and grime. Apply a thick layer of storage wax (also called “summer wax”) to protect the base from drying out. Don’t scrape the wax off—leave it on until the start of next season. Store the board in a board bag or wrap it in a towel to protect it from scratches and dings.
Boot Care: Remove the insoles and liners from your boots and let them dry completely. Clean the exterior with a damp cloth and mild soap. Loosen all laces and straps to prevent material fatigue. Store boots in a cool, dry place with the tongues pulled forward to maintain their shape. Avoid storing boots in direct sunlight or near heat sources, which can damage the materials.
Binding Care: Check all screws and hardware for tightness. Clean the bindings with a damp cloth. Loosen all straps to prevent material fatigue. If your bindings have removable parts, check them for damage and replace as needed. Store bindings in a bag or box to protect them from dust and scratches.
Clothing Care: Wash all clothing according to the manufacturer’s instructions. Use a technical wash designed for waterproof fabrics to maintain DWR (Durable Water Repellent) coating. Reapply DWR treatment if water no longer beads on the fabric. Dry all clothing completely before storing.
Mid-Season Maintenance
Regular maintenance during the season keeps your gear performing at its best:
- Wax your board every 3-5 days of riding for optimal glide
- Check binding screws before each day of riding
- Clean and dry boots after each use
- Check edges for damage and have them tuned as needed
- Re-waterproof clothing as needed throughout the season
Storage Checklist
- Board: Clean, storage wax applied, wrapped in bag/towel
- Boots: Dry, laces loosened, stored cool and dry
- Bindings: Clean, straps loosened, stored protected
- Clothing: Cleaned, DWR re-applied, dry before storing
- Goggles: Clean, in protective case, stored in dry place
- Accessories: Clean, dry, organized for next season
21. Waxing & Edge Tuning
Regular waxing and edge maintenance are essential for optimal snowboard performance. A well-waxed board glides faster, turns more easily, and is more enjoyable to ride. Sharp edges provide better grip on hardpack and ice, giving you more control and confidence. Understanding basic maintenance helps you keep your board in top condition throughout the season.
Why Wax Your Board
Your snowboard’s base is made from polyethylene, which is naturally hydrophobic (repels water). However, this property diminishes over time as the base dries out and becomes damaged. Wax fills the pores in the base material, restoring its hydrophobic properties and reducing friction between the board and the snow.
A well-waxed board glides significantly faster and more smoothly than an unwaxed one. It also turns more easily because the reduced friction allows the board to slide through turns more fluidly. The difference is noticeable immediately and makes riding more enjoyable and less tiring.
Types of Wax
Different waxes are designed for different snow temperatures and conditions. Using the right wax for your conditions optimizes performance:
- Cold Temperature Wax: Designed for snow temperatures below 20°F (-7°C). These waxes are harder and more durable in cold, dry snow.
- Warm Temperature Wax: Designed for snow temperatures above 32°F (0°C). These waxes are softer and provide better glide in warm, wet snow.
- All-Temperature Wax: A versatile option that works reasonably well across a range of temperatures. Good for riders who encounter varied conditions.
- Storage Wax: A thick, all-temperature wax applied at the end of the season to protect the base during storage.
Basic Waxing Process
Waxing your board at home is straightforward with the right tools. You’ll need a waxing iron, wax, a scraper, a brush, and a clean work surface. The basic process involves melting wax onto the base, letting it cool, scraping off the excess, and brushing to a smooth finish.
For beginners, many ski shops offer waxing services for a reasonable price. As you gain confidence, you can invest in a basic waxing kit and learn to do it yourself. The cost savings over a season make DIY waxing worthwhile for regular riders.
Edge Tuning
Snowboard edges need to be sharp to provide grip on hardpack and ice. Over time, edges become dull from contact with rocks, ice, and other hard surfaces. Dull edges make it difficult to hold a turn on hard snow and can be dangerous on steep terrain.
Basic edge maintenance involves using a diamond stone or file to remove burrs and restore the edge angle. Most women’s snowboard edges are factory-set at 88-90 degrees. Unless you’re racing or riding very aggressively, maintaining the factory edge angle is usually sufficient.
Determining When to Wax
A simple test to determine if your board needs wax is the “water test.” Flick a few drops of water onto the base. If the water beads up, your wax is still effective. If the water spreads out and soaks in, it’s time to wax. As a general rule, wax your board every 3-5 days of riding for optimal performance.
Signs that your board needs wax include: slower glide, difficulty initiating turns, a dry or white appearance on the base, and increased effort required to maintain speed. If you notice any of these signs, a fresh coat of wax will make a significant difference.
22. Fitness & Pre-Season Preparation
Preparing your body for the snowboard season is just as important as preparing your gear. Snowboarding is a physically demanding sport that requires strength, flexibility, balance, and cardiovascular endurance. A good pre-season fitness program reduces the risk of injury, improves performance, and allows you to ride longer and more comfortably.
Key Fitness Areas for Snowboarding
Leg Strength: Your legs are the primary power source for snowboarding. Squats, lunges, and leg presses build the quad, hamstring, and glute strength needed for carving turns, absorbing impacts, and maintaining balance. Aim for 2-3 leg strength sessions per week during pre-season.
Core Strength: A strong core provides stability and balance on the board. Planks, Russian twists, and mountain climbers build the core strength needed to maintain proper posture and control. Core strength also helps protect your lower back from strain during long days of riding.
Balance and Proprioception: Snowboarding requires excellent balance and body awareness. Balance exercises on a stability ball, BOSU ball, or balance board improve your ability to maintain equilibrium on the board. Single-leg exercises are particularly valuable because they mimic the one-footed balance challenges of snowboarding.
Cardiovascular Endurance: Snowboarding at altitude requires good cardiovascular fitness. Running, cycling, swimming, or other aerobic activities build the endurance needed for full days of riding without fatigue. Even 20-30 minutes of cardio, 3-4 times per week, makes a significant difference.
Flexibility: Good flexibility helps prevent injury and improves range of motion on the board. Focus on hip flexors, hamstrings, and lower back flexibility with regular stretching or yoga. Dynamic stretching before riding and static stretching after riding are both beneficial.
Pre-Season Timeline
Start your pre-season fitness program at least 6-8 weeks before your first day on the mountain. This gives your body time to adapt to the physical demands of snowboarding and reduces the risk of early-season injuries. Here’s a suggested timeline:
- 8-6 weeks before: Focus on building base strength and cardio. Higher reps, lower weights.
- 6-4 weeks before: Increase intensity and add balance work. Moderate reps and weights.
- 4-2 weeks before: Peak training. Higher intensity, sport-specific exercises.
- 2-0 weeks before: Taper. Reduce volume, maintain intensity, focus on flexibility and recovery.
Warm-Up Routine for Riding Days
A proper warm-up before riding reduces injury risk and improves performance. Spend 10-15 minutes warming up before your first run:
- 5 minutes of light cardio (walking, jogging, jumping jacks)
- Dynamic stretches for legs, hips, and back
- Bodyweight squats and lunges
- Balance exercises on one foot
- Gentle twisting motions for spine mobility
23. Riding Tips for Women
Whether you’re a beginner learning your first turns or an intermediate rider looking to progress, these tips will help you improve your riding and get more enjoyment from the mountain. Women often face unique challenges and opportunities on the slopes, and understanding these can help you progress faster and more confidently.
For Beginners
Start with Proper Instruction: Taking a lesson from a certified instructor is the fastest and safest way to learn. Many resorts offer women’s-specific lessons where you can learn in a supportive environment with other women. The investment in lessons pays for itself in faster progression and fewer bad habits.
Master the Basics First: Before trying to ride difficult terrain, make sure you can comfortably link turns, stop confidently, and ride the chairlift safely. These fundamental skills form the foundation for all advanced riding.
Don’t Compare Yourself to Others: Everyone progresses at their own pace. Some women pick up riding quickly, while others need more time. What matters is that you’re improving and having fun. Celebrate your progress, no matter how small.
Invest in Good Gear: As discussed throughout this guide, proper gear makes a significant difference in comfort and performance. Starting with well-fitted, women-specific gear sets you up for success from day one.
For Intermediate Riders
Ride with Better Riders: One of the fastest ways to improve is to ride with people who are better than you. Watch their technique, ask for tips, and push yourself to keep up. You’ll be surprised how quickly you improve when you’re motivated by stronger riders.
Focus on Technique, Not Speed: Many intermediate riders think they need to go faster to progress. In reality, focusing on proper technique at moderate speeds leads to better results. Work on smooth, controlled turns, proper body positioning, and consistent edge changes.
Try Different Terrain: Don’t get stuck riding the same runs every day. Exploring different terrain—trees, bumps, powder, park—challenges your skills in new ways and makes you a more versatile rider.
Take a Clinic or Lesson: Even experienced riders benefit from professional instruction. A lesson can help you identify and correct bad habits, learn new techniques, and突破 plateaus in your riding.
For All Levels
Ride Within Your Limits: Pushing your boundaries is important for progression, but know when to back off. Riding terrain that’s too difficult for your skill level increases injury risk and can destroy confidence. Progress gradually and safely.
Stay Hydrated and Fueled: Altitude and physical exertion dehydrate you quickly. Drink water regularly and eat snacks to maintain energy levels. Dehydration and low blood sugar significantly impact your riding performance and decision-making ability.
Take Breaks: Fatigue is a major contributor to injuries. Take regular breaks to rest, refuel, and warm up. There’s no shame in sitting out a run to recharge—riding tired is when most injuries happen.
Common Women’s Riding Challenges
- Cold Extremities: Layer appropriately, use hand warmers, and consider heated gloves
- Upper Body Strength: Focus on core and leg strength to compensate
- Fear of Committing: Start small, build confidence gradually, celebrate small wins
- Heel Lift in Boots: Ensure proper boot fit, use heel-lock lacing techniques
- Fatigue: Build fitness before the season, take breaks, stay fueled
24. Budget & Investment Guide
Snowboarding gear can be expensive, but smart spending ensures you get the best value for your money. Understanding where to invest and where to save helps you build a high-quality setup without breaking the bank. This section provides guidance on budgeting for different skill levels and priorities.
Prioritizing Your Spending
Not all gear is created equal, and your budget should reflect the relative importance of each item. Here’s the recommended spending priority:
- Boots (Highest Priority): Invest the most in boots. They have the biggest impact on comfort and performance. A $300 pair of boots that fits perfectly is worth more than a $500 board with ill-fitting boots.
- Helmet and Goggles: Safety equipment isn’t worth skimping on. A quality helmet and goggles protect your most important assets—your head and your vision.
- Outerwear: Good waterproofing and breathability keep you comfortable all day. Look for quality construction and features that matter to you.
- Board: A good board lasts many seasons. Choose one that matches your riding style and skill level, and you’ll grow with it.
- Bindings: Reliable bindings are essential, but they don’t need to be the most expensive model. Look for women’s-specific designs with the features you need.
- Base Layers and Accessories: These are relatively affordable and can be mixed and matched. Invest in quality socks and a good base layer system.
Budget Ranges by Skill Level
Beginner (Total Budget: $500-$1,000): At this level, focus on comfort and forgiveness. Buy or rent a beginner-friendly board, invest in well-fitted boots, and choose affordable but functional outerwear. Consider buying last season’s models for significant savings.
Intermediate (Total Budget: $1,000-$2,500): As you progress, invest in gear that matches your developing skills. A quality all-mountain board, medium-flex boots, and versatile outerwear will serve you well for several seasons.
Advanced (Total Budget: $2,500+): Advanced riders benefit from specialized, high-performance gear. Premium boots, a board tailored to your preferred terrain, and technical outerwear provide the performance edge that experienced riders demand.
Money-Saving Tips
- Buy Last Season’s Models: Previous year’s gear is often 30-50% off with no significant performance difference
- End-of-Season Sales: March and April offer the best deals on current-season gear
- Used Gear: Boards, bindings, and outerwear can be found used in good condition. Never buy used boots.
- Rent Before You Buy: Rent different gear to understand what you like before making a purchase
- Package Deals: Some retailers offer discounts when buying board, binding, and boot packages
- Off-Peak Purchasing: Buy gear in summer when demand is lowest
25. Women’s Snowboard Brand Comparison
The snowboard industry features several major brands, each with their own design philosophy, strengths, and target audience. Understanding what each brand offers helps you make informed choices about which products best match your needs, preferences, and budget.
Burton
Burton is the largest and most recognized snowboard brand in the world. They offer the widest range of women’s products, from beginner-friendly to professional-level. Burton’s women’s line is extensive, with dedicated designs for every riding style. Their Step-On binding system has been particularly popular among women for its convenience. Burton products are widely available and backed by excellent customer support.
Strengths: Widest product range, excellent women’s-specific designs, innovative technology (Step-On), strong dealer network
Price Range: Mid to premium
Ride
Ride is known for their playful, fun-oriented approach to snowboarding. Their women’s boards often feature creative graphics and innovative shapes. Ride offers excellent value across their product line, with quality construction at competitive prices. They’re particularly strong in the all-mountain and freestyle categories.
Strengths: Creative designs, good value, playful feel, strong all-mountain and freestyle options
Price Range: Budget to mid
Jones
Jones Snowboards focuses on freeride and all-mountain performance. Their women’s boards are designed for riders who want to explore the entire mountain, from groomers to backcountry. Jones is known for their innovative shapes and high-performance constructions. They’re particularly popular among advanced women riders who prioritize performance.
Strengths: Excellent freeride performance, innovative shapes, high-quality constructions, strong backcountry options
Price Range: Mid to premium
Capita
Capita is known for their artistic approach to snowboarding, with distinctive graphics and creative board designs. Their women’s line offers a range of options from beginner-friendly to advanced freestyle. Capita boards are known for their playful feel and responsive performance.
Strengths: Unique aesthetics, playful performance, good freestyle options, environmentally conscious manufacturing
Price Range: Mid to premium
Roxy
Roxy is a women’s-specific brand that offers a complete line of snowboarding products designed exclusively for women. From boards to outerwear, every product is created with women’s needs in mind. Roxy is a good choice for riders who want a brand that’s entirely focused on women’s snowboarding.
Strengths: 100% women’s focused, complete product line, stylish designs, good entry-level options
Price Range: Budget to mid
Salomon
Salomon brings their extensive outdoor sports expertise to snowboarding. Their women’s boards feature innovative technology and quality construction. Salomon is known for their comfortable boots and versatile all-mountain boards.
Strengths: Comfortable boots, innovative technology, strong all-mountain performance, good build quality
Price Range: Mid to premium
Best for Beginners
Roxy, Ride, Burton
Wide range of beginner-friendly options with forgiving flex patterns
Best for All-Mountain
Burton, Jones, Salomon
Versatile boards that perform well across varied conditions
Best for Freeride
Jones, Burton, Capita
High-performance boards for aggressive off-piste riding
Best Value
Ride, Roxy, Capita
Quality construction and performance at competitive prices
26. Women-Specific Features Deep Dive
This section provides an in-depth look at the specific design features that differentiate women’s snowboarding gear from men’s and unisex alternatives. Understanding these differences helps you appreciate why women-specific gear provides better performance and comfort.
Boot Design Differences
Women’s snowboard boots incorporate several design elements that address the specific characteristics of women’s feet. The heel pocket is narrower to prevent heel lift, which is one of the most common fit issues for women. Women typically have narrower heels relative to their forefoot, and standard boots designed for men often allow the heel to lift during turns, reducing control and causing blisters.
The cuff height of women’s boots is lower to accommodate typically shorter legs and lower calf muscle positioning. Women’s calf muscles are generally positioned lower on the leg, and a cuff that’s too high can create pressure points and discomfort. The lower cuff height also makes it easier to flex the boot, which is important for lighter riders who may not have the leg strength to flex a stiff men’s boot.
The footbed shape is also different. Women’s footbeds are designed to support women’s typically narrower arches and different foot shape. A footbed that matches your foot shape provides better support, reduces fatigue, and improves energy transfer to the board.
Binding Design Differences
Women’s bindings feature highbacks that are shorter and narrower to match women’s calf muscles. The highback angle is often set more forward to accommodate the natural stance angle that many women prefer. The baseplate is typically narrower to match women’s boot widths, and the mounting hardware is positioned to optimize stance width for women.
The ankle strap positioning is different to account for women’s ankle-to-calf ratio. Women’s straps are typically positioned slightly lower and have different padding to distribute pressure more evenly across the boot. This reduces pressure points and improves comfort during long days of riding.
Outerwear Design Differences
Women’s outerwear features narrower shoulders, roomier hips, and shorter sleeve and leg lengths. The hood is designed to fit over a helmet while maintaining visibility, and it’s shaped to accommodate typically smaller head sizes. The waist is often cinched or shaped to provide a more flattering fit while still allowing room for layering.
Interior features like powder skirts, wrist gaiters, and pocket placement are designed for women’s proportions. The powder skirt sits at the natural waist rather than the hips, providing a better seal against snow. Wrist gaiters are sized for smaller hands, and pockets are positioned for easy access.
Board Design Differences
Women’s snowboards feature softer flex patterns calibrated for lighter riders. The sidecut radius is often slightly different to account for women’s typically shorter stature and different turning mechanics. The waist width is narrower to accommodate smaller boot sizes, and the stance options are often set back to help with powder float.
The core construction uses lighter materials to reduce overall weight while maintaining performance. Some manufacturers use different wood species or additional materials like carbon fiber to optimize flex and response for women’s weight ranges. The result is a board that feels more responsive and easier to control for lighter riders.
Why These Differences Matter
These design differences aren’t just aesthetic—they directly affect performance, comfort, and safety. A boot that fits properly allows you to control your board more effectively. A binding that matches your anatomy distributes pressure evenly and responds predictably. Outerwear that fits your proportions keeps you warmer and more comfortable. And a board that matches your weight and size is easier to control and more enjoyable to ride.
27. Gear by Riding Conditions
Different snow and weather conditions require different gear approaches. Understanding how to adapt your equipment and clothing to various conditions helps you ride comfortably and safely regardless of what the mountain throws at you.
Powder Days
Deep powder is every snowboarder’s dream, but it requires specific gear considerations. A longer, wider board with a rockered or hybrid profile provides the float needed to stay on top of the snow. A directional shape with a setback stance helps keep the nose up in deep snow.
For clothing, bibs are essential for powder days to prevent snow from entering your clothing during falls. A helmet with good ventilation prevents overheating during the intense physical effort of powder riding. Goggles with a low-light lens help you see terrain features in the flat light that often accompanies snowfall.
Icy Conditions
Icy conditions require maximum edge hold and precise control. A stiffer board with a camber profile provides the best edge grip. Sharp edges are essential—have them tuned before riding in icy conditions. Boots with good ankle support and responsive bindings help maintain control on hard snow.
For clothing, windproof outerwear is important because icy conditions often accompany high winds. A warm mid-layer helps maintain core temperature when the wind chill is severe. Face protection is essential to prevent windburn and frostbite.
Warm Spring Conditions
Spring riding offers warm temperatures and soft snow, but it requires different gear considerations. A softer, more forgiving board handles the variable snow conditions better. Ventilated outerwear prevents overheating in the warm temperatures. Light-colored goggles or sunglasses (with a retention strap) help with visibility in bright conditions.
Sun protection is critical in spring conditions. The combination of high altitude, reflective snow, and strong sun can cause severe sunburn. Apply sunscreen generously and reapply frequently. A helmet with good ventilation keeps your head cool while providing protection.
Flat Light and Low Visibility
Flat light conditions make it difficult to see terrain features, making riding potentially dangerous. Goggles with high-contrast lenses (yellow, rose, or amber tints) help enhance visibility in flat light. Riding at slower speeds and sticking to familiar terrain reduces risk in poor visibility.
Powder Days
- Longer, wider board with rocker
- Bibs for snow protection
- Low-light goggle lens
- Lighter flex for float
Icy Conditions
- Stiffer board with camber
- Sharp edges (fresh tune)
- Windproof outerwear
- Responsive boots and bindings
Spring Riding
- Softer, forgiving board
- Ventilated outerwear
- Sun protection (SPF 50+)
- Light goggle lens or sunglasses
Flat Light
- High-contrast goggle lens
- Familiar terrain
- Slower speeds
- Extra caution on features
28. Beginner’s Complete Guide
If you’re new to snowboarding, this section provides everything you need to know to get started safely and confidently. From choosing your first gear to understanding mountain etiquette, we’ll cover the essentials for a successful first season.
Your First Gear Setup
As a beginner, your gear should prioritize comfort, forgiveness, and ease of use. You don’t need the most expensive or highest-performance equipment—in fact, very stiff, aggressive gear can actually hinder your learning. Focus on gear that’s comfortable, fits well, and is designed for learning.
Board: Choose a soft-flexing twin tip with a hybrid camber profile. This combination is forgiving, easy to turn, and works well for learning basic maneuvers. Size it to your weight, not your height. A slightly shorter board is easier to control while learning.
Boots: This is where you should invest the most. Comfortable, well-fitting boots make learning much more enjoyable. Look for soft to medium flex boots that are easy to walk in and provide good comfort. Always try boots with riding socks and spend time walking around in them before purchasing.
Bindings: Soft to medium flex bindings provide the forgiveness you need while learning. They’re more comfortable and easier to adjust than stiff, aggressive bindings. Look for women’s-specific designs with easy-to-use straps.
Outerwear: A waterproof shell with a layering system provides the most versatility. You’ll likely get warm from the physical effort of learning, so breathability is important. Bibs are recommended to prevent snow from getting in during the inevitable falls.
Your First Day on the Mountain
Your first day should be focused on learning the basics in a safe environment. Here’s what to expect and how to prepare:
- Take a lesson—it’s the fastest and safest way to learn
- Start on the beginner area (bunny hill) before progressing to longer runs
- Practice falling safely—fall to the side, not forward or backward
- Take frequent breaks—learning is physically exhausting
- Stay hydrated and fueled—altitude and exertion dehydrate you quickly
- Don’t get discouraged—everyone falls a lot when learning
Basic Skills to Master
Focus on these fundamental skills before trying to progress to more difficult terrain:
- Straight Running: Riding straight down a gentle slope while maintaining balance
- Falling Leaf: Moving side-to-side across a slope without fully turning
- Basic Turns: Linking heel-side and toe-side turns
- Stopping: Being able to stop confidently at any speed
- Chairlift Riding: Getting on and off safely and confidently
Common Beginner Mistakes
Avoid these common mistakes that slow your progression:
- Looking Down: Look where you want to go, not at your feet
- Leaning Back: Keep your weight centered over the board
- Stiff Legs: Keep your knees bent and flexible
- Fighting the Fall: Relax and let yourself fall—tensing up causes injuries
- Rushing Progression: Master the basics before moving to harder terrain
29. Intermediate & Advanced Guide
Once you’ve mastered the basics and can comfortably link turns on intermediate terrain, it’s time to take your riding to the next level. This section covers gear considerations and riding techniques for intermediate and advanced women riders.
Intermediate Progression
Intermediate riders can link turns confidently on blue runs and are ready to explore more challenging terrain. At this stage, you should consider upgrading your gear to match your developing skills. A medium-flex all-mountain board provides the versatility to explore different terrain, while medium-flex boots offer a balance of comfort and response.
Focus on refining your technique: work on smoother turns, better speed control, and more dynamic body movements. Try different terrain—trees, bumps, and steeper slopes—to challenge your skills in new ways. Consider taking an intermediate lesson to identify and correct any bad habits.
Advanced Techniques
Advanced riders are comfortable on black diamond terrain and are working on mastering challenging conditions. At this level, gear choices become more specialized. You may want separate boards for different conditions (all-mountain, powder, park) and boots matched to your preferred riding style.
Advanced techniques to work on include carving (maintaining edge contact through the entire turn), riding switch (riding with your opposite foot forward), and variable terrain skills (riding bumps, crud, and mixed conditions). These skills make you a more versatile and confident rider.
Freeride Progression
Freeride riding involves exploring off-piste terrain, riding powder, and tackling natural features. This requires specific gear considerations: a longer, stiffer board with good float, a helmet with MIPS protection, and outerwear that can handle variable conditions. Always ride with a partner in the backcountry and carry appropriate safety equipment.
Freestyle Progression
Freestyle riding involves terrain park features—jumps, rails, boxes, and halfpipe. This requires a more playful setup: a softer-flexing twin tip, comfortable boots, and bindings that allow for movement. Start with small features and progress gradually as your skills develop. Always wear a helmet when riding park features.
Advanced Gear Considerations
- Multiple Board Quiver: Consider separate boards for different conditions
- Boot Upgrades: Stiffer boots for aggressive riding, softer for park
- Binding Customization: Adjust angles, cant, and stance for your style
- Technical Outerwear: Higher waterproofing and breathability ratings
- Safety Equipment: Backcountry gear if venturing off-piste
30. Travel & Resort Tips
Whether you’re driving to a local resort or flying across the country for a snowboard trip, travel logistics can significantly impact your experience. This section covers everything from packing for air travel to choosing the right resort for your skill level.
Flying with Snowboard Gear
Flying with snowboard gear requires careful planning to avoid damage and excess fees. Most airlines allow you to check a snowboard bag as oversized luggage, though fees vary. Some airlines include snowboard bags as standard checked luggage, while others charge extra.
Pack your board in a padded board bag to protect it from damage. Remove bindings and pack them separately to reduce the bag’s profile and protect them from bending. Place fragile items (goggles, electronics) in your carry-on luggage. Wear your heaviest clothing and boots on the plane to save space and weight in your checked bag.
Driving to the Resort
If you’re driving to the resort, organize your gear for easy loading and unloading. Keep your riding gear in one bag and your apres-ski clothes in another. Bring a roof rack or cargo box if your vehicle can’t accommodate all your gear inside. Pack emergency supplies (blanket, food, water, flashlight) in case of delays or breakdowns.
Choosing the Right Resort
Different resorts cater to different skill levels and riding styles. Research resorts before booking to ensure they have terrain appropriate for your ability level. Look for resorts with good beginner areas if you’re learning, extensive intermediate terrain if you’re progressing, and challenging advanced terrain if you’re experienced.
Consider factors like snow quality, altitude, crowds, and amenities when choosing a resort. Some resorts are known for their powder, while others excel in grooming. Some are family-friendly with lessons and childcare, while others cater to serious riders looking for challenging terrain.
Altitude Considerations
Many premier snowboard resorts are at high altitude (8,000+ feet), which can affect your performance and comfort. Altitude sickness can cause headaches, fatigue, and shortness of breath. To minimize altitude effects, hydrate well, avoid alcohol for the first day or two, and take it easy during your first runs.
The higher altitude also means stronger UV radiation. Sunscreen is essential, even on cloudy days. Apply SPF 30+ to all exposed skin and reapply every two hours. Lip balm with SPF protects your lips from sun and wind damage.
31. Women’s Snowboarding Gear: Your Questions Answered
Is women’s-specific snowboard gear really necessary?
Yes, if you want optimal performance and comfort. Women’s gear is designed for differences in anatomy—like narrower shoulders, wider hips, and a lower center of gravity. This leads to better fit, less fatigue, and more control. The difference is immediately noticeable, and most women who switch to women-specific gear never go back.
What’s more important to spend money on: boots or board?
Boots, 100%. You can ride a mediocre board with great boots and have a decent day, but incredible boots on a mediocre board will be miserable. Boots are the direct connection to your board and affect everything—comfort, control, and performance. Invest in the best-fitting boots you can afford.
Can I buy men’s snowboard gear if I can’t find my size in women’s?
For some items like gloves or certain jackets, possibly. For boots, bindings, and boards, it’s not recommended. The fit and performance characteristics are specifically tuned. Always try to find women’s-specific models first. If you have unusually large feet, some brands offer unisex options that may work.
How should snowboard pants fit for women?
They should be snug at the waist but allow full range of motion at the hips and knees. There should be enough room to fit a base layer and mid-layer underneath without being baggy. The cuff should sit over your boot without dragging. Bibs are recommended for better snow protection and comfort.
Are step-on bindings a good option for women?
Yes, they can be excellent for convenience and reducing fatigue from sitting down to strap in. However, ensure you get the compatible boots and that the system fits your boot size and riding style. Try before you buy if possible. Burton’s Step-On system is the most established and widely available option.
What’s the best base layer material for sensitive skin?
Merino wool is naturally odor-resistant, temperature-regulating, and less itchy than older wool types. It’s ideal for sensitive skin. Look for a high merino content (over 80%) for the best feel. If you’re very sensitive, try a merino-synthetic blend for the softness of merino with the durability of synthetics.
How do I know if my snowboard boots fit correctly?
Your toes should lightly brush the end when standing straight, and pull back slightly when in a riding stance. Your heel must be locked down with zero lift. There should be no pressure points or pinching. The boot should feel snug like a firm handshake—comfortable but secure.
Should I get a jacket with built-in insulation or a shell?
A shell (with separate layers) offers more versatility. You can adjust your insulation based on the day’s weather. An insulated jacket is simpler but can be too warm on mild days. For most riders, a shell system is recommended because it provides the most flexibility for varying conditions.
Are there specific goggles for women?
Yes, many brands offer women’s-specific goggles with different frame shapes to fit narrower faces and smaller nose bridges. This prevents gaps and improves seal and comfort. Women’s goggles often have slightly different lens tints optimized for women’s typically smaller frames.
Where is the best place to buy women’s snowboard gear online?
Look for retailers with generous return policies. Amazon can be great for accessories and base layers. For boots, boards, and bindings, consider specialty online snowboard shops with expert fit advice and easy exchanges. Always check the return policy before purchasing, especially for boots.
How often should I wax my snowboard?
Wax your board every 3-5 days of riding for optimal performance. If you notice the base looking dry or white, or if the board feels slower than usual, it’s time to wax. At minimum, wax at the beginning and end of each season. More frequent waxing maintains peak performance.
What’s the difference between men’s and women’s snowboard bindings?
Women’s bindings feature shorter, narrower highbacks designed for women’s calf muscles, ankle straps positioned for women’s ankle-to-calf ratio, softer flex calibrated for lighter riders, and narrower baseplates for women’s boot widths. These differences significantly affect comfort and performance.
How do I choose between a camber and rocker snowboard?
Camber provides better edge hold and pop but is less forgiving. Rocker is easier to turn and more forgiving but offers less edge hold. For beginners, rocker or hybrid profiles are recommended. For advanced riders who prioritize performance, camber or camber-hybrid profiles are better choices.
Can snowboarding help with fitness and weight loss?
Absolutely. Snowboarding is an excellent full-body workout that burns 300-600 calories per hour. It builds leg strength, core stability, balance, and cardiovascular endurance. Regular snowboarding combined with a healthy lifestyle can contribute significantly to fitness and weight management goals.
How long does snowboard gear typically last?
With proper care, a snowboard can last 5-10 seasons, boots typically last 2-4 seasons (depending on use and care), and bindings last 3-5 seasons. Outerwear can last many seasons if properly maintained. The key is regular maintenance and proper storage.
What should I do if my feet get cold while snowboarding?
Cold feet are a common problem, especially for women. Solutions include: wearing properly fitted boots (too tight restricts circulation), using thin liner socks under snowboard socks, wearing heated insoles or boot warmers, and ensuring your boots aren’t too tight. If cold feet persist, consider boots with better insulation.
Is it worth buying a season pass?
A season pass pays for itself in about 5-7 days of riding, depending on the resort. If you plan to ride more than that in a season, a pass is worth the investment. It also encourages you to ride more often, which accelerates your progression. Look for early-season discounts and multi-resort passes for the best value.
Final Word: Invest in Experience
Your gear is the bridge between you and the mountain. Investing in well-fitting, women’s-specific equipment isn’t a luxury—it’s the key to comfort, confidence, and progression. You deserve gear that works with you, not against you.
Remember that the best gear is the gear that fits you properly and matches your riding style and skill level. Don’t chase the latest technology or the most expensive products—focus on finding the right equipment for your specific needs. Take the time to try on boots, test boards when possible, and read reviews from riders with similar body types and skill levels.
Snowboarding is one of the most rewarding outdoor activities available. The combination of physical challenge, natural beauty, and pure fun makes it an incredible way to spend winter days. With the right gear, you’ll be comfortable, confident, and ready to progress at your own pace. Welcome to the sport, and enjoy every run.


Pingback: 7 Best Balaclavas for Snowboarding: Warm Face Masks