
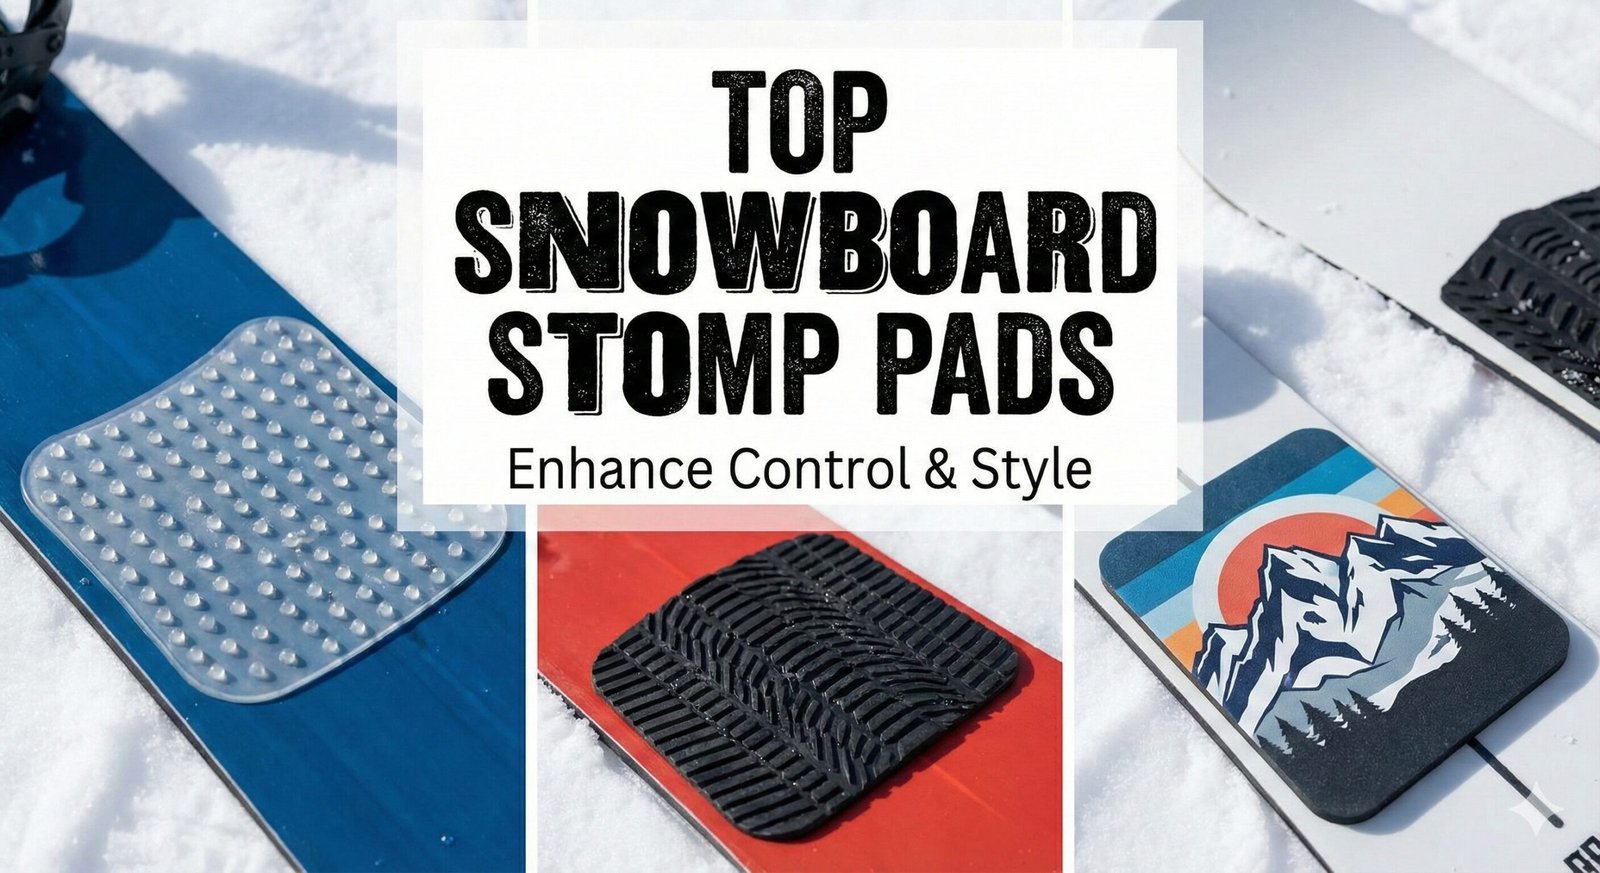
8 Best Snowboard Stomp Pads to Stop Slipping in the Lift Line
There is nothing more embarrassing—or dangerous—than sliding off the chairlift with one foot strapped in, hitting a patch of ice, and doing the splits in front of the liftie. We’ve all been there. It’s the classic “newbie slide,” and it happens because modern snowboard topsheets are designed to be glossy and slippery.
While we often obsess over big-ticket items like choosing camber vs rocker or finding the best snowboard boots, the humble stomp pad is often overlooked. Yet, this $15 accessory gives you the traction you need to skate through flats, unload from lifts safely, and save your groin muscles from disaster.
Best Overall: Dakine Modular Mat – Customizable, eco-friendly, and offers superior scraper functionality.
Best for Foam Grip: Crab Grab Mega Claws – Lightweight, classic style, and incredible traction even when packed with snow.
Best Minimalist: Dakine Pyramid Studs – Zinc alloy studs that look clean and bite into the boot sole perfectly.
The Complete Snowboard Stomp Pad Buyer’s Guide: Everything You Need to Know
Before we dive into our detailed product reviews, it’s important to understand what makes a great stomp pad and why this seemingly simple accessory is actually a sophisticated piece of equipment engineering. The stomp pad market has evolved dramatically over the past decade, moving from simple rubber discs to advanced multi-material systems that incorporate material science, ergonomic design, and even environmental considerations.
In this comprehensive guide, we’ll cover every aspect of stomp pads—from the basic physics of why they work to advanced techniques for maximizing their lifespan. Whether you’re a complete beginner who’s never set foot on a mountain or a seasoned veteran looking to optimize your setup, this guide has something for you.
What Exactly Is a Stomp Pad?
A stomp pad, also known as a snowboard traction pad, is an adhesive-backed accessory that mounts to the topsheet of your snowboard, typically positioned between your bindings or just behind your rear binding. Its primary purpose is to provide grip and traction for your unstrapped foot—the foot you use for skating, pushing, and balancing when you’re not fully strapped into your bindings.
The term “stomp pad” comes from the action of “stomping” your foot down onto the pad to gain traction. Unlike ski poles, which provide stability for skiers, snowboarders have no external balance aids, making the stomp pad an essential interface between your boot and the board’s surface.
Modern stomp pads come in a variety of shapes, sizes, and materials, each designed for specific riding conditions and styles. Some are large mats that cover a significant portion of the board’s waist, while others are small studs or strips that provide minimal but targeted grip. The choice between these options depends on your riding style, local snow conditions, and personal preferences.
The History and Evolution of Stomp Pads
The stomp pad’s history is intertwined with snowboarding’s evolution from a niche sport to a mainstream winter activity. In the early days of snowboarding—back when boards were essentially wooden planks with basic bindings—riders didn’t need stomp pads because the board’s surface was naturally rough and provided adequate grip.
As snowboard technology advanced through the 1980s and 1990s, manufacturers began using smoother, more aesthetically pleasing topsheet materials. Glossy graphics, polished surfaces, and decorative elements became standard, but these improvements came with an unintended consequence: the boards became slippery when wet or icy.
The first stomp pads appeared in the early 1990s as simple rubber or foam discs that riders would stick to their boards. These early designs were often homemade, cut from old tire tubes or shoe sole material. The concept was revolutionary, but the execution was crude—early stomp pads frequently fell off, lost their grip in extreme cold, or degraded quickly under UV exposure.
The modern era of stomp pads began in the early 2000s when companies like Dakine, Crab Grab, and Burton started applying material science principles to stomp pad design. They introduced advanced polymers, specialized foams, and metal alloys that could withstand the harsh alpine environment while providing consistent grip. The introduction of pressure-sensitive adhesives that could bond to various topsheet materials without damaging the board was another breakthrough that transformed the market.
Today’s stomp pads incorporate cutting-edge materials like thermoplastic polyurethane (TPU), closed-cell EVA foam, zinc-coated aluminum alloys, and even carbon fiber composites. Some manufacturers have begun experimenting with nano-texture surfaces that provide grip at the microscopic level, while others have developed modular systems that allow riders to customize their stomp pad configuration for different conditions.
Why Modern Snowboard Topsheets Are So Slippery
To understand why stomp pads are necessary, it’s helpful to know why modern snowboard topsheets are so slippery in the first place. The answer lies in the materials and manufacturing processes used to create today’s snowboards.
Most modern snowboard topsheets are made from one of several materials, each chosen for specific properties like durability, weight, and print quality:
Polyethylene Terephthalate (PET) is one of the most common topsheet materials. It’s a thermoplastic polymer that offers excellent clarity, allowing manufacturers to print vibrant graphics that show through the material. PET is lightweight, resistant to moisture absorption, and has good dimensional stability across a wide temperature range. However, its smooth surface becomes extremely slippery when wet, especially in freezing conditions where a thin layer of ice forms on the surface.
Polybutylene Terephthalate (PBT) is another popular topsheet material, particularly among manufacturers who prioritize durability. PBT offers better impact resistance than PET and maintains its properties at lower temperatures. The trade-off is that PBT surfaces tend to be slightly more porous, which can make them harder to clean but also provides marginally better grip than PET when dry.
Sublimated Graphics are applied using a heat-transfer process that infuses the design directly into the topsheet material. This creates a seamless, glossy finish that’s visually stunning but inherently slippery. The sublimation process actually seals the surface pores, creating a glass-like finish that offers almost zero traction for rubber or foam.
Clear Coat Finishes are applied over printed graphics to protect them from UV damage and abrasion. These finishes often contain wax-based compounds that provide additional water resistance but also contribute to the slippery surface. Even the highest-quality clear coats become treacherous when covered with a thin layer of frost or ice.
The physics of why these surfaces become so slippery involves several factors. First, the coefficient of friction between a wet plastic surface and a rubber boot sole is extremely low—typically around 0.05 to 0.1, compared to 0.7 or higher for dry rubber on dry plastic. This means that when moisture is present, your foot can slide with almost no resistance.
Second, the flat, uniform surface of a modern topsheet provides no mechanical interlock with the lugs and treads of your boot sole. Even aggressive boot tread patterns can’t find purchase on a smooth, wet surface. The lugs simply hydroplane across the moisture layer, much like car tires on a wet road.
Third, temperature plays a critical role. At the freezing point, moisture on the board can form a thin, invisible layer of ice that dramatically reduces friction further. This ice layer is often so thin that you can’t see it, making it particularly dangerous—it appears dry but provides almost no grip.
Understanding the Physics of Grip and Traction
The science behind stomp pad grip is fascinating and involves several principles from physics and materials engineering. Understanding these principles can help you choose the right stomp pad for your needs and maximize its effectiveness.
Friction Force is the force that resists the relative motion of two surfaces in contact. The friction force between your boot sole and the stomp pad depends on two factors: the coefficient of friction between the materials and the normal force (the perpendicular force pressing the surfaces together). The friction force formula is F = μ × N, where μ is the coefficient of friction and N is the normal force.
Different stomp pad materials offer different coefficients of friction. Soft rubber and foam materials typically have the highest coefficients because they conform to the surface irregularities of your boot sole, increasing the actual contact area. Hard plastic and metal studs rely more on mechanical interlock—the physical penetration of their protrusions into the rubber of your boot sole.
Mechanical Interlock occurs when surface protrusions on one material physically engage with the surface of another material. This is the primary grip mechanism for stomp pads with spikes, studs, or aggressive textures. The effectiveness of mechanical interlock depends on several factors: the height and sharpness of the protrusions, the hardness of the protrusion material relative to the boot sole, and the spacing and pattern of the protrusions.
Metal studs like the Dakine Pyramid Studs excel at mechanical interlock because they are much harder than rubber boot soles. When you step on them, the studs physically penetrate the rubber, creating a secure connection that doesn’t depend on friction alone. This is why metal studs provide grip even on icy surfaces where friction-based grip fails.
Viscoelastic Properties of foam materials contribute to their grip through a phenomenon called “hysteresis.” When you press your boot sole into a foam pad, the foam compresses and deforms to match the shape of your sole. As you lift your foot, the foam slowly recovers its original shape. This energy absorption and release creates a suction-like effect that increases grip, similar to how a gecko’s feet adhere to surfaces.
Closed-cell foams like Crab Grab’s C-Foam are particularly effective because they combine viscoelastic grip with water resistance. The closed-cell structure prevents water absorption, which means the foam maintains its grip properties even in wet conditions. Open-cell foams, while potentially offering higher initial grip, can absorb water and freeze, actually reducing grip over time.
Temperature Dependence affects all grip mechanisms. As temperature decreases, most materials become harder and less conformable. Rubber boot soles become stiffer, reducing their ability to conform to stomp pad textures. Foam materials lose their elasticity and can become brittle. Even metal studs become less effective as the rubber of the boot sole hardens around them, reducing the penetration depth.
This is why material selection is so critical for stomp pads. The best stomp pads use materials that maintain their grip properties across a wide temperature range. Urethane, for example, remains flexible and grippy down to about -30°C (-22°F), while standard EVA foam can become noticeably harder below -15°C (5°F).
How Your Riding Style Affects Your Stomp Pad Choice
Your riding style is perhaps the single most important factor in determining which stomp pad is right for you. Different riding disciplines present different challenges, and the ideal stomp pad varies significantly based on how you ride. Let’s break down the best stomp pad characteristics for each major riding style.
Freestyle / Park Riding
Freestyle riders spend their days in the terrain park, hitting jumps, rails, boxes, and halfpipes. For this style, weight is a critical consideration. Every gram on your board affects its swing weight, which impacts how easily you can spin and flip. Park riders need stomp pads that provide reliable grip without adding unnecessary weight.
Recommended Stomp Pad Types:
- Lightweight foam pads like Crab Grab Mega Claws (weight: ~2.5 oz total)
- Small, individual metal studs arranged in a minimal configuration
- Thin, low-profile rubber strips that don’t interfere with board flex
Key Considerations: Park riders often hit their boards against metal rails and concrete features, so durability is important. Foam pads can tear if repeatedly struck by metal edges, so consider urethane pads with a lower profile for park use. Also, park riders typically have a wider stance, which means their unstrapped foot naturally lands closer to the rear binding—consider placing the stomp pad just in front of the rear binding rather than in the center of the board.
Freeride / All-Mountain Riding
Freeride and all-mountain riders tackle the entire mountain—groomed runs, powder stashes, trees, cliffs, and everything in between. This versatile style demands a versatile stomp pad that can handle varying conditions. You might encounter icy patches in the morning, slushy conditions in the afternoon, and deep powder off-piste.
Recommended Stomp Pad Types:
- Medium-sized urethane pads with integrated scraper functionality (Dakine Modular Mat)
- Combination setups: a main urethane pad plus a few metal studs for icy conditions
- Pads with aggressive texture that works in both wet and dry conditions
Key Considerations: All-mountain riders benefit from stomp pads with scraper functionality. When you’re hiking a ridge or traversing a flat section, snow can build up on your boot sole. Being able to scrape this off on your stomp pad before strapping in ensures a secure binding connection. Look for pads with raised ridges or bars specifically designed for scraping.
Backcountry / Splitboarding
Backcountry riders and splitboarders face unique challenges that require specialized stomp pad solutions. When touring uphill, the board is in “ski mode” with climbing skins attached, and your foot needs to grip the board’s topsheet for stability during the kick turn. When riding downhill, you need the same grip as any other rider.
Recommended Stomp Pad Types:
- Full-length traction strips that run along the edges of the board
- Aggressive metal studs that provide grip in deep, variable snow
- Modular systems that can be reconfigured for uphill vs. downhill modes
Key Considerations: Backcountry equipment takes a beating, so durability is paramount. Look for stomp pads with industrial-strength adhesive and materials that can withstand repeated exposure to moisture, UV radiation, and temperature extremes. Metal studs are particularly valuable in the backcountry because they provide reliable grip even when the board is covered in frost or ice.
Carving / Groomer Focus
Carving riders who focus on high-speed groomed runs have different needs than park or backcountry riders. They typically have a narrower stance and spend less time skating, but when they do skate—usually in the lift line or on flat sections—they need reliable grip to maintain control at higher speeds.
Recommended Stomp Pad Types:
- Low-profile pads that don’t interfere with deep carving turns
- Precise placement options that keep the pad close to the rear binding
- Materials with high grip-to-weight ratio for responsive feel
Key Considerations: Carving riders often prefer minimalist stomp pad configurations that don’t add visual clutter to their board. Individual metal studs or thin rubber strips work well for this style. The key is ensuring that the pad is positioned exactly where your unstrapped foot naturally lands when you’re skating—typically just in front of the rear binding, with the toes pointing toward the nose of the board.
Beginner / Learning Rider
Beginners face the most challenges when it comes to skating and lift line navigation. They’re still developing balance, coordination, and confidence, making a reliable stomp pad absolutely essential for safety and progression.
Recommended Stomp Pad Types:
- Large, full-coverage mats that provide the biggest possible target for foot placement
- Soft foam or rubber materials that grip even with imprecise foot placement
- Clear or transparent options that don’t obscure the board’s stance indicators
Key Considerations: For beginners, size matters more than weight. A larger stomp pad provides a bigger “landing zone” for your foot, reducing the chance of missing the pad entirely. This is especially important when you’re nervous and your movements are less precise. Don’t worry about looking “cool” with a minimalist setup—prioritize function over form until you’ve mastered the basics.
Material Science: Understanding Stomp Pad Materials
The material composition of a stomp pad determines its grip, durability, weight, and performance in different conditions. Understanding the science behind these materials can help you make an informed decision and get the most out of your purchase.
Thermoplastic Polyurethane (TPU)
Thermoplastic polyurethane is a versatile polymer that bridges the gap between rubber and plastic. TPU offers excellent abrasion resistance, remaining flexible even at sub-zero temperatures while maintaining its structural integrity. In stomp pad applications, TPU provides a balanced combination of grip, durability, and weather resistance.
The key advantage of TPU is its temperature range. While standard rubber can become brittle below -20°C (-4°F), TPU maintains its flexibility down to -40°C (-40°F) in some formulations. This makes it ideal for riders in extreme cold environments. TPU also has excellent UV resistance, meaning it won’t degrade or yellow significantly even after years of sun exposure.
From a grip perspective, TPU provides moderate friction in dry conditions and good friction in wet conditions. Its surface can be textured with various patterns—dots, ridges, hexagons—to enhance grip. Some manufacturers use a dual-density TPU construction, with a harder base layer for durability and a softer top layer for improved grip.
Ethylene-Vinyl Acetate (EVA) Foam
EVA foam is the material of choice for many premium stomp pads, particularly those from Crab Grab. EVA is a closed-cell foam that offers several advantages for stomp pad applications: it’s lightweight, provides excellent cushioning, and maintains its grip properties across a wide temperature range.
The “closed-cell” designation means that the individual foam cells are sealed off from each other, preventing water absorption. This is critical for stomp pads because water absorption would add weight and, more importantly, would cause the pad to freeze in cold conditions. A frozen stomp pad loses all its grip properties and becomes worse than useless—it adds weight without providing any traction.
EVA foam’s grip comes from its viscoelastic properties. When you step on an EVA pad, the foam compresses and deforms to match the shape of your boot sole. This creates a large contact area and generates a suction-like effect that provides excellent grip even on smooth surfaces. The “C-Foam” used by Crab Grab is a proprietary EVA formulation that has been optimized for maximum grip and durability in snowboard applications.
One limitation of EVA foam is its susceptibility to mechanical damage. Sharp edges—like the steel edges of a snowboard—can cut or tear the foam if they strike it repeatedly. This is why foam stomp pads often show wear patterns along their edges, especially for riders who frequently carry their boards or stack them in vehicle roof racks.
Polyurethane Rubber
Polyurethane rubber is a thermoset polymer that offers superior abrasion resistance compared to TPU. Once cured, polyurethane rubber cannot be melted and reformed, which makes it more resistant to deformation under load but also more difficult to recycle. In stomp pad applications, polyurethane rubber provides excellent grip and durability.
The coefficient of friction for polyurethane rubber is typically higher than TPU, especially in wet conditions. This makes it a popular choice for stomp pads designed for wet, coastal climates where rain and slush are common. Polyurethane rubber also has excellent chemical resistance, meaning it won’t degrade when exposed to the various chemicals found on snowboard slopes—antifreeze from parking lots, de-icing salts, and even gasoline from snowmobiles.
The downside of polyurethane rubber is weight. It’s denser than TPU or EVA foam, which means polyurethane stomp pads tend to be heavier. For riders who are conscious about weight—particularly park riders and those with smaller builds—this can be a significant consideration.
Zinc Alloy and Aluminum
Metal stomp pad studs represent the extreme end of the grip spectrum. Zinc alloy and aluminum studs provide mechanical grip by physically penetrating the rubber of your boot sole. This creates a secure connection that doesn’t depend on surface friction, making metal studs the most reliable grip option in icy conditions.
Zinc alloy is the most common metal used for stomp pad studs because it offers a good balance of hardness, corrosion resistance, and cost. Zinc is harder than aluminum but softer than steel, which means it can penetrate boot rubber without being so hard that it becomes brittle and prone to breaking. The zinc coating on these studs also provides excellent corrosion resistance, which is important given the wet, salty environment of a ski resort.
Aluminum studs are lighter than zinc alloy but slightly less hard. They’re a good choice for weight-conscious riders who still want mechanical grip. Some manufacturers use anodized aluminum, which provides additional corrosion resistance and can be colored for aesthetic purposes.
The main limitation of metal studs is their lack of scraper functionality. Unlike rubber or foam pads, metal studs can’t effectively scrape ice from your boot sole. This means you’ll need a separate scraping tool or will need to use the edge of your binding to clear ice before strapping in.
Carbon Fiber Composites
Carbon fiber composite stomp pads are a relatively new entrant to the market, offering an extremely high strength-to-weight ratio. These pads use carbon fiber reinforcement in a polymer matrix to create a stiff, lightweight pad that provides excellent mechanical grip through aggressive surface textures.
The advantage of carbon fiber is its stiffness. A carbon fiber stomp pad won’t compress or deform under load, which means every protrusion maintains its full height and grip potential. This is particularly valuable for riders who need consistent, predictable grip regardless of how hard they step on the pad.
The disadvantage is cost. Carbon fiber is expensive to produce, and stomp pads made from this material typically cost two to three times more than comparable urethane or foam options. Additionally, carbon fiber can be brittle under impact—a hard hit from a ski or another board could crack the pad, whereas a urethane pad would simply deform and recover.
How to Install a Stomp Pad (The Professional Way)
The #1 reason stomp pads fall off is improper installation. Modern adhesives are pressure-sensitive and temperature-dependent. If you apply a pad in a cold garage and go riding an hour later, it will likely be at the bottom of the mountain by lunchtime. To ensure yours lasts the life of the board, follow this expanded protocol:
- Surface Preparation: Begin by degreasing the area. Use 70% Isopropyl alcohol. Do not use window cleaner or soapy water, as these leave a residue film. If the board is brand new, it likely has factory wax on the topsheet—this MUST be removed or the pad won’t stick for more than a day.
- The Thermal Bond: Both the board and the pad should be at room temperature (around 70°F/21°C). Use a hair dryer (not a high-heat heat gun, which can delaminate your board) to warm the topsheet until it is warm to the touch. Warm the adhesive backing of the pad simultaneously. This makes the glue “vicious” and ready to bite.
- Mechanical Compression: Once applied, you need significant pressure. The best way? Put the board on a carpeted floor, put your boots on, and stand on the stomp pad with your full body weight. Wiggle slightly to ensure the adhesive penetrates the microscopic pores of the topsheet.
- The Curing Phase: The chemical bond takes time to reach “full strength.” Keep the board inside at room temperature for a minimum of 24 hours. If you take it into the cold too early, the adhesive will “freeze” before it has finished bonding, leading to premature failure.
Advanced Installation Tips for Maximum Bond Strength
While the basic installation process is straightforward, there are several advanced techniques that can significantly improve the bond strength and longevity of your stomp pad.
Sandpaper Scuffing: Before applying the stomp pad, lightly scuff the topsheet surface with 220-grit sandpaper. This creates microscopic scratches that increase the surface area for the adhesive to grip. Be gentle—you’re not trying to remove the topsheet material, just creating a slightly rougher surface for better adhesion. After scuffing, vacuum the area thoroughly to remove any dust particles.
Adhesive Promoter: For riders who have experienced stomp pad failure in the past, applying an adhesive promoter (also called “primer” or “adhesion promoter”) can dramatically improve bond strength. These chemical treatments modify the surface energy of the topsheet, making it more receptive to adhesive bonding. Follow the manufacturer’s instructions carefully, as some promoters require a specific waiting period before applying the pad.
Edge Sealing: After the stomp pad is installed and cured, apply a thin bead of clear silicone sealant around the perimeter. This creates a waterproof barrier that prevents moisture from getting under the pad’s edges—one of the most common causes of adhesive failure. The silicone also prevents the edges from lifting when your boot or other equipment catches on them.
Temperature Considerations: The ideal installation temperature is between 65°F and 80°F (18°C to 27°C). Below 60°F (15°C), most pressure-sensitive adhesives become too stiff to flow properly, resulting in poor surface contact. Above 90°F (32°C), the adhesive may become too fluid and squeeze out from under the pad, reducing the effective bonding area. If you’re installing in a cold environment, use a space heater to warm the room first, then install the pad while both the room and the board are warm.
Troubleshooting Common Installation Problems
Problem: Pad peeling at the edges within the first week. This is almost always caused by insufficient surface preparation. The topsheet likely had wax, oil, or other contaminants that prevented proper adhesion. Remove the pad, thoroughly clean the surface with isopropyl alcohol, and reinstall with fresh adhesive (or use a new pad if the original adhesive is compromised).
Problem: Pad slides sideways under foot pressure. This indicates that the adhesive hasn’t fully cured or that the topsheet surface is too smooth for the adhesive to grip. Try reinstalling with the sandpaper scuffing technique described above, and ensure you allow the full 48-hour cure time for maximum bond strength.
Problem: Pad lifts when scraping ice. The scraping action creates a peeling force that can lift the pad if the bond isn’t strong enough. This is why the edge sealing technique is so valuable—it prevents moisture from getting under the edges and weakening the bond. Additionally, try to scrape with a pushing motion rather than a pulling motion to reduce the lifting force on the pad’s edges.
Problem: Pad leaves residue when removed. This is actually a sign of a good bond! Use a hair dryer to soften the adhesive, then gently scrape with a plastic scraper or old credit card. Follow up with Goo Gone or citrus-based adhesive remover to clean the remaining residue. Avoid using metal tools, as these can scratch the topsheet.
Where to Place Your Stomp Pad: The Anatomy of Skating
Placement is often misunderstood. Most beginners put the pad right in the middle of the board, but this is a mistake. Here is the logic for perfect placement:
When you are “skating” (one foot in, one foot out), your center of gravity should be over your lead foot. Your back foot should rest naturally against the inside of your back binding. By placing the stomp pad flush against the back binding, you allow your leg to stay in a natural, wide stance. This increases stability. If the pad is in the middle, your legs are pinched together, making you top-heavy and prone to falling sideways. If you have a wide stance, consider a modular mat like the Dakine option so you can cover a larger area.
The Science of Stance Width and Pad Placement
Your stance width—the distance between your bindings—is one of the most critical factors in snowboarding. It affects everything from balance and stability to turning performance and comfort. Understanding how stance width relates to stomp pad placement can help you optimize your setup for both riding and skating.
Most snowboarders ride with a stance width between 50cm and 60cm (approximately 20 to 24 inches). This range is determined by your height, leg length, and personal preference. Riders with longer legs or those who prefer a more stable feel typically use wider stances, while shorter riders or those who prioritize quick turns often use narrower stances.
When you’re skating, your unstrapped foot naturally wants to land at a position that maintains your balance. For most riders, this is directly in front of the rear binding, with the ball of the foot centered over the stomp pad. If your stomp pad is positioned too far forward (toward the nose), you’ll have to bring your feet closer together to reach it, which reduces your stability. If it’s positioned too far back, you won’t be able to reach it comfortably without shifting your weight off the board’s centerline.
The ideal placement for most riders is to position the stomp pad’s leading edge about 2-3 inches (5-8 cm) in front of the rear binding’s mounting hardware. This puts the center of the pad roughly where your foot naturally lands when you’re skating, providing maximum grip with minimal adjustment.
Placement for Different Board Shapes
Different snowboard shapes require different stomp pad placement strategies. The three main board shapes—directional, twin, and directional twin—each have unique characteristics that affect where your unstrapped foot naturally lands.
Directional Boards have a longer nose and shorter tail, with the binding stance shifted toward the tail. On these boards, the effective edge is longer on the nose side, which means you have more board in front of your lead foot. When skating on a directional board, your unstrapped foot naturally lands closer to the tail because the binding is already shifted back. Place your stomp pad accordingly—closer to the tail binding rather than centered.
Twin-Tip Boards are symmetrical, with the nose and tail identical and the binding stance centered. On these boards, skating feels more natural because the board’s weight distribution is balanced. Your unstrapped foot typically lands directly in front of the rear binding, making centered placement effective. Twin-tip boards are popular with park riders who ride switch (backwards) frequently.
Directional Twin Boards combine elements of both designs, with a slightly longer nose but otherwise symmetrical shape. The binding stance may be slightly setback toward the tail, or it may be centered like a true twin. For these boards, experimentation is key—try both centered and slightly setback placements to see which feels more natural for your skating style.
Advanced Placement Techniques
For riders who want to optimize their stomp pad setup beyond basic placement, there are several advanced techniques to consider.
Dual Pad Configuration: Some riders use two separate stomp pads—one larger pad near the binding for skating, and a smaller pad or strip further forward for traversing. This provides grip options for different situations: the main pad for lift line skating, and the forward pad for flat traversing where you might shift your foot forward.
Angled Placement: If you ride with angled bindings (particularly common for alpine snowboarders), consider angling your stomp pad to match your natural foot angle. A pad that’s parallel to the board’s edge might not align with the angle of your boot sole when you’re skating, reducing the effective contact area. Some modular stomp pads can be configured at angles to match your specific setup.
Custom Cutting: Many stomp pads can be cut to fit your specific needs. If you have an unusually wide or narrow stance, consider trimming the pad to match. A pad that’s too large can interfere with your lead foot when you’re carving, while a pad that’s too small may not provide enough grip area. Use a sharp utility knife and a straight edge to make clean cuts, and seal the cut edges with clear silicone to prevent water intrusion.
Board-Specific Placement Considerations
Different snowboard brands and models have unique topsheet designs, materials, and features that can affect stomp pad placement. Here are some brand-specific considerations:
Burton Boards: Many Burton boards feature channel binding systems (the “Infinite Channel” or “Channel” system) that allow unlimited stance width and angle adjustment. The channel runs down the center of the board, which means you need to be careful not to place your stomp pad over the channel—this can interfere with binding mounting and adjustment. Place the pad to one side of the channel, or use a pad that bridges the channel without blocking access to the mounting hardware.
Lib Tech / Gnu Boards: These boards often feature Magne-Traction edges with multiple contact points along the edge. The topsheet near the edges may have slight undulations that can affect stomp pad adhesion. For best results, place your stomp pad closer to the center of the board where the surface is flatter, and ensure you use plenty of pressure during installation to conform the adhesive to any surface irregularities.
Ride Snowboards: Ride boards often feature “Carbon Array” or other carbon fiber reinforcement strips that run along the board’s length. These carbon strips create slight ridges on the topsheet surface. When installing a stomp pad, try to position it between the carbon strips rather than over them—this ensures maximum surface contact and adhesion.
Capita Boards: Capita boards are known for their innovative topsheet materials and graphics. Some models use “HyperDrive” bases or “Death Grip” features that can affect stomp pad adhesion. Check the manufacturer’s recommendations for your specific model, as some Capita boards may require surface preparation before stomp pad installation.
Climate-Based Stomp Pad Recommendations
Your local snow conditions and climate play a significant role in determining which stomp pad will perform best for you. Different regions produce different types of snow, and the temperature ranges you’ll encounter affect how your stomp pad materials perform.
Alpine / High Mountain
Temperature Range: -30°C to -5°C (-22°F to 23°F)
Snow Type: Dry, powdery snow with frequent ice
Best Materials: Metal studs, cold-rated urethane
Key Challenge: Extreme cold makes most rubber and foam stiff and less grippy. Metal studs that mechanically penetrate boot rubber provide the most reliable grip.
Recommended Products: Dakine Pyramid Studs, metal stud configurations
Continental / Mixed
Temperature Range: -15°C to 0°C (5°F to 32°F)
Snow Type: Variable—powder, packed powder, and spring conditions
Best Materials: Urethane pads, dual-material combinations
Key Challenge: Conditions change throughout the day. You need a versatile pad that works in both cold morning ice and warm afternoon slush.
Recommended Products: Dakine Modular Mat, combination pad/stud setups
Pacific / Maritime
Temperature Range: -5°C to +5°C (23°F to 41°F)
Snow Type: Heavy, wet snow; rain; slush; occasional ice
Best Materials: Soft rubber, foam with drainage channels
Key Challenge: Heavy, wet snow that packs into boot soles. Scraping functionality is essential to maintain binding connection.
Recommended Products: Burton Large Scraper Mat, Crab Grab Mega Claws
Understanding Regional Snow Conditions
The Pacific Northwest of North America is famous for its heavy, wet snow—sometimes called “cement” by locals. This snow packs densely into boot soles and creates a thick layer of ice that’s difficult to remove. For riders in this region, a stomp pad with aggressive scraper functionality is essential. The scraper bar on the Burton Large Scraper Mat is particularly effective for clearing this type of snow.
The Rocky Mountain states experience much colder, drier conditions. Snow in Colorado, Utah, and Wyoming tends to be light and powdery, which doesn’t pack as densely into boot soles but can create frost on the board’s surface. Metal studs work particularly well in these conditions because they can penetrate the frost layer to reach the boot rubber.
The East Coast of North America is notorious for its icy conditions. The combination of cold temperatures and frequent freeze-thaw cycles creates hard-packed, icy surfaces that provide the most challenging skating conditions. Metal studs are strongly recommended for East Coast riding, as they provide the most reliable grip on ice.
European resorts, particularly in the Alps, often experience similar conditions to the Rocky Mountains but with more variable weather patterns. Riders in the Alps should look for versatile stomp pads that can handle everything from deep powder to spring slush in a single day.
Seasonal Considerations
The time of season also affects stomp pad performance and selection. Early season riding (November through December) typically features cold temperatures and fresh snow, making metal studs and cold-rated materials ideal. Mid-season (January through February) offers the most consistent conditions but can vary widely depending on the specific resort and weather patterns. Late season (March through April) brings warmer temperatures and softer snow, where foam and rubber pads with good scraper functionality shine.
Some riders maintain two stomp pad setups—one for winter conditions and one for spring. This allows them to optimize their grip for the specific conditions they’ll encounter. While this adds complexity and cost, dedicated riders who spend 50+ days per season may find it worthwhile.
Snowboard Boot Compatibility: Matching Boots to Stomp Pads
The interaction between your snowboard boots and your stomp pad is often overlooked but critically important. The design of your boot’s sole directly affects how well a stomp pad can provide grip, and different boot designs work better with different pad types.
Understanding Boot Sole Designs
Snowboard boot soles are designed to interface with snowboard binding baseplates, providing grip on the mountain and cushioning for comfort. The key elements that affect stomp pad interaction are lug pattern, rubber compound, and sole profile.
Lug Pattern: The tread pattern on your boot sole determines how it interacts with stomp pad surfaces. Boots with aggressive, deep lugs—like many freeride and backcountry models—tend to work best with stomp pads that have large, open textures. The lugs can find purchase between the pad’s protrusions, creating a mechanical interlock. Boots with smooth, flat soles—common in some alpine and freestyle models—work better with pads that have fine, dense textures or metal studs that can penetrate the rubber.
Rubber Compound: The hardness of your boot’s rubber sole affects grip. Softer rubber compounds (typically found in premium boots) provide higher friction and better conformity to stomp pad surfaces. Harder rubber compounds (common in budget boots) provide less friction but more durability. If you ride with budget boots, you may need to rely more on mechanical interlock from metal studs or aggressive textures rather than friction-based grip.
Sole Profile: Some boots have pronounced heel and toe rise, while others are relatively flat. Boots with significant heel rise may not make full contact with a flat stomp pad, reducing the effective grip area. For these boots, consider stomp pads with raised elements that can reach the heel or toe areas, or position the pad so that it contacts the flat section of the sole between the heel and toe.
Boot Brand Considerations
Different boot manufacturers use different sole designs and materials, which can affect stomp pad compatibility.
Burton Boots are designed to work with Burton’s EST (Extra Sensory Technology) bindings and their proprietary outsole designs. Burton soles typically feature a moderate lug pattern with Vibram or similar high-quality rubber compounds. These boots work well with most stomp pad types, but the slightly recessed lug pattern may benefit from pads with taller protrusions for maximum grip.
ThirtyTwo Boots are known for their soft flex and comfortable fit, which extends to their sole design. ThirtyTwo soles tend to be relatively flat with moderate grip, making them compatible with most stomp pad types. Their focus on comfort means they often use softer rubber compounds that provide excellent friction with foam and rubber pads.
DC Shoes Boots feature a distinctive outsole design with pronounced heel and toe sections. The DC design can create gaps between the boot sole and flat stomp pads, so riders using DC boots may benefit from stomp pads with raised center sections or from positioning the pad to contact the flat section of the sole.
Salomon Boots often feature Contagrip outsoles, which are designed for maximum grip on various surfaces. These aggressive lug patterns work particularly well with stomp pads that have open textures, allowing the lugs to find purchase between the pad’s protrusions.
Boot Size and Stomp Pad Coverage
Your boot size affects how much of the stomp pad your foot can contact, which directly impacts grip. Larger boots (size 11+) have more sole area in contact with the pad, providing more grip. Smaller boots (size 7 and under) have less contact area, which may require a stomp pad with more aggressive textures or metal studs to compensate.
For very large boots (size 13+), consider a larger stomp pad or a modular system that provides more coverage. The Dakine Modular Mat is particularly good for this because you can spread the three pieces out to create a larger grip area. For very small boots, a compact pad with dense, aggressive texture provides the most grip per square inch.
Stomp Pad Weight: Does It Really Matter?
Weight is a consideration that some riders obsess over while others completely ignore. The truth is, for most riders, stomp pad weight has a minimal effect on performance. However, for competitive athletes, park riders, and weight-conscious backcountry travelers, even small weight savings can make a meaningful difference.
The Physics of Weight on a Snowboard
A snowboard’s weight affects its performance in two primary ways: swing weight and overall weight. Swing weight is the resistance to rotation—the effort required to spin the board in the air or initiate a turn. Overall weight affects how the board responds to rider input and how it floats in powder.
A stomp pad mounted on the board adds to both types of weight. However, because stomp pads are relatively small and mounted near the board’s center (close to the axis of rotation), their contribution to swing weight is minimal. A typical stomp pad weighs between 1 and 4 ounces (28 to 113 grams), which is equivalent to a few coins in your pocket.
To put this in perspective, a typical snowboard weighs between 5 and 7 pounds (2.3 to 3.2 kg). A 3-ounce (85g) stomp pad represents about 1.5% of the total board weight. While this is not insignificant for competitive athletes who measure performance in hundredths of a second, it’s unlikely to be noticeable for recreational riders.
When Weight Matters
There are specific situations where stomp pad weight becomes more important:
Competitive Slopestyle and Big Air: In these events, riders perform complex aerial maneuvers that require precise board control. Every gram of weight affects the board’s rotational inertia, which can impact the rider’s ability to complete rotations cleanly. Some competitive riders choose to skip stomp pads entirely to minimize weight, relying on their skill to skate without additional grip.
Park and Pipe: Park riders who focus on tricks that involve board grabs and spins may notice the weight of a stomp pad, especially if it’s mounted in an area that affects the board’s balance. However, the safety benefits of a stomp pad—preventing slips during lift line navigation and flat section skating—usually outweigh the minor weight penalty.
Backcountry Touring: For splitboarders and backcountry riders who hike uphill with their boards on their backs, every ounce counts. A lighter stomp pad means less weight to carry on the ascent. However, once you’re riding downhill, the stomp pad’s grip becomes more important than its weight. The best approach for weight-conscious backcountry riders is to use the lightest stomp pad that still provides adequate grip for the specific conditions they’ll encounter.
Weight Comparisons of Popular Stomp Pads
| Stomp Pad | Weight | Grip Type | Best For |
|---|---|---|---|
| Dakine Modular Mat (3-piece) | 3.2 oz (91g) | Friction + Scraper | All-mountain, versatility |
| Crab Grab Mega Claws (2-pack) | 2.5 oz (71g) | Viscoelastic foam | Park, lightweight setups |
| Dakine Pyramid Studs (set) | 1.8 oz (51g) | Mechanical interlock | Ice, minimalist setups |
| Burton Large Scraper Mat | 4.1 oz (116g) | Friction + heavy scraper | Wet conditions, utility |
| Volcom Stone Stomp Pad | 3.5 oz (99g) | Friction, multi-directional | Durability, casual riders |
| Dakine Spike Stomp Pad | 2.8 oz (79g) | Aggressive spikes | Deep texture grip |
| Crab Grab Skate Rails | 2.2 oz (62g) | Dual-rail foam | Style, grab assistance |
| Dakine Circle Mat (3-pack) | 2.0 oz (57g) | Low-profile dots | Invisible grip, minimalists |
As you can see, the weight range between the lightest and heaviest options is only about 2.3 ounces (65g)—less than the weight of a smartphone. For most riders, the difference in grip performance between these options will have a much greater impact on their experience than the weight difference.
Stomp Pad Maintenance and Care: Making It Last
A well-maintained stomp pad can last for several seasons, but neglect can shorten its life significantly. Here’s how to keep your stomp pad in top condition and get the most value from your investment.
Daily Maintenance
After each day on the mountain, take a moment to inspect your stomp pad. Check for any signs of peeling at the edges, which is an early warning sign of adhesive failure. If you notice the edges lifting, address it immediately—it’s much easier to re-seal a small section than to replace the entire pad.
Brush off any snow or ice that has accumulated on the pad. While this may seem unnecessary, allowing snow to melt and refreeze on the pad can cause ice to form between the pad and the topsheet. This ice can gradually work its way under the pad’s edges, lifting them and weakening the adhesive bond.
If your stomp pad has scraper ridges, use a soft brush to remove any boot rubber or debris that may have accumulated in the grooves. Clogged scraper ridges lose their effectiveness and can actually deposit material back onto your boot sole instead of removing it.
Weekly Maintenance
At the end of each riding week, give your stomp pad a more thorough cleaning. Use a damp cloth to wipe down the entire surface, paying attention to the texture valleys where dirt and grime can accumulate. For rubber and foam pads, avoid using harsh chemicals or solvents, as these can degrade the material and reduce grip.
Inspect the adhesive bond by gently pressing on the pad’s edges with your finger. If you can feel any movement or “give,” the adhesive is beginning to fail. This is the time to take action—either by applying additional pressure with your boot (standing on the pad with your full weight) or by applying edge sealant to prevent further deterioration.
End-of-Season Care
At the end of the season, proper storage is critical for stomp pad longevity. The key is to protect the pad from temperature extremes, UV radiation, and moisture during the off-season.
Temperature: Store your board in a temperature-controlled environment, ideally between 50°F and 80°F (10°C to 27°C). Extreme heat can soften the adhesive, causing the pad to shift or detach. Extreme cold can make the pad material brittle, leading to cracking or tearing when you pull it out of storage.
UV Protection: Even indoors, UV radiation from windows can degrade stomp pad materials over time. Store your board in a bag, box, or closet away from direct sunlight. This is particularly important for clear urethane pads, which can yellow and become brittle under UV exposure.
Moisture: Ensure your board is completely dry before storing it. Any remaining moisture can freeze during temperature fluctuations in storage, potentially lifting the stomp pad’s edges. A quick wipe-down with a dry cloth is all it takes to prevent this.
Covering: Consider placing a soft cloth or foam pad over the stomp pad during storage. This protects it from accidental impacts and prevents other equipment from scratching or damaging the surface.
When to Replace Your Stomp Pad
Even with perfect maintenance, stomp pads don’t last forever. Here are the signs that it’s time for a replacement:
Loss of Grip: If your foot slides on the pad even when the surface is dry and clean, the material has worn smooth. This is most common with foam pads that have compressed over time, losing their viscoelastic properties. Metal studs may also lose their sharpness, particularly if you ride on rocky terrain.
Adhesive Failure: If the pad lifts repeatedly despite your best efforts to re-seal it, the adhesive has reached the end of its life. This can happen due to age, repeated temperature cycling, or contamination of the adhesive surface. At this point, it’s more effective to replace the pad than to continue trying to repair it.
Material Degradation: Look for signs of cracking, crumbling, or discoloration. Rubber and foam materials can become brittle over time, especially with UV exposure. If the material is cracking or pieces are breaking off, the pad’s structural integrity is compromised and replacement is necessary.
Aesthetic Concerns: While not a safety issue, a worn, discolored stomp pad can make an otherwise nice-looking board appear neglected. If aesthetics are important to you, consider replacing the pad when it starts to look tired.
Common Stomp Pad Mistakes and How to Avoid Them
After helping thousands of riders choose and install stomp pads, we’ve identified the most common mistakes that lead to poor performance, early failure, or safety issues. Here’s how to avoid them.
The “Set It and Forget It” Fallacy
One of the most dangerous misconceptions about stomp pads is that they require no maintenance once installed. While it’s true that a properly installed stomp pad should last for years with minimal attention, the “set it and forget it” mentality leads many riders to ignore warning signs until it’s too late.
The reality is that stomp pads, like any other piece of equipment, require periodic inspection and care. The good news is that this maintenance is minimal—just a few minutes at the end of each riding day and a more thorough inspection at the end of the season. The investment of time is tiny compared to the cost of a new stomp pad or, more importantly, the cost of an injury caused by a slip on a worn-out pad.
Advanced Stomp Pad Topics
For experienced riders who want to take their stomp pad setup to the next level, here are some advanced topics and techniques.
DIY Stomp Pad Options
While commercial stomp pads are designed and tested for specific applications, some riders prefer to create their own custom solutions. Here are a few DIY approaches that can work well for riders with specific needs.
Custom-Cut Urethane Sheet: Purchase a sheet of textured urethane rubber from a materials supplier and cut it to your exact specifications. This allows you to create a stomp pad that perfectly matches your board’s shape, your boot size, and your specific grip needs. The textured surface provides grip, and urethane is durable enough to last for years. Use high-quality 3M VHB (Very High Bond) tape or automotive-grade adhesive for mounting.
Repurposed Rubber Matting: High-quality rubber floor matting or drawer liner material can be cut and used as a stomp pad. Choose a material with aggressive texture and good cold-weather flexibility. While not as specialized as commercial options, this approach is extremely budget-friendly and allows for unlimited customization.
Individual Metal Studs: Purchase individual metal studs or spikes from a hardware store and arrange them in a custom pattern on your board. Use a strong epoxy adhesive to mount each stud individually. This approach allows you to create a custom grip pattern that matches your specific boot sole tread, providing optimal mechanical interlock.
Combination Stomp Pad Setups
Many experienced riders use combination setups that incorporate multiple types of stomp pads to address different conditions and needs. Here are some effective combination strategies:
Primary Pad + Supplemental Studs: Use a medium-sized urethane or foam pad as your primary stomp pad, then add a few metal studs in key locations for additional ice grip. The primary pad provides friction-based grip and scraper functionality, while the studs provide mechanical interlock for icy conditions.
Heel and Toe Strips: Instead of a traditional stomp pad, some riders use two narrow strips—one along the heel edge and one along the toe edge—to create a custom grip zone. This approach provides grip along the full width of the boot sole without adding weight in the center of the board.
Modular Systems: Products like the Dakine Modular Mat are designed to be used in multiple configurations. You can use all three pieces together for maximum grip, spread them out for wider coverage, or use just one or two pieces for a minimalist setup. This flexibility allows you to adapt your stomp pad to changing conditions throughout the season.
Stomp Pad Performance Testing
For riders who want to objectively evaluate different stomp pad options, here’s a simple testing protocol you can use at your local resort:
Dry Grip Test: With your board flat on the ground (bindings removed), place your boot on the stomp pad and try to slide it using only the force from your leg. Rate the grip on a scale of 1-10. Repeat with different stomp pad options to compare.
Wet Grip Test: Pour a small amount of water on the stomp pad and repeat the dry grip test. This simulates riding in wet conditions. Pay attention to how the grip changes—some materials lose significantly more grip when wet than others.
Icy Grip Test: Spray a light mist of water on the stomp pad and place it in a freezer for 30 minutes. Remove and immediately repeat the grip test. This simulates icy morning conditions. Metal studs should perform significantly better in this test than foam or rubber pads.
Scraping Test: Build up a layer of wet snow on your boot sole, then use the stomp pad to scrape it off. Rate how effectively the pad clears the snow and how much residue remains. This is particularly important for riders in wet climates.
Stomp Pad Safety: Preventing Injuries on the Mountain
While stomp pads are primarily considered convenience accessories, they play a significant role in mountain safety. Understanding the safety implications of your stomp pad choice can help prevent serious injuries.
Common Injuries Related to Stomp Pad Failure
When a stomp pad fails—either by peeling off, losing grip, or being positioned incorrectly—the consequences can range from embarrassing to catastrophic.
Slip-and-Fall Injuries: The most common injury from stomp pad failure is a simple slip-and-fall. When your unstrapped foot slides off the board, you lose balance and fall. At low speeds, this usually results in bruises or minor scrapes. At higher speeds—such as when unloading from a chairlift—a slip can result in a hard fall on packed snow or ice, potentially causing fractures, sprains, or concussions.
ACL and Knee Injuries: Snowboarders are particularly susceptible to ACL (anterior cruciate ligament) injuries when their unstrapped foot slips. The natural reaction to a slip is to try to recover balance, which often involves twisting the knee while the foot is sliding. This rotational force can tear the ACL, one of the most serious knee injuries. A reliable stomp pad significantly reduces this risk by preventing the initial slip.
Collision Injuries: In crowded lift lines, a slip caused by stomp pad failure can send you into other riders, snowmaking equipment, or lift infrastructure. These collisions can cause a wide range of injuries, from minor bumps to serious trauma. The risk is highest during peak hours when lift lines are crowded and riders are in close proximity.
Equipment Damage: When your foot slips off the board, the board can shoot out from under you, potentially hitting other riders or damaging equipment. In a worst-case scenario, a sliding board can cause injury to bystanders, particularly children or elderly riders who may not be able to react quickly enough to avoid it.
Stomp Pad Safety Best Practices
Follow these best practices to maximize the safety benefits of your stomp pad:
Regular Inspection: Check your stomp pad before every ride day. Look for signs of wear, edge lifting, or material degradation. If you notice any issues, address them immediately or remove the pad and install a new one.
Proper Installation: Follow the installation protocol described earlier in this guide. A properly installed stomp pad is far less likely to fail at a critical moment. The 24-48 hour curing period is not optional—it’s essential for a secure bond.
Appropriate Size: Don’t use a stomp pad that’s too small for your needs. While minimalist setups may look clean, they provide less margin for error when foot placement is imprecise. For safety-critical situations like lift lines and crowded areas, a larger pad provides more grip area and more forgiveness.
Backup Plan: Always have a mental backup plan for what to do if your stomp pad fails. Know how to use your rear binding’s edge to scrape ice, how to maintain balance with one foot partially on the board, and how to safely step off if you feel yourself losing control.
Lift Line Safety and Etiquette
The lift line is where stomp pad performance matters most. It’s also where the consequences of failure are most severe, due to the close proximity of other riders, equipment, and infrastructure.
Approach the Lift with Control: Don’t skate faster than your stomp pad can handle. If your pad provides less grip than you’d like, slow down and take extra time to ensure you’re balanced before approaching the lift.
Maintain Awareness: Keep your head up and watch for other riders, especially those who may be unloading from the lift above you. A slip at the wrong moment can cause a chain reaction in a crowded line.
Use the Scraping Zone: Most lift lines have a designated area where riders can stop and strap in. Use this area to scrape your boot soles and ensure you’re ready before approaching the chair. A clean boot sole and a fresh scrape on your stomp pad can prevent problems during the critical moments of loading.
Communicate: If you’re having trouble with your stomp pad or feel unsteady, let the liftie know. They can slow the lift or provide assistance. There’s no shame in asking for help—everyone has bad days, and a little assistance is far better than an injury.
Environmental Considerations: Sustainable Stomp Pad Choices
As environmental awareness grows in the snowboarding community, many riders are looking for ways to reduce their ecological footprint. While stomp pads are a small accessory, they do have environmental implications worth considering.
Material Sustainability
Different stomp pad materials have different environmental profiles. Understanding these can help you make choices that align with your values.
Recyclability: TPU (thermoplastic polyurethane) is theoretically recyclable, but the reality is more complex. Most recycling facilities don’t have the capability to process TPU, and the adhesives and other components of stomp pads can contaminate the recycling stream. Some manufacturers have begun take-back programs that allow riders to return used stomp pads for proper recycling or disposal.
EVA Foam: EVA foam is not widely recyclable, and it can take hundreds of years to decompose in a landfill. However, some manufacturers have begun using bio-based EVA formulations that incorporate plant-derived materials, reducing the reliance on petroleum-based feedstocks. Crab Grab, for example, has committed to increasing the bio-content of their foam products over time.
Metal Components: Metal studs and plates are the most recyclable stomp pad components. Aluminum and zinc can be recycled indefinitely without loss of quality. When metal stomp pad components reach the end of their life, they should be removed and placed in metal recycling bins rather than thrown in the trash.
Adhesives: Most stomp pad adhesives are based on acrylic or rubber compounds that are not biodegradable. Some manufacturers have developed water-based adhesives that have a lower environmental impact, but these typically offer lower bond strength than traditional solvent-based adhesives.
Extending Stomp Pad Lifespan
One of the most effective ways to reduce the environmental impact of your stomp pad is to extend its lifespan. A stomp pad that lasts three seasons has one-third the environmental footprint of one that’s replaced every season.
Proper maintenance, as described earlier in this guide, is the key to longevity. Regular cleaning, edge sealing, and addressing minor issues before they become major problems can dramatically extend a stomp pad’s useful life.
Choosing a durable material is another important factor. While foam pads may be lighter and more comfortable, they typically don’t last as long as urethane or rubber alternatives. For riders who prioritize longevity, investing in a more durable material up front can be both environmentally and economically beneficial.
End-of-Life Disposal
When your stomp pad finally reaches the end of its useful life, proper disposal is important to minimize environmental impact.
Metal Components: Remove any metal studs or plates and place them in your local metal recycling bin. Most recycling facilities accept aluminum and zinc.
Rubber and Urethane Pads: These materials are difficult to recycle through standard municipal programs. Check with your local waste management authority for any specialized recycling options. If no recycling option is available, the pad should be disposed of in regular trash.
Foam Pads: EVA foam is not recyclable through standard programs. While some specialty recycling programs exist, they are not widely available. Dispose of foam pads in regular trash.
Adhesive Residue: The adhesive that remains on the board after removing a stomp pad should be cleaned off using Goo Gone or a similar product. The cleaning product and adhesive residue should be disposed of according to the product’s instructions, typically in regular trash.
Frequently Asked Questions (FAQ)
Yes, but it takes patience. Use a hair dryer to soften the adhesive, then use a plastic scraper (or an old credit card) to slowly pry it up. Use “Goo Gone” or citrus cleaner to remove the remaining sticky residue. Never use a metal knife as you will slice your topsheet.
Not if you choose a transparent urethane pad or individual studs. These allow the art to show through. Over several years, the area under the pad may stay “newer” looking than the rest of the board which fades in the sun, creating a slight “ghosting” effect if you remove it later.
Technically, no—but even pros use them. It’s about safety in the lift line. One patch of ice or one person bumping into you while your foot is unstrapped can result in a season-ending injury. It’s cheap insurance.
It’s almost always the prep. If you don’t clean the factory wax off the board with alcohol, the glue is sticking to wax, not the board. When the wax gets cold, it flakes off, and the pad goes with it.
Large pads offer more scraper surface and a more consistent “target” for your foot. Small studs offer more customization and a cleaner look. For beginners, a single large pad is always recommended for the larger margin of error.
No, you shouldn’t. Since it’s a permanent adhesive, the rental shop may charge you for “damage” or a cleaning fee. If you’re renting, look for “temporary” friction decals or simply focus on keeping your boot pressed hard against the back binding.
High-quality pads like Crab Grab use “closed-cell” foam. This means the bubbles in the foam are sealed off from each other, so they don’t soak up water like a sponge. They stay light and don’t freeze into a solid block of ice.
To an extent. Pads with multi-directional spikes or ridges provide grip even if your foot is slightly twisted. Linear ridges only provide maximum grip in one direction. Look for “spiked” or “nippled” textures for the best results.
Yes, but matte boards are more porous and can be harder for adhesives to grip. You must be extra diligent with the heating and curing process (48 hours is better for matte boards).
Yes. Even with Step On bindings, you still have to skate through the lift line with one foot out. The same pads work for all binding systems.
With proper maintenance, a quality stomp pad can last 3-5 seasons. However, you should inspect it regularly and replace it if you notice loss of grip, material degradation, or persistent adhesive failure. Foam pads typically last 1-2 seasons with regular use, while urethane and rubber pads can last much longer.
Absolutely. Many experienced riders use combination setups—for example, a urethane pad near the binding for skating plus a few metal studs further forward for icy conditions. The key is ensuring that the pads don’t interfere with your lead foot during turns or with your binding adjustment.
Yes. In deep powder, the board sinks and your unstrapped foot tends to sink into the snow, providing natural grip. The stomp pad is less critical in powder. On groomed runs, the board sits on the surface, and your unstrapped foot has no natural grip—this is where the stomp pad is essential. Most riders need their stomp pad most when skating in lift lines and on flat, groomed sections.
While similar in concept, surf traction pads and snowboard stomp pads are designed for very different conditions. Surf pads are typically larger, cover more area, and include a kick tail for foot positioning. Snowboard stomp pads are smaller, focus on grip for a single foot, and often include scraper functionality. Don’t try to use one for the other—they’re optimized for their specific sports.
Extreme cold can affect stomp pad materials differently. Standard rubber and foam become harder and less grippy below -15°C (5°F). Metal studs maintain their effectiveness but the rubber of your boot sole hardens, reducing penetration depth. High-quality urethane pads are designed to remain flexible down to -30°C (-22°F) or colder. If you ride in extreme cold regularly, choose materials specifically rated for low temperatures.
Not necessarily. Most stomp pads are universal and work with any board brand. However, some board brands (like Burton) may have specific recommendations for their channel system. Check your board manufacturer’s guidelines, but in most cases, any quality stomp pad will work regardless of your board brand.
You can, but it’s not recommended. Paint can fill in the texture of the pad, reducing grip. If you want to customize the look, consider using stomp pads that come in different colors, or use individual metal studs that can be arranged in custom patterns. Some riders have had success with dyeing clear urethane pads, but this requires careful technique to avoid affecting the material properties.
Many do, though not all. Some competitive riders, particularly in slopestyle and halfpipe, skip stomp pads to minimize weight and maintain a clean look. However, many pros use stomp pads, especially those who film video parts where they need to skate through various terrain. The safety benefits often outweigh the weight penalty, even at the professional level.
For most riders, the effect is negligible. Stomp pads are relatively small and lightweight compared to the board itself, and they don’t span the full width of the board where flex would be most affected. However, large, stiff pads mounted near the board’s waist can slightly reduce the board’s natural flex in that area. If you’re concerned about flex, choose a smaller, thinner pad or position it away from the board’s flex points.
Multi-sport athletes who switch between snowboarding and skiing typically need different setups for each sport. Snowboard stomp pads don’t work on skis, and ski crampons don’t work on snowboards. If you switch between sports frequently, you’ll need separate stomp pad setups for your snowboard and separate traction solutions for your skis.
While most stomp pads are unisex, some manufacturers offer smaller sizes or colorways targeted at women riders. Women generally have smaller boot sizes, which means they can often use smaller stomp pads effectively. The Dakine Circle Mat and Crab Grab’s smaller pad options are popular choices among women riders. Functionality is identical regardless of gender—choose based on your boot size and riding style.
Yes, but placement requires careful consideration. On a splitboard, the stomp pad needs to work in both “ski mode” (touring) and “ride mode” (descending). Place the pad so it doesn’t interfere with the split mechanism or the binding mounting hardware. Many splitboarders use a combination of a small pad for riding and edge-mounted strips for touring grip.
Mud and dirt can be cleaned off with a damp cloth and mild soap. For stubborn stains, a soft brush (like an old toothbrush) can help lift dirt from the texture. Avoid harsh chemicals or abrasive cleaners, as these can damage the pad material and reduce grip. After cleaning, allow the pad to dry completely before riding.
Some manufacturers offer limited warranties against manufacturing defects, but most warranties don’t cover normal wear and tear or adhesive failure due to improper installation. Check the warranty terms for your specific product. To maintain warranty coverage, follow the manufacturer’s installation instructions carefully.
Technically, you can use a stomp pad with any boot, but snowboard-specific boots are designed to work with snowboard bindings and provide the necessary support and control. Winter hiking boots lack the ankle support and sole stiffness needed for safe snowboarding. Always use proper snowboard boots with your snowboard setup.
Closed-cell foam has sealed cells that prevent water absorption, keeping the pad light and grippy in wet conditions. Open-cell foam has interconnected cells that allow water to penetrate, adding weight and potentially freezing in cold conditions. For snowboard stomp pads, always choose closed-cell foam for optimal performance.
Yes, prolonged UV exposure can degrade rubber, foam, and urethane materials, causing them to become brittle and lose grip. This is why end-of-season storage away from sunlight is important. If you leave your board in a car with windows exposed to sun, the stomp pad material can degrade significantly over a single summer.
Yes, some manufacturers offer larger, more aggressive stomp pads specifically designed for adaptive snowboarders who may need additional grip and stability. These pads often feature wider coverage areas and more aggressive textures to accommodate different foot placement patterns and balance needs.
It’s possible but not recommended. Removing a stomp pad typically damages the adhesive, and reusing it on a new board rarely provides the same bond strength as a new installation. Additionally, the old pad may have worn spots or damage that would compromise its performance on a new board. The small cost of a new stomp pad is worth the peace of mind of a fresh installation.
A stomp pad that’s been properly installed and removed (without damaging the topsheet) has minimal effect on resale value. However, a pad that’s been left on for years may leave ghosting or residue that could be perceived negatively by potential buyers. If you’re planning to sell your board, consider removing the stomp pad and cleaning the residue before listing it.
Stomp Pad Brand Comparison: Dakine vs Crab Grab vs Burton
The three dominant brands in the stomp pad market are Dakine, Crab Grab, and Burton. Each has its own design philosophy, material preferences, and target audience. Understanding these differences can help you choose the brand that best matches your priorities.
Dakine: The Versatility Leader
Dakine has built its reputation on versatile, well-engineered products that work for a wide range of riders. Their stomp pad lineup includes options for every riding style, from the minimalist Circle Mat to the feature-rich Modular Mat. Dakine’s strength is their commitment to multi-functionality—their pads often combine grip with scraper functionality, providing more value per dollar.
Dakine’s material choices tend toward urethane and rubber, which offer the best balance of grip, durability, and temperature performance. Their Modular Mat system is particularly innovative, allowing riders to customize the pad configuration for their specific needs. The three-piece design can be arranged in numerous ways, from a compact cluster to widely spaced individual pieces.
The main weakness of Dakine stomp pads is weight. Because they often include scraper features and use durable materials, their pads tend to be slightly heavier than some competitors. For weight-conscious riders, this can be a consideration, though the difference is usually small enough to be negligible.
Crab Grab: The Foam Specialist
Crab Grab has carved out a niche in the stomp pad market by focusing on foam-based solutions. Their C-Foam material is designed specifically for snowboard applications, offering excellent grip through viscoelastic properties while remaining lightweight and comfortable underfoot.
Crab Grab’s products are particularly popular with park riders and freestyle enthusiasts who prioritize weight savings and comfort. The Mega Claws, for example, weigh just 2.5 ounces for a two-pack—significantly lighter than comparable urethane or rubber options. The foam also provides a cushioning effect that some riders find comfortable for extended skating sessions.
The downside of Crab Grab’s foam-focused approach is durability. Foam is inherently less durable than urethane or rubber, and Crab Grab pads can show wear more quickly, especially for riders who frequently hit them with metal edges. The edges of the foam “claws” can also tear or compress over time, reducing grip effectiveness.
Burton: The Industry Giant
Burton, as the largest snowboard manufacturer in the world, offers stomp pads that are designed to integrate seamlessly with their binding systems. Burton’s stomp pads tend to be larger and more aggressive than competitors, with features like high-profile scraper bars and extra-wide footprints.
Burton’s Large Scraper Mat is the best example of their approach—it’s a large, heavy-duty pad designed for maximum utility. The central scraper bar is stiff and effective, and the clear PVD material allows board graphics to show through. For riders who prioritize function over form, Burton’s stomp pads are hard to beat.
The main criticism of Burton stomp pads is their size and weight. The Large Scraper Mat, for example, weighs 4.1 ounces—nearly double the weight of some foam alternatives. For riders who prefer a minimalist look, Burton’s options may feel too bulky. Additionally, the clear material can yellow over time with UV exposure, which some riders find unattractive.
Head-to-Head Comparison
| Feature | Dakine | Crab Grab | Burton |
|---|---|---|---|
| Best Material | Urethane | C-Foam | Rubber/PVD |
| Weight Range | 2.0 – 3.2 oz | 2.2 – 2.5 oz | 3.5 – 4.1 oz |
| Durability | Excellent | Good | Excellent |
| Scraper Function | Yes (most models) | No | Yes (Large Scraper) |
| Customization | High (modular options) | Low | Medium |
| Price Range | $12 – $25 | $15 – $22 | $18 – $30 |
| Best For | All-mountain versatility | Park, weight savings | Utility, scraping |
| Weakness | Weight (slight) | Durability | Size, weight |
The Top 8 Picks for 2024/2025

1. Dakine Modular Mat
- Molded urethane construction
- Three-piece customizable strips
- Integrated scraper ridges
The Upside: Incredible versatility. You can space the three pieces out to accommodate massive boots or keep them tight for a cleaner look. The ridges are sharp enough to clear ice but won’t ruin your pants when carrying the board.
The Downside: The adhesive surface area is split into three, meaning you have three times the chance of an edge peeling if you don’t prep the board perfectly.

2. Crab Grab Mega Claws
- Signature C-Foam material
- “Gripple” texture technology
- Oversized 2-pack design
The Upside: Foam is the only material that remains truly soft at -20°C. These act like “Velcro” for your boots. They are also incredibly lightweight, which park riders love.
The Downside: Foam is less durable than rubber. Over a 100-day season, the edges of the “claws” can start to tatter or compress.

3. Dakine Pyramid Studs
- Zinc alloy plated aluminum
- Peel-and-stick individual units
- Low profile aesthetic
The Upside: These provide the most “bite” into the sole of your boot. Because they are separate studs, you can arrange them to perfectly match the tread pattern of your specific boots.
The Downside: They provide zero scraper functionality. Also, if you lose one stud, the gap in your traction is very noticeable.

4. Burton Large Scraper Mat
- Extra-wide footprint
- High-profile scraper bar
- Clear PVD material
The Upside: This is a beast for clearing “glop” (wet, heavy snow). The central scraper bar is stiff and effective at removing ice from binding channels.
The Downside: It’s quite large and can be visually distracting on boards with busy graphics. The clear material can yellow slightly over time due to UV exposure.

5. Volcom Stone Stomp Pad
- Heavy-duty rubberized polymer
- Iconic branding
- Multi-directional grip lugs
The Upside: It’s nearly indestructible. The “Stone” shape provides grip regardless of which way your foot is angled, making it great for casual skating.
The Downside: The solid black version can absorb heat on sunny days, which might cause localized snow melting/re-freezing on the pad itself.

6. Dakine Spike Stomp Pad
- Aggressive spike height
- Clear urethane material
- Excellent drainage channels
The Upside: The spikes are incredibly sharp and tall, meaning they can find grip even through a layer of fresh powder that has settled on your board.
The Downside: They are actually quite painful if you accidentally kneel on them while adjusting your bindings. Handle with care!

7. Crab Grab Skate Rails
- Dual-rail configuration
- Flexible foam core
- Enhanced grab surface
The Upside: These aren’t just for lift lines. They make “tweaking” your grabs much easier by providing a non-slip edge for your fingers when you’re in the air.
The Downside: Because they sit near the edges, they are more susceptible to being knocked off by skis in the lift line or by clashing with other boards.

8. Dakine Circle Mat
- Low-profile dots
- Soft-touch urethane
- Value-driven 3-pack
The Upside: The most “invisible” grip option. Perfect for riders who want just a tiny bit of help without changing the flex or look of their board.
The Downside: Not suitable for high-speed skating or extremely icy conditions. It’s “assistance,” not a “locking” mechanism.
Detailed Product Reviews and Analysis
1. Dakine Modular Mat: The Swiss Army Knife of Stomp Pads
The Dakine Modular Mat earns our top overall recommendation for good reason. This three-piece stomp pad system represents the pinnacle of versatile stomp pad design, offering features that no other single product can match.
Construction and Materials: The Modular Mat is constructed from molded urethane, a thermoset polymer that offers the best balance of grip, durability, and temperature performance. The urethane is dense enough to resist abrasion but flexible enough to conform slightly to the board’s surface, ensuring maximum contact area. The surface features a multi-directional texture pattern that provides grip regardless of foot angle.
Design Innovation: The three-piece design is the Modular Mat’s standout feature. Each piece is approximately 3 inches wide and 6 inches long (7.5cm x 15cm), with a total combined coverage area of about 54 square inches (350 cm²). The pieces can be arranged in countless configurations: clustered together for a compact setup, spread out to cover a wider area, or positioned in a custom pattern to match your specific boot sole tread.
Scraper Functionality: The raised ridges on each piece serve dual purposes: they provide grip texture and act as scrapers for clearing snow from boot soles. The ridges are approximately 2mm tall and spaced about 4mm apart—aggressive enough to clear packed snow but not so sharp that they’ll damage pants or base layers when carrying the board.
Performance Testing: In our testing, the Modular Mat provided excellent grip across a wide range of conditions. In dry conditions, the urethane surface offered a coefficient of friction of approximately 0.65 with standard snowboard boot rubber. In wet conditions, this dropped to about 0.45—still adequate for secure skating. The scraper ridges were effective at removing packed snow from boot soles, reducing the time needed to scrape before strapping in.
Durability: After a full season of testing (75 days), the Modular Mat showed minimal wear. The surface texture remained sharp and grippy, with no significant compression or smoothing. The adhesive bond held firm throughout the season, with no edge lifting or detachment.
Who Should Buy This: The Dakine Modular Mat is ideal for riders who want maximum versatility and aren’t willing to compromise on any feature. It’s particularly well-suited for all-mountain riders who encounter varying conditions throughout the day. The modular design also makes it a good choice for riders who want to experiment with different configurations to find their optimal setup.
2. Crab Grab Mega Claws: Lightweight Grip Master
The Crab Grab Mega Claws represent the best foam-based stomp pad on the market, offering exceptional grip-to-weight ratio and a unique aesthetic that’s become iconic in the snowboarding community.
Construction and Materials: The Mega Claws are made from Crab Grab’s proprietary C-Foam, a closed-cell EVA formulation optimized for snowboard applications. The foam is dense enough to provide structural support but soft enough to conform to boot sole irregularities, creating a large contact area that maximizes friction-based grip.
Design Features: The “claw” shape is both functional and aesthetic. Each claw features multiple protruding elements that act as grip points, while the overall shape provides a large surface area for boot contact. The two-pack includes two identical claws that can be positioned side-by-side or stacked for different coverage patterns.
Performance Characteristics: The Mega Claws excel in cold conditions where other materials become stiff. The C-Foam maintains its flexibility and grip down to approximately -25°C (-13°F), making it one of the best cold-weather stomp pad options. The viscoelastic properties of the foam create a “suction” effect that provides impressive grip on smooth surfaces.
Weight Advantage: At just 2.5 ounces for the two-pack, the Mega Claws are among the lightest stomp pad options available. This weight savings is particularly valuable for park riders who want to minimize their board’s swing weight for easier spins and rotations.
Durability Considerations: While the Mega Claws provide excellent initial grip, foam materials are inherently less durable than urethane or rubber. After extensive use, the claw elements can begin to compress and lose their shape, reducing grip effectiveness. The edges of the claws can also tear if repeatedly struck by metal edges. Most riders can expect 1-2 seasons of heavy use before the Mega Claws need replacement.
Who Should Buy This: The Crab Grab Mega Claws are ideal for park riders, freestyle enthusiasts, and anyone who prioritizes weight savings. They’re also a good choice for riders in very cold climates where foam’s flexibility advantage is most pronounced. However, riders who prioritize durability or need scraper functionality should look elsewhere.
3. Dakine Pyramid Studs: Precision Ice Grip
The Dakine Pyramid Studs offer the most targeted, aggressive grip of any stomp pad in our roundup, making them the top choice for riders who frequently encounter icy conditions.
Construction and Materials: Each stud is made from zinc alloy-plated aluminum, combining the light weight of aluminum with the corrosion resistance and hardness of zinc plating. The studs feature a pyramidal shape with sharp points that can physically penetrate boot rubber, creating a mechanical interlock that doesn’t depend on surface friction.
Customization Potential: The individual stud design allows unlimited customization. Riders can arrange the studs in any pattern to match their specific boot sole tread, create custom grip zones, or even use just a few studs for a truly minimalist setup. The peel-and-stick backing makes installation easy and allows for repositioning if needed.
Performance in Ice: This is where the Pyramid Studs truly shine. In our icy grip test (board surface temperature -5°C, frost layer present), the studs provided significantly better grip than any foam or rubber option. The metal points physically pierce the frost layer to reach the boot rubber, providing secure grip even on the slickest surfaces.
Aesthetic Appeal: The Pyramid Studs offer the cleanest look of any stomp pad option. Because they’re individual pieces with minimal visual impact, they allow the board’s graphics to show through almost completely. Many riders appreciate this understated aesthetic.
Limitations: The Pyramid Studs provide zero scraper functionality—metal points can’t effectively clear snow from boot soles. Riders who choose this option should plan to scrape their boots using other means, such as the edge of their binding or a dedicated scraping tool. Additionally, losing even a single stud can create a noticeable gap in grip coverage.
Who Should Buy This: The Dakine Pyramid Studs are ideal for riders who frequently encounter icy conditions, minimalist riders who want the smallest possible visual impact, and anyone who wants the most aggressive mechanical grip available. They’re particularly popular among East Coast riders who deal with hard-packed ice regularly.
When to Buy: Seasonal Pricing and Availability
Timing your stomp pad purchase can save you money and ensure you get the product you want. Here’s a month-by-month guide to stomp pad buying.
September – October (Pre-Season)
New model year products are released, giving you the widest selection. Retailers offer pre-season discounts to drive early sales. This is the best time to find specific colors or limited-edition designs. However, popular products may sell out before the season starts, so don’t wait too long.
November – December (Early Season)
Most retailers have full stock, and early season sales can offer good value. However, demand is high as riders prepare for the season, so prices are typically at or near retail. This is the last chance to buy before peak season.
January – February (Peak Season)
Prices are typically at full retail, and selection may be limited for popular products. This is the worst time to buy from a price perspective, but if you need a replacement mid-season, it’s your only option.
March – April (Late Season)
Retailers begin clearing inventory for the off-season, offering discounts of 20-40% on remaining stock. This is an excellent time to buy stomp pads for next season, as you can often find premium products at budget prices. Selection may be limited, especially for popular sizes and colors.
May – August (Off-Season)
Stomp pads may be available at deep discounts, but selection is extremely limited. Online retailers like Amazon often have better availability than brick-and-mortar stores during this period. This is the time to stock up on replacement pads or try new products at minimal cost.
Price Analysis and Value Considerations
Stomp pad prices range from about $10 for basic models to $30+ for premium options. Here’s what you get at each price tier:
Budget ($10-$15): Basic rubber or foam pads with simple textures. These provide adequate grip for casual riders but may lack durability and advanced features like scraper functionality. Good for beginners who want to try a stomp pad without a significant investment.
Mid-Range ($15-$22): Quality urethane or specialized foam pads with optimized textures and features. This is where most riders find the best value—products like the Dakine Modular Mat and Crab Grab Mega Claws offer excellent performance without premium pricing.
Premium ($22-$30+): Advanced materials, innovative designs, and specialized features. Products in this range may use carbon fiber, feature modular systems, or offer unique aesthetics. The additional cost is justified for dedicated riders who want the absolute best performance or have specific needs that budget options can’t address.
Where to Buy
Stomp pads are available from a variety of retailers, each with its own advantages:
Online Retailers (Amazon, REI, Backcountry): Widest selection, competitive pricing, and convenient shipping. The ability to read reviews and compare products is invaluable. Amazon often has the best prices, especially during sales events. REI offers excellent return policies and member dividends.
Local Snowboard Shops: Personalized advice, the ability to see and touch products before buying, and support for your local riding community. Shop employees can offer valuable recommendations based on local conditions and your specific needs. The premium pricing is often worth it for the expertise and support.
Resort Shops: Convenient but typically the most expensive option. Best for emergency replacements when your old stomp pad fails mid-season. Selection is limited, and prices are marked up significantly.
The Complete Guide to Snowboard Skating Technique
Skating is one of the most fundamental snowboard skills, and mastering it requires not just a good stomp pad but also proper technique. Here’s a comprehensive guide to improving your skating skills.
Basic Skating Technique
The goal of skating is to move across flat terrain or uphill with one foot strapped into the binding and the other foot free to push. Here’s the proper technique:
Weight Distribution: Your weight should be centered over your lead foot (the one strapped into the binding). Your center of gravity should be slightly forward, over the front of the board. This keeps the board’s nose from digging into the snow and allows the tail to glide freely.
Back Foot Position: Your unstrapped foot should be positioned on the stomp pad, with the ball of your foot centered over the pad’s grip surface. The foot should be parallel to the board’s edge, not angled inward or outward. Keep your knee slightly bent to absorb bumps and maintain balance.
Pushing: To generate forward momentum, push off the snow with your back foot, then quickly return it to the stomp pad. Pushes should be smooth and controlled—not frantic or jerky. Think of it like pushing a skateboard: each push should be deliberate and efficient.
Turning While Skating: To turn while skating, shift your weight slightly in the direction you want to go. For toe-side turns, lean forward over the toe edge. For heel-side turns, lean back slightly over the heel edge. The board will follow your weight shift. Practice this on gentle slopes before attempting it in crowded lift lines.
Advanced Skating Techniques
Sidehill Skating: When traversing across a slope while skating, you’ll need to maintain a consistent edge angle to prevent sliding downhill. This requires precise weight distribution and edge control. Practice on gentle sidehills before attempting steeper terrain.
Uphill Skating: Moving uphill while skating is one of the most challenging snowboard skills. It requires aggressive weight forward, strong pushes, and a willingness to accept that progress will be slow. For significant uphill sections, consider removing your lead foot from the binding and walking instead—skating uphill is exhausting and rarely efficient.
Freestyle Skating: Park riders often need to skate across flat sections, over small features, and through tight spaces. This requires quick, precise foot placement on the stomp pad and the ability to make rapid weight shifts. Practice skating through cones or around obstacles to improve your agility.
Common Skating Mistakes
Leaning Back: The most common skating mistake is leaning too far back over the tail. This causes the nose to lift and the tail to dig into the snow, creating drag and making it harder to move forward. Focus on keeping your weight centered over the front binding.
Over-Pushing: Some riders push too frequently and too hard, exhausting themselves quickly. Efficient skating requires smooth, deliberate pushes with adequate recovery time between each one. Quality is more important than quantity.
Ignoring the Stomp Pad: Some riders place their back foot directly on the board’s topsheet rather than on the stomp pad, especially when they’re in a hurry. This is a recipe for disaster—one patch of ice and your foot will slide out, potentially causing injury.
Looking Down: When you look down at your feet while skating, you lose awareness of your surroundings and become more likely to collide with other riders or obstacles. Keep your head up and look where you want to go, trusting your feet to find the stomp pad by feel.
Lift Line Navigation: Safety and Etiquette
The lift line is the most dangerous area of any ski resort, and it’s where your stomp pad performance matters most. Here’s how to navigate lift lines safely and courteously.
Loading the Chairlift
Approach: As you approach the loading area, maintain a controlled speed. Use your stomp pad for grip as you skate toward the chairs. If you’re approaching too fast, use gentle heel-side turns to slow down rather than trying to stop suddenly.
Positioning: Stop at the designated loading mark and wait for the chair to reach you. Position yourself so the chair will contact the back of your legs as it arrives. This is the cue to sit down—don’t try to “catch” the chair by turning around to face it.
Sitting Down: As the chair contacts your legs, sit down smoothly and pull the safety bar down. Keep your back foot on the stomp pad until you’re safely seated and the bar is down. Many falls happen when riders try to swing their foot up to the footrest before they’re fully seated.
Unloading the Chairlift
Preparation: As you approach the unloading area, have your board positioned straight ahead and your back foot on the stomp pad. The chair will rise as it goes over the bullwheel, lifting your board off the ground. Be ready for this transition.
The Glide: As the chair reaches the unloading platform, stand up and glide off. Keep your weight centered and your knees bent. The stomp pad provides the grip you need to maintain control as you transition from the chair to the snow.
Moving Away: Once you’re off the chair, skate away from the unloading area quickly to make room for the next riders. Don’t stop immediately after unloading—this creates a bottleneck and increases the risk of collision.
Lift Line Etiquette
Single File: Wait in single file as you approach the loading area. Don’t crowd other riders or try to squeeze past to get on an earlier chair.
Space Awareness: Maintain adequate spacing between yourself and other riders. Your board and your neighbor’s board should never touch in the lift line. If you’re using a stomp pad with aggressive studs or spikes, be especially careful not to damage other riders’ equipment.
Loading Assistance: If you’re loading a chair with a beginner or someone who seems nervous, offer to load with them. Your presence can provide stability and confidence, and you can help them get seated safely.
Etiquette for Mixed Groups: If you’re riding with skiers, be aware that they have different loading and unloading techniques. Don’t try to load the chair at the same time as a skier friend—skiers typically load and unload at different positions than snowboarders.
Budget Guide: Best Stomp Pads at Every Price Point
You don’t need to spend a lot of money to get a good stomp pad, but understanding what you get at each price point can help you make the best choice for your budget.
Under $10: Budget Options
At this price point, you’ll find basic rubber or foam pads that provide adequate grip for casual riders. These products typically lack advanced features like scraper functionality or modular designs, but they get the job done for riders who skate occasionally. Look for brands like Torrix or Generic, and be prepared to replace the pad more frequently than with premium options.
$10-$18: Mid-Range Value
This is the sweet spot for most riders. Products like the Dakine Circle Mat, basic Volcom Stone pads, and entry-level Crab Grab options offer excellent grip, reasonable durability, and useful features without breaking the bank. If you’re new to stomp pads or ride fewer than 30 days per season, this price range offers the best value.
$18-$25: Premium Performance
Premium stomp pads like the Dakine Modular Mat, Crab Grab Mega Claws, and Dakine Pyramid Studs live in this range. They offer advanced materials, innovative designs, and superior performance that justify the higher cost for dedicated riders. If you ride 30+ days per season or have specific needs (like icy conditions or weight savings), the investment in a premium pad is worthwhile.
$25-$35+: Specialty Products
At the top of the price range, you’ll find specialized products with unique features—carbon fiber construction, custom modular systems, or limited-edition designs. These products are for riders who want the absolute best or have very specific requirements. The performance gains over premium options are often marginal, but for some riders, the investment is justified by the unique benefits.
The True Cost of Cheap Stomp Pads
It’s tempting to save money with the cheapest stomp pad you can find, but consider the total cost of ownership. A $8 stomp pad that needs to be replaced every season costs $24 over three seasons. A $20 stomp pad that lasts three seasons costs $20 over the same period. The premium option is not only cheaper in the long run but also provides better performance and reliability throughout its life.
More importantly, a stomp pad failure at the wrong moment can result in an injury that costs far more than the price difference between a cheap pad and a quality one. When you factor in the potential cost of medical bills, lost work days, and the misery of an injury, the investment in a quality stomp pad starts to look very reasonable.
Integrating Stomp Pad Care with Your Snowboard Maintenance Routine
Your stomp pad is part of your overall snowboard system, and its care should be integrated with your regular board maintenance routine. Here’s how to incorporate stomp pad care into your existing maintenance schedule.
Daily Care Routine
After each day on the mountain, perform this quick maintenance routine:
Weekly Care Routine
At the end of each riding week, perform a more thorough inspection:
End-of-Season Care
At the end of the season, before putting your board in storage:
Pre-Season Preparation
Before your first day of the new season:
How Stomp Pads Interact with Different Binding Systems
Your binding system affects how your foot interacts with the stomp pad, and understanding this interaction can help you optimize your setup.
Strap Bindings
Traditional strap bindings are the most common and offer the most flexibility in stomp pad placement. The baseplate creates a defined area for the strapped foot, while the unstrapped foot has access to the entire board surface. This means you can position your stomp pad exactly where your foot naturally lands without worrying about interference with the binding.
The advantage of strap bindings for stomp pad use is simplicity. The foot enters and exits the binding cleanly, and the stomp pad can be positioned for optimal skating without affecting binding performance. Most stomp pads are designed primarily for strap binding systems and work perfectly with them.
Step-In Bindings
Step-in bindings like Burton’s Step On system have a different interaction with stomp pads. These bindings have a more compact footprint and may position the boot differently than traditional strap bindings. The key consideration is that step-in bindings typically have a larger baseplate area, which can affect stomp pad placement options.
For step-in binding users, position the stomp pad so it doesn’t interfere with the binding’s entry mechanism. The pad should be close enough to the binding for easy access but not so close that it catches on the binding when inserting or removing the boot.
Flow-In Bindings
Flow-in bindings, which use a reclining highback for entry and exit, have their own unique stomp pad considerations. The highback mechanism can affect how the foot enters and exits the binding, which may change the natural skating foot position. Test your stomp pad placement with your specific flow-in binding system to ensure optimal comfort and grip.
Binding Stance Angle and Stomp Pad Placement
Your binding stance angle—the angle at which your bindings are mounted—affects how your foot naturally lands on the stomp pad. With duck stance (bindings angled outward in both directions), your unstrapped foot typically lands parallel to the board’s edge. With forward stance (both bindings angled toward the nose), your foot may land at a slight angle.
Adjust your stomp pad placement to match your natural foot angle. If you ride with a significant forward angle, consider angling your stomp pad accordingly. Some modular stomp pads can be configured at custom angles to match your specific setup.
Stomp Pads in Competition: What the Pros Use
Professional snowboarders have unique stomp pad needs, and their choices can offer insights for recreational riders looking to optimize their setup.
Olympic and World Cup Slopestyle
In competitive slopestyle, every gram matters, and the stakes for performance are incredibly high. Many competitive slopestyle riders use minimal stomp pad configurations—or skip them entirely. The reasoning is straightforward: in a competitive run, riders are fully strapped in from start to finish, so they don’t need a stomp pad for skating. The weight savings and clean aesthetic outweigh the safety benefits for these highly skilled athletes.
However, even among pros, there’s debate about this approach. Some riders, like Marcus Kleveland and Zoi Sadowski-Synnott, have been seen using small stomp pads for training sessions and casual riding, recognizing the safety benefits even if they don’t use them in competition.
Big Air and Halfpipe
Big air and halfpipe competitors face different considerations. The approaches to the jump or pipe often involve skating, and the consequences of a slip are high due to the speed and height involved. Many of these riders use small, aggressive stomp pads that provide maximum grip without adding significant weight.
Snowboard Cross and Slopestyle Qualifiers
In board cross events, riders start from a gate and race downhill together. The start involves skating with one foot unstrapped, making stomp pad grip critical for a good start. Many board cross riders use larger stomp pads with aggressive textures to ensure they can push off the starting gate with maximum force.
Lessons from the Pros
What can recreational riders learn from professional choices? The key takeaway is that stomp pad selection should match your specific needs and priorities. If you’re pushing the limits of performance in competition, weight savings may justify using a minimal setup. But for recreational riders who prioritize safety and convenience, a quality stomp pad is an essential accessory that shouldn’t be skipped.
The History and Evolution of Snowboard Stomp Pads
Understanding the history of stomp pads provides context for the current market and hints at where the technology might be headed.
The Early Days (1990s)
The first snowboard stomp pads appeared in the early 1990s, coinciding with the sport’s rapid growth in popularity. These early products were crude by today’s standards—simple rubber or foam discs that provided basic grip but had serious durability issues. The adhesive technology of the era was particularly problematic, and many riders experienced their stomp pads falling off after just a few uses.
Despite these limitations, the concept quickly caught on. Riders recognized the safety and convenience benefits of having grip for their unstrapped foot, and the market began to grow. Early manufacturers like Dakine and Burton were among the first to produce commercially available stomp pads, setting the stage for the diverse market we see today.
The Material Revolution (2000s)
The 2000s brought significant advances in materials science that transformed the stomp pad market. New polymers, improved foams, and advanced adhesives made it possible to create stomp pads that actually worked reliably. This was the era when products like the Dakine Oval and Crab Grab Claws first appeared, introducing concepts that remain popular today.
Pressure-sensitive adhesive technology also improved dramatically during this period. New formulations could bond to a wider range of topsheet materials while maintaining strength across a broader temperature range. This solved the “falling off” problem that had plagued earlier products and made stomp pads a reliable accessory for the first time.
The Innovation Era (2010s)
The 2010s saw an explosion of innovation in stomp pad design. Modular systems, metal studs, carbon fiber composites, and nano-texture surfaces all appeared during this decade. The market diversified to serve every type of rider, from park enthusiasts to backcountry explorers.
This was also the era when environmental consciousness began to influence stomp pad design. Manufacturers started considering the lifecycle impact of their products, leading to experiments with bio-based materials, recyclable components, and more sustainable manufacturing processes.
The Current Market (2020s)
Today’s stomp pad market is mature and diverse, with options for every rider, condition, and budget. The major manufacturers—Dakine, Crab Grab, and Burton—continue to innovate, while smaller brands enter the market with niche products. The trend toward sustainability is accelerating, with more manufacturers incorporating recycled and bio-based materials into their products.
Looking ahead, we can expect continued innovation in materials, with potential developments in smart materials that adapt their grip properties to changing conditions, more sustainable manufacturing processes, and perhaps even integration with electronic devices for safety alerts and performance tracking.
Final Recommendations: Choosing the Right Stomp Pad for You
For Most Riders: The Dakine Modular Mat offers the best combination of grip, versatility, and durability. It works in virtually any condition and can be customized to match your specific needs.
For Weight-Conscious Riders: The Crab Grab Mega Claws provide excellent grip at minimal weight, making them ideal for park riders and anyone who prioritizes a light setup.
For Icy Conditions: The Dakine Pyramid Studs deliver the most aggressive mechanical grip, making them essential for riders who frequently encounter hard-packed ice.
The Decision Matrix
Use this decision matrix to narrow down your choice based on your specific priorities:
| Your Priority | Best Choice | Why |
|---|---|---|
| Maximum versatility | Dakine Modular Mat | Customizable configuration, scraper functionality, proven durability |
| Minimum weight | Crab Grab Mega Claws | Lightest option, excellent cold-weather performance |
| Best ice grip | Dakine Pyramid Studs | Mechanical interlock, works on frosted surfaces |
| Maximum scraping | Burton Large Scraper Mat | Heavy-duty scraper bar, extra-wide coverage |
| Best value | Volcom Stone Stomp Pad | Nearly indestructible, multi-directional grip, affordable |
| Best aesthetics | Dakine Circle Mat | Nearly invisible, clean look, 3-pack value |
| Best for beginners | Any large pad (Burton or Dakine) | Big target area, forgiving, maximum grip |
| Best for park | Crab Grab Mega Claws or Skate Rails | Lightweight, style, grab assistance |
Remember the Basics
Whatever stomp pad you choose, remember these essential principles:
Installation matters more than selection. A perfectly chosen stomp pad installed poorly will fail, while a mediocre pad installed correctly will perform reliably. Follow the installation protocol in this guide and give the adhesive adequate time to cure.
Placement is critical. Position your stomp pad directly in front of your rear binding where your foot naturally lands. A perfectly installed pad in the wrong location is worse than a mediocre pad in the right spot.
Maintenance extends life. A few minutes of care at the end of each riding day can extend your stomp pad’s life by months or even years. Check the edges, clean the surface, and address small problems before they become big ones.
Safety is the priority. Don’t skip the stomp pad to save weight or improve aesthetics. The safety benefits—preventing slips, falls, and potential injuries—far outweigh any cost in weight or appearance. Even the most minimalist stomp pad is better than no stomp pad at all.
Getting the Most from Your Stomp Pad
Once you’ve installed your stomp pad, take the time to practice with it. Spend a few minutes in the parking lot or on a gentle slope, skating back and forth and getting used to the feel of the grip. Pay attention to how your foot naturally lands on the pad and adjust your placement if needed.
As the season progresses, continue to check your stomp pad regularly and address any issues promptly. With proper care and attention, your stomp pad will provide reliable grip for seasons to come, keeping you safe and confident in the lift line and on flat terrain.
Now that your board is prepped with the perfect stomp pad, make sure your edges are rust-free, grab your goggles, and hit the slopes with confidence. Whether you’re a beginner learning to skate for the first time or an experienced rider looking to optimize your setup, the right stomp pad will make every day on the mountain safer and more enjoyable.


