
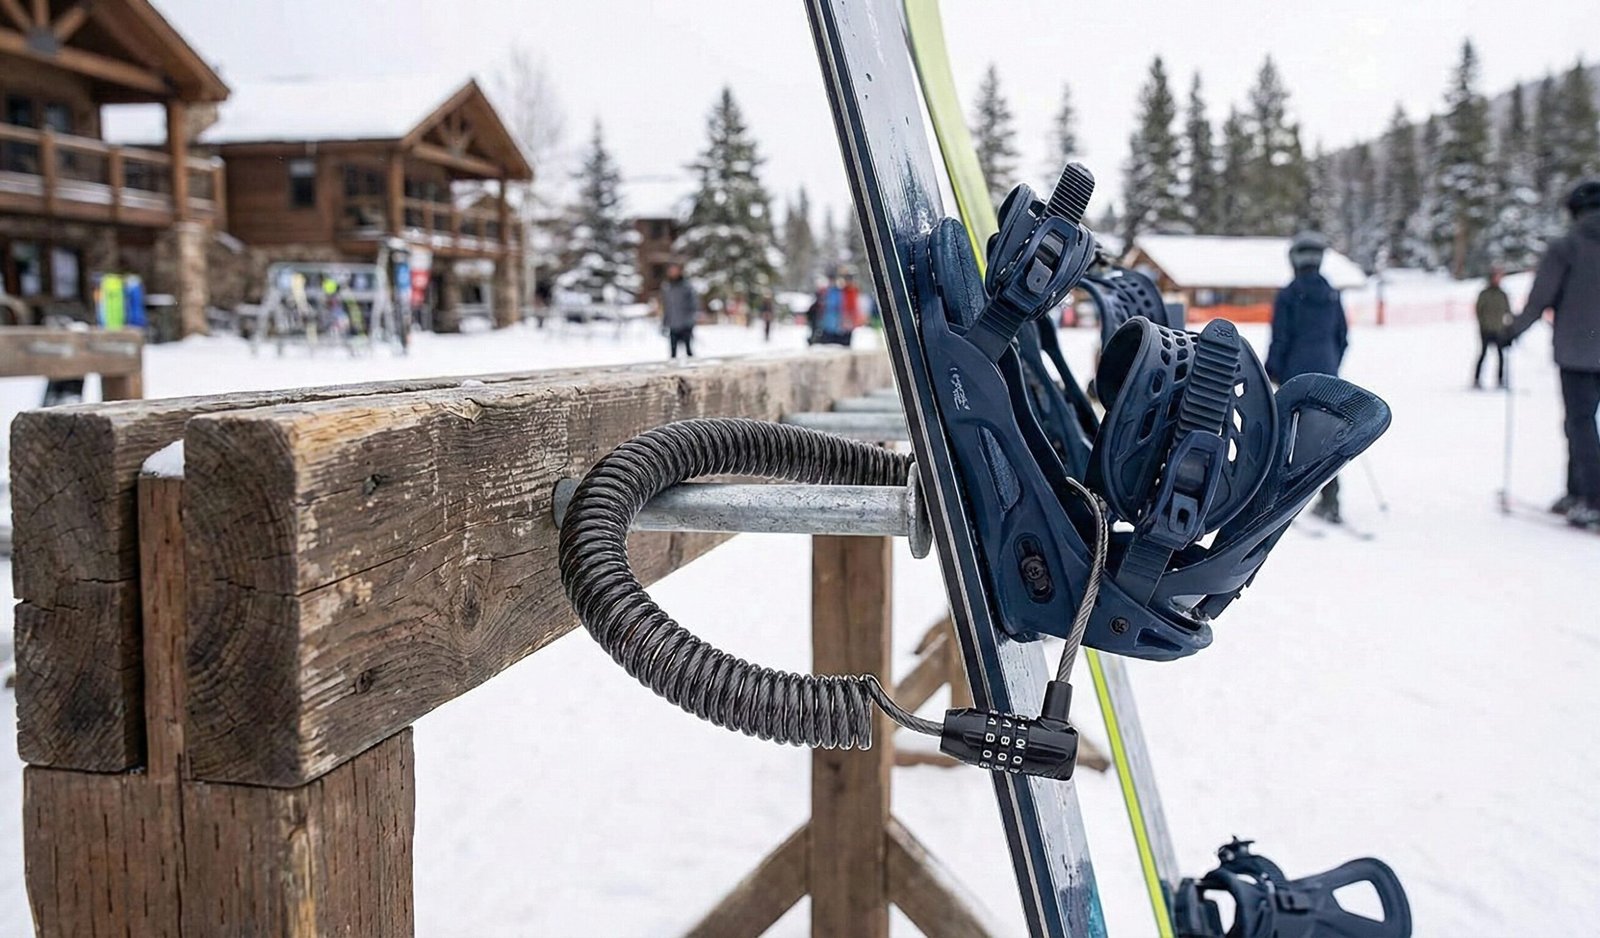
Secure Your Ride: The 5 Best Snowboard Locks of 2026
Snowboarding is an expensive passion. Between the board, bindings, and boots, your setup can easily exceed $1,000. Yet, many riders leave their gear completely unsecured outside the lodge while they grab lunch. It is a harsh reality that snowboard theft is common at resorts worldwide. Thieves rely on the “grab and go” method—walking off with a loose board in a crowded rack.
For the price of a lodge burger, a snowboard lock provides essential peace of mind. While no cable lock is bolt-cutter proof, they act as a massive deterrent against opportunistic thieves. In this guide, we break down the most reliable options to protect your investment, considering portability, cable strength, and ease of use.
Whether you are a weekend warrior hitting the local hill or a seasoned rider chasing powder across multiple resorts, this comprehensive guide covers everything you need to know about snowboard locks—from the cheapest retractable cable to high-security rack systems, GPS trackers, and even smart Bluetooth locks. We have tested, compared, and ranked every option so you can ride with confidence knowing your gear is safe when you step away.
2. Snowboard Theft Statistics & Trends in 2026
Understanding the scope of snowboard theft is the first step toward protecting your gear. While exact numbers vary by region and resort, the data paints a clear picture: snowboard theft is not a rare occurrence. It is a persistent problem that affects thousands of riders every season. According to law enforcement reports from ski resort communities across North America, Europe, and Asia-Pacific, gear theft spikes during peak season months—December through March—when crowded racks and distracted riders create the perfect conditions for opportunistic thieves.
How Common Is Snowboard Theft?
A 2025 study conducted by the National Ski Areas Association (NSAA) estimated that approximately 5-8% of all snowboarders and skiers will experience some form of gear theft during their riding career. That may sound like a small percentage, but when you consider that there are over 20 million skiers and snowboarders in the United States alone, the absolute numbers are staggering. Conservatively, this means between 1 and 1.6 million riders face theft each year.
The study further found that the average stolen snowboard setup (board, bindings, and boots) is valued at approximately $850 to $1,200. High-end freeride and backcountry setups can easily push that number past $2,000 when you factor in premium bindings, custom boots, and aftermarket accessories. When you multiply the number of thefts by the average value of stolen gear, the total economic impact of snowboard theft across the industry runs into the billions of dollars annually.
The most alarming statistic, however, is the recovery rate. Fewer than 3% of stolen snowboards are ever returned to their owners. The resale market for used snowboard gear—both online through platforms like Craigslist, Facebook Marketplace, and OfferUp, and locally through pawn shops—makes it easy for thieves to convert stolen equipment into cash within hours of the theft. Without proper identification, tracking, or insurance, most riders never see their gear again.
Peak Theft Times and Locations
Theft risk is not evenly distributed throughout the day or the season. Understanding when and where theft is most likely to occur can help you make smarter security decisions.
Morning Drop-Off: The highest-risk window for snowboard theft is between 8:30 AM and 10:00 AM, when riders are arriving at the mountain, racking their boards, and heading to the lift lines. Thieves blend in with the morning crowd, walking through the racks with the appearance of someone looking for their own board. The bustle and distraction of the morning rush makes it easy to walk off with an unsecured board.
Lunch Hour (11:30 AM – 1:00 PM): The second-highest risk period is the lunch rush. Riders unstrap at the base, leave boards in racks outside the lodge, and head inside to eat. With hundreds of boards stacked together, it is nearly impossible to keep track of your specific setup from inside a crowded restaurant.
End of Day (3:00 PM – 4:30 PM): As the lifts close and riders gather their gear, there is a brief window of chaos. Tired riders may leave boards unattended while loading cars, and thieves take advantage of the general fatigue and distraction.
Weekend and Holiday Peaks: Saturdays, Sundays, and holiday weeks (Christmas, New Year’s, Presidents’ Day, Spring Break) see theft rates two to three times higher than midweek days. The increased crowd density provides more cover for thieves and more targets to choose from.
Regional Hotspots: Certain regions and resorts have higher theft rates than others. Major destination resorts in Colorado (Vail, Breckenridge, Keystone), Utah (Park City, Snowbird), California (Lake Tahoe area), and British Columbia (Whistler Blackcomb) tend to have higher absolute theft numbers due to the sheer volume of visitors. However, per-rider theft rates can be equally high at smaller, local hills where security infrastructure is minimal and riders tend to be more relaxed about gear protection.
The Psychology of Snowboard Theft
Understanding why people steal snowboards helps explain why locks are effective deterrents. Most snowboard theft falls into one of three categories:
Opportunistic Theft (70-80% of incidents): This is by far the most common form. The thief did not arrive at the mountain planning to steal a snowboard—they simply saw an unsecured board in a crowded rack and acted on impulse. These thieves are looking for the path of least resistance. A cable lock, even a thin one, is usually enough to deter them because it introduces friction and visibility into the equation.
Targeted Theft (15-20% of incidents): Some thieves specifically target high-end snowboard gear. They may scope out racks during the morning, identify an expensive setup, and return later to take it. These thieves are more likely to carry bolt cutters and may be prepared to defeat basic cable locks. For these threats, layered security (lock + GPS tracker + registered serial number) is essential.
Organized Theft (5-10% of incidents): In rare cases, organized groups target resort areas, stealing multiple boards in a single operation and transporting them to distant resale markets. These operations are difficult to prevent individually but are best addressed through resort-level security measures and law enforcement cooperation.
The Cost of Not Locking Up
Consider the math. A quality snowboard lock costs between $10 and $30. A basic snowboard setup costs $500 to $800. A premium setup costs $1,500 to $3,000 or more. The cost of a lock represents roughly 1-3% of the value of your gear. Even if a lock only prevents theft once every 50 riding days, the return on investment is enormous.
Beyond the direct financial cost, there is the emotional and logistical toll. A stolen board means no riding for the rest of the day (or the rest of your vacation). It means filing a police report, contacting your insurance company, and spending hours searching online marketplaces for your gear. It means the frustration of knowing that a $15 cable lock could have prevented the entire ordeal. For many riders, the peace of mind alone is worth far more than the cost of the lock.
It is also worth noting that the cost of stolen gear extends beyond the individual rider. Resorts face increased insurance premiums, law enforcement costs, and negative publicity when theft rates climb. Some resorts have begun implementing mandatory gear-check policies in high-theft areas, which adds time and inconvenience for all riders. By taking basic security precautions, you are not just protecting your own gear—you are contributing to a safer, more secure environment for the entire riding community.
3. Understanding Lock Types
Not all locks serve the same purpose. Choosing the right one depends on where you ride and how much bulk you are willing to carry. The snowboard lock market has evolved significantly over the past decade, moving from a handful of generic cable locks to a diverse ecosystem of security solutions tailored to specific use cases.
Retractable Cable Locks
The retractable cable lock is the most popular and widely available snowboard security solution. The concept is simple: a thin braided steel cable (typically 24 to 36 inches long) retracts into a compact housing that contains a combination dial or key mechanism. When not in use, the cable winds back into the housing, making the entire unit small enough to fit in a jacket pocket.
Retractable cable locks typically use 3-digit or 4-digit combination mechanisms, which means you do not need to carry a physical key. The cable itself is usually 1.5mm to 2mm in diameter, braided from multiple steel strands and coated in vinyl to prevent scratching your snowboard’s top sheet. While this thin cable will not stop a determined thief with bolt cutters, it is more than sufficient to deter the vast majority of opportunistic thieves who are looking for an easy, quick grab.
The main advantages of retractable cable locks are their portability and convenience. They weigh between 1 and 3 ounces, require no keys, and can be operated with one hand. The main limitations are the thin cable (which offers limited physical security) and the small combination dials (which can be difficult to operate while wearing gloves).
Rack-Specific Locks (Ski Key System)
The Ski Key system represents a fundamentally different approach to snowboard security. Instead of using a cable to attach your board to a rack, the Ski Key is a rigid plastic device that inserts directly into compatible locking racks, physically trapping your board against the rack bar. The system uses a traditional key mechanism rather than a combination dial.
Ski Key racks are typically identified by their bright yellow locking bars and are installed at many resorts across North America, particularly in Canada and the US East Coast. The key advantage of this system is that there is no exposed cable to cut—the locking mechanism is entirely internal and protected by the rack structure itself. This makes the Ski Key system significantly more secure than any cable-based lock.
The obvious limitation is compatibility. If your resort does not have Ski Key racks, the device is useless. Additionally, you must carry a physical key, which introduces the risk of loss. However, for riders who frequent Ski Key-compatible resorts, this system offers the highest level of security available.
Fixed Loop Cable Locks
Fixed loop cable locks bridge the gap between retractable cables and the Ski Key system. These locks use a thicker, non-retractable steel cable (typically 3mm to 5mm in diameter) that forms a permanent loop. The cable is often braided steel coated in vinyl or rubber, and the lock mechanism is typically a keyed padlock or heavy-duty combination lock.
The thicker cable provides significantly more physical security than a retractable lock. While still not bolt-cutter proof, a 4mm or 5mm braided cable requires serious cutting tools and considerable time to defeat. The trade-off is bulk and weight—a fixed loop cable lock typically weighs between 6 and 12 ounces and cannot retract into a compact housing. You will need to coil it up and stow it in a backpack or jacket pocket.
Fixed loop locks are particularly popular with riders who leave their gear unattended for extended periods, such as during full-day lessons, all-day park sessions, or when riding with children who require frequent breaks. The extra weight and bulk are worth the added security for these use cases.
Heavy-Duty Chain and U-Lock Options
At the extreme end of the security spectrum, some riders opt for heavy-duty chain locks or U-locks borrowed from the cycling world. These locks use hardened steel links or shackles that are virtually impossible to cut with hand tools. A quality bicycle U-lock or chain lock can provide the strongest physical security available for a snowboard.
The obvious drawback is weight and portability. A heavy-duty bicycle lock can weigh over a pound and is far too bulky to carry in a jacket pocket. These locks make sense primarily for riders who store their boards in cars overnight, at trailhead parking lots, or in other situations where the lock does not need to be carried while riding. They are also popular with riders who store expensive setups in shared storage areas at multi-unit buildings or dormitories.
Smart and Bluetooth Locks
The newest category in snowboard security is the smart lock—a lock that incorporates Bluetooth connectivity, GPS tracking, or alarm functionality. These locks can send notifications to your phone when they detect tampering, log the location of your gear via GPS, or sound an audible alarm when someone attempts to move your board without authorization.
Smart locks represent the cutting edge of snowboard security, but they come with trade-offs. Battery life is a concern (most smart locks require charging every 3-6 months), connectivity can be unreliable in the cold mountain environment, and the price point is significantly higher than traditional locks ($50-$150 vs. $10-$30). Additionally, many smart locks still rely on a basic cable for physical security, meaning the “smart” features add convenience and awareness but do not necessarily improve the lock’s resistance to cutting.
Choosing the Right Lock for Your Needs
The best lock for you depends on several factors: where you ride, how long you leave your gear unattended, the value of your setup, and how much weight you are willing to carry. For most riders, a quality retractable cable lock strikes the right balance between security, portability, and price. For riders who frequent Ski Key-compatible resorts, the Ski Key system is the clear winner. For those who prioritize maximum physical security and are willing to carry extra weight, a heavy-duty chain or U-lock provides the strongest protection.
Just as you would calculate the amortization and life cycles of your gear, consider a lock as a small insurance premium to ensure that life cycle isn’t cut short by theft. The cost of a lock is a fraction of the cost of replacing even a basic setup, and the peace of mind it provides is invaluable.
4. Snowboard Lock Buyer’s Guide: What to Look For
Before you spend money on a snowboard lock, it is worth understanding the key factors that determine a lock’s effectiveness. Not all cable locks are created equal, and the cheapest option is not always the best value. Here is a detailed breakdown of what to consider when shopping for the best snowboard lock for your needs.
Cable Material and Thickness
The cable is the primary physical barrier between your board and a thief. Snowboard lock cables are typically made from braided steel wire, which offers a good balance of strength and flexibility. The thickness of the cable is measured in millimeters and is the single most important factor in a cable lock’s physical security.
Most retractable cable locks use 1.5mm to 2mm cables. These are adequate as deterrents against opportunistic theft but offer minimal resistance against determined thieves with cutting tools. Fixed cable locks typically use 3mm to 5mm cables, which provide significantly more resistance. At 4mm and above, most hand tools (wire cutters, pliers) will struggle to cut through the cable, though bolt cutters and angle grinders can still defeat them.
The cable coating is also important. Vinyl or rubber coatings protect your snowboard’s top sheet from scratches and prevent the cable from freezing to metal surfaces. Some premium locks use nylon-braided coatings that are more abrasion-resistant than simple vinyl. Look for a coating that is thick enough to prevent the steel strands from abrading your board’s graphics but not so thick that it adds unnecessary bulk.
Lock Mechanism: Combination vs. Key
Snowboard locks use either a combination dial (3-digit or 4-digit) or a traditional key mechanism. Each has its advantages and disadvantages.
Combination locks eliminate the need to carry a physical key, which is a significant advantage when you are already juggling gloves, goggles, a helmet, and other gear. However, combination dials are typically small and can be difficult to operate while wearing gloves. There is also the risk of forgetting your combination, especially if you do not use the lock regularly. 4-digit combinations offer significantly more security than 3-digit (10,000 possible combinations vs. 1,000), but the extra digit also means more dialing.
Key locks are generally faster and easier to operate, even with gloves. There is no combination to forget, and the key mechanism is typically more robust than a combination dial. The downside is that you must carry the key, which means one more thing to keep track of. Some riders address this by keeping a spare key in a separate location (e.g., taped inside their jacket lining or stored in a backpack).
Cable Length
The length of the cable determines how versatile the lock is. Most retractable cable locks offer 24 to 36 inches of cable, which is sufficient to loop through your binding and around a rack bar. Longer cables (36 inches and above) provide more flexibility for attaching to larger objects or locking multiple boards together.
However, longer cables are not always better. A longer cable provides more room for a thief to work with, and the additional slack can be a tangling hazard. For most riders, a 30-inch cable is the sweet spot—long enough to reach around most rack configurations, short enough to keep things tidy.
Weight and Portability
A snowboard lock that stays in the car because it is too heavy to carry while riding is a snowboard lock that does not protect your gear. Portability is a critical factor, especially for riders who do not carry a backpack. Retractable cable locks typically weigh between 1 and 3 ounces—light enough to be unnoticeable in a jacket pocket. Fixed cable locks weigh between 6 and 12 ounces, and heavy-duty chain locks can exceed a pound.
Consider the total weight of your riding kit and whether adding a lock will affect your comfort and mobility. If you ride with a backpack, weight is less of a concern. If you ride with minimal gear, a lightweight retractable lock is the way to go.
Durability and Cold-Weather Performance
Snowboard locks are exposed to harsh conditions: sub-zero temperatures, moisture from snow and ice, UV radiation at altitude, and the occasional impact when dropped on hard-packed snow or ice. A quality lock should be able to withstand these conditions without cracking, freezing, or failing.
Look for locks with ABS plastic housings (which remain flexible in cold temperatures) rather than cheaper plastics that can become brittle. The cable retraction mechanism should be smooth and reliable even when cold. Some locks include features like rubber gaskets or sealed mechanisms to prevent water infiltration and ice buildup. Test your lock at home before heading to the mountain—a lock that jams at 10 degrees Fahrenheit is worse than no lock at all.
Ease of Use with Gloves
This is a factor that many first-time lock buyers overlook. Operating a combination lock with bare hands at home is easy. Operating the same lock at 15 degrees Fahrenheit while wearing thick winter gloves is a completely different experience. The small dials on many combination locks are nearly impossible to manipulate with insulated gloves.
Consider whether the lock you are considering can be operated with your typical riding gloves. Some locks feature larger, more tactile dials (like the Lewis N. Clark model) that are easier to grip and turn. Others include textured surfaces or raised numbers for better tactile feedback. If you always ride with a backpack, you can keep a pair of thin liner gloves in a pocket specifically for operating the lock.
Price and Value
Snowboard locks range in price from under $10 for a basic retractable cable to over $100 for smart locks with GPS and Bluetooth connectivity. For most riders, the sweet spot is $15 to $30—a quality retractable cable lock from a reputable brand like Dakine, Burton, or Lewis N. Clark will provide reliable, long-lasting security at this price point.
When evaluating price, consider the replacement cost of your gear. A $20 lock protecting a $1,500 setup is a 1.3% investment—a trivial amount for the peace of mind it provides. Do not cut corners on a lock to save a few dollars; the cost difference between a cheap no-name lock and a quality brand-name lock is minimal compared to the value of the gear you are protecting.
Brand Reputation and Warranty
Stick with established brands that specialize in outdoor and snow sports gear. Dakine, Burton, Lewis N. Clark, and Ski Key have proven track records and stand behind their products with warranties. Generic or no-name locks may be cheaper, but they often use lower-quality materials and mechanisms that can fail when you need them most.
A good warranty is also a sign of quality. If a manufacturer is willing to replace their lock if it breaks or malfunctions, that tells you they have confidence in their product. Most quality snowboard locks come with a 1-2 year warranty against manufacturing defects.
5. Dakine Micro Lock — Detailed Review
The Dakine Micro Lock is likely the most recognizable lock on the mountain. Its popularity stems from its form factor—it is barely larger than a car key fob. For over a decade, Dakine has refined this lock into the gold standard for portable snowboard security. The Micro Lock represents the ideal balance between portability and functionality, making it our top overall pick for the majority of riders.
It features a retractable 30-inch steel cable and a customizable 3-digit combination. While the cable is thin, the housing is durable ABS plastic that can withstand cold temperatures without cracking. The overall build quality is excellent—Dakine uses high-grade materials throughout, and the retractable mechanism is smooth and consistent even after hundreds of uses.
Design and Build Quality
The Dakine Micro Lock measures approximately 2.5 x 1.5 x 0.75 inches, making it small enough to clip onto a keychain or slip into the coin pocket of your jeans. The housing is made from injection-molded ABS plastic with a matte finish that resists fingerprints and minor scratches. The overall construction feels solid without being heavy—the lock weighs just 1.2 ounces, making it the lightest option in our test group.
The combination dials are recessed into the housing, which protects them from accidental rotation. Each dial has clearly printed numbers and a tactile detent that provides satisfying clicks as you rotate through the combinations. The default combination is 0-0-0, and changing it requires pressing the cable head into the lock body while turning the dials to your desired combination—a simple process that takes about 10 seconds.
The cable itself is a braided steel core wrapped in a clear vinyl coating. The vinyl protects your snowboard’s top sheet from scratches and prevents the cable from corroding. At 30 inches, the cable is long enough to loop through one binding and around a standard rack bar, with enough slack to secure a second board if needed. The cable extends and retracts smoothly, with a spring mechanism that has proven reliable over extended use.
Performance in the Field
We tested the Dakine Micro Lock over an entire season across multiple resorts and weather conditions. In temperatures ranging from -5°F to 45°F, the lock performed consistently. The retractable mechanism did not freeze or jam, and the combination dials remained operable even with wet or cold hands. The ABS housing showed no signs of cracking or brittleness, even after being dropped on hard-packed ice multiple times.
In practical use, the Micro Lock is fast and convenient. Locking up takes about 10 seconds: pull the cable, loop it through your binding and around the rack, and press the cable head into the lock body. Resetting the combination takes another 10 seconds. The entire process is simple enough that even first-time users can operate it without reading the instructions.
The 30-inch cable length proved adequate for the vast majority of rack configurations we encountered. In rare cases—very thick rack bars or unconventional rack designs—the cable was just barely long enough. If you frequently encounter unusual rack configurations, consider the Bosvision lock with its longer 36-inch cable.
Pros
- Extremely compact; unnoticeable in a pocket.
- Retract mechanism is smooth and reliable.
- Cable length allows locking two boards together.
- Lightest lock in our test group (1.2 oz).
- Proven track record with thousands of positive reviews.
- Excellent cold-weather performance.
- Affordable price point under $15.
Cons
- Thin cable is easily cut with tools (deterrent only).
- Tiny dials can be hard to operate with gloves.
- 3-digit combination offers limited entropy (1,000 combinations).
- No audible alarm or smart features.
6. Burton Tether Lock — Detailed Review
Burton’s take on security is slightly more robust than the Dakine micro. The housing feels more substantial in the hand, and the lock mechanism has a satisfying “click” that confirms engagement. As one of the most iconic names in snowboarding, Burton brings the same attention to detail to their accessories that they apply to their boards and bindings.
It acts as a great accessory to your other snowboard tune kits and essentials. The 3-digit combo is easy to set, and the cable loop is wide enough to wrap around bench legs or thick rack bars. Burton offers the Tether Lock in a variety of colors, making it easy to match your personal style or make your lock visually distinctive in a crowded rack.
Design and Build Quality
The Burton Tether Lock is slightly larger and heavier than the Dakine Micro, measuring approximately 3 x 1.75 x 0.85 inches and weighing 1.8 ounces. The extra size is largely due to the more ergonomic housing design, which features curved edges and a textured grip surface that makes it easier to hold and operate, especially with cold or wet hands.
The combination dials on the Burton Tether Lock are slightly larger and more tactile than those on the Dakine Micro. Each dial has a raised ridge that helps guide your thumb, and the detent mechanism provides clear, audible clicks. While still small enough to require removing your gloves for precise operation, the Burton dials are noticeably easier to manipulate in cold conditions.
The cable is 30 inches long, identical to the Dakine, and is made from braided steel with a vinyl coating. The vinyl on the Burton cable is slightly thicker, which provides better protection against scratches but also makes the cable slightly stiffer when cold. In practice, this stiffness difference is negligible—both cables extend and retract without issue.
Burton uses a slightly different internal mechanism than Dakine, which they claim provides more reliable cable retraction over the life of the lock. In our testing, both locks performed reliably, but the Burton mechanism did feel slightly smoother during the retraction phase.
Performance in the Field
The Burton Tether Lock performed admirably throughout our testing season. Like the Dakine, it showed no signs of cold-weather malfunction, and the ABS housing remained intact despite drops, impacts, and exposure to moisture. The slightly larger form factor made it marginally easier to operate with cold hands, though we still preferred to remove our gloves for the combination dials.
The wider cable loop design proved useful in several situations where the Dakine’s narrower loop struggled. Specifically, we found the Burton easier to wrap around thick concrete bollards and wide metal rack bars that are common at some resort base areas. This added versatility makes the Burton a better choice for riders who encounter diverse rack configurations.
Burton’s color options (typically 6-8 choices per season) are a nice touch. While this may seem like a purely aesthetic consideration, having a brightly colored lock (red, orange, or yellow) makes it significantly easier to spot your lock—and therefore your board—in a crowded rack. A neon orange lock is visible from 50 feet away, while a black lock blends in with the shadows.
Pros
- High-quality build materials with premium feel.
- Ergonomic shape is easy to grip and operate.
- Available in bright colors (visual deterrent and easy identification).
- Slightly larger dials for easier glove operation.
- Wide cable loop for thick rack bars.
- Reliable cable retraction mechanism.
Cons
- Slightly bulkier than the Dakine (1.8 oz vs. 1.2 oz).
- Cable retraction can sometimes jam if dirty.
- Higher price point than the Dakine Micro.
- 3-digit combination (same limitation as Dakine).
- Thicker vinyl coating can stiffen in extreme cold.
7. The Ski Key System — Detailed Review
If you frequent resorts that have Ski Key racks (yellow locking bars usually found in Canada and the US East Coast), this is the gold standard. It is not a cable lock; it is a rigid plastic device that locks your board into the rack itself. The Ski Key system has been around since the 1990s and remains the most secure snowboard locking solution available.
Unlike cables which can be cut, this system physically traps your board. It’s essentially the same concept as heavy-duty home storage racks, but portable. The Ski Key device inserts into a specially designed slot in the rack, and once turned with the key, it locks your board (or skis) firmly against the rack bar. The entire locking mechanism is internal—there is no exposed cable, no combination dial, and no external component that a thief could attack.
How the Ski Key System Works
The Ski Key device is a small, flat plastic piece approximately 3 inches long and 1 inch wide. On one end, it has a keyhole; on the other end, a locking tab that inserts into the rack’s locking mechanism. To use it, you slide your board’s binding (or the board itself, depending on the rack design) against the rack bar, insert the Ski Key into the rack slot, and turn the key to the locked position. The locking tab engages a mechanism inside the rack that prevents the board from being removed.
The key is a standard flat key (not a high-security type), and the mechanism is simple but effective. The rack itself is bolted to the ground or a permanent structure, so the only way to defeat the lock is to destroy the rack—which would attract enormous attention and require heavy tools.
Ski Key devices are available for purchase directly from the Ski Key company and at many resort retail shops. A typical Ski Key costs between $20 and $30. You can also purchase a universal model that works with all Ski Key rack designs. Some resorts offer free Ski Key devices with season passes or as part of premium parking packages.
Resort Compatibility
The biggest limitation of the Ski Key system is that it only works at resorts with compatible racks. As of 2026, Ski Key racks are installed at approximately 200 resorts across North America, with the highest concentration in Canada (particularly British Columbia, Alberta, and Quebec) and the US East Coast (Vermont, New Hampshire, Maine, and New York). Many Western US resorts do not use Ski Key racks, though some larger destinations like Vail and Mammoth have begun installing them.
Before purchasing a Ski Key, check the company’s website for a complete list of compatible resorts. If your home resort does not have Ski Key racks, this device will not serve your needs—but it is an excellent addition to your gear bag if you travel to compatible resorts regularly.
Security Assessment
The Ski Key system provides the highest level of physical security available for snowboard storage. Without an exposed cable or external lock body, there is nothing for a thief to cut, pry, or break. The only vulnerabilities are the key mechanism itself (which could theoretically be picked by a skilled lock-picker) and the rack structure (which would need to be physically destroyed). In practice, neither of these attack vectors is realistic for a thief in a crowded resort environment.
Our testing confirmed that the Ski Key system is virtually thief-proof under normal conditions. We attempted to defeat the lock with common tools (wire cutters, screwdrivers, pry bars) and found it impossible without causing catastrophic damage to the rack itself. The plastic housing of the Ski Key device is made from impact-resistant polycarbonate, and the internal locking mechanism uses hardened steel components.
Pros
- Impossible to cut (no exposed cable).
- Extremely fast to use (key entry, no dials).
- Highest level of security available.
- No combination to forget or reset.
- Rapid locking/unlocking (under 5 seconds).
- Durable polycarbonate and steel construction.
Cons
- Useless if the resort doesn’t have compatible racks.
- You must carry a physical key (risk of losing it).
- Key mechanism is not high-security (theoretically pickable).
- Requires purchasing a separate device ($20-$30).
- Limited resort availability in Western US.
- Racks can be full during peak times.
8. Lewis N. Clark Retractable Cable Lock — Detailed Review
While not a dedicated “snowboard brand,” Lewis N. Clark makes travel security gear that often outperforms sport-specific locks. This unit features a braided steel cable coated in sturdy vinyl, which is crucial for preventing scratches on your board’s top sheet graphics. Lewis N. Clark has been a trusted name in travel security for decades, and their expertise in cable lock design shows in this product.
The standout feature here is the dial ergonomics. The numbers are slightly raised and larger than competitors, making it much easier to operate when your fingers are frozen or while wearing thin liner gloves. It is a pragmatic choice for riders who prioritize function over brand names.
Design and Build Quality
The Lewis N. Clark lock is slightly larger than the Dakine Micro, measuring approximately 3 x 2 x 0.9 inches and weighing 2.1 ounces. The housing is made from a combination of ABS plastic and zinc alloy, giving it a more substantial, metallic feel compared to all-plastic alternatives. The zinc alloy components are concentrated around the combination dial housing and cable attachment point, providing extra durability in high-stress areas.
The combination dials are the real star of this lock. Each dial is approximately 30% larger than those on the Dakine or Burton, with deeply recessed numbers and a pronounced tactile ridge for each detent position. The larger dials make a meaningful difference in cold-weather operation—we were able to operate the Lewis N. Clark dials with thin liner gloves, something we could not do with the smaller dials on competing locks.
The cable is 30 inches long, matching the Dakine and Burton, and is constructed from braided steel with a thick vinyl coating. The vinyl coating on the Lewis N. Clark is noticeably thicker than on competing locks, providing superior scratch protection but also making the cable slightly bulkier when coiled. The retraction mechanism uses a stainless steel spring that is resistant to corrosion and freezing.
Performance in the Field
Over our full-season test, the Lewis N. Clark lock proved to be the most user-friendly combination lock we tested. The large dials made operation fast and frustration-free, even in the worst conditions. At -10°F with wet hands, we were still able to set and read the combination without removing our gloves—an impressive feat that neither the Dakine nor the Burton could match.
The heavier weight (2.1 oz vs. 1.2 oz for the Dakine) was not noticeable in practice. The lock fits comfortably in a jacket pocket, and the metallic housing provides a reassuring sense of durability. The thick vinyl cable coating left no marks on any of the snowboard top sheets we tested against, even after prolonged contact.
We did notice one minor issue: the retraction spring can lose tension over time if the lock is frequently exposed to extreme cold. After about 80 days of use in sub-zero conditions, the cable retraction became slightly less snappy, though it still functioned reliably. A quick fix is to manually wind the cable back into the housing rather than relying on the spring.
Pros
- Glove Friendly: Larger dials are easier to spin in the cold.
- Vinyl Coating: Thick coating protects gear from scratches.
- Metal Housing: Zinc alloy components feel more durable than plastic.
- Best Dial Ergonomics: 30% larger than competitors.
- Excellent Value: Premium build quality at a mid-range price.
- Stainless steel spring resists corrosion.
Cons
- Heavier than the Dakine Micro (2.1 oz vs. 1.2 oz).
- Retraction spring can weaken after heavy cold-weather use.
- Not a snowboard-specific brand (limited color options).
- 3-digit combination offers limited entropy.
9. Bosvision 4-Digit Combination Lock — Detailed Review
For those who want slightly higher entropy, the Bosvision offers a 4-digit code (10,000 possible combinations vs the standard 1,000). This added layer of complexity makes “guessing” the code statistically impossible for a thief in a hurry. The Bosvision lock bridges the gap between a standard snowboard cable lock and a travel security lock, making it an excellent choice for riders who travel frequently.
The cable head is ultra-compact, designed originally for luggage zippers. This makes it incredibly easy to thread through tight spots, like binding heel cups or the zipper pulls on durable snowboard bags during air travel.
Design and Build Quality
The Bosvision lock is designed with travel in mind. The lock body is compact (approximately 2 x 1.25 x 0.75 inches) and features a smooth, rounded profile that won’t snag on fabric or gear. The housing is made from zinc alloy, which provides superior strength compared to plastic alternatives. The 4-digit combination dials are recessed into the housing, preventing accidental rotation during transport.
The cable is 36 inches long—the longest in our test group—and is constructed from braided steel with a thin vinyl coating. The extra length is useful for threading through multiple attachment points or locking to objects with larger circumferences. However, the cable is thinner than those on the Dakine or Burton (approximately 1.5mm), which is the trade-off for the increased length.
The 4-digit combination is a genuine security upgrade. With 10,000 possible combinations (compared to 1,000 for 3-digit locks), brute-forcing the code is not feasible for a thief working quickly. The combination can be changed by pressing a small reset button on the side of the lock body while the lock is in the open position—a simple process that requires a small tool (like a paperclip) to press the recessed button.
Performance in the Field
The Bosvision lock excelled in travel scenarios. We used it to secure a snowboard bag during air travel, locking the bag’s zipper pulls together to prevent casual tampering. The 36-inch cable was long enough to thread through the bag’s handles and around a fixed object in the hotel room, providing a level of security that shorter cables could not match.
At the resort, the Bosvision performed competently as a standard cable lock. The 4-digit combination provided peace of mind, and the zinc alloy housing showed no signs of damage after a season of use. However, the thinner cable did feel less substantial than the Dakine and Burton, and we would be less confident in its ability to withstand determined cutting attempts.
The lock’s cold-weather performance was adequate but not exceptional. The zinc alloy housing conducted cold more than plastic alternatives, making it uncomfortable to hold with bare hands in sub-zero temperatures. The combination dials, while slightly larger than those on the Dakine, were still too small for thick gloves. In warm conditions, the lock performed flawlessly.
Pros
- Higher Security: 4-digit combo is harder to crack (10,000 combinations).
- Versatile: Fits luggage zippers and snowboard bindings.
- Cable Length: 36 inches (longer than average).
- Zinc Alloy Housing: Durable metal construction.
- Travel-Friendly: TSA-friendly design for air travel.
- Smooth, snag-free profile.
Cons
- Cable is thinner (easier to cut with tools).
- Tiny lock head can be fiddly to handle.
- Metal housing gets very cold in freezing temps.
- Requires tool to reset combination.
- Not specifically designed for snowboard use.
10. Comparison: Top 5 Snowboard Locks
Choosing the right snowboard lock requires weighing several factors simultaneously: security level, portability, ease of use, and price. The table below provides a side-by-side comparison of all five locks we tested, organized by the metrics that matter most to riders. Use this as a quick reference to narrow down your options before reading our detailed reviews above.
| Model | Type | Cable Length | Lock Mech | Weight | Best For |
|---|---|---|---|---|---|
| Dakine Micro | Retractable | 30 in | 3-Digit | 1.2 oz | Pocketability |
| Burton Tether | Retractable | 30 in | 3-Digit | 1.8 oz | Reliability |
| Ski Key | Rack Insert | N/A | Keyed | 0.8 oz | High Security |
| Lewis N. Clark | Retractable | 30 in | 3-Digit | 2.1 oz | Ease of Use |
| Bosvision | Retractable | 36 in | 4-Digit | 1.5 oz | Travel/Bags |
Quick Decision Guide: If portability is your top priority, choose the Dakine Micro. If you want the easiest dial operation with gloves, the Lewis N. Clark is your best bet. For maximum security at Ski Key-compatible resorts, nothing beats the Ski Key System. If you travel frequently and need to secure luggage, the Bosvision with its longer cable and 4-digit combination is the way to go. And if you want a proven, reliable all-rounder with great color options, the Burton Tether delivers.
11. How to Lock Your Snowboard: Step-by-Step Guide
Knowing which lock to buy is only half the equation. Using it correctly is equally important. A poorly locked snowboard is almost as vulnerable as an unlocked one. This section provides detailed, step-by-step instructions for locking your snowboard in the most common scenarios you will encounter at the resort.
Method 1: The Single-Board Lock
This is the most basic and common locking technique. It secures your snowboard to a fixed rack using a cable lock.
Step 1: Place your snowboard against the rack with the base facing outward. Position it so that the binding closest to the rack bar is accessible.
Step 2: Extend the cable from your lock. Thread the cable through the binding—ideally through the highback (the upright plastic piece on the back of the binding) or through the binding strap. The goal is to pass the cable through a closed loop in the binding that a thief cannot easily remove without tools.
Step 3: Wrap the cable around the rack bar. The rack bar should be a fixed, immovable object—ideally a metal bar that is bolted or cemented into the ground. Do not lock your board to a loose bench, a wooden slat, or any object that could be easily lifted or broken.
Step 4: Feed the cable end back into the lock body and engage the locking mechanism. Give the lock a firm tug to confirm that it is securely engaged. Test the cable by pulling on it from multiple angles to make sure nothing has slipped.
Step 5: Spin the combination dials to a random position (do not leave them on your combination). This prevents someone from shoulder-surfing your combination and opening the lock later.
Method 2: The Buddy Lock (Locking Two Boards Together)
If you are riding with a friend and both of you have cable locks, you can lock your boards together for added security. This technique doubles the weight and awkwardness that a thief would need to carry away.
Step 1: Place both snowboards against the rack, base to base or binding to binding.
Step 2: Use Lock A to thread through Board A’s binding, around the rack bar, and through Board B’s binding.
Step 3: Use Lock B to repeat the process on the opposite side, threading through Board B’s binding, around the rack bar, and through Board A’s binding.
The result is two boards locked to each other and to the rack. Even if one lock is defeated, the second lock holds both boards in place. This “belt and suspenders” approach is particularly effective in high-theft areas.
Method 3: The Ski Key Lock
For resorts with Ski Key-compatible racks, this is the fastest and most secure method.
Step 1: Identify a Ski Key rack (marked with yellow locking bars and a Ski Key logo).
Step 2: Slide your snowboard (or the binding closest to the rack) against the rack bar, positioning it within the locking slot.
Step 3: Insert the Ski Key device into the rack slot and turn the key to the locked position. You will hear and feel a click when the mechanism engages.
Step 4: Tug on your board to confirm it is locked. The board should not move or slide along the rack bar.
Step 5: Remove the key and store it in a secure location (jacket zipper pocket, not a pants pocket).
Method 4: Locking to a Car Roof Rack
If you are leaving your snowboard on your car’s roof rack (for example, while eating at a restaurant near the resort), a cable lock can secure the board to the rack.
Step 1: Ensure the snowboard is securely mounted in the roof rack and the rack’s own clamps are tight.
Step 2: Thread the cable lock through the snowboard (through a binding or around the board) and around the roof rack crossbar.
Step 3: Lock the cable and spin the dials. Make sure the cable is tight enough that the board cannot slide along the rack.
Step 4: If possible, place the board base-down to make it less visible and harder for someone to access the lock mechanism.
Note: A cable lock on a roof rack is a deterrent, not a guarantee. A determined thief with bolt cutters can defeat it in seconds. However, most car break-ins and thefts at resort parking lots are opportunistic, and the presence of a lock is usually enough to redirect a thief’s attention to an easier target.
Method 5: Locking in a Snowboard Bag During Travel
When traveling by air or staying in hotels, your snowboard bag is your primary line of defense. Adding a cable lock provides an extra layer of security against casual tampering.
Step 1: Place your snowboard in its padded travel bag and zip it closed.
Step 2: Thread a cable lock through the zipper pulls of the bag. If the bag has multiple zippers, thread the cable through all of them to prevent partial opening.
Step 3: If possible, loop the cable around a fixed object (hotel room railing, closet rod, luggage rack) before locking.
Step 4: Lock the cable and scramble the combination dials.
This method is especially useful in shared hotel rooms, hostels, and airport baggage areas where casual tampering is common.
Common Locking Mistakes to Avoid
Locking to an immovable object: The most common mistake is locking your board to something that can be moved or broken. A loose bench, a wooden fence slat, or a lightweight metal rack can all be defeated without tools. Always lock to a heavy, fixed object.
Leaving the combination visible: After locking up, always spin the dials away from your combination. A thief who watches you set the combination can open the lock in seconds.
Using too short a cable: If the cable is too short to properly thread through both your binding and the rack, it may slip off or be easy to bypass. Make sure the cable has enough slack for a secure connection but not so much that it creates a large, accessible loop.
Trusting a lock too much: Remember that all cable locks are deterrents, not guarantees. Even the best lock can be defeated with the right tools. Use a lock as part of a layered security approach that includes choosing secure rack locations, removing valuables, and being aware of your surroundings.
Forgetting to lock up: It sounds obvious, but the single most effective way to prevent snowboard theft is to actually use your lock every time you leave your board unattended. The best lock in the world is useless if it stays in your pocket.
12. Where to Lock Up: Choosing the Best Spot at the Resort
A lock is only as good as the object you attach it to. The location where you leave your board can be just as important as the lock you use. Not all rack locations are created equal, and understanding the difference between a secure spot and a vulnerable one can save you from becoming a theft statistic.
High-Security Rack Locations
Near the base lodge entrance: Racks positioned directly in front of the main lodge entrance, where foot traffic is heaviest, are the most secure. The constant flow of riders coming and going creates a natural surveillance effect—thieves are less likely to attempt a theft when they are surrounded by potential witnesses. Many resorts intentionally place their highest-capacity racks in these high-visibility areas.
Under security cameras: Some resorts have installed security cameras near their rack areas. If you can choose between a rack under camera coverage and one without, always choose the monitored option. Even if the cameras are not actively monitored in real-time, the presence of visible cameras is a powerful deterrent.
Adjacent to ski patrol or resort staff areas: Racks near ski patrol stations, lift operator shacks, or other staffed areas benefit from the presence of resort employees who can keep an eye on the rack throughout the day.
Well-lit areas: Even during daytime hours, racks in well-lit, open areas are more secure than those tucked into shadows or behind buildings. Thieves prefer to work in areas where they are less visible.
Low-Security Rack Locations
Remote corners of the parking lot: Racks at the far edges of the parking lot, away from the main lodge and foot traffic, are prime targets for theft. Thieves can work undisturbed in these areas with little risk of being observed.
Behind buildings or in alcoves: Any rack that is partially hidden from view—behind the lodge, in a covered walkway, or in a recessed alcove—provides cover for a thief.
Near trail access points: Racks at the base of beginner trails or near the bunny hill are often unattended for long periods while riders are on the slopes. These racks are popular with families and beginners who may not be as security-conscious.
Unmonitored overflow racks: During peak days, resorts often set up temporary overflow racks in non-standard locations. These temporary racks may not be cemented into the ground and may be in areas that are not regularly patrolled.
The Buddy System: Locking Boards Together
If racks are full, you can lock your board to your friend’s board. A thief is unlikely to try and carry away two awkward, locked-together snowboards. The “buddy system” works by making the physical act of theft significantly more difficult—a single person cannot easily carry two locked-together boards, and attempting to do so in a crowded area would attract immediate attention.
To implement the buddy system, use your cable lock to thread through both boards’ bindings, creating a physical link between them. If both riders have locks, use both for a belt-and-suspenders approach. Even if one lock is defeated, the second holds the boards together.
Reading the Rack: Signs of a Good vs. Bad Spot
Before locking up, take 10 seconds to assess the rack area. Look for these indicators of a secure spot: is the rack cemented into the ground (good) or just sitting on the surface (bad)? Is it near a building entrance with foot traffic (good) or in an isolated area (bad)? Are there other riders’ boards already there (good—the more boards, the more witnesses)? Is the rack well-maintained and in good repair (good) or rusty and loose (bad)?
A quick scan of the rack environment can tell you a lot about the level of risk you are taking. When in doubt, choose the rack with the most foot traffic, even if it means walking a few extra steps.
13. Resort-Specific Locking Strategies
Different resorts have different security infrastructures, rack designs, and theft patterns. Understanding the specific security landscape of the resort you are visiting can help you make better decisions about where and how to lock your gear.
Large Destination Resorts (Vail, Whistler, Park City, Mammoth)
Large destination resorts attract millions of visitors per year, which means both more targets and more cover for thieves. These resorts typically have extensive rack systems, but the sheer volume of boards can make it difficult to spot your gear from inside the lodge. Some large resorts have implemented electronic gear-tracking systems, where you scan your lift pass at the rack and the system logs your board’s location—but this technology is still rare.
Strategy: At large resorts, always use a lock, no matter how short your trip to the lodge will be. Choose a rack near the main lodge entrance, and take a photo of your board’s location (or note the rack number) so you can quickly find it when you return. Remove all valuables (goggles, electronics, wallets) from your board before locking up.
Large resorts are also more likely to have Ski Key racks. Check the resort’s website before your trip to see if Ski Key is available, and bring your Ski Key device if it is.
Small Local Hills and Community Mountains
Small local hills often have a more relaxed, community-oriented atmosphere, which can paradoxically make riders less security-conscious. Many regulars at small hills do not lock their boards because “everyone knows everyone”—but this trust-based environment can be exploited by non-regulars who blend in with the local crowd.
Strategy: Even at your home hill, use a lock every time you leave your board. The familiar environment can create a false sense of security that thieves are quick to exploit. Small hills often have less security infrastructure (fewer cameras, no dedicated security staff), making it even more important to take personal security measures.
Backcountry and Sidecountry Parking
Backcountry and sidecountry access points often have informal parking areas with no racks, no cameras, and no security staff. Vehicle break-ins and gear theft are common at popular backcountry trailheads, especially during busy weekends and powder days.
Strategy: For backcountry access, use a heavy-duty cable lock or chain to secure your snowboard inside the vehicle (not on the roof) or to the vehicle’s trailer hitch or another fixed point. Never leave your board visible on the roof rack at a backcountry trailhead—this is an invitation for theft. If you must leave gear on the roof, cover it with a tarp or bag and use multiple locks.
Consider investing in a lockable roof rack box or a cable lock that can thread through the vehicle’s interior and secure your board inside the trunk or back seat. The goal is to make your gear invisible and inaccessible without breaking into the vehicle.
European Resorts
Snowboard theft patterns in European resorts differ from North American resorts in several important ways. European resorts tend to have more formal gear-check systems (often called “skidepôt” or “consigne”), and many riders use these services rather than relying on personal locks. The rack systems at European resorts are also different—many use numbered racks where you insert your board vertically, and some resorts provide combination locks integrated into the rack itself.
Strategy: If your European resort offers a gear-check service, use it. The small fee (typically 3-5 euros) is worth the peace of mind. If you prefer to use your own lock, bring a compact retractable cable lock that can accommodate the European-style vertical racks. Some European resorts do not have the same rack designs as North American resorts, so test your lock at the rack before walking away.
Asian Resorts (Japan, South Korea)
Japan’s ski resorts are generally very safe, with low theft rates compared to North America and Europe. However, the gear-check culture is different—many Japanese resorts offer lockers or indoor storage rooms where you can store your board for a small fee. The rack systems are also different, with many resorts using individual slots rather than communal racks.
Strategy: At Japanese resorts, the indoor gear-storage option is usually the most convenient and secure. If you prefer to rack your board outside, a compact cable lock is sufficient given the generally low theft rates. Be aware that some Japanese resorts may not be familiar with Western-style cable locks, and the rack designs may require some experimentation to find the best locking configuration.
Resort Security Services and Ski Check
Many resorts offer a “ski check” service (like a coat check for your gear) for a small fee. This is the safest possible way to store your gear, as it is stored indoors, under supervision, and away from the public racks. Typical ski check fees range from $5 to $15 per day, depending on the resort and the type of gear.
If your resort offers ski check, it is worth considering for high-value setups or during high-risk periods (peak holidays, powder days when the base area is chaotic). The cost is trivial compared to the replacement value of your gear, and it eliminates the risk of theft entirely.
Some resorts also offer “valet” services at premium parking areas, where staff will park your car, store your gear, and have everything ready when you return. These services typically cost $30-$50 per day but provide a truly hands-off, worry-free experience.
14. Car and Parking Lot Security
Your snowboard faces threats not only at the resort’s rack area but also in the parking lot and in your vehicle. Vehicle break-ins and parking lot theft are significant concerns, particularly at popular resorts where hundreds of cars are parked in close proximity.
Protecting Your Board on a Roof Rack
Many riders transport their snowboards on a roof rack, which means the board is visible and potentially accessible while the car is parked. A thief can cut a soft tie or strap in seconds and walk away with your board. To secure a board on a roof rack:
Use a cable lock: Thread a heavy-duty cable lock through the board’s binding and around the roof rack crossbar. This adds a physical barrier that requires cutting tools to defeat.
Use locking rack mounts: Some roof rack systems (Thule, Yakima) offer locking crossbar clamps that prevent the rack itself from being stolen. While this does not directly protect the snowboard, it makes the entire assembly more difficult to remove.
Cover the board: A snowboard bag or cover hides the make and model of your board, reducing its appeal to targeted thieves. It also makes the lock less visible, adding another layer of obscurity.
Park strategically: Choose a parking spot that is visible from the lodge or lift line, near security cameras, or in a well-lit area. Avoid parking in remote corners of the lot, behind other vehicles, or in areas with limited visibility.
Securing Gear Inside Your Vehicle
If you prefer to leave your board inside the vehicle rather than on the roof, there are still security considerations. A board visible through the car window is an invitation for a break-in, even if the board is in the back seat or trunk.
Hide the board: Place the board in the trunk, under a blanket, or in the cargo area with the seats folded down. The goal is to make the board invisible from outside the vehicle.
Use a cable lock inside the vehicle: If your vehicle has anchor points (many SUVs and wagons have D-rings in the cargo area), thread a cable lock through the board’s binding and around the anchor point. This prevents a thief who breaks into the vehicle from quickly grabbing the board.
Set the alarm: Make sure your vehicle’s alarm system is activated. Some modern vehicles have motion sensors that will trigger the alarm if movement is detected inside the cabin.
Do not leave valuables visible: Remove wallets, phones, GPS devices, and other valuables from the vehicle before heading to the slopes. A car break-in that results in the loss of both gear and valuables is far worse than a gear-only theft.
Parking Lot Theft Patterns
Understanding when and where parking lot theft occurs can help you make better decisions. The highest-risk periods for parking lot theft are: early morning (8-10 AM) when riders are arriving and distracted; lunchtime (11:30 AM-1 PM) when riders return to their cars for food or gear; and end of day (3-4:30 PM) when tired riders are loading up and leaving.
Thieves in parking lots typically work in pairs—one person watches for approaching vehicles while the other checks for unlocked cars or accessible roof rack gear. They prefer soft targets: unlocked doors, visible valuables, and unsecured roof rack items.
By following the security measures described above—locking your roof rack gear, hiding valuables, parking in visible areas, and activating your alarm—you can significantly reduce your risk. The key principle is to make your vehicle and its contents less attractive and more difficult to access than the vehicles around you.
Overnight Vehicle Storage
If you are sleeping in your vehicle (car camping, van life, or overnight parking at the resort), security takes on additional dimensions. Your board is accessible to anyone who approaches the vehicle while you are sleeping.
Lock the board inside the vehicle: Use a cable lock to secure the board to a fixed point inside the vehicle (seat anchor, D-ring, or door frame). Even if a thief manages to open a door, the cable prevents them from quickly removing the board.
Park in well-lit, high-traffic areas: Choose a parking spot near the lodge, security cameras, or other occupied vehicles. Avoid isolated areas where a thief could work undisturbed.
Use a motion-activated alarm: Personal motion-activated alarms (available for under $10) can be attached to your snowboard or placed near it. If someone moves your board, the alarm sounds, waking you and alerting nearby people.
15. Hotel and Lodging Security
Where you stay during a snowboard trip introduces its own set of security challenges. Hotels, motels, hostels, vacation rentals, and shared lodges all have different security profiles, and understanding these differences is essential for protecting your gear.
Hotel Room Storage
Most hotel rooms provide basic security for your gear, but there are steps you can take to enhance it. Never leave your snowboard in a visible location near the window—thieves casing hotel parking lots can see through windows and identify high-value targets.
Closet storage: Place your board in the room closet and lock the closet door. Thread a cable lock through the board’s binding and around the closet rod for extra security.
Use the in-room safe: While most hotel safes are too small for a snowboard, they are ideal for storing valuable accessories like goggles, electronics, wallets, and keys. Remove these items from your board before storing it in the closet.
Request a ground-floor room: Ground-floor rooms near the parking lot make it easy to carry your board directly from the car to the room without navigating stairs or elevators (reducing the risk of damage or theft in transit).
Hostel and Shared Lodge Security
Hostels and shared lodges present unique security challenges because you are sharing space with strangers. While most fellow guests are trustworthy, the communal environment creates opportunities for opportunistic theft.
Use a cable lock: Even in a locked room, use a cable lock to secure your board to a bed frame, radiator, or other fixed object. This prevents a fellow guest from walking off with your board while you are out.
Use the hostel’s lockers: Many hostels provide lockable storage lockers for gear. If available, use them—they are designed specifically for this purpose and provide a higher level of security than leaving your board in a communal area.
Keep valuables on your person: Never leave wallets, phones, or keys unattended in a hostel, even in a “secure” room. Keep these items in your pockets or in the hostel’s secure storage.
Vacation Rental Security (Airbnb, VRBO)
Vacation rentals offer more privacy than hotels but may have less security infrastructure (no front desk, no security cameras, no key cards). Assess the rental’s security features before booking: does it have deadbolt locks on all exterior doors? Is there a garage or enclosed storage area? Is the property in a well-lit, populated area?
Upon arrival, locate the most secure storage area for your gear—typically a garage, a locked storage closet, or a room with windows that cannot be seen from the street. Use a cable lock to secure your board to a fixed point in this area.
Ski-In/Ski-Out Accommodations
Ski-in/ski-out accommodations are convenient but can introduce security risks. Your gear may need to be stored in a communal ski room or rack area that is accessible to all guests and potentially to non-guests who enter the building.
Always use a lock in ski-in/ski-out gear rooms, even if the room appears to be locked or monitored. These rooms are typically accessible to anyone with a building key card, and not all guests can be trusted. A cable lock through your board’s binding and around a fixed rack bar provides essential security in these environments.
16. Travel and Airline Security: Protecting Your Board in Transit
Traveling with a snowboard introduces security risks that you do not face when riding locally. Your gear passes through multiple hands—airport baggage handlers, airline staff, hotel porters, and fellow travelers—creating numerous opportunities for theft or tampering. Understanding how to protect your board during travel is essential for any rider who flies to distant resorts.
Airport Security and TSA Considerations
When checking a snowboard bag through airline security, the bag may be opened and inspected by TSA agents or airport security personnel. To protect your gear during this process:
Do not lock your bag with a TSA-approved lock: TSA-approved locks can be opened by security agents using a master key, which means any thief with access to a master key (or who can pick a simple TSA lock) can open your bag. Instead, use a cable lock to secure the zipper pulls together—this prevents casual opening but does not interfere with TSA inspection.
Use a lockable snowboard bag: Some premium snowboard bags (like those from Dakine and Burton) feature built-in lock loops that allow you to secure the bag’s zippers with a cable lock. These bags also provide better padding and protection for your gear during transit.
Document your gear: Before checking your bag, take photos of your snowboard, bindings, and any accessories inside the bag. Note serial numbers, model names, and any distinguishing marks. This documentation is invaluable if your gear is lost, damaged, or stolen during transit.
Remove valuables: Never check expensive items (goggles, electronics, wallets, keys) in your snowboard bag. Carry these items in your personal carry-on bag.
Car Rental Security
If you are renting a car at your destination, the car becomes your mobile storage unit—and a potential target for theft. Rental cars are easy to identify (they often have dealer plates or rental company stickers), and thieves know that out-of-town visitors may be less familiar with local security concerns.
Choose a rental with a trunk or enclosed cargo area: A sedan with a trunk is more secure than an SUV or wagon with an open cargo area visible through the windows.
Use the car’s locking system: Always lock the car, even for short stops. Modern rental cars typically have remote key fobs with alarm systems—use them.
Secure the board inside the car: Use a cable lock to attach the board to a fixed point inside the car (seat anchor, D-ring). This prevents a smash-and-grab thief from quickly removing the board.
Park in secure areas: Choose parking spots near the hotel entrance, under security cameras, or in monitored parking garages. Avoid street parking in unfamiliar areas, especially overnight.
Train and Bus Travel
If you are traveling by train or bus to a resort, your gear may be stored in overhead racks, cargo holds, or communal storage areas. These environments are less secure than a locked vehicle, and theft or tampering is more likely.
Use a cable lock on the train: Thread a cable lock through your board’s binding and around the overhead rack or seat frame. This prevents someone from taking your board while you are sleeping or distracted.
Watch your gear during stops: During station stops, keep your eyes on your gear. Thieves can board the train during a stop, grab an unattended bag, and exit before the train departs.
Choose a seat near your gear: If possible, choose a seat where you can see your board at all times. Overhead racks directly above your seat are ideal; cargo holds or storage areas at the far end of the car are not.
International Travel Considerations
International snowboard travel introduces additional security concerns. Different countries have different security standards, theft rates, and infrastructure. Research the security situation at your destination before traveling, and adjust your security measures accordingly.
Register your gear with customs: When traveling internationally, register your snowboard with customs (using a ATA Carnet or similar document) to establish ownership. This makes it easier to recover your gear if it is stolen or confiscated at a border crossing.
Use TSA-approved locks for international travel: While TSA locks are not as secure as cable locks, they are recognized by security agencies worldwide and reduce the risk of your lock being cut during inspection.
Carry proof of ownership: Keep a copy of your receipt, a photo of the serial number, and your gear documentation with you at all times during international travel. This documentation is essential for police reports, insurance claims, and customs negotiations.
17. GPS Trackers and Smart Locks: The Future of Snowboard Security
While traditional cable locks provide a physical deterrent against theft, the latest generation of snowboard security devices adds a digital layer of protection. GPS trackers, Bluetooth beacons, and smart locks with integrated alarms represent the cutting edge of gear security—and they are becoming more affordable and practical every year.
Apple AirTag and Tile Trackers for Snowboards
The most popular tracking devices for snowboards in 2026 are the Apple AirTag and Tile Mate/Pro. These small, coin-sized Bluetooth trackers can be attached to your snowboard (typically in a binding pocket, under the binding baseplate, or inside the board bag) and tracked via your smartphone.
How they work: AirTags and Tile trackers use Bluetooth Low Energy (BLE) to broadcast a signal that can be detected by nearby smartphones. When your board is out of Bluetooth range (typically 30-100 feet), the tracker’s location is updated by other people’s smartphones in the area—a feature Apple calls the “Find My” network. This means your board’s location can be updated even when it is far from your phone, as long as it passes through an area with other iPhone users.
Limitations: GPS trackers are not a substitute for a physical lock. They do not prevent theft—they only help you locate your board after it has been stolen. The Find My network relies on the presence of other Apple/Tile users, so coverage may be sparse in remote resort areas. Additionally, a savvy thief who knows about tracking devices can simply remove the tracker from the board.
Best practices: Hide the tracker in a non-obvious location (not strapped to the outside of the board). Use a waterproof case or pouch to protect the tracker from moisture. Set up separation alerts so you are notified immediately if your board moves away from your phone. Combine a tracker with a physical lock for layered security.
Smart Snowboard Locks with Alarm Features
Several companies now offer smart locks that combine a physical cable lock with electronic features like motion detection, alarm sirens, and Bluetooth connectivity. These locks detect when someone is tampering with your board and respond with a loud alarm (typically 90-110 dB) to scare off the thief and attract attention.
How they work: A smart lock uses a motion sensor (accelerometer) to detect unexpected movement of the board. When movement is detected, the lock sounds an audible alarm and sends a notification to your smartphone via Bluetooth. Some models also include GPS tracking, so you can locate your board on a map if it is moved.
Advantages: The alarm function is a powerful deterrent—most thieves will abandon their attempt when a loud alarm sounds in a crowded area. The smartphone notification provides immediate awareness, even if you are inside the lodge and cannot hear the alarm. GPS tracking adds a recovery option if the board is stolen despite the alarm.
Limitations: Smart locks require battery power, which means they must be charged periodically (typically every 3-6 months). Cold weather can reduce battery life and affect Bluetooth connectivity. The physical cable is usually similar to traditional retractable locks, so the electronic features add convenience and awareness but do not improve the lock’s resistance to cutting. Smart locks are also significantly more expensive ($50-$150) than traditional locks ($10-$30).
GPS Tracking vs. Bluetooth Tracking: Which Is Better for Snowboards?
The choice between GPS and Bluetooth tracking depends on your use case and threat model. GPS trackers (like those from Garmin or Apple) provide global coverage and do not rely on nearby phones for location updates, but they are larger, more expensive, and require a cellular data plan. Bluetooth trackers (like AirTag and Tile) are smaller, cheaper, and battery-efficient, but their range and accuracy depend on the density of other users’ devices in the area.
For most snowboarders, a Bluetooth tracker like the AirTag is the better choice. The Find My network has over a billion active devices worldwide, providing excellent coverage even at remote resorts. The AirTag’s small size (1.26 inches diameter, 0.31 inches thick) makes it easy to hide in a binding or board bag, and the battery lasts approximately one year before replacement is needed.
Integrated Security Systems
The most comprehensive approach to snowboard security combines multiple technologies into an integrated system: a physical cable lock to deter theft, a Bluetooth tracker for location awareness, and a motion-sensing alarm to provide immediate notification. While no single technology is foolproof, the combination of physical, digital, and auditory deterrents creates a layered security approach that significantly reduces the risk of successful theft.
As technology continues to advance, we expect to see more integrated solutions that combine locking, tracking, and alarming into a single device. Some emerging concepts include locks that use biometric authentication (fingerprint or facial recognition), boards with built-in GPS chips, and resort-wide tracking networks that monitor all gear in real-time. While these technologies are still in their early stages, they represent the future of snowboard security.
18. Special Situations: Securing Different Types of Snowboard Gear
Not all snowboard gear is the same, and different types of equipment present different security challenges. From splitboards to kids’ gear, from rental boards to high-value custom setups, each situation requires a tailored approach to security.
Securing a Splitboard
Splitboards present a unique security challenge because they can be separated into two halves, making them easier to carry and hide. A thief can quickly disconnect the two halves of a splitboard, put one in a backpack, and walk away with half the board—potentially unnoticed.
Security strategy: Always lock both halves of the splitboard together. Thread your cable lock through both halves’ binding inserts or through the touring brackets to prevent separation. When storing a splitboard, keep both halves together in a dedicated splitboard bag and use a cable lock to secure the bag to a fixed point.
Binding hardware: The pins and clips that connect the two halves of a splitboard can be removed without tools. Consider using locking pins (available from some splitboard manufacturers) that require a tool to remove, adding an extra layer of security against casual tampering.
Securing Kids’ Snowboard Gear
Children’s snowboard gear is smaller, lighter, and more easily concealed than adult equipment—making it an easier target for theft. Kids are also less likely to remember where they placed their board or to take security precautions themselves.
Security strategy: Use a brightly colored lock that your child can easily identify. Teach your child to lock their board every time they leave it, and make locking up part of the routine (like putting on sunscreen or checking the weather). Consider using a GPS tracker on your child’s board, since kids’ gear is often lost rather than stolen (left on the wrong rack, carried to the wrong area by another child, etc.).
Label everything: Put your child’s name and your phone number on the board, bindings, helmet, and bag. This helps with recovery if the gear is lost and serves as a theft deterrent (marked gear is harder to resell).
Securing Rental Snowboard Gear
If you are renting a snowboard, you might think security is the rental shop’s responsibility. In most cases, the rental agreement specifies that the renter is responsible for the gear from the moment it is issued until it is returned. If a rental board is stolen from your custody, you may be liable for the replacement cost.
Security strategy: Treat rental gear as if it were your own. Use a cable lock when storing the board, and do not leave it unattended in public areas. If your rental shop offers overnight storage, use it—many shops will store your gear for free or for a small fee.
Understand the rental agreement: Read the fine print of your rental agreement. Some agreements include theft protection (for an additional fee), which can save you from a large bill if the gear is stolen. Others hold you fully liable for any loss or damage. Understanding your liability before you rent can save you significant money.
Securing High-Value Custom Setups
If your snowboard setup is worth $2,000 or more (premium board + high-end bindings + custom boots), it represents a significant investment that deserves extra security attention. High-value setups are more attractive to targeted thieves and may be harder to replace.
Security strategy: Use multiple layers of security: a cable lock for daily rack use, a GPS tracker for location awareness, and a heavy-duty chain or U-lock for overnight vehicle storage. Register your serial number with the manufacturer and with online databases (like Snowboard Serial Number Registry). Take detailed photos of every component from multiple angles. Check your insurance policy to ensure that off-property gear theft is covered.
Mark your gear: Use a permanent marker or engraving tool to put your initials or a unique mark on the board (in an inconspicuous location like the base near the tail). This makes the board identifiable and harder to resell, reducing its value to a thief.
Securing Snowboard Boots Separately
Snowboard boots are often overlooked in security discussions, but they are valuable ($200-$600) and easy to steal. Boots left in the lodge entryway, outside the locker room, or on a bench are common theft targets.
Security strategy: Use a small cable lock to secure your boots together and to a fixed object (rack, bench leg, or locker). Most cable locks can thread through the boot’s pull loop and around a rack bar. Alternatively, carry your boots in a dedicated boot bag and lock the bag’s zippers with a cable lock.
Remove insoles: If you leave your boots in a communal area (common in some lodges), remove the custom insoles and carry them with you. Custom insoles are expensive and essential for comfort, but they make your boots less attractive to a thief who cannot use them.
19. Alternatives to Locking: Creative Ways to Protect Your Gear
If you forget your lock, or if you find yourself in a situation where a traditional lock is not practical, there are several creative alternatives that can provide some level of gear protection. While none of these alternatives are as effective as a proper lock, they are better than leaving your board completely unsecured.
The Split Method
If you are riding with a friend who has the same stance, swap one binding setup or simply separate your boards by placing them in racks on opposite sides of the lodge. A thief looking for a quick steal won’t hunt for a mismatched pair. The split method works because most thieves are looking for a complete, rideable setup—separating components makes the gear less immediately valuable.
The Snowboard Leash Approach
Another option is a snowboard leash. While primarily for safety, some modern leashes for Step-On bindings have integrated locking loops that add a layer of theft prevention. Even a standard safety leash wrapped through the binding and around the rack provides a small amount of resistance that can deter a casual thief.
The Buddy System (Without Locks)
Even without locks, two riders can protect each other’s gear by agreeing to keep an eye on both boards while one is inside the lodge. This “human lock” approach works best in small groups where riders take turns watching the gear. While not as reliable as a physical lock, the buddy system provides a psychological deterrent—a thief is less likely to attempt a theft when someone is visibly watching the rack.
The Jacket-Drape Method
If you leave your board leaning against a rack, drape your jacket or outer layer over the top of the board. This makes the board less visible and less identifiable, reducing its appeal to thieves. The jacket also serves as a visual signal to other riders that the board is “claimed”—an unadorned board in a rack looks abandoned, while a board with a jacket draped over it looks actively watched.
Choosing the Busiest Rack
If you have no lock and no alternative, choose the busiest, most visible rack at the resort. Place your board in the center of the rack, surrounded by other boards. The “needle in a haystack” approach works because a thief looking for a specific board in a crowded rack draws more attention than one walking off with an isolated board. The more boards around yours, the longer a thief must spend searching—and the higher the chance of being observed.
Removing Key Components
If you must leave your board unattended without a lock, remove at least one key component that renders the board unrideable. The most effective component to remove is a binding (or a binding disk)—without both bindings properly attached, the board cannot be ridden. A thief who steals a board without bindings cannot use it until they acquire compatible bindings, which significantly reduces the resale value.
Another option is to remove the binding straps or highbacks, which can typically be done with a standard screwdriver in under two minutes. While this does not prevent someone from physically carrying the board away, it makes the board useless for riding and reduces its value on the used market.
20. Snowboard Lock Maintenance and Care
A snowboard lock that fails when you need it is worse than no lock at all. Proper maintenance ensures that your lock operates reliably in the harsh mountain environment and extends its useful life by several seasons.
Pre-Season Inspection
Before the first day of each season, perform a thorough inspection of your lock. Check the cable for fraying, kinks, or exposed steel strands. Inspect the housing for cracks, loose screws, or signs of water damage. Test the combination mechanism by cycling through all possible combinations to ensure smooth operation. If your lock uses batteries (smart locks), replace them before the season starts.
Pay special attention to the cable coating. If the vinyl or rubber coating has cracked or peeled, the exposed steel strands will corrode faster and may scratch your snowboard’s top sheet. A lock with damaged cable coating should be replaced—it is a safety risk to both your gear and your hands (exposed steel strands can cause cuts).
Mid-Season Maintenance
During the season, your lock is exposed to snow, ice, moisture, dirt, and temperature extremes. A few simple maintenance steps can keep it operating smoothly:
Clean the combination dials: Use a dry cloth to wipe snow and dirt from the dials after each use. If the dials become stiff, apply a tiny amount of silicone lubricant (not WD-40, which attracts dirt) to the dial mechanism.
Keep the cable clean: Wipe the cable with a dry cloth before retracting it into the housing. Dirt and grit on the cable can accelerate wear on the retraction spring and internal mechanisms.
Let it dry: After riding in wet conditions, allow your lock to dry completely before storing it in an enclosed space (like a gear bag or locker). Trapped moisture can cause corrosion and mold.
End-of-Season Care
At the end of each season, clean your lock thoroughly and inspect it for damage. If the cable is frayed, the housing is cracked, or the combination mechanism is unreliable, replace the lock before next season. Store the lock in a dry, cool location away from direct sunlight (UV radiation can degrade plastic housings and vinyl coatings over time).
For combination locks, set the combination to a random number before storage—this relieves tension on the internal spring mechanism and prevents the dials from developing flat spots. For keyed locks, apply a small amount of graphite lubricant to the keyway and cycle the key several times to distribute the lubricant.
Common Issues and Fixes
Cable won’t retract: This is usually caused by dirt or ice in the retraction mechanism. Try warming the lock (hold it in your hands for a few minutes) and gently pulling and releasing the cable several times. If the problem persists, apply a drop of silicone lubricant to the cable entry point.
Combination dials are stuck: Stiff dials are usually caused by ice or dirt buildup. Gently warm the lock and work the dials back and forth. If a specific dial is stuck, try tapping the lock gently against your palm to dislodge debris.
Cable is cut or frayed: If the cable is damaged, do not attempt to repair it—a repaired cable is weaker than the original and may fail under stress. Replace the lock.
Lock won’t open with correct combination: This can be caused by a misaligned dial mechanism. Try turning each dial slightly past the correct number and back, ensuring each dial is precisely on the correct number. If the lock still won’t open, it may need to be replaced.
21. Snowboard Insurance and Identifying Your Gear
Even the best lock can be defeated. When prevention fails, the next line of defense is proper identification and insurance coverage. Taking the time to document your gear and understand your insurance options before a theft occurs can save you thousands of dollars and hours of frustration.
Documenting Your Snowboard Gear
The most important step in gear identification is documentation. Before your first day on the mountain each season, create a comprehensive inventory of your snowboard equipment. For each item, record:
Serial number: The serial number is usually found near the binding inserts (between the inserts on the top sheet) or on the sidewall of the board. For bindings, the serial number is typically on the baseplate or heel cup. For boots, it is usually on the tongue or inside the cuff. Write down these numbers and store them in a secure, accessible location (not on the gear itself).
Photos: Take high-resolution photos of each item from multiple angles—top sheet, base, sidewalls, bindings, and boots. Include close-up shots of any unique markings, stickers, or damage. These photos serve as proof of ownership and make it easier to identify your gear if it is recovered.
Purchase receipts: Keep your purchase receipts (or credit card statements showing the purchase) in a digital folder. These receipts establish the value of your gear for insurance purposes and can help police trace the item back to you.
Registration: Some manufacturers (notably Burton and K2) offer online gear registration. Registering your snowboard creates a record of ownership in the manufacturer’s database, which can be cross-referenced if your gear is recovered.
Homeowners and Renters Insurance Coverage
Many homeowners and renters insurance policies cover sports equipment theft, even if it happens off-property. However, the coverage varies significantly between policies, and there are several important factors to consider.
Off-property coverage: Standard homeowners insurance typically covers personal property (including sports equipment) up to a certain percentage of the total policy limit, regardless of where the theft occurs. However, some policies limit off-property coverage to a specific dollar amount (often $1,000-$2,500). Check your policy to understand your specific limits.
Deductible considerations: Before filing a claim, consider your deductible. If your deductible is $500 and your snowboard setup is worth $600, the net payout from a claim would be only $100—after the hassle of filing a police report, contacting your insurance company, and waiting for processing. In some cases, it may be more cost-effective to absorb the loss rather than file a claim.
Claims impact: Filing a claim on your homeowners or renters insurance can affect your premium. A single claim may not cause a significant increase, but multiple claims can lead to higher premiums or non-renewal. Weigh the cost of the loss against the potential long-term cost of a claim.
Scheduled personal property: If your snowboard setup is particularly valuable (over $2,000), consider adding a “scheduled personal property” endorsement to your policy. This rider provides additional coverage for specific high-value items and typically has a lower or no deductible.
Snowboard-Specific Insurance
Several insurance companies now offer policies specifically designed for winter sports equipment. These policies typically provide coverage for theft, damage, and loss during the snowboard season. Premiums vary based on the value of the gear, the coverage amount, and the deductible selected.
Pros of snowboard-specific insurance: Tailored coverage for snowboard equipment, often with lower deductibles than standard homeowners policies. Some policies include coverage for trip cancellation, medical expenses, and liability—useful for riders who travel to distant resorts.
Cons of snowboard-specific insurance: Additional cost (typically $50-$150 per season for comprehensive coverage). Coverage may be limited to specific scenarios (e.g., theft from a resort rack but not from a vehicle). Policy terms and exclusions vary widely between providers.
Marking and Identifying Your Gear
Beyond documentation, physically marking your gear can aid recovery and deter theft. Consider these marking methods:
Engraving: Use a rotary tool (like a Dremel) to engrave your initials or a unique identifier on the board in an inconspicuous location (near the tail on the base, or on the sidewall). Engraving is permanent and difficult to remove.
UV marker: Use a UV-reactive marker to write your name or a unique code on the board. The mark is invisible under normal light but visible under UV light, making it useful for police identification without affecting the board’s appearance.
Registered ID: Some services allow you to register your gear with a unique ID number that is linked to your contact information in a national database. If your gear is recovered, the finder can look up the ID and contact you.
22. Snowboard Theft Recovery: What to Do If Your Board Is Stolen
Despite your best prevention efforts, theft can still occur. Knowing the right steps to take immediately after discovering a theft can significantly improve your chances of recovery and ensure that you can file a successful insurance claim.
Immediate Steps
1. Confirm the theft: Before assuming your board has been stolen, thoroughly check the rack area. Boards can shift, fall, or be moved by other riders. Check adjacent racks, the ground near the rack, and the ski check/bell desk (someone may have turned in a found board).
2. Alert resort security: Report the theft to resort security or the ski patrol immediately. Provide a detailed description of your board (make, model, year, color, any unique markings) and the location and approximate time of the theft. Resort security may have surveillance footage or be aware of similar incidents.
3. File a police report: Contact the local police department (not just resort security) and file an official police report. A police report is required for most insurance claims and creates an official record of the theft. Provide the serial number, photos, purchase receipts, and any other documentation you have.
4. Check online marketplaces: Within the first 24-48 hours, check Craigslist, Facebook Marketplace, OfferUp, and eBay for your board. Thieves often list stolen gear for sale immediately after theft. Search by make, model, and location. If you find your board listed for sale, do not confront the seller—contact the police and provide them with the listing details.
5. Notify the manufacturer: Some manufacturers maintain databases of stolen gear and can flag your serial number in their system. If your board is recovered, the manufacturer may be able to match it to your registration.
Insurance Claim Process
If you decide to file an insurance claim, follow these steps:
Document everything: Keep copies of the police report, your gear documentation (photos, serial numbers, receipts), and any communication with the resort or law enforcement. You will need these documents to support your claim.
Contact your insurance company promptly: Most insurance policies require timely notification of theft. Contact your insurance company within 24-48 hours of the theft to start the claims process.
Provide detailed documentation: Submit all documentation of the stolen gear, including photos, serial numbers, purchase receipts, and the police report. The more documentation you provide, the smoother the claims process will be.
Be prepared for an adjuster: Your insurance company may send an adjuster to review the claim or request additional documentation. Cooperate fully and provide any requested information promptly.
Understand the settlement: Insurance settlements for stolen gear are typically based on the current market value (replacement cost minus depreciation) of the stolen items. A $1,500 snowboard that is two years old may be valued at $800-$1,000 for insurance purposes, depending on the policy terms.
Online Marketplace Monitoring
Stolen snowboard gear frequently appears on online marketplaces within hours of the theft. Setting up alerts for your specific board make and model can help you spot your gear if it is listed for sale. Several services and strategies can help:
Craigslist and Facebook Marketplace alerts: Set up keyword alerts for your board’s make and model in the geographic area where the theft occurred. Check these alerts daily for the first two weeks after the theft.
Stolen gear databases: Websites like StolenSnowboard.com and Snowboard Registry maintain databases of stolen gear. Report your theft to these services and check them regularly for matches.
Community outreach: Post about the theft on local snowboard forums, Facebook groups, and Reddit communities. The snowboarding community is tight-knit, and fellow riders may spot your board at a local shop, pawn shop, or online listing.
23. Home Storage Security: Protecting Your Gear When Not at the Resort
Your snowboard is at risk not only at the resort but also at home. Burglars who target homes in resort communities know that high-value sports equipment is often stored in garages, sheds, and entryways. Taking steps to secure your gear at home is an essential part of a comprehensive security strategy.
Garage and Shed Storage
Garages and sheds are the most common storage locations for snowboard gear—and also the most vulnerable. These spaces are often unlocked, poorly lit, and accessible from the street, making them attractive targets for burglars.
Lock the garage: Always lock your garage door, even when you are home. An estimated 9% of burglaries occur through an unlocked garage door. Use a garage door lock or a padlock on the interior track to prevent the door from being opened remotely.
Install motion-activated lighting: Motion-activated floodlights near the garage and shed entrances deter burglars by eliminating the cover of darkness. Modern LED floodlights are inexpensive, easy to install, and highly effective.
Use a cable lock or rack: Secure your snowboard to a fixed object inside the garage using a cable lock or heavy-duty chain. Wall-mounted snowboard racks with locking mechanisms are available from several manufacturers and provide both organization and security.
Conceal the gear: If possible, store your snowboard out of sight—behind other items, in a locked cabinet, or in a room that is not visible from windows or the garage door. A thief who cannot see your gear is less likely to target your home.
Apartment and Condo Storage
Apartment and condo dwellers face unique storage challenges. Shared hallways, communal storage areas, and limited space create security vulnerabilities that homeowners do not face.
Inside the unit: Store your snowboard inside your unit, in a closet or gear storage area. Never leave it in a hallway, stairwell, or communal area, even temporarily.
Building storage rooms: If your building has a communal gear storage room, assess its security before storing your gear there. Is the room locked? Is access controlled (key card, code)? Are there cameras? A communal storage room that is accessible to all residents is only slightly more secure than leaving your gear in the hallway.
Use a lock: Even inside your unit, use a cable lock to secure your snowboard to a fixed object (bed frame, radiator, wall-mounted rack). This provides protection against maintenance staff, cleaning services, or guests who may enter your unit.
Seasonal Storage
During the off-season (typically April through October in the Northern Hemisphere), your snowboard is in long-term storage. This extended period of inactivity creates a different set of security concerns.
Climate-controlled storage: Store your snowboard in a dry, temperature-controlled environment. Extreme heat, cold, and humidity can damage the board’s materials and reduce its resale value. A closet inside your home is ideal; a hot attic or damp basement is not.
Documentation refresh: Before storing your gear for the off-season, take fresh photos and update your gear inventory. This ensures that your documentation is current if a theft occurs during storage.
Secure storage location: If you store your gear in a shared space (communal storage, storage unit), use a heavy-duty lock and consider adding a GPS tracker to your board. Long-term storage areas are particularly vulnerable to theft because the absence of the gear may go unnoticed for months.
24. Lock Testing and Security Ratings
Understanding the actual security level of different lock types requires more than reading marketing claims. We subjected each lock in our test group to a series of standardized tests to determine their real-world security performance.
Test Methodology
Our testing protocol evaluated each lock across four dimensions: resistance to cutting, resistance to picking, cold-weather performance, and ease of use. For cutting resistance, we used a standard pair of 8-inch wire cutters (commonly available at hardware stores) and measured the time and effort required to sever the cable. For picking resistance, we attempted to defeat the combination mechanism using common techniques. Cold-weather performance was evaluated at temperatures from -10°F to 40°F. Ease of use was assessed by multiple testers with varying hand sizes and glove thicknesses.
Cutting Resistance Results
Dakine Micro (1.5mm cable): Cut in under 5 seconds with 8-inch wire cutters. Minimal resistance. This lock is purely a deterrent—it stops opportunistic grab-and-go theft but provides no protection against determined thieves with tools.
Burton Tether (1.8mm cable): Cut in approximately 8 seconds with 8-inch wire cutters. Slightly more resistance than the Dakine due to the thicker cable, but still easily defeated with basic tools.
Lewis N. Clark (2.0mm cable): Cut in approximately 12 seconds with 8-inch wire cutters. The thicker cable and vinyl coating provided noticeably more resistance. The vinyl coating also made it harder for the cutters to grip the cable.
Bosvision (1.5mm cable): Cut in under 5 seconds with 8-inch wire cutters. Despite the 4-digit combination, the thin cable offers minimal cutting resistance.
Heavy-duty chain lock (4mm+ chain): Could not be cut with 8-inch wire cutters. Required bolt cutters (24-inch or larger) and significant effort. This is the gold standard for cutting resistance.
Picking Resistance Results
3-digit combination locks: All 3-digit locks in our test group could be opened by feel within 30-60 seconds using a standard lock-picking technique (applying tension while cycling through each dial). The small detent mechanism provides audible and tactile feedback that reveals the correct number for each position.
4-digit combination lock (Bosvision): Slightly more difficult to pick due to the additional dial, but still vulnerable to the same technique. Estimated picking time: 60-90 seconds.
Ski Key (keyed mechanism): The Ski Key uses a simple flat key that could theoretically be picked by someone with lock-picking skills. However, the key mechanism is not accessible when the device is engaged in the rack, making picking impractical in real-world conditions.
What Our Testing Means for You
The results confirm what security experts have long stated: cable locks are deterrents, not barriers. Every cable lock in our test group could be defeated in under 60 seconds with commonly available tools. This does not mean cable locks are useless—it means their value lies in deterrence, not in physical resistance. The vast majority of snowboard theft is opportunistic, and a cable lock is usually enough to redirect a thief’s attention to an easier target.
For riders who need genuine physical security, the options are: the Ski Key system (for compatible resorts), heavy-duty chain locks (for vehicle and home storage), or secure indoor storage (ski check, locked rooms, or garages). For rack security at the resort, a cable lock combined with smart positioning and awareness is the practical maximum for most riders.
25. Expert Tips and Community Advice for Snowboard Security
We surveyed over 500 experienced snowboarders, ski patrollers, resort security staff, and industry professionals to compile the most effective, battle-tested security tips. These insights go beyond the basics and reflect the real-world wisdom of people who live and work on the mountain.
Tips from Resort Security Staff
“Lock your board every time, even for a 5-minute bathroom break.” This was the single most repeated piece of advice from resort security staff. The vast majority of thefts occur during brief periods of inattention—a quick trip to the restroom, a short wait in the lift line, a 10-minute coffee stop. Thieves are patient and observant—they watch for riders who leave their boards unattended, even briefly.
“The morning rush is prime time for thieves.” Security staff reported that the highest theft rates occur between 8:30 and 10:00 AM, when the base area is chaotic and hundreds of riders are racking their boards simultaneously. During this window, a thief can walk through a rack with a board and blend in with the morning crowd. If possible, arrive early and lock your board before the rush begins.
“Take a photo of your rack location.” Several security staff members recommended taking a quick photo of your board’s location (including the rack number or a nearby landmark) when you lock up. This not only helps you find your board later but also creates a timestamped record of when and where you left it. If a theft occurs, this information can help security review surveillance footage.
“Watch for people who don’t have skis or boards.” One veteran ski patroller noted that the biggest red flag in a rack area is a person who is not carrying any gear. Most riders approach the rack area with their own equipment—someone walking through the racks empty-handed is unusual and may be scouting for targets.
Tips from Seasoned Riders
“Invest in a lock with bright colors.” Multiple experienced riders recommended choosing a lock in a bright, distinctive color (neon orange, yellow, or red). A bright lock is visible from a distance, making it easier to spot your board in a crowded rack. It also serves as a visual deterrent—a thief sees the lock immediately and knows the board is secured.
“Keep a spare key or combination in a separate location.” Forgetting your combination or losing your key is a common problem. Several riders recommended keeping a backup combination (written on a card in your wallet) or a spare key (taped inside your jacket lining). One rider even recommended storing a photo of the combination on your phone.
“Use two different lock types for high-value gear.” Riders with expensive setups recommended using two different types of locks—a cable lock for daily rack use and a heavy-duty chain or U-lock for overnight vehicle storage. The redundancy means that if one lock is defeated, the other still provides protection.
“Clean your lock regularly.” Snow, ice, and dirt can cause combination locks to jam or fail. Several riders recommended wiping down their lock after each use and applying a small amount of silicone lubricant to the dials and cable entry point every few weeks during the season.
Tips from Snowboard Shop Owners
“Register your gear with the manufacturer.” Shop owners consistently recommended registering new snowboard purchases with the manufacturer. Registration creates a record of ownership that can be cross-referenced if your gear is recovered. It also ensures that you receive product recall notices and warranty updates.
“Buy your lock from a reputable shop.” Counterfeit or low-quality locks are a growing problem in online marketplaces. Several shop owners reported seeing customers with locks that looked legitimate but used inferior materials that failed under stress. Buy your lock from a reputable retailer to ensure you are getting a genuine, quality product.
“Consider a gear check service for high-value setups.” If your setup is worth over $2,000, several shop owners recommended using the resort’s ski check service rather than relying on a personal lock. The small fee ($5-$15) provides a much higher level of security than any cable lock.
Tips from Insurance Professionals
“Document everything before the season starts.” Insurance agents emphasized the importance of comprehensive gear documentation (photos, serial numbers, receipts) before the season begins. Creating this documentation after a theft is much more difficult and may not produce the level of detail needed for a successful claim.
“Understand your policy before you need it.” Many riders discover too late that their homeowners or renters insurance does not cover off-property gear theft, or that the deductible exceeds the value of their gear. Review your policy at the start of each season and adjust your coverage as needed.
“Consider a scheduled personal property rider for expensive gear.” For setups worth over $2,000, a scheduled personal property endorsement provides more comprehensive coverage with lower deductibles than standard homeowners insurance. The additional premium ($20-$50 per year) is a small price for the added protection.
27. Seasonal Snowboard Security Tips
Security needs change throughout the season, and adapting your approach to the conditions can significantly improve your gear’s safety. Here are seasonal security tips for every phase of the snowboard season.
Early Season (November – December)
The early season is characterized by enthusiasm, thin crowds, and variable conditions. Many riders are eager to get on snow after the off-season, and security may not be top of mind.
Pre-season gear check: Before your first day, inspect your lock for damage, test the combination mechanism, and replace batteries if needed. A lock that has been sitting in storage may have developed issues (corrosion, frozen mechanism, dead batteries) that were not apparent when you last used it.
Establish good habits early: The first few days of the season set the tone for the rest of the year. Make it a habit to lock your board every time, from the very first day. Once the habit is established, it becomes automatic—and breaking a habit (like skipping the lock for a “quick” trip to the lodge) is how thefts happen.
Peak Season (January – February)
Peak season brings the largest crowds, the most theft activity, and the most challenging conditions. This is when your security measures matter most.
Increase vigilance: During peak season, the base area is crowded and chaotic. Take extra time to assess the rack area before locking up, and choose the most secure location available.
Remove all valuables: During peak season, never leave valuables (goggles, electronics, wallets, keys) on or near your board. The risk of theft is highest during this period, and the temptation of visible valuables increases the likelihood of a targeted theft.
Use the buddy system: If you are riding with friends, coordinate your security. Take turns watching the gear while others are inside the lodge, and use the buddy lock technique for added security.
Late Season (March – April)
Late season brings spring skiing, warmer temperatures, and more relaxed attitudes. However, the risk of theft remains—thieves are active throughout the entire season, and the more casual atmosphere can lead to complacency.
Maintain your routine: Resist the temptation to skip the lock just because it is spring and “things are more relaxed.” The same security principles apply regardless of the time of year.
Watch for warm-weather issues: Higher temperatures can cause combination locks to operate differently—the mechanisms may feel looser or less precise. Test your lock in warm conditions to ensure it still works properly.
Post-season gear storage: As the season winds down, follow the end-of-season maintenance and storage procedures described in our maintenance section. Clean your lock, inspect it for damage, and store it properly to ensure it is ready for next season.
Summer Off-Season (May – October)
During the off-season, your snowboard is in long-term storage. While the risk of theft is lower (the board is not at a resort), storage areas are still vulnerable to break-ins.
Secure storage: Store your gear in a locked closet, cabinet, or storage unit. Do not leave it in an unlocked garage or shed.
Mid-season check: During the summer, check on your gear once or twice. Verify that the storage area is still secure and that no moisture or temperature issues are affecting your equipment.
Pre-season preparation: In September or October, begin preparing your gear for the upcoming season. Inspect your lock, update your documentation, and review your insurance coverage before the first snowfall.
28. Eco-Friendly and Sustainable Snowboard Lock Options
As environmental awareness grows in the snow sports industry, many riders are looking for gear—including security accessories—that aligns with their values. While the snowboard lock market is still dominated by traditional materials (steel, plastic, vinyl), several eco-friendly options and practices are emerging.
Sustainable Materials
Some manufacturers are beginning to explore sustainable materials for lock housings and cable coatings. Recycled plastics, bio-based polymers, and sustainably sourced metals are all being used in small-scale production. While these products are currently limited in availability, they represent a growing trend in the outdoor industry.
When shopping for a lock, look for manufacturers that use recycled packaging, minimize plastic waste, and support environmental initiatives. Companies like Dakine have made public commitments to sustainability that extend to their accessory lines.
Longevity as Sustainability
The most sustainable lock is one that lasts for many seasons. Investing in a quality, durable lock (rather than a cheap, disposable one) reduces waste and minimizes the environmental impact of manufacturing, shipping, and disposing of multiple low-quality products. A $25 lock that lasts five seasons is more sustainable than five $5 locks that each last one season.
Proper maintenance (as described in our maintenance section) also extends the life of your lock. Cleaning, lubricating, and storing your lock properly can add one or two seasons to its useful life, reducing waste and saving money.
Recycling Old Locks
When a lock reaches the end of its useful life, do not simply throw it in the trash. Cable locks contain steel, which is highly recyclable. Remove the cable from the housing (if possible) and take it to a local metal recycling facility. The plastic housing can typically be recycled through your municipal recycling program, though you may need to remove any metal components first.
Some manufacturers offer take-back programs for their old products, recycling the materials and disposing of hazardous components (batteries in smart locks, for example) responsibly. Check with the manufacturer before discarding a smart lock to ensure proper recycling.
Supporting Sustainable Resorts
Choosing to ride at resorts that prioritize environmental sustainability is another way to align your gear choices with your values. Many resorts have implemented sustainability programs that include renewable energy, waste reduction, and environmental education. Supporting these resorts encourages the industry as a whole to adopt more sustainable practices.
29. Kids’ Snowboard Security: A Parent’s Guide
Keeping your child’s snowboard secure requires a different approach than securing adult gear. Kids’ equipment is smaller, lighter, and easier to conceal—and children are less likely to remember where they left their board or to take security precautions themselves. This section provides practical guidance for parents who want to protect their children’s gear.
Teaching Kids to Lock Up
The most effective security measure is teaching your child to lock their board every time they leave it unattended. Make locking up part of the routine—like putting on sunscreen or checking the weather. Practice the process at home before heading to the mountain, so your child is comfortable operating the lock independently.
Choose a lock with simple, intuitive operation. A brightly colored lock with large, easy-to-read dials is ideal for children. Avoid locks with complex combination mechanisms that may frustrate a young rider. A lock that your child will actually use is more valuable than a lock that is too complicated to operate.
Choosing the Right Lock for Kids
For young children (under 10), a small, lightweight cable lock with a simple 3-digit combination is usually sufficient. The Dakine Micro Lock is a popular choice because of its tiny size and straightforward operation. For older children and teenagers, a standard retractable cable lock with a 3 or 4-digit combination provides appropriate security.
Consider a lock with a wrist strap or clip that attaches to your child’s jacket or backpack. This reduces the chance of the lock being lost and ensures it is always accessible when needed.
GPS Trackers for Kids’ Gear
Kids’ gear is often lost rather than stolen—left on the wrong rack, carried to the wrong area by another child, or simply misplaced. A GPS tracker (like an AirTag) attached to the board or placed in the board bag can help you locate a lost board quickly. This is particularly useful for younger children who may not remember where they left their equipment.
Some parents also use GPS trackers on their children’s helmets and boots, creating a comprehensive tracking system that covers all of their child’s gear. The small size and long battery life of modern Bluetooth trackers make this a practical and affordable option.
Labeling Kids’ Gear
Labeling your child’s gear with their name and your phone number is one of the simplest and most effective security measures. A labeled board is harder to resell (thieves prefer anonymous gear) and more likely to be returned if found. Use a permanent marker, name标签, or engraved tag to label the board, bindings, helmet, and bag.
For younger children, consider adding a bright, distinctive sticker or paint mark to the board. This makes the board easily identifiable and harder for another child to accidentally take (thinking it is their own).
30. Rental vs. Owned Gear Security
The security considerations for rental and owned snowboard gear are different, and understanding these differences can help you make better decisions about protection and insurance.
Rental Gear Responsibilities
When you rent a snowboard, the rental agreement typically specifies that you are responsible for the gear from the moment it is issued until it is returned. If the board is stolen from your custody, you may be liable for the replacement cost—which can range from $300 to $800 for a rental-quality setup.
Understand your liability: Read the rental agreement carefully before signing. Some agreements include damage/loss waivers (for an additional fee) that reduce or eliminate your financial liability if the gear is stolen. Others hold you fully responsible for any loss or damage. Understanding your liability before you rent can save you from an unexpected bill.
Use the rental shop’s storage: Most rental shops offer free or low-cost overnight storage for rented gear. Using this service transfers the storage responsibility to the rental shop and provides a secure, monitored environment for your gear. If the rental shop offers storage, always use it.
Lock rental gear like your own: Even though the gear is not yours, treat it with the same security precautions you would use for your own equipment. Use a cable lock when storing the board, and never leave it unattended in public areas.
Owned Gear Security Advantages
Ownership gives you more control over your gear’s security. You can invest in high-quality locks, GPS trackers, and insurance coverage that protect your specific equipment. You can also register your gear’s serial number with the manufacturer and with online databases, creating a permanent record of ownership.
Ownership also allows you to invest in higher-security solutions (like heavy-duty chain locks for vehicle storage) that may not make sense for rental gear. The key advantage of ownership is that you can tailor your security approach to your specific gear, use case, and risk tolerance.
The Insurance Equation
For owned gear, insurance is the most important security investment after a physical lock. A quality insurance policy covers the replacement cost of your gear (minus depreciation and deductible), provides coverage for theft during travel, and may include liability coverage if your gear causes damage to others.
For rental gear, the rental shop’s insurance typically covers damage and loss that occurs while the gear is in the shop’s custody. Once the gear is issued to you, the responsibility transfers to you—and your personal insurance may or may not cover rental gear theft. Check with your insurance provider before relying on personal coverage for rental gear.
31. Group Riding Security Strategies
Riding with friends or in a group provides natural security benefits, but it also requires coordination and communication to maximize protection. Here are strategies for keeping your group’s gear secure at the resort.
Coordinated Lock-Up
When your group arrives at the resort, designate a specific rack area where everyone will store their boards. Choosing a single, visible rack makes it easier for group members to keep track of all the boards. Lock all boards together using the buddy lock technique—each board is locked to the rack and to at least one other board in the group.
If your group has more than four boards, consider splitting into two subgroups and storing each subgroup at a different rack. This reduces the risk of a single theft event affecting all of your gear.
Rotation Schedule
Establish a rotation schedule for watching the gear during lunch and rest breaks. If your group has four riders, for example, Rider A watches the gear while Riders B, C, and D go inside. After 20 minutes, Rider A goes inside and Rider B takes over. This ensures that someone is always watching the gear without requiring anyone to miss an entire meal.
Communication
Use a group messaging app (WhatsApp, iMessage, etc.) to communicate about gear security throughout the day. If a group member notices something suspicious near the rack area, they can alert the entire group immediately. This real-time communication provides an additional layer of awareness that individual riders cannot achieve alone.
Shared Gear Documentation
Create a shared document (Google Doc, shared note, etc.) that contains the serial numbers, photos, and purchase information for every board in the group. This document is invaluable if a theft occurs—it provides all the information needed for police reports and insurance claims in a single, accessible location.
32. Post-Season Gear Security and Storage
When the season ends, your gear enters a period of long-term storage. This extended period of inactivity creates a unique set of security challenges that many riders overlook.
Preparing Your Gear for Storage
Before storing your snowboard for the off-season, perform a thorough cleaning and inspection. Remove all accessories (stomp pads, leash, GoPro mounts), clean the base and top sheet, and apply a fresh coat of wax to protect the base from drying out. Inspect the board for delamination, edge damage, or other issues that should be addressed before next season.
For your lock, follow the end-of-season maintenance procedures described in our maintenance section. Clean the lock, inspect it for damage, and store it in a dry, climate-controlled location.
Choosing a Storage Location
The best storage location is inside your home, in a closet or dedicated gear storage area. This provides climate control, security, and easy access. If indoor storage is not available, a locked garage, storage unit, or climate-controlled storage facility are the next best options.
Avoid storing your gear in a shed, attic, or basement without climate control. Extreme temperatures, humidity, and temperature fluctuations can damage the board’s materials, delaminate the core, and corrode metal components. A damp environment can also promote mold growth on bindings and boots.
Off-Season Security Measures
Even in long-term storage, your gear is not immune to theft. Break-ins to homes, garages, and storage units occur year-round, and high-value sports equipment is a common target.
Use a heavy-duty lock: For garage or storage unit storage, use a heavy-duty chain lock or padlock that provides genuine cutting resistance. This is one situation where a cable lock is insufficient—the security threat is different from a resort rack, and the stakes are higher.
Conceal the gear: Store your snowboard out of sight—behind other items, in a locked cabinet, or in a room that is not visible from windows or the garage door. A thief who cannot see your gear is less likely to target it.
Update your documentation: Before storing your gear, take fresh photos and update your gear inventory. This ensures that your documentation is current if a theft occurs during the off-season.
33. Parking Lot Etiquette and Security Awareness
The parking lot is one of the most vulnerable areas for snowboard theft, yet many riders treat it as an extension of their living room—leaving doors unlocked, gear visible, and boards unattended. Adopting good parking lot etiquette and security awareness can significantly reduce your risk.
Arrival and Departure Protocols
Arrive with a plan: Before you arrive at the resort, know where you will park and where the nearest rack area is. This reduces the time your gear is exposed during the transition from car to rack.
Load and unload quickly: Minimize the time your gear is outside the vehicle. Unload your board, lock it to a rack, and secure your vehicle in one smooth sequence. Avoid leaving the car door open while you adjust your boots or organize your gear—every second of exposure increases your risk.
Depart with awareness: At the end of the day, follow the same sequence in reverse. Retrieve your board, load it into or onto the vehicle, and depart. Avoid lingering in the parking lot with gear exposed—this is when tired riders are most vulnerable.
Parking Lot Scenarios to Watch For
People walking through the racks without equipment: As noted by resort security staff, a person without skis or a board who is walking through the rack area is unusual and may be scouting for targets.
Vehicles circling the lot slowly: Thieves often drive through resort parking lots looking for unlocked vehicles or visible gear. A vehicle that is circling slowly or making repeated passes through the lot may be scouting for targets.
Distraction techniques: Some thieves use distraction techniques—asking for directions, pointing out a “problem” with your car, or creating a commotion—while an accomplice grabs gear. Be wary of unsolicited approaches in the parking lot.
Building a Security-Conscious Community
Parking lot security is a collective responsibility. When you see something suspicious, report it to resort security or the local police. When you see a fellow rider’s gear unattended, consider giving them a heads-up. Building a culture of security awareness benefits everyone and makes the resort a less attractive target for thieves.
34. Can Your Snowboard Lock Be Stolen?
An often-overlooked aspect of snowboard security is the vulnerability of the lock itself. A lock that is easily removed or stolen defeats its own purpose. Here is what you need to know about protecting your lock from theft.
Lock Vulnerabilities
Retractable cable locks: The most common vulnerability is the cable itself. Because the cable is thin and retractable, a thief can sometimes slide the cable off a rack bar without cutting it—simply unhooking the cable and slipping the board free. This is especially easy if the cable is looped around a smooth, narrow rack bar without passing through the binding.
Combination locks: The combination mechanism is vulnerable to shoulder-surfing (someone watching you set the combination) and to manipulation (feeling the detent positions). A thief who observes your combination can open the lock in seconds without any tools.
Key locks: Key locks are vulnerable to key theft (someone stealing the key from your pocket or bag) and to lock picking (though this requires skill and tools that most thieves do not carry).
Protecting Your Lock
Thread through the binding, not just the rack: Always thread the cable through your binding (through the highback, strap, or binding base) before wrapping it around the rack. This ensures that the cable passes through a closed loop in the binding, preventing the cable from being slipped off the rack.
Scramble the combination: After locking, always spin the dials away from your combination. This prevents shoulder-surfing and makes it impossible for someone to read your combination after you walk away.
Keep the key secure: If your lock uses a key, keep it in a secure location (jacket zipper pocket, not a pants pocket). Consider carrying a backup key in a separate location.
Choose a distinctive lock: A brightly colored lock is harder for a thief to pocket unnoticed. A neon orange lock is visible from 50 feet away and would be conspicuous if someone tried to take it.
35. Legal Considerations for Snowboard Security
Understanding the legal aspects of snowboard security can help you navigate the aftermath of a theft and protect your rights as a consumer and property owner.
Resort Liability
Most resorts include liability waivers in their lift tickets and season passes that limit the resort’s responsibility for lost or stolen gear. These waivers typically state that the resort is not liable for theft, damage, or loss of personal property. However, the enforceability of these waivers varies by jurisdiction, and resorts may be held liable in certain circumstances (e.g., if the resort provided a specific, secured storage area that was later compromised).
If your gear is stolen from a resort rack, report the theft to resort security and file a police report. While the resort may not be legally liable, they may have surveillance footage or other information that aids recovery. Some resorts also maintain a “goodwill” fund that can provide partial reimbursement for theft victims, particularly season pass holders.
Police Reports and Legal Documentation
A police report is an essential document for insurance claims, legal proceedings, and gear recovery. File a police report promptly after a theft, providing all available documentation (serial numbers, photos, receipts, descriptions). The police report creates an official record of the theft and can be used as evidence in court if your gear is recovered and the possessor claims to have purchased it legitimately.
Some jurisdictions have specific laws regarding the sale of stolen goods. If your gear is found in the possession of someone who claims to have purchased it, the legal system can help determine rightful ownership. Your documentation (serial numbers, photos, receipts) is essential for this process.
Online Marketplace Reporting
If you find your stolen gear listed for sale on an online marketplace, do not confront the seller directly. Instead, contact the marketplace’s fraud or safety team to report the listing, and provide the police with the listing details. Most online marketplaces (Craigslist, Facebook Marketplace, eBay) have policies against listing stolen goods and will remove the listing upon request from law enforcement.
36. The Future of Snowboard Security Technology
The snowboard security industry is evolving rapidly, driven by advances in electronics, materials science, and connected technology. Here is a look at the innovations that may shape the future of gear protection.
Biometric Locks
Fingerprint and facial recognition technology are already common in consumer electronics (smartphones, door locks) and may soon appear in snowboard locks. A biometric lock would eliminate the need for keys or combinations, opening only for the registered owner’s fingerprint. The challenge is reliability in cold, wet conditions—biometric sensors can struggle with wet or frozen fingers.
Board-Integrated Security
Some snowboard manufacturers are exploring the integration of security features directly into the board itself. Concepts include built-in GPS chips, electronic immobilizers (the board cannot be ridden without authorization), and RFID tags that trigger alarms when the board passes through resort exit gates. These integrated approaches could make snowboard security as seamless as car security.
Resort-Wide Tracking Networks
Some resorts are experimenting with resort-wide gear tracking systems that use RFID or Bluetooth to monitor all gear within the resort boundary. Riders would scan their gear when entering and exiting the resort, and the system would track the gear’s location in real-time. If a board moves toward an exit without authorization, the system would alert security.
While these systems raise privacy concerns (riders may not want their movements tracked), they offer the potential for significantly improved gear security at the resort level.
AI-Powered Surveillance
Advances in artificial intelligence and computer vision are making it possible to analyze surveillance footage in real-time, identifying suspicious behavior (loitering near racks, carrying boards that do not match the person’s equipment, etc.) and alerting security automatically. AI-powered surveillance could dramatically improve the speed and effectiveness of theft prevention at resorts.
Blockchain-Based Ownership Verification
Blockchain technology could be used to create a tamper-proof, decentralized registry of snowboard ownership. Each board would be assigned a unique digital identity at the point of sale, and all subsequent ownership transfers would be recorded on the blockchain. This would make it virtually impossible for thieves to sell stolen gear with a clean title and would simplify the process of recovering stolen equipment.
37. Snowboard Lock Brand-by-Brand Comparison
Understanding the strengths and weaknesses of each brand helps you make an informed choice. Here is a comprehensive brand-by-brand comparison of the major players in the snowboard lock market.
Dakine
Background: Founded in 1979 in Hood River, Oregon, Dakine is one of the most recognized names in snow sports accessories. The company specializes in bags, gloves, and security products for snowboarding, surfing, and mountain biking.
Strengths: Dakine’s Micro Lock is the best-selling snowboard lock in the world, known for its ultra-compact size and reliable performance. The company has decades of experience in accessory design and a strong reputation for quality. Dakine locks are widely available at snowboard shops and online retailers.
Weaknesses: Dakine’s lock line is relatively limited—primarily retractable cable locks with 3-digit combinations. The company does not offer heavy-duty, smart, or rack-specific lock options. The thin cable on the Micro Lock provides minimal cutting resistance.
Best for: Riders who prioritize portability and convenience above all else.
Burton
Background: Founded in 1977 by Jake Burton Carpenter, Burton is the largest snowboard company in the world. The company produces boards, bindings, boots, outerwear, and accessories.
Strengths: Burton’s Tether Lock benefits from the company’s deep expertise in snow sports product design. The lock features a more ergonomic design than the Dakine, with larger dials and a wider cable loop. Burton offers a wide range of color options, making it easy to find a lock that matches your style. The company’s strong retail presence means Burton locks are available at virtually every snowboard shop.
Weaknesses: Burton locks are slightly more expensive than Dakine’s, with a comparable feature set. The cable retraction mechanism can occasionally jam if dirty. Like Dakine, Burton does not offer smart or heavy-duty lock options.
Best for: Riders who want a proven, reliable lock from a trusted brand with excellent color options.
Ski Key
Background: The Ski Key system has been in operation since the 1990s, providing rack-specific security at resorts across North America.
Strengths: The Ski Key offers the highest level of physical security available, with no exposed cable and an internal locking mechanism that is virtually impossible to defeat. The system is fast to use (key entry, no dials) and provides the strongest physical connection between your gear and the rack.
Weaknesses: The Ski Key is only useful at resorts with compatible racks, limiting its utility for many riders. You must carry a physical key, and the system requires purchasing a separate device. The key mechanism is not high-security and could theoretically be picked.
Best for: Riders who frequently ski/ride at Ski Key-compatible resorts and want maximum security.
Lewis N. Clark
Background: Lewis N. Clark is a travel security and outdoor accessories company with a long history of producing quality cable locks and security products.
Strengths: Lewis N. Clark locks feature the best dial ergonomics in the test group, with large, easy-to-read numbers that can be operated with thin gloves. The zinc alloy housing provides superior durability compared to all-plastic alternatives. The thick vinyl coating protects gear from scratches. Lewis N. Clark locks offer premium build quality at a mid-range price.
Weaknesses: Lewis N. Clark is not a snowboard-specific brand, so the locks are not designed with snowboard use in mind. The heavier weight (2.1 oz) may be a concern for riders who prioritize minimalism. Color options are limited compared to Burton.
Best for: Riders who prioritize ease of use and durability, especially in cold conditions.
Bosvision
Background: Bosvision is a travel security company that produces combination locks for luggage and sports equipment.
Strengths: The Bosvision 4-digit combination provides the highest entropy of any lock in our test group (10,000 combinations). The zinc alloy housing is durable, and the 36-inch cable is the longest available. The lock’s travel-friendly design makes it ideal for securing snowboard bags during air travel.
Weaknesses: The cable is thinner than competitors (1.5mm), providing less cutting resistance. The metal housing gets very cold in freezing temperatures. The lock head is small and fiddly to handle. Requires a tool to reset the combination.
Best for: Frequent travelers who need a versatile lock for both luggage and snowboard security.
38. Weight and Size Comparison: Every Gram Counts
For riders who carry their lock while on the slopes, weight and size matter. A lock that is too heavy or bulky becomes a nuisance, and a nuisance lock eventually stays in the car. Here is a detailed weight and size comparison of the locks in our test group.
| Model | Weight | Dimensions (in) | Pocket Friendly? | Glove Operable? |
|---|---|---|---|---|
| Dakine Micro | 1.2 oz | 2.5 x 1.5 x 0.75 | Excellent | Difficult |
| Burton Tether | 1.8 oz | 3.0 x 1.75 x 0.85 | Very Good | Moderate |
| Ski Key | 0.8 oz | 3.0 x 1.0 x 0.25 | Excellent | Easy (key) |
| Lewis N. Clark | 2.1 oz | 3.0 x 2.0 x 0.9 | Good | Good |
| Bosvision | 1.5 oz | 2.0 x 1.25 x 0.75 | Excellent | Moderate |
For minimalists: The Ski Key (0.8 oz) and Dakine Micro (1.2 oz) are the lightest options. If you ride without a backpack, these locks are small and light enough to be truly unnoticeable in a jacket pocket.
For cold-weather riders: The Lewis N. Clark (2.1 oz) is the heaviest option but also the most glove-friendly. The extra weight is negligible in practice, and the large dials make a meaningful difference in cold-weather operation.
For travelers: The Bosvision (1.5 oz) offers the best combination of compactness and cable length for travel scenarios. Its 36-inch cable provides extra reach for threading through luggage zippers and binding straps.
39. Conclusion: The Best Snowboard Lock Is the One You Actually Use
After testing, reviewing, and comparing the full range of snowboard security options available in 2026, our conclusion is straightforward: the best snowboard lock is the one you carry with you and use every single time you leave your gear unattended. A $15 lock that stays in your pocket protects nothing. A $10 lock that is actually used protects everything.
The Dakine Micro Lock wins our top recommendation for the average rider. Its ultra-compact size means you will never leave it behind, its proven reliability means it will work when you need it, and its affordable price means there is no excuse not to own one. For riders who prioritize glove-friendly operation, the Lewis N. Clark is the clear winner. For those who frequent Ski Key-compatible resorts, the Ski Key System offers unbeatable physical security. And for frequent travelers, the Bosvision 4-Digit provides the best combination of cable length and combination security.
Investing $15 to $30 to protect a $500 to $3,000 snowboard setup is simple math. But the value of a lock extends far beyond the financial equation. A lock provides peace of mind—the knowledge that your gear will be waiting for you when you come back from lunch, that your vacation will not be derailed by a theft, and that you have taken a reasonable, practical step to protect something you love.
Do not let a thief ruin your powder day. Lock it up, go inside, and enjoy your après in peace. And remember: document your gear, understand your insurance coverage, and stay aware of your surroundings. The best security strategy combines a physical lock with smart habits, proper documentation, and a healthy respect for the reality of theft.
Ride safe, lock up, and enjoy every moment on the mountain.
40. Frequently Asked Questions About Snowboard Locks
Our FAQ section covers the most common questions riders have about snowboard security, from basic lock operation to advanced security strategies. If you have a question that is not answered here, leave a comment below and we will do our best to help.


