


Every expert snowboarder you’ve watched effortlessly carve down the mountain started in the same place you are right now — standing sideways on a plank of wood, staring down a hill, and wondering what on earth to do with their feet. Learning to turn a snowboard is the single most transformative skill you’ll develop as a beginner. Once it clicks, the entire mountain opens up. This guide walks you through every step — from your first skid across the slope to smooth, linked turns that actually feel good.
Why Turning Is the Foundation of Every Snowboard Skill
Before we get into technique, it helps to understand what’s actually happening when you turn a snowboard. Unlike skiing — where two independent planks let you steer your feet independently — a snowboard forces both feet to work in concert. You are literally chained to a single plank, which is why snowboarding has a steeper initial learning curve but ultimately a more intuitive feel once you understand the mechanics.
Turning a snowboard is not primarily about moving your feet. It is about managing edge angle, body rotation, and pressure distribution — three forces that, when combined correctly, guide the board smoothly across the snow. Get this wrong and you either catch an edge and slam into the ground or skid out of control. Get it right and you’ll experience one of the most fluid sensations in all of winter sports.
Turning also matters because it is your primary method of speed control. Unlike a bicycle where you can simply stop pedaling, gravity is always working on you on a slope. Turning across the fall line — the steepest path down the mountain — bleeds off speed and keeps you in control. If you can’t turn, you can’t ride safely. That’s why this skill deserves every minute of attention you give it.
There’s also a safety argument worth making here. Falling safely on a snowboard is a skill in itself, but the best way to avoid the worst falls is to stay in control of your speed and direction. Turns give you that control. They are also how you navigate around other skiers and snowboarders on the mountain, avoid terrain features you’re not ready for, and respond to changing snow conditions. It all comes back to turning.
The Psychological Barrier: Why Learning Turns Feels Harder Than It Is
Most beginner snowboarders experience a specific frustration: they understand intellectually what they’re supposed to do but their body refuses to cooperate. The brain sends the signal, the muscles hesitate, and the turn either doesn’t happen or collapses halfway through. This is called the cognitive-motor lag, and it’s completely normal at any new physical skill.
The good news is that this lag closes quickly with deliberate repetition. Snowboarding research and coaching consensus consistently shows that the breakthrough moment — when turns start happening fluidly without conscious thought — typically occurs within 6–15 hours of actual on-snow time when structured correctly. That’s less time than you might think, spread across two or three full days of riding.
The key is practicing at the edge of your comfort zone without tipping into full panic. Terrain that’s slightly challenging but not terrifying forces adaptation. Terrain that’s genuinely scary puts you in survival mode, which bypasses the learning centers of your brain entirely. Choose beginner slopes, stay on them longer than you think you need to, and let the turns develop naturally. Many resorts have dedicated learning areas that are specifically designed for this — check out our beginner resort terrain guide for the best spots with appropriate learning zones. There’s also a broader debate worth exploring about whether snowboarding or skiing is ultimately more enjoyable as a winter sport — but you’ll form your own opinion once those first turns start flowing.
Research consistently shows that beginners who take even one or two structured lessons learn turns significantly faster than those who try to self-teach. A qualified instructor can see body mechanics you can’t feel yet. If you’re weighing the cost, check out this in-depth analysis of snowboard instruction’s cost-benefit ratio — the numbers are compelling.
That said, this guide is designed to stand alone. Whether you’re on the mountain right now, studying at home the night before your first lesson, or reviewing after a frustrating day on the slopes, everything you need to understand snowboard turns is right here.
📦 Best Beginner Snowboard Package
Soft-flex all-mountain board with forgiving rocker profile — ideal for learning turns. Comes pre-tuned and ready to ride.
🛒 Shop on AmazonUnderstanding Your Edges: Heel, Toe, and the Flat Base
Your snowboard has two metal edges running the full length of the board — one on each side. These edges are the business end of every turn you’ll ever make. Understanding the difference between them, and the “flat base” state between them, is the conceptual key that unlocks everything else in this guide.
The Heelside Edge
The heelside edge runs along the back of your board relative to your stance — the side your heels rest above. When you engage the heelside edge, you tilt the board so this edge bites into the snow, and your weight leans slightly backward (toward the slope’s uphill side when you’re traversing). This creates a heelside turn, which curves in the direction of your back foot.
Most beginners find heelside turns easier to initiate because the instinct is to lean back — away from the scary downhill direction. The challenge is not leaning too far back, which collapses your balance.
The Toeside Edge
The toeside edge runs under your toes. Engaging it tips the board the opposite way — you lean forward, toward the slope, bending your knees and ankles to bring your toe edge into contact with the snow. Toeside turns are often the harder of the two for beginners because you’re leaning into the mountain, which psychologically feels like falling.
The Flat Base: The Moment Between Edges
Between every heelside and toeside turn, there is a brief moment when your board is flat against the snow — neither edge engaged. This is the transition zone, and it’s where most beginner crashes happen. The flat-base moment requires you to briefly ride with zero edge engagement while the board points straight downhill. Your speed briefly accelerates, your stability briefly drops, and your job is to smoothly guide the board from one edge to the other.
The steeper your edge angle — the more you tip the board onto its edge — the more aggressively the edge bites the snow. A shallow edge angle produces a skidded, sliding turn. A steep angle produces a clean, carving turn. Beginners should start with moderate edge angles and skidded turns before chasing clean carves. Want to understand how edge geometry affects performance at a deeper level? This analysis of edge bevel angles and hardpack physics goes surprisingly deep.
Understanding these three states — heelside, flat, toeside — means you’re never surprised by what your board is doing. Every turn follows the same pattern: engage one edge → flatten the board → engage the other edge. The rest of this guide is about executing each of those phases with intention and control.
It also helps to understand how your board’s profile plays into turning. Boards with a rocker or flat profile are more forgiving during edge transitions, making them ideal for beginners. Boards with a traditional camber profile have more edge grip and pop, which can actually make early turns harder to initiate. When you’re ready to go deeper on board selection, our guide to choosing your first snowboard has a full breakdown.
Snow Conditions and How They Affect Edge Learning
Not all snow is created equal, and as a beginner learning turns, the condition of the snow surface has a disproportionately large effect on your experience. Soft, groomed corduroy — the ribbed pattern left by a grooming machine — is essentially the ideal learning surface. It offers consistent grip, predictable edge response, and forgives minor mistakes. Try to ride in the morning when groomers are freshest.
Icy conditions are the enemy of beginner edge work. On ice, your edges need to be sharper to grip effectively, and even slight mistakes in edge angle cause washouts that are discouraging and hard to learn from. If the snow is icy, consider it an advanced challenge rather than a beginner learning environment — there’s nothing wrong with recognizing that and adjusting your expectations.
Heavy, wet spring snow creates another set of challenges: the board slows dramatically in the heavy snow, which can feel like it’s grabbing rather than flowing. If your board hasn’t been recently waxed, spring conditions will make turning noticeably harder. Understanding why waxing your snowboard matters will help you appreciate why a well-maintained base makes everything feel more fluid.
Stance and Binding Setup for Optimal Beginner Turns
Your binding setup directly affects how easily you can initiate and control turns. Riding with your bindings in the wrong position is like trying to run in shoes that are three sizes too big — everything feels awkward and nothing responds the way you expect it to.
Regular vs. Goofy: Getting Your Stance Right
Before anything else, you need to know whether you ride regular (left foot forward) or goofy (right foot forward). This is not a skill decision — it’s a biological preference, similar to handedness. The classic test is to have someone push you from behind without warning. Whichever foot you instinctively step forward with is typically your lead foot. You can also check out our full breakdown of regular vs. goofy stance biomechanics for more context.
Stance Width
Shoulder-width is the universal starting point. Stand naturally with your knees slightly bent — the distance between the center of each foot is approximately your ideal stance width. Most boards have reference stance markers in the binding inserts; starting there is perfectly fine. Going too narrow reduces stability; going too wide makes it harder to shift weight fluidly between turns.
Binding Angles
Binding angles — measured in degrees from the nose of the board — determine how your knees and hips naturally align during turns. Common beginner setups:
| Setup Style | Front Binding | Rear Binding | Best For |
|---|---|---|---|
| Duck Stance (recommended) | +15° | −15° | All-around beginner riding, easier turn initiation |
| Forward-Angled Stance | +21° | +6° | Directional riding, powder |
| Positive-Only Setup | +18° | +3° | All-mountain freestyle |
For beginners, a symmetrical duck stance (equal positive and negative angles) is the most forgiving. It naturally points your knees and hips across the board, making it easier to rotate your body into heelside and toeside turns. Our full snowboard stance setup guide has everything you need to dial this in precisely.
Boot Fit and Binding Forward Lean
Your boots must fit snugly — not painfully tight, but secure enough that there’s zero heel lift when you flex forward. Heel lift is the enemy of toeside turns. The binding’s high back forward lean (typically adjustable) controls how aggressively you can apply toeside pressure. Beginners often benefit from slightly more forward lean on the rear binding to make toeside turns feel more natural. If you’re dealing with persistent heel lift, this guide on fixing heel lift in snowboard boots is essential reading.
Once your stance is set, take a moment to ride a flat section of snow. Notice how your weight naturally distributes. You should feel centered over the board — not leaning toward the nose or tail. This neutral position is your baseline for everything that follows.

🎯 Top-Rated Beginner Bindings
Soft-to-medium flex bindings with easy-adjust straps and forgiving response — perfect for your first season learning turns.
🛒 View on AmazonStep 1 — The Falling Leaf Drill: Your First Real Skill
Before you attempt a full turn, you need to earn your edges. The falling leaf drill is the bridge between standing on your board and actually steering it. It’s called the falling leaf because you move across the slope the way a leaf drifts down from a tree — swaying back and forth, always on the same edge, never fully committing to going straight downhill.
The Heelside Falling Leaf
Strap in on a gentle beginner slope. Stand on your heelside edge — dig your heels down into the snow so the board bites and holds you in place. Your toes should be lifted slightly.
- Shift your weight gently toward your front foot. The board will begin to slide forward across the slope (perpendicular to the fall line).
- Apply equal pressure to both feet and the board will stop sliding and hold its edge.
- Now shift weight toward your back foot. The board will slide backward, still on the heelside edge.
- Repeat — forward, stop, backward, stop — while traversing across the slope.
The goal is complete edge control. You should be able to stop at any moment just by equalizing pressure. Practice until this feels effortless in both directions.
The Toeside Falling Leaf
Once you’re comfortable on your heelside, flip it. Face the slope and engage your toeside edge — press your toes into the snow so the toe edge bites. It feels more exposed at first because you’re looking at the mountain, but it’s exactly the same movement pattern.
- Shift weight to your front foot — slide forward (toeside traverse).
- Even out your weight — stop.
- Shift weight to your back foot — slide backward.
Practice this drill on both edges until you can start and stop on command. That level of edge control is what allows turns to happen intentionally rather than accidentally. A lot of beginner crashes happen because riders lose their edge without knowing it — this drill trains you to feel the difference.
The falling leaf is boring. You will want to skip it and try actual turns immediately. Resist that urge. Riders who spend 20–30 minutes mastering the falling leaf are significantly more likely to link clean turns on the same day. Those who skip it spend most of their session falling because their edge control isn’t there yet.
Step 2 — Your First Heelside Turn
A heelside turn is where the board curves toward your heels — meaning if you’re regular stance, you’re turning left. It’s typically the easier of the two for beginners to learn because you’re opening your body toward the slope rather than facing it, which feels more natural psychologically.
Before you start, choose a very gentle slope — something so mellow it feels almost flat. You need space to build confidence, not steep enough to terrify you. A true beginner slope (green run) is ideal. If you’re at a mountain for the first time, look at the beginner resort terrain progression guide to identify the right zones.
Starting Position for Heelside Turn
Start by traversing across the slope on your heelside edge — exactly like the falling leaf, but this time you’re going to use that momentum to initiate a turn rather than stopping. As you slide forward on your heelside edge, get your body into this position:
- Knees bent — not just slightly, but with real flex. Aim for your knees tracking over your toes.
- Arms out to the sides at roughly waist height — this is your balance anchor.
- Eyes looking in the direction you want to go, not at your feet.
- Weight roughly centered, leaning slightly toward the front of the board.
How to Execute the Heelside Turn
- Begin your heelside traverse: Slide forward on your heel edge across the slope. Build a little speed — enough to feel momentum but not enough to panic.
- Initiate with your front shoulder: This is the trigger. Take your leading shoulder and rotate it downhill — in the direction you want to turn. Your hips and board will follow. Do not try to steer with your feet alone.
- Press into your front foot: As you initiate, shift slightly more weight toward your front foot. This helps the nose of the board lead the turn.
- Keep heels pressed down: Maintain continuous pressure on your heelside edge throughout the turn. Do not relax this — it’s the only thing preventing an edge catch.
- Look where you’re going: Your eyes should be focused on where you want to end up — not on your board, not at the snow in front of you.
- Finish across the slope: Let the turn arc naturally until you’re pointing across the fall line again. The board will naturally stop or slow as you cross perpendicular to the slope.
The turn feels smooth rather than jerky. You finish the turn pointed across (not downhill) and feel in control of your speed. Your heel edge held throughout without washing out, and you didn’t need to bail to stop.
Practice this single turn 15–20 times before moving on. Start from your heelside traverse, initiate, complete the arc, and then fall-leaf-traverse back to restart. When heelside turns feel consistent, you’re ready for toeside.
Step 3 — Your First Toeside Turn
Toeside turns are the mirror image of heelside turns, but they require a different mental approach. You’re leaning into the slope — toward the mountain — which triggers a primal fear response in most beginners. The snow is right there in your face and your brain is screaming not to fall forward into it.
The secret is that you cannot fall forward into the mountain when your toe edge is properly engaged. The edge is biting the snow at an angle, your knee is driving into the turn, and physics is keeping you on your feet. Trust the edge and the fear dissolves.
Here’s a useful mental reframe: instead of thinking about leaning toward the mountain, think about pulling your toes toward your shins. When your toes lift inside your boots, your toe edge engages. The lean is a consequence of proper edge engagement, not the cause. Start with your toes and the lean happens automatically — and correctly.
Another reason toeside turns feel harder for many beginners: the visual reference is different. On a heelside traverse, you’re looking away from the slope and the horizon feels stable. On a toeside traverse, you’re staring directly at the mountain rushing past you, which creates a sensation of instability even when you’re perfectly balanced. This is purely psychological and fades within a few sessions once your brain trusts the edge.
Starting Position for Toeside Turn
Begin by traversing on your toeside edge — facing the slope. Get comfortable in this position before you try to turn. You want:
- Weight centered, slightly toward front foot
- Front knee bent and driving toward the slope
- Eyes looking across the slope in the direction you’re traveling
- Toes lifted slightly to maximize toeside edge engagement
The Toeside Turn Step-by-Step
- Begin your toeside traverse: Slide forward on your toe edge, facing the slope. Feel secure before initiating.
- Drive your front knee downhill: This is the toeside equivalent of rotating your front shoulder. Lead with your knee — not your foot, not your hip, your knee. The board follows.
- Drop your hips slightly: Lower your center of gravity as the turn initiates. Think of sitting down into the turn rather than standing on top of it.
- Toes stay lifted: Keep continuous toe-edge pressure. Your toes should feel like they’re pulling toward your shins throughout the turn.
- Look where you’re going: Eyes forward, looking across and slightly downhill in the direction of the turn.
- Finish across the slope: Let the arc complete until you’re pointing across the fall line in the opposite direction from where you started.
Toeside turns often take more repetition to feel natural than heelside turns. Don’t get discouraged if your first several attempts feel awkward or you lose your edge. The muscle memory takes time to develop. If you find your board washing out on the toeside, check that you’re not leaning back onto your heels — which immediately releases the toe edge you need to complete the turn.
On your first toeside attempts, you can practice the body position while standing still by holding a fence or ski instructor’s hand. Get the feel of driving your knee and dropping your hips into the turn without the anxiety of moving. Then transfer that muscle memory to the moving version.

🛡️ Beginner Safety: Wrist Guards
Wrist injuries are the most common snowboarding injury for beginners. These guards provide impact protection without sacrificing glove feel.
🛒 Shop Wrist Guards on AmazonStep 4 — Linking Heelside and Toeside Turns Together
This is the milestone moment. When you can link a heelside turn directly into a toeside turn (and vice versa) without stopping in between, you are officially riding down the mountain. Not just surviving — riding. Everything that follows in your snowboard career — carving, park, powder, backcountry — builds on this single skill.
Linking turns is harder than executing individual turns because you have to manage the flat-base transition between edges. This is the moment your board is pointing more or less straight downhill, picking up speed, and you need to stay calm and initiate the opposite-edge turn before the speed overwhelms you.
Understanding the Edge-to-Edge Transition
When you complete a heelside turn, you’re pointed across the slope. To link a toeside turn, you need to flatten the board briefly and let it pivot through the fall line. During this moment:
- Your speed will briefly increase as you align with gravity.
- Your board is temporarily without strong edge engagement.
- This is where an edge catch is most likely.
The solution is to be proactive rather than reactive. As you finish your heelside turn, already begin thinking about the toeside — start moving your weight and rotating your body toward the next turn before the board has fully transitioned.
The Sequence for Linking Your First Turns
- Complete a heelside turn: Ride your heelside arc until you’re pointing across the slope with good speed control.
- Anticipate the transition: Before the board fully finishes the heelside arc, begin rotating your front shoulder slightly downhill — the direction of the next toeside turn.
- Flatten the board: Let the board momentarily flatten as you pivot through the fall line. Stay centered over the board and keep your knees bent. Do not freeze up here.
- Drive into toeside: As the nose of the board swings across the fall line, drive your front knee downhill and press your toes — initiating the toeside turn immediately. Do not wait.
- Complete the toeside arc: Ride the toeside turn until you’re pointing across the slope in the opposite direction.
- Anticipate again: Already think about linking back into heelside. Rotate that front shoulder.
- Flatten and repeat: The pattern is edge — transition — edge — transition, over and over down the slope.
When linking starts to feel natural, you’ll notice the rhythm: the slight speed increase through the fall line, the edge grabbing, the arc slowing you down, then doing it again. That rhythm is what snowboarding feels like — it never really gets old, no matter how advanced you become.
The Mental Game: Staying Calm Through the Fall Line
One of the biggest barriers to linking turns isn’t physical — it’s the moment of anxiety when the board is flat and pointed downhill. Speed increases. Your visual field drops toward the bottom of the mountain. Every instinct says to stop or bail. This is normal and it’s temporary.
The cognitive strategy that helps most beginners is to pre-commit to the next turn. Before your board reaches the flat-base moment, decide exactly where on the slope you’re going to initiate the next turn. Visualize the exact spot. Then execute. Riders who go into the transition with a destination in mind crash far less than those who react to the transition after it’s already happening. Proactive riding beats reactive riding at every level.
Breathing also plays a larger role than most people expect. In moments of anxiety, we unconsciously hold our breath — which tightens muscles, reduces reaction speed, and amplifies fear. Make a deliberate habit of exhaling as you enter each flat-base transition. The relaxation response kicks in almost immediately. It sounds almost too simple to be real, but experienced coaches call it out consistently as a breakthrough technique for anxious beginners.
Another mental strategy: count your turns. Rather than thinking about how many times you’ve fallen or how steep the slope looks, count each clean transition: “one… two… three…” Focusing on the number keeps your conscious mind occupied so your trained muscle memory can execute the technique without interference. Many beginners report that counting is what finally made turns feel automatic.
This is also a good time to review your snowboard stopping techniques so you always have an escape valve if speed gets away from you during linked turns. Stopping is just an exaggerated heelside or toeside turn with extra edge pressure — the same mechanics, dialed to 100%.
Step 5 — Speed Control Through Turn Shape
Here is one of the most important concepts for beginner riders: your speed is determined by your turn shape, not just by how hard you edge. The steeper the angle you travel relative to the fall line, the faster you go. The more perpendicular you stay to the fall line, the slower you go.
This means you can control your speed without edge-skidding or panic-stopping by simply changing the shape of your turns. This is called J-turn and C-turn technique.
| Turn Shape | Path Description | Speed Effect | Best Used When |
|---|---|---|---|
| J-Turn | Start across the slope, briefly drop downhill, finish across | Brief speed increase, then control | Intermediate terrain, controlled linking |
| C-Turn | Deep arc that finishes pointing uphill | Strong speed reduction | Steep runs, when speed gets away |
| S-Turn | Continuous linking of equal arcs | Steady, moderate speed | Normal riding on groomed slopes |
| Skid Turn | Board pivots rather than carves | Rapid deceleration | Emergency speed check, very steep terrain |
The practical application for beginners is to always finish your turns. A lot of beginner crashes happen because riders panic mid-turn and stop the arc early, leaving the board aimed downhill and gathering speed. If you commit to completing the full arc — especially pointing slightly uphill at the finish — you’ll always have control.
For more insight into how edge geometry affects your ability to carve clean arcs, check out this detailed guide on carving edge control and angulation. It’s the natural next step after you’ve mastered beginner turns.
Pointing straight downhill to control speed by braking at the end is a survival instinct that actually builds bad habits. Use turn shape — not straight-line braking — to manage speed from day one. It will make your progression to intermediate riding much smoother.

🩳 Protect Your Tailbone: Impact Shorts
A beginner’s tailbone takes a beating. These padded impact shorts sit invisibly under your pants and cushion hard heelside falls. Worth every penny.
🛒 Shop Impact ShortsStep 6 — 10 Common Beginner Turn Mistakes (And How to Fix Each One)
Learning turns is as much about identifying and correcting mistakes as it is about following instructions. Here are the ten errors every beginner makes, what they look like, and exactly how to fix them.
Detailed Breakdown of Each Mistake
1. Looking at your feet. The moment your eyes drop to your board, your upper body collapses and your balance shifts. Always look in the direction of travel — at least 10 feet ahead of where you currently are.
2. Riding with stiff legs. Straight legs are the enemy of snowboard control. Your knees act as shock absorbers and as steering inputs. Bent knees = more control, better edge response, softer landings. Aim for a constant athletic stance, like you’re about to jump.
3. Leaning too far back on the tail. This is a survival instinct that backfires badly. When you’re scared, you lean back — but this actually makes steering harder, causes the nose to rise and chatter, and ruins your toe edge turns. Stay centered. Your weight should feel roughly equal over both feet.
4. Not committing to the edge. Half-hearted edge pressure causes half-hearted turns that skid instead of arc. When you initiate a heelside turn, press your heels down with intention. Toeside, drive your knee hard. Timid edges = no edge control. Protect yourself with wrist guards and proper protective gear so fear of falling doesn’t make you ride tentatively.
5. Arms hanging at your sides. Your arms are your balance counterweights. Keep them slightly out at waist height — not above your head, not glued to your body. If you’re falling sideways, extend the opposite arm to recover balance instinctively.
6. Not finishing turns. Stopping the arc early is how you lose speed control. Every turn should finish with the board pointing across the slope, not downhill.
7. Steering with feet alone. Snowboard turns require body rotation — specifically leading with your front shoulder (heelside) or front knee (toeside). Trying to turn by twisting just your ankles doesn’t generate enough force.
8. Holding your breath. Tension is a turn-killer. Consciously exhale as you initiate each turn. Breathing keeps your muscles relaxed, your movements fluid, and your focus sharp. It sounds like a soft-skill tip but it makes a measurable difference.
9. Practicing only on steep terrain. Find the gentlest slope at the resort and stay there until your turns are consistent. Steeper terrain amplifies every mistake and rewards correct technique — in that order.
10. Rushing the progression. The mountain will always be there. There is zero shame in spending your entire first day on the easiest slope. The riders who progress fastest are almost always the ones who nailed their basics on gentle terrain before moving up.
Gear That Makes Learning Turns Significantly Easier
The right equipment can noticeably accelerate how quickly you learn to turn. This isn’t about buying the most expensive gear — it’s about choosing gear tuned for the learning process rather than for expert riders.
Snowboard Profile: Rocker and Flat Are Your Friends
A traditional camber board has a large arch between the bindings that creates aggressive edge grip. That’s great for experts carving at speed but brutal for beginners who are still managing the flat-base transition. During edge transitions, a camber board wants to dig in and catch — which sends beginners tumbling.
Rocker profiles (reverse camber) and flat profiles are far more forgiving. The rocker means the edges near the contact points are lifted, reducing the chance of catching an uphill edge during the transition. The board feels more skatey and forgiving. Check out our full camber vs. rocker profile breakdown for a deep technical comparison.
Also worth noting: twin versus directional shapes affect how your board responds to turns. For beginners, a twin (symmetrical) shape is easiest to manage because the board responds the same way whether you’re going forward or sliding slightly backward through a transition.
Boot Flex: Softer Is Better for Beginners
Soft-flex boots (ratings of 1–4 on most brand scales) allow more ankle movement and require less force to initiate turns. Stiff boots are great for aggressive carving but require significantly more physical input to engage edges. If you’re learning, a medium-soft boot is the sweet spot: enough support to feel your edges, enough flex to not exhaust your legs. Browse the best snowboard boots with kinetic flex-weight metrics to understand how boot flex actually translates to on-snow feel.
Binding Flex and Response
Similarly, bindings should have soft-to-medium flex for learning. Very stiff bindings transmit too much feedback during early turns and can feel harsh and unforgiving. Bindings with good cushioning in the footbed also reduce fatigue — your legs take a lot of impacts when you’re learning. See our tested affordable all-mountain bindings for options under $200 that perform well for learners.
Protective Gear That Lets You Learn Without Fear
Padding isn’t just for safety — it reduces fear, which in turn improves your riding. When you know your tailbone is protected by impact shorts, you’re more willing to commit to turns. When your wrists are guarded, you fall more safely and confidently. When your head is protected by a quality MIPS helmet, you ride with less tension. All of this gear pays for itself in accelerated learning.
✅ Best Gear Choices for Beginners
- Rocker or flat-profile board
- Soft-medium flex boots
- Duck stance bindings with soft flex
- MIPS helmet
- Wrist guards under gloves
- Impact shorts for tailbone
- Well-fitted waterproof pants and jacket
❌ What NOT to Buy as a Beginner
- Aggressive full-camber race boards
- Stiff boots (flex 7–10)
- Very stiff, aggressive bindings
- Used boots that don’t fit (sizing matters!)
- Skimping on protective gear
- Oversized boards (harder to turn)
If you’re trying to size your board correctly, use our snowboard sizing guide by height and weight — the right length makes a massive difference in how easily a board turns. Too long and it resists turning; too short and it feels unstable at any meaningful speed.
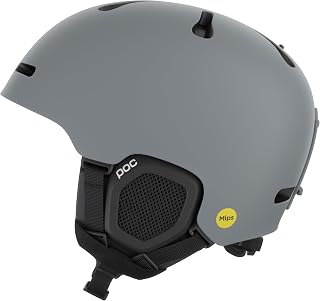
🪖 Beginner Helmet — MIPS Protection
Head protection should be non-negotiable for anyone learning turns. This helmet includes MIPS rotational impact protection and comfortable venting.
🛒 Find MIPS HelmetsAdvanced Drills to Level Up Your Turns Faster
Once you’ve got basic linked turns working, these drills will sharpen your technique, fill in gaps in your mechanics, and prepare you for more challenging terrain. None of these require special equipment — just space, patience, and a willingness to look a little awkward while you figure them out.
Drill 1: The Pencil Drill (Turn Shape Awareness)
Make your linked turns as wide and gradual as possible — imagine you’re drawing a giant S with a thick pencil, not a sharp pen. Wide, round arcs force you to use your edges through the full arc rather than only at the beginning and end of each turn. This builds complete edge engagement habits that make everything you do in future riding cleaner.
Drill 2: The Garland (One-Edge Practice)
A garland is a series of incomplete turns on one edge. Start traversing on your heelside. Dip the nose of the board briefly toward the fall line — partially initiating a heelside turn — then pull back to traverse before completing the full turn arc. Repeat across the slope. This isolates turn initiation without the complexity of completing and transitioning to the opposite edge. It’s ideal for building confidence in the first half of each turn.
Drill 3: Pole Tap Exercise (Timing and Rhythm)
Borrow a pair of ski poles from the rental shop (or use your hands). As you complete each turn, touch the snow briefly with the pole on the downhill side. This teaches turn rhythm and timing, forces you to reach downhill with your arm (opening your body into the turn), and prevents the common mistake of keeping both arms on the same side as the slope.
Drill 4: The Pivot Slide (Flat-Base Control)
Find a very gentle, groomed slope. Ride straight downhill in a flat-base position for a few feet, then use your body rotation to pivot the board 90 degrees — to your heelside edge. Hold that edge for 3 seconds. Flatten the board again. Pivot to toeside. Hold for 3 seconds. This drill specifically targets the flat-base transition phase that causes most beginner falls during turn linking.
Drill 5: Toe-Heel Alternation (Balance Board Off-Mountain)
Off the mountain, use a balance board designed for snowboarders to practice the weight shift between heel and toe edges in a controlled environment. This lets you build muscle memory for the edge transition without the consequences of falling on ice. Doing 15–20 minutes of balance board work the night before a riding day can noticeably improve your on-snow feel.
Drill 6: Slow-Motion Turns with Commentary
Find a gentle slope and make your turns as slowly as possible. Talk through what you’re doing out loud as you do it: “Shifting weight to front foot… initiating front shoulder rotation… heel edge engaged… flattening the board… driving front knee… toeside edge engaged…” Verbalizing forces you to stay conscious of each movement and catches technique errors before they become habits.
Your physical conditioning off the mountain also matters more than most beginners realize. If your legs are burning out after 20 minutes on the slope, you won’t have the energy for clean turns. Building specific core strength for snowboarding and preseason fitness will extend your effective riding time and keep your form sharp longer into each session. A solid preseason fitness checklist can make a real difference in your first-season experience.
What Comes After Beginner Turns: Your Progression Path
Once your linked heelside and toeside turns feel repeatable, you’re no longer a true beginner — you’re an early intermediate rider. The mountain has just gotten dramatically larger for you. Here’s where to take your skills from here.
Carving: The Next Frontier
Beginner turns often involve some skidding — the tail of the board sliding sideways as you arc. Carving eliminates that skid. In a true carve, both the nose and tail of the board travel the same path — a clean arc with no sideways movement. The result is faster, more efficient, and incredibly satisfying. Our guide to carving technique and edge angulation will walk you through the transition from skidded to carved turns.
Steeper Terrain
When you’re comfortable on beginner slopes, try a gentle blue run. The techniques are identical — the consequences of mistakes are simply higher. Use C-turns to control speed on steeper sections, and never point straight downhill to manage speed.
Park Introduction
Once your turns are solid, the terrain park starts making sense. Boxes, rails, and small jumps all require edge control — the same skill you’ve been building from day one. Check out the snowboard trick progression ladder for a structured path from butters to air tricks.
Switch Riding
Eventually you’ll want to ride switch — with your non-dominant foot forward. Everything feels backward and awkward at first. The technique is identical; your body’s spatial memory just needs retraining. Start with switch falling leaf drills and progress from there.
Powder and Off-Piste
Deep snow requires different weight distribution (typically more toward the tail) but the same edge initiation principles. Backcountry and powder riding open up a completely different dimension of the sport once your fundamentals are solid. If Japan’s legendary powder is on your bucket list, our Japow riding guide is required reading.
And when your skills are ready for more advanced board shapes, explore everything from asymmetrical board designs to specialized powder setups. The gear world deepens along with your riding. You can also explore the best snowboarding destinations worldwide once you’re confident in your turns.

👟 Best Beginner Snowboard Boots
Properly fitted soft-flex boots make every turn easier and reduce foot fatigue dramatically. These are consistently top-rated by first-season riders.
🛒 Shop Beginner BootsFrequently Asked Questions About Snowboard Turns for Beginners
Your First Real Turn Is Closer Than You Think
Snowboard turns aren’t a mystery — they’re a skill. Like any skill, they feel impossible before they click and completely natural after. The key is building the right foundation: understanding your edges, earning that foundation through the falling leaf, committing fully to heelside and toeside, and trusting the physics that holds you on the slope even when it feels counterintuitive.
Every carver you admire on the mountain was once standing exactly where you are, falling on the same edges, working through the same mental blocks. The difference between them and a rider who gave up is simply persistence and smart practice. You’ve got both — you’re reading a 10,000-word guide, after all.
Get out there. Do the drills. Fall a few times (it’s part of it). And then feel that moment when the edge catches, the arc completes, and you transition smoothly to the other side — that’s when you’ll understand why people do this for decades.


