
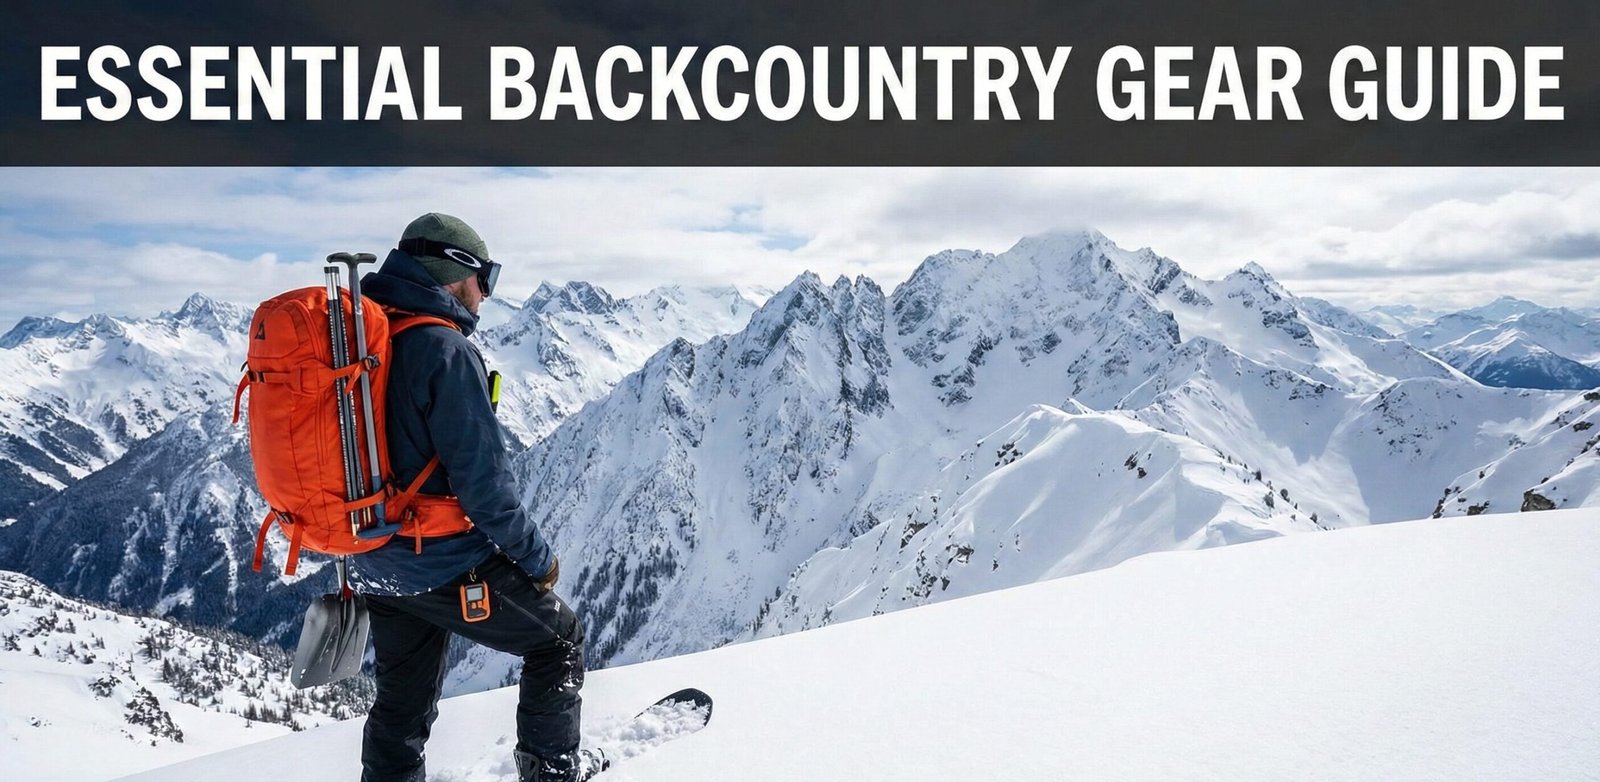
Beyond the Rope Line: The Full-Spectrum Backcountry Snowboard Safety Protocol
The untracked canvas of the backcountry rewards the prepared, not the lucky. Deep powder, pristine slopes and total freedom—but only if you respect the mountain’s volatile personality. This isn’t resort riding; the snowpack doesn’t care about your style. It responds to physics, layers, and stress. This comprehensive safety protocol integrates AIARE principles, snowpack stratigraphy, mechanical rescue, meteorology, route planning, emergency medicine, and physiological readiness. Whether you are transitioning from sidecountry or committing to a splitboard expedition, these 13,000+ words are your standard operating procedure.
1. Mindset Shift: You Are the Forecaster
In a resort, ski patrol mitigates avalanches, marks obstacles, and rescues if needed. In the backcountry, you are patrol, forecaster, and rescue team. The first step in any backcountry snowboard safety protocol is accepting that no slope is 100% safe. Every turn is a hypothesis: “the snow will remain stable.” Your tools (beacon, shovel, probe, brain) test that hypothesis.
Many riders underestimate the cognitive load. You’re navigating, reading snow, managing group dynamics, and riding variable snow. This is why we train year-round. Core strength for snowboarding isn’t just about carving—it’s about having the stability to stop suddenly on a convex roll, or dig a pit with controlled posture. A fatigued core leads to sloppy observations.
☑️ The Pre-Trip Declaration
Before skinning up, each rider must verbally agree: “I am ready to turn around. No line is worth a burial.” Discuss the red flags: recent avalanches, collapsing snow (whumpf), rapid warming, wind loading. If anyone is hesitant, you choose a lower-angle objective. No exceptions.
The Psychological Cost of Backcountry Riding
Backcountry snowboarding imposes a unique cognitive burden that resort riders rarely experience. Inbounds, your decisions carry minimal consequence—a fall means a bruise, not a burial. Out of bounds, every decision has cascading implications. You must simultaneously process terrain features, snowpack observations, group energy levels, weather changes, navigational accuracy, and your own fatigue. This is why seasoned backcountry riders emphasize mental preparation as much as physical readiness.
Research from the Swiss Institute for Snow and Avalanche Research (SLF) demonstrates that decision quality degrades measurably after four hours of sustained mountain travel. This “decision fatigue” manifests as optimism bias—”the snow looks fine”—and reduced willingness to change plans. Combat this by building mandatory rest stops into your route plan, rotating the group leader role every hour, and establishing a non-negotiable turnaround time before you leave the trailhead.
The psychological concept of commitment bias is particularly dangerous in backcountry snowboarding. After hours of uphill travel, riders become emotionally invested in reaching their objective. The sunk-cost fallacy whispers, “We’ve already worked so hard—we can’t turn back now.” Recognize this trap. The mountain will be there tomorrow. You may not be if you push beyond your margin of safety. Your partners depend on your willingness to be the voice of caution when the objective looks increasingly questionable.
Building Your Risk Tolerance Profile
Every rider has a unique risk tolerance shaped by experience, training, recent events, and personality. Understanding your personal threshold is not about eliminating risk—it’s about making informed, conscious decisions about which risks to accept. Before each season, honestly assess: What is my experience level in avalanche terrain? How current is my training? What are my physical limitations this year? Who am I riding with, and what are their capabilities? These questions form the foundation of your personal risk management framework.
Consider keeping a backcountry journal. After each outing, write three things: what went well, what surprised you, and what you’d change. Over time, patterns emerge—you’ll notice recurring blind spots, perhaps always underestimating wind effect on leeward aspects, or consistently starting tours too late. This self-awareness becomes your most valuable safety tool, more important than any piece of equipment.

Level up: industry‑standard rescue kit
BCA Tracker 4 – intuitive digital beacon with 60m range, compact probe, and D‑shovel. Your life depends on these three.
🔍 CHECK PRICE ON AMAZON#1 rated avalanche package • 500+ reviews
2. Reading Snowpack Stratigraphy & Geometry
You can’t see instability, but you can infer it. The mountain builds a layered cake all winter: storms, sun crusts, surface hoar, wind slabs. Each layer has grain type, hardness, and bond. The backcountry snowboarder must understand snowpack stratigraphy geometry. Weak layers (facets, depth hoar, surface hoar) are persistent slabs that can avalanche weeks after burial.
Our deep dive on backcountry snowboarding snowpack stratigraphy geometry explains how angular facets act like ball bearings. On a slope >30°, a trigger point—often a rider’s weight—can propagate failure across hundreds of feet. In the field, perform quick compression tests on similar aspects. Dig a pit, isolate a column, tap with shovel blade. Sudden failure (Q1, Q2) = instability.
| Grain type | Shape | Danger | Typical layer |
|---|---|---|---|
| Facets (angular) | cubic / striated | persistent slab, propagate | near crust, depth hoar at ground |
| Surface hoar | feathery stars | extreme – buried feathers | on old snow surface |
| Round grains | spherical | stable, well sintered | well‑settled snow |
| Ice crust | solid | slab above crust = slick bed surface | rain or melt‑freeze |
Understanding Grain Metamorphism
Snow grains undergo continuous transformation driven by temperature gradients and vapor pressure. In a shallow snowpack with a steep temperature gradient (greater than 10°C per meter), kinetic metamorphism produces faceted crystals—weak, angular grains with minimal bonding. This process, called depth hoar formation, creates persistent weak layers near the ground that can remain reactive for months. Depth hoar is particularly insidious because it doesn’t heal with additional snowfall; instead, new snow adds load on an already fragile foundation.
In contrast, equilibrium metamorphism occurs when the temperature gradient is gentle (less than 10°C per meter). Under these conditions, vapor moves slowly and deposits on existing grains, rounding them and strengthening bonds. This is how snowpack stabilizes over time—round grains sinter together, creating a cohesive matrix. However, this process requires time and stable temperatures. Rapid temperature fluctuations can reverse the process, re-faceting previously rounded grains.
Surface hoar forms on cold, clear nights when the snow surface radiates heat and the air above is calm and humid. These feathery crystals grow upward from the surface and, when buried by subsequent snowfall, create one of the most dangerous persistent weak layers in the snowpack. Research shows that buried surface hoar can remain reactive for 40+ days after burial, making it a long-lasting hazard that requires careful assessment weeks after the initial storm.
Hand Hardness Test: Your Field Classification Tool
Hand hardness is your quickest field assessment tool. Push your finger, pencil, knife blade, or fist into the snow. This gives you a five-point scale from Fist (F-1, very soft) to Knife (K-5, extremely hard). Wind slabs register 4-Finger to Pencil hardness. Weak layers like depth hoar often register as Fist or One-Finger—dramatically softer than the slab above. This hardness contrast is the fundamental instability mechanism: a hard, cohesive slab sitting on a soft, weak layer creates a loaded spring ready to release.
When digging a snowpit, systematically test each layer’s hardness. Note abrupt transitions—these are your areas of concern. A Pencil-hard wind slab overlying Fist-hard facets is the classic persistent slab problem. The greater the hardness contrast, the more readily the weak layer can fail under the stress of a rider’s weight. Document these observations in your field notebook; they’ll help you track snowpack evolution across multiple tours throughout the season.
Crystal Size and Structure
Grain size matters for stability assessment. Large, well-developed depth hoar crystals (3-5mm) indicate prolonged kinetic metamorphism and a deeply unstable snowpack structure. Surface hoar crystals vary from 2-15mm, with larger crystals generally posing greater danger when buried. When examining grains with a loupe or magnifier, note whether they’re clustering together or sitting loosely. Clustered grains with some sintering suggest some bond development, while loose, independent grains indicate zero cohesion.
Proppant layers—thin layers of graupel or small rounded grains between slabs—act as additional failure planes. These can be particularly tricky to identify in the field because they’re often only a few centimeters thick. Pay attention to the snowpit walls: subtle color changes or texture differences can indicate proppant layers that aren’t immediately obvious with hand hardness testing alone.
3. Avalanche Formation Science: The Stress-Strain Model
Understanding how avalanches form is fundamental to avoiding them. An avalanche requires three ingredients: a slope steep enough for gravity to pull snow downward (typically 30-45°), a weak layer within the snowpack, and a trigger that adds enough stress to exceed the snowpack’s shear strength. This is the stress-strain model of avalanche release.
Types of Avalanches
Slab avalanches are the most dangerous and the most relevant to backcountry snowboarders. In a slab avalanche, a cohesive plate of snow (the slab) releases from the surrounding snowpack along a defined fracture plane. The slab breaks into large pieces that can entrain additional snow as it moves downhill. Slab avalanches can release naturally (from loading or temperature changes) or be triggered by a person. They range from small (1-5 meters wide) to enormous (hundreds of meters wide), and can travel at speeds exceeding 100 km/h.
Loose snow avalanches (also called point-release avalanches) start from a single point and fan out as they descend. They’re generally less dangerous than slabs because they release small amounts of snow incrementally. However, they can still knock a rider off balance and push them into terrain traps. Loose snow avalanches are common in fresh, unconsolidated snow and are often triggered by a rider’s turn.
Wet avalanches occur when water content in the snowpack increases, reducing cohesion between grains. These typically happen during spring warming or rain events. Wet avalanches are slower than dry slabs but involve heavier, denser snow that can bury victims more quickly and is extremely difficult to excavate during rescue. They often release during the warmest part of the day, making afternoon touring in spring conditions particularly hazardous.
The Three-Stage Release Process
Avalanche release follows a predictable sequence. Stage 1: Initiation. A fracture starts within the weak layer, often at a stress concentration point like a shallow spot in the snowpack, a rock outcrop, or beneath a rider’s weight. The fracture propagates laterally through the weak layer at speeds of 30-100 meters per second, often far faster than the rider can travel. Stage 2: Propagation. Once the fracture has weakened a sufficient area, the slab begins to separate from the underlying snowpack. This separation can occur nearly instantaneously across a wide area. Stage 3: Release. The slab accelerates downslope under gravity, entraining additional snow and increasing in size. A small initial fracture can quickly grow into a large avalanche through this entrainment process.
Research using controlled explosives has shown that a trigger can initiate fracture propagation well beyond the immediate area of impact. A snowboarder standing on a slope may trigger an avalanche hundreds of meters away where the snowpack is shallower or weaker. This is why “stand on the rocks”—a common backcountry safety practice—doesn’t always work. The stress from your weight can propagate through the rock into the surrounding snowpack.
Critical Slope Angles
While avalanches can occur on slopes as low as 25° and as steep as 60°, the critical range is 30-45°, with 38° being the most common angle for slab releases. Snowboarders should understand that their descent angle during turns is often steeper than the terrain angle. On a 35° slope, a carved turn can generate forces equivalent to a much steeper slope. This is why controlled, measured turns are essential—you’re managing not just the terrain angle but the dynamic forces your riding creates.
Use a clinometer app on your phone or a traditional inclinometer to measure slope angles before committing to a line. Remember that convex slopes are more dangerous than concave slopes because they experience greater tensile stress. A convex roll at 35° is significantly more dangerous than a straight 35° face. Similarly, slope transitions—where a flat area meets a steep face—create stress concentrations that can initiate fractures.
Fracture Mechanics and Propagation
The mechanics of fracture propagation in snow are remarkably similar to fracture mechanics in engineering materials. The critical difference is that snow fracture is dynamic—the crack speed and propagation distance depend on the stress state of the snowpack at the moment of initiation. Researchers use the concept of crack propagation speed to assess instability: fast-propagating cracks indicate a snowpack primed for large releases, while slow-propagating cracks suggest limited fracture energy.
The Extended Column Test (ECT), developed by avalanche researchers, directly measures propagation potential. An ECT that produces propagation (ECTP) across the full column indicates high fracture propagation potential and elevated avalanche danger. An ECT that produces localized fracture without propagation (ECTN) suggests limited propagation potential. This distinction is critical for assessing whether a triggered fracture will remain localized or propagate into a large slab release.
4. The 5×5 Backyard Beacon Protocol (and Beyond)
Professional guides use the 5×5 system: five steps, five meters. But for backcountry snowboarders, the protocol extends to five critical safety checkpoints before each descent.
- Slope angle: 30°+ is prime slide terrain. Use inclinometer app or compass.
- Wind loading: Cornices, pillows, drifting snow. Leeward slopes hold slabs.
- Couloir/terrain trap: If it slides, where do you go? Avoid gullies, trees, cliffs.
- Group separation: One at a time. Watch from safe island, not directly below.
- Escape route: Always plan a diagonal exit to dense timber or ridge.
Never trust “it hasn’t slid yet.” A study by snowboardbible shows 43% of avalanche fatalities occurred on slopes with no recent slides. Instability is invisible. Your helmet technology can mitigate rotational impact during a tumble, which is why MIPS snowboard helmet technology explained is essential reading—but a helmet does not prevent burial. It only helps you survive the ride if the snow breaks.
Applying the 5×5: A Field Scenario
Imagine you’ve skinning toward a north-facing couloir. Stop at the base. Pull out your clinometer: 34°. Check. Scan for cornices: small cornice 200m above, recently loaded. Check. Identify terrain traps: creek bed at the bottom, tight trees on the left. Check. Discuss with your partner: one descends while the other watches from the rock band on the right. Check. Confirm escape route: diagonal to the treeline on the right side. Check. All five conditions met. Now discuss: does the snowpack support this line? Have you tested stability? Are there recent avalanche signs? This is where the 5×5 meets snowpack assessment—they work together, not in isolation.
The Red Flag System
Establish clear red flags before entering avalanche terrain. These are non-negotiable indicators that demand an immediate change of plans. Red flag #1: Any signs of recent avalanche activity on similar aspects and elevations. Red flag #2: Persistent whumpfing sounds—the sound of the snowpack collapsing under your weight, indicating weak layers failing. Red flag #3: Shooting cracks that propagate from your feet. Red flag #4: Rapid temperature rise or rain, which weakens snow bonds. Red flag #5: Heavy, wind-driven precipitation creating rapid loading. If you observe any single red flag, descend to lower-angle terrain. Two or more red flags should end your tour.
5. The Avalanche Danger Scale: Your Daily Briefing
Every backcountry rider should check the avalanche forecast before every outing. The North American Avalanche Danger Scale uses five levels to communicate avalanche danger and recommended travel habits. Understanding this scale is as important as understanding your beacon—it tells you what terrain is appropriate for the day.
| Level | Rating | Likelihood of Avalanches | Recommended Action |
|---|---|---|---|
| 1 | Low | Natural avalanches unlikely; human-triggered avalanches unlikely | Generally safe; be cautious in steep terrain |
| 2 | Moderate | Natural avalanches unlikely; human-triggered avalanches possible | Use careful route-finding; evaluate snow on terrain features |
| 3 | Considerable | Natural avalanches possible; human-triggered avalanches likely | Cautious route-finding essential; conservative terrain choices |
| 4 | High | Natural avalanches likely; human-triggered avalanches very likely | Travel in avalanche terrain not recommended |
| 5 | Extreme | Widespread natural avalanches certain | Avoid all avalanche terrain |
The danger rating applies to specific elevation bands, aspects, and slope angles—not necessarily to the entire mountain. A “Considerable” rating on north-facing slopes above treeline doesn’t mean south-facing slopes below treeline are equally dangerous. Always read the detailed forecast discussion, which explains which terrain features are most problematic and why.
How Danger Ratings Are Determined
Avalanche forecasters synthesize data from multiple sources: weather station measurements, snowpack observations from professional observers, avalanche incident reports, and weather model forecasts. They apply the Avalanche Danger Scale matrix, which combines avalanche size, probability of release, and expected distribution. The result is a nuanced assessment that accounts for the specific conditions in each forecast zone.
Understanding persistence is key to reading forecasts. When forecasters mention “persistent slab problem,” they’re referring to weak layers that don’t heal quickly—buried surface hoar, depth hoar, or faceted layers. These problems can maintain “Considerable” or “High” danger for weeks, even during dry weather. Conversely, “storm slab” problems tend to stabilize within 24-48 hours after a storm ends.
International Danger Scales
The European Avalanche Warning Services (EAWS) use a similar five-level scale but with different criteria. The European scale includes “European Avalanche Danger Levels” with specific definitions for each level. If you’re touring in the Alps, Chamonix, or other European backcountry, familiarize yourself with the local scale. Similarly, avalanche centers in Japan, New Zealand, and Canada each have region-specific forecasting that accounts for local snowpack characteristics and terrain.
🔑 Key Takeaway
Always check avalanche.org (US), avalanche.ca (Canada), or your local avalanche center before every tour. The forecast is your first and most important safety tool—more valuable than any gear.
6. Mountain Weather: Forecasting for the Backcountry Rider
Weather drives avalanche conditions. Understanding mountain meteorology isn’t just about staying warm—it’s about predicting when and where the snowpack will become unstable. Every backcountry snowboarder should develop basic weather literacy, including the ability to read weather models, interpret cloud formations, and understand how temperature, wind, and precipitation interact with terrain.
Temperature and the Snowpack
Temperature affects snowpack stability in multiple ways. Rapid warming (rising temperatures, especially with solar radiation) weakens snow bonds by introducing liquid water between grains. A 5°C temperature rise in a single day can dramatically increase avalanche danger on sun-affected aspects. Rapid cooling can create temperature gradients within the snowpack, driving kinetic metamorphism and facet formation. The sweet spot for stability is gradual, moderate temperatures with minimal fluctuation.
Nighttime radiative cooling can create surface hoar on clear, cold nights—setting up weak layers that will be buried by future snowfall. This is why clear weather during a multi-day storm cycle can be more dangerous than continuous cloud cover. Forecasters pay close attention to overnight minimum temperatures and cloud cover as predictors of surface hoar formation.
Wind: The Great Shaper
Wind is the most powerful force shaping avalanche danger. Wind transports snow from windward slopes and deposits it on leeward slopes, creating wind slabs—dense, cohesive layers of wind-packed snow that sit atop weaker layers. A moderate wind (20-30 mph) can transport enormous volumes of snow in a single storm cycle, creating dangerous slabs in terrain that was safe just hours before.
Learn to read wind indicators: cornices (wind-deposited snow overhanging a ridge), wind-affected snow textures (sastrugi, ripples), and the distribution of snow (deep on leeward aspects, scoured on windward). Wind direction is critical—a north wind loads south-facing slopes, a west wind loads east-facing slopes. Always consider how recent wind patterns have affected the terrain you’re traveling through.
Precipitation Intensity and Duration
The rate and duration of snowfall directly impacts loading rates and avalanche danger. Intense precipitation (>2 cm/hour of water equivalent) can overwhelm the snowpack’s ability to adjust, rapidly increasing stress on weak layers. The concept of storm slab refers to cohesive layers of new snow that form as storm snow settles and bonds. Storm slabs typically stabilize within 24-48 hours after storm intensity decreases, but can remain reactive longer in cold temperatures.
Rain is the most dangerous form of precipitation for avalanche danger. Rain adds weight (1 cm of rain = 1 cm of water, weighing 10x more than snow), introduces liquid water that weakens bonds, and can trigger widespread releases. Rain-on-snow events produce some of the largest and most destructive avalanches. If rain is forecast at your touring elevation, strongly consider postponing or choosing lower-angle terrain.
Cloud Reading for Backcountry Riders
Cloud types tell you what’s coming. Altocumulus lenticular clouds (lens-shaped) indicate strong upper-level winds and potential turbulence—expect wind loading. Cumulonimbus clouds (tall, anvil-shaped) signal convective activity—heavy precipitation, lightning, and rapid temperature changes. Stratus clouds (low, flat, gray) often indicate stable air but can hide terrain features and reduce visibility. Cirrus clouds (thin, wispy, high-altitude) often precede a weather system—storms may be 12-24 hours away.
Develop the habit of checking weather models (GFS, NAM, ECMWF) before every tour. Focus on the mountain-specific forecasts rather than valley-floor forecasts—temperatures at 3000m can be 15-20°C colder than at the trailhead. Wind speeds increase dramatically with elevation and exposure. Use tools like mountain-forecast.com or windy.com to get terrain-specific predictions.
Building a Personal Weather Station
For regular backcountry riders, consider investing in a portable weather station or at minimum a reliable thermometer, wind gauge, and barometer. Track daily observations: temperature, wind speed/direction, precipitation, cloud cover, and visibility. Over time, you’ll develop an intuitive understanding of how local weather patterns affect your specific touring areas. This hyper-local knowledge, combined with official forecasts, gives you a powerful decision-making tool.

Smith Nexus MIPS
Koroyd + MIPS, low-bulk profile, works with hoods and audio. The benchmark for sidecountry/backcountry helmets.
⛑️ BUY ON AMAZON7. The Non‑Negotiable Gear System
Resort snowboarders obsess over camber profiles and wax; backcountry riders obsess over beacon frequency, probe length, shovel blade. You carry three critical items: 457kHz beacon, 240cm+ probe, metal-blade shovel. Anything less is a gamble. Additionally, an avalanche airbag (ABS, JetForce, Alpride) increases survival probability by 50% – it keeps you on the surface or reduces burial depth.
✅ Beacon must‑haves
- Multi‑antenna (3+), marking function
- Analog/digital hybrid (e.g., Barryvox S2)
- Wide search strip: 50–70m
- Familiar interface – practice weekly
⚠️ Frequent mistakes
- Wearing beacon under thick layer
- Old batteries (replace at 40%)
- No aluminum shovel (plastic fails)
- Probe shorter than 240cm
Your splitboard or snowboard needs appropriate tuning: a well‑waxed base glides uphill efficiently. Snowboard maintenance basics: the complete home care guide reminds us that sintered bases hold wax longer—critical when you’re miles from the trailhead. A sticky, slow board forces more work, more sweat, and clouds your goggles.
Gear Comparison: Popular Backcountry Transceivers
| Model | Antennas | Marking | Range | Best for |
|---|---|---|---|---|
| BCA Tracker 4 | 3 | Yes (flag) | 60m | Simplicity, reliable |
| Mammut Barryvox S2 | 3 | Yes + group check | 70m | Fastest processor |
| Ortovox Diract Voice | 3 | Acoustic feedback | 50m | Voice guidance |
| Pieps DSP Pro | 3 | Pro version | 60m | Durability |
The Complete Backcountry Gear Checklist
Beyond the “big three” (beacon, probe, shovel), your gear list should include layers for changing conditions, navigation tools, emergency supplies, and items specific to your touring style. Here’s a comprehensive breakdown organized by priority:
Essential (carry every tour): Avalanche transceiver (fresh batteries), 240cm+ probe, metal-blade shovel, repair kit for splitboard bindings/skins, headlamp with spare batteries, emergency bivy or space blanket, first aid kit, whistle, sun protection (sunscreen, lip balm, sunglasses), water (minimum 1 liter), high-energy food, map and compass, fully charged phone (for emergency use only), satellite communicator (InReach, SPOT, or similar).
Recommended (conditions-dependent): Avalanche airbag pack, ski crampons (for icy traverses), ice axe (for steep bootpacks), GPS device, radio/communication device for group, extra goggles (different lens for changing light), hand warmers, thermos with hot drink, extra skins (for multi-day tours), tent and sleeping system (for overnight expeditions).
Avalanche Airbag Technology: Airbag systems work on the principle of inverse segregation (the “Brazil nut effect”)—a larger object surrounded by smaller particles tends to rise to the surface during mixing. By inflating a large airbag around the rider, the system increases the person’s volume relative to the surrounding snow, helping them stay on or near the surface during an avalanche. Modern systems like JetForce use battery-powered fans that can reinflate if the bag is punctured. Alpride E2 uses supercapacitors for instant deployment. ABS uses compressed gas canisters. Each system has trade-offs in weight, cost, and reliability.
Repair Kits for the Backcountry
Carry a compact repair kit that addresses common failures: a multi-tool with pliers and screwdrivers, duct tape wrapped around a pencil, zip ties, spare binding screws, extra skin glue strips, a small length of cord, and emergency patches for delaminated bases. Test your repair skills before you need them—practice swapping a binding in your living room, fix a delamination with epoxy, repair a torn skin. The ability to field-repair your equipment can mean the difference between walking out under your own power and requiring rescue.
8. Beacon Proficiency: The 60‑Second Target
In a burial, time to first probe is the only metric that matters. Oxygen lasts 15 minutes; after 10 minutes, survival drops exponentially. Practice beacon searches until you can pinpoint a deep signal under 90 seconds. Use the strip search method: walk straight lines, perpendicular to fall line. When signal appears, follow flux lines, reduce gain, use fine grid. Always confirm with probe before digging.
Search Technique: From Coarse to Fine
A beacon search follows three phases. Phase 1: Coarse search. Move quickly in a grid pattern perpendicular to the most likely burial direction. Keep the beacon at waist height, pointed downhill. Your search strips should be spaced approximately 40-50 meters apart (for a 60m-range beacon). Move fast—this is about covering ground, not precision. Phase 2: Signal acquisition. When you first hear a signal, note the distance reading. Move in the direction of decreasing distance (the numbers should go down as you approach). When the numbers start increasing again, you’ve passed over the burial. Turn 90° and search in that direction. Phase 3: Fine search. Within 3 meters of the burial, switch to the fine/search mode on your beacon. Move slowly, keeping the beacon close to the snow surface. When you get the lowest distance reading and the arrows converge, mark that spot. This is your probe point.
The most common mistake is stopping the coarse search too early—when you first hear a signal, resist the urge to slow down. Continue your search strip until you’re confident you’re in the general burial area. A false signal or a second burial can mislead you. Always search the entire slope systematically rather than rushing to the first signal.
Multiple Burial Protocol
In a multiple burial scenario, your beacon’s marking function becomes critical. After locating the first burial, mark it (most beacons have a flag or mark button), then continue searching for additional signals. The marked burial will emit a different signal pattern, allowing you to distinguish it from unmarked burials. Communicate clearly with your rescue partners: “First burial marked at 1.2 meters—continue searching northwest.” Practice multiple burial scenarios regularly; they’re more common than you think—40% of avalanche incidents involve two or more burials.
Beacon Maintenance and Testing
Test your beacon before every tour. Turn it on, verify it receives signals, check battery level, and perform a quick range test with a partner. Clean the battery contacts regularly with a pencil eraser. Store beacons in a cool, dry place—not in a hot car or direct sunlight. Replace batteries when they reach 40% capacity or at the start of each season, whichever comes first. Carry spare batteries in your repair kit. Some guides recommend carrying a second, lightweight beacon as a backup—a “sacrificial” beacon that can be left in send mode if the primary fails.
9. Rescue Drills: Probe Strike & Shovel Snowflow
Probing should be systematic—start downhill of the last signal, poke every 25cm in a grid. Once you strike, leave probe in place. Shoveling: don’t excavate a crater; move snow downhill in an L‑shape pattern. Clear the airway first. Many victims die of asphyxiation from ice mask or re‑breathed CO2. If you ride with a partner in Japan or Utah, the snow density varies: Utah snowboard resorts boast 6% moisture powder, while maritime snow is denser. Denser snow suffocates faster. Practice with rescue drills in all conditions.
Shoveling Technique: The Conveyor Belt Method
Effective shoveling is about moving volume, not digging a hole. Use the conveyor belt method: position shovelers in a line from the probe strike point downhill. The first person (closest to probe) pries snow blocks loose and passes them to the second person, who moves them to the third, who moves them further downhill. This assembly-line approach moves snow much faster than individual digging. In deep burial (1.5m+), you’ll need 4-6 shovelers working in coordination. Practice this drill until it’s muscle memory—every second counts.
Airway Priority and Survival Physiology
Once you reach the victim, your first priority is the airway. An avalanche victim typically has an air pocket around their face (snow doesn’t compact instantly), but this pocket shrinks as surrounding snow settles. Clear snow from the mouth and nose immediately, even before fully extracting the body. If the victim is conscious, they can help by exhaling to create space. If unconscious, tilt the head back and clear the airway. Begin rescue breathing as soon as the airway is clear—many victims are resuscitated after extended burial.
Victims in cardiac arrest from avalanche burial have significantly better resuscitation outcomes than cardiac arrest from other causes. The cold slows metabolism, protecting the brain from oxygen deprivation. Victims buried in cold, dry snow have been successfully resuscitated after 60+ minutes of burial. Do not give up. Continue CPR for at least 60 minutes unless the victim shows signs of life or rescue personnel advise otherwise.

Black Diamond Evac 7 + QuickDraw
Evac 7 has D‑shaped handle, aluminum blade; 260cm probe collapses fast. All‑in rescue combo.
🛒 SEE ON AMAZON10. Splitboard Specifics: Transitions Are Danger Windows
Splitboarders face unique risks: transitions take time, often on exposed ridges or convexities. Minimize time stationary in runout zones. Memorize the 3‑minute changeover; practice in your living room. What is a splitboard: how snowboarders ride uphill is foundational—but more important is the safety transition checklist: before removing split mode, confirm your anchor (ski crampons, heel risers). Keep beacon on body, never in backpack.
Transition Efficiency: Time is Safety
Every second you spend stationary in avalanche terrain is a second you’re vulnerable. Professional splitboarders aim for sub-2-minute transitions. The key is muscle memory—practice the sequence until it’s automatic. From top to bottom: switch beacon to send (if you were searching), stow probe and shovel, remove skins (fold glue-on-glue for efficiency), align binding brackets, lock touring pins, flip toe piece to ride mode, flip heel piece to ride mode, check both bindings are secure. Time yourself. Set goals. Competition drives improvement.
Climbing Skins: Selection and Maintenance
Skin selection affects your uphill efficiency and safety. Mohair (nylon blend) skins offer the best glide-to-grip ratio and are ideal for most backcountry conditions. Pure nylon skins grip better on steep, icy terrain but are slower. Hybrid skins balance both properties. Glue quality matters more than most riders realize—worn-out glue means skins that slip on steep terrain, forcing you to bootpack in conditions where skinning is safer. Reglue your skins annually or whenever the adhesive becomes contaminated with dirt or debris.
Binding Systems and Failure Points
Splitboard binding systems have evolved significantly, but each has failure modes. Pin-based systems (Voile, Spark) can develop play over time—test your pins regularly. Clamp systems (Karakoram) are more secure but heavier. The critical check is the tour-to-ride transition: ensure your binding is fully seated and locked before descending. A binding that松脱 mid-turn is catastrophic. Carry spare parts specific to your binding system: extra pins, a multi-tool compatible with your hardware, and emergency repair tape.
11. Terrain Traps: Avoid the Deadfall
Avalanches aren’t the only killers. Tree wells, creek holes, and cliff bands lurk under fresh snow. In deep snowpack regions like Japan snowboarding trips: the ultimate guide to riding Japow, riders can be inverted in tree wells in seconds. Protocol: never ride tight trees alone; keep board within reach; if you fall head‑first into a well, attempt to pack snow under feet to push upward.
Identifying Terrain Traps in Your Line
Terrain traps are features that increase the consequences of an avalanche, even a small one. Gullies funnel avalanche debris into concentrated flow paths, increasing burial depth. Creek beds and rock bands create holes where debris piles up. Cliff bands below your line mean a small slide could carry you over a vertical drop. Dense timber creates impact hazards and makes rescue extremely difficult. Before committing to any line, trace the full path from top to bottom and ask: “If this slides, what happens at the bottom?”
Convex terrain—where the slope angle increases as you descend—is particularly dangerous. The convex roll places the snowpack under tension, making it more likely to fracture. Riders often don’t feel the transition from low-angle to steep terrain because they’re focused on their turns. Train yourself to sense convex rolls by checking your slope angle regularly with a clinometer app.
12. Route Planning & Navigation: Your Pre-Tour Blueprint
Effective route planning separates experienced backcountry riders from novices. Before every tour, study the terrain map, identify avalanche paths, plan escape routes, and establish turnaround times. A well-planned route accounts for terrain traps, sun exposure, wind loading potential, and exit options at every decision point.
Map Reading and Terrain Association
Topographic maps reveal critical terrain features: slope angle (contour line spacing), aspect (contour line direction), drainage patterns, ridgelines, and vegetation boundaries. Learn to identify avalanche paths on maps—look for broad, open bowls above treeline with deposition zones below. These terrain features have released avalanches historically and will release again. Cross-reference your map with avalanche center forecasts to identify specific areas of concern for the day.
GPS devices and smartphone apps (Gaia GPS, CalTopo, OnX Backcountry) provide invaluable navigation support, but they’re supplements to—not replacements for—map and compass skills. Batteries die, screens freeze, satellites lose signal in deep valleys. Carry a physical map in a waterproof case and know how to navigate by compass bearing and terrain association. Practice these skills in benign conditions so they’re automatic when visibility drops.
Escape Route Planning
Every route should have multiple escape options. As you ascend, identify features that could serve as safe havens: ridgelines, dense timber, rock bands, or benches above the runout zone. Mark these mentally (or on your map) as decision points. At each point, ask: “Can I reach safety from here if conditions deteriorate?” If the answer is no, you’re committing to a terrain trap. Redesign your route.
The concept of “safe islands” is critical for group travel in avalanche terrain. Safe islands are terrain features that provide refuge during a slide: rocky outcrops above the fall line, dense trees on low-angle terrain, or ridgelines. Position your group members on safe islands while individuals descend through avalanche terrain. Communicate clearly: “I’m dropping in. Watch from the rock band. If I trigger something, come to me.”
Timing Your Tour
Start early. This isn’t just about getting more vertical—it’s about traveling during the safest weather window. Morning temperatures are typically stable, winds are lighter, and solar radiation hasn’t begun warming the snowpack. In spring conditions, aim to be off steep terrain by noon. In winter storms, plan to be below treeline before visibility drops. Build buffer time into your schedule for unexpected delays: a skin track that takes longer than expected, a transition that requires more attention, or a weather change that forces a route modification.
13. Group Dynamics & Communication
The human element of backcountry snowboarding is as critical as the technical. Poor group dynamics kill. A 2019 study found that 67% of avalanche fatalities involved interpersonal pressure—riders felt unable to voice concerns because of social hierarchy, desire to fit in, or fear of being the “buzzkill.” Establish clear communication norms before you enter the backcountry.
Role Assignment
Assign specific roles at the trailhead: Navigator (responsible for route-finding and timing), Weather Watcher (monitors conditions and communicates changes), Snow Observer (conducts stability tests and notes observations), Group Leader (makes final terrain decisions). Rotate roles throughout the day to prevent fatigue and ensure everyone stays engaged. The Group Leader role carries the authority to call a turnaround—it should be someone with recent AIARE training and experience in the specific terrain.
Communication Protocols
Establish clear, simple communication protocols before entering avalanche terrain. Use standardized phrases: “Dropping in” (I’m descending), “Watch me” (I need visual supervision), “Safe” (I’ve reached a safe position), “Hold” (stop and wait), “Turn around” (conditions require retreat). Avoid ambiguous language—shouting “Watch out!” could mean anything from “rock above” to “avalanche starting.” Clarity saves lives.
Radios are essential for groups larger than two or when separated by terrain. FRS/GMRS radios work line-of-sight but have limited range in deep valleys. Digital radios offer clearer reception but shorter range. Test your radios before every tour and carry spare batteries. Establish a communication schedule: check in every 15 minutes when separated, more frequently in deteriorating conditions.
Managing Group Size
Optimal group size for backcountry snowboarding is 3-4 riders. Larger groups move slower, make decisions by committee (which often means the loudest voice wins), and create larger debris fields during rescue. Smaller groups (2 riders) offer maximum flexibility but have reduced rescue capacity if one person is injured. For groups of 3-4, establish clear descent order: most experienced rider descends first (to assess conditions), followed by least experienced (while being watched from above), then the remaining riders.
14. Decision-Making Frameworks for Avalanche Terrain
Structured decision-making frameworks transform gut feelings into systematic assessments. The Avalanche Problem Framework, used by avalanche centers worldwide, categorizes instability into distinct problem types: new snow, wind slab, persistent slab, deep persistent slab, wet slab, loose wet, cornices, and glide slab. Each problem type has specific terrain management strategies. Understanding which problem is dominant on a given day shapes your terrain choices.
The Levers of Risk Management
Risk management in avalanche terrain involves four levers: terrain choice (angle, aspect, elevation, features), timing (when you’re in specific terrain), group management (separation, communication, rescue capability), and preparation (training, fitness, equipment). You adjust these levers based on conditions. On a “Low” danger day, you might open up to steeper terrain. On “Considerable” with persistent slabs, you pull every lever toward caution: lower angles, fewer people in the path, more conservative timing.
Practice what-if scenarios with your partners before every tour. “What if the snowpack is worse than we expect? What’s our backup objective?” “What if weather moves in early—do we have an exit route?” “What if someone gets injured—how do we get them out?” These conversations force you to think through contingencies while you’re still at the trailhead, with clear heads and no pressure.
The Continuum of Caution
Think of your risk management as a sliding scale, not a binary switch. On one end: maximum caution (low-angle terrain, minimal exposure, conservative timing). On the other end: maximum risk (steep terrain, significant exposure, tight timing). Every day, conditions push you toward one end or the other. The goal is to match your position on the scale to the objective reality of the day. Self-awareness is key: are you in the right mental state to manage higher-risk terrain today? Did you sleep well? Are you emotionally compromised? These factors matter.
15. Human Factors: Ego, Familiarity, and the “Acceptance Heuristic”
Data from 2020–2025 shows 92% of avalanches are triggered by the victim or someone in their party. Human factors outweigh snowpack. Familiarity heuristic: “I rode this last week, it’s fine.” Social acceptance: you don’t want to be the one who cancels the pow run. Use the 1‑2‑3 checklist: 1) Am I tired/hungry/stressed? 2) Am I influenced by the group? 3) Would I ride this if I were alone? If the answer to any is “maybe” – stop.
The Normalization of Deviance
When you repeatedly take a specific line without incident, you develop a false sense of security. This is the normalization of deviance—the gradual acceptance of risk that was once considered unacceptable. “I’ve ridden this slope 50 times and nothing happened” ignores the statistical reality: each time, the probability of avalanche was non-zero. The mountain doesn’t remember your previous successes. Today’s conditions are independent of yesterday’s.
Counter this bias by maintaining a healthy respect for the mountain regardless of your experience level. Veteran backcountry riders are killed every season—not because they lack skill, but because familiarity breeds complacency. Treat every tour as if it’s your first. Ask fundamental questions: Is this terrain appropriate for today’s conditions? Am I confident enough in my assessment to stake my life on it?
The Role of Expertise in Decision-Making
Expertise helps—but it also creates blind spots. Highly experienced riders can fall prey to overconfidence bias, believing their judgment is more reliable than it actually is. Research shows that expert decision-making is most reliable when supported by systematic frameworks (like the ones described in this guide) rather than relying on intuition alone. Your 20 years of experience are valuable, but they’re not a substitute for checking the avalanche forecast, digging a snowpit, and assessing conditions objectively.
16. Wet & Storm Slab Dynamics
Wet avalanches represent a distinct hazard profile compared to dry slab avalanches. They typically occur when solar radiation or warm air temperatures introduce liquid water into the snowpack, reducing cohesion between grains. Wet avalanches are slower (30-50 km/h vs. 100+ km/h for dry slabs) but involve denser, heavier snow that buries victims more quickly and is significantly harder to excavate during rescue.
Timing Is Everything
Wet avalanche danger follows a daily cycle. Risk is lowest in the early morning when temperatures are coldest and the snowpack is frozen. As the sun rises and temperatures increase, liquid water percolates through the snowpack, weakening bonds. Danger peaks in the early afternoon, then decreases as temperatures drop and the snowpack refreezes. This cycle means that terrain safe at 7 AM may be deadly by noon. In spring conditions, establish a hard turnaround time—typically by 11 AM to noon on solar aspects.
Indicators of wet avalanche instability include: rollerballs (small, round snow balls rolling down the slope), point releases from rocks or dark objects that absorb solar radiation, saturated snow (snow that sounds “wet” when you walk on it), and recent wet avalanche debris. If you observe any of these indicators, descend immediately to lower-angle terrain and avoid steep, sun-affected slopes for the remainder of the day.
Storm Slab: The Post-Storm Hazard
Storm slabs form during and immediately after snowfall events. New snow settles and bonds, creating a cohesive layer that can sit atop weaker, pre-existing layers. Storm slabs are most dangerous in the first 24-48 hours after a storm, when bonding is incomplete. They’re typically most reactive on leeward aspects where wind has deposited additional snow, and on steep terrain where gravity accelerates settlement.
After a storm, observe the snowpack for signs of storm slab instability: shooting cracks that propagate from your board, whumpfing sounds, and recent natural avalanche activity. If these signs are present, stick to low-angle terrain (below 30°) until the storm slab has time to bond. The general rule: wait 24-48 hours after the storm ends before venturing into steeper terrain, and even then, test stability carefully before committing.
17. Cornice Management: Avoiding the Overhead Hazard
Cornices are overhanging masses of wind-deposited snow that form on the leeward side of ridges and cliffs. They can extend 10-30 meters beyond the ridge crest and weigh many tons. Cornices break without warning, often triggered by the cornice’s own weight as it grows, or by a rider on the ridge above. The debris from a cornice fall can trigger avalanches on the slopes below.
Safe Travel Near Cornices
Never travel directly under a cornice. The debris field from a cornice fall can be enormous, and the cornice can extend further than you think. Stay at least 3 times the cornice height below the ridge. When traveling on a ridge with cornices, stay on the windward side—the side the cornice is growing away from. Test the cornice edge with a pole before committing weight. The cornice edge can be 1-2 meters back from the visible overhang.
Cornices grow during wind events and can continue growing for days after the wind stops. This delayed growth creates a hidden hazard: you might travel safely beneath a cornice on Monday, only for it to grow and break on Tuesday. Monitor cornice size over multiple days—if it’s noticeably larger than your last visit, exercise extreme caution.
18. Travel Techniques for Avalanche Terrain
How you move through avalanche terrain matters as much as where you move. Group spacing is the most important travel technique: never have more than one person on a suspect slope at a time. Others should observe from a safe island or ridge. Descent angle matters—ride controlled turns that manage speed and keep you within your chosen line. Avoid “pinning it” through avalanche terrain.
Switchback and Kick-Turn Technique
Efficient uphill travel reduces time in avalanche terrain. Master the kick turn—the fundamental switchback technique for steep skin tracks. Practice on flat ground first: step uphill, rotate your body 180°, plant the downhill ski/skin, and transfer weight. In avalanche terrain, position switchbacks on benches or low-angle terrain, not on convexities. Each switchback should be placed where an avalanche would flow around you, not through you.
Flat touring (traveling across a slope rather than up or down) is the most efficient way to cross avalanche terrain. It minimizes exposure to overhead hazard and keeps the group on stable, low-angle terrain. When flat-traveling, maintain spacing between riders and avoid bunching up at transition points. If you must cross a steep face, do it quickly and purposefully—don’t linger.
Bootpacking Considerations
When terrain is too steep or icy for skinning, you’ll need to bootpack. Bootpacking in avalanche terrain requires the same protocols as skinning: one person at a time, observers on safe islands, careful route selection. Kick steps firmly to create secure platforms. Use an ice axe on slopes greater than 35°. Place your pack on the uphill side for stability. Bootpacks are typically slower than skin tracks, so factor this into your timing—add 30-50% more time for a bootpack section compared to an equivalent skin track.
19. Sluff Management in Steep Terrain
Sluff is the loose surface snow that moves during and after a turn. On steep, powder-covered terrain, sluff can accumulate rapidly and knock you off balance—particularly dangerous near terrain traps or cliff bands. Managing sluff is a critical skill for riding steep backcountry lines safely.
The Sluff Cycle
When you make a turn in powder, you displace snow that then flows downslope. On a 40° slope, this displaced snow can travel 50-100 meters before settling. If you’re making linked turns, each turn generates additional sluff that compounds the previous turn’s sluff. The result: a flowing river of loose snow that can easily knock you over, especially near the fall line.
Manage sluff by turning across the fall line rather than straight down. This redirects sluff away from your descent path. On very steep terrain, use a “sluff management” technique: make one or two turns, then traverse to the side while the sluff drains, then continue down. This pause-and-drain approach prevents sluff from building up beneath you.
Assessing Sluff Potential
Before dropping into steep terrain, assess sluff potential. Fresh, unconsolidated powder creates the most sluff. Wind-affected or settled snow creates less. Temperature affects sluff behavior—cold snow sluffs more readily than warm, cohesive snow. Consider the slope’s aspect: south-facing slopes in spring may have surface melt that reduces sluff, while north-facing slopes retain cold, sluffy conditions longer.
Identify sluff runout zones before you ride. Where will the sluff accumulate? Is it flowing toward a terrain trap? Is there a gully or creek at the bottom? If the sluff runout is problematic, consider a different line or technique. Sluff is not just an inconvenience—it can be a serious hazard, particularly for snowboarders whose wide boards displace more snow than skis.

Arc’teryx Volt 40L Airbag
Superlight Alpride E2 supercapacitor, dual deployment, integrated carry. The pinnacle of backcountry protection.
🎒 CHECK LATEST PRICE20. Emergency First Aid in the Backcountry
When you’re hours from the nearest road, first aid knowledge becomes a survival skill. Backcountry first aid differs from urban first aid because help is not coming quickly. You must stabilize injuries, manage pain, prevent hypothermia, and prepare for evacuation—all with limited supplies and in challenging conditions.
The Primary Survey (ABCDE)
Follow the standard emergency assessment protocol: Airway (is it clear?), Breathing (is the patient breathing?), Cculation (is there bleeding?), Disability (is the patient conscious?), Exposure (protect from cold). In avalanche burial, airway and breathing are the priorities—clear the airway immediately, begin rescue breathing if needed. In trauma cases (tree impacts, falls), control major bleeding first, then assess for spinal injury.
Trauma Assessment
After controlling immediate life threats, perform a systematic head-to-toe assessment. Look for: deformities (fractures), contusions (bruising), abrasions (scrapes), punctures (impalements), burns (friction from snow/ice), and tenderness. Pay special attention to the spine—if the patient fell or was struck, assume spinal injury until proven otherwise. Immobilize the spine before moving the patient. Use your splitboard as a splint for suspected fractures—secure with duct tape, straps, or cord.
Pain Management
Manage pain aggressively—pain increases metabolic demand, accelerates fatigue, and impairs decision-making. Ibuprofen (400-600mg) is effective for most musculoskeletal pain. Acetaminophen can be used if ibuprofen is contraindicated. Avoid opioids in the backcountry—they suppress respiration, cause nausea, and impair judgment. If you carry prescription pain medication, know the dosages and contraindications. Pain management is a balance: enough to keep the patient functional, not so much that it masks serious symptoms.
21. Cold Weather Injuries: Hypothermia & Frostbite
Cold injuries are the most common medical emergencies in backcountry snowboarding. Hypothermia (core temperature below 35°C) develops when the body loses heat faster than it can produce it. Frostbite (freezing of skin and underlying tissue) occurs when exposed tissue freezes. Both can be life-threatening, but both are preventable with proper preparation and response.
Hypothermia Stages and Response
Mild hypothermia (32-35°C): shivering, fumbling hands, slurred speech, mild confusion. Response: stop activity, add insulation layers, consume warm, sugary drinks, generate heat through movement (do NOT exercise vigorously). Moderate hypothermia (28-32°C): violent shivering → shivering stops, drowsiness, irrational behavior. Response: prevent further heat loss (remove wet clothing, add dry insulation), apply heat to core (warm water bottles, chemical heat packs), handle gently (rough handling can trigger cardiac arrest). Severe hypothermia (below 28°C): no shivering, loss of consciousness, weak pulse. Response: treat as a medical emergency, handle extremely gently, begin CPR if no pulse, evacuate immediately.
The classic field test for hypothermia: ask the patient to touch their thumb to each fingertip. If they can’t perform this simple coordination task, they’re hypothermic. This “finger-to-nose” test is quick, reliable, and doesn’t require equipment.
Frostbite Assessment and Treatment
Frostbite progresses through stages: frostnip (numbness, white/gray skin, no tissue damage—rewarm with body heat), superficial frostbite (skin feels hard but underlying tissue is soft—rewarm carefully), deep frostbite (entire area feels hard, no sensation—medical emergency). Rewarm frostbitten tissue only if you can keep it warm—refreezing causes significantly more damage than the initial freeze. In the backcountry, if you can’t guarantee continuous warmth, leave frostbitten tissue frozen until you reach definitive care.
Prevention is paramount: recognize the early signs (numbness, white/gray skin patches), and respond immediately by adding insulation, covering exposed skin, and generating heat. High-risk areas are extremities: fingers, toes, ears, nose. Wind chill dramatically accelerates frostbite risk—8 hours of exposure at -15°C with 30 mph wind can produce frostbite in minutes.
22. Communication & Satellite Devices
In the backcountry, your phone is useless for communication. Cell towers don’t reach remote terrain, and even when they do, cold batteries die quickly. Satellite communicators (Garmin InReach, SPOT, ACR Bivy) provide two-way messaging, SOS capability, and GPS tracking via satellite networks. These devices are not optional—they’re essential safety equipment.
Choosing a Satellite Communicator
Garmin InReach Mini 2: Two-way messaging, SOS, GPS tracking, weather forecasts. Compact, reliable, long battery life. The industry standard for backcountry communication. SPOT X: Two-way messaging, SOS, tracking. More affordable but less reliable in extreme cold. ACR Bivy Track: SOS-only with tracking. Simple, rugged, affordable. No two-way messaging. Zoleo: Two-way messaging, SOS, seamless switching between satellite, Wi-Fi, and cellular networks.
Carry your satellite communicator on your body (not in your pack) in case you’re separated from your pack during an avalanche. Program emergency contacts before every tour. Test the device monthly. Carry spare batteries in your repair kit. Know how to use the SOS function—it should be instinctive, not something you fumble with during an emergency.
Radio Communication for Groups
For groups larger than two, radios are essential. FRS/GMRS radios provide reliable line-of-sight communication up to 2-5 miles in open terrain. Digital radios offer clearer audio and some encryption. Program your radios to a common channel and test before every tour. Establish communication protocols: check-ins at regular intervals, emergency signals (three short blasts = emergency), and clarity standards (speak clearly, identify yourself, state your message concisely).
Radio etiquette matters. Keep transmissions brief—long conversations waste battery and block the channel for emergency communications. Use standard phrases: “Radio check” (confirm you’re receiving), “Stand by” (wait for my next transmission), “Affirmative/Negative” (yes/no), “Say again” (repeat your last transmission). In an emergency, broadcast clearly: “This is [name]. Avalanche burial at [location]. Need rescue. Stand by for more info.”
23. Backcountry Gear Integrity: Don’t Let Rust Kill You
Splitboard edges rust quickly when exposed to salt sweat and wet spring snow. Corroded edges lose grip on icy traverses. Follow the Snowboard maintenance basics: the complete home care guide but with extra attention: after each tour, dry your pucks, clips, and skins. Apply gummi stone to remove micro‑burrs. A broken climbing skin glue can strand you in avalanche terrain; reglue annually.
Pre-Season Gear Audit
Before each season, perform a comprehensive gear audit. Check beacon batteries (replace if below 40%), inspect probe for bends or corrosion, examine shovel blade for cracks, test binding hardware for play, verify skin glue adhesion, inspect climbing wire mechanisms, check splitboard brackets and pins, verify first aid kit contents, and replace expired medications. This audit takes 1-2 hours but can prevent a backcountry emergency.
Post-Tour Maintenance Routine
After every tour, follow a maintenance routine: dry skins thoroughly (hang or lay flat), clean base of dirt and debris, inspect edges for burrs, check binding screws for tightness, clean and dry beacon contacts, recharge satellite communicator, restock first aid kit, and note any gear concerns in your logbook. This routine prevents small issues from becoming big problems. A 5-minute post-tour maintenance check is cheaper than a backcountry rescue.
24. Physiological Readiness: Core & Ascent Economy
Fatigue destroys decision‑making. You need core endurance to maintain posture while skinning and bootpacking. A collapsed, hunched upper body restricts breathing and oxygen to the brain. Our complete guide to core strength for snowboarding: the secret to control & endurance emphasizes anti-rotation exercises—Pallof press, dead bugs—which translate directly to carrying a heavy pack on uneven terrain. Include 2–3 zone 2 cardio sessions weekly to build aerobic base for 1000m vert days.
The Backcountry Fitness Triangle
Backcountry fitness rests on three pillars: aerobic capacity (sustained effort for hours), lower body strength (skinning, bootpacking, riding), and core stability (balance, posture, injury prevention). Most riders focus on strength and neglect aerobic fitness—but aerobic capacity is the limiting factor for most backcountry tours. A rider with a strong aerobic base can skin all day; a rider with strong legs but poor cardio will be exhausted after 500 meters of vertical.
Train specifically for your backcountry goals. If you plan multi-day tours, practice with weighted pack (15-20kg) for 2-3 hours. If you focus on steep bootpacks, train with hill repeats and stair climbing. If you want to ride well after a long ascent, practice high-intensity interval training followed immediately by technical skill work. The specific preparation principle: train the way you play.
Altitude Considerations
Altitude affects performance and decision-making. Above 2500m, oxygen availability decreases, reducing aerobic capacity by 10-20%. Above 3000m, the effects are more pronounced. Acclimatize gradually—spend 1-2 nights at moderate altitude before venturing to higher elevations. Symptoms of altitude sickness (headache, nausea, fatigue, insomnia) indicate you’re ascending too quickly. Descend immediately if symptoms are severe. Altitude also increases UV exposure—sunburn risk is 40% higher above 3000m.
25. Nutrition & Hydration Strategy for Long Days
Backcountry snowboarding burns 3000-6000 calories per day. Dehydration and caloric deficit impair judgment, slow reaction time, and increase injury risk. A proactive nutrition strategy—eating and drinking before you feel hungry or thirsty—is essential for maintaining performance and decision-making throughout a long tour.
Hydration Protocol
Dehydration begins before you feel thirsty. Aim for 500ml per hour of active touring, more in cold, dry air (you lose significant moisture through respiration). Carry water in an insulated bottle or hydration bladder—insulation prevents freezing. Electrolyte tablets or powder replace salts lost through sweat. Avoid caffeine in excess—it’s a diuretic and can increase dehydration risk. Hot drinks in a thermos serve double duty: hydration and warmth.
Monitor your hydration status: dark urine indicates dehydration; pale yellow is optimal. In cold weather, the thirst mechanism is suppressed—you may not feel thirsty even when significantly dehydrated. Set a timer on your watch to remind yourself to drink every 30 minutes. Pre-hydrate the evening before and morning of your tour.
Fueling Strategy
Eat frequently—every 45-60 minutes during touring. High-carbohydrate, high-fat foods provide sustained energy: nuts, dried fruit, energy bars, chocolate, cheese, salami. Carry a variety to prevent “flavor fatigue.” Hot food in a thermos (soup, oatmeal, rice) provides comfort and calories. After the tour, consume protein and carbohydrates within 30 minutes to accelerate recovery.
For multi-day tours, plan your food carefully. Calculate daily caloric needs based on elevation gain, pack weight, and duration. Carry 10-15% more food than you think you’ll need—unexpected delays happen. Consider weight-to-calorie ratios: nuts (175 cal/oz), cheese (120 cal/oz), chocolate (150 cal/oz), energy bars (110-140 cal/oz). Optimize your food carry for maximum calories per gram.
26. Seasonal Considerations: Early Season, Mid-Winter, and Spring
Avalanche conditions and terrain challenges evolve throughout the season. Understanding seasonal patterns helps you anticipate hazards and choose appropriate terrain.
Early Season (November–December)
Thin snowpack means rocks, stumps, and ground-level obstacles are close to the surface. Shallow snowpack often harbors depth hoar—weak, faceted crystals formed during the cold, clear autumn months. Early-season avalanches are often shallow but dangerous because victims can be pushed into ground-level obstacles. Avoid steep terrain with thin coverage. Use caution on south-facing aspects where early-season snow may have undergone melt-freeze cycles.
Mid-Winter (January–February)
The snowpack deepens and storm cycles become more frequent. Persistent slab problems dominate—weak layers from early season remain buried and reactive. Wind slabs form rapidly during storm cycles. Avalanche danger is often at its highest during this period. Travel conservatively. Check forecasts daily. Practice extensive stability testing before committing to steep terrain.
Spring (March–May)
Spring brings wet avalanche conditions. Solar radiation, warming temperatures, and rain introduce liquid water into the snowpack. The daily danger cycle is predictable: safe in early morning, increasingly dangerous through the afternoon. Start early, finish early. Be off steep, solar aspects by noon. Avoid terrain beneath cornices—they weaken as temperatures rise. Spring conditions also produce excellent corn skiing/boarding—but the transition from solid to liquid snow is rapid and requires careful timing.
Summer and Glacier Travel
In high-altitude areas, summer touring is possible but presents unique hazards: glacier travel requires crevasse rescue skills, rockfall increases as ice melts, and afternoon thunderstorms create lightning risk. If you’re touring in summer conditions, carry an ice axe, crampons, rope, and crevasse rescue equipment. Avoid glacier travel alone. Start early—rockfall increases as the sun warms cliff faces.
27. Environmental Ethics & Leave No Trace
Backcountry snowboarders are guests in wild places. Our access depends on responsible stewardship. Follow Leave No Trace principles: pack out all waste (including toilet paper), stay on established skin tracks when possible, minimize noise in remote areas, and respect wildlife closures. The backcountry is a shared resource—your actions affect other users and the long-term viability of backcountry access.
Wildlife Awareness
Winter brings wildlife into lower elevations. Deer, elk, and moose use snow-covered meadows and forest edges for forage. Avalanche terrain often overlaps with critical winter wildlife habitat. Respect seasonal closures, avoid disturbing wildlife, and carry bear spray if you’re in bear country (some bears remain active into early winter). Keep food stored securely and avoid leaving food scraps on the mountain.
Access and Permitting
Many backcountry areas require permits, passes, or have seasonal restrictions. Check local regulations before every tour. Common requirements include: wilderness permits (often limited to protect fragile areas), parking passes, and seasonal closures for wildlife protection or avalanche control. Violating closures or permits can result in fines and, more importantly, jeopardize future access for all backcountry users.
Respect private property boundaries. Many trailheads cross private land before reaching public backcountry. Obtain permission where required, stay on designated routes, and leave gates as you found them. Good relationships with landowners ensure continued access for the backcountry community.
Quiver choice: Powder-specific vs. All-mountain split
| Board type | Float | Uphill weight | Versatility | Ideal for |
|---|---|---|---|---|
| Powder split (volume shift, swallowtail) | Excellent | Light (short) | Low – deep only | Dedicated Japow, deep days |
| All‑mountain split (directional) | Good | Moderate | High – trees, corn, variable | Most backcountry riders |
| Resort board + day pack | Fair (setback) | Heavy (no skin base) | Low – sidecountry only | Occasional tours |

Jones Solution (women’s/men’s)
The benchmark split for serious backcountry missions – camber underfoot, spoon tip, durable sintered base.
🏔️ SHOP ON AMAZONBackcountry Safety: Your Critical Questions
Ride Another Day
The best backcountry snowboarders aren’t the ones who drop the gnarliest couloirs—it’s the ones who come home, analyze their decisions, and refine their protocol. Commit to a personal minimum: AIARE course, weekly beacon drills, and a pre‑season fitness block. Your family, your partners, and the next generation of riders need you to be the benchmark of safety.
🔔 FIND AIARE COURSE📌 bookmark this guide – updated for 2026 season
You may also like: Women’s gear guide • Best MIPS helmets • CO snow metrics. All links open in new tab.


