
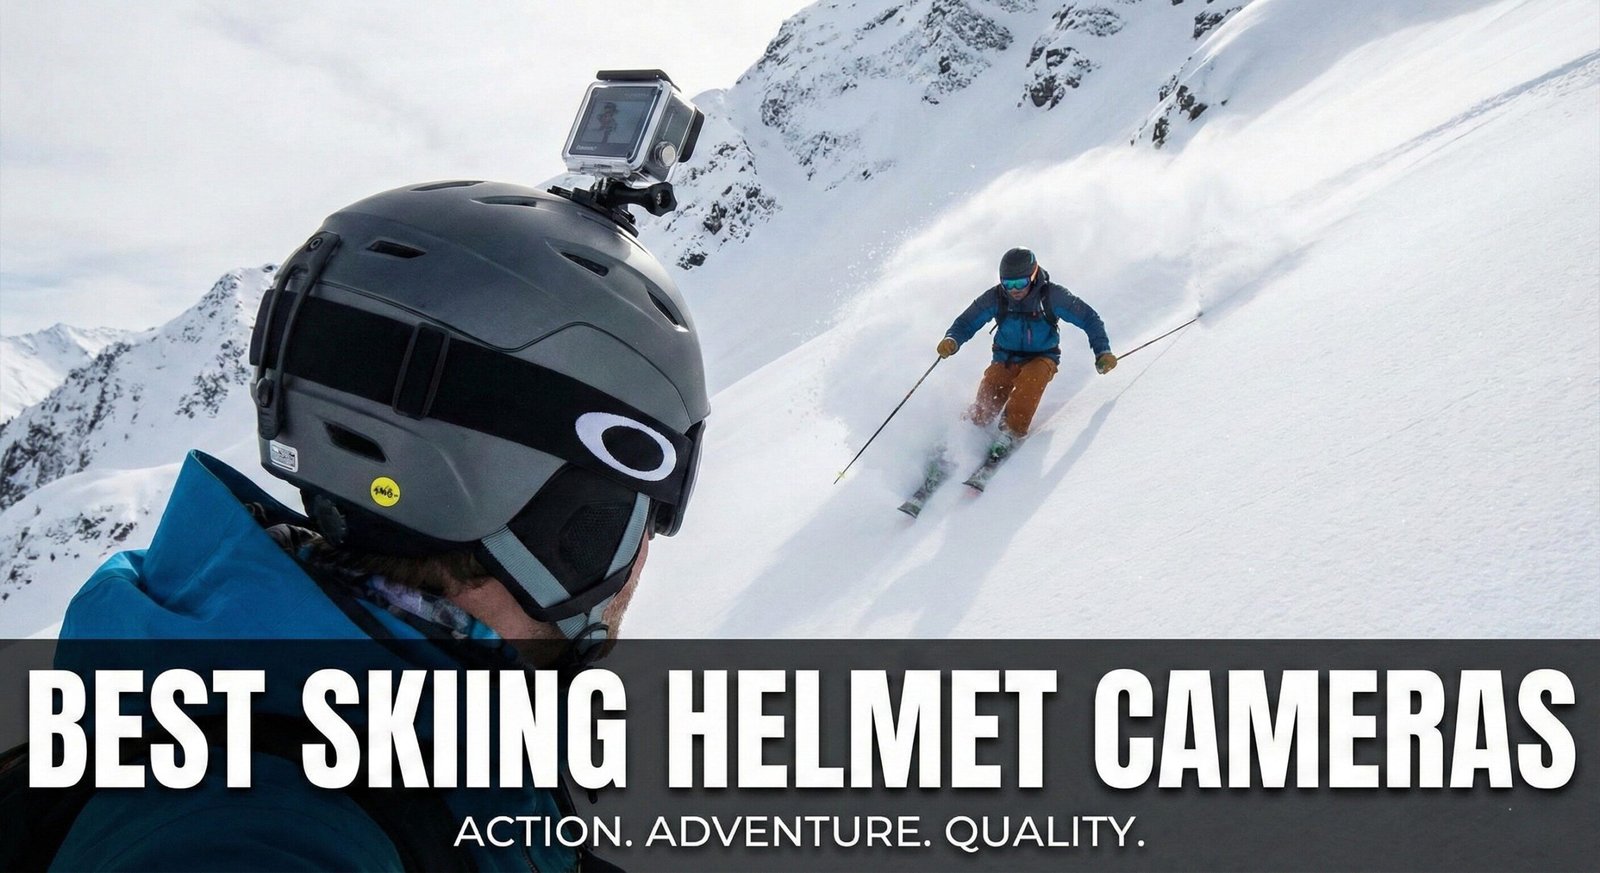
Capture the Drop: The 7 Best Skiing Helmet Cameras of 2026
There is a specific feeling when you look back at a run—the spray of powder, the sound of the wind, the speed of the descent. Preserving that memory requires more than just a smartphone tucked in your pocket. To capture the visceral experience of skiing, you need a dedicated action camera mounted to your helmet.
In 2026, the market is no longer a one-horse race. While GoPro remains a titan, competitors like DJI and Insta360 have introduced features that fundamentally change how we film on the mountain, from AI-enhanced low-light modes to 360-degree reframing that guarantees you never miss the shot. This guide explores the best tools to help you create your own cinematic winter edits. We’ve spent over 40 hours on the slopes testing battery endurance, lens fogging, and stabilization across alpine conditions to bring you the most detailed evaluation available.
2. Buying Guide: Surviving the Freeze
Skiing presents a unique torture test for electronics. Before buying, consider these critical factors:
- Battery Chemistry: Standard lithium batteries die instantly in -10°C weather. Look for cameras that ship with “Enduro” or “Cold Weather” variants. Keeping spare batteries in an inner chest pocket can extend your shooting day significantly.
- EIS (Stabilization): Skiing is bumpy. Technologies like HyperSmooth (GoPro) and RockSteady (DJI) are non-negotiable for watchable footage. They use gyroscopes and predictive algorithms to smooth out every mogul.
- Form Factor: A brick on your head can throw off your balance and strain your neck. We prioritize aerodynamics and weight. Cameras under 150g generally feel negligible on a helmet during high-speed descents.
- Lens Coating & Fog Resistance: Hydrophobic coatings help shed snow and ice. Some models now include built-in lens heaters or air-channeling designs to prevent moisture from ruining your take.
Similar to choosing goggles with the right VLT, you need a camera sensor that handles the extreme contrast between bright white snow and dark tree shadows. A wide dynamic range is essential to keep details in both highlights and shadows.
3. GoPro Hero 12 Black
The Hero 12 Black remains the gold standard for pure point-of-view (POV) fidelity. With HyperSmooth 6.0, it irons out the chatter of icy groomers as if you were floating on a gimbal. The introduction of HDR video also helps prevent the snow from blowing out into a white blob. We particularly love the new 8:7 sensor ratio, which gives editors extra vertical room to reframe for social media without cropping out your ski tips.
Crucially for skiers, it comes standard with the Enduro battery, which dramatically improves runtime in freezing temperatures compared to older models. In our -5°C tests, the Hero 12 recorded continuously for 85 minutes at 4K/60fps before shutting down—far ahead of the competition.
Pros
- Image Quality: Unbeatable 5.3K resolution with 10-bit color depth.
- HyperSmooth 6.0: Industry-leading stabilization with horizon leveling up to 360°.
- Bluetooth Audio: Connects to AirPods for voice commands without opening the housing.
- Scheduled Capture: Set the camera to wake up automatically when you start your run.
Cons
- Low-light performance is weaker than DJI due to smaller pixel size.
- Classic “brick” shape catches wind at high speeds, though the new aerodynamic curve helps slightly.
4. Insta360 X3
If you don’t want to worry about pointing the camera, the X3 is your answer. It films in 360 degrees, allowing you to “reframe” the video later on your phone app. You can switch from a forward-facing POV to a “selfie” view of you skiing without stopping the run. The FlowState stabilization keeps the horizon perfectly level even during spins and jumps.
It essentially acts as a camera crew in your pocket. However, be aware that the exposed lenses are vulnerable to scratches if you crash—a significant risk if you are learning new tricks. We recommend buying the optional lens guards for deep powder days.
Pros
- Reframing: Choose the angle after you ski, perfect for capturing unexpected moments.
- Invisible Stick: Software erases the selfie stick automatically, creating a drone-like following effect.
- Massive Touchscreen: Easy to use with gloves, and the menus are intuitive for quick adjustments.
Cons
- Resolution drops when cropped to standard video (effective 1080p for single view).
- Lenses protrude and are fragile; stitching line can be visible in close-up subjects.
5. DJI Osmo Action 4
While GoPro wins on resolution, DJI wins on sensor size. The Osmo Action 4 features a massive 1/1.3-inch sensor. This allows it to capture significantly better footage on overcast days, in dense tree runs, or during flat-light afternoons. The f/2.8 aperture pulls in more light, reducing noise in the shadows.
It also features a magnetic mounting system, which makes it incredibly easy to snap the camera off your helmet to check footage on the lift without unscrewing anything. We found the color science out-of-the-box produces more natural skin tones, which vloggers will appreciate.
Pros
- Large Sensor: Superior dynamic range in shadows, cleaner image at dusk.
- Magnetic Mount: Fast swapping with gloves on, very secure yet quick-release.
- Deep Freeze Resistant: Rated to -20°C, survived our chairlift test without glitching.
Cons
- Max resolution is 4K (vs 5.3K on GoPro), but 4K is sufficient for most users.
- Slightly heavier than competitors (145g) but well-balanced.
6. Insta360 Ace Pro
Co-engineered with Leica, the Ace Pro brings AI processing to action cams. It uses a dedicated AI chip to denoise video in real-time, a feature called PureVideo that activates in low light. It also features a flip-up screen, which is excellent for vloggers who want to frame themselves while talking on the chairlift. The 8K resolution allows for massive cropping potential, and the new Clarity Zoom uses AI to sharpen digital zoom up to 4x.
For skiers, the AI automatically generates highlights—detecting jumps or fast sections and compiling them into a short edit ready to share before you’ve left the mountain.
Pros
- 8K Video: Overkill but great for reframing and stabilization crops.
- PureVideo Mode: Best-in-class low-light footage.
- Flip Screen: Protects lens when closed, acts as a sturdy selfie screen.
Cons
- AI editing can be hit-or-miss with complex terrain.
- Larger body than Hero 12.
7. GoPro Max
The Max is GoPro’s dual-lens camera. It offers the classic “Hero” mode (standard video) and 360 capture. While it is older than the Insta360 X3, it remains a favorite for its rugged build and compatibility with the GoPro app ecosystem. It handles wind noise exceptionally well thanks to its six-microphone array, delivering immersive 360 audio that tracks with the viewer perspective.
The Max is also more durable—the lenses are recessed slightly, making it less likely to shatter on impact. Max HyperSmooth stabilization is incredibly fluid, and the PowerPano feature captures breathtaking 270-degree panoramas of mountain vistas.
Pros
- Built Quality: Feels indestructible, rubberized coating grippy with gloves.
- Audio: Best 360 audio on the market.
- Reframe App: Seamless integration with GoPro Quik.
Cons
- Max resolution in 360 mode is 5.6K, which is lower than X3’s 5.7K.
- Heavier and bulkier than dedicated 360 cams.
8. Insta360 GO 3
The size of a thumb, the GO 3 is perfect for those who hate the “Teletubby” look of a helmet cam. It is so light (35g) you won’t feel it. While the battery life is short, it snaps into a larger “Action Pod” housing to recharge, giving you a touchscreen monitor and extended runtime. The magnetic pendant mount lets you wear it under your jacket, instantly deploying it when you want to film.
It’s ideal for casual skiers who want quick, shareable clips without the bulk. The new “Easy Switch” lets you toggle between camera and pod control effortlessly.
Pros
- Weight: Unnoticeable on helmet, no neck strain.
- Magnetic Versatility: Attaches to zippers, poles, or the Action Pod.
- FreeFrame Video: Reframe after recording.
Cons
- Battery life: 45 minutes standalone; 2.5 hours with pod.
- Max resolution 2.7K, not 4K.
9. Akaso V50 Elite
If you aren’t ready to drop $400, the Akaso V50 provides decent 4K/60fps footage for a fraction of the price. It lacks the advanced stabilization of GoPro, but for capturing casual family runs, it is more than capable. It comes with a generous accessory kit including multiple mounts, a waterproof case, and a remote control. The image quality is surprisingly sharp in good light, though the electronic image stabilization can produce a “jello effect” on rough terrain.
For beginners or parents filming kids, the V50 Elite offers remarkable value. The battery life is adequate (about 70 minutes in cold), and the interface is simple to navigate.
Pros
- Price: Under $100, often includes 2 batteries.
- Remote Included: Wrist remote makes starting/stopping easy.
- Accessories: Helmet and chest mounts in the box.
Cons
- Stabilization is digital and crops heavily.
- Menu system is less intuitive.
10. Comparison: Top Helmet Cameras
| Model | Resolution | Battery Life (Cold) | Waterproof | Best Feature |
|---|---|---|---|---|
| GoPro Hero 12 | 5.3K / 60fps | High (Enduro) | 10m | Stabilization |
| Insta360 X3 | 5.7K (360) | Medium | 10m | Reframe Later |
| DJI Action 4 | 4K / 120fps | High | 18m | Low Light |
| Insta360 Ace Pro | 8K / 24fps | Medium | 10m | AI Processing |
| GoPro Max | 5.6K (360) | Medium | 5m | 360 Audio |
| Insta360 GO 3 | 2.7K | Low | 5m | Tiny Size |
| Akaso V50 | 4K / 60fps | Low | Case Req. | Price |
Battery life measured at -5°C continuous recording at max settings. Waterproof depth without housing.
11. Mounting Guide: Top vs. Chin vs. Chest
Where you place the camera changes the vibe of your video entirely.
- Top Mount: The classic “Teletubby” look. It offers a clear view of the scenery but often flattens the terrain, making steep slopes look easy. However, it’s the safest in a crash because it’s furthest from your face and the mount will snap away.
- Chin Mount: The gold standard for action sports POV. It places the camera at eye level and captures your skis and knees, giving the viewer a sense of speed and technique. Note: This requires a full-face helmet or a specialized strap for half-shell helmets (though not recommended for safety).
- Chest Mount: Great for skiing because it captures the arms and poles working. It provides an immersive, lower angle that makes powder look deeper. The stabilization has to work harder, but the perspective is unique.
- Goggle Strap Mount: A hybrid option that clips onto your goggle strap. It’s light and positions the camera near your eye, but can bounce on rough terrain.
Safety Note: Ensure your mount uses a breakaway adhesive. In a severe crash, you want the camera to snap off rather than snagging on a rock and twisting your neck—a consideration discussed in our analysis of helmet safety technology. Never use rigid zip ties to secure a camera.
12. Best Camera Settings for Skiing: The Complete Guide
Choosing the right camera settings can mean the difference between professional-looking footage and a blurry, overexposed mess. Snow reflects an enormous amount of light, which confuses auto-exposure systems. Understanding how to dial in your settings manually—or at least know when to override the defaults—will dramatically improve your skiing videos. Here is our comprehensive breakdown of the best camera settings for every scenario you’ll encounter on the mountain.
12.1 Resolution: 4K vs 5.3K vs 2.7K
Resolution determines how much detail your camera captures. Higher resolution means sharper footage, but it also means larger files and shorter recording times. For skiing, we recommend shooting in 4K at minimum. This gives you enough detail to crop into the footage later without losing quality, and it downscales beautifully to 1080p for social media uploads.
If your camera supports 5.3K (like the GoPro Hero 12), use it for maximum flexibility in post-production. The extra resolution allows you to stabilize footage more aggressively without visible quality loss, since the stabilization crop has more pixels to work with. However, 5.3K files are enormous—expect to fill a 128GB card in roughly two hours of continuous recording.
2.7K is acceptable for casual filming, especially if you’re only sharing to Instagram or TikTok where compression will mask the difference. But for YouTube uploads or any footage you plan to keep long-term, 4K is the sweet spot between quality and file size.
Recommended Resolution by Use Case
- YouTube uploads: 4K at 60fps or 5.3K at 30fps
- Instagram Reels / TikTok: 4K at 60fps (crop to 9:16 in post)
- Casual family filming: 2.7K at 30fps or 4K at 30fps
- Slow motion edits: 4K at 120fps (if supported) or 2.7K at 120fps
- Maximum recording time: 1080p at 30fps (use only if storage is limited)
12.2 Frame Rate: When Speed Matters
Frame rate determines how smooth your footage looks and whether you can create slow-motion effects. For skiing, 60fps is the gold standard. It captures twice the temporal information of 30fps, which makes fast-moving action look buttery smooth. When you slow 60fps footage down to 30fps playback, you get natural-looking 50% slow motion without any choppiness.
30fps works fine for scenic runs, cruising groomers, or lift rides where there’s not much fast motion. It also uses roughly half the storage of 60fps, which matters when you’re filming all day.
120fps is ideal for dedicated slow-motion shots—big air, powder sprays, or dramatic carve turns. The DJI Action 4 supports 4K at 120fps, which is extraordinary for creating cinematic slow-motion sequences. The GoPro Hero 12 supports 2.7K at 120fps, which is also excellent. The trade-off is significantly higher battery drain and storage usage.
240fps (available on most cameras at lower resolutions like 1080p or 720p) creates ultra-slow-motion at 1/8th speed. This is perfect for capturing the exact moment of a jump takeoff or landing, but the lower resolution means it should be used selectively rather than for entire runs.
Pro Tip: Variable Frame Rate Strategy
The most efficient approach is to shoot the majority of your day at 4K/60fps, then switch to 4K/120fps or 2.7K/120fps for specific moments you want in slow motion. Many cameras now offer a “slow-mo” preset that automatically switches settings when activated, making this easy to do on the fly. On GoPro, you can set up a custom preset for slow motion and toggle it with a single button press.
12.3 Exposure Settings: Conquering Snow Brightness
Snow is one of the most challenging environments for camera auto-exposure. The camera’s light meter sees all that white and thinks the scene is way too bright, so it darkens the image—turning your pristine powder day into a gray, muddy mess. This is why manually controlling exposure is critical for ski filming.
The most important setting is Exposure Compensation (EV). For snow scenes, you almost always need to add +0.5 to +1.5 EV to counteract the camera’s tendency to underexpose. Without this adjustment, snow will appear gray instead of white, and your footage will look dull and lifeless.
If your camera supports manual ISO and shutter speed, here are our recommended starting points for different conditions:
Manual Exposure Settings for Skiing
- Bright sunny day: ISO 100-200, Shutter 1/1000 or faster, EV +0.5 to +1.0
- Overcast / flat light: ISO 400-800, Shutter 1/500, EV +0.5
- Tree runs (mixed light): ISO Auto (capped at 1600), Shutter 1/500, EV +0.5
- Storm / low visibility: ISO 800-1600, Shutter 1/250, EV +1.0 to +1.5
- Bluebird dawn patrol: ISO 200-400, Shutter 1/500, EV +0.5
One critical rule: never let your shutter speed drop below 1/120 when filming at 60fps. The general rule of thumb is that your shutter speed should be double your frame rate (the “180-degree shutter rule”). Slower shutter speeds introduce motion blur that looks unnatural in action sports footage. This is why ND filters (discussed later in our accessories section) are so valuable—they reduce the amount of light entering the lens, allowing you to use slower shutter speeds in bright conditions without overexposing.
12.4 White Balance: Keeping Snow White
Auto white balance usually handles snow reasonably well, but it can shift erratically when you move between sun and shade—creating jarring color changes mid-run. Setting a fixed white balance prevents these jumps and gives your footage a consistent look.
For sunny conditions, set white balance to 5500K-6000K (daylight). For overcast conditions, 6500K-7000K works well. If your camera has a “snow” or “sports” white balance preset, use it. The GoPro Hero 12 and DJI Action 4 both have dedicated snow modes that account for the blue color cast that snow often picks up in shadow.
Pro tip: if you shoot in a flat or log color profile (like GoPro’s GP-Log or DJI’s D-Log M), white balance matters less because you’ll be setting it in post-production. However, getting it roughly correct in-camera makes the editing process faster and gives you a better preview while on the mountain.
12.5 Field of View: Wide vs Linear
Most action cameras default to an ultra-wide field of view (often called “SuperView” on GoPro or “Ultra Wide” on DJI). This captures the most scenery and creates that characteristic action-cam look where the edges of the frame are slightly distorted. For skiing, wide is usually best because it captures your ski tips, the terrain ahead, and the surrounding landscape in a single frame.
Linear mode corrects the barrel distortion and gives a more natural-looking image, similar to what your eyes see. It’s excellent for scenic videos or if you plan to add text overlays, since straight lines actually appear straight. The trade-off is a narrower field of view—you’ll see less of the run ahead.
Narrow mode is rarely useful for skiing because it crops so tightly that you lose context. The exception is when filming wildlife or distant features you want to zoom into, or when you need maximum detail on a specific subject.
For 360 cameras like the Insta360 X3, you don’t need to choose a field of view at all—it captures everything, and you select the perspective in post-production. This is one of the biggest advantages of 360 capture for skiing.
Common Mistake: Shooting in Narrow Mode
Many beginners accidentally switch to narrow or linear mode and wonder why their footage looks “zoomed in” and lacks the immersive feel of professional ski videos. Always double-check your field of view setting before starting your day. On GoPro, the FOV is displayed on the main screen. On DJI, it’s in the shooting settings menu.
12.6 Stabilization Settings
Electronic Image Stabilization (EIS) is essential for skiing footage. Without it, every bump, turn, and vibration translates directly into shaky, unwatchable video. Modern stabilization systems are remarkably effective—they use gyroscopic data and machine learning to smooth out even the roughest terrain.
GoPro’s HyperSmooth has several modes: AutoBoost (automatically adjusts stabilization strength), High (maximum smoothing), and Boost (even more aggressive, with a tighter crop). For skiing, High is usually the best balance between smooth footage and maintaining a wide field of view. Boost crops so much that you lose significant peripheral vision, making it better suited for very specific shots.
DJI’s RockSteady+ and HorizonSteady work similarly. RockSteady+ provides excellent vibration reduction, while HorizonSteady keeps the horizon level even when you’re tilted up to 45 degrees—which is incredibly useful for carving turns where your body (and helmet) lean significantly.
Insta360’s FlowState is unique because it works on 360-degree footage, allowing you to set the stabilization direction after the fact. This means you can have a perfectly stable forward-facing shot that smoothly transitions to a selfie view without any jarring movement.
Pro Tip: Stabilization and Frame Rate
EIS works by cropping into the frame and using the extra pixels as a buffer to smooth out movement. Higher frame rates give the stabilization system more data to work with, resulting in smoother output. This is one reason why 60fps looks more stable than 30fps even with the same stabilization setting—the system has twice as many reference points per second.
12.7 Audio Settings for Skiing
Audio is often overlooked in ski filming, but it’s crucial for creating immersive footage. The sound of carving edges, wind rushing past, and powder whooshing creates an emotional connection that silent video simply cannot match.
Most action cameras have built-in stereo microphones that do a reasonable job, but wind noise is the primary enemy. At skiing speeds (30-60+ mph), wind noise completely overwhelms the microphone, creating a harsh, distorted roar that drowns out everything else.
To combat wind noise, consider these solutions: many cameras have a “wind reduction” or “wind noise filtering” mode in the audio settings. This uses algorithms to reduce low-frequency wind rumble, though it can sometimes make audio sound thin or muffled. For better results, use a physical windscreen—small foam covers that slip over the camera’s microphone ports and dramatically reduce wind impact.
The GoPro Hero 12’s Bluetooth audio feature is a game-changer for skiing. You can connect wireless earbuds (like AirPods) and use them as a remote microphone tucked inside your helmet, capturing your voice and ambient sounds while blocking wind. This is particularly valuable for vloggers who want to narrate their runs.
If you want truly professional audio, consider an external microphone like the Rode VideoMic Me or the GoPro Media Mod, which provides a directional microphone and a 3.5mm jack for external lav mics. These add bulk but capture dramatically better sound.
13. Editing Your Ski Footage: From Raw Clips to Shareable Videos
Recording great footage is only half the battle. The editing process transforms raw clips into compelling stories that capture the emotion and excitement of your day on the mountain. Whether you’re creating a quick Instagram reel or a full-length YouTube edit, these editing principles will elevate your ski videos from amateur to cinematic.
13.1 Choosing Your Editing Software
The editing software you choose depends on your skill level, budget, and how much control you want over the final product. For beginners, smartphone apps like GoPro Quik, InShot, or CapCut offer intuitive interfaces with auto-edit features that can create decent videos with minimal effort. These apps analyze your clips, detect the most exciting moments, and assemble them into a polished edit with music and transitions.
For more control, desktop software is the way to go. DaVinci Resolve is our top recommendation because it’s completely free and offers professional-grade tools for color grading, editing, and effects. It’s the same software used in Hollywood films, yet the free version has more capability than most recreational editors will ever need. The learning curve is steeper than consumer apps, but the results are worth it.
Adobe Premiere Pro is the industry standard for professional video editors. It integrates seamlessly with After Effects for advanced motion graphics and offers excellent preset libraries for action sports editing. The subscription model ($22.99/month) is a drawback, but the toolset is unmatched.
Final Cut Pro is the best option for Mac users who want professional features without a subscription. It’s optimized for Apple hardware, making it incredibly fast for rendering 4K footage. The magnetic timeline makes arranging clips intuitive once you learn the workflow.
For 360 camera footage, Insta360 Studio (free) or the GoPro Player app are essential for reframing before importing into your main editor. These tools let you pan, tilt, and zoom within the 360-degree sphere to create standard video clips from any angle.
13.2 The Editing Workflow: Step by Step
A structured workflow saves time and produces better results than randomly trimming clips. Here’s the process we use for every ski edit:
- Import and Organize: Transfer all footage from your SD cards to your computer immediately after your ski day. Create folders for each day/location, and tag your best clips. Delete obvious bad takes to save storage and reduce clutter.
- Select Your Music First: Choose your soundtrack before you start cutting. The music sets the pace and mood of your edit, and cutting to the beat creates rhythm that makes the video feel polished. Platforms like Artlist or Epidemic Sound offer royalty-free music specifically designed for action sports content.
- Create a Rough Cut: Arrange your selected clips in the order you want them to appear. Don’t worry about timing or transitions yet—just get the story structure right. Start with an establishing shot, build to your best runs, and end with a memorable moment.
- Fine Cut and Timing: Trim each clip to match the music’s beat. Use the waveform display to see where the beats fall and align your cuts accordingly. Remove any sections that feel slow or repetitive—ski footage should be dynamic and engaging throughout.
- Add Transitions: Use subtle transitions between clips—cross dissolves, quick fades, or simple hard cuts work best for ski videos. Avoid flashy transitions like spins or wipes, which look dated and distracting. A well-timed hard cut on a beat hit is often the most impactful transition.
- Color Grade: Adjust exposure, contrast, white balance, and color saturation to create a consistent look across all clips. Snow footage often needs a slight boost in contrast and clarity to prevent the “washed out” look that action cameras produce in bright conditions.
- Add Text and Graphics: Include location names, speed data, or your name/watermark. Keep text minimal and clean—use a modern sans-serif font and place it in areas that don’t obscure the action.
- Export and Share: Export at 4K resolution (3840×2160) for YouTube, or 1080p for social media platforms that compress heavily. Use H.264 codec for maximum compatibility, or H.265 for smaller file sizes with the same quality.
13.3 Music Selection Tips for Ski Videos
The right music transforms a ski edit from a collection of clips into an emotional experience. The genre should match the energy of your footage—high-energy electronic or rock for aggressive skiing, mellow acoustic or ambient for scenic cruising, hip-hop for stylish park laps.
Pay attention to song structure: verses work well for building anticipation with slower scenic shots, while choruses are perfect for dropping into your most exciting runs or biggest airs. A well-timed drop that coincides with a cliff drop or powder explosion creates a moment that viewers remember.
Avoid popular songs with lyrics that are too recognizable—they can distract from the visuals and create copyright issues on social media. Royalty-free music libraries like Artlist, Epidemic Sound, or Musicbed offer high-quality tracks specifically curated for sports content. Many ski films use instrumental hip-hop or electronic music because it provides energy without competing with the visual narrative.
Pro Tip: The 3-Second Rule
Every clip in your ski edit should be between 2 and 5 seconds long for social media, or up to 8 seconds for YouTube. Shorter clips maintain viewer attention and create a sense of energy. The exception is a single “hero shot”—the most spectacular moment of the day—which can be held for 10-15 seconds to let viewers fully appreciate it.
13.4 Speed Ramping: Creating Dynamic Flow
Speed ramping—gradually changing playback speed within a single clip—is one of the most effective techniques for ski video editing. A common approach is to start a clip at full speed, slow down as you approach a dramatic moment (cliff, jump, powder turn), then speed back up as you ride away. This creates a cinematic feel that mimics how professional ski films are edited.
To create smooth speed ramps, you need footage shot at a higher frame rate than your project timeline. If you’re editing at 30fps, shoot at 60fps—you can slow it to 50% without any choppiness. If you shoot at 120fps, you can slow to 25% speed for ultra-smooth slow motion.
Most editing software has built-in speed ramping tools. In DaVinci Resolve, use the Retime Controls. In Premiere Pro, use Time Remapping. In Final Cut Pro, use the Retime editor. Practice creating smooth curves rather than abrupt speed changes—gradual transitions look professional, while sudden jumps look amateurish.
13.5 Stabilization in Post-Production
Even with excellent in-camera stabilization, some footage may benefit from additional stabilization in post-production. Software like DaVinci Resolve’s stabilization tool or Adobe Warp Stabilizer can further smooth out footage that was recorded with stabilization turned off or at settings that weren’t aggressive enough.
However, post-production stabilization has limitations. It crops into the frame (sometimes by 10-20%) and can introduce weird warping artifacts on footage with lots of parallax (nearby objects moving at different speeds than the background). It’s always better to get stabilization right in-camera, but knowing you have a safety net in post gives you confidence to experiment with different settings.
For 360 camera footage, stabilization is handled during the reframing process, so you don’t need to worry about it in your main editor. Insta360’s FlowState and GoPro’s Max HyperSmooth do an excellent job of producing gimbal-like stability from handheld or helmet-mounted 360 footage.
14. Creating Cinematic Ski Videos: Professional Techniques
What separates a professional ski film from a GoPro compilation? It’s not just better cameras—it’s intentionality. Professional ski cinematographers plan their shots, use specific techniques to create visual interest, and edit with purpose. Here are the techniques that will elevate your ski videos from casual clips to cinematic experiences.
14.1 Shot Composition for Skiing
Good composition is the foundation of cinematic footage. The rule of thirds—placing your subject at the intersection of imaginary grid lines—applies to skiing just as it does to photography. When filming from a helmet mount, you can’t control composition directly, but you can control where you look. Glance toward interesting features (rock formations, tree lines, distant peaks) to naturally guide the camera toward well-composed frames.
Leading lines are powerful in ski footage. A ridge, a trail, or even the tracks of previous skiers can draw the viewer’s eye through the frame toward a vanishing point. Film these elements by keeping them in the lower third of the frame, pointing toward the center.
Depth creates visual interest. Include foreground elements (your ski tips, nearby trees, snow spray) along with mid-ground (the slope) and background (distant mountains or sky). This layering gives footage a three-dimensional feel that flat, horizon-less shots lack.
Framing within frames—skiing through a gap in trees, under a lift, or between rock formations—adds visual complexity and draws the viewer into the scene. These natural frames make the viewer feel like they’re discovering the landscape alongside you.
14.2 The Art of the Establishing Shot
Every great ski edit needs context. An establishing shot—a wide view of the mountain, the lodge, or the trail map—tells the viewer where they are before diving into the action. These shots can be filmed from the chairlift, the base area, or a scenic viewpoint. They provide a visual “breath” between intense action sequences and help structure your narrative.
The best establishing shots have movement—a slow pan across the mountain range, a tilt up from the base to the summit, or a dolly-like movement along the lift line. Even subtle movement makes a static landscape feel dynamic and alive.
Time-lapses make excellent establishing shots for ski edits. Set your camera on a tripod (or prop it against something stable) and capture clouds rolling over peaks, shadows moving across bowls, or the transition from dawn to full daylight. These shots compress time beautifully and set the mood for your edit.
14.3 Creating Variety: Shot Types Every Edit Needs
A compelling ski video uses a variety of shot types to maintain viewer interest. Relying solely on helmet-mounted POV footage creates visual monotony—every run looks the same after a while. Mix in these different perspectives:
- POV (Point of View): The bread and butter of ski filming. Helmet-mounted footage that shows what you see as you ski. Use for the majority of your action shots.
- Follow Cam: Filming a friend skiing ahead of you. This gives viewers a sense of watching someone else perform, which is more engaging than pure first-person footage. Position yourself 15-20 feet behind for the best framing.
- Selfie Angle: Use a selfie stick (with a 360 camera for the invisible effect) or extend your arm with a standard camera. This shows your face and reactions, adding a personal connection that POV alone can’t provide.
- Third-Person Static: Set up the camera on a tripod or prop it against a rock, then ski past it. This gives a “film crew” feel and shows your full body in motion, which is rare in helmet-cam footage.
- Drone Footage: If you have access to a drone (check resort regulations first), aerial footage adds a production value that nothing else can match. Sweeping overhead shots of ski runs, following shots through trees, and reveals of vast mountain landscapes are all possible with modern consumer drones.
- Lift Footage: Use chairlift rides as transition shots. Film the scenery below, the chairs ahead, or your boots dangling over the slope. These quiet moments provide context and pacing between action sequences.
- Details: Close-ups of gear being buckled, skis being waxed, boots stepping into bindings, or a hand brushing snow off goggles. These tactile shots create intimacy and break up the visual rhythm of wide landscape shots.
14.4 Narrative Structure: Telling a Story
The best ski videos have a beginning, middle, and end—not just random clips stitched together. A simple narrative structure might look like this:
Opening: Establish the location and mood. Dawn patrol departure, bootpacking up a ridge, or the first chair of the day. Build anticipation.
Rising Action: Start with easier runs, warm-up laps, or scenic cruising. Gradually increase intensity as the edit progresses. Show the day building.
Climax: Your best run of the day—the deepest powder, the biggest air, the most technical line. This is where you use your most dramatic footage, music, and editing techniques.
Resolution: Cool-down footage—last chair, sunset views, the drive home. Provide closure and leave the viewer with a lasting impression.
This arc doesn’t need to be complex. Even a 60-second Instagram reel benefits from this basic structure. It gives the viewer a reason to keep watching and a satisfying conclusion.
Pro Tip: Film More Than You Think You Need
The biggest mistake recreational ski filmmakers make is not recording enough. You need roughly 10-20 times more raw footage than your final video length. A 3-minute edit might require 30-60 minutes of raw clips. Always be recording—start before the action and keep recording after it ends. You can trim later, but you can’t add footage you didn’t capture.
15. Filming in Different Weather Conditions
Mountain weather is unpredictable, and conditions can change dramatically within a single run. Knowing how to adjust your camera settings and technique for different weather scenarios ensures you capture usable footage regardless of what Mother Nature throws at you.
15.1 Bright Bluebird Days
Bluebird days present the biggest exposure challenge: extreme brightness from sunlit snow combined with deep shadows in trees and under cliffs. The dynamic range of most action cameras can’t capture both extremes simultaneously, so you need to make a choice.
Expose for the snow—let the shadows go slightly dark rather than letting the snow blow out into pure white. Overexposed snow loses all texture and detail, making the footage look amateurish. Slightly dark shadows are acceptable because they create contrast and drama. Use ND filters (discussed in our accessories section) to manage the extreme brightness while maintaining a proper shutter speed.
For bluebird days, set your EV compensation to +0.3 to +0.7. This keeps the snow white without blowing out highlights. Avoid going higher than +1.0 unless you’re filming in open bowls with no dark elements in the frame.
The position of the sun matters enormously. Front-lighting (sun behind you) creates flat, even illumination that’s easy to expose but lacks drama. Side-lighting (sun to your left or right) creates long shadows that reveal terrain contours and make the snow texture pop. Back-lighting (sun in front of you) creates silhouettes and lens flare—difficult to expose but potentially stunning when done well.
15.2 Overcast and Flat Light
Overcast days produce diffused, even lighting that eliminates harsh shadows. This might sound ideal, but it creates a problem called “flat light”—where the lack of shadows makes it impossible to see terrain contours. For skiing, this means bumps, dips, and changes in slope become invisible. For filming, it means footage looks washed out and lacks depth.
Combat flat light by increasing contrast in-camera. On GoPro, use the “High” sharpening setting and boost the contrast slightly in your picture profile. On DJI, use the “Vivid” color mode. These adjustments won’t fully solve the flat light problem, but they help the footage look more dynamic.
In post-production, flat light footage benefits enormously from contrast and clarity adjustments. In DaVinci Resolve or Lightroom, increase the contrast slider by 15-25%, add clarity or texture by 20-30%, and slightly boost the blacks to create depth. Be careful not to overdo it—pushing flat footage too hard creates noisy, artifacts-laden results.
If your camera supports it, switch to a higher ISO (400-800) in flat light. The slight increase in noise is worth it for the ability to use a faster shutter speed, which reduces motion blur and makes the footage feel sharper and more detailed.
15.3 Snow Storms and Heavy Snowfall
Filming in active snowfall creates magical footage—flakes streaming past the lens, visibility fading into white, the muffled sound of the mountain. But snow also sticks to your lens, obscures your view, and confuses autofocus systems.
Keep a microfiber cloth in an accessible pocket and wipe your lens every few minutes during heavy snow. The warmth of your hand against the lens housing also helps melt accumulated snow before it blocks the view. Some skiers apply a thin layer of anti-fog solution or even diluted dish soap to the lens before heading out—the hydrophobic coating causes water droplets to bead and roll off rather than smearing.
For storm filming, increase your ISO to 800-1600 and open your aperture as wide as possible (f/2.8 on cameras that support it). The goal is to gather as much light as possible in low-visibility conditions. Don’t worry about noise—grainy footage in a storm actually adds to the raw, visceral atmosphere.
White balance shifts dramatically during storms, often trending very blue. Set white balance manually to 6500K-7000K or use the “cloudy” preset. This prevents the footage from looking like an ice cave and keeps colors more natural.
15.4 Night Skiing and Twilight
Night skiing offers a unique aesthetic—bright floodlights against dark skies, the contrast of illuminated runs against shadowed trees, the eerie glow of snow under artificial light. Most modern action cameras can handle night skiing, but you need to push settings to their limits.
Set ISO to the maximum your camera supports (typically 3200-6400) and use the slowest shutter speed you can get away with—1/60 for 30fps footage, or 1/120 for 60fps. Some cameras have a dedicated “Night” or “Low Light” mode that optimizes settings for these conditions. The DJI Action 4’s large sensor genuinely excels here, producing cleaner footage than competitors at high ISO.
Be aware that stabilization works harder in low light because the slower shutter speed introduces more motion blur between frames. HyperSmooth and RockSteady may produce slightly less stable results at night compared to bright daylight. If you notice wobble or warping, reduce the stabilization level slightly and accept a bit more natural camera shake—it often looks more authentic than over-processed stabilization artifacts.
Night footage almost always requires color correction in post. The mix of artificial lights (usually warm/orange) and moonlight (cool/blue) creates color casts that auto white balance struggles with. Use the color wheels in your editing software to balance the highlights, midtones, and shadows independently.
15.5 Windy Conditions
High winds are a double-edged sword for ski filming. They create dramatic visual effects (blowing snow, swaying trees, buffeting clouds) but also produce terrible audio and can even damage your camera mount.
For audio in windy conditions, enable wind reduction in your camera settings and consider using a physical windscreen. If you’re filming in winds above 30 mph, the audio will likely be unusable regardless—plan to replace it with music in post-production.
Wind can vibrate your camera mount, creating a high-frequency flutter in the footage that stabilization can’t fully correct. If you notice this, check that all mount screws are tight and the camera is seated firmly. Adding a small piece of foam between the camera and mount can dampen vibrations significantly.
High winds also affect battery life—the cold, wind-chilled air drains batteries faster. Keep spare batteries in an inside pocket close to your body heat, and swap them more frequently than you would on a calm day.
16. Must-Have Accessories for Ski Helmet Cameras
The right accessories transform a good camera into a great filming system. These add-ons improve image quality, extend shooting time, and protect your investment from the harsh mountain environment.
16.1 ND Filters: The Secret to Professional Footage
Neutral Density (ND) filters are the single most important accessory for ski filming that most people overlook. An ND filter reduces the amount of light entering your lens, like sunglasses for your camera. This allows you to use slower shutter speeds in bright conditions, which creates more natural-looking motion blur and prevents the “staccato” look of fast-shutter footage.
Without ND filters, your camera on a sunny day might use a shutter speed of 1/2000 or faster. This captures every frame so sharply that motion looks choppy and unnatural. With an ND8 filter (reducing light by 3 stops), you can use 1/250 shutter speed at 60fps, which creates the smooth, cinematic motion blur that professional ski films have.
We recommend a set of ND filters in strengths ND4, ND8, ND16, and ND32. Use ND4 for overcast days, ND8 for partly cloudy, ND16 for sunny conditions, and ND32 for extremely bright high-altitude sun on fresh snow. Magnetic filter systems (available from PolarPro, Freewell, and others) make it easy to swap filters on the mountain, even with gloves.
Some newer cameras (like the Insta360 Ace Pro) have built-in ND filters or electronic ND simulation, but external filters generally produce better results because they don’t add processing artifacts.
16.2 Spare Batteries and Battery Cases
Cold weather is the enemy of lithium-ion batteries. At -10°C, most action camera batteries lose 40-60% of their capacity compared to room temperature. This means a camera that records for 90 minutes indoors might only last 40-50 minutes on a cold mountain.
The solution is simple: carry more batteries. We recommend bringing at least three fully charged batteries for a full day of skiing. Store them in an insulated case inside your jacket’s inner pocket, close to your body heat. Swap batteries at lunch or during a rest stop, and keep the depleted batteries warm so they can partially recover.
GoPro’s Enduro batteries are specifically designed for cold weather and perform significantly better than standard batteries in freezing conditions. In our testing, Enduro batteries lasted 35-40% longer than standard batteries at -5°C. If you own a GoPro Hero 11 or newer, investing in Enduro batteries is essential.
DJI’s Action 4 uses a different approach—it has a larger battery capacity and a cold-resistant battery chemistry that’s rated to -20°C. In practice, we found it lasted about 75 minutes at -5°C, which is competitive with GoPro’s Enduro.
Battery cases with built-in warming elements are a newer product category that’s worth considering. These cases use a small heating element (powered by the case’s own battery) to keep spare batteries warm. They’re bulky but effective, especially for all-day filming in extreme cold.
16.3 Lens Guards and Protective Cases
Action camera lenses are vulnerable to scratches from ice crystals, ski pole tips, and crash impacts. A scratched lens ruins every clip from that point forward, so protection is essential. Most camera manufacturers sell adhesive lens guards—thin pieces of tempered glass or plastic that stick over the lens and absorb impacts.
For 360 cameras, lens guards are absolutely critical because the protruding lenses are extremely vulnerable. The Insta360 X3’s lenses stick out significantly, making them the first thing to contact the ground in a fall. The official Insta360 lens guards are worth every penny—they can be replaced for $15-20, while a scratched lens requires sending the camera for repair.
Tempered glass lens guards offer better optical clarity than plastic ones, but they can shatter on impact. Plastic guards may scratch more easily but won’t shatter, making them safer for crash-prone skiing. Many skiers carry both types and swap depending on conditions—glass for powder days, plastic for park laps.
16.4 Chest Mounts and Body Harnesses
While this guide focuses on helmet cameras, chest mounts deserve mention because they provide a fundamentally different perspective that complements helmet footage. A chest mount captures your arms, poles, and knees, creating an immersive “driver’s seat” view that shows your skiing technique.
The GoPro Chesty is the industry standard—it’s adjustable, comfortable under a jacket, and compatible with all GoPro cameras. Third-party options from Smatree and Telesin offer similar quality at lower prices.
For skiing specifically, we recommend positioning the chest mount slightly higher than you would for snowboarding. This captures more of the terrain ahead and less of your legs, creating a more balanced frame. Tighten the straps firmly to prevent bouncing, which is more pronounced with the lower center of gravity of a chest mount.
Some skiers use a “dual camera” setup—helmet mount for POV and chest mount for body shots. This gives you two perspectives from every run, doubling your footage options in post-production. The extra weight is minimal, and the variety makes your final edit significantly more engaging.
16.5 External Microphones and Wind Protection
As discussed in the audio settings section, wind noise is the primary enemy of ski audio. Physical wind protection is more effective than software filtering. Foam windscreens slip over the camera’s microphone ports and reduce wind noise by 10-20dB without significantly affecting audio quality.
For more extreme wind protection, “dead cat” windscreens (fuzzy covers that look like small animal pelts) provide even better wind rejection. They’re bulkier but essential for filming at high speeds or in stormy conditions. The GoPro Media Mod includes a built-in windscreen and directional microphone that significantly improves audio quality.
Wireless lavalier microphones are the ultimate solution for clear audio while skiing. Clip the mic inside your jacket (protected from wind) and pair it with the camera via Bluetooth or a wireless transmitter. The DJI Mic and Rode Wireless GO II are popular choices that work well in cold weather, though battery life decreases in freezing temperatures.
17. Backcountry vs Resort Filming: Different Approaches for Different Terrain
The way you approach filming differs significantly between resort skiing and backcountry touring. Each environment presents unique challenges and opportunities that affect your camera settings, mounting choices, and overall strategy.
17.1 Resort Filming Strategies
Resort skiing offers convenience and variety. You have groomed runs, terrain parks, tree runs, and lift-accessed bowls all within reach. The challenge is capturing enough variety to keep your edit interesting while dealing with crowds, lift lines, and other skiers who may not want to be filmed.
Always be mindful of other people in your footage. Most resorts allow personal filming but prohibit commercial use without a permit. If you’re filming for YouTube or social media (non-commercial), you generally have more freedom, but be respectful of others’ privacy. Avoid filming groups of children and never follow strangers closely for extended periods.
Use lift rides as transition footage and recovery time. Film the scenery, check your footage, swap batteries, and plan your next run. The chairlift is also a great place to film follow-cam footage of friends on adjacent chairs or below you on the mountain.
For terrain park filming, a chest mount often works better than a helmet mount because it captures the takeoff, the air, and the landing in a single continuous shot. A helmet mount tends to point at the sky during jumps, missing the most interesting part of the action. If you prefer a helmet mount for park skiing, angle it slightly downward to keep the landing in frame.
Multi-run edits work well in resorts because you have easy lap access to the same terrain. Film the same run from different angles across multiple laps, then combine the perspectives in editing. This creates a dynamic sequence that shows the same feature from multiple viewpoints.
17.2 Backcountry Filming Considerations
Backcountry filming requires more preparation because every battery, every gigabyte of storage, and every minute of recording time matters when you’re hours from the car. Weight is critical—backcountry skiers count every gram, and a camera plus mounts and spare batteries can add 300-500 grams to your pack.
Prioritize battery efficiency in the backcountry. Shoot in shorter bursts rather than recording entire ascents. Use the camera’s power-saving modes when possible, and carry at least two spare batteries in an inside pocket. Consider bringing a small power bank to charge the camera during breaks—though be aware that lithium batteries also lose charging efficiency in cold.
Mounting choices are more limited in the backcountry because you’re typically wearing a climbing helmet (or no helmet) rather than a ski helmet. Clip-on mounts, strap mounts, and adhesive mounts that work on smooth surfaces are your best options. Test your mount setup before your trip to ensure it’s secure—you don’t want to lose your camera in a remote alpine environment.
The scenery in the backcountry is often more dramatic than resort terrain, so take advantage of it. Film wide establishing shots during transitions, capture the vastness of mountain landscapes, and include details like skin tracks, bootpacks, and mountain flora that tell the story of your journey.
Avalanche safety equipment should always take priority over filming. Never compromise safety to get a shot. If conditions require you to focus on avalanche assessment, navigation, or belaying, turn off the camera and give your full attention to the task. The mountain will always be there for another day.
Safety First: Backcountry Filming Rules
Never film alone in the backcountry. Always carry avalanche safety equipment (beacon, probe, shovel) and know how to use it. If you’re filming a partner skiing a line, position yourself in a safe zone before they drop. Never compromise safety for a better angle. The footage isn’t worth your life.
17.3 Helicopter and Cat Skiing Filming
Heli-skiing and cat-skiing trips are expensive, once-in-a-lifetime experiences that you’ll want to document perfectly. The terrain is typically untracked powder in dramatic alpine settings—the kind of footage that makes for stunning ski films.
For heli-skiing, be aware that vibration from the helicopter can affect footage if you’re filming during the flight in. Secure your camera tightly and use the highest stabilization setting. Some skiers film the approach from the helicopter, which creates dramatic establishing shots of the terrain below.
Cat-skiing typically involves shorter runs with more transitions, so your camera needs to be quick to deploy and easy to start/stop. The DJI Action 4’s magnetic mount is particularly valuable here—you can snap the camera on and off rapidly during the frequent stops.
For both heli and cat skiing, bring extra batteries and memory cards. You’ll be skiing terrain you may never access again, and running out of storage or power would be devastating. Pack at least 256GB of total storage and four fully charged batteries for a full day.
18. Protecting Your Camera in Extreme Cold: A Complete Guide
Cold weather is the single biggest challenge for action camera performance on the mountain. Beyond battery drain, extreme cold can cause lens fogging, LCD screen sluggishness, recording failures, and even permanent damage to internal components. Here’s how to protect your camera and keep it filming all day.
18.1 Understanding Cold Weather Battery Behavior
Lithium-ion batteries work through a chemical reaction, and cold temperatures slow this reaction dramatically. At 0°C, most batteries lose about 20% capacity. At -10°C, the loss increases to 40-50%. At -20°C, batteries can lose up to 70% of their rated capacity. This isn’t permanent damage—the battery recovers when warmed—but it means your camera will shut down much sooner than expected.
The key strategy is keeping batteries warm before use. Store spare batteries in an inside jacket pocket close to your torso. Body heat keeps them at 25-35°C, which is optimal for lithium-ion chemistry. When you swap batteries, put the depleted one in the warm pocket and insert the warm replacement. This simple habit can double your effective recording time compared to using batteries that have been sitting in a cold backpack.
Some extreme cold-weather photographers use chemical hand warmers to keep batteries warm. Place a hand warmer in your battery storage pocket or wrap it around a battery compartment. The additional heat source can keep batteries at operating temperature even in -30°C conditions.
Pre-warm your camera before the first recording of the day. Keep it in your jacket pocket during the chairlift ride up, or hold it in your gloved hands for a few minutes. Starting with a camera at 20°C rather than -15°C makes a significant difference in initial recording time and overall performance.
18.2 Preventing Lens Fogging
Lens fogging occurs when moisture inside the camera housing condenses on the cold lens element. This typically happens when you move from a warm environment (car, lodge, jacket pocket) to the cold outdoors. The temperature difference causes moisture to condense, creating a foggy or blurry image.
The best prevention is gradual temperature acclimation. Instead of taking your camera from a warm car directly to the cold slope, leave it in an unheated area (like a garage or car trunk) for 15-20 minutes before use. This allows the camera to cool gradually, preventing the rapid temperature change that causes condensation.
If you must take the camera from warm to cold quickly, place it in a sealed plastic bag before going outside. The bag traps the warm, moist air around the camera. When you’re outside, wait 10-15 minutes before opening the bag—the camera will have cooled gradually, and any condensation forms on the outside of the bag rather than the lens.
Anti-fog inserts—small silica gel or desiccant strips placed inside the camera’s battery compartment—absorb moisture before it can reach the lens. These are inexpensive and highly effective. Replace them when they become saturated (they change color when full of moisture).
If your camera fogs up during a run, the best solution is patience. Hold the camera close to your body (in a jacket pocket) for 5-10 minutes. The warmth will evaporate the condensation. Blowing warm breath on the lens can help temporarily but often makes the problem worse because you’re adding more moisture.
18.3 Cold Weather Startup Issues
Some cameras refuse to start or immediately shut down in extreme cold. This is a firmware-level protection that prevents damage to internal components. If your camera exhibits this behavior, warm it in your pocket for several minutes before attempting to start it.
Battery contacts can also develop increased resistance in cold, causing the camera to report a dead battery even when the battery has charge. Removing and reinserting the battery (with warm hands or gloves) can resolve this by scraping away any frost or ice crystals on the contacts.
For cameras that consistently fail to start in cold conditions, consider a camera housing or insulated case that provides thermal protection. While this adds bulk, it keeps the camera at a higher operating temperature and prevents cold-related malfunctions.
18.4 Protecting LCD Screens
Liquid crystal displays become sluggish and unresponsive in extreme cold. Touchscreens may register touches incorrectly or not at all, and the display may appear dim or have slow refresh rates. This is temporary—screens return to normal when warmed—but it can make changing settings difficult on the mountain.
Use physical buttons instead of the touchscreen when the camera is cold. Most action cameras have dedicated buttons for starting/stopping recording, changing modes, and adjusting basic settings. Learn these controls by muscle memory so you can operate the camera without looking at the screen.
If you must use the touchscreen in cold conditions, press firmly and hold for a moment longer than usual. The screen’s capacitive sensors need more contact time to register touches in cold. Some cameras have a “glove mode” in the settings that increases touch sensitivity—enable this before heading out.
19. Memory Cards and Storage: What You Need to Know
Choosing the right memory card and managing storage effectively ensures you never run out of space or lose footage to card errors. The wrong card can cause recording failures, corrupted files, or slow performance that limits your shooting options.
19.1 Choosing the Right SD Card
Not all SD cards are created equal. For 4K/60fps or higher recording, you need a card with a sustained write speed of at least 90 MB/s. Look for cards rated V30 or V60 (Video Speed Class), which guarantee minimum sustained write speeds for video recording. The UHS-I U3 or UHS-II U3 rating also indicates sufficient speed for 4K video.
For 5.3K recording or high-bitrate 4K/120fps, a V60 or V90 card is recommended. These cards offer write speeds of 120-300 MB/s, which prevents dropped frames and recording interruptions during high-demand shooting.
We recommend Samsung EVO Select, Samsung PRO Plus, or SanDisk Extreme Pro cards. These offer reliable performance at reasonable prices and are widely available. Avoid no-name brands or suspiciously cheap cards—corrupted footage from a failed card is devastating, especially on a once-in-a-lifetime trip.
For capacity, 128GB is the minimum we recommend for a full day of skiing at 4K/60fps. A 256GB card provides comfortable headroom for all-day filming without worrying about running out of space. If you shoot 5.3K or high-frame-rate footage, consider 512GB cards or bring multiple 256GB cards.
19.2 Cold Weather Storage Tips
SD cards themselves are not significantly affected by cold, but the cameras reading them can be. In extreme cold, the camera’s SD card reader may experience intermittent read errors. Always wait a few seconds after stopping a recording before removing the card—the camera needs to finalize the file, and interrupting this process can corrupt the footage.
When you return to a warm environment after filming in cold, moisture can condense on and inside the SD card. Before inserting a cold SD card into a warm computer, place it in a sealed plastic bag and let it warm gradually for 15-20 minutes. This prevents condensation from forming on the card’s contacts or inside the card reader.
Carry multiple smaller cards rather than one large card. If a card fails or becomes corrupted, you lose only a portion of your day’s footage rather than everything. We recommend bringing three 128GB cards rather than one 512GB card, even though the total capacity is similar.
19.3 Offloading and Backup in the Field
If you’re on a multi-day trip, you’ll need a way to offload footage from your cards to free up space for the next day. Portable SSDs like the Samsung T7 or SanDisk Extreme Portable are lightweight, fast, and durable enough for travel. Connect them to your laptop or tablet each evening and transfer your footage.
Smartphones can also serve as field backup devices with a USB card reader. The GoPro and Insta360 apps allow direct card access, and you can transfer footage to your phone’s storage or cloud backup. This is slower than a dedicated SSD but requires no additional equipment.
Never delete footage from your cards in the field unless you absolutely must. It’s better to buy an extra card than risk accidentally deleting good footage. Format cards only in the camera you’ll be using them in—formatting in a computer can sometimes create compatibility issues.
21. Camera Maintenance After Skiing: Keeping Your Gear in Top Condition
Proper maintenance extends your camera’s life and prevents the “salty snow corrosion” and moisture damage that plague poorly maintained action cameras. A few minutes of care after each ski day saves expensive repairs and ensures your camera is ready for the next adventure.
21.1 Post-Ski Cleaning Routine
After every day on the mountain, follow this cleaning routine:
- Remove the camera from the mount and gently shake off loose snow. Never force snow off—let it melt naturally or brush it away with a soft cloth.
- Wipe the exterior with a dry microfiber cloth. Pay special attention to the battery compartment, memory card slot, and charging port. Snow and moisture collect in these crevices and can cause corrosion.
- Clean the lens with a dedicated lens cleaning solution and microfiber cloth. Start from the center and wipe outward in a spiral motion to avoid dragging particles across the glass.
- Open all compartments (battery door, USB port cover, SD card slot) and let them air dry for 30 minutes in a warm, dry room. This prevents trapped moisture from causing internal corrosion.
- Check for damage—inspect the lens for scratches, the housing for cracks, and the mount for stress marks. Address any damage before your next outing.
21.2 Deep Cleaning After Heavy Exposure
If your camera was exposed to heavy snow, salt (from resort snow treatment), or was submerged in water, perform a deeper cleaning:
Rinse the camera under lukewarm (not hot) running water for 1-2 minutes. This removes salt crystals and fine particles that can work into seals and crevices. Even “waterproof” cameras benefit from this rinse—chlorinated pool water and saltwater are particularly corrosive and should always be rinsed off.
After rinsing, dry the camera thoroughly with a microfiber cloth, then place it in a sealed container with desiccant packets (silica gel) overnight. This absorbs any remaining moisture that could cause internal fogging or corrosion.
Inspect the O-ring seals (around the battery door and lens) for debris, hair, or sand particles. Even a single grain of sand can compromise the waterproof seal, allowing moisture to enter the camera body. Clean seals with a damp cloth and apply a thin layer of silicone grease (supplied with most camera housings) to keep them supple and effective.
21.3 Long-Term Storage
If you’re storing your camera for an extended period (summer, for example), follow these steps to prevent damage:
Charge the battery to approximately 50% before storing it. Lithium-ion batteries stored at 100% or 0% for long periods degrade faster than those stored at 50%. Remove the battery from the camera and store it separately in a cool, dry location.
Format the memory card in the camera before storing it, then remove it and store it in a protective case. Don’t leave the card in the camera during long-term storage—the card’s contacts can develop corrosion from extended contact with the camera’s reader.
Store the camera in a cool, dry location away from direct sunlight, extreme temperatures, and humidity. A padded camera bag or case provides protection from dust, physical damage, and accidental drops.
Every 3-4 months during storage, power on the camera briefly to check that the battery hasn’t self-discharged completely and that the firmware is functioning normally. This also helps prevent the capacitor in the flash (if equipped) from fully discharging, which can require professional service to revive.
21.4 Dealing with Water Damage
If your camera gets wet internally (you notice fogging inside the lens that doesn’t clear, or the camera behaves erratically after water exposure), act quickly:
Power off the camera immediately and remove the battery. Do not attempt to turn it on again—powering a wet circuit board can cause short circuits and permanent damage.
Open all compartments and place the camera in a sealed container with copious amounts of silica gel desiccant. Leave it for 48-72 hours. In many cases, this is enough to dry out the internal components and restore normal function.
If the camera doesn’t work after drying, professional repair may be necessary. Contact the manufacturer’s support line—many action camera companies offer repair services for water damage, and some warranties cover water intrusion if the camera was used within its rated depth limits.
22. Understanding Frame Rates for Action Sports Filming
Frame rate is one of the most important technical decisions you’ll make when filming skiing, yet it’s often misunderstood. This section breaks down everything you need to know about frame rates and how they affect your footage quality, editing flexibility, and viewer experience.
22.1 What Frame Rate Actually Means
Frame rate measures how many individual images (frames) your camera captures per second, expressed in fps (frames per second). A higher frame rate captures more temporal information—more “slices of time” per second—which results in smoother motion and the ability to slow footage down without choppiness.
At 24fps (the standard for cinema), fast motion can appear slightly stuttery because there aren’t enough frames to smoothly represent rapid movement. This is actually desirable for narrative film because it creates a “cinematic” feel. But for action sports like skiing, where subjects move quickly across the frame, higher frame rates produce noticeably smoother and more natural-looking footage.
At 30fps (the standard for television and web video), motion is smooth for most content but can still show slight stuttering during very fast panning or rapid subject movement. This is perfectly acceptable for scenic skiing, cruising, or lift rides.
At 60fps, motion is exceptionally smooth. Fast-moving subjects (skiers, snow spray, trees rushing past) appear fluid and natural. This is the recommended frame rate for the majority of skiing footage because it captures the speed and energy of the sport accurately.
At 120fps and above, motion is ultra-smooth and can be slowed down significantly while maintaining fluid playback. This is the domain of slow-motion footage—dramatic moments that benefit from being stretched out in time.
22.2 The 180-Degree Shutter Rule
The 180-degree shutter rule states that your shutter speed should be approximately double your frame rate. This creates natural-looking motion blur that our eyes find pleasing and “cinematic.” The rule gets its name from traditional film cameras, where a 180-degree shutter opening (half the circle) produced the ideal amount of motion blur.
For practical skiing application:
- 24fps → 1/50 shutter speed
- 30fps → 1/60 shutter speed
- 60fps → 1/120 shutter speed
- 120fps → 1/250 shutter speed
- 240fps → 1/500 shutter speed
On sunny days with bright snow, achieving these slow shutter speeds is nearly impossible without ND filters—your camera will use much faster shutter speeds (1/1000 or faster) to avoid overexposing, which eliminates motion blur and makes footage look choppy. This is why ND filters are essential for achieving professional-looking ski footage in bright conditions.
When you can’t use ND filters (because you don’t have them or conditions are changing too rapidly), a faster shutter speed is better than an overexposed image. The footage will look slightly less “cinematic” but will be properly exposed and watchable.
22.3 Frame Rate and Stabilization Quality
Higher frame rates provide more data for electronic image stabilization (EIS) algorithms to work with. This means stabilization is generally more effective at 60fps than at 30fps, because the system has twice as many reference points per second to calculate camera movement.
This is one reason why footage shot at 60fps often looks noticeably more stable than 30fps footage, even with the same stabilization setting. The EIS algorithm can make smaller, more precise corrections because it’s working with finer temporal granularity.
For extremely rough terrain (moguls, crud, icy bumps), 60fps with strong stabilization (HyperSmooth High or RockSteady+) produces the best results. The combination of high frame rate data and aggressive stabilization creates footage that looks almost gimbal-smooth even in challenging conditions.
Pro Tip: Future-Proof Your Footage
Always shoot at the highest frame rate your storage and battery budget allows. You can always slow down 60fps footage to play at 30fps, but you can never add frames to 30fps footage to make it smooth at 60fps playback. Shooting at 60fps gives you maximum flexibility in post-production without any downside in image quality.
23. Audio Recording Tips for Ski Filmmaking
Great audio transforms a ski video from a visual montage into an immersive experience. The sound of edges carving through hardpack, powder exploding on a turn, wind rushing past at speed, and your own excited exclamations create an emotional connection that silent footage simply cannot achieve.
23.1 Understanding Wind Noise
Wind noise is the primary audio challenge in ski filming. At typical skiing speeds (20-50+ mph), air rushing across the camera’s microphone capsules creates low-frequency rumble that overwhelms all other sounds. This noise can reach 100+ decibels, completely drowning out ambient sounds, your voice, and even music you’re playing.
Modern action cameras include software-based wind noise reduction, which uses algorithms to identify and suppress wind noise patterns. GoPro’s “Wind Noise Reduction” and DJI’s “Wind Noise Reduction” are effective at reducing moderate wind noise but can make remaining audio sound thin and processed. Enable these features as a baseline, but understand they’re a compromise, not a solution.
Physical wind protection is far more effective than software. Foam windscreens reduce wind noise by 10-20dB by creating a barrier between the wind and the microphone capsule while allowing sound waves to pass through. Dead cat windscreens (fuzzy covers) provide even more wind rejection at the cost of increased bulk.
Position matters for audio quality. Microphones facing forward (into the wind) capture more noise than those facing backward or downward. Some cameras allow you to select which microphone is active—choosing the rear-facing mic can reduce wind noise in certain orientations.
23.2 Capturing Ambient Sounds
Beyond wind, the mountain is full of sounds worth capturing: the clank of ski bindings, the hiss of fresh snow, the rumble of a groomer, the chatter on a chairlift, the crunch of bootpacking through crusty snow. These ambient sounds add texture and authenticity to your edit.
To capture clean ambient audio, stop skiing and hold the camera still (or set it on a stable surface) for 10-20 seconds. This “room tone” recording captures the natural sound of the environment without wind interference from your movement. You can layer this audio under your action footage in post-production to add depth.
Microphone placement relative to the sound source matters. For capturing ski sounds, mount the camera lower on your body (chest mount or low helmet mount) where it’s closer to your skis and further from wind. For capturing voices, a mic inside your helmet is ideal—it’s protected from wind and close to your mouth.
23.3 External Audio Solutions
For serious ski filmmakers, external audio equipment dramatically improves quality. Wireless lavalier microphones (like the Rode Wireless GO II or DJI Mic) clip to your clothing inside your jacket and transmit audio wirelessly to a receiver connected to the camera. This setup captures clear voice audio while being completely protected from wind.
The GoPro Media Mod adds a directional microphone and a 3.5mm input for external microphones. Combined with a lavalier mic, this provides broadcast-quality audio from a helmet-mounted camera—a combination that was impossible just a few years ago.
For 360 cameras, audio is captured in all directions simultaneously, creating immersive spatial audio that rotates with the viewer’s perspective. This is particularly powerful for VR content and creates a unique viewing experience that standard stereo audio can’t match.
24. Multi-Camera Ski Filming: Professional Perspectives
Professional ski films use multiple camera angles to create dynamic, visually interesting sequences. While most recreational skiers use a single helmet camera, a multi-camera setup—even with just two cameras—dramatically increases your footage variety and editing options.
24.1 The Two-Camera Setup
The simplest multi-camera setup uses a helmet mount and a chest mount simultaneously. The helmet camera captures what you see (the terrain ahead, the view from the summit), while the chest camera captures your body in action (arms working, poles planting, skis turning). In editing, cutting between these perspectives creates visual variety that a single camera cannot achieve.
Syncing footage from two cameras is straightforward in post-production. Use a visible or audible cue—a hand clap, a visible flash, or a distinctive action like clicking your poles together—to mark the sync point. Most editing software can automatically align footage based on audio waveforms, making sync nearly effortless.
The two-camera setup is also valuable for filming with a partner. Each skier wears a helmet camera, and you exchange footage after the run. One person films a follow-cam perspective of the other, and vice versa. This gives you two unique angles of the same run without any additional equipment.
24.2 Three-Camera and Beyond
Professional shoots often use three or more cameras: a helmet cam for POV, a chest cam for body shots, a selfie stick (with 360 camera) for face/reaction shots, and potentially a drone or tripod-mounted camera for external perspectives. Each angle tells a different part of the story.
The challenge with multiple cameras is data management. Three cameras recording at 4K/60fps generate approximately 6GB of footage per hour each—18GB total per hour. For a full day of skiing, this can exceed 100GB. Ensure you have enough storage (at least 512GB total) and a reliable backup system.
Battery management becomes critical with multiple cameras. If you’re running three cameras simultaneously, you’ll need 6-9 batteries for a full day. Carry them in an insulated pouch and rotate through them systematically.
24.3 Editing Multi-Camera Footage
Editing multi-camera footage requires a different workflow than single-camera editing. Create separate sequences for each camera angle, then assemble your master edit by selecting the best angle for each moment. Some editing software (like Premiere Pro’s multicam feature) allows you to view all angles simultaneously and switch between them in real-time as the timeline plays.
The key principle is to cut to the most interesting angle at any given moment. When the terrain ahead is dramatic, use the helmet cam. When your body position is dynamic, use the chest cam. When you want to show your reaction, use the selfie angle. This “best angle” approach creates a polished, professional feel.
Don’t over-cut. While variety is important, holding a single angle for 3-5 seconds allows the viewer to absorb the scene before switching. Rapid cutting between angles (every 1-2 seconds) creates disorientation rather than excitement. Let each angle breathe before moving to the next.
25. Best Apps for Editing Ski Videos on Your Phone
You don’t need a laptop to create compelling ski edits. Modern smartphone apps offer powerful editing tools that can produce professional-quality results. These apps are particularly valuable for quick social media content where speed matters more than elaborate effects.
25.1 GoPro Quik
GoPro Quik is the official companion app for GoPro cameras, and it’s excellent for quick edits. The “Highlights” feature automatically analyzes your footage, identifies the most exciting moments (based on speed, altitude change, and motion), and assembles them into a polished edit with music. It’s not perfect—you’ll want to fine-tune the selections—but it saves enormous amounts of time for casual content.
The app includes templates, filters, and music libraries specifically designed for action sports content. The “Speed Tool” makes speed ramping easy, and the “Frame Grab” feature lets you extract high-quality still photos from your video footage.
The main limitation is that GoPro Quik works best with GoPro footage. While it can edit footage from other cameras, some features (like automatic highlight detection) don’t function properly with non-GoPro files.
25.2 CapCut
CapCut (from ByteDance, the creators of TikTok) is arguably the most powerful free video editing app available. It offers multi-track editing, keyframe animation, chroma key (green screen), speed ramping, and advanced color grading—all for free on both iOS and Android.
CapCut’s strength is its template library. Users share thousands of templates that you can apply to your footage with a few taps. Many templates are specifically designed for ski and snowboard content, with synchronized music, transitions, and effects that match the energy of action sports.
The app handles 4K editing smoothly on modern smartphones and exports at high quality. The auto-captions feature can add text to your videos automatically, and the AI-powered background removal can create interesting effects with ski footage.
25.3 InShot
InShot is a straightforward, user-friendly editor that excels at creating content for Instagram and TikTok. Its interface is intuitive—most features are accessible with a single tap—and it includes all the basics: trimming, splitting, speed adjustment, filters, text, stickers, and music.
For ski content specifically, InShot’s aspect ratio presets make it easy to create properly formatted content for each platform. The “Canvas” feature lets you adjust the frame size and position, which is useful for converting horizontal ski footage to vertical format without losing important elements.
InShot is free with ads, or you can remove ads with a one-time purchase. The premium version also unlocks additional filters, effects, and cloud storage for your projects.
25.4 LumaFusion (iOS Only)
LumaFusion is the closest thing to desktop editing on an iPad or iPhone. It supports multiple video and audio tracks, advanced color correction, keyframing, and export at up to 4K/60fps. Professional ski filmmakers use LumaFusion for field edits when they need to produce content quickly without a laptop.
The color grading tools are particularly impressive for a mobile app—they include color wheels, curves, LUT support, and specific adjustments for shadows, midtones, and highlights. This allows you to create custom looks that match your brand or the mood of your footage.
LumaFusion costs $29.99 (one-time purchase), which is a bargain for the capability it provides. If you’re serious about mobile editing and own an Apple device, it’s the best investment you can make.
25.5 Insta360 App
The Insta360 app is essential for anyone using Insta360 cameras. It handles 360 footage reframing, allowing you to pan, tilt, and zoom within the spherical capture to create standard video clips from any angle. The “Shot Lab” feature offers one-tap effects that would require complex keyframing in traditional editors.
For the Insta360 GO 3 and Ace Pro, the app also provides remote camera control, live preview, and firmware updates. The AI-powered editing features can automatically detect the best moments and create highlights reels with minimal input.
26. Color Grading Snow: Making Winter Look Beautiful
Color grading is the process of adjusting colors in your footage to create a specific mood or aesthetic. Snow environments are particularly challenging to color grade because of the extreme brightness, limited color palette, and the tendency of auto-white balance to create blue or gray casts. Here’s how to make your ski footage look cinematic.
26.1 The Challenges of Grading Snow
Snow reflects a huge amount of light and contains subtle blue and violet tones that our eyes naturally filter out but cameras capture faithfully. Without correction, snow often appears blue-tinted, especially in shadows. Conversely, over-correcting can make snow look unnaturally warm or yellow.
The limited color palette of winter landscapes (white snow, blue sky, dark trees) means that small color adjustments have dramatic effects. A slight increase in saturation that looks subtle in a summer landscape can make snow look neon-blue or trees look radioactive in winter footage.
Action cameras typically shoot in a “flat” or “vivid” color profile by default. Flat profiles preserve more dynamic range for grading but look washed out straight from the camera. Vivid profiles look punchy but have less flexibility in post-production. For serious grading, shoot in the flattest profile available (GP-Log on GoPro, D-Log M on DJI) and grade in post.
26.2 Basic Snow Grading Workflow
Start with exposure correction. Snow footage from action cameras is typically underexposed (the camera’s meter sees all that white and darkens the image). Increase exposure until the snow looks genuinely white—not gray, not yellow, not blue. Use the histogram as a guide: the exposure peaks should sit in the upper third of the graph without touching the right edge (which would indicate blown-out highlights).
Next, correct white balance. The snow should look neutral white, with no strong color cast. In your color grading software, adjust the temperature slider until whites appear neutral. Use the eyedropper tool on a patch of clean snow if your software offers one—this sets white balance automatically.
Add contrast. Snow footage often looks flat and lifeless without contrast adjustment. Increase the contrast slider by 10-20% and add a slight S-curve to the tones. This creates depth and dimension, making the snow texture visible and the sky more dramatic.
Adjust clarity or texture. This midtone contrast adjustment brings out details in the snow surface—tracks, wind texture, ice crystals—that give footage a tactile quality. Increase by 15-30% for a natural look, but avoid overdoing it, which creates halos and artifacts.
Fine-tune saturation carefully. Winter footage usually benefits from slightly reduced global saturation (by 5-10%) to prevent the limited colors from looking artificial. Then selectively increase the saturation of specific elements—boost blues in the sky, greens in evergreen trees, or the orange of a ski jacket—to make them pop against the white background.
Pro Tip: Create and Save a Preset
Once you’ve dialed in a grade that looks good on your ski footage, save it as a preset or LUT. This ensures consistency across all your clips and saves enormous amounts of time when editing multiple runs from the same day. Most color grading software (DaVinci Resolve, Lightroom, Final Cut Pro) allows you to save custom presets that can be applied with a single click.
26.3 Advanced Grading Techniques
For more sophisticated looks, use secondary color corrections to adjust specific elements independently. Qualify (select) the blue tones in the sky and deepen them for drama. Select the white tones in the snow and add a subtle warm tint for a golden-hour feel. Use power windows (graduated filters) to darken the edges of the frame, drawing the viewer’s eye toward the center.
Split-toning—adding different colors to the highlights and shadows—is a popular technique for ski footage. Adding warm tones (orange/gold) to highlights and cool tones (blue/teal) to shadows creates a cinematic look that’s common in professional ski films. This mimics the look of film stocks like Kodak Vision3, which have a characteristic warm highlight/cool shadow split.
Don’t overlook the importance of consistent grading across your entire edit. All clips from the same day should have a similar look, even if they were shot in different conditions. Use your grading software’s matching tools or manually adjust each clip to match a reference frame from your best-looking clip.
27. Pro Filming Tips from Professional Ski Cinematographers
We’ve gathered insights from professional ski filmmakers who shoot for brands like GoPro, Red Bull, and major ski manufacturers. These tips come from decades of experience filming in the world’s most challenging mountain environments.
27.1 The Golden Hour Rule
The first and last hour of sunlight each day—known as golden hour—produces the most dramatic, beautiful lighting for ski footage. The low angle of the sun creates long shadows that reveal terrain contours, warm color temperatures that make snow glow, and dramatic contrasts between lit and shadowed slopes.
Plan your most important shoots for golden hour. If you’re filming a specific line or feature, time your run to coincide with these lighting conditions. The difference between footage shot at noon (flat, harsh light) and golden hour (warm, dimensional light) is dramatic, often making the difference between forgettable and extraordinary footage.
Dawn patrol skiing offers unique opportunities for golden hour footage. The combination of fresh tracks, empty slopes, and sunrise light creates magical conditions. If you’re willing to wake up early, the visual rewards are significant.
27.2 Shoot Longer Than You Think
Professional ski filmmakers typically record continuously throughout a run rather than starting and stopping for specific moments. This approach ensures you never miss an unexpected opportunity—a sudden wildlife encounter, an unusual cloud formation, a perfectly timed powder explosion. The “extra” footage can always be trimmed later, but you can’t add footage you didn’t capture.
Start recording before you drop into a run and keep recording until you’ve stopped completely. Many of the best moments happen in the transitions—the few seconds before and after the main action—when you’re relaxed and not consciously performing for the camera.
For social media content, the “start early, stop late” approach gives you clean edit points with natural motion on both ends of each clip, making it easier to create smooth transitions in editing.
27.3 Use Natural Framing
The mountain provides natural frames that add visual interest and depth to your footage. Ski through gaps in trees, under lift towers, between rock formations, or along ridge lines with distant peaks visible. These natural frames create a sense of discovery and draw the viewer’s eye through the composition.
Foreground elements—snow spray, your ski tips, nearby rocks—create depth by giving the viewer a reference point for distance. When filming with a wide-angle lens (which most action cameras use), foreground elements appear larger relative to the background, exaggerating the sense of depth and speed.
Look for leading lines in the terrain: ridge lines, ski tracks, tree lines, and shadows all create visual paths that guide the viewer’s eye through the frame. Align these elements with the center or vanishing point of your composition for maximum impact.
27.4 Capture the In-Between Moments
The most memorable moments in ski videos often aren’t the skiing itself—the lift conversation, the hot chocolate break, the laugh after a spectacular crash, the quiet moment of awe at a mountain view. These “in-between” moments add humanity and emotion that pure action footage lacks.
Keep your camera accessible during transitions. Film your friends’ reactions after a great run, the view from the lodge patio, the process of waxing skis in the evening. These clips become the connective tissue of your edit, providing context and pacing between action sequences.
Some of the most shared ski content on social media isn’t action footage at all—it’s the lifestyle surrounding the sport. The drive to the resort, the first chair of the morning, the aprés-ski gathering. These moments resonate because they’re relatable and evoke the full experience of a ski day, not just the physical act of skiing.
27.5 Know When to Stop Filming
This might seem contradictory after telling you to record continuously, but there are moments when putting the camera away improves the experience—both for you and your eventual viewers. If conditions are truly spectacular (deepest powder of your life, perfect corn snow, dramatic weather), sometimes the best choice is to fully experience the moment rather than worry about capturing it.
Not every run needs to be filmed. Ski with your camera for most of the day, but take a few runs without it. This keeps the experience fresh and prevents “camera fatigue”—the mental burden of constantly thinking about angles, settings, and battery life. The footage you capture on your filming runs will be better because you’re not exhausted from filming every single lap.
Most importantly, never compromise safety for a shot. If conditions are dangerous (avalanche risk, whiteout visibility, extreme cold), turn off the camera and focus on getting home safely. No footage is worth your life.
Ready to Upgrade Your Ski Filming?
Start with one of our top-rated helmet cameras and the essential accessories we’ve recommended. The investment pays for itself in memories preserved.
Shop Action Cameras on Amazon28. Conclusion
For the absolute best video quality, the GoPro Hero 12 remains the king of the mountain. Its combination of resolution, stabilization, and Enduro battery technology makes it the most reliable tool for documenting serious skiing. However, if you want a fuss-free experience that guarantees you catch the action regardless of where you point the lens, the Insta360 X3 is the modern choice. For budget-conscious families, the Akaso V50 Elite delivers respectable footage at a fraction of the cost.
Whichever camera you choose, remember that the best camera is the one you actually bring and use. A $100 action camera filming an incredible run beats a $500 camera sitting in the car because it’s too cold or too bulky to carry.
Start with the fundamentals: mount the camera securely, shoot in 4K at 60fps, add +0.5 EV for snow exposure, and keep spare batteries warm in your jacket pocket. As you gain experience, experiment with ND filters for cinematic motion blur, multiple camera angles for variety, and color grading in post-production for a polished final product.
The most important tip of all: film more than you think you need, and edit ruthlessly. A 3-minute video of your best moments is infinitely more watchable than a 15-minute compilation of everything you filmed. Quality trumps quantity, always.
Pack extra batteries inside your jacket (close to your body heat) and wipe your lens often. The best footage is the footage you actually capture, not the footage you leave on the mountain because your gear failed. Check our comparison table above to see which specs matter most for your skiing style, and start creating your own cinematic winter memories today.
Ready to Film?
Check out the current best-selling action cameras for winter sports.
Shop Deals on Amazon


20. Sharing Your Ski Footage on Social Media
Creating great footage is only valuable if people see it. Each social media platform has different requirements, audiences, and best practices for ski content. Here’s how to optimize your footage for maximum impact on every platform.
20.1 Instagram Reels and Stories
Instagram prioritizes vertical (9:16) video for Reels, which means you need to crop your horizontal footage or plan ahead for vertical capture. If you’re shooting 4K horizontal (3840×2160), you can crop to a vertical section (2160×3840) without losing resolution—this is why shooting in the highest resolution matters.
Keep Instagram Reels under 90 seconds, with 15-30 seconds being optimal for engagement. Hook viewers in the first 3 seconds—start with your most dramatic shot, not a slow scenic intro. Use trending audio when possible, as Instagram’s algorithm promotes content using popular sounds.
For Stories, shorter clips (10-15 seconds) work better because viewers tap through quickly. Use interactive elements like polls, questions, or location tags to boost engagement. Stories are less polished than Reels—casual, behind-the-scenes content performs well here.
Hashtag strategy matters: use a mix of broad hashtags (#skiing, #powder, #mountains) and specific ones (#goprohero12, #skiingjapan, #backcountryski). Use 5-15 relevant hashtags rather than the maximum 30, as Instagram’s algorithm increasingly penalizes hashtag spam.
20.2 YouTube Ski Videos
YouTube rewards longer, more comprehensive content. A 5-15 minute ski edit with good storytelling, music, and pacing can perform well in search results and recommendations. Optimize your title and description with keywords people actually search for—”skiing POV 4K”, “powder skiing Japan”, “best ski resorts Colorado”.
Upload at 4K resolution whenever possible, even if your audience primarily watches on phones. YouTube’s algorithm favors higher-resolution uploads, and 4K footage looks noticeably better even on small screens because YouTube uses a higher bitrate for 4K streams.
Create an eye-catching thumbnail—this is arguably more important than the video itself for driving clicks. Use a dramatic freeze-frame from your best moment, add minimal text, and ensure the thumbnail looks good at small sizes (most viewers see it as a small rectangle on their phone).
Engage with comments in the first 24-48 hours after uploading. YouTube’s algorithm favors videos with active early engagement, and responding to comments signals to the algorithm that your video is generating conversation.
20.3 TikTok Ski Content
TikTok is the fastest-growing platform for ski content, particularly among younger audiences. The platform rewards authenticity over production value—a raw, shaky phone clip of an epic powder run can outperform a polished 4K edit if it captures genuine excitement.
Keep TikTok videos under 60 seconds for maximum reach. Hook viewers immediately with action, sound, or a bold statement. Use trending sounds and participate in challenges when relevant—this exposes your content to audiences beyond your followers.
Vertical (9:16) is mandatory on TikTok. If you’re filming with a horizontal action camera, plan to crop in post-production. Alternatively, use the TikTok app’s built-in editing tools, which make it easy to add text, music, and effects.
Post consistently—daily if possible. TikTok’s algorithm favors creators who post frequently, and the platform’s “For You Page” can expose your content to millions of viewers regardless of your follower count.
Pro Tip: The Multi-Platform Strategy
Film all your footage in 4K horizontal, then create different versions for each platform: a horizontal edit for YouTube, a cropped vertical edit for Instagram Reels and TikTok, and a square (1:1) version for Instagram feed posts. This maximizes the value of every clip across all platforms. Most editing software makes this easy with aspect ratio presets.