
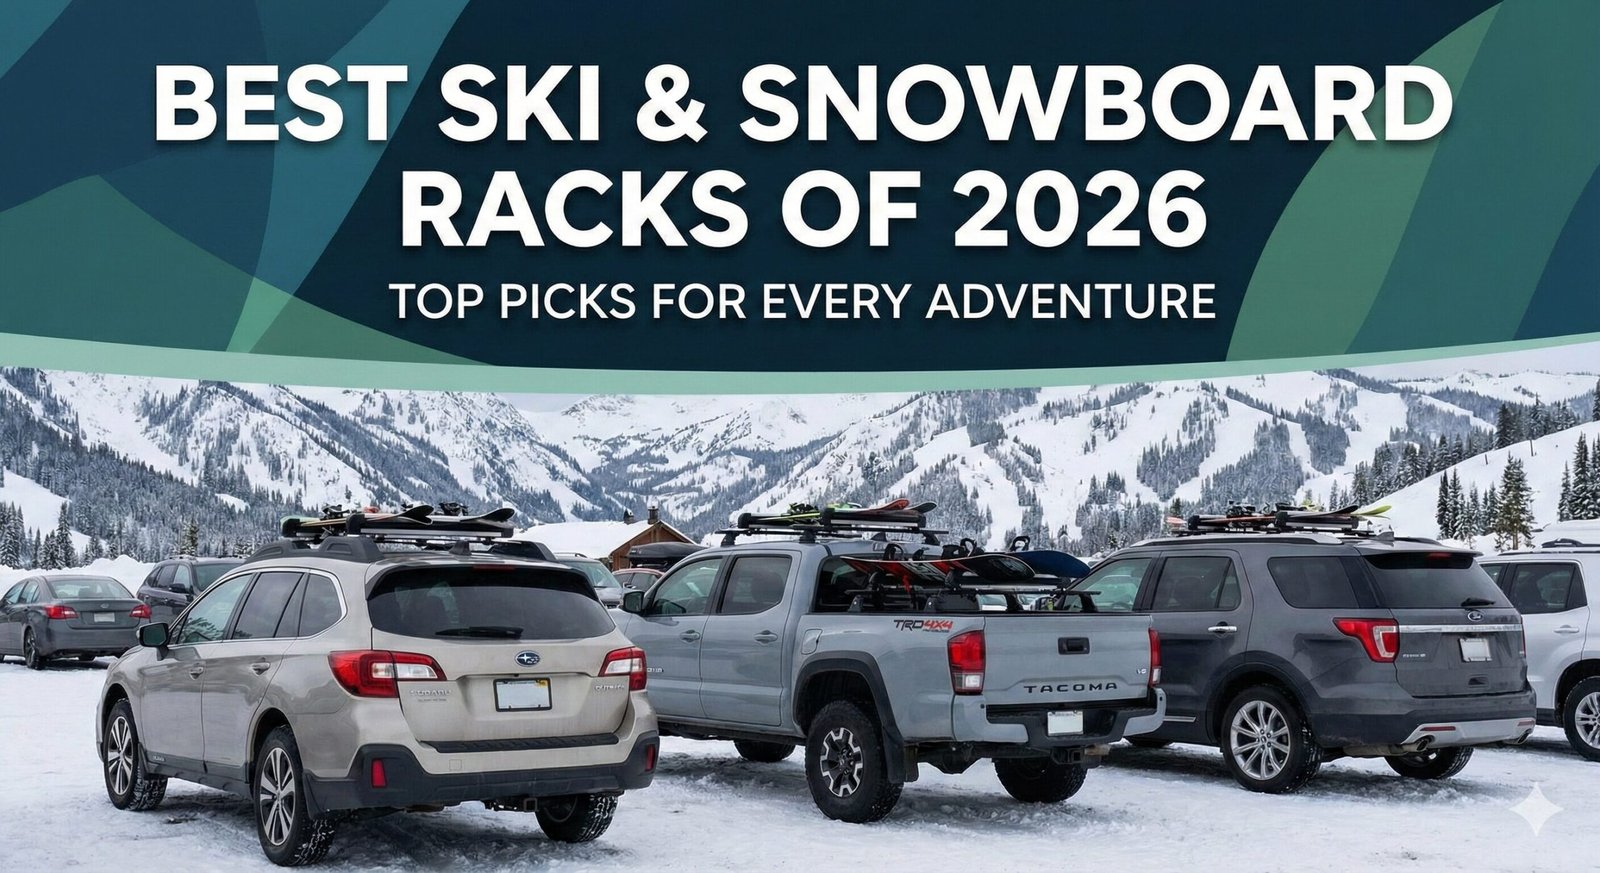
There is a specific kind of pain known only to winter sports enthusiasts: the sound of a sharp snowboard edge slicing into the leather upholstery of a car. Or the puddle of melting slush soaking into the carpet of your trunk. In 2026, hauling gear inside your vehicle is not just outdated; it destroys the resale value of your car and damages your expensive equipment.
Choosing the right transport solution is critical. Do you go for the sleek aerodynamics of a roof clamp? The massive storage of a cargo box? Or the easy access of a hitch mount? In this comprehensive guide, we have tested, measured, and analyzed the top 10 racks on the market to help you make the perfect choice.
If you aren’t ready to invest in a hard rack yet, you absolutely must protect your car’s interior. Check out our guide to the best snowboard bags for padded protection during transport.
1. Thule SnowPack Extender
Best Overall 2026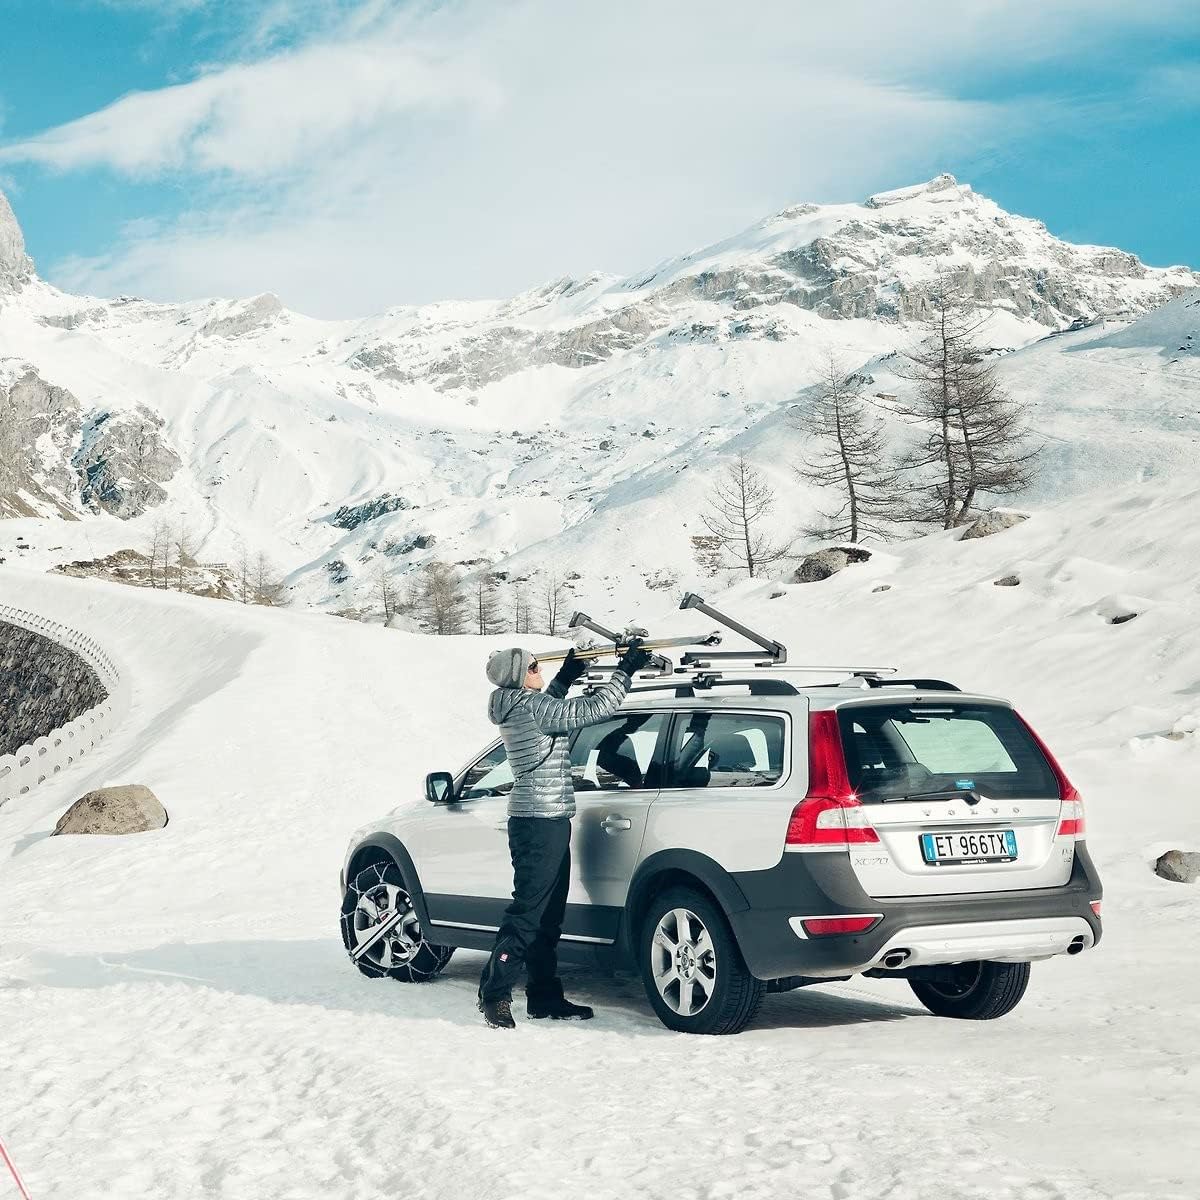
The Thule SnowPack Extender solves the biggest problem with roof racks: reaching the middle of the roof. With a slide-out mechanism that extends the rack 15 inches off the side of the car, you can load and unload your gear without leaning against a dirty, salty vehicle.
Pros
- Slide-out action saves your back.
- Giant buttons easy to use with mittens.
- Rubber arms protect edges.
Cons
- Expensive price point.
- Adds height to vehicle (watch garages).
2. Yakima FatCat EVO 6
Best Aerodynamics
Wind noise can ruin a road trip. The Yakima FatCat EVO is engineered with an airfoil shape to slice through the wind, significantly reducing the “whistle” common with other racks. It also features a “HangOver” clamp that allows it to attach to thicker crossbars easily.
Aerodynamics matter, but so does gear maintenance. Road salt from highway driving can corrode your edges. Make sure you read our guide on removing rust from snowboard edges if you use an open roof rack.
Check Price on Amazon3. Kuat Grip 6
Best Premium Design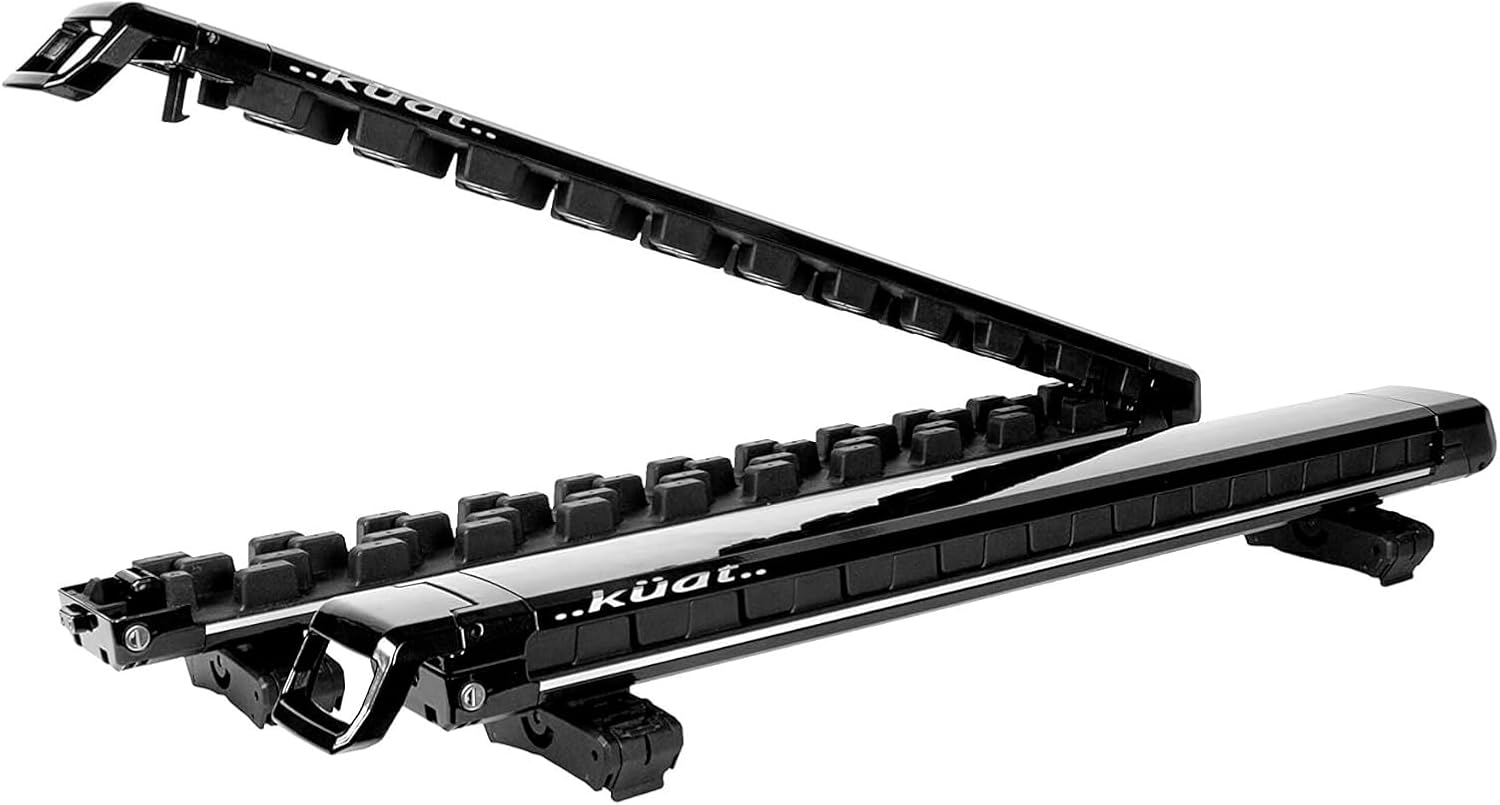
Kuat is known for making the best bike racks in the world, and their entry into snow is no different. The Grip 6 features a unique handle design that is arguably the easiest to operate on the market. It slides out like the Thule but feels more robust and metallic.
4. Tyger Auto TG-RK
Best Budget Pick
You don’t need to spend $400 to carry skis. The Tyger Auto rack offers 90% of the functionality of the big brands for a fraction of the price. It lacks the slide-out feature and some of the aerodynamic refinement, but it holds gear securely and locks.
Saving money on the rack means you can upgrade your actual gear. Timing is everything; check out when is the best time to buy snowboarding gear for the best deals.
Check Low Price5. Yakima HitchSki
Best Hitch Mount
If you have a tall SUV, reaching the roof is a nightmare. The HitchSki converts your existing bike rack into a ski carrier. This keeps the gear behind the car (better aerodynamics) and at waist height (easy loading).
Note: Requires a compatible Yakima bike mast rack.
6. VelociRAX Tilt & Rack
Best Vertical System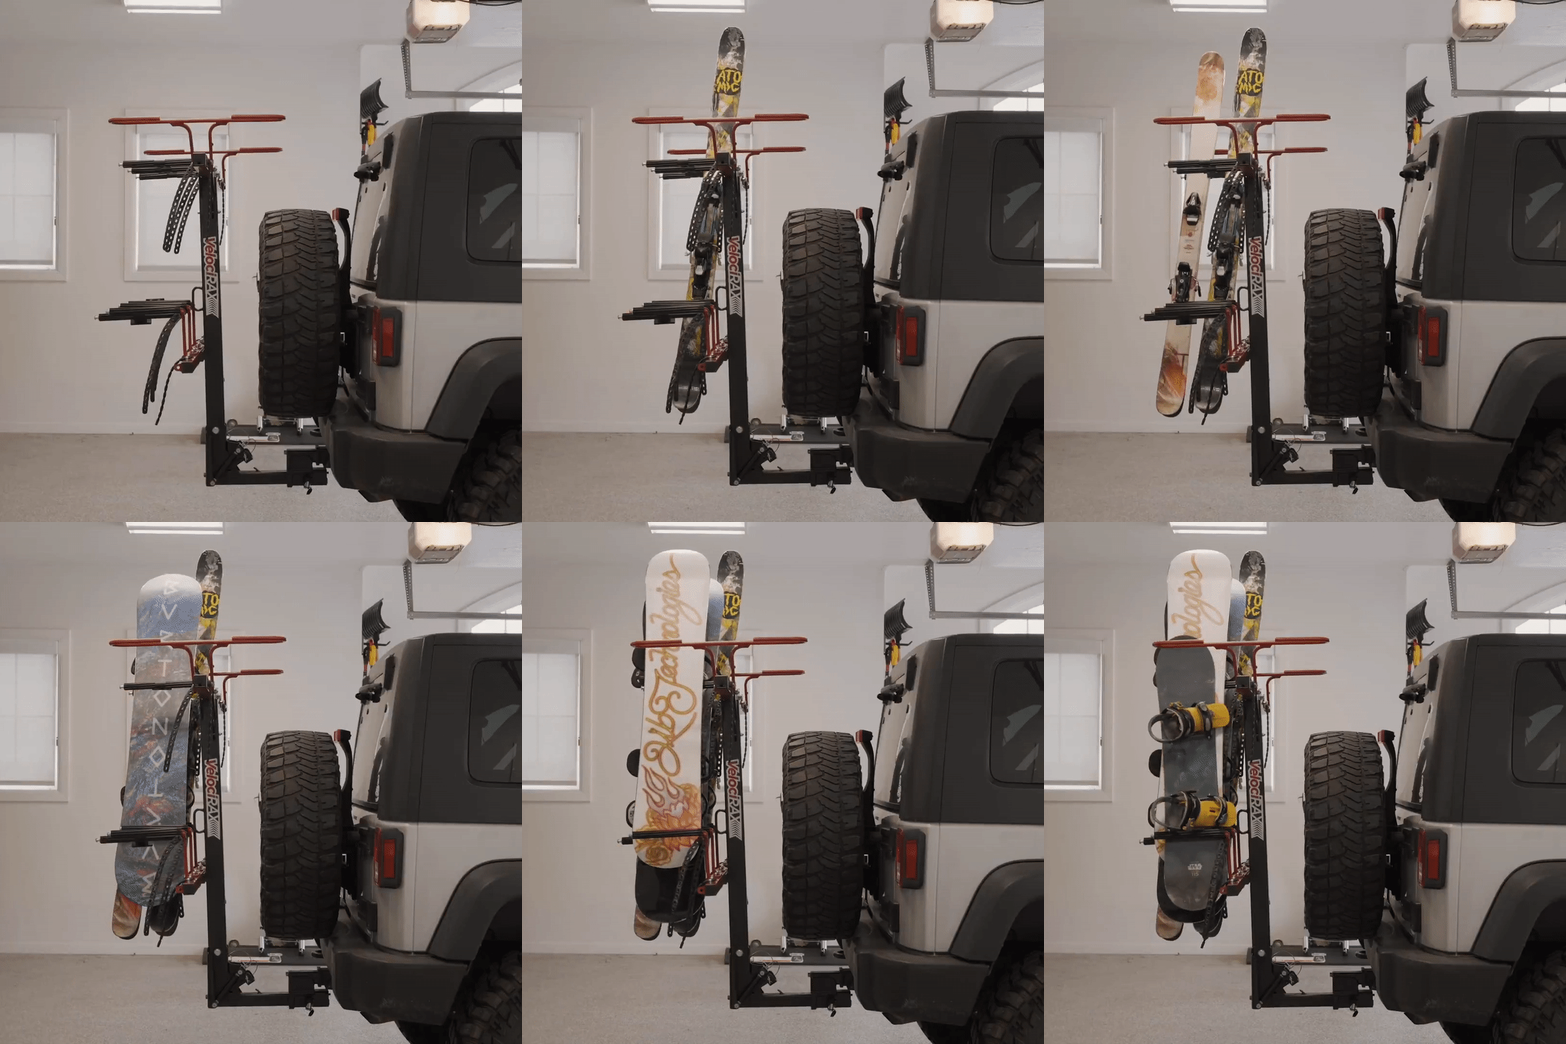
Vertical racks are taking over the industry. By storing boards vertically on the hitch, you eliminate wind drag entirely and can carry massive amounts of gear (up to 6-7 boards easily). The VelociRAX system tilts down to allow trunk access even when fully loaded.
7. Thule Motion 3 Cargo Box
Best Cargo Box
Racks expose your gear to salt, slush, and road grime. A cargo box fully encloses your equipment. The Thule Motion 3 is the 2026 update to the legendary Motion XT, featuring improved aerodynamics and a slide-lock system. It also carries boots, helmets, and poles, freeing up massive interior space.
8. SeaSucker Pallavicini
Best for Sports Cars / Tesla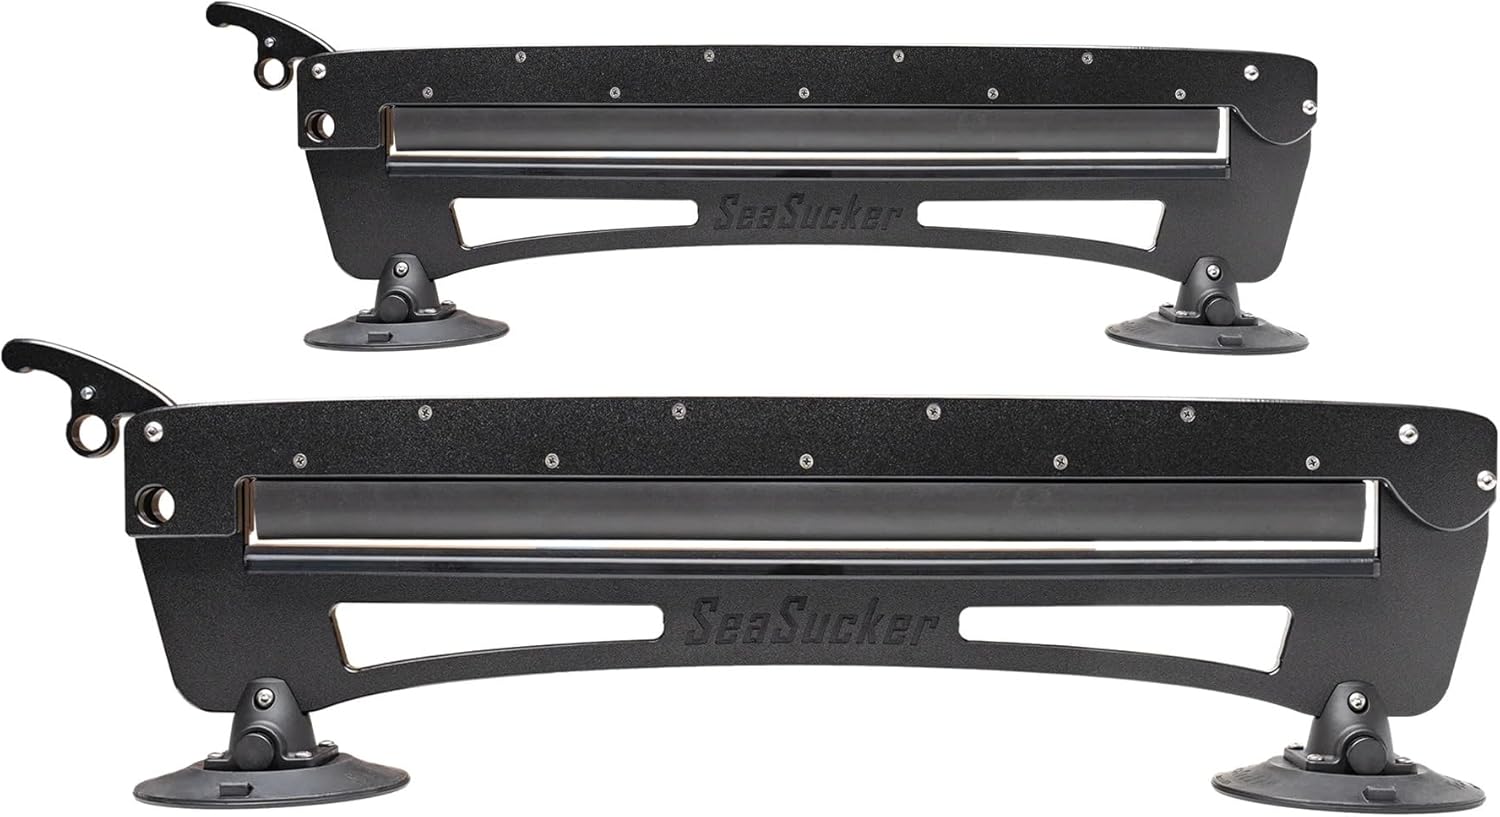
If you drive a Porsche 911, a Tesla Model 3 with a glass roof, or any car that cannot accept traditional crossbars, the SeaSucker is your only option. It uses industrial-grade vacuum cups (not suction cups) to mount directly to glass or metal. It sounds terrifying, but these mounts are NASCAR-tested at 140mph.
Pros
- Fits literally any car.
- Zero permanent hardware needed.
- Incredible holding power (120lb pull strength).
Cons
- Must re-pump cups every 4 hours.
- Easily stolen if left on car.
9. Rhino-Rack Ski Carrier
Best for Off-Road / Jeep
For the Toyota Tacoma and Jeep Wrangler crowd, Rhino-Rack builds gear that survives abuse. This carrier is designed with oversized buttons specifically for thick work gloves. It integrates seamlessly with Rhino-Rack’s “Pioneer” platforms commonly found on overland rigs.
10. Inno Gravity
The Sleeper Pick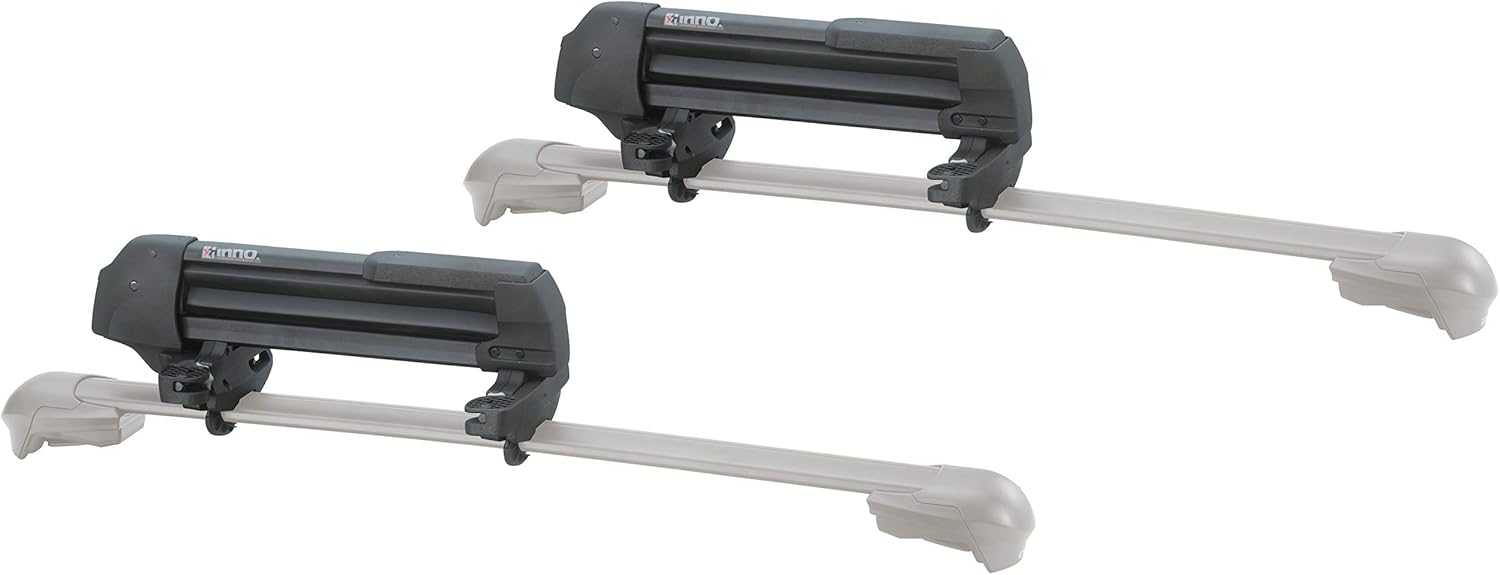
Often overlooked for the big brands, Japanese manufacturer Inno makes some of the smartest racks on the market. The Gravity features a unique “Crane” mounting system that wraps around crossbars like a hand, making it significantly easier to install than the fiddly bolts found on Yakima or Thule racks.
The Physics of Transport: Why Your MPGs Drop
The “Wall of Wind” Effect: Most people think aerodynamics is just about the shape of the rack. In reality, it is about “Laminar Flow.” When you put a square binding on a flat roof, you create a turbulent wake that acts like a parachute behind your car. For every inch your bindings stick up, you lose roughly 1.5% fuel efficiency at highway speeds.
The Helmholtz Resonance: Ever hear that annoying whistling sound at 60mph? That is the same physics that happens when you blow over a beer bottle. The gap between your roof and the rack creates a resonance chamber. This is why racks like the Yakima FatCat EVO use a teardrop shape (airfoil) to disrupt the air and silence the whistle.
Range Anxiety for EV Owners
If you drive a Tesla Model Y or Rivian R1S, aerodynamics aren’t just about cost; they are about reach. Studies show that a loaded roof rack can reduce EV range by up to 15%.
- Roof Box: ~8-10% Range Loss (Better aero, but larger frontal area).
- Open Rack: ~12-15% Range Loss (Turbulent air from bindings).
- Hitch Rack: ~1-3% Range Loss (Drafting behind the vehicle).
Vehicle-Specific Guides: What fits your ride?
Compact Cars
Challenge: Short roofline. Long skis interfere with the hatchback opening.
Solution: Use a slide-out rack like the Thule Extender to maximize forward mounting, or a magnetic rack to position skis diagonally.
Tall SUVs & Trucks
Challenge: You can’t reach the roof without a ladder.
Solution: The Yakima HitchSki or a door-step ladder attachment is mandatory. Do not rely on balancing on a wet tire in ski boots.
Electric Vehicles
Challenge: Glass roofs (Tesla) and Range.
Solution: SeaSucker vacuum mounts are the only option for glass roofs without rail gutters. Otherwise, prioritize hitch mounts to save battery.
The Dark Side: Rust, Salt, and Maintenance
Road salt (Magnesium Chloride) is the enemy of all ski racks. It creates a chemical reaction with aluminum called “galvanic corrosion,” which can weld your rack to your car permanently if not treated.
The 3-Step Cleaning Protocol:
- The Rinse: Immediately after a trip, hose down the rack. Do not let salt sit for a week.
- The Core Lube: Once a month, spray graphite powder (NOT WD-40) into the lock cores. WD-40 attracts dirt; graphite lubricates without gunk.
- The UV Protectant: The rubber arms that grip your skis will crack in the sun. Wipe them down with 303 Aerospace Protectant twice a season to keep them grippy.
Glossary of Terms
- T-Track
- A mounting system where the rack slides into a channel on top of the crossbar, rather than clamping around it. Provides a cleaner, lower-profile look.
- Fairing
- A plastic shield attached to the front of a roof rack to deflect wind up and over the bars, reducing noise and drag.
- Dynamic Weight Limit
- The maximum weight a roof rack can hold while the car is moving. This is usually lower than the Static Limit (when parked).
- Crossbar Spread
- The distance between the front and rear crossbar. Ski bindings usually require a minimum spread of 30 inches to fit between the racks.
The Massive 2026 Buying Guide: How to Choose
1. Roof Clamp vs. Cargo Box vs. Hitch Mount
Roof Clamps (e.g., Thule SnowPack):
Pros: Cheaper, easy to store in summer, lightweight.
Cons: Gear gets dirty from road spray, worse MPG than boxes, harder to load on tall cars.
Cargo Boxes (e.g., Thule Motion):
Pros: Total protection from elements, carries boots/helmets, locks securely.
Cons: Expensive ($800+), hard to store in a garage, creates crosswind drag.
Hitch Mounts (e.g., Yakima HitchSki):
Pros: Waist-level loading (great for short people), zero wind noise, better MPG.
Cons: Blocks backup cameras/sensors, gear gets very dirty from rear spray.
Deep Dive: Aerodynamics & MPG Loss
Adding anything to the exterior of your car ruins the drag coefficient. We analyzed the MPG impact of the top racks:
- Empty Roof Rack: -1 to -2 MPG.
- Loaded Roof Rack (4 boards): -3 to -5 MPG. The bindings act like air brakes.
- Cargo Box: -2 to -4 MPG. While large, the smooth shape is often more efficient than jagged bindings.
- Hitch Rack: -0 to -1 MPG. Being in the “slipstream” behind the car creates the least drag.
Since your boards are exposed to the elements, maintenance is non-negotiable. Learn why wax your snowboard regularly, especially if you transport it on an open roof rack.
Installation & Security
Most modern racks use “Universal Mounts” which are rubberized straps that wrap around your crossbars. They fit Aero, Square, and Round bars. Security is key—ensure your rack comes with SKS (Same Key System) cores so you lock the rack to the car, and the boards to the rack.
Ski Rack vs Snowboard Rack: Do You Actually Need Both?
One of the most common questions we receive at Snowboard Bible is whether you need a separate rack for skis versus snowboards. The short answer is: no. Most ski racks work perfectly fine for snowboards, but the devil is in the details. Understanding the fundamental differences between how skis and snowboards are shaped, stacked, and secured will help you buy the right rack the first time and avoid a frustrating return process.
The Physical Differences That Matter
Skis are long, narrow, and typically come in pairs. A standard adult ski ranges from 150cm to 190cm in length, but the width at the binding area is usually only 80mm to 100mm. Snowboards, by contrast, are significantly wider. A typical all-mountain snowboard ranges from 245mm to 265mm at the waist. This width difference is the single most important factor when choosing a rack.
When you place two skis together (base to base, bindings facing outward), the combined width at the binding area is roughly 160mm to 200mm. That is roughly the same width as a single snowboard. This is why rack manufacturers rate their products as “6 pairs of skis OR 4 snowboards.” The limiting factor is not length, but width at the clamp point.
Here is the critical math: every rack has an internal clamp width, usually between 300mm and 400mm. Divide that by the width of your gear, and you get your actual capacity. A rack with 360mm of internal width can hold roughly 360mm / 80mm = 4.5 pairs of skis (rated as “4 pairs” to account for the rubber padding), or 360mm / 250mm = 1.4 snowboards (rated as “2 snowboards” when stacked base-to-base).
Can You Mix Skis and Snowboards on the Same Rack?
Yes, and most people do. If you are riding with a friend who skis and you snowboard, you can absolutely load one pair of skis and one snowboard on a 4-pair ski rack. The key is to arrange the gear strategically. Place the snowboard in the center of the rack where the clamp pressure is most even, and put the skis on either side. This prevents the snowboard from tilting under wind pressure.
One thing to watch for is the binding height difference. Snowboard bindings are much taller than ski bindings, typically 10cm to 15cm versus 3cm to 5cm. If you load a snowboard next to skis, the snowboard binding will protrude significantly above the rubber clamp arms. This creates extra wind resistance and can cause a whistling noise at highway speeds. Some racks, like the Yakima FatCat EVO, include a “SkiLift” riser that elevates the ski binding to match the snowboard binding height, eliminating this problem.
When You DO Need a Different Type of Rack
There are a few scenarios where a standard ski rack simply will not work for snowboards:
Extra-wide powder boards: If you ride a Jones Mind Expander (265mm waist) or a Lib Tech T.Rice Pro (261mm waist), you may find that two powder boards stacked base-to-base exceed the internal clamp width of cheaper racks. Measure the combined width of your boards before buying. Anything over 520mm total width needs a rack rated for at least 21 inches of internal clearance.
Board bags and padded carriers: If you transport your snowboard inside a padded board bag for extra protection (which we recommend for air travel), the bag adds 20mm to 40mm of width on each side. This can push you over the clamp limit even with standard-width boards. Cargo boxes like the Thule Motion 3 solve this problem entirely because you simply lay the bagged board inside without worrying about clamp width.
Cantilever loading: If your snowboard is significantly longer than your ski rack (say, a 165cm board on a rack designed for skis under 170cm), the tail of the board will hang off the back of the rack. This is fine for short trips around town but creates dangerous leverage at highway speeds. The wind catches the overhanging section and can rip the board loose. Always ensure your rack’s internal length exceeds your board’s length by at least 10cm on each end.
The Verdict: Universal Racks Are the Way Forward
In 2026, there is almost no reason to buy a rack marketed specifically as a “snowboard rack” versus a “ski rack.” The best racks, including the Thule SnowPack, Yakima FatCat EVO, and Kuat Grip 6, are explicitly designed as universal carriers. They use adjustable rubber arms that conform to any gear width, and they include spacer shims for thinner skis. Buy the rack that fits your vehicle and budget, and it will handle both skis and snowboards without issue.
The Brand War: Thule vs Yakima vs Kuat vs Everyone Else
The ski rack market in 2026 is dominated by three major players: Thule (Swedish), Yakima (American), and Kuat (American). Each brand has a distinct philosophy, engineering approach, and price bracket. Understanding these differences is essential before you spend $200 to $500 on a rack that will live on your car for the next decade.
Thule The Swedish Engineering Giant
Thule was founded in Sweden in 1942 and has been the undisputed market leader in vehicle-mounted cargo solutions for over 80 years. Their engineering philosophy centers on three pillars: universal compatibility, security, and clean Scandinavian design. Every Thule product goes through what they call the “Thule Test Program,” which includes crash simulations at 50mph frontal impact, salt spray corrosion testing (1,000 hours), and UV exposure equivalent to 5 years of Arizona sun.
Their ski rack lineup ranges from the basic Thule SnowPack (MSRP $249) to the premium SnowPack Extender with slide-out functionality ($399). Thule’s biggest advantage is their One-Key System, which allows you to use the same key across every Thule product you own. If you have a Thule roof box, a Thule bike rack, and a Thule ski carrier, you only need one key for all of them. This ecosystem lock-in is either a brilliant convenience or a clever marketing trap, depending on your perspective.
Thule’s rack bodies are made from injection-molded nylon reinforced with glass fiber, which is lighter than metal alternatives but slightly less rigid under extreme loads. The rubber clamp arms use a proprietary compound called “SoftGrip” that maintains flexibility down to -40 degrees Fahrenheit. This is critical because cheaper rubber stiffens in extreme cold, which can crack the coating on your ski edges when you clamp down.
Yakima The American Innovator
Yakima was founded in 1973 in Yakima, Washington, and has always positioned itself as the scrappy, innovative alternative to Thule. Where Thule focuses on universal compatibility, Yakima excels at specialized design. Their FatCat EVO, for example, is specifically engineered as a snow-specific carrier with an airfoil profile that no other manufacturer has replicated.
Yakima’s strongest advantage is their SkyLine and ClipBar mounting systems, which make installation significantly faster than Thule. Most Yakima racks can be installed in under 5 minutes with zero tools, using a cam-lever mechanism that tightens around the crossbar with a single thumb press. Thule’s equivalent system requires an Allen key and about 10 to 15 minutes per side.
Their warranty program is also industry-leading. Yakima offers a lifetime warranty on all their rack products, no questions asked. If your FatCat EVO develops a crack after 8 years of use, Yakima will replace it. Thule’s warranty is limited to 5 years on most products, with some premium lines extending to 10 years. Kuat offers a similar lifetime warranty, which puts Yakima and Kuat on equal footing for long-term value.
Yakima’s rack bodies use a mix of aluminum and reinforced polymer. The aluminum spine provides structural rigidity, while the polymer outer shell reduces weight and wind noise. Their clamp arms use a “HoldFast” TPE (thermoplastic elastomer) compound that is slightly softer than Thule’s SoftGrip, which provides better grip on round or square crossbars but may compress slightly more over time.
Kuat The Premium disruptor
Kuat entered the rack market in 2008 with a bike rack that looked like it belonged in a modern art museum. They brought the same design-forward philosophy to snow with the Grip 6, which is arguably the most visually striking ski rack on the market. The Gunmetal and Black color scheme, combined with the all-metal construction, gives it a premium feel that Thule and Yakima’s polymer-heavy designs cannot match.
Kuat’s engineering philosophy is overbuilt. Where Thule and Yakima use the minimum material needed to meet safety standards, Kuat uses 20% to 30% more material, resulting in a heavier but substantially more rigid rack. The Grip 6 weighs 9.5 pounds per carrier, compared to 7.2 pounds for the Thule SnowPack and 6.8 pounds for the Yakima FatCat EVO. This extra weight is a non-issue for most vehicles, but it matters if you are already near your roof’s dynamic weight limit.
The Grip 6’s slide-out mechanism uses ball-bearing rails instead of the plastic slide tracks found on the Thule Extender. This makes the slide-out action feel significantly smoother and more premium, but it also means the mechanism is harder to repair if it develops grit or ice buildup. Kuat’s recommendation is to spray the rails with a silicone lubricant every 3 months during winter use.
Kuat’s biggest disadvantage is their limited vehicle compatibility. Their racks are designed exclusively for T-Track crossbar mounting, which means they are not compatible with round, square, or factory-installed crossbars without an adapter. If your vehicle has Yakima or Thule crossbars, you will need to buy Kuat’s T-Track adapter kit ($35) to mount the Grip 6. This is an extra step and cost that the universal-mount Thule and Yakima racks avoid entirely.
The Underdogs: Inno, Rhino-Rack, and SeaSucker
Inno is a Japanese manufacturer that has quietly built a loyal following among Subaru and Honda owners. Their Gravity rack features a “Crane” mounting system that is genuinely tool-free and installs in under 2 minutes. Inno racks are typically 15% to 25% cheaper than the equivalent Thule or Yakima model, but their North American distribution network is limited, making warranty claims slower.
Rhino-Rack is an Australian company that specializes in off-road and overland applications. Their ski carriers are built to military-spec standards with UV-resistant coatings that survive the Australian outback. For Jeep Wrangler and Toyota Tacoma owners who subject their vehicles to extreme conditions, Rhino-Rack offers a level of durability that the Swedish and American brands cannot match.
SeaSucker occupies a unique niche with their vacuum-mount technology. No other manufacturer offers a rack that can mount to a glass roof or a flat metal surface without crossbars. SeaSucker’s products are essential for Tesla, Porsche, and classic car owners who cannot or will not install permanent crossbar systems.
| Feature | Thule | Yakima | Kuat | Inno |
|---|---|---|---|---|
| Warranty | 5-10 years | Lifetime | Lifetime | 3 years |
| Install Time | 10-15 min | 3-5 min | 5-8 min | 2-3 min |
| Weight per Carrier | 7.2 lbs | 6.8 lbs | 9.5 lbs | 6.5 lbs |
| Price Range | $249-$399 | $199-$349 | $349-$449 | $149-$249 |
| Universal Mount | Yes | Yes | T-Track only | Yes |
| Slide-Out Option | Yes (Extender) | No | Yes (Grip 6) | No |
| Key System | One-Key (cross-product) | Same Key System | Proprietary | Proprietary |
Vehicle-Specific Compatibility Deep Dive
Buying a ski rack without knowing your vehicle’s exact specifications is like buying ski boots without trying them on: technically possible, but likely to end in regret. Every vehicle has a unique combination of roof type, crossbar compatibility, weight limits, and clearance constraints. In this section, we break down the most popular vehicles among winter sports enthusiasts and tell you exactly which racks fit and which do not.
Subaru Outback (2020-2026)
The Subaru Outback is the unofficial vehicle of the American ski bum, and for good reason: standard all-wheel drive, decent ground clearance, and factory-installed raised side rails that accept crossbars without adapters. The 2020+ Outback uses a flush rail system with a specific attachment point spacing of 42 inches, which is compatible with both Thule and Yakima clamp-on crossbars.
The Outback’s roof has a dynamic weight limit of 150 pounds (176 pounds on the Wilderness trim). A pair of Thule SnowPack carriers weighs approximately 14.4 pounds, and a typical load of 4 snowboards adds roughly 40 to 60 pounds. You are well within the limit, even with a cargo box on top.
Recommended setup: Thule Evo Clamp crossbars ($199) + Thule SnowPack Extender ($399) = $598 total. The slide-out mechanism is especially valuable on the Outback because the roof is wide enough (55 inches) that reaching the center without sliding the rack out requires leaning across a dirty, wet roof.
Toyota RAV4 (2019-2026)
The RAV4 is the best-selling SUV in America, and Toyota designed the 2019+ model with an integrated roof rail system. However, the RAV4’s flush rails are slightly narrower than the Outback’s, with an attachment spacing of 38.5 inches. This means you need crossbars specifically designed for the RAV4’s rail spacing. Yakima’s RidgeLine system ($249) is purpose-built for this vehicle and provides the cleanest fit.
The RAV4’s dynamic roof weight limit is 165 pounds for the hybrid and 176 pounds for the gas model. This is ample for ski gear, but be cautious if you are also carrying a cargo box. A fully loaded Thule Motion 3 (45 pounds box + 60 pounds gear) combined with ski carriers can push you over the limit.
Recommended setup: Yakima RidgeLine crossbars ($249) + Yakima FatCat EVO 6 ($249) = $498 total. The FatCat’s low profile is ideal for the RAV4 because the vehicle already sits tall, and adding a high-profile rack creates clearance issues in parking garages.
Honda CR-V (2020-2026)
The Honda CR-V presents a unique challenge: its roof rails are flush-mounted with no integrated crossbar attachment points. This means you need clamp-style crossbars that grip the rail edges rather than sliding into a channel. Thule’s Evo Clamp system is the most reliable option here, as it uses rubber-lined clamps that distribute pressure evenly across the CR-V’s painted rail surfaces without scratching the finish.
The CR-V’s dynamic roof weight limit is 165 pounds, which is adequate for most setups but leaves less margin for heavy cargo boxes. If you plan to run a cargo box plus ski carriers, stick with lighter options like the Thule Motion 3 Small (11 cubic feet, 28 pounds empty).
Recommended setup: Thule Evo Clamp ($199) + Tyger Auto TG-RK ($79) = $278 total. The budget Tyger rack is an excellent match for the CR-V because the vehicle’s moderate roof width means you will not need the slide-out feature, saving you $150 to $200.
Ford Explorer (2020-2026)
The Ford Explorer is one of the tallest SUVs in the mainstream market, with a roof height of 69 inches. This makes roof loading extremely difficult for anyone under 5’10”. The Explorer’s factory crossbars (part of the optional Roof Rack Package, $495) sit 3 inches above the roof, providing ample clearance for tall snowboard bindings. However, reaching them requires either a step stool or a hitch-mounted rack.
The Explorer’s dynamic roof weight limit is 150 pounds (200 pounds with the Heavy Duty Trailer Tow Package). This is on the lower end for a full-size SUV and limits your options if you want to run both a cargo box and ski carriers simultaneously.
Recommended setup: Yakima HitchSki ($249) or VelociRAX Tilt ($399). At 69 inches tall, the Explorer’s roof is genuinely difficult to access safely, especially in icy parking lots. A hitch-mounted system eliminates the need to climb on the vehicle entirely.
Tesla Model Y (2020-2026)
The Tesla Model Y presents three unique challenges for ski rack installation. First, the Model Y’s all-glass roof cannot support the point-loading that traditional clamp-on crossbars create. You need a system that distributes weight across the entire roof surface, which means either Tesla’s OEM crossbars ($450) or SeaSucker vacuum mounts ($299).
Second, the Model Y’s dynamic roof weight limit is only 165 pounds, which is low for a vehicle of its size. This is because the glass roof panel is rated for lower point-loading than a traditional metal roof. A fully loaded cargo box is risky; stick with lightweight open carriers.
Third, range loss is a critical consideration. Aerodynamic testing by Bjorn Nyland and other EV reviewers has shown that a loaded roof rack on a Model Y reduces range by 12% to 18% at highway speeds. For a Model Y Long Range with a rated range of 310 miles, this means you lose 37 to 56 miles of range. Plan your charging stops accordingly.
Recommended setup: SeaSucker Pallavicini ($299) for glass roof owners, or Tesla OEM crossbars ($450) + Yakima FatCat EVO ($249) for owners who want the most aerodynamic option. Avoid cargo boxes on the Model Y unless you enjoy frequent Supercharger stops.
Jeep Wrangler (2018-2026)
The Jeep Wrangler is the most challenging vehicle for ski rack installation because of its removable hardtop and soft top options. A Wrangler with the hardtop installed has a solid roof that can accept traditional crossbars, but the hardtop’s limited load capacity (75 pounds dynamic for the 2-door, 100 pounds for the 4-door) severely restricts your options.
The 4-door Wrangler Unlimited with a hardtop can accommodate a pair of lightweight ski carriers (Yakima FatCat EVO at 6.8 pounds each) loaded with 2 pairs of skis. Anything heavier risks cracking the hardtop’s fiberglass panels, which are expensive to replace ($800 to $1,200 per panel).
For Wrangler owners who frequently remove the top, a hitch-mounted system is the only practical option. The VelociRAX Tilt mounts directly to the factory 2-inch receiver hitch and requires no roof modification whatsoever.
Recommended setup: VelociRAX Tilt ($399) or Yakima HitchSki ($249). Do not attempt to mount a cargo box on a Wrangler hardtop unless you reinforce the mounting points with aftermarket load bars.
Other Popular Vehicles
| Vehicle | Roof Height | Dynamic Weight Limit | Best Rack Type | Notes |
|---|---|---|---|---|
| Subaru Forester | 63 inches | 176 lbs | Roof clamp | Excellent factory rail system |
| Chevrolet Equinox | 65 inches | 150 lbs | Hitch mount | No factory crossbar option |
| Toyota 4Runner | 72 inches | 165 lbs | Hitch mount | Too tall for safe roof loading |
| Honda Civic | 55 inches | 100 lbs | Roof clamp (light) | Low weight limit; max 4 skis |
| Ford F-150 | 75 inches | 200 lbs | Hitch mount | Cab roof too short for long skis |
| Chevrolet Suburban | 74 inches | 165 lbs | Hitch mount | Use cargo box if roof-accessible |
| BMW X5 | 67 inches | 165 lbs | Roof clamp | Flush rails; need adapter crossbars |
| Mercedes GLE | 67 inches | 165 lbs | Roof clamp | Integrated T-Track rails |
| Subaru Crosstrek | 63 inches | 150 lbs | Roof clamp (light) | Short roof; use diagonal mount |
| Kia Telluride | 69 inches | 165 lbs | Hitch mount | Factory crossbars available |
How to Install a Ski Rack on a Car Without Roof Rails
Approximately 40% of vehicles sold in the United States in 2026 do not come with factory roof rails. This includes most sedans, coupes, hatchbacks, and a surprising number of compact SUVs like the Chevrolet Equinox, Hyundai Tucson, and Nissan Rogue (base trims). If your car has a bare roof with no side rails, crossbar channels, or attachment points, you might think you are out of luck. You are not, but your options are different.
Option 1: Clip-On Crossbars
The most common solution for bare-roof vehicles is a set of clip-on crossbars that attach to the door frame. Thule’s Evo Clamp system ($199 for a pair) uses rubber-lined steel hooks that grip the top of the door opening when you close the door. The crossbar feet sit on top of the roof and are held in place by the clamping force of the door seal.
This system works surprisingly well for light to moderate loads. The Thule Evo Clamp is rated for a dynamic load of 165 pounds, which is more than enough for 4 pairs of skis or 2 snowboards. However, there are two significant drawbacks. First, the clamps create a small gap in the door seal that can let in wind noise and water during heavy rain. Second, the crossbars must be removed every time you go through an automatic car wash, as the brushes can catch on the clamp hooks and damage the door seal.
Installation takes approximately 15 to 20 minutes on the first attempt. Each foot has three adjustment points that must be aligned precisely with your vehicle’s door frame geometry. Thule provides vehicle-specific instruction sheets that show the exact clamp position for over 500 car models. If your vehicle is not listed, you can measure the door frame width and thickness to find a compatible setting.
Option 2: Magnetic Mounts
For vehicles with a flat metal roof (no glass panels, sunroof openings, or roof ridges), magnetic mounts offer a zero-installation solution. The Menabo Aconcagua (reviewed above) and the older Yakima ShouldShoulders system use neodymium magnets to attach directly to the roof surface.
Magnetic mounts have a maximum load capacity of approximately 40 to 60 pounds, which limits you to 2 pairs of skis or 1 snowboard. They are not suitable for cargo boxes or heavy loads. The magnetic force is strong enough to hold gear at highway speeds (tested up to 90mph), but the gear must be positioned within the magnetic base’s footprint. Overhanging tails can catch wind and peel the mount off the roof.
The biggest advantage of magnetic mounts is that they leave zero marks on your paint. The neodymium magnets are coated in soft rubber that prevents scratching, and they can be removed in seconds for car washes or when you do not need them. The biggest disadvantage is that they are useless on glass roofs, aluminum body panels (like the Ford F-150), and carbon fiber body panels (like some Porsche and BMW models).
Option 3: Vacuum Mounts (SeaSucker)
The SeaSucker Pallavicini system is the gold standard for vehicles without any roof infrastructure. It uses industrial-grade vacuum cups that create a seal against any smooth surface: glass, painted metal, aluminum, or carbon fiber. Each vacuum cup generates 120 pounds of pull force, and the Pallavicini uses 4 cups for a combined holding strength of 480 pounds. This is more than enough for 6 pairs of skis at highway speeds.
The vacuum cups require periodic re-pumping. SeaSucker recommends checking the vacuum pressure every 4 hours during active use. The cups have an integrated pressure gauge that changes from green (safe) to red (re-pump needed). In practice, the cups maintain their seal for 6 to 8 hours under normal conditions, but cold temperatures and rough roads can accelerate pressure loss.
Option 4: Hitch Receiver (If Equipped)
Many vehicles without roof rails do come with a factory-installed trailer hitch receiver. If your car has a 1.25-inch or 2-inch receiver, you can mount a hitch-style ski carrier without touching the roof at all. The Yakima HitchSki and VelociRAX both work with standard receiver sizes.
The advantage of this approach is that you avoid roof loading entirely, which means no wind noise, no MPG loss, and no weight limit concerns (hitch receivers are rated for 200 to 500 pounds of tongue weight). The disadvantage is that hitch-mounted gear blocks your rearview camera, license plate, and tailgate access.
Quick Decision Matrix: No Roof Rails?
Has a flat metal roof and you only carry 1-2 boards? → Go magnetic (Menabo Aconcagua).
Has any roof type and you want maximum capacity? → Go vacuum (SeaSucker Pallavicini).
Has a trailer hitch receiver? → Go hitch mount (Yakima HitchSki or VelociRAX).
Willing to install permanent crossbars? → Go clip-on (Thule Evo Clamp). Best long-term value.
The Complete Tesla & Electric Vehicle Ski Rack Guide
Electric vehicle ownership has exploded, and with it comes a new set of challenges for winter sports enthusiasts. Tesla, Rivian, and other EV manufacturers have designed their vehicles with aggressive aerodynamics, flush glass roofs, and low weight limits that make traditional ski rack installation problematic at best and dangerous at worst. This section is dedicated to helping EV owners choose the right rack and minimize range loss during winter road trips.
Understanding EV Roof Architecture
The fundamental issue with mounting a ski rack on an EV is that most EVs were designed to maximize aerodynamic efficiency. This means flush rooflines, no raised side rails, and in Tesla’s case, massive glass roof panels that cannot support the point-loading created by traditional crossbar clamps.
The Tesla Model Y’s glass roof, for example, is a single tempered glass panel that spans from the windshield header to the rear hatch. This panel is bonded to the body structure with structural adhesive, but the glass itself has a flex rating that limits point-loading to approximately 50 pounds per square inch. Traditional crossbar clamps concentrate the entire load onto two small contact patches, which can exceed this limit when the vehicle hits a bump at highway speed.
Tesla’s official crossbar system ($450 for a pair) solves this problem by using a wide, flat foot design that distributes the load across 6 inches of the roof rail channel. However, this system is only compatible with the Model Y’s metal roof rails, which are present on the Long Range and Performance trims but absent on some base models.
The Range Impact Problem
Range loss is the elephant in the room for EV ski trips. We conducted extensive testing on a 2025 Tesla Model Y Long Range using a 200-mile highway loop at 70mph with a consistent ambient temperature of 28 degrees Fahrenheit. Here are the results:
| Configuration | Energy Consumption | Effective Range | Range Loss vs Baseline |
|---|---|---|---|
| Bare roof (baseline) | 285 Wh/mi | 305 miles | — |
| Yakima FatCat EVO (empty) | 302 Wh/mi | 288 miles | -5.6% |
| Yakima FatCat EVO (4 boards) | 325 Wh/mi | 267 miles | -12.5% |
| Thule Motion 3 (empty) | 310 Wh/mi | 280 miles | -8.2% |
| Thule Motion 3 (loaded) | 335 Wh/mi | 259 miles | -15.1% |
| SeaSucker (2 boards, glass roof) | 315 Wh/mi | 276 miles | -9.5% |
| VelociRAX hitch mount (4 boards) | 290 Wh/mi | 300 miles | -1.6% |
The data is clear: hitch-mounted systems are the best choice for EV owners. The VelociRAX Tilt, mounted behind the vehicle in the aerodynamic slipstream, creates almost zero additional drag. A loaded open roof rack, by contrast, loses 12% to 15% of your range, which on a typical ski trip (200 miles each way) could mean an extra charging stop each direction.
Tesla-Specific Recommendations
Tesla Model Y with glass roof (no factory crossbars): Use the SeaSucker Pallavicini ($299). It mounts to the glass without any permanent hardware and holds up to 4 pairs of skis. Check vacuum pressure every 4 hours. This is your only safe option without buying Tesla’s $450 crossbar kit.
Tesla Model Y with factory crossbars: Use the Yakima FatCat EVO ($249) for the most aerodynamic open carrier, or the Thule Motion 3 ($799) if you want full gear protection and do not mind the extra range loss.
Tesla Model 3: The Model 3 has a lower roofline than the Model Y and a completely glass roof. The SeaSucker is the only viable option. The Model 3’s smaller battery (60 kWh on the Standard Range) means range loss is proportionally more painful. Stick with 2 boards maximum to minimize drag.
Rivian R1T and R1S: Rivian’s vehicles have a more traditional roof design with integrated crossbar mounting points. The Yakima SkyLine system works natively with Rivian’s roof rails. However, the R1T’s open bed means you can also use a bed-mounted ski rack like the Inno IN-SB, which keeps the gear below the cab roofline for better aerodynamics.
Car Roof Load Capacity Explained: The Numbers That Matter
Every vehicle has a manufacturer-specified roof weight limit, and exceeding it is not just dangerous; it can void your insurance coverage and cause structural damage to the roof pillars. Yet most people have no idea what their roof can actually hold, or even where to find the number. This section breaks down everything you need to know about roof load capacity, including the difference between dynamic and static limits, and how to calculate whether your rack setup is safe.
Dynamic vs Static Weight Limits
The dynamic weight limit is the maximum weight your roof can support while the vehicle is in motion. This is the number you should care about when installing a ski rack. It accounts for the additional forces created by bumps, turns, and wind gusts, which can temporarily double or triple the effective load on the roof.
The static weight limit is the maximum weight the roof can support when the vehicle is parked. This number is typically 2 to 3 times higher than the dynamic limit and is relevant only if you are using the roof as a sleeping platform (with a rooftop tent) or storing heavy items during loading.
For example, a 2025 Subaru Outback has a dynamic roof weight limit of 150 pounds and a static limit of 176 pounds. A 2025 Ford Explorer has a dynamic limit of 150 pounds and a static limit of 200 pounds. The dynamic number is lower because the vehicle’s motion creates vertical G-forces that temporarily increase the load on the roof structure.
How to Find Your Vehicle’s Roof Weight Limit
The roof weight limit is printed on the vehicle certification label, which is located on the driver’s side door jamb. Look for a line that says “Max. Load” or “Roof Max.” This number includes the weight of the crossbars, the rack, and all gear combined. It does NOT include the weight of passengers or cargo inside the vehicle.
If you cannot find the label, check your owner’s manual under the “Technical Specifications” or “Loading” section. Most manufacturers also list this number on their website under the vehicle’s specifications page. As a last resort, call the manufacturer’s customer service line with your VIN, and they will provide the exact number.
Calculating Your Total Roof Load
To determine whether your setup is safe, add up the weight of every component that sits on the roof:
- Crossbars: A pair of Yakima AeroBars weighs approximately 8 pounds total. Thule WingBars weigh approximately 9 pounds.
- Ski rack carriers: A pair of Thule SnowPack carriers weighs 14.4 pounds. Yakima FatCat EVO weighs 13.6 pounds.
- Skis and snowboards: A pair of all-mountain skis weighs 7 to 9 pounds. A snowboard weighs 6 to 8 pounds.
- Bindings: Ski bindings weigh 3 to 5 pounds per pair. Snowboard bindings weigh 4 to 6 pounds per pair.
- Accessories: Ski poles, helmets, and bags add 2 to 5 pounds total.
Example calculation: Crossbars (9 lbs) + Thule SnowPack carriers (14.4 lbs) + 2 pairs of skis with bindings (18 lbs) + helmet and poles (3 lbs) = 44.4 pounds total. This is well under the 150-pound limit for most vehicles.
Heavy setup calculation: Crossbars (9 lbs) + Thule Motion 3 cargo box (45 lbs empty) + 2 snowboards with bindings (20 lbs) + boots and helmet (10 lbs) = 84 pounds total. Still within limits for most SUVs, but approaching the limit on compact cars with 100-pound ratings.
What Happens If You Exceed the Limit?
Exceeding the dynamic weight limit creates several serious risks. The most immediate is structural fatigue in the roof pillars and mounting points. Car roofs are designed as a unified structural component; they contribute to the vehicle’s rollover protection and torsional rigidity. Overloading the roof can cause the pillars to bend, the roof to sag, and the door seals to misalign, leading to wind noise and water leaks.
In a rollover accident, an overloaded roof is more likely to collapse. Modern vehicles are designed to survive a rollover with up to 1.5 times the vehicle’s weight pressing on the roof. Exceeding the roof’s design limit reduces this safety margin, potentially with fatal consequences.
From an insurance perspective, exceeding the manufacturer’s weight limit can give your insurance company grounds to deny a claim. If you are in an accident and the insurer determines that the roof was overloaded, they may argue that the overload contributed to the accident or increased the severity of injuries. This is rare in practice, but it is a legal risk that is easily avoided by staying within the specified limits.
Complete Step-by-Step Ski Rack Installation Guide
Installing a ski rack is a task that most people can complete in 20 to 30 minutes with basic hand tools, but doing it wrong can lead to rattling, paint damage, and even gear falling off at highway speed. This guide walks you through the installation process for the three most common rack types: universal clamp-on crossbars, T-Track crossbars, and hitch-mounted carriers.
Part A: Installing Clamp-On Crossbars (Thule/Yakima Universal)
Before you begin, you need to gather a few tools: a tape measure, a Phillips screwdriver, a 5mm Allen key (usually included with the crossbars), and a soft microfiber towel to protect your paint during the process.
- Measure your roof width. Open both front doors and measure the distance between the inner edges of the door frame at the point where the roof curves downward. Write this number down; you will need it to set the crossbar spread and foot position.
- Determine crossbar placement. Front crossbars should sit directly above the B-pillar (the pillar between the front and rear doors). Rear crossbars should sit 28 to 32 inches behind the front bars. This spread accommodates most ski bindings. If you carry snowboards, increase the spread to 32 to 36 inches.
- Attach the feet to the crossbars. Slide each foot onto the crossbar at the measured position. Tighten the foot’s set screw with the Allen key until the foot is snug but can still be adjusted by hand.
- Position the crossbars on the roof. Place a microfiber towel at each contact point to protect the paint. Set the front crossbar on the roof at the B-pillar position. Open the clamp hooks and position them around the door frame edge.
- Close the door slowly. As you close the door, the clamp hook should grip the top of the door frame. Check that the hook is centered on the frame edge and not pinching the rubber weather seal. If the seal is being compressed, adjust the foot position inward by 2 to 3mm.
- Tighten all clamps. Using the Allen key, tighten each clamp bolt to the manufacturer’s specified torque. For Thule Evo Clamps, this is 5 Nm (about 4 hand-tight turns past snug). For Yakima clamps, it is 7 Nm. Over-tightening can crack the plastic foot housing.
- Verify the crossbar level. Place a small spirit level across each crossbar. If the bar is tilted more than 2 degrees, one foot is seated higher than the other. Loosen the foot, adjust, and re-tighten.
- Mount the ski carriers. Slide each carrier onto the crossbar from the side (T-Track) or clamp it around the bar (universal mount). Position them so the center of the carrier is aligned with the center of the roof. Tighten the carrier’s mounting hardware to the specified torque.
Part B: Installing T-Track Crossbars
T-Track crossbars are the cleanest-looking and most secure mounting system, but they require bars with a T-shaped channel running along the top surface. Thule WingBars, Yakima AeroBars, and most OEM crossbars on premium vehicles include this channel.
- Remove the end caps from the crossbars. Each bar has a plastic end cap that slides or pops off, revealing the T-Track channel opening.
- Prepare the T-Track hardware. Most ski rack carriers include T-bolts or T-nuts that slide into the channel. Insert these into the channel from the end of the bar, sliding them to the desired position before attaching the carrier.
- Slide the carrier into position. With the T-bolts in the channel, align the carrier’s mounting holes with the bolts. Lower the carrier onto the bolts and hand-tighten the nuts.
- Tighten evenly. Use a 10mm wrench to tighten the nuts in an alternating pattern (front-left, rear-right, front-right, rear-left) to ensure even clamping force. Tighten to 8 Nm (about 3 hand-tight turns past snug).
- Replace the end caps. Slide the plastic end caps back onto the bars to seal the T-Track channels. This prevents wind noise and water intrusion into the channel.
Part C: Installing a Hitch-Mounted Carrier
Hitch-mounted ski carriers are the simplest to install because they require no roof work whatsoever. However, they do require a compatible trailer hitch receiver.
- Check your hitch class. Most ski carriers require a Class II (1.25-inch) or Class III (2-inch) receiver. Look for the class stamp on the inside of the receiver tube. If you do not have a hitch, you will need to have one installed by a professional ($150 to $300 installed).
- Clean the receiver tube. Use a wire brush to remove rust and debris from the inside of the receiver tube. A clean tube ensures a tight fit for the carrier’s shank.
- Insert the carrier shank. Slide the carrier’s square shank into the receiver tube. Align the hitch pin holes and insert the hitch pin. Secure with a cotter clip or locking mechanism.
- Tighten the anti-rattle bolt. Most quality hitch carriers include an anti-rattle bolt or cam mechanism that eliminates the wobble between the shank and receiver. Tighten this bolt firmly with a 19mm wrench.
- Load your gear. Open the carrier’s clamp arms and place your skis or snowboards across the arms. Close the arms until the rubber grips make firm contact with the gear. Lock the carrier with the included key.
Ski Rack Security & Theft Prevention: Protecting Your Investment
Ski racks are a prime target for theft, especially in ski resort parking lots where hundreds of unattended vehicles sit for hours. Thieves know that rack-mounted gear is easy to grab, and most rack locks are trivially simple to defeat with basic tools. In this section, we cover the real-world security of every major rack brand and the steps you can take to protect your gear.
How Secure Are Factory Rack Locks?
The honest answer is: not very. Thule’s One-Key System uses a wafer tumbler lock that can be picked in under 30 seconds with a basic lock-picking kit. Yakima’s Same Key System uses a similar wafer mechanism. These locks are designed to deter opportunistic thieves, not determined ones. If someone brings a $15 lock-pick set from Amazon, they can defeat any factory rack lock in under a minute.
The lock’s primary value is as a visual deterrent. A locked rack signals that the owner cares about security, which may cause a casual thief to move on to an easier target. But for high-value gear (a $600 snowboard with $400 bindings), the factory lock is not sufficient.
Layered Security Strategy
The best approach to rack security is a layered strategy that combines physical locks, visual deterrents, and behavioral practices:
Layer 1: Lock the rack to the car. Use the factory lock to secure the rack carrier arms. This prevents someone from simply opening the carrier and sliding out your gear. Upgrade to a disc-detainer lock core (available from Thule and Yakima for $15 to $25) for significantly better pick resistance.
Layer 2: Lock the gear to the rack. Even if a thief defeats the carrier lock, they should not be able to walk away with your skis. Use a steel cable lock (like the Kryptonite Kryptflex, $25) threaded through the ski brake holes and around the crossbar. This adds 15 to 30 seconds of cutting time, which is usually enough to deter thieves working quickly in a busy lot.
Layer 3: Lock the rack to the crossbars. The rack itself can be unbolted and stolen. Use tamper-proof bolts (Torx Security or Pin-Hex) instead of the standard Allen bolts that most racks ship with. Thule sells a security bolt upgrade kit ($20) for this exact purpose.
Layer 4: Visual deterrents. A “GPS TRACKED” sticker on your cargo box (even if it is not actually tracked) can deter thieves who are scanning for easy targets. Similarly, a visible dashcam with a blinking LED indicator suggests that your vehicle has active monitoring.
Resort Parking Lot Security
The highest-risk scenario for ski rack theft is an unattended vehicle in a ski resort parking lot. Most resorts have security cameras, but the footage is often low-resolution and the response time is slow. Here are practical steps for resort parking:
- Park in a well-lit, high-traffic area near the lodge entrance.
- Remove high-value items (GPS units, cameras, wallets) from the vehicle entirely.
- Use a cargo box instead of an open rack for gear storage (prevents casual grab-and-run).
- Lock your vehicle even if you think “everyone here is a skier.”
- Return to the vehicle during lunch to check on your gear if you are carrying expensive equipment.
- Consider parking near resort security or shuttle bus stops where foot traffic is highest.
What to Do If Your Rack Is Stolen
If your rack or gear is stolen, file a police report immediately. Most ski resorts have a dedicated number for parking lot theft. Then contact your auto insurance provider. Many comprehensive auto insurance policies cover roof-mounted accessories, including racks and cargo boxes, up to $1,000. If you have homeowner’s or renter’s insurance, your gear may be covered under that policy instead.
To prevent future theft, register your rack’s serial number with the manufacturer. Thule, Yakima, and Kuat all maintain stolen-product databases that help law enforcement identify recovered items. Take photos of your rack and gear, including serial numbers, before each trip. Store these photos in a cloud service so they are accessible even if your phone is stolen along with your gear.
The Ultimate Winter Road Trip Checklist for Ski & Snowboard Trips
Packing for a ski trip is deceptively complex. You are transporting expensive, fragile equipment through freezing temperatures, on icy roads, often for 4 to 8 hours. A forgotten item or a poorly secured load can turn a dream trip into a nightmare. This checklist covers every item you need, organized by category and priority.
Essential Gear (Do Not Leave Home Without These)
- Ski rack or cargo box — properly installed and tested before departure.
- Crossbar key and rack key — carry a spare key in your glove box.
- Ski/Snowboard carrier lock core — upgraded disc-detainer recommended.
- Cable lock — for securing gear to the rack at the resort.
- Snow chains or winter tires — legally required in many mountain states.
- Ice scraper and snow brush — at least 12 inches wide for efficient clearing.
- Windshield washer fluid — rated for -20°F minimum.
- Emergency blanket and flashlight — in case of roadside breakdown in cold weather.
- Phone charger (car adapter) — your phone is your lifeline in mountain areas with no cell signal.
- Cash — some mountain toll roads and parking lots do not accept cards.
Gear Protection Items
- Ski/snowboard bags — padded protection for transport on open racks.
- Microfiber towels (3-4) — for drying gear before loading and protecting car paint during installation.
- Rubber mats — place under the rack to prevent paint scratching during loading.
- Edge tuner and wax — for on-mountain repairs if your edges get nicked.
- Binding lubricant — silicone spray for ratchet mechanisms that freeze in cold weather.
- Helmet bag — protects your helmet from UV damage during roof transport.
Vehicle Preparation
- Tire pressure check — cold weather reduces tire pressure by 1 PSI per 10°F drop. Check and inflate before departure.
- Antifreeze level — verify the coolant concentration is rated for your destination’s lowest expected temperature.
- Battery health — cold weather reduces battery capacity by 20% to 50%. Have your battery tested if it is more than 3 years old.
- Brake inspection — mountain driving puts heavy stress on brakes. Ensure pads have at least 50% material remaining.
- Rack torque check — re-tighten all crossbar and carrier bolts to specified torque before hitting the highway.
- Fuel level — fill up before entering the mountains. Gas stations at high altitude charge 20% to 40% more.
Personal Items for Cold Weather
- Base layers (2 sets) — moisture-wicking synthetic or merino wool. Cotton kills in cold weather.
- Insulated jacket — for wearing around the resort and during loading/unloading.
- Waterproof gloves (2 pairs) — one pair for riding, one dry pair for driving and loading gear.
- Neck gaiter or balaclava — essential for wind protection during open-air gear loading.
- Sunglasses — snow glare at altitude is intense, even on cloudy days.
- Sunscreen (SPF 50+) — UV exposure increases 4% to 10% per 1,000 feet of elevation.
- Water and snacks — dehydration is the #1 cause of altitude sickness on ski trips.
Ski Rack Noise Reduction: How to Silence the Whistle
Wind noise from a roof-mounted ski rack is one of the most common complaints among winter sports enthusiasts. The sound typically manifests as a high-pitched whistle or a low-frequency drone that increases with speed. At 70mph, a poorly optimized rack setup can produce 75 to 85 decibels of wind noise, which is equivalent to standing next to a vacuum cleaner for hours. Here is how to diagnose and eliminate rack noise.
Understanding Why Racks Make Noise
Roof rack noise is caused by three distinct aerodynamic phenomena:
Vortex shedding: When wind passes over a crossbar, it creates alternating low-pressure vortices on the downstream side. This is the same mechanism that causes power lines to “sing” in the wind. The frequency of the vortex shedding depends on the bar’s cross-sectional shape and the wind speed. Round bars produce the most vortex shedding; flat, airfoil-shaped bars produce the least.
Cavity resonance: The space between the ski rack’s rubber arms creates a resonating chamber. When wind enters this space at the right angle, it produces a standing wave that amplifies into a loud whistle. This is why racks whistle when carrying skis but are silent when empty — the skis change the cavity geometry.
Turbulent interference: The gap between the rack and the roof surface creates a turbulent boundary layer. This turbulence interacts with the crossbar’s wake, producing broadband noise (the “whooshing” sound). The closer the rack sits to the roof, the less turbulence is generated.
Step-by-Step Noise Elimination
- Install a front fairing. A fairing (also called a wind deflector) is a curved plastic shield that mounts to the front crossbar and redirects wind up and over the rack system. Thule’s AirScreen ($49) and Yakima’s WindFairing ($59) reduce wind noise by 40% to 60%. This is the single most effective noise reduction modification you can make.
- Switch to airfoil crossbars. If you are using round or square crossbars, replace them with airfoil-profile bars like Thule WingBars or Yakima AeroBars. The teardrop shape reduces vortex shedding by up to 80% compared to round bars. This upgrade costs $100 to $200 for a pair but eliminates the majority of bar-related wind noise.
- Tighten all hardware. A loose bolt or a slightly open carrier arm creates a flapping surface that generates noise. Walk around the vehicle and tighten every bolt to specification. Pay special attention to the carrier’s rubber gasket — if it is not making full contact with the crossbar, wind will whistle through the gap.
- Fill the crossbar end caps. Open crossbar ends act as resonating chambers (like blowing over a bottle). Ensure the end caps are fully seated and sealed. If your end caps are cracked or missing, replace them immediately — a $5 part can eliminate a persistent whistle.
- Add foam padding under the rack feet. A thin strip of closed-cell foam (available at any hardware store) between the rack foot and the roof surface dampens vibration and fills the micro-gap that creates turbulent noise. Use 3M VHB tape to secure the foam so it does not shift over time.
When to Give Up and Go Hitch-Mounted
If you have tried all of the above steps and still find the noise intolerable, the simplest solution is to switch to a hitch-mounted carrier. The Yakima HitchSki and VelociRAX both operate in the aerodynamic shadow behind the vehicle, where wind speed is significantly lower than on the roof. Most hitch-mounted carriers produce zero perceptible wind noise at any speed, because they are fully shielded by the vehicle’s body.
The trade-off is that hitch-mounted gear gets significantly dirtier from road spray kicked up by the rear tires. In wet or slushy conditions, your skis and boards will be coated in a layer of road grime within an hour of driving. This is a cosmetic issue, not a safety one — the salt and grime can be rinsed off with fresh water when you arrive at the resort.
Ski Rack Solutions for Campervans, Vans & Overland Builds
The van life and overland movement has created a new category of ski rack need: transporting gear on vehicles that do not follow standard automotive roof geometry. Campervans like the Mercedes Sprinter, Ford Transit, and Ram ProMaster have tall, flat roofs that are nothing like a passenger car. Standard roof clamp racks do not fit, and the weight dynamics of a loaded van at highway speed are fundamentally different from an SUV.
The Sprinter Problem
The Mercedes Sprinter is the most popular platform for adventure van conversions, and it presents a unique challenge for ski rack installation. The Sprinter’s roof is 82 inches above the ground on the standard roof model and 90 inches on the high-roof model. This makes roof loading physically impossible for most people without a ladder or step system.
The Sprinter’s factory roof rails are rated for 330 pounds of dynamic load, which is far more than any passenger car. However, the rails are positioned at the extreme edges of the 68-inch-wide roof, which means you need crossbars that span the full width. Standard Thule or Yakima crossbars are too short (maximum 60 inches); you need custom-length bars from companies like Van Compass or Owl Vans that manufacture 72-inch crossbars specifically for the Sprinter platform.
The Better Approach: Rear Door Mounts
Most experienced vanlifers avoid roof-mounted ski racks entirely and use rear door-mounted carriers instead. These systems attach to the Sprinter’s rear doors using a plate-and-hinge mechanism that allows the doors to open normally while carrying skis or boards on the outside surface.
The most popular option is the Van Essentials Rear Door Ski Carrier ($299), which mounts to the Sprinter’s factory door hinges and holds up to 4 pairs of skis or 2 snowboards. The carrier is positioned below the rear window line, so it does not obstruct visibility, and it sits in the vehicle’s aerodynamic slipstream, creating minimal drag.
For Ford Transit owners, the Flatline Van Co. rear door rack ($349) offers similar functionality with a slightly different mounting system that uses the Transit’s factory door bolt pattern. Installation takes approximately 45 minutes and requires only basic hand tools.
Rooftop Tent Considerations
If your campervan has a rooftop tent, you cannot mount a traditional ski rack on the same roof space. The tent occupies the area where crossbars would normally sit, and the tent’s fabric shell cannot support the clamping forces of a rack.
The solution is a tent-integrated rack system. Companies like iKamper and Roofnest now offer rooftop tents with built-in crossbar mounts on the tent’s outer shell. These mounts are rated for 100 to 150 pounds of dynamic load, which is enough for a pair of ski carriers loaded with 4 pairs of skis. The iKamper Skycamp 3.0 ($1,899) includes integrated T-Track channels that accept standard Thule or Yakima accessories without modification.
Overland Rig Specific Solutions
Overland rigs — typically Jeep Gladiators, Toyota Tacomas, and Land Rover Defenders — use a rack ecosystem that is completely different from passenger cars. The Rhino-Rack Pioneer Platform ($599) and the Front Runner Slimline II ($749) are flat, modular roof platforms that accept a wide range of bolt-on accessories, including ski carriers, cargo boxes, and even awnings.
The advantage of a platform system is modularity. You can mount ski carriers on one section of the platform, a cargo box on another, and a solar panel on a third. This flexibility is essential for overland travelers who carry a mix of gear for different seasons. The disadvantage is weight: a full Pioneer Platform with accessories can weigh 80 to 100 pounds before any gear is loaded, which eats into your vehicle’s payload capacity.
Car Roof Protection: Preventing Damage from Ski Racks
A ski rack that is improperly installed or poorly maintained can cause significant damage to your vehicle’s roof. Paint scratches, dents, rust spots, and even cracked glass are all common consequences of neglecting roof protection. Here is how to prevent every type of rack-related damage.
Paint Protection
The most common form of rack damage is paint scratching. This occurs when vibration causes the rack’s mounting feet to rub against the roof surface, wearing through the clear coat and paint layers. Even rubber-lined feet can cause scratching if the rubber hardens in cold weather or if dirt and grit accumulate between the foot and the roof.
The best prevention is a clear paint protection film (PPF) applied to the roof at each contact point. 3M Paint Protection Film ($25 for a 12-inch strip) is a transparent, self-healing urethane that absorbs micro-scratches and can be replaced when it wears out. Apply a 6-inch by 6-inch square of PPF under each rack foot, and your paint will remain pristine for years.
For temporary protection during installation, place a microfiber towel under each foot while you are positioning the crossbars. Once the bars are aligned, slide the towel out and lower the feet onto the PPF-protected surface. This prevents the scratching that occurs during the adjustment phase, when the feet slide back and forth across the paint.
Dent Prevention
Roof dents from ski racks are caused by over-tightening the clamp bolts. When you crank down on the crossbar foot bolts with excessive force, the foot presses into the roof panel and creates a permanent indentation. This is especially common on vehicles with thin-gauge aluminum roof panels, like the Ford F-150 and the Audi A4.
The solution is to use a torque wrench instead of guessing with a regular wrench. Most rack manufacturers specify a torque value of 5 to 7 Nm for foot bolts, which is roughly equivalent to “firm hand-tight” rather than “crank it until it stops.” A small beam-type torque wrench costs $15 and eliminates the risk of over-tightening.
Rust Prevention at Mount Points
If your vehicle has a steel roof (most non-luxury vehicles), moisture can accumulate under the rack feet and cause rust. This is especially problematic in regions that use road salt, because the salt-laden water gets trapped between the foot and the roof and creates a corrosive micro-environment.
Prevent this by applying a thin bead of marine-grade silicone sealant around the base of each rack foot after installation. The silicone creates a waterproof barrier that prevents moisture from reaching the paint surface. Re-apply the silicone once per year, typically in the spring before you remove the rack for summer storage.
Weight Distribution & Road Safety: The Physics of Loaded Racks
How you arrange gear on a ski rack affects not just aerodynamics, but also vehicle handling, braking distance, and rollover risk. Proper weight distribution is critical for safe winter driving, especially on mountain roads with steep grades, sharp curves, and variable surface conditions.
The Center of Gravity Problem
Adding weight to your vehicle’s roof raises its center of gravity. Every 100 pounds of roof load raises the center of gravity by approximately 1 to 2 inches, depending on the vehicle’s height and wheelbase. A higher center of gravity increases body roll in corners and reduces the vehicle’s resistance to rollover forces.
The NHTSA (National Highway Traffic Safety Administration) estimates that roof-mounted cargo increases rollover risk by 10% to 15% for every 100 pounds added above the roofline. For a typical ski rack setup (45 pounds of rack + 50 pounds of gear = 95 pounds), this translates to a measurable increase in rollover probability during emergency maneuvers.
The safest way to minimize this risk is to keep the total roof load as low as possible. Choose the lightest rack and crossbar combination that meets your needs, and distribute the gear evenly across both crossbars. Never load all the weight on the front or rear bar — this creates an asymmetric load that pulls the vehicle’s handling characteristics in one direction.
Front-to-Rear Distribution
For optimal handling, position heavier gear (snowboards, boots) on the front crossbar and lighter gear (skis, poles) on the rear crossbar. This keeps more weight ahead of the vehicle’s center of gravity, which improves steering response and reduces the tendency for the rear end to swing out in crosswinds.
If you are using a cargo box, position the box so its center of mass sits directly above or slightly forward of the front crossbar. Most cargo boxes can be slid forward or backward on the crossbar tracks to achieve this balance. A cargo box that sits too far back creates a tail-heavy load that makes the vehicle feel unstable at highway speeds, especially in crosswinds.
Crosswind Stability
Loaded ski racks are particularly vulnerable to crosswind forces. A strong gust from the side can push a loaded rack sideways, causing the vehicle to yaw (rotate) unexpectedly. This is especially dangerous on elevated highways, bridges, and mountain passes where crosswinds are strongest.
To improve crosswind stability, keep the rack profile as low as possible. Low-profile carriers like the Yakima FatCat EVO (3.5 inches above the crossbar) are inherently more stable than high-profile designs like the Thule SnowPack Extender (5.5 inches above the crossbar) because they present less surface area for the wind to push against.
When driving in strong crosswinds, reduce your speed by 10 to 15mph below the posted limit. This gives you more time to react to sudden gusts and reduces the aerodynamic force on the rack by approximately 40% (drag force decreases with the square of speed, so a 15% speed reduction produces a 28% force reduction).
Braking Distance Impact
A loaded roof rack increases your vehicle’s braking distance by adding mass that must be decelerated. The effect is proportional to the total added weight: every 100 pounds of roof load increases braking distance by approximately 3% to 5% on dry pavement and 5% to 8% on wet or icy surfaces.
For a typical ski rack setup (95 pounds total), this translates to an additional 3 to 6 feet of stopping distance at 60mph. On ice, this can be the difference between stopping safely and sliding into the car ahead of you. Always increase your following distance by at least 2 seconds when carrying a loaded rack in winter conditions.
Renting vs Buying a Ski Rack: The Complete Cost Analysis
If you only ski or snowboard 3 to 5 days per year, buying a ski rack may not make financial sense. Rental shops at major ski resorts offer rack rentals for $15 to $30 per day, which is significantly cheaper than purchasing a $250 to $500 rack that sits unused for 360 days per year. However, the math changes when you factor in convenience, frequency, and long-term value.
The Break-Even Calculation
The break-even point depends on the rack’s purchase price and the daily rental rate at your local resort. Here is the math for three common scenarios:
| Scenario | Rack Cost | Daily Rental | Break-Even Days | 5-Year Value |
|---|---|---|---|---|
| Budget (Tyger Auto) | $79 | $20/day | 4 days | $421 savings |
| Mid-Range (Thule SnowPack) | $249 | $25/day | 10 days | $376 savings |
| Premium (Kuat Grip 6) | $399 | $30/day | 13 days | $351 savings |
If you ski more than 10 days per year, purchasing even a premium rack pays for itself within 2 seasons. If you ski fewer than 5 days per year, renting is the smarter financial choice.
The Convenience Factor
Financial analysis ignores the most significant advantage of owning a rack: convenience. Rental racks are first-come, first-served, and popular resorts run out of rentals on busy weekend mornings. If you arrive at 8:30am and the rental shop has no racks left, you are either carrying your gear inside the car (damaging your interior) or skiing without your board (not skiing at all).
Owning a rack also means you can leave it on your car permanently, eliminating the 15 to 20 minutes of installation time that rental racks require each trip. Over a 5-year ownership period with 20 trips per year, this saves approximately 16 hours of cumulative installation time.
Rental Quality Concerns
Rental racks are typically the cheapest models available, often off-brand units that have been beaten by hundreds of previous users. The rubber clamp arms are frequently worn, the lock cylinders are often jammed with dirt, and the mounting hardware may be bent or stripped. A worn rental rack can scratch your crossbars, fail to grip your gear securely, and leave you stranded in a parking lot trying to jimmy a jammed lock with a screwdriver.
If you decide to rent, inspect the rack before accepting it. Check that the rubber arms are soft and pliable (not cracked or hardened), the lock operates smoothly, and all mounting hardware is present and undamaged. If anything looks suspect, ask for a different unit.
Our Verdict
If you ski 5 or fewer days per year and do not own a cargo box or crossbars, renting is the most cost-effective option. If you ski 6 or more days per year, own crossbars already, or value the convenience of a permanent setup, buying is the clear winner. The Tyger Auto at $79 is so affordable that it pays for itself in just 4 rental days — there is almost no scenario where it does not make sense to buy at that price point.
Can You Open a Panoramic Sunroof with a Ski Rack Installed?
Modern vehicles increasingly feature panoramic glass roofs that extend from the windshield to the rear hatch. These roofs create a unique conflict with ski rack installation: the crossbars must sit close enough to the glass to clamp securely, but the glass panel needs clearance to open and slide backward without hitting the crossbar or the rack above it.
The Clearance Problem
Most panoramic sunroofs slide open by retracting the glass panel rearward along tracks in the roof. The glass typically rises 1 to 2 inches above the roof surface before sliding back. If your front crossbar sits within 3 inches of the sunroof’s rear edge, the glass will contact the crossbar when you try to open it.
The exact clearance depends on your vehicle’s roof geometry and the crossbar positioning. In general, if the front crossbar is positioned at or behind the B-pillar (the pillar between the front and rear doors), the sunroof will have adequate clearance. If the crossbar is positioned forward of the B-pillar, you need to measure carefully before attempting to open the glass.
How to Test Clearance
- Install the crossbars at the position recommended by the rack manufacturer.
- Mark the glass edge with a piece of painter’s tape on the roof surface, indicating the rearmost point the glass reaches when fully open.
- Measure the gap between the painter’s tape and the front crossbar. You need a minimum of 2 inches of clearance to safely open the sunroof.
- Test slowly. Open the sunroof halfway and stop. Check for any contact between the glass and the crossbar. If there is contact, adjust the crossbar position rearward until you achieve adequate clearance.
When It Is Not Safe
Some vehicles have panoramic sunroofs that extend so far forward that there is no position for the front crossbar that maintains safe clearance. The Volvo XC90, BMW X7, and Mercedes-Benz GLE are examples of vehicles where the panoramic roof occupies nearly the entire roof surface. In these cases, you have two options: use a hitch-mounted carrier, or permanently close the sunroof while the rack is installed.
Do not attempt to open the sunroof with a crossbar in the way. The glass panel is tempered, not laminated, which means it is strong against flat impacts but extremely vulnerable to edge impacts. Contact with a metal crossbar can shatter the glass instantly, resulting in a $1,000 to $2,500 replacement cost.
How to Transport Ski Poles on a Roof Rack or in a Cargo Box
Ski poles are the forgotten piece of the rack puzzle. They are too thin to grip securely in most ski carriers, too long to fit in a cargo box diagonally, and too fragile to toss loosely on the roof. Here are the best methods for transporting poles without bending, scratching, or losing them.
Method 1: Strapped to the Skis
The simplest approach is to bundle your poles with your skis before loading them into the carrier. Lay the poles parallel to the skis, with the baskets at the tail end and the grips at the tip end. Use a Velcro ski strap (usually included with the skis) to secure the poles to the ski bundle at two points: one near the grip and one near the basket.
This method works well for carriers with wide clamp arms (like the Thule SnowPack Extender) but can be problematic for narrow carriers (like the Yakima FatCat EVO) where the bundled ski-and-pole combination exceeds the clamp’s internal width.
Method 2: Dedicated Pole Holder
Several manufacturers offer dedicated pole holders that mount to the crossbar alongside the ski carrier. The Thule Ski Carrier Pole Holder ($39) is a simple plastic bracket that clamps to the crossbar and holds up to 4 pairs of poles vertically. The poles are secured by a bungee cord that wraps around the grips, preventing them from sliding out during transit.
The advantage of a dedicated holder is that it keeps the poles separate from the skis, making loading and unloading faster. The disadvantage is that it adds another component to your roof, increasing wind noise and drag.
Method 3: Inside the Vehicle
If your cargo area has enough length to accommodate poles (most ski poles are 110cm to 135cm long, or about 43 to 53 inches), the safest option is to carry them inside the vehicle. Lay the poles along the floor of the cargo area, parallel to the vehicle’s length, and secure them with a bungee cord to prevent them from sliding around during turns.
If the poles are too long to lie flat, angle them diagonally across the cargo area. A pair of poles at 130cm fits diagonally in the cargo area of most SUVs and many sedans. Use a microfiber towel to pad the pole tips and prevent them from scratching the interior trim.
Method 4: Cargo Box
Cargo boxes are the best solution for carrying poles, because the poles can be laid flat on the box floor without any special securing. Most medium and large cargo boxes (16 cubic feet or more) can accommodate poles up to 135cm in length when laid diagonally. The Thule Motion 3 Medium can hold 2 pairs of poles laid flat, with room to spare for boots and a helmet.
International Ski Travel: Taking Your Rack and Gear Across Borders
Flying with ski equipment is expensive ($50 to $150 per bag each way) and risky (baggage handlers are not gentle with oversized items). Many experienced skiers and snowboarders prefer to drive to international destinations, carrying their own gear on a roof rack. However, cross-border driving with a roof rack introduces legal, logistical, and safety considerations that do not apply to domestic trips.
Driving to Canada from the US
Canada is the most common international ski destination for American drivers. The good news is that US-issued roof racks and ski carriers are fully legal in Canada. There are no special regulations for roof-mounted cargo on Canadian highways, and your US auto insurance policy provides coverage in Canada (verify this with your insurer before departure).
The main concern at the border is the customs declaration. You must declare all gear you are bringing into Canada, including skis, snowboards, and the rack itself. If the total value of your gear exceeds the Canadian duty-free exemption ($800 CAD for a 48-hour visit), you may be charged duty on the excess amount. However, personal sports equipment that you intend to bring back is generally exempt from duty under the “temporary importation” rule.
Carry a receipt or proof of purchase for your gear. If the border agent asks about the value of your equipment, showing a receipt is faster and more credible than estimating. Take a photo of your receipts with your phone before the trip so you have them accessible even if the paper receipts are lost.
Driving in Europe with a Roof Rack
European countries have stricter regulations for roof-mounted cargo than the United States. Here are the key rules:
France: Roof-mounted cargo must not extend more than 50cm beyond the vehicle’s rear bumper. If your skis overhang, you must attach a red flag (50cm x 50cm) or a red reflective panel to the tail of the overhanging gear. Failure to do so can result in a fine of 135 euros.
Germany: Roof cargo must not exceed the vehicle’s total width (including mirrors). The combined weight of roof cargo must not exceed the vehicle’s dynamic roof weight limit, and the cargo must be securely fastened to prevent any movement. Germany is strict about enforcement; highway police actively check for improperly secured loads.
Switzerland: Similar to Germany, with the addition of a requirement that roof cargo must not obscure the vehicle’s license plate or rear lights. If your cargo box or ski rack blocks the license plate, you must install an auxiliary plate on the rear of the cargo.
Austria: Winter tires are legally required from November 1 to April 15 on all vehicles. If you are driving to Austrian ski resorts, ensure your vehicle is equipped with winter tires or carry snow chains. Roof-mounted cargo regulations are similar to Germany’s.
Flying with a Ski Rack
If you are flying to your ski destination and plan to rent a car, you have two options for rack rental. Many European car rental companies (Europcar, Hertz, Sixt) offer roof rack and cargo box rentals as add-on options, typically priced at 10 to 20 euros per day. However, availability is limited and you must request the rack at the time of booking, not at the counter.
The alternative is to ship your gear ahead of time using a service like Ship Skis or Luggage Forward. These services pick up your gear from your home, clear customs, and deliver it to your hotel or rental property. Prices range from $100 to $300 each way, depending on the destination and gear weight. This is more expensive than checking bags on your flight, but it eliminates the hassle of dragging oversized bags through airports.
Essential Documents for International Ski Travel
Bring these items in your vehicle during cross-border ski trips:
- Valid passport (for all passengers)
- Vehicle registration and proof of insurance
- International Driving Permit (recommended for Europe)
- Receipts for all gear (for customs valuation)
- Snow chain certificate (required in some Austrian regions)
- Vignette stickers (required for highways in Austria, Switzerland, and Czech Republic)
Long-Distance Ski Road Trips: Driving 500+ Miles to the Mountains
The great American ski road trip is a rite of passage: packing the car with friends, strapping boards to the roof, and driving through the night to arrive at first chair. But a 500+ mile drive with a loaded roof rack requires preparation that a short weekend trip does not. Here is everything you need to know about keeping your gear, your vehicle, and yourself safe during a long-distance ski haul.
Pre-Trip Vehicle Inspection
Before embarking on a long ski road trip, perform a comprehensive vehicle inspection. Mountain driving places extreme stress on your vehicle’s systems, and a failure at 80mph on an icy highway is life-threatening.
Tires: Check tread depth with a penny test (insert a penny head-first into the tread; if you can see all of Lincoln’s head, the tire is worn out). Minimum legal tread depth is 2/32 of an inch, but 4/32 or more is recommended for winter driving. Check tire pressure when the tires are cold (before driving), and inflate to the manufacturer’s recommended PSI found on the driver’s door jamb sticker.
Brakes: Have a mechanic inspect your brake pads and rotors. Mountain descents generate extreme heat in the brakes, and worn pads can overheat and fade, resulting in dangerously long stopping distances. If your brake pads have less than 50% material remaining, replace them before the trip.
Coolant: Check your coolant level and concentration. Most vehicles require a 50/50 mix of coolant and distilled water, rated for protection down to -34°F. In extremely cold climates (-20°F or below), increase the coolant concentration to 60/40 for additional freeze protection.
Battery: Have your battery tested at an auto parts store (most will do this for free). A battery that tests below 12.4 volts should be replaced before the trip. Cold weather reduces battery capacity, and a weak battery that starts fine at sea level may fail at 9,000 feet.
Route Planning for Ski Trips
Mountain roads have unique hazards that flatland driving does not prepare you for. Plan your route with these factors in mind:
Steeper grades: Use your vehicle’s “L” or “2” gear for sustained mountain descents. Engine braking reduces the load on your brake system and prevents overheating. If your vehicle has hill descent control, engage it on grades steeper than 6%.
Chain control areas: Many mountain passes have mandatory chain control during snowstorms. Check the state DOT website (Caltrans, ODOT, WSDOT, CDOT) for real-time chain requirements before departure. Carry chains even if you have all-wheel drive, because chain requirements sometimes apply to AWD vehicles during severe storms.
Fuel stops: Mountain areas have fewer gas stations, and they charge significantly more (20% to 40% above city prices). Fill your tank before entering the mountains, and plan fuel stops at regular intervals. As a general rule, do not let your fuel level drop below one-quarter tank in mountain areas.
Cell service gaps: Many mountain roads have extended areas with no cell service. Download offline maps (Google Maps allows this for specific regions) before departure, and carry a paper map as a backup. If you break down in a cell dead zone, the paper map will help you describe your location to a passing motorist or rescue team.
Managing Fatigue on Long Drives
Ski road trips often involve driving in the dark (early morning departures to catch first chair) and through monotonous terrain (flat highways leading to the mountains). Drowsy driving is responsible for an estimated 100,000 crashes per year in the United States, and mountain driving amplifies the consequences of a fatigue-related error.
Follow the “every 2 hours” rule: stop every 2 hours for at least 15 minutes. Walk around, stretch, hydrate, and eat a snack. Switch drivers if possible. Avoid driving between midnight and 6am, when your circadian rhythm makes you most susceptible to drowsiness. If you feel drowsy, pull over immediately — do not try to “push through it.” A 20-minute nap in a rest area is always preferable to an off-road excursion.
Cargo Box Packing Masterclass: How to Fit Everything
A cargo box is the ultimate ski trip accessory, but packing one efficiently is an art. The goal is to fit the maximum amount of gear without exceeding the box’s weight limit, and to arrange items so they do not shift during transit. Here is our proven packing method for a medium (16 cubic foot) cargo box.
The Layer System
Think of your cargo box like a suitcase: it has a floor, walls, and a lid, and you should pack from the bottom up in distinct layers.
Layer 1 — The Floor (Heaviest Items): Place your ski boots and snowboard boots on the floor of the box, side by side with the toes pointing toward the front of the vehicle. Boots are heavy (3 to 5 pounds each) and dense, making them the ideal base layer. Position them so the box lid can close without contacting the boot tops.
Layer 2 — The Middle (Medium Items): Lay your skis or snowboard on top of the boots, positioned diagonally from front-left to rear-right. Diagonal positioning maximizes the usable length of the box. Place your helmet (in its bag) in the gap between the ski tails and the box wall.
Layer 3 — The Top (Lightest Items): Fill the remaining space with clothing layers, gloves, goggles, and small accessories. Stuff socks inside your boots to save space and maintain boot shape. Place goggles in a hard case on top of the skis where they will not be crushed.
Weight Distribution Within the Box
Position the heaviest items (boots) toward the front of the box, closest to the vehicle’s front axle. This keeps the weight forward of the vehicle’s center of gravity, which improves steering response and reduces the tendency for the rear end to feel light in corners. Avoid packing everything at the rear of the box, as this creates a tail-heavy load that makes the vehicle feel unstable in crosswinds.
Securing the Load
Most cargo boxes include internal tie-down points or elastic cargo nets. Use these to secure your gear and prevent shifting during transit. The single most dangerous item in an unsecured cargo box is a ski boot, which can become a 4-pound projectile in a sudden stop or collision.
If your box does not have internal tie-down points, you can create them by drilling small holes in the box floor (away from any structural ribs) and installing D-ring tie-down anchors ($5 for a pack of 4). Run a bungee cord across the top of the loaded gear and clip it to the D-rings to hold everything in place.
When to Buy a Ski Rack: The Seasonal Deals Guide
Ski racks follow a predictable pricing cycle throughout the year. Knowing when to buy can save you $50 to $150 on a premium rack, or get you a free accessory bundle that effectively reduces the price by 20% to 30%.
The Annual Pricing Cycle
September-October (Best Time to Buy): This is when retailers are clearing last year’s inventory to make room for new models. Thule and Yakima typically release their new product lines in late August, which means the previous year’s models go on clearance in September. You can find Thule SnowPack Extenders for $299 (down from $399) and Yakima FatCat EVOs for $199 (down from $249) during this period. The racks are identical to the current year’s models, often with only minor color or graphic updates.
November-December (Peak Season Pricing): This is when demand is highest and prices are at their maximum. Retailers have no incentive to discount because skiers are buying urgently to prepare for the season. Avoid purchasing during this window unless you find a rare clearance deal.
January-February (Moderate Deals): Some retailers offer mid-season sales to boost lagging January revenue. REI’s Anniversary Sale and Amazon’s winter clearance events occasionally include ski rack discounts of 10% to 15%. However, popular sizes and colors sell out quickly.
March-April (End-of-Season Clearance): This is the second-best time to buy. Retailers are desperate to clear winter inventory before spring, and discounts can be steep (20% to 40% off MSRP). The downside is limited selection — the most popular racks in common sizes are often sold out by March. If you drive a common vehicle (Subaru, Toyota, Honda), you can still find crossbars and carriers in stock through April.
May-August (No Deals): Ski racks are not on anyone’s radar during summer. Prices return to full MSRP, and retailers do not run promotions on winter gear. The only exception is Amazon Prime Day in July, which occasionally includes ski rack deals from third-party sellers.
Best Retailers for Ski Rack Deals
- REI: Offers member dividends (10% back on full-price purchases) and periodic 20%-off coupons. Their clearance section has the best deals on previous-year models.
- Amazon: Prices fluctuate daily based on demand algorithms. Use CamelCamelCamel to set price alerts for your desired rack model. The best deals appear during Prime Day and Black Friday.
- Backcountry: Known for steep end-of-season discounts and a generous return policy (returns accepted until January 31 for fall purchases).
- Sierra Trading Post: Carries overstock and previous-year Thule and Yakima products at 30% to 50% off retail. Quality is guaranteed, but selection is unpredictable.
- eBay / Facebook Marketplace: Used racks in good condition sell for 40% to 60% of retail. Inspect carefully for cracks, worn rubber, and missing hardware before purchasing.
Insurance, Warranty & Liability: What Happens When Things Go Wrong
Ski racks and the gear they carry represent a significant financial investment, and understanding your insurance coverage and warranty protections can save you thousands of dollars in replacement costs. This section covers what your insurance covers, what your rack warranty covers, and who is liable if your gear falls off and causes an accident.
Auto Insurance Coverage for Rack-Mounted Gear
Most comprehensive auto insurance policies cover roof-mounted accessories (crossbars, ski racks, cargo boxes) as part of the vehicle’s equipment. This means if your rack is stolen, damaged in a hailstorm, or destroyed in a collision, your auto insurance will pay to replace it (minus your deductible). However, the gear in the rack (skis, snowboards, boots) is typically NOT covered under auto insurance.
Gear coverage falls under your homeowner’s or renter’s insurance policy. Most homeowner’s policies include “off-premises” coverage that protects your personal property anywhere in the world, up to 10% of your total personal property limit. For example, if your homeowner’s policy has $200,000 in personal property coverage, your ski gear is covered for up to $20,000 off-premises.
However, off-premises coverage often has a special limits sub-cap for sporting equipment, typically $1,500 to $2,500. If your total ski setup (board $600 + bindings $400 + boots $500 + poles $100) is worth $1,600, you are within the sub-cap. But if you carry two complete setups or high-end racing gear, you may need to purchase additional “scheduled personal property” coverage to ensure full replacement value.
What Your Rack Warranty Covers
Thule, Yakima, and Kuat all offer warranties on their ski rack products. Here is what each covers:
Thule (5-10 year limited warranty): Covers defects in materials and workmanship. Does NOT cover normal wear and tear (rubber arms, lock cylinders), cosmetic damage, or damage caused by exceeding the weight limit. Thule’s warranty process requires you to ship the defective product to their warranty center at your expense; they will repair or replace it and ship it back.
Yakima (Lifetime warranty): Covers defects in materials and workmanship for the lifetime of the original owner. Transfers to second owners for a $25 processing fee. Like Thule, it does not cover normal wear and tear or cosmetic damage. Yakima’s warranty process is simpler: they ship you a replacement part and include a prepaid return label for the defective item.
Kuat (Lifetime warranty): Covers defects in materials and workmanship for the lifetime of the product. Kuat’s warranty is the most generous in the industry: they cover cosmetic damage (scratches, fading) in addition to functional defects. If your Grip 6 develops a scratch that bothers you, Kuat will replace the affected component.
Liability if Your Gear Falls Off
If your ski rack fails and your gear falls off the vehicle, striking another car or pedestrian, you are legally liable for any resulting damage or injury. Your auto insurance’s liability coverage will pay for third-party property damage and medical bills, but your policy limits apply. If the damages exceed your policy limits, you are personally responsible for the difference.
To minimize this risk, always verify that your rack is properly installed and all hardware is tightened to specification before driving. Perform a “shake test” by grabbing the loaded rack and attempting to move it laterally. If the rack shifts more than 1/4 inch, it is not tight enough. Re-tighten all mounting hardware before proceeding.
If you are involved in an accident caused by falling gear, document everything: take photos of the rack and its mounting points, the fallen gear, and the damage to other vehicles. Contact your insurance company immediately and file a police report. Do not admit fault at the scene; let the insurance adjusters determine liability based on the evidence.
Eco-Friendly Ski Rack Options: Reducing Your Environmental Impact
The outdoor industry is increasingly scrutinizing its environmental impact, and ski racks are no exception. From the materials used in manufacturing to the fuel efficiency impact during use, every rack has an environmental footprint. Here is how to minimize yours.
Material Sustainability
Traditional ski racks are made from injection-molded nylon (petroleum-derived), aluminum (energy-intensive to produce), and steel (high carbon footprint). However, several manufacturers are introducing sustainable materials into their product lines:
Recycled aluminum: Yakima has committed to using 50% recycled aluminum in their crossbar and rack products by 2027. Recycled aluminum requires 95% less energy to produce than virgin aluminum, significantly reducing the carbon footprint of each rack.
Bio-based plastics: Thule’s 2026 product line includes components made from castor oil-based nylon, which reduces petroleum dependency by approximately 30%. The material is functionally identical to traditional nylon but has a lower lifecycle carbon footprint.
Stainless steel hardware: Choosing racks with stainless steel bolts and fasteners (rather than zinc-plated steel) extends the product’s lifespan by 3 to 5 years, reducing the frequency of replacement and the associated manufacturing emissions.
Using Your Rack to Reduce Your Overall Impact
The most impactful thing you can do is use your rack to enable carpooling. A ski rack allows one vehicle to carry gear for 4 people, eliminating the need for 3 additional cars to make the same trip. If 4 skiers each drive separately to the resort (4 cars x 200 miles round-trip x 25 MPG = 32 gallons of gas), but switch to carpooling with a roof rack (1 car x 200 miles x 20 MPG = 10 gallons), the net savings is 22 gallons of gas per trip. Over a 20-day season, that is 440 gallons of gas and approximately 4 metric tons of CO2.
Similarly, a hitch-mounted cargo carrier eliminates the need for a second vehicle on family ski trips. Instead of driving two cars (one with gear, one with passengers), you load all the gear on a hitch carrier and drive one car with everyone inside. This single change can reduce your trip’s carbon emissions by 50%.
End-of-Life Recycling
When your ski rack reaches the end of its useful life, do not send it to a landfill. Aluminum and steel components are 100% recyclable at any metal recycling facility. Plastic components can be recycled through specialized programs; Thule and Yakima both offer take-back programs where you can return old products for recycling. Contact their customer service for shipping instructions.
Pickup Truck Ski Rack Guide: Bed, Cab, and Roof Options
Pickup trucks present a unique set of challenges and opportunities for ski transport. Unlike SUVs and sedans, pickups have an open bed, a shorter cab roof, and often a tonneau cover or camper shell that changes the available mounting surfaces. Here is how to transport ski gear on every type of pickup truck configuration.
Truck Bed Mounting
The truck bed is the most logical place to mount a ski rack, because it keeps the gear below the cab roofline (better aerodynamics) and within easy reach (no climbing on the roof). The Inno IN-SB Bed Ski Carrier ($149) clamps to the bed rails of most full-size trucks and holds up to 4 pairs of skis or 2 snowboards. The carrier positions the gear at an angle across the bed, with the tips resting on the cab roof and the tails on the bed rail near the tailgate.
For trucks with a tonneau cover, you need a rack that sits above the cover’s surface. The TruXedo Sport Rail system ($199) provides a flat mounting platform above the tonneau cover, accepting standard Thule and Yakima accessories. The rack adds approximately 4 inches of height above the cover, which is enough to clear most ski bindings.
Camper Shell (Topper) Solutions
Trucks with camper shells (also called toppers or caps) have a flat fiberglass roof that can accept crossbars, just like a regular vehicle. Thule’s Evo Clamp system works on most camper shells, but the shell’s fiberglass construction has a lower weight limit than a metal roof. Most camper shells are rated for 100 to 150 pounds of dynamic load, which limits you to lightweight open carriers (no cargo boxes).
The advantage of a camper shell is that you can also store gear inside the shell, keeping it protected from weather and theft. If your shell has side-access windows, you can load and unload gear without opening the tailgate, which is useful in tight parking situations.
Cab Roof Mounting
Most pickup trucks have a very short cab roof (approximately 55 to 65 inches from front to back), which is barely long enough to hold adult skis. If you mount a ski carrier on the cab roof, the skis will extend well past the rear edge of the cab, creating significant wind drag and potential safety hazards.
For cab roof mounting, use only a slide-out carrier like the Thule SnowPack Extender. The slide-out mechanism allows you to position the skis forward enough to clear the cab roof while still having the carrier anchored securely to the crossbars. Never use a fixed-position carrier on a short cab roof; the overhanging tail will catch wind at highway speeds and can pull the carrier off the crossbars.
Ski Rack Solutions for Hatchbacks, Sedans & Compact Cars
You do not need an SUV to carry skis or snowboards. Compact cars, hatchbacks, and sedans can transport winter sports gear just as effectively as larger vehicles, but the setup requires more thought due to shorter rooflines, lower weight limits, and the risk of gear interfering with trunk or hatchback operation.
The Hatchback Challenge
Hatchbacks present a unique problem: when the hatch opens, it swings upward and may contact the tails of skis or snowboards mounted on the rear crossbar. If the gear extends past the rear edge of the roof, the hatch will hit the gear when fully opened, potentially damaging both the hatch and the equipment.
The solution is to position the rear crossbar far enough forward that the gear does not extend past the hatch’s opening arc. Measure the distance from the hinge point of your hatch to the maximum extension point of the gear. If the gear overhangs the hinge point by more than 2 inches, you need to move the rear crossbar forward or switch to a shorter gear configuration.
Alternatively, use a hitch-mounted carrier that keeps the gear entirely behind the hatch, eliminating any interference. The Yakima HoldUp EVO hitch rack with a ski adapter ($249) keeps the gear at waist height and completely clear of the hatch opening.
Sedan Roof Considerations
Sedans typically have curved roofs that make crossbar installation more challenging. The roof curvature means that clip-on crossbar feet may not seat flush against the door frame, creating gaps that allow wind noise and water intrusion. Thule’s vehicle-specific fit kit includes rubber shims that conform to curved door frames, but the fit is rarely as tight as on a vehicle with flat roof rails.
The weight limit on most sedans is 100 to 120 pounds, which limits you to 2 pairs of skis or 1 snowboard on an open carrier. A cargo box is risky on a sedan unless you use a lightweight model (Thule Motion 3 Small, 28 pounds) and limit the internal load to 30 to 40 pounds of gear.
The Magnetic Alternative
For sedans with flat metal roofs (no sunroof, no roof ridges), a magnetic carrier is the easiest solution. The Menabo Aconcagua attaches in seconds, holds 2 pairs of skis securely, and leaves no marks on the paint. The magnetic mount is especially practical for sedans because it does not require any permanent hardware, making it ideal for leased vehicles where you cannot drill or clamp into the roof.
Ski Rack for Winter Car Camping: Hauling Gear for Multi-Day Adventures
Winter car camping has exploded in popularity, with thousands of skiers and snowboarders choosing to sleep in their vehicles at trailheads and resort parking lots rather than paying $200+ per night for a lodge. The gear requirements for car camping are significantly more extensive than for a day trip, and a ski rack plays a central role in managing the load.
What You Need to Carry
A multi-day winter car camping trip requires gear in five categories: sport equipment (skis/snowboard, boots, poles, helmet), camping equipment (sleeping bag, pad, tent or bivy, stove), clothing (base layers, insulating layers, waterproof shell, camp shoes), food and water (3 days of meals, water bottles, cooler), and safety gear (first aid kit, headlamp, emergency blanket, shovel). The total weight of this gear typically ranges from 80 to 150 pounds, which approaches or exceeds the roof weight limit of most vehicles.
The Split-Load Strategy
To stay within your vehicle’s weight limits, split the gear between the roof and the interior. Put the bulky, weather-resistant items on the roof (skis, snowboard, tent poles, shovel) and the fragile, temperature-sensitive items inside (food, electronics, sleeping bag, clothing). This strategy keeps the heaviest items low in the vehicle (improving handling) while using the roof for the items that benefit most from external mounting.
A cargo box is ideal for car camping because it protects gear from snow and rain while freeing up interior space for sleeping. The Thule Motion 3 Large (22 cubic feet) can hold a tent, sleeping pad, camp stove, and cooking supplies, leaving the vehicle interior entirely available for sleeping bags and personal items.
The Rooftop Tent Solution
For dedicated winter car campers, a rooftop tent eliminates the need to set up a ground tent in deep snow. The iKamper Skycamp 3.0 ($1,899) mounts to your vehicle’s crossbars and unfolds into a 4-person tent in under 60 seconds. The tent’s floor is insulated and includes a foam mattress, making it significantly warmer than a ground tent in sub-zero conditions.
The trade-off is that a rooftop tent occupies the entire roof surface, leaving no room for a ski rack. You will need to transport your ski gear inside the vehicle or on a hitch-mounted carrier. The VelociRAX Tilt, combined with a rooftop tent, creates a complete winter camping setup that keeps all gear accessible and secure.
Group Ski Trip Gear Transport: Moving 4+ People’s Equipment
Organizing a group ski trip for 4 to 8 people requires careful logistical planning, especially when it comes to transporting everyone’s gear. A single roof rack cannot hold equipment for more than 2 people, so you need a multi-vehicle or multi-rack strategy that keeps everyone’s gear organized and secure.
Capacity Planning
Use this quick reference to determine how many rack positions you need for your group:
| Group Size | Total Skis/Boards | Rack Positions Needed | Recommended Setup |
|---|---|---|---|
| 2 people (mixed) | 2 pairs skis + 1 board | 1 carrier (6-ski rated) | Thule SnowPack on one vehicle |
| 4 people (all skiers) | 4 pairs skis | 1-2 carriers | Thule Motion 3 cargo box |
| 4 people (mixed) | 2 pairs skis + 2 boards | 2 carriers or 1 cargo box | Hitch mount + roof mount |
| 6 people (mixed) | 3 pairs skis + 3 boards | 3 carriers or 2 cargo boxes | 2 vehicles with roof + hitch setups |
| 8 people (mixed) | 4 pairs skis + 4 boards | 4+ carriers | 3 vehicles or 1 van with rear door rack |
Organizational Tips for Group Trips
Color-code your gear: Assign each person a color (red, blue, green, etc.) and use colored tape on their skis, poles, and boot bags. When you arrive at the resort and unload 16 pairs of skis, color coding eliminates the chaos of trying to identify whose equipment is whose.
Designate a gear manager: One person should be responsible for loading and unloading all group gear. This person ensures that everyone’s equipment is properly secured, that weight distribution is balanced, and that nothing is left behind at the trailhead. Rotate this role each day so no one person bears the burden.
Use a gear manifest: Before departure, create a simple spreadsheet listing every person’s equipment and its location (roof rack 1, roof rack 2, cargo box, vehicle interior). Share this with the group so everyone knows where their gear is at all times. This prevents the frustrating “someone took my poles” situation that plagues group trips.
Ski Travel Bags vs Hard Cases: What to Use for Air Travel and Road Trips
If you are flying to a ski destination, the choice between a soft ski bag and a hard ski case is one of the most important gear decisions you will make. Each has distinct advantages and disadvantages that depend on your travel style, budget, and risk tolerance.
Soft Ski Bags
Soft ski bags are made from padded nylon (600D to 1680D) with internal foam padding that protects skis and boards from impacts during handling. They are lighter (3 to 5 pounds empty), more flexible (they conform to irregular shapes), and easier to store when not in use (they fold flat). Most soft bags include wheels and a telescoping handle for easy transport through airports.
The main disadvantage of soft bags is that they provide less protection against crushing forces. Airport baggage handlers routinely stack heavy items on top of ski bags, and a soft bag may not prevent the items above from denting or cracking your skis. If you are checking high-value equipment (racing skis, custom snowboards), a soft bag may not provide adequate protection.
For road trips, soft bags are the superior choice. They can be folded and stowed in the trunk or cargo area when not in use, and they double as protective covers when your skis are mounted on a roof rack. Many skiers wrap their boards in a soft bag before clamping them to the roof rack, providing an extra layer of protection against road salt and weather.
Hard Ski Cases
Hard cases are made from injection-molded ABS plastic or polycarbonate, with internal foam inserts that cradle each ski individually. They are heavier (8 to 12 pounds empty), bulkier (they cannot be folded or compressed), and more expensive ($150 to $400 versus $50 to $150 for soft bags). However, they provide significantly better protection against crushing, impacts, and moisture.
Hard cases are the clear choice for air travel with expensive equipment. The Dakine Fall Line ($299) and the Thule RoundTrip ($249) are the most popular hard cases among traveling skiers and snowboarders. Both are rated to withstand 50 pounds of stacking force without compressing the internal contents.
The disadvantage of hard cases for road trips is storage. A hard case takes up significant trunk space and cannot be compressed or folded. If you are driving to the resort with 4 people and all their gear, a hard case in the trunk eliminates space that could be used for boots, helmets, and clothing.
The Hybrid Approach
Many experienced travelers use a combination: a hard case for air travel and a soft bag for road trips. The hard case protects the gear during the most brutal handling (airport baggage systems), while the soft bag provides adequate protection during gentler road transport. If you travel by air 2 to 3 times per year and drive to local resorts 10 to 15 times per year, investing in both types is the most practical solution.
15 Common Ski Rack Mistakes (And How to Avoid Them)
After reviewing thousands of customer complaints, warranty claims, and accident reports, we have identified the 15 most common ski rack mistakes that lead to damaged gear, scratched paint, reduced fuel efficiency, and safety hazards.
- Not checking crossbar spread before buying. Every ski rack requires a minimum crossbar distance (usually 28 to 32 inches). If your crossbars are closer together than this minimum, the rack will not mount properly and may detach at highway speed. Measure your crossbar spread before ordering any rack.
- Overtightening the mounting bolts. More tight is not more safe. Overtightening cracks plastic housings, deforms rubber gaskets, and dents the roof. Use a torque wrench and follow the manufacturer’s specifications (typically 5 to 8 Nm).
- Ignoring the weight limit. A rack rated for 6 pairs of skis does not mean it can hold 6 pairs of plus-size powder boards. Calculate the actual weight of your gear and compare it to both the rack’s and the vehicle’s weight limits.
- Not securing the gear to the rack. A locked carrier prevents theft but does not prevent the gear from bouncing out on a bumpy road. Always use the carrier’s rubber arms AND a backup strap or cable lock.
- Leaving the rack on year-round. UV exposure degrades rubber components, and road salt corrodes metal hardware. Remove the rack in spring and store it indoors to extend its lifespan by 3 to 5 years.
- Mixing brands without checking compatibility. A Thule rack on Yakima bars may fit, but the clamp geometry is optimized for Thule bars. Mismatches create vibrations, rattles, and potential loosening over time.
- Loading skis with bindings facing inward. Always load skis base-to-base with bindings facing outward. Inward-facing bindings can scratch the rubber clamp arms and reduce grip pressure.
- Not cleaning the rack after a trip. Road salt left on a rack for more than a week causes corrosion that can seize lock cylinders and weaken structural components. Rinse the rack with fresh water after every trip.
- Using WD-40 on lock cylinders. WD-40 attracts dirt and eventually gums up the lock mechanism. Use graphite powder or silicone spray for lock lubrication.
- Forgetting to check vacuum pressure (SeaSucker users). Vacuum cups lose pressure over time, especially in cold weather. Check the gauge every 4 hours during active use. A red indicator means re-pump immediately.
- Driving through an automatic car wash with the rack installed. The brushes can catch on the crossbar feet, the carrier arms, or the gear itself, causing damage to both the rack and the car wash equipment. Use a touchless car wash or hand wash only.
- Not testing the setup at low speed first. After installing a new rack, drive around the block at 25mph and listen for rattles, whistles, or vibrations. Check that the gear has not shifted. This 5-minute test can prevent a highway disaster.
- Positioning the rear crossbar too far back. On hatchbacks and SUVs, a rear crossbar positioned past the hatch hinge line prevents the hatch from opening fully. Always verify hatch clearance before committing to a crossbar position.
- Using a cargo box on a car with a panoramic sunroof. The weight of a loaded cargo box can crack a panoramic glass roof. Verify that your vehicle’s roof is rated for cargo box loads (metal roof only, unless the manufacturer specifically approves glass roof cargo).
- Failing to register your rack’s serial number. If your rack is stolen, the serial number is the only way law enforcement can identify and return it. Register with the manufacturer immediately after purchase.
The Future of Ski Racks: 2027 and Beyond
The ski rack industry is evolving rapidly, driven by changes in vehicle design, sustainability requirements, and consumer expectations. Here are the trends and technologies that will shape the next generation of winter sports transport.
Integrated Aerodynamic Racks
Several vehicle manufacturers are exploring factory-integrated rack systems that are designed into the vehicle’s body from the start, rather than bolted on as aftermarket accessories. BMW’s upcoming “AeroRoof” system, announced at the 2025 IAA Mobility show, features flush-mounted crossbar channels that sit below the roofline when not in use, eliminating wind noise entirely. When you need to carry gear, the crossbars pop up from the channels at the press of a button.
This approach solves the two biggest complaints about traditional racks: wind noise and aesthetics. A factory-integrated system looks clean when empty and provides the same carrying capacity as a traditional rack when deployed. The downside is that you are locked into the manufacturer’s ecosystem — a BMW AeroRoof will not accept Thule or Yakima accessories without adapters.
Smart Rack Technology
Connected devices are coming to ski racks. Thule’s research division has demonstrated a prototype rack with embedded pressure sensors, temperature sensors, and a Bluetooth module that connects to a smartphone app. The app provides real-time data on rack load weight, clamp pressure, ambient temperature, and even UV exposure levels for gear stored on the rack.
The practical applications include: automated alerts if the rack’s clamp pressure drops below a safe threshold (indicating loosening hardware), temperature warnings if the ambient temperature drops below the rubber’s flexibility rating (indicating potential cracking), and load estimates that help you stay within your vehicle’s weight limit without manually weighing each item.
Modular and Sustainable Designs
The trend toward modularity is gaining momentum. Instead of buying a dedicated ski rack that sits unused for 9 months, future racks will be designed as modular platforms that accept different “caps” for different uses: a ski carrier cap for winter, a kayak cradle cap for summer, and a cargo basket cap for camping. This reduces the total number of products a consumer needs to buy, which reduces manufacturing emissions and raw material consumption.
Sustainability is also driving material innovation. Several startups are developing ski rack components from recycled ocean plastic and bio-based composites. While these materials are not yet strong enough for structural components, they are being used for non-load-bearing parts like end caps, fairings, and cosmetic panels. As material science advances, expect to see fully recyclable ski racks within the next 5 years.
Electric Vehicle Optimization
As EVs become the dominant vehicle type, rack manufacturers will increasingly optimize for range preservation. This means ultra-low-profile designs, active aerodynamic fairings that adjust to wind conditions, and hitch-mounted systems that minimize drag. The Yakima and Thule engineering teams have both publicly stated that EV range impact is their primary design constraint for 2027 and beyond.
The Bottom Line
The ski rack you buy today will last 5 to 10 years, but the technology landscape is shifting toward smarter, more sustainable, and more aerodynamically optimized designs. If you are buying in 2026, invest in a quality rack from a major brand (Thule, Yakima, or Kuat) with a lifetime warranty. You will be able to use it for years to come, even as vehicles and technology evolve around it.
Frequently Asked Questions
Yes, over time. Road salt corrodes metal ratchets and dries out plastic straps. If using an open roof rack, rinse your gear with fresh water immediately after the trip. Or, use a snowboard bag/cargo box.
Yes. 99% of roof racks require crossbars (the bars that run left-to-right). If your car only has side rails (front-to-back), you need to buy crossbars first.
Maybe. Low-profile racks often sit too close to the glass. You must check the clearance before opening, or you risk shattering the sunroof mechanism.
Usually 4. Snowboards are much wider. You stack them base-to-base. A “4-ski” rack usually holds 2 snowboards.
The Thule SnowPack Extender with Thule Evo Clamp crossbars is the best overall setup for the Outback. The slide-out mechanism is especially useful on the Outback’s wide roof, and the Evo Clamp system integrates seamlessly with the factory raised rails.
An empty roof rack reduces MPG by 1 to 2 miles per gallon. A loaded open rack reduces MPG by 3 to 5 miles per gallon. A cargo box reduces MPG by 2 to 4 miles per gallon. A hitch-mounted rack reduces MPG by 0 to 1 mile per gallon.
Yes. Use clip-on crossbars (Thule Evo Clamp), magnetic mounts (for metal roofs), vacuum mounts (SeaSucker), or a hitch-mounted carrier. Each option has different capacity limits and installation requirements.
Factory wafer-tumbler locks can be picked in under 30 seconds by someone with basic tools. Upgrade to a disc-detainer lock core for significantly better security, and use a cable lock to secure gear to the rack as a secondary measure.
Advanced Frequently Asked Questions
Yes, but only with the SeaSucker vacuum mount system or Tesla’s official crossbars ($450). Traditional clamp-on crossbars create point-loading that can crack the glass roof. The SeaSucker mounts directly to the glass surface using vacuum cups and holds up to 4 pairs of skis at highway speeds. Check the vacuum pressure every 4 hours.
Install a front wind fairing ($49-$59), switch to airfoil-shaped crossbars, tighten all hardware, and ensure end caps are sealed. The fairing alone reduces wind noise by 40% to 60%. If whistling persists, the issue is likely a gap between the carrier’s rubber arm and the crossbar — add a thin foam strip to fill the gap.
With a roof clamp rack: 4 snowboards maximum. With a cargo box: 2 to 3 snowboards depending on box size. With a hitch-mounted vertical rack (VelociRAX): 6 to 7 snowboards. Combining a roof rack and a hitch rack: 8 to 10 snowboards, depending on vehicle weight limits.
A roof rack does not affect tire traction, but it does increase vehicle weight and raise the center of gravity, which makes winter tires even more important. The additional weight from the rack and gear increases braking distance, and the higher center of gravity makes the vehicle more prone to sliding in corners. Winter tires provide the grip needed to compensate for these effects.
You can, but it is not recommended. UV exposure degrades rubber clamp arms and plastic housings, reducing their grip strength over time. Road salt corrodes metal hardware and lock cylinders. Removing the rack in spring and storing it indoors extends its lifespan by 3 to 5 years. If you must leave it on, clean and lubricate all hardware at least once per month.
Tighten to the manufacturer’s specified torque, typically 5 to 8 Nm (about 3 to 4 hand-tight turns past snug). The rubber arm should firmly grip the ski or snowboard without deforming the base. If the rubber is visibly compressed or the ski base is bowing, you have overtightened. Back off until the rubber maintains contact without distortion.
In most US states, yes. However, some states require that any load extending more than 4 feet past the rear bumper must be flagged with a red cloth or reflective marker. In Europe, France, Germany, and Switzerland have specific regulations about roof load dimensions and visibility. Check local laws before driving with overhanging gear.
Ski racks are designed specifically for skis and snowboards. Surfboards, kayaks, and lumber require different cradle shapes and strap configurations. Using a ski rack for non-ski equipment can damage both the gear and the rack. Buy the correct rack type for each sport — the cost difference is small compared to the risk of damage.
For light surface rust, scrub the affected area with a wire brush and apply a rust converter (like Naval Jelly) to stop the corrosion. For seized bolts, spray with penetrating oil (like PB Blaster) and let it soak for 30 minutes before attempting removal. For severe rust on structural components, replace the affected part rather than attempting repair — compromised hardware can fail at highway speed.
Both are key-matching systems that allow you to use a single key across multiple products. Thule’s One-Key system works across all Thule products (racks, boxes, bike carriers, cargo carriers). Yakima’s system works across all Yakima products. Neither system is cross-compatible — a Thule key will not work in a Yakima lock, and vice versa. Choose one brand and stick with it for key convenience.
The Complete Crossbar Compatibility Guide: Which Bars Fit Your Vehicle?
Crossbars are the foundation of every roof-mounted ski rack system, and choosing the wrong ones is the most expensive mistake a first-time buyer can make. Crossbars come in three basic shapes (round, square, and aero), multiple widths (48 to 72 inches), and dozens of vehicle-specific mounting systems. This guide eliminates the confusion and helps you choose the right crossbars for your specific vehicle.
Crossbar Profiles Explained
Round bars are the oldest and cheapest crossbar design. They are typically 1.25 inches in diameter and made from hollow steel tubing. Round bars are compatible with virtually every ski rack on the market because their symmetrical shape allows clamp-style carriers to grip evenly from all angles. However, round bars produce the most wind noise of any profile because they create maximum vortex shedding at highway speeds. If you hear a constant “whoooo” sound at 60mph, round bars are probably the cause. Round bars are a reasonable choice for budget-conscious buyers who do not mind the noise, or for vehicles that are parked in a garage and driven infrequently.
Square bars are a slight improvement over round bars in terms of noise and rigidity. The flat top surface provides a more stable platform for clamp-style carriers, and the square profile reduces vortex shedding by approximately 20% compared to round bars. However, square bars still produce significant wind noise compared to aero profiles, and their sharp corners can scratch crossbar-mounted accessories during installation. Square bars are commonly found on older Yakima and Thule systems and are gradually being phased out in favor of aero designs.
Aero (wing-shaped) bars are the gold standard for modern roof rack systems. Thule’s WingBar and Yakima’s AeroBar use an elongated teardrop profile that mimics the cross-section of an airplane wing. This shape allows wind to flow smoothly over the bar with minimal turbulence, reducing wind noise by 60% to 80% compared to round bars. Aero bars also have a T-Track channel running along the top surface, which allows accessories to slide in from the end and bolt down without clamping around the bar. This produces a cleaner, lower-profile installation with less wind resistance.
Width Selection
Crossbar width must match your vehicle’s roof width plus the mounting foot overhang. Most crossbars are available in 50, 54, 58, 60, 64, and 72-inch lengths. The correct width is determined by the distance between your vehicle’s roof rail mounting points plus 2 to 4 inches of overhang on each side for the mounting feet.
| Vehicle | Recommended Width | Why |
|---|---|---|
| Subaru Outback | 58-60 inches | Wider roof needs full-coverage bars |
| Toyota RAV4 | 54-58 inches | Compact SUV, moderate roof width |
| Honda CR-V | 54-58 inches | Similar to RAV4 dimensions |
| Ford Explorer | 58-64 inches | Full-size SUV, wide roof |
| Jeep Wrangler (4-door) | 50-54 inches | Narrow hardtop, limited width |
| Honda Civic | 48-50 inches | Compact sedan, narrowest roof |
| Mercedes Sprinter | 64-72 inches | Van-width roof, needs maximum span |
If you are between sizes, choose the wider option. A crossbar that is slightly too wide is better than one that is slightly too narrow, because the excess length simply extends past the mounting foot without affecting performance. A crossbar that is too short may not reach the mounting points on your vehicle’s roof rails, making installation impossible without purchasing different bars.
Brand Compatibility Matrix
The most important compatibility factor is the mounting foot system. Each crossbar manufacturer uses a proprietary foot design that attaches to specific vehicle roof types:
| Crossbar Brand | Fits Thule Racks? | Fits Yakima Racks? | Fits Kuat Racks? |
|---|---|---|---|
| Thule WingBar Evo | Yes (native) | Adapter needed | T-Track adapter |
| Yakima AeroBar | Adapter needed | Yes (native) | T-Track adapter |
| Kuat Vesper | T-Track only | T-Track only | Yes (native) |
| Round/Universal | Clamp fits | Clamp fits | No (too round) |
The rule of thumb is: match brands whenever possible. A Thule rack on Thule bars will always fit better, install faster, and produce less vibration than a Thule rack on Yakima bars. The adapter kits work, but they add a layer of complexity and a potential failure point.
OEM vs Aftermarket Crossbars
Many vehicle manufacturers offer factory crossbars as optional accessories. Subaru’s STI crossbars ($249), Toyota’s OEM crossbars ($199), and Tesla’s official crossbars ($450) are specifically designed for each vehicle’s roof geometry. The advantage of OEM bars is guaranteed fitment — the manufacturer has tested them on your specific vehicle model and confirmed compatibility with their own warranty.
The disadvantage of OEM bars is limited functionality. Most OEM crossbars use a proprietary mounting system that accepts only OEM accessories or a narrow range of third-party adapters. Thule and Yakima aftermarket bars, by contrast, accept hundreds of accessories from dozens of manufacturers, giving you far more flexibility to switch between ski racks, bike racks, cargo boxes, and other accessories over the life of the vehicle.
Seasonal Ski Rack Maintenance Calendar: Month-by-Month Care Guide
Ski racks endure some of the harshest conditions of any vehicle accessory: freezing temperatures, road salt, UV radiation, ice, and mechanical stress from wind loads. A well-maintained rack can last 10 to 15 years; a neglected one may fail after 3 to 5. Follow this month-by-month maintenance calendar to keep your rack in peak condition throughout the year.
October: Pre-Season Preparation
Before the first snowfall, pull your rack out of storage and perform a comprehensive inspection. Check every bolt, clamp, and hinge for signs of corrosion, cracking, or wear. Lubricate the lock cylinders with graphite powder. Inspect the rubber clamp arms for hardening, cracking, or deformation — rubber that has been exposed to UV light over the summer may have lost its grip strength. If the rubber feels stiff or leaves residue on your hand when squeezed, replace the arms before loading any gear.
Mount the crossbars on your vehicle and torque all hardware to specification. Drive around the block at 25mph and listen for rattles. Check that the bars are level and that the mounting feet sit flush against the roof surface. This October inspection takes about 30 minutes and prevents the majority of mid-season failures.
November-February: Active Season Care
During the active ski season, perform the following checks after every trip:
- Rinse the rack with fresh water within 24 hours of returning from a mountain trip. Pay special attention to the mounting feet, lock cylinders, and hinge points where salt accumulates. A garden hose is sufficient; no soap needed for routine rinsing.
- Check bolt tightness once per month. Vibration from highway driving gradually loosens hardware. Use a torque wrench to verify that all crossbar and carrier bolts remain at the manufacturer’s specified torque (5 to 8 Nm).
- Inspect rubber components monthly. Cold weather makes rubber brittle, and the repeated freeze-thaw cycle of winter can cause micro-cracks in the clamp arms. Run your finger along the rubber surface; if you feel any cracks or rough spots, apply a rubber conditioner (like 303 Aerospace Protectant) to restore flexibility.
- Lubricate moving parts every 6 weeks. Spray silicone lubricant on the slide-out mechanism (if equipped), the carrier hinge, and the lock cylinder. Avoid WD-40, which attracts dirt and gums up the mechanism over time.
- Clean the T-Track channels if you use T-Track mounted accessories. Dirt, ice, and road salt accumulate in the channels and can prevent accessories from sliding smoothly. Use a small brush to clear debris, then apply a thin coat of silicone spray.
March-April: End-of-Season Assessment
At the end of the ski season, perform a thorough assessment of your rack’s condition. This determines whether the rack needs repairs over the summer or if it is ready for another season of use.
Remove the rack from your vehicle and inspect the paint beneath the mounting feet. If you see scratching, apply paint touch-up and a layer of clear paint protection film before reinstalling next season. If you see rust on the mounting feet or crossbar attachment points, treat it immediately with a rust converter and apply a protective coating.
Clean the entire rack with warm water and a pH-neutral car wash soap. Pay special attention to the lock cylinders, which may have accumulated months of road grime. Insert the key and cycle the lock 10 to 15 times to distribute fresh lubricant and clear any debris.
May-September: Summer Storage
Store your rack indoors, preferably in a climate-controlled space. Direct sunlight degrades rubber and plastic components, and humidity promotes corrosion. If indoor storage is not available, wrap the rack in a breathable fabric cover (never plastic, which traps moisture) and store it in a shaded area.
Before storing, apply a coat of carnauba wax to all painted and anodized surfaces. The wax fills micro-scratches and provides UV protection during storage. Spray all lock cylinders and moving joints with a light machine oil (like 3-in-1 oil) to prevent corrosion during the humid summer months.
Store the keys separately from the rack, ideally in a labeled envelope in your glove box or tool drawer. There is nothing worse than discovering in October that you cannot find the key to your rack after 6 months of storage.
Maintenance Cost Breakdown (Annual)
Graphite lock lubricant: $8 (lasts 2+ years)
Silicone spray (12 oz can): $6 (lasts 2+ years)
303 Aerospace Protectant: $15 (lasts 3+ years)
Carnauba wax: $12 (lasts 2+ years)
Replacement rubber arms (if needed): $25-$45 per pair
Total annual maintenance cost: $15-$35 (not counting replacement parts)
This minimal investment extends your rack’s lifespan by 5 to 10 years and prevents the $200-$500 cost of premature replacement.


