
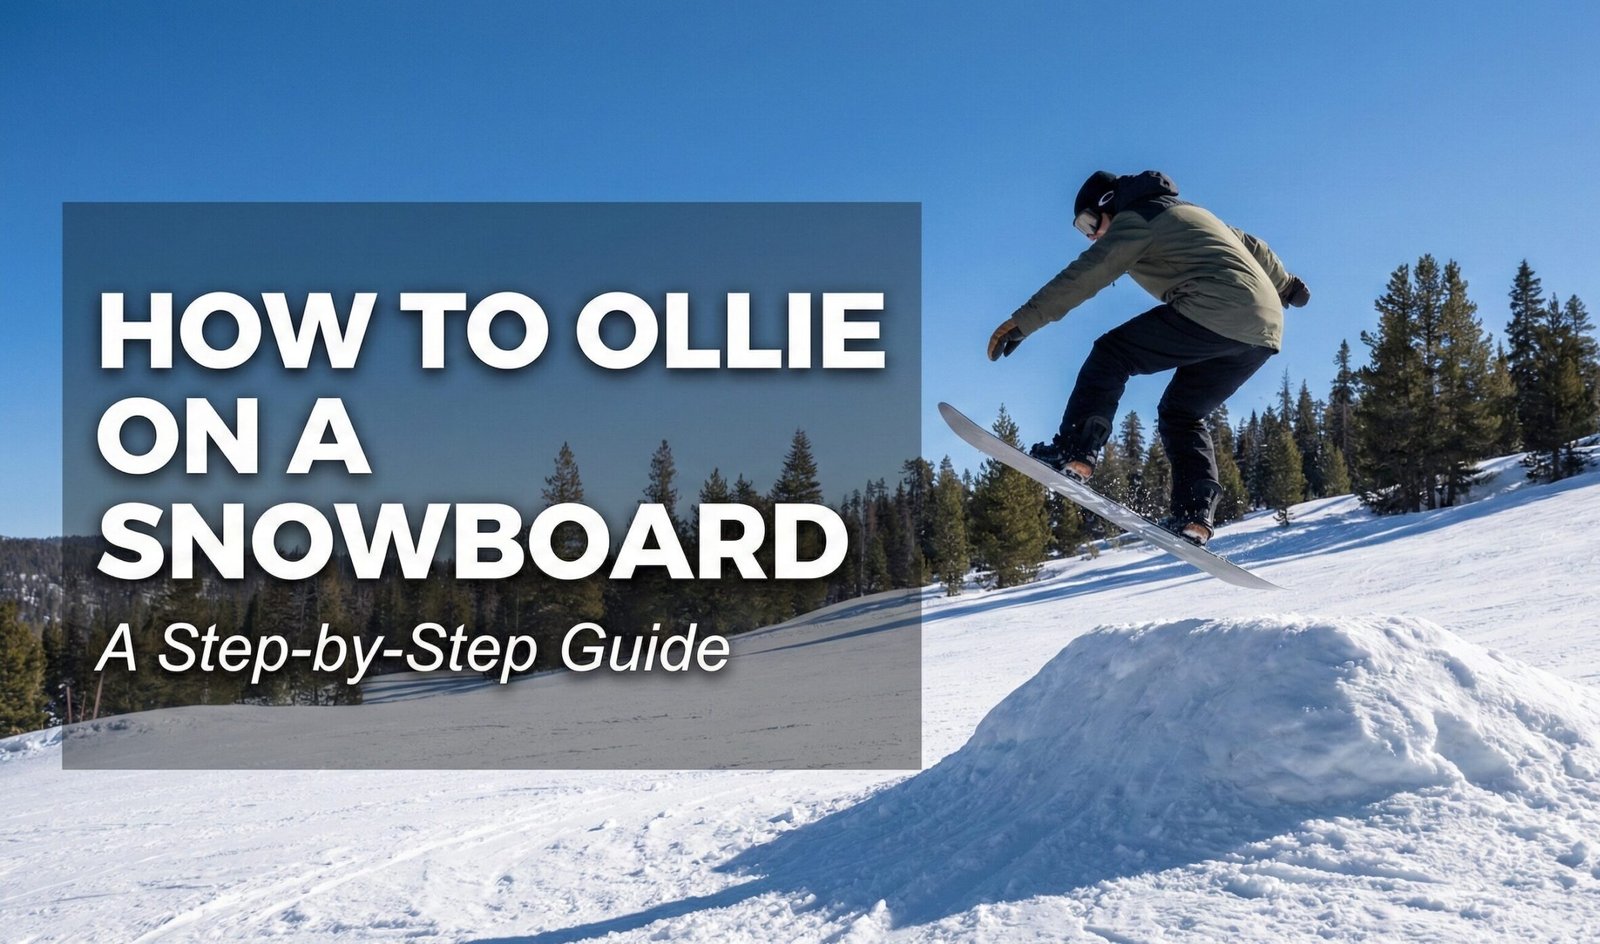
How to Ollie on a Snowboard: The Ultimate Step-by-Step Guide
The Ollie is not just a trick; it is the heartbeat of snowboarding. It is the fundamental movement that separates a passenger from a pilot. Whether you want to clear a “Slow” sign, hop onto a box in the park, or simply pop over a patch of ice, learning how to Ollie is mandatory.
Many beginners mistake a “hop” (jumping with both feet simultaneously) for an Ollie. They are different. A proper Ollie uses the potential energy stored in the tail of your board to act as a spring, launching you higher than your legs could alone. If you’ve been wondering why snowboarding is fun, landing your first clean Ollie over a roller is usually the answer.
In this guide, we will break down the mechanics, the muscle memory, and the gear you need to master this essential skill safely. We’ll also cover safety gear like wrist guards and impact shorts, because let’s be honest—learning to fly usually involves some crashing.
An Ollie is a maneuver where a snowboarder shifts their weight to the back foot to “load” the tail of the board, then snaps the tail off the ground to jump into the air. It consists of four distinct phases: The Load (shifting weight back), The Pop (springing off the tail), The Level (bringing knees up to even out the board), and The Landing (absorbing impact).
Why the Ollie Is the Most Important Trick in Snowboarding
Before diving into the mechanics, it is worth understanding why every snowboard instructor, park rider, and backcountry explorer considers the Ollie the single most critical skill in the sport. The Ollie is not just a trick you perform for style points. It is a functional, everyday movement that makes every aspect of snowboarding easier, safer, and more enjoyable.
Think about it this way: without an Ollie, you are stuck on the snow at all times. Every bump, every roller, every patch of crud, and every obstacle forces you to absorb impact with your legs. Over the course of a full day, this constant absorption leads to leg burn, fatigue, and a decline in your riding quality. The Ollie lets you float over terrain features instead of plowing through them. It is an energy-saving technique as much as it is a trick.
On groomed runs, small Ollies let you clear roller crests, hop over icy patches, and maintain a smooth line without scrubbing speed. In the terrain park, the Ollie is the gateway to every single feature. You cannot press a box without popping onto it. You cannot clear a jump without loading the lip. You cannot lock into a rail without first launching yourself off the snow. Every park maneuver starts with a pop, and that pop is the Ollie.
Even in the backcountry, the Ollie has its place. When you encounter a tree well, a creek crossing, or a steep rollover, being able to pop the nose of your board over the obstacle is often the difference between a clean line and an ugly crash. Riders who can Ollie consistently describe a feeling of being “connected” to their board—they are not just standing on it; they are communicating with it through pressure, pop, and control.
There is also a mental component. The first time you land a clean Ollie—really clean, with a loaded tail, an explosive snap, and a balanced landing—something shifts in your brain. You realize that the board is not just something you ride; it is something you can command. That realization cascades into confidence across all aspects of your riding. You start hitting steeper terrain, trying faster speeds, and exploring new features because you trust your ability to react and recover.
In short, the Ollie is the foundation. Every other trick, every park skill, every backcountry move builds on the principle of loading, popping, and controlling your board in the air. Master this one movement, and the rest of snowboarding becomes dramatically more accessible.
The Science Behind the Ollie: Physics and Biomechanics
Understanding the physics of the Ollie is not just academic—it directly improves your execution. When you know why a camber board pops harder than a rocker board, or why bending your knees on landing reduces impact force, you make better decisions on the mountain.
Elastic Potential Energy and the Board as a Spring
Your snowboard is essentially a giant spring. When you apply pressure to the tail (or nose, in the case of a Nollie), you bend the board out of its natural shape. The camber profile—the curve of the board when it is sitting flat on the snow—determines how much energy the board can store. A traditional camber board has its contact points raised off the snow in the center, creating a bridge-like arch. When you load the tail, you are compressing that arch. The moment you release, the board snaps back to its original shape, and that snap converts stored elastic potential energy into kinetic energy—launching you upward.
This is why camber boards generally produce higher, more explosive Ollies than rocker boards. A rocker board already sits with its center on the snow and its tips curved upward, so when you load the tail, there is less stored energy to release. A hybrid camber profile offers a middle ground—the center has some camber for pop, while the tip and tail have rocker for forgiveness. This is why boards like the Capita DOA, which feature a hybrid profile, are so popular for freestyle riders who want both pop and playfulness.
Newton’s Third Law: For Every Action
The Ollie is a textbook demonstration of Newton’s Third Law: for every action, there is an equal and opposite reaction. When you kick your back leg downward to snap the tail off the snow, the snow pushes back against the tail with equal force. That reaction force is what propels you upward. The harder and faster you snap the tail, the greater the reaction force, and the higher you go.
This principle also explains why Ollies are harder on soft snow or powder. In powder, the snow absorbs some of the reaction force instead of returning it. The tail sinks rather than snaps, and you lose the crisp rebound that a groomed run provides. This is why most riders learn to Ollie on groomed or packed terrain first—the consistent, firm surface gives you the most efficient energy transfer.
The Center of Mass and Trajectory Control
Once you are airborne, your center of mass follows a parabolic arc determined by your takeoff angle and velocity. You cannot change your trajectory in midair (ignoring subtle shifts from limb movement). This means that the height and distance of your Ollie are almost entirely determined at the moment of takeoff. A common mistake is trying to “pull yourself higher” by yanking your knees up immediately after takeoff. While sucking your knees up does make the board level and creates the illusion of greater height, it does not actually raise your center of mass. The real height comes from the force of the pop and the speed of the snap.
Understanding this helps you focus on what matters: a powerful, well-timed pop rather than frantic midair movements. The knee pull happens after the pop, during the leveling phase, and its purpose is to level the board parallel to the snow—not to gain additional altitude.
Angular Momentum and the Board Level
When the tail snaps off the snow, it creates a moment of angular momentum that rotates the board nose-up. This is natural and desirable—it is part of the Ollie’s signature motion. However, if you do not counteract this rotation, the board will continue to rotate and you will land tail-first. The leveling phase—pulling your back knee up toward your chest—reduces this rotation by shifting mass closer to the board’s axis of rotation. This is the same principle figure skaters use when they pull their arms in during a spin to slow their rotation. By sucking your knees up, you bring the board flat and prepare for a balanced, two-footed landing.
Impact Absorption and the Impulse-Momentum Theorem
The impulse-momentum theorem states that Force × Time = Change in Momentum. When you land, your momentum goes from downward to zero. If you land with stiff legs, the time of deceleration is very short, which means the force is very high—this is what hurts your knees, ankles, and back. If you land with soft, bent knees, you increase the time of deceleration, which reduces the peak force. This is why “always land with soft knees” is the most repeated piece of advice in snowboarding. It is not just about comfort; it is about physics. Bending your knees on landing literally reduces the force on your joints by spreading the impact over a longer time period.
This same principle explains why impact shorts and wrist guards are so effective. They add a compressible layer between your body and the ground, increasing deceleration time and reducing peak impact force. Wearing pads is not a sign of weakness—it is an application of physics that lets you learn faster and with less fear of injury.
Phase 1: The Prerequisites
Before you start throwing your weight around, you need to ensure your foundation is solid. An Ollie requires a stable platform.
1. Stance and Balance
You must be comfortable riding with your knees bent and your weight centered. If you are unsure if you are Goofy or Regular, figure that out first. A centered stance is easier for learning ollies than a directional, setback stance.
Your stance width also matters. If your feet are too close together, you lose leverage over the tail. If they are too far apart, you lose mobility and the ability to shift weight quickly. Most riders find that a shoulder-width stance (measured from the center of each binding) provides the best balance between leverage and agility for Ollies. Your bindings should be angled slightly outward—a “duck stance” of roughly +15 degrees on the front foot and -9 to -15 degrees on the back foot is the most common freestyle setup because it keeps both feet comfortable when riding in either direction.
2. Body Conditioning and Flexibility
The Ollie demands explosive leg power and core stability. Before heading to the mountain, spend a few weeks building the muscles you will rely on. Squats and jump squats build the quad and glute power needed for the pop. Calf raises strengthen the ankle stability required for balance. Planks and Russian twists build the core strength that keeps your upper body stable while your legs do the work.
Flexibility is equally important. Tight hip flexors limit how high you can pull your knees during the leveling phase. Tight hamstrings reduce your range of motion when bending into the setup. A daily stretching routine focusing on hips, hamstrings, and calves will make a noticeable difference in your Ollie height and control. Yoga is particularly effective for snowboarders because it combines flexibility, balance, and breath control—all of which translate directly to better riding.
If you want to train your Ollie-specific balance at home, a balance board is the single most effective tool. It simulates the unstable surface of a snowboard and forces your stabilizer muscles to engage, building the muscle memory you need for confident weight shifts on the mountain.
3. Gear Check
While you can Ollie on anything, the profile of your board matters.
- Camber: Boards with traditional camber have the most “pop” because the shape naturally fights to snap back to its original curve.
- Rocker: Rocker boards are easier to press, but they don’t have the same explosive recoil.
- Hybrid: Hybrid profiles blend camber underfoot with rocker at the tips. This gives you decent pop with added forgiveness—a great compromise for learning.
- Boots: If you are experiencing heel lift, you will lose energy transfer. Ensure your boots are tight and responsive.
4. Understanding Board Flex
Board flex is rated on a scale from 1 (softest) to 10 (stiffest), and it plays a major role in how your Ollie feels. A softer flex (1-4) is more forgiving and easier to press, which can help beginners learn the loading phase without harsh consequences. However, soft boards absorb energy rather than returning it, so you get less pop. A medium flex (5-7) is the sweet spot for most freestyle riders—it provides enough resistance for a solid pop while still being playful enough for presses and butters. A stiff flex (8-10) delivers maximum energy return but demands precise technique; if you mistime your weight shift on a stiff board, it will buck you off rather than gently correcting.
For learning to Ollie, a medium-soft to medium flex board is ideal. It gives you enough feedback to feel when you load the tail correctly while being forgiving enough that mistakes do not punish you too harshly. As you progress, you can move to a stiffer board for more aggressive popping and faster response.
5. The Right Boots Matter More Than You Think
Your boots are the interface between your body and the board. Every ounce of force you generate passes through your boots before it reaches your bindings and the board. If your boots are loose, poorly fitted, or too soft for your style, you lose a significant percentage of your power before it ever reaches the snow.
The most common issue for Ollie beginners is heel lift. When your heel lifts inside the boot during the loading phase, the energy you apply to the tail is absorbed by the gap between your foot and the boot rather than being transferred to the board. This makes the tail feel unresponsive and mushy. To fix this, ensure your boots are the correct size (your toes should lightly brush the front of the boot when standing upright, and pull back slightly when you bend your knees). Tighten your laces or BOA system firmly, focusing on the ankle zone. If you still experience lift, aftermarket insoles with deep heel cups can make a dramatic difference.
Phase 2: The Step-by-Step Mechanics
- The Setup: Ride at a comfortable speed on a flat or slightly downhill slope. Keep your knees bent and eyes looking forward (not at your feet). Ensure your shoulders are aligned with the board.
- The Load (Shift Back): Smoothly shift your hips over your back foot. Imagine you are trying to do a “wheelie.” You should feel the nose of the board lift slightly and the tail of the board flex under pressure. This is storing potential energy.
- The Pop (The Snap): This is the explosive moment. As the tail flexes, kick off your back leg aggressively while simultaneously lifting your front leg. The board will snap back straight, launching you into the air.
- The Leveling: Once you are airborne, suck your back knee up towards your chest to match your front knee. This levels the board out parallel to the snow. This is crucial for style and safety.
- The Landing: Extend your legs slightly to prepare for contact, but keep knees soft to absorb the impact. Try to land on both feet simultaneously. If you land heavy on the tail, you might slip out.
Detailed Breakdown: The Setup Phase
The Setup is where most Ollies succeed or fail before you even leave the ground. Ride at a moderate, comfortable speed—think of a brisk walking pace to a light jog. Too slow, and the board lacks the forward momentum to stay stable during the weight shift. Too fast, and fear takes over, causing you to rush or abort the motion. The ideal speed is one where you feel confident and relaxed, with your knees bent and your weight centered over both feet.
Check your body alignment before initiating. Your shoulders should be roughly parallel to the board, not twisted open toward the direction of travel. A twisted upper body causes the board to rotate during takeoff, leading to off-axis landings. Your eyes should be looking ahead at the terrain—not down at your feet. Looking down shifts your weight forward and causes you to break at the waist, which is the opposite of what you want.
Your hands can play a role too. Many riders find it helpful to extend their arms slightly for balance, similar to a tightrope walker. Others prefer to keep their hands low and relaxed near their hips. There is no single “correct” hand position—the key is that your upper body remains stable and balanced while your lower body does the work.
Detailed Breakdown: The Load Phase
The Load is the most critical phase for generating height. This is where you store energy in the board by flexing the tail. To execute the Load, smoothly shift your hips rearward over your back foot while maintaining a bent-knee posture. Think of it as sitting back into a chair. Your weight should move from centered to approximately 60-70% over the tail.
The key word here is “smoothly.” A sudden, jerky weight shift will unsettle the board and cause the tail to slap the snow rather than load progressively. Imagine you are pressing the tail into the snow like you are pressing a button—firm and deliberate, but not frantic. As you shift back, you should feel the nose of the board rise slightly off the snow and the tail begin to flex. This flex is the board storing energy, like pulling back on a slingshot.
A common mistake during the Load is bending at the waist instead of at the knees. When you bow forward, your center of mass moves ahead of the board, counteracting the rearward weight shift. This creates a tug-of-war where your hips are trying to load the tail but your torso is pulling forward. The result is a weak, compressed pop. Keep your chest up, your shoulders stacked over your hips, and let your knees do the bending.
The depth of the Load determines your maximum height. A shallow Load (barely shifting weight back) produces a small hop. A deep Load (loading the tail until the nose is 6-12 inches off the snow) stores far more energy and produces a significantly higher pop. However, deeper Loads require more commitment and better timing. As a beginner, start with a moderate Load and gradually increase the depth as your confidence and coordination improve.
Detailed Breakdown: The Pop Phase
The Pop is the explosive release of stored energy. This is the moment of truth—where all the preparation pays off. To Pop, you simultaneously extend (kick) your back leg downward while pulling your front leg upward. This dual motion does two things: it snaps the tail off the snow (converting stored elastic energy into upward force) and it initiates the board’s rotation from nose-up to level.
The timing of the Pop is critical. If you Pop too early (before the tail is fully loaded), you release before maximum energy is stored, resulting in a weak jump. If you Pop too late (after the tail has already rebounded), you miss the window entirely and just kind of… hop. The ideal moment is at the peak of the Load—when you feel the tail maximumly flexed and about to rebound on its own. Your Pop amplifies and directs that natural rebound.
Think of the Pop as a quick, sharp snap—like popping a balloon with your foot. It is not a slow press; it is a fast, decisive motion. The faster you snap the tail, the more explosive the rebound. This is why many experienced riders describe the Pop as a “flick” rather than a “push.” It is a momentary, high-speed movement, not a sustained effort.
Your front foot plays a crucial role too. As you Pop with your back leg, your front leg should be actively pulling the nose of the board upward and forward. This serves two purposes: it helps level the board in the air, and it prevents the nose from diving. Think of it as pulling a bicycle handlebar up while kicking a kickstand down—the coordinated motion of both legs creates the clean, level arc of the Ollie.
Detailed Breakdown: The Leveling Phase
The Leveling phase happens in the split second after the Pop when you are airborne. Your board is angled nose-up from the tail snap, and you need to level it out parallel to the snow for a clean landing. This is done by sucking your back knee up toward your chest—essentially pulling the tail of the board upward to match the height of the nose.
This motion is not passive. Many beginners think the board will level itself. It will not. Without active leveling, the board stays nose-up, and you land tail-heavy, which often results in slipping out backward or losing speed. The leveling motion is an active pull—the same motion you would use to bring your knee to your chest in a standing crunch.
The height of your Ollie is determined by two factors: the height of your pop (how far your center of mass leaves the snow) and the height of your knee pull (how high you bring the board). A big pop with a lazy knee pull results in a high body but a board that stays low. A moderate pop with an aggressive knee pull results in a board that rises up toward your body, creating the visual impression of a higher Ollie. The best Ollies combine both—a strong pop and an aggressive knee pull that brings the board up to your body.
For riders who want to Ollie onto features (boxes, rails, ledges), the Leveling phase becomes even more important. You need the board to be level before you reach the feature so that you land flat on top of it rather than nose-diving or tail-slapping. This requires earlier leveling—pulling your knees up faster after the Pop to give the board more time to flatten out.
Detailed Breakdown: The Landing Phase
The Landing is where you absorb the impact and ride away clean. A good landing starts before you touch the snow. As you reach the apex of your Ollie and begin descending, extend your legs slightly to prepare for contact. This is not a full extension—you are not locking your knees. You are simply lowering the board toward the snow while keeping your knees soft and ready to absorb.
Aim to land on both feet simultaneously, with your weight centered over the board. Landing on the tail alone (a “tail-heavy” landing) can cause the board to slide out from under you. Landing on the nose alone (a “nose-heavy” landing) can cause the edge to catch, throwing you forward. The ideal landing distributes force evenly across both feet.
The moment you feel the board contact the snow, compress your knees to absorb the impact. This compression should be smooth and controlled—not a collapse. Think of it as landing on a trampoline: you bend your knees to absorb the bounce, then ride out the remaining momentum. The depth of the compression depends on the height of your Ollie. A small Ollie requires a slight bend; a big Ollie requires a deep squat.
After the initial absorption, return to your normal riding stance: knees slightly bent, weight centered, eyes looking ahead. Do not stand up straight immediately—keep your knees soft for a few seconds to ensure you have full control before transitioning back to regular riding.
Ollie vs. Nollie: Understanding the Difference
The Nollie (short for “nose ollie”) is the mirror image of the Ollie. Instead of loading the tail and popping off the back of the board, you load the nose and pop off the front. The Nollie is generally considered more difficult than the Ollie because it requires you to shift your weight forward (toward the direction of travel) rather than backward. This feels counterintuitive and requires more commitment, especially at speed.
In a Nollie, you shift your hips over your front foot, loading the nose of the board, then snap the nose off the snow while pulling your back leg up. The mechanics are the same as an Ollie but reversed. The Nollie is useful in terrain park situations where you need to pop off a feature nose-first, and it is a prerequisite for many advanced tricks like Nollie 180s and Nollie flips.
For beginners, the recommendation is to master the Ollie first. The Ollie’s backward weight shift feels more natural because you are moving away from the direction of travel, which is inherently safer—if something goes wrong, you are falling backward rather than forward. Once the Ollie is second nature, the Nollie becomes much easier to learn because you already understand the pop-and-level mechanics; you are simply applying them to the opposite end of the board.
A “switch Ollie” is yet another variation. Riding “switch” means riding with your opposite foot forward (a Regular rider riding Goofy, or vice versa). A switch Ollie is simply an Ollie performed while riding switch. This is significantly harder than a regular Ollie because your non-dominant foot is in front, which disrupts your balance and timing. Learning to Ollie switch is a mark of an advanced rider and typically comes after you are comfortable with both the regular Ollie and the Nollie.
How Long Does It Take to Learn to Ollie on a Snowboard?
This is one of the most frequently asked questions by snowboard beginners, and the honest answer is: it depends. The timeline varies widely based on your athletic background, how often you practice, your board setup, and your willingness to commit to the movement. However, most riders can expect the following general progression:
Days 1-3: The Wobble Phase
You understand the concept, but your weight shifts are clumsy and uncoordinated. You might get a small hop, but it feels more like a bunny hop than a true Ollie. The timing is off—you load the tail but Pop too early or too late. This is completely normal. You are building neural pathways that do not exist yet.
Days 4-7: The “Almost” Phase
You can feel the tail loading and you are getting a distinct pop off the snow. The board leaves the ground for a split second. You are starting to understand the coordination between the back leg kick and the front leg lift. You might land a few small but real Ollies. The board is coming up off the snow, but the landing is rough—off-balance, tail-heavy, or shaky.
Weeks 2-3: The Muscle Memory Phase
The basic motion is becoming automatic. You can pop the board off the snow without thinking about each individual step. Your Ollies are getting higher and more consistent. The leveling is improving—you are starting to bring the back knee up to match the front. Landings are getting cleaner. You start to develop a feel for the timing and can adjust on the fly.
Weeks 4-8: The Refinement Phase
Your Ollies are now functional and reliable. You can use them to clear terrain features, hop onto small boxes, and jump over obstacles. The focus shifts from “can I do it” to “how can I do it better.” You work on height, style, consistency, and adapting the Ollie to different terrains and speeds. This is where the Ollie stops being a trick and starts being a natural extension of your riding.
Months 3+: The Mastery Phase
The Ollie is automatic. You do not think about it anymore—it just happens when you need it. You can Ollie on command, at any speed, on any terrain. You can Ollie onto features, off features, over features. You begin combining the Ollie with other tricks—180s, grabs, spins. The Ollie has become your foundation for everything else.
It is important to note that these timelines assume regular riding (at least 2-3 days on the mountain per season). If you ride daily during a week-long vacation, you can compress the early phases significantly. If you only ride once a month, progression will be slower because you lose muscle memory between sessions. This is why off-season training (discussed later in this guide) is so valuable for accelerating your learning curve.
Pro Tip: Film Yourself
One of the fastest ways to improve your Ollie is to film yourself and watch the playback in slow motion. Set your phone on a tripod or ask a friend to record you. When you watch the playback, you will immediately see issues that you cannot feel in the moment—like whether you are truly loading the tail, whether your weight is shifting far enough back, or whether you are leveling the board. Most riders are surprised by what the camera reveals. What feels like a massive Ollie in real time often looks like a small hop on video, which means you have much more room for improvement than you think.
Common Mistakes to Avoid
Even intermediate riders develop bad habits. Here is what to watch out for:
The “Bunny Hop”
This is jumping with both feet at the same time. While it gets you in the air, it lacks height and control. A true Ollie must have that rolling motion from tail to air. If you struggle with this, practicing on a balance board at home can build the correct muscle memory.
The bunny hop is the single most common mistake among beginners, and the reason it is so persistent is that it actually works—you get off the ground, and your brain registers that as success. But a bunny hop has a hard ceiling on height because you are limited by the force your legs can generate alone. An Ollie multiplies that force by using the board’s弹性 energy. The difference becomes dramatic at higher levels: a bunny hop might get you 6 inches off the snow, while a well-executed Ollie can launch you 2-3 feet or more.
To break the bunny hop habit, focus on the sequential nature of the movement. It should feel like a wave rolling from your back foot to your front foot—not a simultaneous jump. Practice on flat ground at walking speed: shift back, load the tail, feel the nose rise, then Pop. If both feet leave the snow at the exact same time, you are bunny hopping. There should be a distinct moment where the tail is loaded before you spring off it.
Breaking at the Waist
Don’t bow to the snow. Keep your chest up and bend at the knees. Bending at the waist throws your center of gravity off, which is a prime reason why falls happen.
When you break at the waist, two things go wrong. First, your weight moves forward over the nose of the board, counteracting the rearward weight shift you need to load the tail. This is like trying to pull a slingshot backward while someone pushes the pouch forward—you cannot store energy if your forces are fighting each other. Second, bending at the waist puts your head and shoulders ahead of your feet, which means when you Pop, your upper body continues forward while the board goes up. This causes you to land off-balance, often catching the downhill edge and slamming into the snow.
The fix is to focus on “stacking” your body. Your shoulders should be roughly over your hips, your hips over your knees, and your knees over your feet. The bend should come from the knees and hips—not from the spine. Think of it as a squat, not a bow. If you are unsure whether you are breaking at the waist, have a friend watch you from the side. They should see your torso relatively upright (perhaps tilted slightly back) with a clear bend at the knees.
Stiff Legs
Landing with straight legs is a recipe for disaster. It sends shockwaves through your skeleton and is often why feet hurt when snowboarding. Always compress on landing.
Stiff-legged landings are especially dangerous because they cause two types of harm. First, the impact force goes directly through your bones and joints instead of being absorbed by your muscles. This can lead to bruised heels, sore knees, and even stress fractures over time. Second, stiff legs make you rigid and top-heavy on landing. If the terrain is uneven or you land slightly off-balance, a stiff-legged rider cannot adjust—they topple like a falling tree. A rider with soft, bent knees can shift weight, absorb bumps, and recover from an imperfect landing.
Practice the landing motion on flat ground: jump off a small curb or step and focus on bending your knees deeply on contact. Make it a habit to always land soft. Over time, this becomes automatic, and you will absorb landings without conscious thought.
Looking Down at Your Feet
When you look down at your feet during the Ollie, several things go wrong. Your head drops forward, pulling your shoulders and torso with it, which shifts your weight off the tail and toward the nose. This directly undermines the loading phase. Additionally, looking down limits your spatial awareness—you cannot see what is ahead, which is dangerous at speed and makes it harder to time your Ollie relative to terrain features. Keep your eyes up and looking forward, just like you would when riding normally. Your feet are attached to the board; you do not need to look at them to know what they are doing.
Popping Too Early or Too Late
Timing the Pop correctly is one of the hardest parts of learning the Ollie. Pop too early, and you release the tail before it is fully loaded—you get a weak, half-hearted jump. Pop too late, and the tail has already started rebounding on its own—you miss the window and get a feeble hop. The sweet spot is at the peak of the Load, when you feel the tail at maximum flex and the board is about to snap back. This timing improves with practice and becomes instinctive over time. If you are struggling with timing, try to count in your head: “load… POP.” Adding a verbal cue can help synchronize your brain and body until the rhythm becomes natural.
Rushing the Load
Many beginners try to execute the entire Ollie in one fast motion—shifting back and popping almost simultaneously. This robs the Ollie of its power. The Load needs time. The tail needs to flex. The energy needs to build. Rushing through the Load is like pulling back a slingshot and releasing it before you have pulled it all the way back—you get a fraction of the potential energy. Slow down the Load phase deliberately. Shift back, feel the tail flex, wait for the peak, then Pop. It may feel slow at first, but the resulting Ollie will be dramatically higher and more powerful.
Tensing the Upper Body
Tension in your shoulders, arms, and chest is the enemy of a smooth Ollie. When you are nervous or trying too hard, your upper body tenses up, which restricts your range of motion and throws off your balance. A tense upper body also makes the Pop feel jerky rather than smooth. Focus on keeping your upper body relaxed—shoulders loose, arms slightly extended for balance, chest open. Let your legs do the work while your upper body stays calm and centered. Think of it like a dancer: the legs are expressive and powerful, but the torso is composed and balanced.
Not Committing to the Pop
This is the mental barrier that stops more riders than any technical issue. You load the tail, you feel the energy building, and then… you hesitate. You do not fully commit to the Pop because you are afraid of what happens next—falling, landing badly, losing control. This hesitation results in a half-hearted Pop that produces a weak, unsatisfying Ollie. The key is to commit fully once you start the motion. Trust that the Pop will work. Trust that you can absorb the landing. Hesitation in the middle of the Ollie is worse than a committed attempt with imperfect technique, because at least a committed attempt gives you a real Ollie to learn from.
Over-Rotating the Shoulders
When you Pop, your shoulders should remain aligned with the board. If you swing your shoulders open (rotating your upper body toward the nose), the board will rotate with them, causing you to land at an angle. If you swing your shoulders closed (rotating toward the tail), you will land with the board turned behind you. This is especially common when riders get nervous and flail their arms for balance. Instead, keep your shoulders quiet and stable. If you need to use your arms for balance, extend them outward (like airplane wings) rather than swinging them in circles.
Focusing on Height Instead of Technique
It is tempting to measure your progress by how high you Ollie. But height is the result of good technique, not a goal in itself. Chasing height before your technique is solid leads to bad habits: exaggerated movements, off-balance landings, and inconsistent timing. Focus first on consistency—can you Ollie every time, on command, with clean technique? Once consistency is locked in, height will come naturally as a byproduct of improved timing, stronger loading, and better pop mechanics.
Ollie on Different Terrain: Adapting Your Technique
The Ollie is not a one-size-fits-all movement. The terrain beneath your board changes how the tail loads, how the board pops, and how the landing feels. Learning to adapt your Ollie to different surfaces is what separates a one-trick pony from a versatile rider.
Ollie on Groomed Runs (Hardpack)
Groomed runs are the ideal learning surface for Ollies. The hard, consistent surface provides maximum energy return—when you load and pop the tail, the snow pushes back with minimal absorption. This makes the pop feel crisp and responsive. Groomed runs also provide a predictable, flat surface for landing, which reduces the risk of catching an edge on uneven snow. If you are just learning, spend most of your time on groomed green and blue runs until your Ollie is consistent and confident.
Ollie on Icy Surfaces
Icy conditions change the Ollie dynamic significantly. On ice, the tail has less grip on the surface, which means it can slide laterally instead of loading cleanly. This makes the pop feel less predictable and more “skatey.” To Ollie on ice, keep your movements compact and precise. Avoid dramatic weight shifts that could cause the tail to slide out. Focus on a clean, vertical pop rather than a wide, sweeping motion. Also, be extra cautious on the landing—icy surfaces offer less grip, so you are more likely to slide out on contact. Land with your weight perfectly centered and your knees soft to absorb any lateral movement.
Ollie on Powder
Powder is the most challenging surface for Ollies. The soft snow absorbs the tail’s reaction force, reducing the pop significantly. In deep powder, the tail sinks rather than snapping, and you get much less height than on groomed terrain. To maximize your Ollie in powder, ride slightly faster to keep the nose up, load the tail with more force to compensate for the absorption, and Pop aggressively. You will also need to level the board earlier because the powder surface is uneven and unpredictable for landing. A wider stance can help with stability in powder Ollies.
Ollie on Slush
Spring slush is heavy, wet, and slow. It grabs the board and creates drag, which makes the Pop feel sluggish. The tail tends to stick in the slush rather than snapping cleanly. To Ollie in slush, approach with more speed than you would on groomed terrain (to overcome the drag), load the tail firmly, and Pop with extra emphasis. The landing in slush is generally forgiving because the wet snow absorbs impact well, but be prepared for the board to decelerate rapidly on contact.
Ollie on Uneven / Choppy Terrain
Choppy snow—crud, bumps, and rutted terrain—requires a reactive Ollie. You cannot set up a perfect Load on an unpredictable surface, so you need to adapt. Keep your knees very soft and absorb the bumps as you ride, then Pop opportunistically when you find a relatively flat moment. Choppy terrain Ollies tend to be smaller and less clean, but they serve an important purpose: getting you over obstacles and maintaining momentum in rough conditions. Do not aim for a competition-level Ollie in the crud—just focus on getting off the ground enough to clear what you need to clear.
Ollie on Terrain Park Features
The terrain park is where the Ollie transforms from a flat-ground trick into a functional tool for navigating features. Boxes, rails, jumps, and lips all require precise Ollie technique to approach, mount, and ride safely.
Ollie Onto a Box
A box is a flat, wide surface that is the most forgiving park feature for beginners. To Ollie onto a box, approach at a moderate speed with your knees bent. As you reach the takeoff zone (usually a small ramp or the edge of the box), execute a clean Ollie with extra emphasis on leveling the board. You want to land flat on top of the box with both feet centered. If you land nose-heavy, the board will slide forward off the far end. If you land tail-heavy, you might slip backward off the approach. A perfectly level landing distributes your weight evenly and lets you ride across the box smoothly.
Ollie Onto a Rail
Rails are narrower and more demanding than boxes. The margin for error is much smaller—your board must be aligned precisely with the rail, and your balance must be centered. The Ollie onto a rail requires the same mechanics as a box Ollie, but with added precision. Focus on a clean, straight approach (not angled), a well-timed Pop, and a level landing. Your knees should be directly over the rail—not leaning left or right. Rails are an intermediate-to-advanced feature; master boxes first before attempting rails.
Ollie Off a Jump Lip
When hitting a jump, the Ollie is modified by the ramp. The ramp provides upward trajectory, so you do not need to Pop as hard as you would on flat ground. Instead, your timing changes: load the tail as you ride up the transition of the ramp, and Pop just as you reach the lip (the very top edge). Popping at the lip maximizes your height because the ramp’s trajectory and your Pop combine. Popping too early (mid-ramp) wastes the ramp’s lift. Popping too late (past the lip) means you have already left the ramp and your Pop has no surface to push against.
For small jumps (tabletops and small kickers), a standard Ollie is sufficient. For larger jumps, you typically rely more on the ramp’s trajectory and less on a dramatic Ollie—think of it as a “boosted” hop rather than a full flat-ground Ollie. The principles are the same, but the execution is scaled to the feature.
Using the Ollie for Butter Tricks
Buttering is the art of pressing and flexing the board while riding on the snow. It is essentially a ground-based expression of the same weight-shifting principles used in the Ollie. A nose press is a Nollie that does not leave the ground—you shift weight to the nose and hold the tail up. A tail press is the opposite—shift weight to the tail and hold the nose up. 50-50 butters combine both, rocking from nose to tail in a fluid motion.
Learning to butter is an excellent complement to learning to Ollie because it trains the same weight-shifting and board-sensing skills in a lower-risk environment. You are not leaving the ground, so there is less consequence for mistakes, but you are developing the fine motor control and board awareness that make your Ollies more precise and confident.
The Ollie Trick Progression: Where to Go from Here
Once your Ollie is solid, a whole world of tricks opens up. The Ollie is the foundation for every aerial maneuver in snowboarding. Here is the natural progression from basic Ollie to intermediate and advanced tricks:
Level 1: Foundation Tricks
- Ollie: The base skill. Get this dialed first.
- Nollie: The nose-end version of the Ollie. Requires more commitment and balance.
- Switch Ollie: An Ollie while riding switch. A true test of your riding symmetry.
Level 2: Rotation Tricks
- Frontside 180: An Ollie with a 180-degree rotation toward your toeside. The front shoulder opens up, and you land riding switch.
- Backside 180: An Ollie with a 180-degree rotation toward your heelside. The back shoulder opens, and you land switch. Generally considered easier than frontside because the rotation feels more natural.
- Ollie North: An Ollie where you extend your front foot forward off the nose of the board while in the air. A stylish flat-ground trick.
Level 3: Grabs
- Indy Grab: Grab the toeside edge between your feet with your back hand. The most common beginner grab.
- Mute Grab: Grab the toeside edge between your feet with your front hand.
- Melon Grab: Grab the heelside edge between your feet with your front hand.
- Stalefish: Grab the heelside edge between your feet with your back hand, reaching behind your back leg.
Level 4: Combined Tricks
- Frontside 180 + Indy: Combine a frontside rotation with an Indy grab for a classic freestyle combo.
- Backside 360: A full 360-degree rotation starting with a backside 180 and continuing through.
- Method Air: An Ollie with a melon grab combined with a tweaked back leg extension—one of the most iconic tricks in snowboarding.
The key to progressing through these tricks is to master each level before moving to the next. Do not try backside 360s before you can consistently land backside 180s. Do not attempt grabs before your Ollie is high enough to give you airtime. Each trick builds on the skills of the previous one, and rushing the progression leads to bad habits and unnecessary crashes.
The 80/20 Rule for Trick Progression
Spend 80% of your terrain park time on the features you can already ride well, and only 20% on new features. This ensures you are building consistency and confidence on what you know while still pushing your limits. Riders who spend all their time attempting new features without solidifying the basics end up with a collection of half-learned tricks rather than a few truly mastered ones.
Off-Season Training: How to Improve Your Ollie Without Snow
The off-season does not have to mean lost progress. With the right training approach, you can actually improve your Ollie during the summer months so that when winter arrives, you pick up where you left off—or even ahead of where you stopped. Here is a comprehensive off-season training program designed specifically for snowboarders who want better Ollies.
Balance Board Training
A balance board is the single most effective off-season tool for snowboarders. It simulates the unstable surface of a snowboard and trains the same stabilizer muscles you use on the mountain. Spend 15-20 minutes a day on your balance board, practicing: front-to-back weight shifts (simulating the Ollie Load and Pop motion), side-to-side tilts (simulating heel-to-toe transitions), and static holds (standing still in a centered stance for 30-60 seconds to build baseline stability). As you progress, try doing squats and lunges on the balance board for an added challenge.
Plyometric Training
Plyometrics are explosive, jumping-based exercises that directly build the fast-twitch muscle fibers used in the Ollie Pop. The most effective plyometric exercises for snowboarders include: box jumps (jump onto a sturdy box or platform from a standing position—this trains the same explosive leg extension used in the Pop), broad jumps (jump forward for distance, focusing on explosive takeoff and soft landing), tuck jumps (jump vertically and pull your knees to your chest in midair—this simulates the leveling phase of the Ollie), and single-leg hops (hop on one foot repeatedly to build ankle stability and unilateral leg power).
Core and Stability Work
A strong core is the silent hero of the Ollie. Your core muscles keep your torso stable while your legs do the explosive work. Without core strength, your upper body collapses during the Load, your balance wavers in the air, and your landing is shaky. Effective core exercises for snowboarders include planks (standard, side, and reverse), Russian twists (with or without weight), dead bugs (lying on your back, alternating arm and leg extensions), and bicycle crunches. Aim for 3 sets of 12-15 reps for each exercise, 3-4 times per week.
Flexibility and Mobility
Flexibility work pays dividends in Ollie height. Tight hip flexors limit how high you can pull your knees during the leveling phase. Tight hamstrings restrict your squat depth during the loading phase. A daily stretching routine targeting hips (pigeon pose, hip flexor stretch, 90/90 stretch), hamstrings (standing toe touch, seated forward fold, downward dog), calves (wall calf stretch, step drops), and ankles (ankle circles, dorsiflexion stretches) will noticeably improve your range of motion and, consequently, your Ollie height.
Skateboarding
Skateboarding is the closest off-season analog to snowboarding. The Ollie on a skateboard uses the same fundamental principles—load, pop, level, land—on a smaller, faster platform. Skateboard Ollies are actually harder than snowboard Ollies because the board is not strapped to your feet, which means you must use friction and technique to keep the board with you in the air. If you can consistently Ollie on a skateboard, a snowboard Ollie will feel easy by comparison. Skateboarding also improves your overall board sense, balance, and spatial awareness, all of which transfer directly to snowboarding.
Trampoline Training
If you have access to a trampoline, it is an excellent tool for practicing the aerial awareness and body control needed for Ollies. On a trampoline, you can practice the knee-pull motion (simulating the leveling phase) and the soft-landing compression (simulating the landing phase) with minimal impact. Focus on jumping straight up, pulling your knees to your chest at the peak, and extending for a soft landing. Avoid adding flips or rotations until you have the basic motion dialed—trampoline injuries are common among overconfident beginners.
Jump Rope
Jump rope is an underrated training tool for snowboarders. It builds calf endurance, ankle stability, coordination, and timing—all of which contribute to a better Ollie. A 10-15 minute jump rope session before your balance board or plyometric workout warms up your lower body and sharpens your fast-twitch response. Double-unders (where the rope passes under your feet twice per jump) are particularly effective because they require the same explosive calf extension used in the Ollie Pop.
Board Profile Deep Dive: Which Snowboard Is Best for Learning to Ollie?
Choosing the right board can accelerate or hinder your Ollie progression. Here is a detailed comparison of the main board profiles and how each affects the Ollie learning experience.
| Board Profile | Ollie Pop | Forgiveness | Best For | Difficulty |
|---|---|---|---|---|
| Traditional Camber | Maximum pop, explosive snap | Less forgiving—catches edges easily | Experienced riders wanting maximum height | Harder to learn on |
| Rocker (Reverse Camber) | Lower pop, softer rebound | Very forgiving—hard to catch an edge | Beginners who prioritize comfort over height | Easiest to learn on |
| Hybrid (Camber + Rocker) | Good pop, moderate snap | Moderately forgiving | Intermediate riders wanting both pop and playfulness | Moderate |
| Flat (Zero Camber) | Moderate pop, predictable | Neutral—neither forgiving nor punishing | Riders who want a predictable, consistent feel | Moderate |
Recommendation for Ollie beginners: Start with a hybrid camber board. It provides enough pop to feel a real Ollie while being forgiving enough that mistakes do not send you crashing. As your technique improves and you want more explosive pop, transition to a traditional camber board. Avoid starting on a full rocker board—while it is forgiving, the lack of pop will make it harder to learn the proper loading and popping sensation, and you may develop bad habits (like over-loading to compensate for the weak rebound) that are hard to unlearn later.
Board Length and Ollie
Board length affects Ollie difficulty. A shorter board is easier to Ollie because it requires less force to flex the tail and less energy to level in the air. A longer board provides more stability but demands more power and commitment to Pop. Most freestyle riders choose a board that reaches somewhere between their chin and nose when stood on end—a good compromise between stability and maneuverability. If you are learning to Ollie, err on the shorter side of your recommended length range.
Board Weight and Ollie
Your weight relative to the board’s flex rating determines how easily you can load the tail. A light rider on a stiff board will struggle to flex the tail enough to store meaningful energy. A heavy rider on a soft board will bottom out the flex and lose responsiveness. Match your weight to the board’s recommended weight range (listed by most manufacturers) to ensure optimal Ollie performance.
The Role of Bindings in Your Ollie
Bindings are the critical link between your body and the board. Every movement you make—every weight shift, every ankle flex, every Pop—passes through the bindings before it reaches the board. If your bindings are not set up correctly, you lose power, control, and confidence.
Binding Stiffness
Like boards, bindings come in different flex ratings. Softer bindings are more forgiving and allow more foot movement, which can help beginners feel comfortable but reduces power transfer. Stiffer bindings lock your foot in place and transfer every ounce of energy directly to the board, which is great for powerful Ollies but less forgiving of mistakes. For learning, a medium-flex binding is ideal—it provides enough support for efficient power transfer while allowing enough movement to feel natural.
Binding Angle Setup for Ollies
Your binding angles affect how your weight distributes across the board. A “duck stance” (front foot angled forward, back foot angled backward) keeps both feet comfortable and balanced, which is ideal for Ollies because the rearward weight shift feels natural. A forward-facing stance (both bindings angled toward the nose) is more directional and better for carving, but it can make Ollies feel awkward because your back foot is angled away from the Pop direction. Most freestyle riders use a duck stance with angles of approximately +15/-9 to +15/-15 degrees.
Highback Position
The highback is the vertical plate on the back of each binding that supports your calf. For Ollies, the highback’s responsiveness matters: when you lean back to Load the tail, your calf presses against the highback, which transfers force to the binding baseplate and then to the board. If your highbacks are too loose or angled too far back, this transfer is inefficient. Ensure your highbacks are snug against your calves and angled to match your binding stance. Some riders lean their highbacks slightly forward (toward the nose) to improve heelside responsiveness, which helps with the rearward weight shift during the Load phase.
Strap Tightness
Your binding straps should be tight enough to eliminate all movement between your boot and the binding. Any slop (wiggle room) between your foot and the binding means lost energy. When you Pop, a loose strap allows your foot to shift inside the binding before the force reaches the board—this feels like a delay or a “mushy” pop. Tighten your ankle strap firmly (but not so tight that it cuts off circulation) and ensure your toe strap sits snugly over the front of your boot. Check your strap tightness at the start of each run, as they can loosen throughout the day.
Safety First: Protecting Yourself
Pad Up Before You Pop Up
Learning to Ollie involves falling backwards—a lot. This puts your wrists and tailbone in the danger zone. We highly recommend wearing wrist guards and impact shorts while learning. It gives you the confidence to commit to the jump without fear of injury.
Why Wrist Guards Are Non-Negotiable for Beginners
Wrist fractures are the single most common snowboarding injury, accounting for nearly 25% of all snowboard-related emergency room visits. The mechanism is simple: when you fall backward (as you often will when learning to Ollie), your instinct is to put your hands out to break the fall. This hyperextends the wrist and can snap the distal radius—the small bone at the wrist joint. Wrist guards prevent this hyperextension by providing a rigid structure that absorbs the impact and distributes the force across the forearm rather than concentrating it on the wrist joint.
The Demon Flexmeter wrist guards (recommended in our gear section) are specifically designed for snowboarding with a D3O impact foam that is soft and flexible during normal movement but hardens instantly on impact. They are the gold standard for wrist protection and are worn by riders of all levels, from beginners to professionals.
Impact Shorts: Your Tailbone’s Best Friend
When you fall backward during an Ollie, your tailbone (coccyx) takes a direct hit. This is one of the most painful falls in snowboarding because the tailbone is close to the skin surface with minimal padding. Repeated impacts to the tailbone can cause bruising, inflammation, and in severe cases, a fracture. Impact shorts are padded shorts worn under your snow pants that provide cushioning for the tailbone, hips, and sit bones. They are thin enough to be invisible under your gear but provide significant protection against impact injuries.
Helmets Are Not Optional
While wrist guards and impact shorts protect against the most common Ollie-related injuries, a helmet protects against the most dangerous one: head trauma. Falls during Ollie practice can be unpredictable, and even a low-speed backward fall can result in your head striking the snow (especially on hardpack or ice). A properly fitted snowboard helmet reduces the risk of concussion and traumatic brain injury by absorbing and distributing impact force. There is no reason not to wear one—modern snowboard helmets are lightweight, well-ventilated, and come in designs that look great. Protect your brain; it is the only one you have.
Learning to Fall Safely
Falling is an inevitable part of learning to Ollie, so you might as well learn to do it safely. The safest way to fall backward is to tuck your chin to your chest (to prevent your head from whipping back), bend your knees, and roll onto your back with your arms tucked in against your body. Do not reach back with your hands—this is how wrists break. Instead, absorb the impact with your padded backside (hence the importance of impact shorts) and roll with the momentum rather than trying to stop abruptly.
When falling forward, the instinct is to catch yourself with your hands, which puts your wrists at risk. Instead, try to land on your forearms or fists (with wrist guards on) and roll into a shoulder roll. This distributes the impact across a larger surface area and prevents the concentrated force on the wrist joint. Practice falling on soft snow at slow speeds until the motion becomes automatic—it is far better to learn this before you need it than during a high-speed crash.
Top Gear to Help You Learn
Having the right equipment accelerates the learning curve. Here are three top-rated products available on Amazon that specifically help with pop, practice, and protection.

Indo Board Original
You can’t be on the mountain every day. The Indo Board is the industry standard for training balance and leg strength at home. It mimics the weight transfer required for an Ollie.
Pros
- Builds core strength
- Improves weight transfer
- Fun indoor workout
Cons
- Pricey
- Learning curve
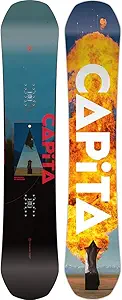
Capita Defenders of Awesome (DOA)
This is a legendary freestyle board. It features a hybrid camber profile that offers the aggressive pop of camber with the forgiveness of flat kicks. Perfect for learning to jump.
Pros
- Incredible snap/pop
- Stable at speed
- Award-winning design
Cons
- Stiffer flex
- Requires maintenance

Demon Flexmeter Wrist Guards
When you mistime an Ollie, you often fall back on your hands. These are the best in the business, designed by a surgeon to prevent hyperextension.
Pros
- Superior protection
- Medical grade
- Fits under most gloves
Cons
- Expensive
- Bulky
Advanced Tips for Higher Ollies
Once you have the basic motion down, you’ll want to go bigger. Here is how to boost your height:
1. Speed is Your Friend
Momentum helps stability. It is actually harder to Ollie at a snail’s pace. Find a confident cruising speed on a green run. At higher speeds, the board has more forward momentum, which stabilizes you during the weight shift and helps you maintain a clean line through the Pop. You do not need to be bombing a black diamond—a moderate cruising speed on a blue run is perfect. The forward momentum acts as a gyroscope, keeping you balanced while your weight shifts rearward for the Load.
2. Use the Terrain
Look for “rollers” or small knolls on the trail. Time your Ollie so that you are loading the tail as you go up the roller, and popping right at the crest. This adds the terrain’s height to your jump. Rollers are nature’s Ollie trainers because they give you an assist—the upward slope of the roller helps lift your body, and the crest provides a natural takeoff point. Time your Ollie so the Pop coincides exactly with the crest, and you will get significantly more height than on flat ground with the same effort.
3. Sucking the Knees
The height of your Ollie is determined not just by how high you jump, but by how high you lift your board. Actively pull your knees into your armpits in the air. This is essential if you want to hop onto park features. The difference between a mediocre Ollie and a massive one is often just the knee pull. Riders who leave their legs extended after the Pop have boards that stay low to the ground, regardless of how high their body goes. An aggressive knee pull brings the board up to your body, creating the visual and functional impression of a much higher Ollie.
4. Pre-Load with a Small Crouch
Before the Load phase, add a small, quick crouch—bending your knees deeper than your normal riding stance for a split second. This “pre-load” compresses your legs like a spring, and when combined with the tail Load, it adds an extra burst of energy to the Pop. Think of it as taking a short breath before shouting—the brief compression builds potential energy that amplifies the subsequent explosion. Do not overdo it—a small, quick crouch is enough. An exaggerated crouch wastes time and throws off your balance.
5. Timing the Pop with Your Natural Bounce
Every rider has a natural bounce rhythm—a frequency at which their body naturally oscillates up and down when riding over terrain. If you time your Ollie to coincide with an upward bounce (say, riding over a small bump), the natural rebound of your legs adds to the Pop. This requires awareness and practice, but riders who master this timing report significantly higher Ollies with less effort. It is like surfing a wave—you are not creating all the energy yourself; you are harnessing the terrain’s energy and combining it with your own.
6. The Double-Pump Technique
For maximum height, some advanced riders use a “double-pump” technique: an initial small Pop to get off the snow, followed by a second, more powerful Pop in midair. This is an advanced technique that requires excellent timing and coordination, but it can produce Ollies that are significantly higher than a single Pop. The first Pop lifts the board off the snow; the second Pop (performed by quickly flexing and extending the legs in midair) adds a second burst of energy. This technique is used primarily by park riders hitting large features and is not recommended for beginners.
Equipment Maintenance for Ollie Durability
Ollies put significant stress on your board’s tail and your bindings. Regular maintenance keeps your gear performing at its best and prevents failures that could ruin a session—or worse, cause an injury.
Board Maintenance
The tail of your board takes the brunt of every Ollie. Over time, the constant flexing and snapping can cause the tail to delaminate (the top layer separating from the core), develop stress cracks in the topsheet, or lose its camber profile. Inspect your tail regularly for signs of damage—look for cracks, delamination bubbles, or a flattened camber. Small cosmetic damage is usually fine, but structural damage (especially delamination) should be repaired before it worsens.
Keep your base waxed and your edges clean (remove rust if necessary) to ensure you have the speed required for a clean takeoff. A well-waxed base reduces friction, which means more speed for less effort, which means more consistent Ollies. Wax your board every 3-5 days of riding (more often if you ride in wet or abrasive snow) and have your edges professionally tuned at least once per season.
Binding Maintenance
Ensure your bindings are screwed in tight before every session. The repeated shock of Ollie landings can loosen binding screws over time. A loose binding is not just inefficient (you lose power transfer)—it is dangerous. A binding that shifts or detaches during a landing can cause an immediate loss of control. Before each day on the mountain, check all binding screws with a screwdriver and tighten any that have loosened. Also inspect the binding straps for wear, fraying, or cracking, and replace them before they fail.
Boot Care
Snowboard boots are the most overlooked piece of maintenance equipment. Over time, the liner compresses, the lacing system stretches, and the sole wears down—all of which reduce responsiveness and power transfer. If your boots feel “mushy” or you notice increased heel lift despite tightened laces, it may be time for new boots. Proper boot care also helps: dry your boots thoroughly after each use (remove the liners and let them air dry), avoid leaving them in a hot car (heat degrades the foam), and replace the insoles if they become compressed or worn.
Troubleshooting: Why Can’t I Ollie on a Snowboard?
If you have been practicing and your Ollie still is not working, you are not alone. Here are the most common reasons riders struggle with the Ollie, along with specific fixes for each.
Problem: “I Can’t Get the Board off the Ground”
This is usually caused by insufficient tail loading. You are either not shifting your weight far enough back, or you are popping before the tail is fully loaded. Fix: exaggerate the weight shift. Move your hips all the way over the back foot until you feel the nose of the board lift several inches off the snow. Hold that position for a beat before Popping. You should feel the tail flexed and straining against the snow like a coiled spring. If you do not feel that tension, you have not loaded enough.
Problem: “I Get Air But the Board Stays Low”
Your Pop is working, but your leveling phase is weak. You are not pulling your knees up high enough after takeoff, so the board stays low even though your body is in the air. Fix: actively practice the knee-pull motion. After you Pop, focus all your energy on sucking your back knee up to your chest as fast as possible. Imagine you are trying to touch your knee to your nose. The more aggressively you pull, the higher the board rises.
Problem: “I Land Off-Balance and Fall”
This is typically caused by one of three issues: your weight is not centered over the board during the Load (you are leaning too far to one side), your shoulders are rotated during takeoff (causing the board to twist), or your landing compression is insufficient (stiff legs cause you to bounce). Fix: film yourself from behind to check your alignment. Your hips should shift straight back, not diagonally. Keep your shoulders square to the board. And bend your knees deeply on landing—think of catching a heavy ball.
Problem: “My Ollie Is Weak and Feeble Despite Good Technique”
If your technique looks correct but the result is still weak, the problem may be your equipment. A board with low camber (or a heavily broken-in camber board) stores less energy and produces less pop. Soft boots absorb force rather than transferring it. Loose bindings waste energy. Fix: check your gear. If your board is several seasons old and the camber has flattened, it may be time for a new board. Ensure your boots are responsive and your bindings are tight. Sometimes the fix is equipment, not technique.
Problem: “I Can Ollie on Flat Ground But Not on a Slope”
This is a psychological issue more than a technical one. On flat ground, you feel in control. On a slope, the added speed and gradient create anxiety that disrupts your timing. Fix: start with very gentle slopes—barely perceptible gradients where you are barely rolling forward. Ollie on these gentle slopes until the added gradient feels normal. Gradually increase the slope steepness as your confidence grows. The technique does not change on a slope; only your comfort level does.
Problem: “I Can Ollie Standing Still but Not While Moving”
Standing-still Ollies (static Ollies) are actually easier than moving Ollies because the board is stable and predictable. When you add forward motion, the board reacts to surface variations, wind, and your body movements, which makes everything less predictable. Fix: start moving at a very slow speed—a slow walk pace—and Ollie. Gradually increase speed as your moving Ollie becomes consistent. The key insight is that forward motion actually helps your Ollie by providing gyroscopic stability (the spinning wheels of a bicycle stay upright; same principle applies to a moving snowboard).
Frequently Asked Questions About Snowboard Ollies
Can you Ollie on a rocker snowboard?
Yes, you can Ollie on any board profile, including full rocker. However, the pop will be noticeably less explosive because rocker boards store less elastic energy. The tail does not flex and snap back as aggressively as it does on a camber board. Many beginners actually prefer learning on rocker because the forgiveness outweighs the reduced pop. As you progress, transitioning to a camber or hybrid board will give you a noticeable boost in Ollie height.
What is the easiest trick to learn on a snowboard?
The Ollie is generally considered the easiest aerial trick to learn because it involves only one axis of movement (up and down) with no rotation. The next easiest tricks are the frontside 180 and backside 180, which add a single rotation to the Ollie. Grabs (Indy, Mute, Melon) are also relatively easy once you have enough air from the Ollie to reach down. The trick progression should go: Ollie, Nollie, backside 180, frontside 180, then grabs.
Do you need to Ollie to snowboard?
No, you do not technically need to Ollie to snowboard. Many riders never learn to Ollie and still enjoy the sport by riding groomed runs, carving, and cruising. However, you are severely limiting your potential without it. The Ollie opens up terrain parks, natural features, steep terrain navigation, and a general sense of board control that makes every aspect of riding more enjoyable. Think of it like knowing how to swim: you can enjoy the beach without swimming, but you are missing out on half the experience.
Can you learn to snowboard in one day?
You can learn the basics of snowboarding—sliding, stopping, and turning—in one day with good instruction. However, learning to Ollie in one day is unrealistic for most people. The Ollie requires muscle memory that takes time to develop. Some naturally athletic riders might get a basic Ollie on their first day, but it will not be clean or consistent. Give yourself at least a few days on the mountain before expecting a functional Ollie.
Is it harder to Ollie on a flat or camber board?
A fully flat (zero camber) board is harder to Ollie than a camber board. Flat boards sit entirely on the snow surface without any arch, so there is no stored energy to release when you load the tail. You are relying entirely on your own leg power with no assistance from the board’s shape. A camber board, by contrast, acts like a loaded spring—your Pop amplifies the board’s natural desire to snap back to its arched shape. Camber boards produce the highest, most explosive Ollies of any profile.
Should beginners learn to Ollie?
Yes, but not on day one. Beginners should first learn to ride comfortably—linking turns, controlling speed, and feeling balanced on the board. Once you can ride a blue run with confidence, the Ollie should be the next skill you tackle. Learning too early (before you are comfortable riding) adds an unnecessary layer of complexity and frustration. Learning too late means you miss out on one of the most rewarding and useful skills in the sport. The sweet spot is usually during your second or third season, when riding fundamentals are solid but you still have plenty of time to build the skill over many sessions.
What is the difference between a snowboard Ollie and a skateboard Ollie?
The fundamental mechanics are the same: load the tail, pop, level, and land. The key difference is that a snowboard is strapped to your feet while a skateboard is not. On a skateboard, you must use friction between your front foot and the griptape to drag the board upward during the leveling phase. On a snowboard, the bindings hold the board to your feet, so you simply pull your knees up and the board follows. This makes snowboard Ollies easier in one sense (you do not need the drag technique) but harder in another (the board is heavier and you cannot use your feet independently to level it).
How high should my Ollie be?
There is no specific height requirement for a “good” Ollie. A functional Ollie—one that clears small obstacles and gets you onto park features—is typically 6-12 inches off the snow. An intermediate Ollie reaches 1-2 feet. An advanced Ollie can exceed 3 feet. Focus on technique and consistency rather than height. A clean, controlled 6-inch Ollie is infinitely more useful than a sketchy, off-balance 2-foot Ollie. Height will come naturally as your technique improves.
Should I learn to Ollie on the toe side or heel side edge?
The Ollie is performed with the board flat on the snow, not on an edge. You should be riding with your base flat against the snow surface, with weight centered, before initiating the Load. If you try to Ollie on an edge, the board will tend to slip laterally instead of loading cleanly, and the pop will be unpredictable. Always Ollie on a flat base. If you are on a slope, try to find a relatively flat traverse or ride across the fall line to minimize the edge engagement during the Ollie.
Do pro snowboarders still practice the Ollie?
Absolutely. Every professional snowboarder, regardless of discipline, maintains their Ollie as a foundational skill. In fact, many pros spend time refining their Ollie technique even at the highest levels because it directly impacts the quality of every other trick they perform. A pro who can Ollie higher and more consistently will execute bigger grabs, higher rotations, and more impressive park runs. The Ollie is not a trick you “graduate from”—it is a skill you continue to sharpen throughout your entire snowboarding career.
The Mental Game: Building Confidence for the Ollie
Learning to Ollie is as much a mental challenge as a physical one. The fear of falling, the frustration of repeated failures, and the intimidation of committing to an explosive movement can all hold you back. Here are strategies for overcoming the mental barriers.
Start Small, Stay Patient
Do not try to launch a 2-foot Ollie on your first attempt. Start with tiny Ollies—barely lifting the tail off the snow. The goal at first is not height; it is simply feeling the tail load and Pop. Once the basic motion feels natural at small scale, gradually increase the intensity. Each small success builds confidence for the next attempt. Trying to go too big too soon is the fastest way to crash, lose confidence, and develop a fear of the Ollie that takes weeks to overcome.
Visualize Before You Pop
Visualization is a powerful tool used by athletes in every sport. Before you attempt an Ollie, close your eyes (or just focus) and mentally rehearse the entire motion: the Load, the Pop, the Leveling, and the Landing. Imagine yourself doing it perfectly. This mental rehearsal primes the neural pathways that control the movement, making the actual execution feel more familiar and less intimidating. Many riders report that visualization noticeably improves their first-attempt success rate.
Commit or Don’t Go
The most dangerous Ollie is a half-committed one. If you start the motion and then hesitate mid-Load, you create an inconsistent, unpredictable outcome. You might get a partial pop with an off-balance landing, which is worse than not trying at all. Make a deal with yourself: either commit fully to the Ollie, or do not start the motion. There is no shame in choosing not to attempt it on a particular run. But if you start, follow through completely.
Celebrate Small Wins
Learning to Ollie is a long process, and if you only celebrate the “perfect” Ollie, you will spend most of your time feeling disappointed. Celebrate every improvement: the first time you feel the tail load, the first time the board leaves the snow, the first time you land on both feet, the first time you land without wobbling. These incremental milestones are the markers of real progress, and acknowledging them keeps you motivated through the frustrating early stages.
Find a Riding Partner
Learning with a friend accelerates progress in multiple ways. A partner can film you (so you can review technique), offer real-time feedback (spotting issues you cannot feel), provide encouragement (celebrating your successes and keeping you motivated during failures), and create healthy competition (trying to out-Ollie each other pushes both riders). If you do not have a riding partner, consider taking a lesson with a certified instructor—professional feedback is the fastest route to improvement.
Ollie Etiquette and Mountain Awareness
As you develop your Ollie skills and start using them more frequently on the mountain, there are some important etiquette and safety considerations to keep in mind.
Choose the Right Location
Practice your Ollie on wide, uncrowded runs with good visibility. Avoid practicing in narrow cat tracks, near lift lines, or in areas with heavy traffic. You need space to make mistakes without endangering yourself or others. A groomed green or blue run with minimal traffic is the ideal practice zone. If the mountain has a designated beginner terrain park, this is an excellent place to practice because the features are designed for learning and the speed is controlled.
Look Uphill Before Starting
Before you set up for an Ollie, always look uphill to make sure no one is riding toward you. An Ollie requires a moment of concentrated setup—shifting weight, bending knees, focusing on timing—and during this moment, you are less aware of your surroundings. A rider coming up behind you at speed may not expect you to slow down or shift direction, and a collision can result. Quick uphill glance before every attempt—it takes a second and prevents potentially serious accidents.
Call Your Features
If you are practicing Ollies on a specific feature (like a roller or a small jump), let other riders know. A simple “dropping in” or “Ollieing this” alerts people behind you that you are about to perform a maneuver that may change your speed or trajectory. This is especially important in terrain parks, where riders may be approaching features from different angles and at different speeds.
Know When to Move On
If you are practicing Ollies and a line of riders starts forming behind you, move to a less crowded area. Holding up traffic is not only inconsiderate—it is dangerous, as frustrated riders may try to pass you in tight spaces. Find a quiet stretch of the mountain where you can practice without inconveniencing others.
Conclusion
Mastering the Ollie unlocks the entire mountain. The groomed run becomes a playground, the fallen tree becomes a feature, and the terrain park becomes accessible. It takes patience, timing, and a bit of bravery.
The Ollie is more than a trick—it is a philosophy of snowboarding. It represents the moment you stop passively riding the mountain and start actively commanding your board. Every great rider you have ever watched, every epic line you have seen in a video, every smooth park run that made your jaw drop—it all started with the Ollie. The foundation is simple: load the tail, pop, level, land. But the mastery is infinite: higher pops, cleaner landings, more creative applications, effortless integration into every aspect of your riding.
Do not get discouraged if you do not get it day one. Watch tutorials, including this excellent breakdown from Red Bull on how to Ollie, and keep practicing. Every rider who now throws effortless backside 180s off kickers started exactly where you are—struggling to load the tail, mistiming the Pop, and landing off-balance. The difference between them and you is not talent; it is reps. Every Ollie attempt, whether successful or not, builds the neural pathways that eventually make the movement automatic.
Ensure you have the right boots, protect your wrists, and enjoy the process of flight. The mountain is waiting—and now you have the key to unlock it.
An Ollie on a snowboard consists of four phases: (1) Setup — ride at moderate speed with knees bent and weight centered; (2) Load — shift your hips over your back foot to flex the tail, storing elastic energy; (3) Pop — explosively kick your back leg down while lifting your front leg to snap the tail off the snow; (4) Level & Land — suck your knees up to level the board, then extend and absorb impact with soft knees. Key tips: use a camber or hybrid camber board for maximum pop, keep your chest up (do not bend at the waist), land with bent knees, and wear wrist guards and a helmet while learning. Practice on groomed runs, film yourself for feedback, and progress gradually from small hops to full-height Ollies.


