
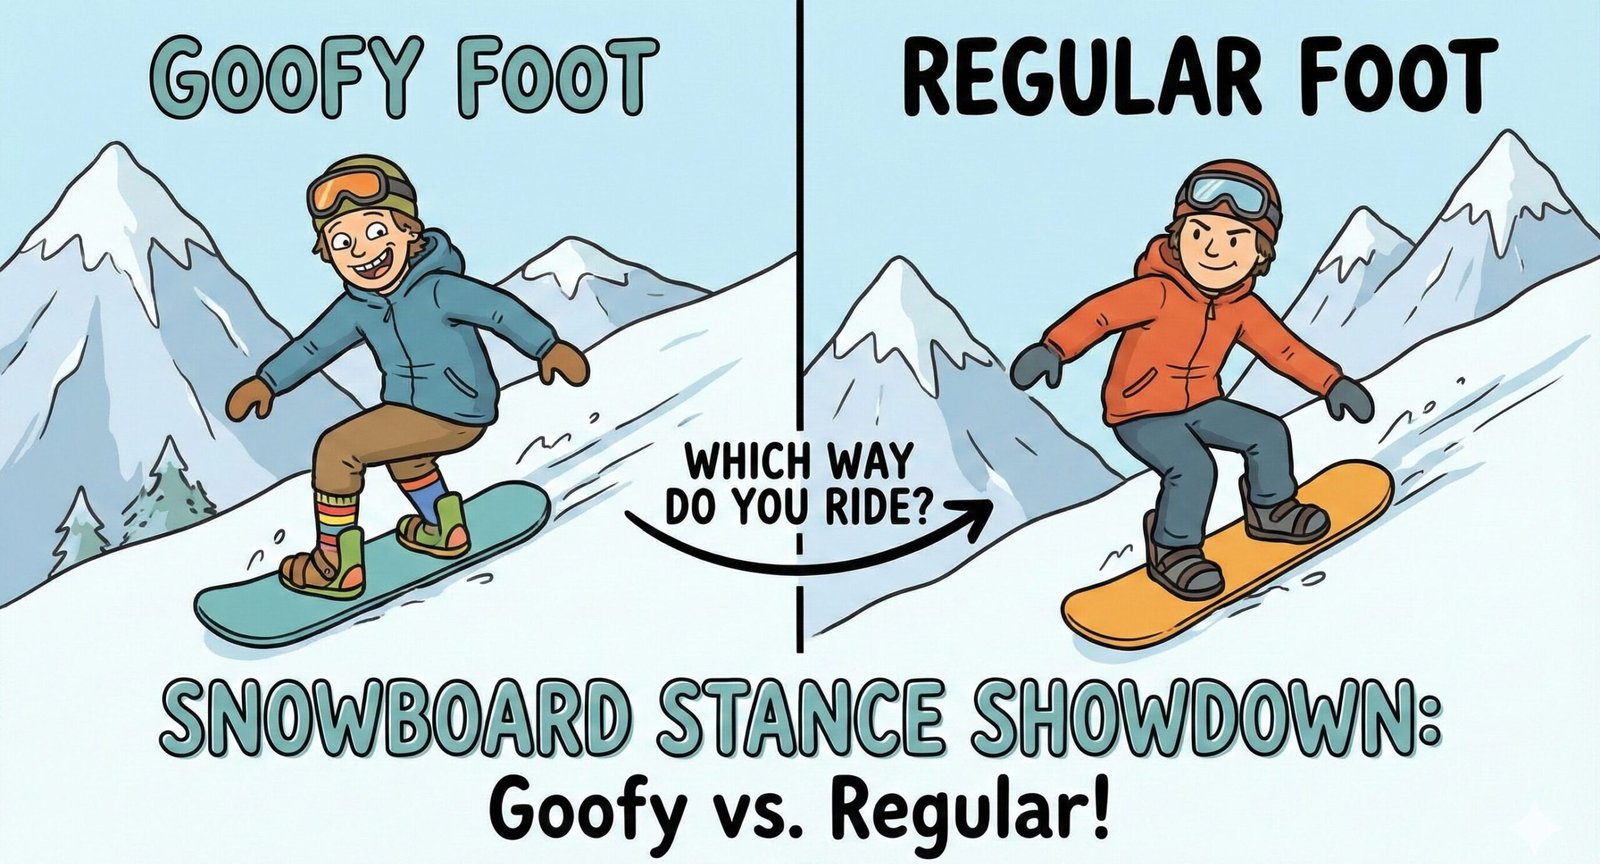
Goofy vs. Regular Snowboard Stance: How to Find Your Dominant Foot
Key Article Highlights
- Biomechanics of Lead Foot Selection
- 3 Living-Room Stance Tests
- Duck Stance vs. Directional Setup
- Switch Riding Fundamentals
- Cerebral Dominance vs. Leg Power
- Stance Width Measurement Guide
- Complete Binding Angle Breakdown
- Terrain-Specific Stance Setups
- Common Stance Mistakes & Fixes
- Off-Season Stance Training Exercises
Before you even worry about when is the best time to buy snowboarding gear or strapping into your bindings, you need to answer one fundamental question: Are you Goofy or Regular?
It sounds like a personality test, but in the world of board sports, it is pure biomechanics. Your stance dictates how you set up your equipment, how you turn, and how you balance. Getting this wrong is the number one reason beginners struggle, fall unnecessarily, and wonder why do my feet hurt when I snowboard. In this exhaustive guide, we breakdown the neurological and physical factors that determine your mountain stance — and we go far beyond the basics to cover stance width, binding angles, body alignment, terrain-specific setups, and the training exercises that will transform your riding.
The Psychology of Stance: It’s Not About Hands
A common misconception is that if you are right-handed, you must be Regular. This is false. While there is a correlation, your “handedness” does not dictate your “footedness.” Your stance is determined by your dominant leg — the leg you instinctively use to catch yourself, balance, or generate power. This leg is your “rudder.” It provides the power for steering and braking. Your front leg is your “pivot.” It guides the board. This is why knowing how to carve on a snowboard feels so different depending on your stance.
The science behind this comes down to proprioception — your body’s awareness of its position in space. Your dominant leg has more developed neural pathways for balance correction. When you are falling or sliding, that dominant leg fires first to stabilize you. In snowboarding, this creates an interesting paradox: the leg that instinctively steps forward to save you from a fall actually becomes your back foot, because it is the foot that manages emergency stability corrections, weight shifts, and power transfer during turns. Your less dominant foot becomes the guide — the front foot — because it needs less neurological overhead to perform its role of steering and initiating edge changes.
Research from the Journal of Sports Sciences has shown that approximately 70% of the population is “right-leg dominant” in terms of dynamic balance tasks, which correlates with the roughly 70/30 split between Regular and Goofy riders worldwide. However, there is a fascinating wrinkle: some people are cross-dominant, meaning their dominant hand does not match their dominant leg. A right-handed person might have a dominant left leg, making them Goofy. This cross-dominance is more common than people think and is one of the primary reasons the “handedness equals stance” myth persists — because the correlation is real but imperfect.
Your stance also relates to cerebral lateralization. The left hemisphere of your brain controls the right side of your body and is associated with analytical, sequential processing. The right hemisphere controls the left side and is associated with spatial awareness and balance. This neurological architecture means that your dominant leg is not just stronger — it processes balance information faster. When you ride, your back foot is constantly making micro-adjustments to maintain edge pressure, absorb terrain changes, and manage speed. This is why having your dominant leg in the back position gives you a tangible advantage in control and reaction time.
Immediate balance improvements; faster turn initiation; reduced muscle fatigue in the lead quad; intuitive edge control; quicker reaction to terrain changes; more natural switch riding progression; better absorption of bumps and landings; reduced mental load while riding.
Constant “counter-rotation” (twisting your torso); higher risk of catching edges; difficulty riding flat catwalks; mental frustration; excessive quad burn in the wrong leg; inability to ride switch comfortably; knee pain from misaligned force vectors; plateauing at intermediate level.
3 Proven Tests to Find Your Stance
You can do these tests right now in your living room. You don’t need to be at one of the best snowboarding destinations to figure this out. These tests isolate your vestibular system and your muscle-memory reflex to see which foot takes the lead without your conscious brain interfering.
1. The Slide Test (The Gold Standard)
Put on a pair of thick socks on a smooth floor. Run and slide. Which foot naturally goes in front to stabilize you? That is likely your lead foot. This test is superior because it mimics the “dynamic balance” required on snow. If your left foot is forward, you are Regular. If your right foot is forward, you are Goofy.
The reason this test works so well is that it engages your vestibular-ocular reflex — the same system that helps you maintain balance while moving at speed on a snowboard. When you slide on socks, your body instinctively positions your dominant balance leg behind you to manage the deceleration and weight distribution. This mirrors exactly what happens when you ride: the front foot guides direction while the back foot manages speed and stability. If you want to refine this test further, try it multiple times and have a friend watch from the side. Consistency across attempts is the key indicator. One fluke slide means nothing — five consistent slides with the same foot forward means you have found your stance.
Some riders find that variations of the slide test produce different results. For example, sliding forward versus sliding sideways. The forward slide is more accurate because snowboarding is primarily a forward-motion sport. Sideways slides engage different muscle groups and can be misleading. If you get inconsistent results, always default to the forward slide test. You can also try the “rolling” variation: lie on your back and roll to standing as quickly as possible. Whichever foot you use to plant and push yourself up is very likely your dominant leg — which should be your back foot.
2. The Push Test (Neurological Reflex)
Stand with your feet together and close your eyes. Ask a friend to gently push you from behind unexpectedly. The foot you step forward with to catch your fall is your dominant “reflex” foot. In snowboarding, this foot usually becomes your Back Foot because it is the one that manages weight shifts and emergency stability corrections.
[Image diagram of a person performing the push test showing lead and trail foot placement]
The push test works because it bypasses your conscious decision-making entirely. When you are pushed unexpectedly, your body does not have time to “think” about which foot to move — it acts purely on reflex. This reflex is hardwired into your nervous system and reflects the same automatic responses you rely on when riding at speed through variable terrain. The foot that shoots forward is the one your brain trusts most for balance recovery. In snowboarding, that trust translates directly to edge control, turn completion, and recovery from near-falls.
There is an important nuance to the push test that many guides overlook: the direction of the push matters. A push directly from behind will produce different results than a push from the side. For snowboarding, the most relevant push is from directly behind, because this simulates the forward-momentum forces you experience while riding. A sideways push engages lateral balance, which is less relevant to your riding stance. Always specify “push me straight from behind” to get the most accurate result.
If you perform the push test and the slide test and they give different results, always trust the slide test. The slide test involves forward momentum, which is the primary state of snowboarding. The push test is a useful confirmation but is slightly less reliable because it involves an external force rather than self-generated momentum.
3. The Jump-and-Land Test (The Dynamic Confirmation)
This is the third test that completes the trio and provides dynamic confirmation of your stance. Stand on both feet and jump straight up as high as you can. When you land, observe which foot you instinctively place slightly forward. Do this 5 to 10 times in rapid succession and note the pattern. The foot that consistently lands in front is your natural lead foot.
The jump-and-land test is particularly valuable because it engages your fast-twitch muscle fibers and your proprioceptive balance system simultaneously. When you jump and land, your body must rapidly re-establish balance. The foot placement it chooses reflects deep neurological wiring — not conscious preference. This test also accounts for gravitational forces in a way the other tests do not. When you land from a jump, the impact forces travel through your body in a pattern that closely mimics the forces experienced during snowboard landings from small jumps or drops.
For the most accurate results with the jump-and-land test, perform it on a hard surface with good traction (not slippery socks). Wear the shoes you would normally wear day-to-day. Jump straight up — not forward or sideways — and let gravity do the work on the landing. If you find yourself consistently landing with your left foot forward, you are Regular. Right foot forward means Goofy. If you get a 50/50 split across 10 jumps, you may be ambidextrous (cross-dominant), which is a significant advantage for freestyle and park riding because riding switch will feel more natural to you.
What to Do After You Find Your Stance
Once you have completed all three tests and identified a consistent pattern, write it down. Seriously. The excitement of buying new gear and hitting the slopes can make you second-guess yourself. Having a written record prevents that. If two out of three tests agree, go with the majority result. If all three agree, you can be very confident.
After confirming your stance, you are ready to move on to the next critical steps: determining your stance width, setting your binding angles, and fine-tuning your body alignment. These three factors, combined with your Goofy or Regular designation, create your complete riding setup. Getting all four right is what separates riders who progress quickly from those who plateau at the intermediate level.
Stance Width: How Wide Should Your Snowboard Stance Be?
Stance width is one of the most overlooked aspects of snowboard setup, yet it has an enormous impact on your riding. A stance that is too narrow makes you unstable and top-heavy. A stance that is too wide limits your mobility and makes it difficult to initiate turns. Finding the sweet spot is essential for carving performance, balance, and overall comfort on the mountain.
The general rule of thumb is that your stance width should be approximately shoulder width to shoulder width plus 2 inches. This gives you a stable base without restricting your ability to shift weight and flex your knees. However, this is a starting point — not a universal prescription. Your ideal stance width depends on several factors including your height, weight, boot size, riding style, and personal preference.
Stance Width by Rider Height
| Rider Height | Suggested Stance Width | Binding Setback | Riding Style Notes |
|---|---|---|---|
| 5’0″ — 5’3″ (152–160 cm) | 18.5″ — 20″ (47–51 cm) | 0″ — 0.5″ | Narrower stance aids quick edge transitions for lighter riders |
| 5’4″ — 5’7″ (163–170 cm) | 19.5″ — 21″ (50–53 cm) | 0.5″ — 1″ | Mid-range stance suits all-mountain riding versatility |
| 5’8″ — 5’11” (173–180 cm) | 21″ — 22.5″ (53–57 cm) | 0.75″ — 1.25″ | Standard stance for most adult male riders |
| 6’0″ — 6’3″ (183–191 cm) | 22″ — 23.5″ (56–60 cm) | 1″ — 1.5″ | Wider stance provides leverage for larger frames |
| 6’4″+ (193 cm+) | 23″ — 24.5″ (58–62 cm) | 1.25″ — 2″ | Widest standard stance; some may need custom setups |
These measurements are guidelines, not gospel. Professional snowboarders frequently experiment with their stance width throughout the season. Some riders prefer a slightly narrower stance for park riding because it allows quicker board rotation during spins. Others widen their stance for powder days because the wider base provides more stability in deep, variable snow. The key is to start within the recommended range and adjust by quarter-inch increments until you find your personal sweet spot.
How to Measure Your Stance Width
Stance width is measured from the center of one binding mounting hole to the center of the other binding mounting hole. This is the “stance center” measurement. When you buy a snowboard, the manufacturer lists a recommended stance range (for example, 19″–23″). This range represents the minimum and maximum widths that the board’s insert pattern supports.
To measure your stance on the board, align a tape measure with the center holes of your front and back binding inserts. Count the inserts from the nose and tail to make sure you are measuring the correct pair. Most boards have a reference stance marked on the topsheet — often indicated by notches or hash marks near the insert packs. This reference stance is typically set at the board’s recommended center point and represents a good starting position for most riders.
An important detail that many beginners miss: your stance width on the snowboard is measured along the board’s centerline, not along your body. Because snowboard bindings are mounted at angles (not straight ahead like ski bindings), the effective width between your feet is actually slightly less than the mounting distance. At a 15-degree angle, the difference is negligible. At wider angles like 21 degrees, the effective stance width narrows by about half an inch. This is something to be aware of when fine-tuning your setup, but it is not something most riders need to actively compensate for.
The Relationship Between Stance Width and Riding Style
Your stance width is not a one-size-fits-all measurement — it should adapt to what you are doing on the mountain. Here is how different riding styles benefit from different widths:
Park and Freestyle: Many park riders run a slightly narrower stance (shoulder width or just below) because it facilitates faster board rotation during spins and makes it easier to manipulate the board on rails and boxes. A narrower stance also centers your weight more naturally over the board, which is helpful for landing switch. Some freestyle riders who focus heavily on rail riding go even narrower for better board feel and control on jib features.
All-Mountain: The standard shoulder-width-plus setup works perfectly for all-mountain riding. You get enough stability for carving at speed, enough mobility for tight trees, and enough balance for occasional park laps. Most riders who stick with the recommended stance range find it perfectly adequate for all-mountain use.
Powder: A slightly wider stance can help in powder because it distributes your weight over a larger area of the board, improving flotation. Some powder-specific boards are designed with wider stance options in mind. Additionally, a wider stance paired with a setback binding position helps keep the nose up in deep snow. If you are riding powder regularly, consider widening your stance by a quarter to half inch beyond your normal setting.
Freeride and Big Mountain: Riders who charge hard at high speeds often prefer a wider stance for maximum stability. The wider base provides better leverage over the edges and helps absorb the forces generated during aggressive carving at speed. If you are hitting steep lines, jumps off natural features, or variable terrain at high speed, a wider stance gives you a more solid platform.
Carving and Groomers: For pure carving on groomed runs, stance width is less critical than binding angles and body position. However, a moderate-to-wide stance provides the best balance of edge control and stability during high-speed carves. The wider platform helps you apply even pressure across the entire edge length, producing cleaner, more controlled turns.
Complete Binding Angles Guide: From Duck Stance to Directional
Binding angles are the degree to which your bindings are rotated on the board. They determine how your feet point relative to the board’s edges and have a massive impact on comfort, turn initiation, and riding style. If stance width is the foundation, binding angles are the architecture — they shape how every movement translates into board performance.
Angles are measured in degrees from the board’s centerline. A positive angle means the binding is rotated toward the nose of the board (toes pointing forward). A negative angle means the binding is rotated toward the tail (toes pointing backward). A zero degree binding is perpendicular to the board’s centerline.
Common Binding Angle Setups
Balanced, versatile. Great for beginners and park riders. Allows comfortable riding in both directions.
Slightly forward-biased duck. Good all-mountain compromise for riders who want some switch capability.
Both bindings face forward. Optimized for carving and all-mountain. Reduces switch capability.
Extreme forward angles for deep carving. Maximum toe-side performance. Difficult for switch riding.
Asymmetric duck with forward-biased front foot. Popular with park riders who ride mostly regular.
Racing and hard carving angles. Maximum speed and edge hold. Not suitable for park or casual riding.
Understanding Front Foot Angle
Your front foot angle is the most important angle to get right because it determines your primary riding position. For most riders, the front foot angle falls somewhere between +12 degrees and +21 degrees. A higher front foot angle opens your hips toward the nose of the board, making it easier to initiate toe-side turns and see where you are going. A lower front foot angle keeps your body more sideways, which can feel more natural for freestyle riding.
The relationship between your front foot angle and your carving technique is direct. A more open front foot angle (higher degree) makes it easier to roll onto your toe edge and engage a clean carve. This is why carving-focused riders tend to run higher front foot angles. Conversely, a more neutral front foot angle (lower degree) makes it easier to flatten the board and slide, which is useful for freestyle tricks but produces less defined carves.
Understanding Back Foot Angle
Your back foot angle works in conjunction with your front foot angle to create your overall stance geometry. The most common back foot angle is between 0 degrees and -9 degrees (duck stance) or between +3 degrees and +9 degrees (forward stance). A negative back foot angle (duck stance) turns your back foot toes toward the tail, making it more comfortable to ride switch. A positive back foot angle keeps both feet pointing generally forward, which is better for carving but makes switch riding awkward.
The interaction between front and back foot angles creates what riders call the “angle spread” — the total difference between your two angles. A +15/-15 duck stance has a 30-degree spread. A +18/+6 forward stance has a 12-degree spread. The spread affects your hip alignment, knee tracking, and overall body rotation. A wider spread opens your body more toward the nose, while a narrower spread keeps you more centered over the board.
How to Dial In Your Binding Angles
The process of finding your ideal binding angles is iterative. Start with a standard duck stance (+15/-15) if you are a beginner, or with the angles recommended by your board manufacturer. Ride for a few sessions and pay attention to where you feel discomfort or limitation. Common indicators that your angles need adjustment include: knee pain on the inside of your front knee (front foot angle may be too high), hip pain or lower back tightness (angle spread may be too wide), difficulty initiating toe-side turns (front foot angle may be too low), and inability to ride switch comfortably (back foot angle may not be negative enough).
When adjusting, change only one binding at a time by two to three degrees. Ride at least half a day before making another adjustment. This incremental approach prevents you from overcorrecting and helps you identify which angle changes produce the most improvement. Keep a note on your phone with your current angles so you can reference them later. Many riders find their ideal setup after two to three rounds of adjustment and then rarely change it.
One often-overlooked factor is that binding angles interact with stance width. Widening your stance while keeping the same angles will change how your body aligns over the board. Similarly, changing your angles while keeping the same stance width will alter the effective distance between your feet. When you make adjustments, try to change only one variable at a time so you can isolate the effect of each change.
Body Posture and Alignment: The Hidden Key to Effortless Riding
Even with the perfect stance, Goofy or Regular designation, ideal stance width, and dialed-in binding angles, your riding will suffer if your body posture is wrong. Posture is the invisible variable that determines whether your setup translates into smooth, controlled riding or constant battles with the board. Many intermediates plateau not because of their equipment setup, but because of their body alignment.
The Athletic Stance
The foundation of good snowboard posture is the athletic stance — the same ready position used in skiing, skateboarding, surfing, and virtually every board sport. The athletic stance consists of:
Knees bent: Your knees should be flexed at roughly 20 to 30 degrees. This is not a deep squat — think of the posture you would take if someone were about to throw a ball at your stomach. A slight, active flex in the knees allows you to absorb terrain changes, absorb landings, and maintain edge pressure. Riding with straight legs is the most common posture mistake among beginners. Straight legs transfer every bump directly to your spine, cause you to lose edge contact, and make your turns jerky and uncontrolled.
Back straight, not rigid: Your spine should be in a neutral position — not hunched forward and not arched backward. Imagine a string pulling the top of your head toward the sky. This neutral spine position allows your core muscles to engage properly and distributes forces evenly across your back. Hunching forward puts excessive pressure on your quads and causes you to fall forward onto your toe edge. Leaning back puts you in the “backseat,” reducing your ability to control the board and increasing the risk of catching your heel edge.
Shoulders aligned with the board: Your shoulders should be roughly parallel to the snowboard. This is one of the most critical and frequently violated principles of good snowboard posture. When your shoulders rotate away from the board’s alignment — opening toward the nose or twisting toward the tail — you create counter-rotation. Counter-rotation is the number one killer of smooth riding. It forces your lower body to fight against your upper body, creating a twisting motion that kills edge hold, reduces turn efficiency, and causes fatigue. Good riders look effortless because their shoulders stay quiet and aligned with the board while their lower body does the work.
Eyes looking where you want to go: Your body follows your eyes. This is a neurological principle called oculomotor coupling. Where you look, your body naturally aligns. Looking down at your board causes you to hunch forward and lose balance. Looking at the trees you are afraid of hitting makes you ride toward them (this is called target fixation). Instead, keep your eyes up and focused on the path ahead. Scan the terrain 15 to 20 feet in front of you and look through your turns. This simple adjustment dramatically improves your balance, line selection, and overall control.
Weight Distribution: The 60/40 Principle
When riding in a neutral, straight-line position, your weight should be distributed approximately 60% on your back foot and 40% on your front foot. This is counterintuitive for many riders who assume that weight should be centered or even forward-weighted. The reason for the rear bias is that your back foot controls speed and stability — the two things you need most when riding straight. Weight on the back foot also helps the board’s sidecut engage properly and prevents the nose from diving into soft snow.
However, weight distribution is not static — it shifts constantly during riding. During a toe-side turn, weight shifts slightly forward as you press into your toe edge and initiate the turn. During a heel-side turn, weight shifts slightly back as you sit into your highback and use your rear leg to control the turn radius. In powder, weight shifts dramatically rearward — up to 80% on the back foot — to keep the nose floating. On hardpack at high speed, weight centers more evenly to maximize edge contact and stability.
Understanding these weight shifts is essential for smooth riding. Many beginners struggle because they keep their weight static in one position. Riding is a dynamic activity, and your weight distribution should be constantly adjusting to the terrain, speed, and turn phase. The key is to develop a feel for these shifts rather than consciously thinking about them. This comes with practice and proper instruction. If you are wondering are snowboard lessons worth it, this dynamic weight management is one of the top reasons why professional instruction accelerates your learning.
The Role of Your Hips in Turning
Your hips are the command center for snowboard turning. Every turn starts with a subtle hip movement that shifts your weight and changes the board’s edge angle. On a toe-side turn, your hips drive forward toward the nose of the board while your knees push forward into your boot tongues. On a heel-side turn, your hips sit back as if you are lowering into a chair, engaging the highbacks of your bindings.
The hip movement in snowboarding is often compared to the motion of a metronome — a smooth, rhythmic side-to-side swing. This hip swing is what generates the flowing S-shaped turns that characterize skilled riding. When your hips are stiff or locked, your turns become rigid and angular. When your hips are loose and mobile, your turns become smooth and connected. This is why off-season hip mobility exercises are so valuable for snowboarders — they directly translate to better turn quality on the mountain.
Terrain-Specific Stance Setups: Optimizing for Every Condition
While a single “do everything” stance setup exists for casual riders, serious snowboarders who want to maximize performance in specific conditions benefit from tailoring their setup to the terrain. Think of it like a golf bag — you would not use a putter on the tee box, and you would not use a driver on the green. Similarly, your snowboard stance can be optimized for the specific conditions you are riding.
Park and Freestyle Stance Setup
Park riding demands a stance that prioritizes board feel, balance, and switch capability. The ideal park stance typically features:
Centered stance: Unlike all-mountain or freeride setups where the bindings may be setback toward the tail, park riders keep their bindings centered on the board. This ensures the board spins evenly and that switch landings feel identical to regular landings. A centered stance is essential for rails, boxes, and spins. If your bindings are off-center, the board will be “heavier” on one end, making spins uneven and switch landings unpredictable.
Duck stance angles: Most park riders use a duck stance with angles like +15/-15, +18/-12, or even +21/-9. The negative back foot angle ensures that riding switch feels comfortable and natural. The more symmetrical the angles, the more symmetrical your riding will be in both directions. Some park riders who focus exclusively on rails run very low angles (like +9/-9 or even +6/-6) because the neutral foot position provides maximum board feel and control on jib features.
Slightly narrower stance: A narrower stance (shoulder width or slightly below) makes it easier to rotate the board during spins. When you are doing 360s, 540s, or larger rotations, a narrower stance reduces the moment of inertia, making the spin faster and more controlled. It also makes it easier to “pop” off kickers because your legs can extend more vertically without fighting against a wide base.
Sofer binding forward lean: While not technically part of stance, reducing your binding’s forward lean is a common park setup adjustment. Less forward lean allows your ankles to flex more freely, improving board feel on rails and boxes. It also makes it easier to flatten the board for presses and butters. For jump-focused park riding, you might keep slightly more forward lean for edge hold on takeoffs and landings.
Powder Stance Setup
Powder riding is the most physically demanding condition for your stance because deep snow creates forces and balance requirements that groomed runs do not. The ideal powder stance features:
Setback binding position: This is the most important powder adjustment. Moving your bindings 1 to 2 inches toward the tail of the board shifts your weight distribution rearward, keeping the board’s nose above the snow surface. Without setback, your nose tends to submerge in deep powder, causing you to pearltuck (nose-dive) and lose speed. Most directional powder boards are designed with setback insert patterns already built in. On a twin-tip board, you can achieve setback by mounting the front binding one or two holes forward from center and the back binding one or two holes back from center.
Wider stance: A slightly wider stance in powder provides more stability in the variable, unpredictable surface of deep snow. The wider base gives you more leverage over the edges and helps you maintain balance when the snow depth changes suddenly beneath you.
Forward-biased angles: Many powder riders increase their front foot angle slightly (to +18 or +21) to open their body toward the direction of travel. This makes it easier to see the terrain ahead and react to obstacles in the deep snow. The back foot angle remains the same or may be brought to zero degrees, since switch riding in powder is rare and the forward-facing back foot helps with overall balance in the deep snow.
It is worth noting that backcountry snowboarding often involves powder conditions, but the terrain is much more variable and unpredictable. In the backcountry, you might encounter powder fields, groomed traverses, rocky sections, and steep chutes all in the same run. For this reason, many backcountry riders use a moderate setback rather than an extreme one, maintaining some versatility for the variable conditions they will encounter.
Carving and Groomer Stance Setup
Carving is the art of riding the board’s edge in a clean, arcing turn without skidding. It is one of the most satisfying feelings in snowboarding, and a proper stance setup makes it dramatically easier. For dedicated carving:
Higher front foot angle: Carving riders often run front foot angles of +21 degrees or higher. This opens the hips toward the direction of travel, making it easier to press into the toe edge and engage the sidecut. The higher angle also aligns the knee more naturally with the direction of force during a carve, reducing strain on the knee joint.
Positive back foot angle: Unlike park or all-mountain setups, dedicated carvers often run positive angles on both feet (+21/+9 or even +24/+12). This keeps both feet generally facing forward and creates a more “forward-facing” body position that is optimized for high-speed edge engagement. The tradeoff is that switch riding becomes very difficult, but dedicated carvers rarely ride switch anyway.
Wider stance for leverage: A wider stance provides more leverage over the edges during high-speed carves. The increased width allows you to apply more pressure to the edge and creates a longer effective edge contact with the snow. This produces more grip and a tighter turn radius at speed.
Increased forward lean: More forward lean in your bindings forces your knees forward and engages your calf muscles, putting you in a more aggressive, ready-to-carve position. It also increases the response time of your bindings, making edge changes quicker and more decisive. For pure carving, maximum forward lean is often recommended.
All-Mountain Stance Setup
All-mountain riding is the most common discipline and benefits from a balanced, versatile stance setup. The goal is to be competent in all conditions without being optimized for any single one. The ideal all-mountain stance features:
Mild duck or forward stance: Angles like +15/-6 or +18/+3 provide a good compromise between switch capability and carving performance. The front foot angle is high enough for comfortable toe-side turns and carving, while the back foot angle is either slightly negative (for some switch comfort) or slightly positive (for forward-focused performance).
Centered or mild setback: A centered stance works well for most all-mountain riding. If you ride powder frequently, a mild setback of 0.5 to 1 inch provides some nose-float benefit without dramatically affecting the board’s behavior on groomed runs.
Standard stance width: Shoulder width plus 0.5 to 1 inch is the standard for all-mountain riding. This provides adequate stability without restricting mobility.
For riders who want one setup that handles everything, True Twin boards with a centered duck stance (+15/-15) are the most forgiving and versatile option. This is why many beginners start with this setup — it allows them to explore different riding styles without being locked into a specialized configuration.
Common Stance Mistakes and How to Fix Them
Even with the best equipment and the right stance designation, riders frequently fall into habits that undermine their performance. Understanding these common mistakes — and knowing how to fix them — is what accelerates your progression from beginner to confident intermediate.
7 Most Common Stance Mistakes
Counter-rotation occurs when your upper body twists in the opposite direction of your lower body during a turn. For example, your shoulders open toward the nose while your hips and legs turn the board in the other direction. This creates a fighting, twisting motion that kills edge hold and causes fatigue. Fix: Focus on keeping your shoulders aligned with the board throughout the turn. Practice “quiet upper body” riding where your shoulders remain stable while your lower body does all the work. Video yourself riding and watch for excessive upper body movement.
Many beginners lean back because it feels safer — the mountain is in front of you and your instinct is to retreat from it. But riding in the backseat puts all your weight on the tail, making turn initiation extremely difficult and causing your front edge to lose contact with the snow. Fix: Consciously shift your weight forward until you feel equal pressure on both feet. Your shins should press lightly against the front of your boot tongues. If your calves are pressing into your highback, you are too far back.
Riding with straight or nearly straight legs is the most common beginner mistake. It eliminates your ability to absorb bumps, makes your turns rigid, and causes you to catch edges frequently. Fix: Think “always bent, never locked.” Even on flat, easy terrain, maintain a slight knee flex. Practice the “bathroom hover” position — that slight squat you hold when the bathroom is questionable — and maintain it while riding.
Looking at your feet or the board beneath you causes your head to drop, your shoulders to round forward, and your weight to shift over the toe edge. It also eliminates your ability to anticipate terrain changes. Fix: Keep your chin up and eyes focused 15 to 20 feet ahead. Trust that your feet are where they should be — your proprioception will handle the rest. Use the phrase “eyes up, chin up” as a mantra until it becomes habit.
An overly wide stance makes you feel stable but limits your mobility and makes it hard to transition between edges. An overly narrow stance makes you feel unstable and tippy. Fix: Use the shoulder-width guideline and adjust from there. If you feel restricted in your turns, narrow by a quarter inch. If you feel tippy or unstable, widen by a quarter inch. Small adjustments make a big difference.
Running extreme duck angles (+21/-21) when you never ride switch, or running aggressive forward angles (+24/+12) when you spend half your time in the park, creates unnecessary discomfort and limits your performance. Fix: Match your angles to your primary riding style. If you are an all-mountain rider, a mild duck stance (+15/-6) covers most situations. If you are a dedicated park rider, go duck. If you are a dedicated carver, go forward. Don’t use someone else’s angles just because they work for them.
Many riders set their stance once and never touch it again, even as their skills, preferences, and riding conditions change. Your stance should evolve with you. Fix: Re-evaluate your stance at the beginning of each season. Try small adjustments after every 10 to 15 riding days. Pay attention to discomfort patterns and address them with setup changes before they become ingrained habits.
Heelside vs. Toeside: Understanding the Two Fundamental Turns
Every snowboard turn is either a heel-side turn or a toe-side turn. Mastering both is the foundation of competent snowboarding, and understanding how your stance affects each type of turn is crucial for progression.
Heelside Turns
Heelside turns are performed by applying pressure to the board’s heel edge. Your body position shifts rearward — imagine sitting into an invisible chair — as your heels press down and your toes lift slightly. Your highbacks (the plastic plates on the back of your bindings) provide the leverage point. The heelside turn is often described as the more “natural” turn for beginners because the sitting-back motion feels safer than the forward-leaning toe-side motion.
During a heelside turn, your weight shifts to your heels, your knees bend deeper, and your hips move slightly behind your heels. Your front knee drives the turn direction while your back leg controls the turn radius. A common heelside mistake is breaking at the waist — hinging forward at the hips instead of sitting down. Breaking at the waist puts your weight over your toes, which is the opposite of what you want on a heel-side turn. Instead, keep your back straight and drop your hips as if lowering into a chair.
Your stance affects heelside turns significantly. A wider stance provides more leverage against the highback, making heelside turns feel more powerful and stable. Higher binding forward lean increases the responsiveness of the highback, making heel-side turns feel quicker and more direct. A negative back foot angle (duck stance) allows your back ankle to flex more naturally during heelside turns, reducing calf fatigue.
Toeside Turns
Toeside turns are performed by pressing into the toe edge of the board. Your body position shifts forward — imagine pressing your shins into the front of your boots — as your toes press down and your heels lift slightly. Toeside turns are often more intimidating for beginners because the forward-leaning position feels less secure, especially at speed. However, toeside turns are generally more powerful and efficient than heel-side turns because the human body has better leverage when pushing forward than when sitting back.
During a toeside turn, your knees push forward into your boot tongues, your hips drive toward the nose of the board, and your weight shifts over your toes. Your front hand reaches toward the ground in the direction of the turn, which helps align your shoulders and hips with the turn. A common toeside mistake is looking back over your shoulder, which rotates your upper body away from the turn and causes you to lose edge pressure. Keep your eyes forward and trust the edge.
Your stance affects toeside turns just as dramatically as heelside turns. A higher front foot angle makes toeside turns more comfortable because it pre-opens your hip in the direction you need to lean. Binding forward lean helps here too — more forward lean puts your ankle in a position that makes pressing into the toe edge easier. If you struggle with toeside turns, try increasing your front foot angle by two to three degrees and see if the extra hip openness helps.
The Transition: Linking Turns Smoothly
The mark of a skilled rider is the ability to transition smoothly between heel-side and toe-side turns. This transition is where stance setup really pays off. A well-dialed stance makes the transition feel effortless — a natural flow from one edge to the other. A poorly configured stance makes the transition feel jerky, forced, or unstable.
During the transition, your weight shifts from one edge to the other through a brief moment of flat-basing (riding on the base of the board with neither edge engaged). This flat-basing moment is where most edge catches happen, which is why the transition is also the most dangerous part of the turn for beginners. Your stance affects the stability of this transition: a wider stance provides more stability during flat-basing, while appropriate binding angles ensure that your feet are positioned to engage the new edge quickly and cleanly.
Practicing the transition in a controlled environment — like a gentle green run or a magic carpet area — is one of the best ways to build confidence. Focus on smooth, gradual transitions rather than quick, aggressive ones. As your skills improve, the transitions will naturally become quicker and more dynamic. If you are struggling with transitions, consider taking a lesson. Professional instructors can identify specific stance or technique issues that are blocking your progress. If you are wondering whether snowboard lessons are worth it, the transition phase is one of the biggest areas where instruction pays dividends.
Weight Distribution During Turns: The Dynamic Balance of Snowboarding
Weight distribution is not a static measurement — it is a constantly shifting balance that changes with every phase of every turn. Understanding these shifts is what separates riders who look effortless from riders who look like they are fighting the mountain.
The Turn Phases
Every snowboard turn has four distinct phases, and your weight distribution changes in each one:
Phase 1 — Initiation: The turn begins when you shift your weight to start the board rotating. For a toe-side turn, this means driving your knees forward and shifting weight toward your toes. For a heel-side turn, this means sitting back and shifting weight toward your heels. At the initiation phase, weight is distributed roughly 50/50 between your feet, with a slight bias toward the front foot as it leads the turn direction.
Phase 2 — Control: As the board begins to arc through the turn, you apply maximum edge pressure. This is where the turn’s shape is determined. Weight shifts toward the outside ski (the downhill foot) as centripetal force pulls you toward the inside of the turn. During this phase, the majority of your weight is on the edge — not distributed between your feet. Your job is to maintain consistent edge pressure through the entire arc.
Phase 3 — Completion: As the turn finishes and the board begins to flatten, you release edge pressure and allow the board to decelerate. Weight shifts back toward center as you prepare for the next turn. Many riders make the mistake of rushing through this phase, throwing the board into the next turn before the current one is complete. Patience through the completion phase produces smoother, more controlled riding.
Phase 4 — Transition: The brief moment between turns where the board is flat on the snow. Weight is evenly distributed between both feet, centered over the board. This is the “reset” moment before the next turn begins. The transition is also when you shift from one edge to the other, making it the most technically demanding phase for balance and coordination.
Speed and Weight Distribution
Your speed affects how you distribute your weight. At low speeds (beginner green runs), your weight stays relatively centered with a slight rear bias for stability. The turns are initiated gently and the forces involved are minimal. At medium speeds (intermediate blue runs), weight distribution becomes more dynamic as you actively shift weight through each turn phase. The forces are higher and require more deliberate control. At high speeds (advanced black runs and carving), weight distribution is critical for safety. You must stay forward enough to maintain edge contact but balanced enough to absorb terrain changes at speed. An excessively rear-weighted stance at high speed is dangerous because it reduces your ability to initiate turns and absorb bumps.
Off-Season Stance Training: Exercises to Improve Your Riding
You do not need to be on the mountain to improve your riding stance. Off-season training is one of the most effective ways to build the strength, flexibility, and balance that translate directly to better on-snow performance. Here are the most effective exercises for stance improvement:
Single-Leg Balance Holds
Stand on one foot with your knee slightly bent (athletic stance). Hold for 30 to 60 seconds. Progress by closing your eyes, standing on an unstable surface (pillow, balance board), or adding gentle head turns. This directly trains the proprioceptive balance system you rely on while riding.
Wall Sits
Lean against a wall with your knees at 90 degrees. Hold for 45 to 90 seconds. This builds the isometric quad strength needed to maintain an athletic stance throughout a full day of riding. Add difficulty by holding your board between your knees or extending one leg.
Squat to Stand
Perform a deep squat (below parallel), then drive up to a standing position with arms overhead. This dynamic movement trains the hip mobility and leg strength needed for deep turns and landing absorption. Do 3 sets of 15 repetitions.
Lateral Lunges
Step wide to one side and sink into a lateral lunge, keeping the other leg straight. Alternate sides. This trains the lateral (side-to-side) movement patterns used in edge transitions and wide-stance riding. Do 3 sets of 12 per side.
Plank with Rotation
Start in a forearm plank, then rotate your body to one side, extending your top arm toward the ceiling. Return to plank and rotate to the other side. This builds the core stability and rotational control that prevents counter-rotation on the mountain. Do 3 sets of 10 per side.
Jump Squats
Perform a bodyweight squat, then explode upward into a jump. Land softly with knees bent. This builds explosive leg power needed for ollies, nollies, and absorbing landings. Do 3 sets of 10 with full recovery between sets.
For riders who want to simulate snowboard-specific balance, the Indo Board Balance Trainer (available on Amazon) is one of the best off-season training tools. It mimics the lateral balance demands of snowboarding and can be used for a wide range of exercises from simple balance holds to dynamic carving simulations.

Indo Board Balance Trainer
The best tool for stance testing. Improve your fitness and find your balance center at home.
Check on Amazon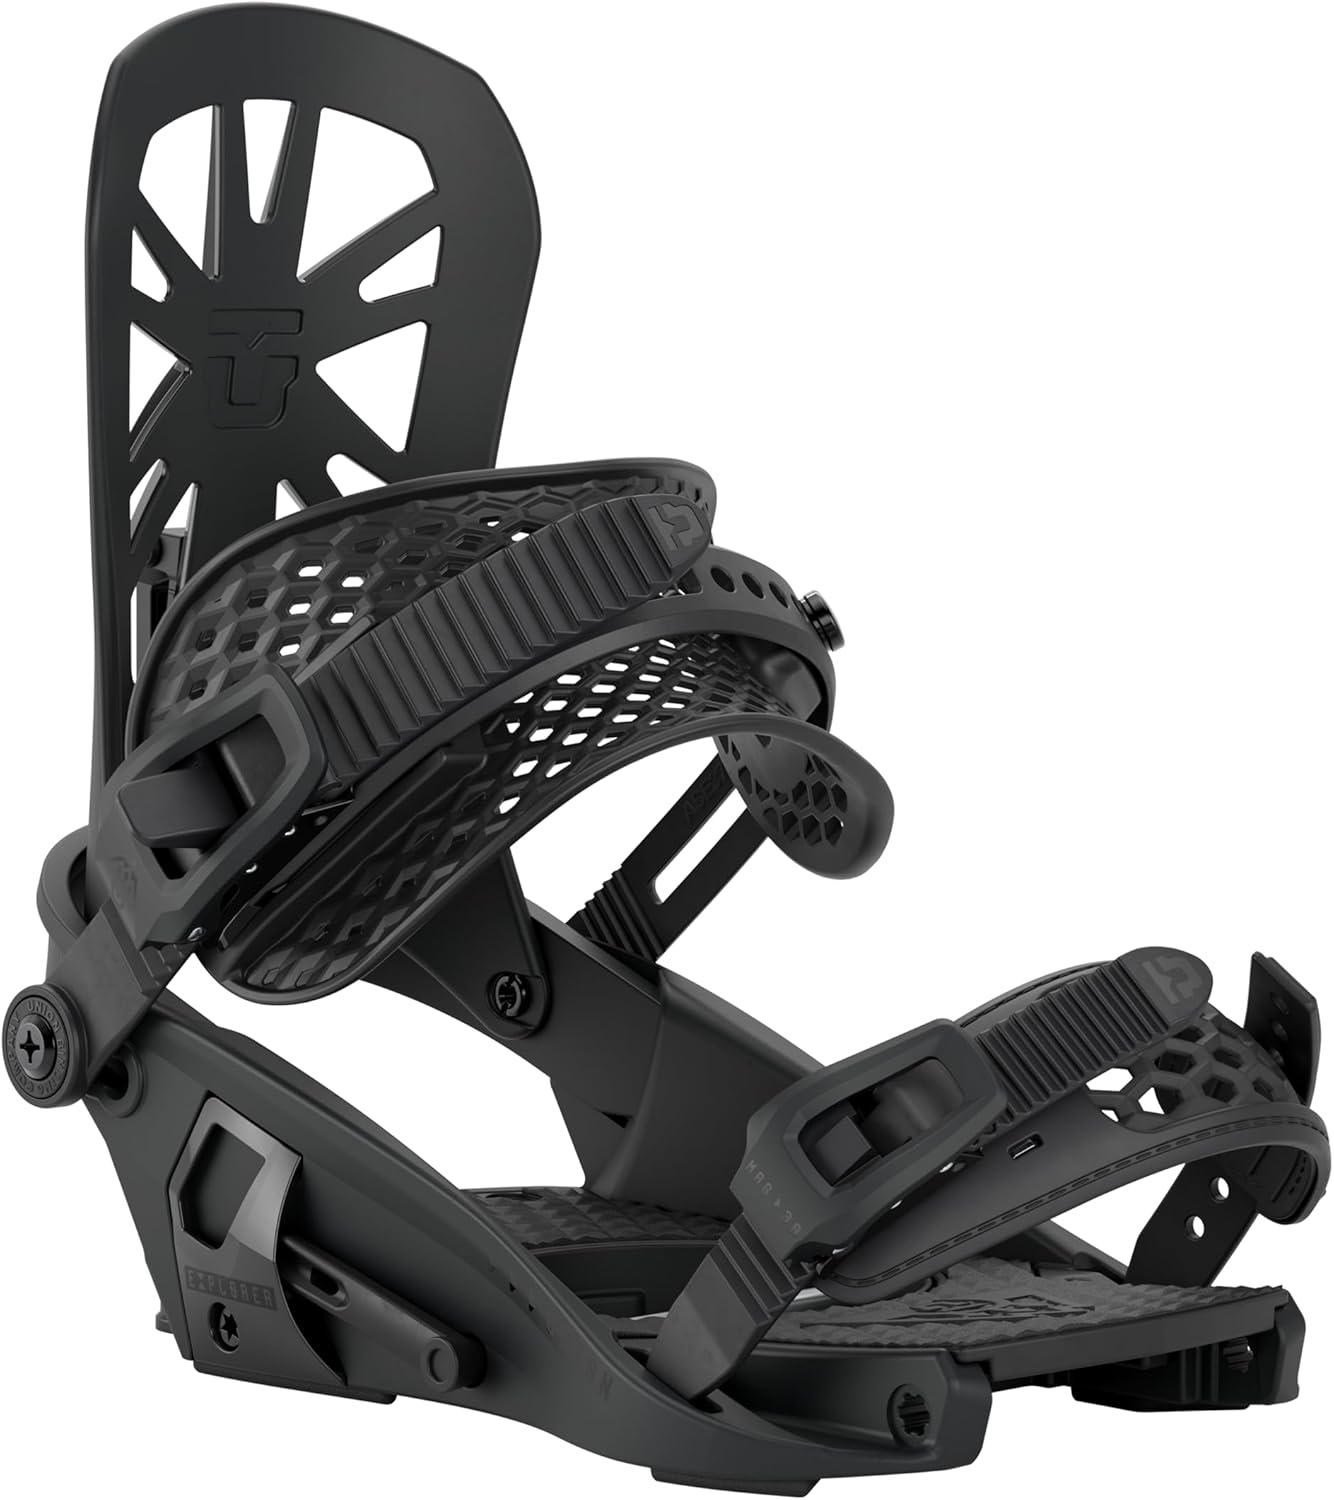
Union Flite Pro Bindings
Lightweight and symmetrical, making it easy to swap between Regular and Goofy setups during testing.
Check on Amazon
Burton Moto BOA Boots
A soft-flexing boot that helps you “feel” your stance. Essential for new riders learning stance geometry.
Check on AmazonStance and Injury Prevention: Protecting Your Knees, Hips, and Back
A properly configured stance does not just improve your riding — it protects your body from the repetitive stresses that snowboarding imposes. Snowboarding generates forces that travel from the snow, through the board, through your bindings, through your boots, and into your joints. An improper stance amplifies these forces in unhealthy ways, while a well-configured stance distributes them evenly and safely.
Knee Protection
The knees are the most vulnerable joints in snowboarding. They absorb impact from landings, endure lateral forces during turns, and endure repetitive flexion-extension cycles throughout the day. A stance that misaligns the knee — particularly one where the binding angles cause the knee to track inward or outward during turns — creates shear forces that can lead to ligament strain over time.
To protect your knees, ensure that your binding angles allow your knees to track naturally over your toes during turns. When you are in your riding stance, look down at your front knee. It should point in roughly the same direction as your front toes. If your knee points inward (valgus) while your toes point outward, your front binding angle may be too high. If your knee points outward while your toes point inward, your binding angle may be too low. Adjust in small increments until the knee-to-toe alignment feels natural.
Additionally, maintaining a slightly wider stance reduces the lateral forces on the knees during turns. A very narrow stance forces the knees to work harder to maintain balance, while an excessively wide stance can put too much strain on the inner knee ligaments. The sweet spot — generally shoulder width — provides the best balance of stability and knee protection.
Hip Protection
Hip pain in snowboarding is almost always caused by excessive angle spread or asymmetric binding angles. When the difference between your front and back foot angles is too extreme (more than 30 degrees), it forces your hips into an unnatural rotational position that creates strain over time. This is particularly common with aggressive forward stances (+24/+3) where the hip is forced into an asymmetric twist.
If you experience hip pain, first check your angle spread. Reduce it by three to five degrees and see if the pain improves. If it does, you have found the issue. If hip pain persists, it may be related to hip mobility limitations. Off-season hip mobility work — including pigeon stretches, hip circles, and 90/90 transitions — can significantly reduce hip pain while riding. Consider pairing your snowboard season with a regular yoga or mobility practice for long-term hip health.
Back Protection
Lower back pain in snowboarding is typically caused by either excessive forward lean or riding in the backseat. Excessive forward lean forces your lower back into a flexed (rounded) position that compresses the lumbar discs. Riding in the backseat creates an extended (arched) lower back position that stresses the facet joints. Both positions, maintained over a full day of riding, produce cumulative strain that manifests as lower back pain.
The fix for both causes is the same: maintain a neutral spine in the athletic stance. Your lower back should have its natural inward curve — not flattened and not exaggerated. Check this by having a friend photograph you from the side while you are in your riding stance. Your spine should form a gentle S-curve. If it is flat or rounded, reduce your forward lean. If it is excessively arched, check that you are not riding in the backseat.
Protective gear also plays a role in back health. A impact shorts with built-in padding can cushion falls that would otherwise jar your spine. A proper helmet protects against head injuries that can cause neck and back strain from whiplash forces.
How Stance Affects Jumping, Ollies, and Air Tricks
If you plan to progress beyond basic turning and want to start catching air, your stance setup becomes even more critical. Jumps, ollies, and freestyle tricks all depend on specific stance characteristics to execute properly.
The Ollie: Snowboarding’s Foundation Trick
The ollie is the most fundamental trick in snowboarding — a small jump performed by loading the tail of the board and springing upward. The ollie is the foundation for virtually every freestyle trick, from basic jumps to complex rotations. Your stance affects ollie performance in several ways:
Stance width: A slightly narrower stance makes ollies easier because your weight can shift more dramatically from front to back foot. A wider stance requires more effort to load the tail but produces a higher, more stable ollie once mastered. Most freestyle riders prefer a slightly narrower stance for this reason.
Binding position: A centered binding position provides the best platform for ollies because the board’s effective edge is evenly distributed. A setback position makes ollies asymmetric — the front of the board is longer than the back, which changes the spring dynamics of the tail.
Binding angles: Duck stance angles make ollies more comfortable because both feet are positioned to provide balanced input. Extreme forward angles can make the ollie motion feel awkward because the back foot is not positioned to load the tail efficiently.
Jump Technique and Stance
When jumping off kickers, rollers, or natural features, your stance determines your takeoff stability, air balance, and landing absorption. A wider stance provides more stability on takeoff and landing because it gives you a broader base of support. A narrower stance makes air maneuvers easier because the board is more compact and easier to control.
For jumps, most riders benefit from slightly increasing their forward lean from their park setting. The extra forward lean provides better edge hold on the lip of the jump (critical for maintaining a straight approach) and helps you absorb the landing by forcing your knees into a bent position. After the jump, you can relax the forward lean for rail and box approaches.
Weight distribution during jumps follows a specific pattern: slightly back on approach (to keep the nose up and maintain speed), centered at takeoff (to pop evenly), centered in the air (to maintain balance), and centered to slightly forward on landing (to absorb the impact and prevent the tail from slamming down). This pattern applies to jumps of all sizes, though the timing becomes more critical as the jump gets larger.
Rail and Box Riding Stance
Rail and box riding — collectively called jibbing — requires a different stance emphasis than jump riding. The key characteristics for a jib stance are:
Low binding angles: Many jibbers run very flat angles (+9/-9 or even +6/-6) to keep their feet in a neutral position that provides maximum board feel. When you are sliding a rail, you need to feel exactly where the board is relative to the feature. High binding angles reduce this feel and make balance more difficult.
Narrow stance: A narrower stance on rails allows you to shift your weight more precisely and makes boardslides (where the board is perpendicular to the rail) easier to initiate and maintain. A wider stance can make boardslides feel locked in but harder to balance.
Centered stance: Like park jumping, centered binding position is essential for rails. Any setback creates an asymmetric board that slides unevenly on the rail feature.
Minimal forward lean: Less forward lean allows your ankles to flex freely, which is essential for maintaining balance on rails. When you are on a rail, your body is making constant micro-adjustments through your ankles. Stiff, forward-leaned bindings restrict these adjustments and make rails much harder.
Board and Stance Compatibility: Matching Your Setup to Your Board
Your stance does not exist in isolation — it interacts with your board’s design, flex, shape, and profile. Understanding these interactions helps you optimize your setup for maximum performance.
Twin vs. Directional Boards
True Twin boards are symmetrical from nose to tail. They are designed to ride identically in both directions, making them ideal for park riding, switch riding, and all-mountain freestyle. With a True Twin board, your binding position should be centered, and your angles should be symmetric (duck stance) for the most balanced feel.
Directional boards have a longer nose than tail and are designed to be ridden primarily in one direction. They typically feature setback binding inserts, a stiffer tail, and a more tapered shape. Directional boards benefit from a forward-biased stance with setback bindings. The setback shifts your weight toward the tail, improving powder float and carving power. Boards like the Capita Mercury exemplify this design philosophy.
Directional Twin boards fall between these two categories. They have a twin-like shape but with a directional flex pattern (softer nose, stiffer tail). These boards work well with either centered or mildly setback binding positions, giving you flexibility to tune your stance for different conditions.
Board Flex and Stance Interaction
A board’s flex rating affects how your stance translates into performance. Soft-flexing boards (flex rating 1-4) are more forgiving and respond to subtle weight shifts. They work well with narrower stances and lower binding angles because the board itself provides much of the turning leverage. Stiff boards (flex rating 7-10) require more aggressive stance settings — wider stance, higher angles, more forward lean — because the rider must generate the force needed to bend the board into a turn.
This relationship between flex and stance is why many beginners start on soft boards. A soft board with a moderate stance setup is forgiving of mistakes and makes turning easier. As riders progress and want more precision and speed, they move to stiffer boards and adjust their stance accordingly. The board-stance relationship is a partnership, and both elements must be in harmony for optimal performance.
Board Profile and Stance
Modern snowboards come in various profiles — camber, rocker, flat, and hybrid — and each profile interacts with your stance differently.
Camber boards have an upward curve in the middle, which creates a spring-loaded feel. They respond best to wider stances with more forward lean because the rider needs to apply consistent edge pressure to engage the camber. Camber boards reward aggressive, dynamic riding with precise edge hold and powerful pop.
Rocker boards (reverse camber) curve downward in the middle, with the tips rising earlier. They are more forgiving and work well with narrower stances and less forward lean. Rocker boards excel in powder and park because they float better in soft snow and are less likely to catch edges on rails and boxes.
Flat boards have no curve in the profile, providing a stable platform that works with almost any stance setup. They are predictable and consistent, making them good choices for beginners and jib-focused riders.
Hybrid profiles combine elements of camber and rocker in various configurations. These boards typically work best with moderate stance settings that allow both the camber and rocker zones to engage as designed.
Women-Specific Stance Considerations
Female riders face some unique stance challenges that are worth addressing specifically. Women’s bodies have different proportions than men’s — wider hips relative to shoulder width, shorter torsos, and generally smaller feet — and these differences affect optimal stance setup.
Hip Width and Stance
Women generally have wider hips relative to their shoulders than men. This means that a stance width that is “shoulder width” for a woman may actually be narrower than optimal for her body geometry. Many women benefit from a stance that is slightly wider than their measured shoulder width — perhaps shoulder width plus 1 to 2 inches rather than the standard shoulder width recommendation.
The wider stance also helps with the angle issue created by wider hips. When a woman’s hips are wider than her shoulders, a narrow stance forces her knees to track inward during turns (valgus stress), which can cause knee pain. A slightly wider stance allows the knees to track more naturally over the toes, reducing this stress and improving comfort.
Boot Size and Binding Angles
Women typically have smaller feet, which means their boot-to-board edge overhang is less than men’s. This is actually an advantage for binding angles — women can run slightly wider angle spreads without the boot overhang causing drag during deep carves. A woman with a size 6 boot can run +18/-12 without any toe or heel drag, whereas a man with a size 12 boot might struggle with the same angles on a narrower board.
Women-specific snowboard bindings are designed with this in mind. They typically have a shorter baseplate, lower highback, and smaller strap dimensions to accommodate women’s boot sizes and leg proportions. Using bindings designed for women ensures that the hardware aligns correctly with the boot and provides proper support without excess material that adds weight and reduces board feel.
Body Weight and Board Selection
Board size is determined primarily by weight, and women generally weigh less than men. This means women typically ride shorter boards with narrower waist widths. The narrower board width interacts with stance by limiting the maximum stance width before boot drag becomes an issue. Women should pay particular attention to boot overhang when setting their stance — if the toes or heels of the boots extend beyond the board’s edge, the stance width or binding angles need to be adjusted.
The Switch Paradox and Advanced Progression
Advanced riding involves being able to ride both ways fluently. Learning switch is essentially learning to snowboard all over again. It is why snowboarding can be dangerous for intermediates — your balance is reversed. Always wear a helmet and impact shorts when practicing switch.
If you’re wondering are snowboard lessons worth it, the answer is a resounding yes for switch riding. An instructor can help you un-learn your dominant-foot biases and find symmetry in your carving.
Why Switch Riding Is So Difficult
Switch riding reverses everything about your normal stance. Your dominant leg, which normally provides stability and power from the back, is now in front acting as the guide. Your less dominant leg is now in the back, responsible for power and stability — a role it is not neurologically optimized for. This reversal creates a cascade of challenges: your balance feels off, your turns feel clumsy, your edges feel unpredictable, and your confidence drops.
The neurological challenge of switch riding is significant. Your brain has spent hundreds or thousands of hours building neural pathways for your normal stance. Switch riding requires building entirely new pathways for the reversed position. This is why switch riding feels so foreign even for expert riders — the motor patterns are simply not as developed. The good news is that these pathways can be built with practice, and riders who invest in switch training often find that it improves their regular riding as well, because it develops a more complete understanding of board control.
Progressive Steps for Learning Switch
Learning switch should be approached as a structured progression, not a trial-by-fire approach. Start on the flattest, easiest terrain available — a bunny hill or a gentle catwalk. Begin by simply riding straight on a flat base in the switch direction. Focus on finding your balance point and getting comfortable with the reversed sensation. Once you can ride straight comfortably, begin making gentle turns. Start with heel-side turns (which are the same mechanical movement regardless of stance direction) before progressing to toe-side turns (which feel most different in switch).
The progression should look something like this: straight riding → heel-side traverses → toe-side traverses → linked heel-side turns → linked toe-side turns → linked S-turns → increasing speed → increasing terrain difficulty. Each step should feel comfortable before moving to the next. Rushing through the progression leads to bad habits and frustration.
A particularly effective drill for switch riding is the pendulum exercise: find a gentle slope and ride back and forth across it, alternating between regular and switch on each pass. This forces you to make the stance transition repeatedly, building muscle memory for both directions. Start with wide, lazy passes and gradually tighten them as your switch confidence grows.
Professional Rider Stance Analysis: What the Pros Do Differently
Studying how professional riders set up their stances provides valuable insights for recreational riders. While you should not copy a pro’s setup exactly (their physical abilities and riding demands are very different from yours), understanding their choices can inform your own experimentation.
Park and Freestyle Pros
Professional park riders tend to run highly symmetrical setups — centered bindings with duck stance angles. Many run relatively narrow stances (19″ to 20.5″) to facilitate board rotation. Their angles are typically +15/-15 to +18/-12, providing balanced switch capability. Notably, many top park riders run less forward lean than recreational riders, prioritizing board feel and ankle mobility for rail tricks. The exception is riders who focus primarily on big-air jumps, who may add forward lean for better takeoff and landing control.
Carving and Racing Pros
Professional carving and racing riders run the most aggressive stance setups. Front foot angles of +27 to +36 are not uncommon in competitive alpine snowboarding. Back foot angles are also positive (+15 to +24), creating a forward-facing body position optimized for maximum edge hold and speed. These riders also run wider stances (22″ to 24″) for maximum leverage and use stiff, responsive boots and bindings that transfer every input directly to the board. Recreational riders should approach these extreme angles cautiously — they are optimized for a very specific style of riding and can cause discomfort and injury if used without proper adaptation.
Big Mountain and Freeride Pros
Professional big mountain riders — those who ride steep, challenging terrain at high speeds — use moderately aggressive setups that balance power and control. Front foot angles of +18 to +24 with back foot angles of +3 to +9 are common. Stance widths are typically on the wider side (22″ to 23.5″) for stability at speed. Binding setback is common on directional boards to improve powder float and reduce the tendency to catch the nose on variable terrain. These riders also tend to use stiffer boots and bindings than park riders, prioritizing response and support over comfort and mobility.
All-Mountain Pros
Professional all-mountain riders who need to perform in every condition typically run the most balanced setups. Front foot angles of +15 to +21 with back foot angles of 0 to -9 (mild duck) are the most common. Stance widths fall in the 21″ to 22.5″ range. These setups are versatile enough to handle park laps, groomer carving, powder runs, and variable terrain without major compromise. This is the setup that most recreational all-mountain riders should aspire to — it provides the broadest capability across the widest range of conditions.
Stance Progression: From Beginner to Advanced
Your stance should evolve as your riding progresses. What works for a beginner is not ideal for an intermediate, and what works for an intermediate is not optimal for an advanced rider. Here is how your stance should progress through the skill levels:
Beginner
Centered duck stance (+15/-15). Shoulder-width stance. Soft-flexing board. Low forward lean. Focus on learning balance and basic turns.
Intermediate
Mild duck or forward (+15/-6 or +18/+3). Slightly wider stance. Medium flex board. Moderate forward lean. Focus on linking turns smoothly and speed control.
Advanced
Style-specific angles. Personalized width. Stiff board for carving or flex for park. Increased forward lean for responsiveness. Focus on terrain-specific optimization.
Expert/Pro
Fine-tuned to conditions. Multiple board setups. Precise angle/width combinations. Micro-adjustments for specific terrain. Focus on marginal gains and performance maximization.
The key principle in stance progression is gradual specialization. As a beginner, your setup should be as versatile and forgiving as possible. As you progress, you can afford to specialize your setup for your preferred riding style. And at the expert level, you may want multiple board setups optimized for different conditions — a park board, an all-mountain board, and a powder board, each with its own ideal stance configuration.
Flat Base Riding: The Often-Overlooked Skill
Flat base riding — traveling on the flat base of the board without an edge engaged — is a skill that many riders overlook but that has significant implications for stance comfort and board control. You ride on a flat base whenever you are traversing between turns, riding catwalks, or making gentle speed adjustments on easy terrain.
Flat base riding is where stance comfort is most apparent. If your binding angles cause any rotational stress on your knees or hips, you will feel it most acutely during flat base riding because there is no edge engagement to mask the discomfort. This is why flat base riding is an excellent test for new stance setups: ride a flat catwalk for 200 meters and pay attention to any discomfort in your knees, hips, or ankles. If you feel strain, your binding angles likely need adjustment.
A proper stance for flat base riding places your weight centered over the board’s base with your knees slightly bent and your body relaxed. The board should feel like an extension of your feet, not something you are standing on top of. This “one with the board” feeling is the goal of all stance optimization — when your setup is right, you stop thinking about your feet and start thinking about the terrain ahead.
Speed, Stability, and Stance: The Physics of Going Fast
As your speed increases, the forces acting on your body and board change dramatically. Understanding how stance affects stability at speed is critical for safety as you progress to faster riding.
At low speeds, aerodynamic forces are negligible and balance is primarily a matter of static weight distribution. At high speeds, aerodynamic drag becomes a significant force that pushes against your body. A hunched, compact body position reduces drag and improves stability. Your stance affects this: a wider stance allows you to compress more effectively, lowering your center of gravity and reducing wind resistance.
At high speeds, vibration damping becomes important. Your legs act as shock absorbers, damping the vibrations from rough snow. A stance with slightly more forward lean helps maintain the knee flex needed for effective damping. A stance that is too upright (less forward lean) causes your legs to straighten at speed, transferring vibrations directly to your body and reducing control.
The relationship between speed and edge hold is also stance-dependent. At high speeds, you need maximum edge engagement to maintain control. A wider stance with higher binding angles provides more leverage over the edges, producing better high-speed grip. This is why speed-focused riders tend to run wider, more aggressive stances than park riders or casual cruisers.
When to Wear Protection Based on Your Stance
Your stance and riding style should influence what protective gear you wear. While everyone should wear a helmet, additional protection depends on your stance and terrain:
Park riders with duck stance: Impact shorts are essential because switch landings and rail falls are frequent. Wrist guards protect against forward falls on rails. Knee pads protect against impacts on box and rail features.
Carving riders with aggressive forward stance: Back protectors are valuable because high-speed falls generate significant force. Impact shorts protect against hip injuries from hardpack falls. Kneepads are less critical because carving falls tend to produce sliding rather than impact injuries.
Powder riders with setback stance: Helmets are the primary concern because powder riding often involves tree wells and hidden obstacles. Back protectors provide insurance against unexpected impacts. Impact shorts are less critical because powder provides natural cushioning for falls.
Understanding why snowboarding can be dangerous helps you make informed decisions about protective gear based on your specific stance and riding style. The risk profile of a park rider with a duck stance is very different from a carving rider with aggressive forward angles, and your protection should reflect that difference.
The Science of Muscle Memory and Stance
When you first set up your stance, everything feels awkward and uncomfortable. Your body is not used to the angles, the width, or the alignment. This discomfort is temporary — your body is building motor engrams, which are neural patterns that encode repeated movements. Once a motor engram is established, the movement becomes automatic and requires minimal conscious effort.
The process of building motor engrams for your stance follows a predictable pattern. In the first few sessions, you will be acutely aware of your feet, your angles, and your body position. Everything requires conscious effort. After 5 to 10 sessions, the basic movements (turning, edge changes, weight shifts) begin to feel more natural. After 20 to 30 sessions, the stance feels like a part of you — you stop thinking about it entirely and focus on the terrain and the experience. This is the goal of all stance optimization: a setup so well-calibrated to your body and riding style that it becomes invisible.
This is also why changing your stance after a long period of riding can feel so disorienting. Your motor engrams are calibrated to your old setup, and any significant change requires the engrams to be rewritten. This is not a reason to avoid change — it is a reason to make changes incrementally. Small adjustments (two to three degrees at a time, quarter-inch width changes) allow your motor engrams to adapt gradually without the jarring disruption of a wholesale stance change.
Testing Your Stance on Snow
Living room tests and gear shop measurements can only take you so far. The ultimate test of your stance is how it performs on the mountain. Here is a systematic approach to testing and refining your stance on snow:
Session 1 — Baseline: Ride your current setup for at least an hour. Pay attention to comfort, control, and any areas of strain. Note specific issues: “knee hurts on toe-side turns,” “hard to initiate heel-side turns,” “feel unstable at speed.” These observations are your baseline.
Session 2 — One Change: Make one adjustment to your setup — change one binding’s angle by two to three degrees, or adjust your stance width by a quarter inch. Ride for at least half a day and note whether the change improved or worsened the issues you identified in Session 1.
Session 3 — Confirm or Revert: If Session 2’s change helped, keep it and consider making another small adjustment. If it did not help, revert the change and try a different adjustment. Continue this iterative process until your setup feels right.
The 10-Day Rule: Give any stance change at least 10 riding days before making another adjustment. Your body needs time to adapt to the new setup and build new motor engrams. Changing your stance after every session prevents adaptation and keeps you in a perpetual state of discomfort. Be patient — the payoff for allowing your body to adapt is a setup that feels natural and effortless.
Expert FAQ: Snowboard Stance Mastery
Yes, roughly 70% of riders are Regular. However, being Goofy is not a disadvantage; it simply means your right foot is more adept at leading turn transitions.
Technically yes, but it is rare. Once your neurological pathways for edge control are established, switching your permanent lead foot is incredibly difficult. However, you can develop strong switch riding ability while maintaining your natural stance.
No, your Goofy or Regular designation stays the same, but your weight distribution changes. You will lean back on your “rudder” foot more to keep the nose afloat, regardless of your stance. Consider adjusting your binding setback for powder days.
Mongo is a skating term for pushing with your front foot. In snowboarding, if you unstrap and push with your front foot, it is awkward and inefficient. Always push with your back foot. This is another indicator of your dominant leg — whichever foot you naturally push with on flat ground is likely your back foot.
They ride “Switch.” They still have a preferred stance for big jumps and primary tricks, but they can carve and land in the opposite stance fluently. Developing switch ability is one of the hallmarks of advanced riding.
No, board size is determined primarily by weight and height. Stance only affects where you mount the bindings on that board. However, your stance width must be compatible with the board’s insert pattern — some short boards do not support very wide stances.
Trust the Slide Test. It involves forward momentum, which is the primary state of snowboarding. If the tests give different results, perform each test 5 to 10 times and go with the result that is most consistent within each individual test.
Absolutely. Higher binding angles, wider stance, and more forward lean all improve carving performance. A heelside turn for a Goofy rider is the same mechanical movement as a heelside turn for a Regular rider, but your binding angles determine how efficiently you can execute that movement.
For beginners, yes. A symmetrical duck stance (+15/-15) helps you find your center and develop balanced skills. As you progress, you can experiment with asymmetrical angles that favor your primary riding direction.
Yes, it is called being cross-dominant. These riders often become the best park and freestyle riders because riding switch comes naturally to them. If your three stance tests give inconsistent results, you may be cross-dominant — embrace it as an advantage.
Re-evaluate at the start of each season and after every 10 to 15 riding days if you notice discomfort. Small changes (2-3 degrees) are usually all that is needed. Avoid changing angles mid-session — make changes and commit to them for at least a full day.
Indirectly. Larger boots may require a slightly wider stance to avoid toe and heel drag (where the boot contacts the snow during deep carves). If you have large feet (size 11+), test your stance width at various angles to ensure no drag occurs at maximum lean angles.
Yes. A True Twin park board benefits from centered bindings and duck angles. A directional powder board benefits from setback bindings and forward-biased angles. An all-mountain board sits in between. Match your stance to the board’s intended purpose.
Chronic misalignment can contribute to repetitive stress injuries in the knees, hips, and lower back. If you experience persistent pain (not just soreness), re-evaluate your stance width, binding angles, and forward lean. Persistent pain should also be evaluated by a medical professional.
As riders age, they often benefit from slightly narrower stances (less strain on hips), reduced forward lean (less knee flex demand), and softer binding settings (more comfort). The fundamental stance principles remain the same, but the settings may need to be adjusted for comfort and joint health.
Stance width is the distance between your binding centers. Effective edge is the length of the board’s metal edge that actually contacts the snow during a turn. A wider stance can increase effective edge by putting more of the board’s sidecut in contact with the snow, producing better grip and a tighter turn radius.
Yes. Hardpack and ice benefit from wider stances with more forward lean for maximum edge hold. Powder benefits from setback stances with wider bases for flotation. Slush and spring conditions benefit from centered stances with moderate angles for playful, surfy riding.
Stand in your riding stance with your knees slightly bent. Your shins should be pressing lightly against the front of your boot tongues. If there is a gap between your shin and the tongue, increase forward lean. If your knees feel forced into an extreme bend, reduce forward lean. The right forward lean maintains gentle shin-to-tongue contact in the athletic stance.
You can use the same angles, but stance width may need to change depending on the board’s waist width and insert pattern. Always measure and verify that your desired stance width falls within the board’s supported range before drilling or mounting.
Getting your Goofy vs. Regular designation correct. All other adjustments — width, angles, forward lean, setback — are refinements. If your fundamental stance direction is wrong, no amount of angle tweaking will compensate. Take the three tests, confirm your result, and build from there.
Conclusion
Finding your stance is the key that unlocks the mountain. It allows you to move from the bunny hill to backcountry snowboarding with confidence. Don’t overthink it — trust your body’s natural instincts. Once your bindings are set, focus on waxing your board and getting your goggles ready for a trip to Colorado.
Your stance is not a static measurement — it is a living, evolving aspect of your riding that should grow with your skills. Start with the fundamentals covered in this guide: confirm your Goofy or Regular designation with the three tests, set your stance width within the recommended range, choose binding angles that match your riding style, and fine-tune your body alignment with the athletic stance principles. Then ride, observe, adjust, and repeat.
The journey from stance novice to stance master is one of the most rewarding progressions in snowboarding. Every adjustment you make teaches you something about how your body interacts with the board and the mountain. Pay attention to the feedback your body gives you, be willing to experiment, and remember that the best stance is the one that feels invisible — the one where you stop thinking about your feet and start thinking about the line ahead.
Whether you are just starting out and need to answer the fundamental Goofy vs. Regular question, or you are an intermediate rider looking to optimize your setup for better carving, or an advanced rider fine-tuning your angles for backcountry adventures, this guide has provided the knowledge you need. The mountain is waiting — strap in, trust your stance, and ride with confidence.


