
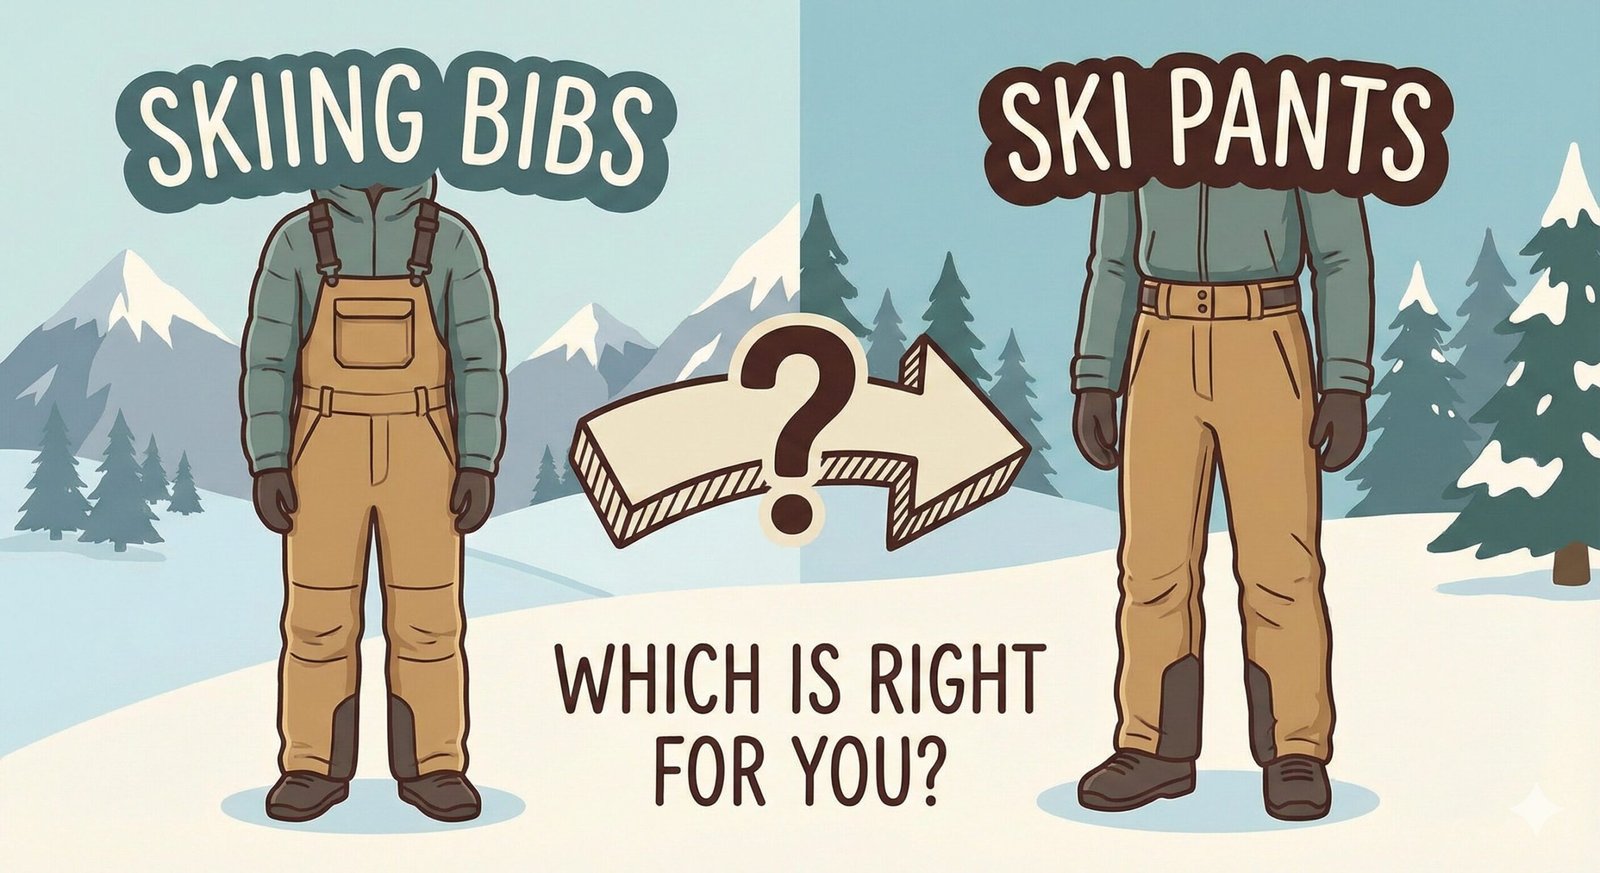
Ski Bibs vs. Pants: The Ultimate Outerwear Showdown
There is a specific feeling that every rider knows, and it is usually the moment that ruins a perfect day. You take a tumble in deep powder, or perhaps you just sit down to strap in, and suddenly—ice cold snow finds its way down your pants and up your back. It is the jarring, freezing reminder that your gear has a gap.
This single moment is at the heart of the great debate: Ski Bibs vs. Pants. Choosing the right outerwear is just as critical as knowing when is the best time to buy snowboarding gear or ensuring your heel doesn’t lift in your boots. It determines your temperature regulation, your range of motion, and ultimately, how long you stay on the mountain.
Whether you believe snowboarding is the best winter sport or you prefer two planks, the pants-vs-bibs decision affects everyone. In this comprehensive guide, we will break down the pros, cons, and performance metrics of each style.
Choose Bibs if you prioritize warmth, deep powder protection, and extra storage. They prevent snow from getting down your back and offer a more secure fit without a belt. Best for backcountry and cold days.
Choose Pants if you prioritize ventilation, ease of bathroom breaks, and a traditional “freestyle” look. They are generally cooler, less expensive, and easier to put on. Best for resort riding, park laps, and spring skiing.
1. The Case for Bibs (The Dungaree Style)
Bibs have seen a massive resurgence in the last decade. Once thought of as “farmer gear” or strictly for toddlers, they are now the mark of a serious rider. A bib extends above the waist, usually covering the chest and back, held up by suspenders.
The “Fortress of Solitude” Factor
The primary advantage of a bib is the seal. Because the fabric goes up to your chest, it is nearly impossible for snow to get inside your layers. If you are into backcountry snowboarding or riding deep Japanese powder, bibs are almost mandatory. Falling in deep snow wearing regular pants often results in a wet lower back, which leads to a shortened day.
Comfort and Waist Management
Standard snow pants rely on a waistband, snaps, and often a belt to stay up. This creates a pressure point across your stomach, which can be uncomfortable after a big lunch or when bending over to buckle bindings. Bibs hang from your shoulders. This eliminates waist restriction, offering incredible freedom of movement—something crucial when you are learning how to carve deeply.
Pros of Bibs
- Snow Proof: No gaps between jacket and pants.
- Warmer: An extra layer of fabric over your core (kidneys and chest) retains body heat.
- Storage: Chest pockets are perfect for keeping your phone warm (saves battery) or storing snacks.
- Style: Offers a distinct aesthetic that pairs well with baggy snowboard style.
Cons of Bibs
- The Bathroom Issue: Going #2 is complicated. Unless you have a “drop seat” feature, you often have to take off your jacket and mid-layers to lower the bibs.
- Heat: On spring days, that extra core coverage can make you overheat.
- Cost: They generally use more fabric and hardware, adding to how expensive snowboarding is.
2. The Case for Pants (The Traditionalist)
Pants are the classic choice. They function exactly like your jeans but are waterproof and insulated. While bibs are trendy, pants remain the volume seller for a reason: simplicity.
Ventilation and Versatility
If you ride at snowboarding resorts for beginners or warmer locations like California, pants might be superior. They allow heat to escape from your waist area. Most snow pants also feature inner-thigh vents (mesh lined) that create a cross-breeze.
Furthermore, pants are easier to put on in the parking lot. You don’t have to wrestle with suspender straps underneath your hoodie. They are “grab and go.”
The Impact Short Integration
One consideration is what you wear underneath. If you wear impact shorts for protection (which we highly recommend), pants can sometimes feel bulky around the waist when you add a belt. However, modern pants with adjustable velcro waist tabs largely solve this issue.
Pros of Pants
- Ventilation: Much cooler for spring riding and hiking.
- Simplicity: Easy on, easy off. No shoulder strap fatigue.
- Bathroom Access: Standard fly and button makes life much easier in the lodge.
- Price: Usually $50-$100 cheaper than comparable bibs.
Cons of Pants
- The “Plumber’s Crack”: Bending over to strap in can expose your lower back to the cold.
- Snow Ingress: A bad tumble means snow in your underwear.
- Belt Requirement: You often need a belt to keep them up, which can dig into your gut.
Detailed Comparison Matrix
For a visual breakdown, Columbia Sportswear also offers a great perspective on ski bibs vs pants regarding layering. Here is our technical comparison:
| Feature | Ski/Snowboard Bibs | Ski/Snowboard Pants |
|---|---|---|
| Deep Snow Protection | Excellent (10/10) | Moderate (6/10) |
| Warmth | High (Covers Core) | Medium (Legs Only) |
| Breathability | Lower (Traps Heat) | Higher (Vents at Waist) |
| Convenience (Restroom) | Low (Complex) | High (Simple) |
| Fit/Comfort | Suspended (No waist pressure) | Waist-Dependent (Belt needed) |
| Best For | Powder, Backcountry, Cold | Park, Spring, Resort |
Fit and Style: The “Baggy” Factor
Snowboarding culture has always leaned towards a relaxed fit. Whether you choose pants or bibs, ensuring you have range of motion is key. You need to be able to squat deep to absorb landings or sit comfortably on the snow.
We have a dedicated guide on the best baggy snowboard pants, but the rule of thumb is:
Bibs tend to look better when baggy because they hang from the shoulders and don’t bunch up at the waist.
Pants require a precise fit at the hips to prevent them from falling down, even if the legs are baggy.
Compatibility with Other Gear
Your choice affects your other gear:
- Jackets: With bibs, you can wear a shorter jacket or even a hoodie on warm days without fear of snow exposure. With pants, you need a jacket with a “powder skirt” that snaps into the pants to create a seal.
- Boots: Both styles feature elastic gaiters that go over your boots. Ensure the gaiter is wide enough to fit over your specific boot model (check our K2 review for bulky boot examples).
- Gloves: Bibs often have kangaroo pockets. This is a great place to store your mittens during lunch so they don’t get lost or cold.
Top Amazon Picks
Based on durability, waterproofing (Gore-Tex vs. proprietary), and price, here are the top picks for both categories.

Burton Reserve Bib
The gold standard. Stylish, highly waterproof (Gore-Tex available), and features plenty of chest storage. A favorite among pros.
View on Amazon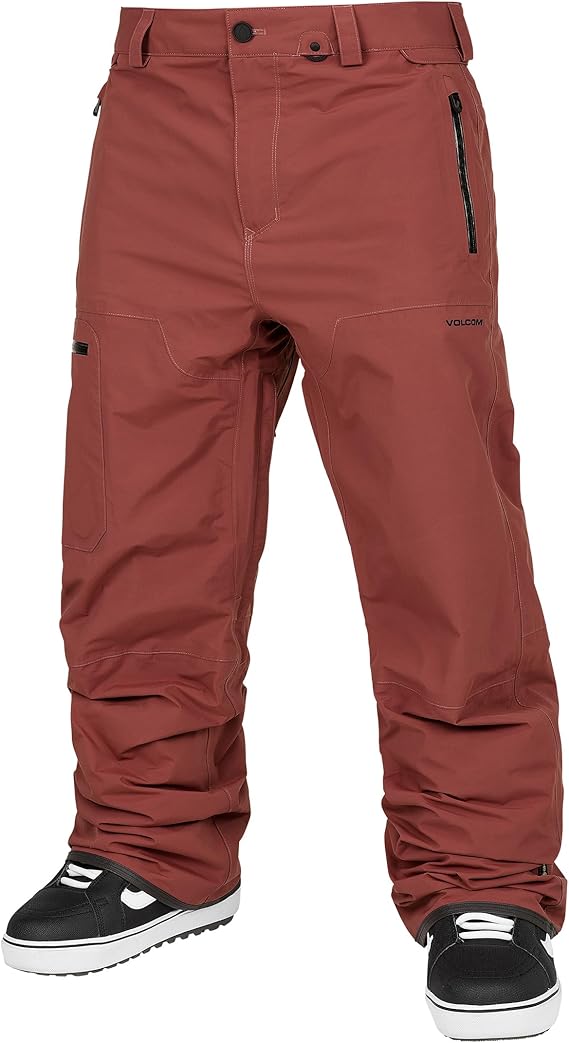
Volcom L Gore-Tex Pant
Features the “Zip Tech” interface that zips directly into Volcom jackets, giving you bib-like protection with the freedom of pants.
View on Amazon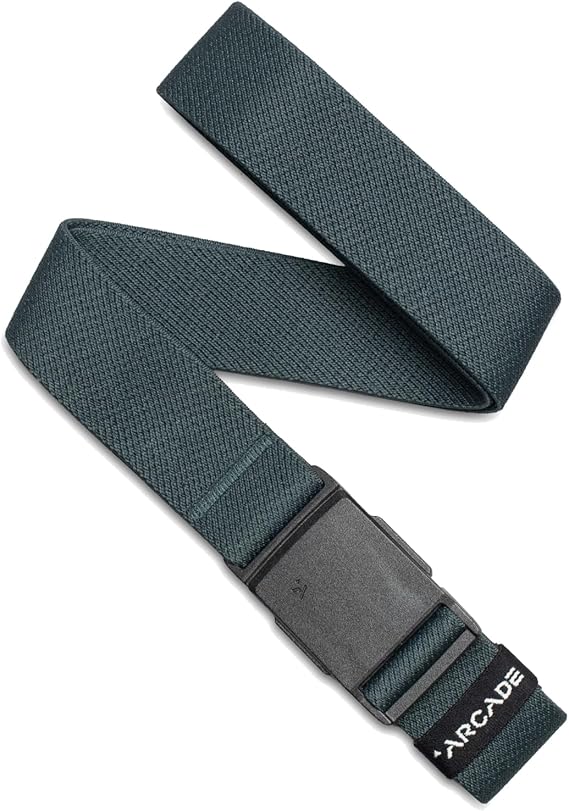
Arcade Ranger Belt
If you choose pants, you need this belt. It’s elastic, stretchy, and has a flat buckle that won’t dig into your stomach when you bend over.
View on AmazonUnderstanding Waterproof Ratings: 5K, 10K, 15K, 20K, and Beyond
Before you decide between ski bibs vs. pants, you need to understand the single most important number on any piece of snow outerwear: the waterproof rating. This number, measured in millimeters (mm), tells you how much water pressure the fabric can withstand before it starts to leak through. Think of it as a shield’s durability — the higher the number, the stronger the barrier between you and the wet snow.
Waterproof ratings are determined using a hydrostatic head test, where a tube of water is placed on top of the fabric and the height of the water column is measured in millimeters before moisture penetrates the material. A rating of 5,000mm means the fabric can withstand a 5,000mm tall column of water before leaking. While this sounds technical, the practical implications are straightforward: higher numbers mean drier days on the mountain.
Breaking Down the Rating Scale
5,000mm (5K): This is the entry-level waterproof rating. You will find this on budget snow pants and some recreational bibs. A 5K rating can handle light snowfall and brief exposure to moisture, but it will quickly become overwhelmed during heavy storms or extended sessions in wet conditions. If you only ride a handful of times per season in dry, cold conditions, 5K might be adequate. However, for anyone who rides regularly, this rating is insufficient. At this level, moisture will eventually seep through, especially in high-wear areas like the seat and knees where the fabric stretches and compresses against wet surfaces.
10,000mm (10K): This is the sweet spot for recreational riders and the most common rating you will find on mid-range snow pants and bibs. A 10K rating handles moderate snowfall, light rain, and sustained exposure to wet conditions reasonably well. Most riders who stick to resort groomers and occasional off-piste adventures will find 10K more than adequate. At this level, you are getting a meaningful barrier against moisture that will keep you dry through a full day of resort riding in typical winter conditions.
15,000mm (15K): This is where serious riders start to pay attention. A 15K rating handles heavy snowfall, wet conditions, and extended backcountry exposure with confidence. If you ride in the Pacific Northwest where wet, heavy snow is the norm, or if you spend hours in the backcountry where you cannot simply duck into a warm lodge, 15K is your minimum threshold. At this rating, you are getting a genuinely waterproof garment that will keep you dry even when sitting in deep snow for extended periods or riding through a wet spring storm.
20,000mm (20K) and above: This is the premium tier. A 20K rating means near-total waterproofing under extreme conditions. Professional riders, dedicated backcountry enthusiasts, and anyone who rides in consistently wet or harsh environments should look for 20K or higher. Brands like Burton, Arc’teryx, and Patagonia offer 20K-rated bibs and pants that use advanced membrane technologies like Gore-Tex to achieve this level of protection. At this tier, you are paying a premium, but you are also getting gear that will keep you dry in virtually any condition the mountain can throw at you.
Many budget snow pants advertise being “water-resistant” rather than “waterproof.” Water-resistant means the fabric repels light moisture but will eventually soak through under sustained exposure. Waterproof means the fabric has a membrane or coating that prevents water from penetrating. Always look for an explicit waterproof rating (in mm) rather than vague claims about “weather resistance.” If a product does not list a specific waterproof rating, assume it is water-resistant at best and plan accordingly.
How Waterproof Ratings Apply to Bibs vs. Pants
Here is a nuance that many riders overlook: the waterproof rating of the fabric does not account for where water actually enters your layers. A pair of pants with a 20K waterproof rating on the legs is still vulnerable to snow entering from the waist gap when you bend over or take a tumble. A bib with a 10K rating on the chest panel may actually keep you drier overall because it physically blocks snow from entering — even if the fabric itself is theoretically less waterproof.
This is why many experienced riders consider bibs to be the superior choice for deep snow and wet conditions, even when the fabric rating is lower than a comparable pair of pants. The physical barrier of the bib chest panel does more to prevent snow ingress than any amount of membrane technology can achieve on a pair of pants with an open waist. When evaluating ski bibs vs. pants for wet conditions, think about both the fabric rating AND the design of the garment.
That said, if you are comparing two garments with the same design (both bibs or both pants), the waterproof rating becomes the deciding factor. In that apples-to-apples comparison, a 20K bib will outperform a 10K bib, and a 20K pair of pants will outperform a 10K pair of pants. The rating matters most when comparing like with like.
Insulated vs. Shell: Choosing the Right Warmth Level
Beyond the waterproof rating, the second most important decision you will make is whether to go with insulated or shell (uninsulated) outerwear. This choice applies equally to both bibs and pants, and it has a massive impact on your comfort throughout the day.
Insulated Bibs and Pants
Insulated snow outerwear comes with built-in warmth. The insulation is typically either synthetic (like PrimaLoft or Thinsulate) or, less commonly, down. The insulation is measured in grams — usually ranging from 40g for lightweight warmth to 200g+ for extreme cold. Here is a general breakdown:
- 40g-60g insulation: Lightweight warmth for mild winter days. Suitable for spring skiing or riders who run warm. This level of insulation adds minimal bulk and allows for good mobility, but it will not keep you comfortable in sub-zero temperatures without proper layering underneath.
- 80g-100g insulation: The most common mid-range option. This is ideal for typical resort riding in cold but not extreme conditions. It provides enough warmth for all-day comfort without making you feel like a marshmallow. Most riders will find this insulation level to be the best balance of warmth and mobility.
- 140g-200g+ insulation: Heavy-duty warmth for extreme cold, late-season night skiing, or riders who spend extended time stationary (like ski patrollers or lift operators). This level of insulation can feel bulky and may cause overheating during high-output activities like hiking or riding through variable terrain.
The advantage of insulated gear is simplicity — you put it on and you are warm. There is no guessing about layering systems or worrying about whether your base layer is sufficient. The disadvantage is that insulation is a one-way street: once you overheat, there is no way to reduce the warmth without removing layers entirely. This is why insulated pants can be problematic on warm spring days, and why insulated bibs — which cover your core — can turn into a portable sauna during high-output riding.
Shell Bibs and Pants
Shell outerwear is uninsulated. It consists of the outer waterproof/breathable fabric without any added warmth. Shell bibs and pants are essentially a protective shell that blocks wind and moisture while allowing you to control your warmth entirely through your layering system underneath.
The shell approach has several significant advantages. First, it is incredibly versatile. By adjusting your base layer and mid-layer, you can wear the same shell bibs or pants in conditions ranging from 30 degrees Fahrenheit to below zero. A thin merino wool base layer provides enough warmth for spring riding, while a thick fleece or puffy mid-layer turns the same shell into an arctic-ready system. This versatility means you can buy one quality shell and adapt it to any condition, rather than owning multiple insulated garments for different temperature ranges.
Second, shell outerwear is lighter. Without the weight and bulk of insulation, shell bibs and pants feel noticeably lighter on the body. This reduced weight improves mobility and reduces fatigue over a full day of riding. For backcountry enthusiasts who hike uphill for their turns, the weight savings of a shell system can be the difference between energy for one more run or an exhausted trudge back to the car.
Third, shell outerwear breathes better. Insulation traps heat, and while modern synthetic insulation is designed to be breathable, it still cannot match the airflow of a shell. If you are an aggressive rider who generates a lot of body heat, a shell will keep you much more comfortable during high-output sessions. This is especially relevant when comparing bibs vs. pants, because insulated bibs trap significantly more heat than insulated pants due to their core coverage.
Choose shell bibs or pants if: (1) you ride in a wide range of temperatures, (2) you are an aggressive rider who generates a lot of body heat, (3) you want maximum versatility from a single garment, (4) you are a backcountry rider who hikes for turns, or (5) you want the lightest possible option. Choose insulated if: (1) you ride primarily in very cold conditions, (2) you prefer simplicity over layering, (3) you do not ride aggressively enough to overheat, or (4) you are a beginner who does not want to invest in a full layering system.
The Hybrid Approach: Removable Insulation
Some manufacturers offer bibs and pants with removable or zip-out insulation liners. This gives you the best of both worlds: wear the insulation during cold snaps and remove it for spring conditions. While this hybrid approach adds some weight and complexity (the attachment points can create drafty spots), it is an excellent option for riders who want maximum versatility without owning two separate garments. Brands like The North Face, Columbia, and Helly Hansen have popularized this approach with their “zip-in” liner systems.
When evaluating a hybrid system, pay close attention to how the liner attaches. Velcro attachments tend to degrade over time and can create uncomfortable bunching. Zip-in systems are more durable but add weight and potential failure points. Button or snap systems are the simplest but may not provide as secure a fit. The best hybrid systems use a combination of zippers and snaps to create a secure, gap-free connection between the shell and the liner.
Waterproof Ratings Explained: Gore-Tex, eVent, and Proprietary Membranes
Understanding waterproof ratings is only half the story. The technology behind the waterproofing matters just as much as the numbers themselves. Not all 15K-rated garments are created equal — the membrane technology, construction quality, and seam sealing all play critical roles in real-world performance.
Gore-Tex: The Gold Standard
Gore-Tex is the most recognized name in waterproof-breathable technology, and for good reason. The Gore-Tex membrane is an expanded polytetrafluoroethylene (ePTFE) membrane with approximately 9 billion pores per square inch. Each pore is 20,000 times smaller than a water droplet but 700 times larger than a water vapor molecule. This means liquid water cannot penetrate from the outside, but sweat vapor can escape from the inside.
Gore-Tex comes in several variants, each designed for different use cases:
- Gore-Tex Standard: The baseline offering. Fully waterproof and breathable with a manufacturer’s guarantee. If the garment fails to keep you dry under normal use, Gore-Tex will repair or replace it. This is the most common variant found in ski and snowboard outerwear.
- Gore-Tex Active: Designed specifically for high-output activities. It is lighter, more breathable, and more comfortable during sustained exertion. Ideal for backcountry riders who hike for their turns. However, it is slightly less durable than standard Gore-Tex and may not hold up as well to abrasion from chairlifts and rugged terrain.
- Gore-Tex Pro: The premium offering. The most waterproof, most breathable, and most durable variant. Used in top-tier outerwear designed for extreme conditions. Gore-Tex Pro garments typically carry the highest price tags but offer the best overall performance. If you want the absolute best waterproofing available, look for Gore-Tex Pro.
- Gore-Tex Infinium: Windproof and water-resistant but NOT fully waterproof. This is designed for high-output activities where breathability is more important than absolute waterproofing. Not recommended for deep powder or wet conditions, but excellent for backcountry touring in cold, dry conditions where wind protection is the priority.
eVent: The Breathability Champion
eVent is Gore-Tex’s main competitor, and it uses a different approach to achieve waterproof-breathable performance. While Gore-Tex relies on a polyurethane (PU) coating to manage moisture transmission, eVent uses a direct ventilation technology that allows air to pass directly through the membrane. This means eVent membranes are generally more breathable than Gore-Tex, especially during high-output activities.
The trade-off is that eVent membranes can be slightly less durable than Gore-Tex, and they are less commonly available in snow sports outerwear. However, for riders who prioritize breathability over everything else — particularly backcountry enthusiasts who generate enormous amounts of heat during uphill travel — eVent is an excellent choice. Brands like Outdoor Research and Mountain Hardwear have adopted eVent in several of their premium snow bibs and pants.
Proprietary Membranes: The In-House Solutions
Many brands develop their own proprietary waterproof-breathable membranes to offer competitive performance at lower price points. These membranes can be surprisingly effective:
- Burton DryRide: Burton’s proprietary membrane technology. Available in multiple tiers (DryRide 2L and DryRide 3L), it offers solid waterproofing and breathability at a more accessible price than Gore-Tex. DryRide 3L is comparable to mid-range Gore-Tex in terms of performance.
- Volcom Zip Tech: While primarily known for its jacket-to-pant interface system, Volcom also offers proprietary waterproofing technology in their higher-end garments. When combined with Zip Tech, even their mid-range pants achieve bib-like protection.
- The North Face DryVent: Available in multiple levels (DryVent 2L, 2.5L, and 3L), this membrane offers graduated performance. DryVent 3L approaches Gore-Tex levels of waterproofing while remaining significantly more affordable.
- Columbia Omni-Tech: Columbia’s waterproof-breathable membrane used across their snow pants and bibs. While not as breathable as Gore-Tex, Omni-Tech offers excellent value for recreational riders who stick to resort groomers.
- Helly Hansen HELLY TECH: Available in Professional, Plus, and Secret tiers, this membrane technology delivers reliable waterproofing across a range of price points. HELLY TECH Professional is the premium offering and performs well in demanding conditions.
- REI Co-op Xpert: REI’s house brand membrane used in their proprietary snow outerwear. Offers solid performance at REI’s typically competitive price point, backed by REI’s generous return policy.
Even the best membrane technology will fail if the garment’s construction is poor. Look for fully taped or critically taped seams, robust zippers (YKK is the industry standard), and reinforced panels in high-wear areas. A $300 pair of pants with a Gore-Tex membrane and fully taped seams will outperform a $500 pair of pants with Gore-Tex but poorly sealed seams. Construction quality matters as much as the membrane technology itself.
How to Layer Under Bibs and Pants: The Complete Layering System
Choosing between ski bibs vs. pants is only one part of the equation. How you layer underneath your outerwear has an enormous impact on your warmth, comfort, and moisture management throughout the day. The three-layer system — base layer, mid-layer, and outer layer — is the foundation of all cold-weather comfort, and understanding how each layer interacts with your bibs or pants is essential.
Base Layers: The Foundation
Your base layer sits directly against your skin and is responsible for moisture management. The primary job of a base layer is to wick sweat away from your body and move it to the outer surface of the fabric where it can evaporate. This is critical because wet skin loses heat 25 times faster than dry skin — meaning that even a thin layer of sweat can make you feel significantly colder than dry skin would in the same conditions.
For snow sports, the two most common base layer materials are merino wool and synthetic fabrics (polyester or polypropylene). Merino wool is the premium choice: it is naturally temperature-regulating, odor-resistant, incredibly soft against the skin, and maintains warmth even when damp. The downside is that merino wool base layers are more expensive ($60-$120 for a top) and require more careful washing to maintain their performance. Synthetic base layers are more affordable, dry faster, and are more durable, but they tend to develop odor over time and do not regulate temperature as effectively as merino wool.
When layering under bibs, the base layer becomes especially important because bibs cover your core. A merino wool base layer top provides additional warmth over your chest and back, where the bib fabric sits closest to your body. With pants, your base layer top is less critical for warmth (since pants only cover your legs), but it remains essential for moisture management — especially under the waistband where sweat can accumulate.
The weight of your base layer should correspond to the conditions. Lightweight base layers (150g/m2) are ideal for spring riding or high-output backcountry touring. Midweight base layers (200-250g/m2) are the most versatile and work well in typical winter conditions. Heavyweight base layers (300g/m2+) are designed for extreme cold and are best paired with shell outerwear in sub-zero temperatures.
Mid-Layers: The Warmth Regulator
Your mid-layer provides the majority of your insulation. This is the layer you can add or remove to adjust your warmth throughout the day. Common mid-layer options include fleece jackets, softshell jackets, insulated vests, and lightweight down or synthetic puffy jackets.
The choice of mid-layer interacts differently with bibs vs. pants. Under bibs, the mid-layer adds warmth to your core, which is already partially insulated by the bib fabric itself. This means you can often get away with a lighter mid-layer under bibs than you would under a jacket alone. Under pants, the mid-layer is less relevant for your lower body (since pants provide their own insulation) but remains critical for your upper body under your jacket.
A popular approach among experienced riders is to wear a midweight fleece or softshell mid-layer under their jacket, paired with a lightweight merino base layer under their bibs or pants. This provides consistent warmth without excessive bulk. For colder days, upgrading to a puffy mid-layer (down or synthetic) provides a significant boost in warmth with minimal additional weight.
The key to comfortable riding is being able to regulate your temperature throughout the day. Start slightly cool — if you are warm at the base, you will overheat on the first run. Your layering system should allow you to add or remove a mid-layer at the lodge or on the lift. With bibs, consider carrying a packable mid-layer in your chest pocket (the warmth from your body will keep it from getting cold and crumpled). With pants, keep your mid-layer in your locker or pack. The ability to quickly adjust your layering is the difference between a comfortable day and a miserable one.
Base Layer Bottoms: The Often Overlooked Essential
Many riders neglect base layer bottoms, but they play a crucial role in warmth and comfort, especially under bibs. Under bibs, the base layer bottom provides an additional layer of insulation over your legs while also creating a smooth surface that allows the bibs to slide on and off more easily. Under pants, base layer bottoms prevent chafing from the pant’s inner lining and add warmth without bulk.
Merino wool base layer bottoms are particularly effective under bibs because the natural temperature regulation of merino wool prevents overheating in the hip and thigh area, where bibs can sometimes trap excess heat. Synthetic base layer bottoms work well under pants, where the primary function is moisture wicking and preventing the pant fabric from sticking to your skin during high-output riding.
For spring skiing or warm-weather riding, lightweight base layer bottoms (or even no base layer at all under pants) may be sufficient. For cold-weather riding, midweight or heavyweight base layer bottoms provide essential warmth that complements your outerwear. When choosing base layer bottoms, ensure they have a smooth, non-bulky waistband that will not create pressure points under your pants’ waistband or bibs’ lower edge.
Snow Pants for Different Riding Styles: Park, Powder, and Groomers
Not all snowboarders and skiers ride the same way, and the optimal outerwear choice varies significantly depending on your primary riding style. Whether you spend your days in the terrain park, hunting for powder stashes, or cruising groomed runs, understanding how bibs and pants perform in each scenario will help you make a better choice.
Park Riding: Pants Often Win
Terrain park riders face unique demands. They need maximum mobility for executing tricks, quick ventilation for hiking features, and easy on/off for long lodge sessions. In this context, pants often have a slight edge over bibs. The reasoning is straightforward: park riding involves frequent transitions between riding and resting. You are constantly taking your jacket on and off, adjusting gear, and moving between the park and the lodge. Pants simplify these transitions significantly.
Park riders also tend to prefer a looser, more relaxed fit that does not restrict movement. While baggy bibs exist, they can feel more restrictive than baggy pants because the suspender system limits how low you can wear the waistband. Many park riders also wear impact shorts underneath for protection during hard landings, and the waistband of pants accommodates the extra bulk of impact shorts more naturally than the lower edge of a bib.
Ventilation is another factor in favor of pants for park riders. Terrain park sessions are high-output activities — you are hiking features, hiking back up for another hit, and generating a lot of body heat. Pants with large inner-thigh vents allow you to cool down quickly between runs, while bibs trap more heat around your core. On warm spring park days, this ventilation advantage can be the difference between comfortable laps and a sweaty, overheated mess.
That said, some park riders prefer bibs for the style factor. Bibs have become increasingly popular in park culture, with brands like Burton, Volcom, and 686 offering park-specific bib designs with slimmer cuts and fewer pockets. If you prefer the bib aesthetic and do not mind the slightly more complex layering and restroom logistics, there is no reason you cannot wear bibs in the park.
Powder Riding: Bibs Dominate
When the snow is deep and the conditions are wet, bibs are the clear winner. The reasoning comes down to physics: when you fall in deep powder with pants, the snow has a clear path to enter through the waist gap. It does not matter how waterproof the pant fabric is if the snow bypasses the fabric entirely and enters through the opening at your waist. Bibs eliminate this problem by extending the waterproof barrier up to your chest, creating an enclosed system that prevents snow from entering regardless of how many times you tumble.
Powder riders also benefit from the additional warmth that bibs provide. Deep powder days are typically cold days, and the extra core insulation from a bib helps maintain body temperature during long, cold chairlift rides and extended sessions in the trees. The chest pockets of bibs are also invaluable for powder days — keeping your phone warm prevents battery drain, and having quick access to snacks and trail maps without removing your jacket is a significant convenience.
For dedicated powder riders, we recommend insulated bibs with a waterproof rating of 15K or higher. The combination of insulation for warmth and high waterproofing for wet conditions creates the ideal powder-day outerwear system. If you prefer to layer rather than use insulation, shell bibs with a 20K or higher rating paired with a heavy mid-layer provide equivalent performance with more versatility.
Research from the snow sports industry consistently shows that riders who wear bibs in deep powder conditions stay on the mountain an average of 1.5-2 hours longer than riders wearing pants. The primary reason is reduced discomfort from snow ingress. A single snow-in-your-pants incident can lower your core temperature and reduce your enjoyment for the remainder of the day. Bibs prevent this entirely, making them the superior choice for any rider who prioritizes powder days.
Groomer Riding: Either Works, But Pants Have Advantages
For riders who stick primarily to groomed runs, the bibs vs. pants debate is less clear-cut. Groomed runs do not involve the deep snow exposure that makes bibs so valuable in powder, and the consistent conditions mean that either option will perform well. However, pants offer several practical advantages for groomer-focused riders.
First, groomer riders tend to be resort-focused, which means they spend a lot of time in the lodge — warming up, eating lunch, using the restroom, and socializing. Pants are simply easier to deal with in these scenarios. You can use the restroom without removing layers, adjust your fit without removing your jacket, and change base layers without a complicated process of removing suspenders and bib panels.
Second, groomer riding is often less physically demanding than powder or backcountry riding, which means temperature regulation is less of a concern. The ventilation advantage of pants may not be as relevant for casual groomer cruising, but the ease of adjustment remains valuable.
Third, groomer riders often ride in a wider range of conditions — from cold mornings to warm afternoons — because they are not specifically seeking out powder days. Pants provide more flexibility in these variable conditions because they are easier to layer under and vent.
For groomer-focused riders, we recommend a quality pair of pants with a 10K-15K waterproof rating and 80-100g insulation. This provides more than enough protection for typical resort conditions while maintaining the comfort and convenience that pants offer.
Snowboard Bibs vs. Ski Bibs: What Is the Difference?
Many riders wonder whether there is a meaningful difference between snowboard bibs and ski bibs. The short answer is that the fundamental design is the same — both are bib-style outerwear that covers the chest and back with suspender support. However, there are subtle differences in cut, features, and fit that reflect the different demands of each sport.
Mobility and Cut
Snowboard bibs tend to have a looser, more relaxed fit that accommodates the wider range of motion required for snowboarding. Snowboarding involves more bending, squatting, and twisting than skiing — particularly when strapping in at the base, absorbing landings from jumps, and navigating through trees. The looser cut of snowboard bibs allows for these movements without restricting your range of motion.
Ski bibs, on the other hand, tend to have a more streamlined, athletic fit that reflects the generally more upright posture of skiing. Skiers spend less time squatting and twisting than snowboarders, so the fit does not need to accommodate as wide a range of motion. This does not mean ski bibs are uncomfortable — they are designed for the specific movements of skiing and perform well within that context. But if a snowboarder tries on ski bibs, they may find them slightly restrictive in the hips and knees.
Feature Differences
Snowboard bibs often include features that cater to snowboard-specific needs. Chest pockets are common and useful for storing phones, passes, and snacks. Some snowboard bibs include built-in goggle wipes or media pockets for listening to music while riding. The “kangaroo pocket” — a large front pocket accessible from both sides — is a snowboard bib staple that provides generous storage without adding bulk.
Ski bibs tend to prioritize different features. They often include articulated knees for enhanced mobility during turns, reinforced scuff guards on the inner ankles to protect against ski edge contact, and simpler pocket configurations focused on ski pass and pole storage. Some high-end ski bibs include RECCO reflectors for avalanche search and rescue — a feature that is becoming increasingly common in backcountry-focused snowboard bibs as well.
Does It Actually Matter?
In practice, the differences between snowboard bibs and ski bibs are subtle enough that most riders can comfortably use either. A snowboarder wearing ski bibs will not experience any significant performance disadvantage, and vice versa. The most important factor is fit — ensure the bibs allow the range of motion you need for your specific discipline, regardless of whether they are labeled “snowboard” or “ski.”
That said, if you are choosing between the two, go with the bibs designed for your sport. The fit and features will be optimized for your specific movements and needs, and you will appreciate the thoughtful details that each discipline-specific design provides.
How to Choose Snow Pants: The Complete Buying Guide
If you have decided that pants are the right choice for you, the next step is choosing the right pair. The snow pants market is vast, with options ranging from $50 budget models to $700+ premium offerings. Here is a comprehensive guide to navigating your options.
Step 1: Determine Your Waterproof Rating Need
Start with the conditions you ride in most frequently. If you ride primarily at resort groomers in dry, cold conditions, a 10K-15K rating is sufficient. If you ride in wet, heavy snow or spend time in the backcountry, look for 15K-20K or higher. If you are a casual rider who only hits the slopes a few times per season in mild conditions, a 5K-10K rating will serve you well at a lower price point.
Step 2: Choose Your Insulation Level
As discussed earlier, the insulation level should match your temperature preferences and riding intensity. For most riders, 80-100g insulation is the sweet spot. If you run warm or ride in variable conditions, shell pants with no insulation offer maximum versatility. If you ride primarily in extreme cold, look for 140-200g insulation.
Step 3: Evaluate the Fit
Snow pants come in three primary fit categories: relaxed, regular, and slim/athletic. Relaxed fit pants are looser through the hips and thighs, providing maximum mobility and room for layering underneath. This is the most common fit for snowboarders who want to accommodate impact shorts and thicker base layers. Regular fit pants offer a balance between mobility and a streamlined appearance. Slim or athletic fit pants are closer to the body and are preferred by skiers and riders who want a more tailored look.
The most important consideration is that your pants should not restrict your movement when you are in a riding position. Try them on and squat, bend, and twist to ensure they allow a full range of motion. Pay particular attention to the knee articulation — pants with articulated knees (pre-shaped at the knee joint) will feel more comfortable and natural during riding than pants with a straight-leg construction.
Step 4: Check the Gaiters
Snow pants should have internal gaiters — elastic cuffs that fit over your boots to prevent snow from entering. The gaiter should be wide enough to fit over your specific boot model without being so loose that it allows snow to enter. Most gaiters have a hook that attaches to your boot laces to keep them in place. Ensure the hook is sturdy and the elastic is strong enough to maintain its grip throughout a full day of riding.
Step 5: Evaluate Ventilation
Look for pants with mesh-lined inner-thigh vents. The vents should be large enough to provide meaningful airflow and positioned to prevent snow from entering when you are riding in deep snow. Zippered vents are more secure than snap or velcro closures, which can accidentally open during aggressive riding. Some premium pants also include back vents or knee vents for additional airflow options.
Step 6: Inspect the Seams and Zippers
Check whether the seams are fully taped or critically taped. Fully taped seams means every seam in the garment has been sealed with waterproof tape, preventing water from entering through the stitching holes. Critically taped seams means only the most exposed seams (shoulders, hood, chest) are taped, while less exposed seams (underarms, inner legs) are left untaped. Fully taped seams provide superior waterproofing but add cost and weight.
Zippers should be YKK or equivalent quality. Look for water-resistant zippers on the fly, pockets, and vents. The main fly zipper should have a storm flap (a fabric overlay that covers the zipper when closed) to prevent water from seeping through. Pocket zippers should be large enough to operate with gloved hands — small, finicky zippers are a common complaint with budget snow pants.
Step 7: Consider Additional Features
- Reinforced scuff guards: Reinforced fabric on the inner ankle that protects against boot and edge abrasion. Essential for riders who drag their feet or walk frequently in their boots.
- Boot gussets: Snap or velcro closures at the bottom of the pant leg that allow you to adjust the leg opening over your boots. Useful for riders with bulky boots or those who prefer a tighter seal.
- Adjustable waist tabs: Velcro or snap tabs at the waist that allow you to fine-tune the fit without a belt. This is especially useful for riders who wear impact shorts or who want to adjust their fit based on layering.
- RECCO reflector: An avalanche search-and-rescue reflector that allows ski patrol to locate you in the event of an avalanche. Standard on most backcountry-focused outerwear and increasingly common on resort-oriented gear.
- Pocket configuration: Consider how many pockets you need and where they are located. Thigh pockets are accessible while riding; hip pockets are accessible while standing. Some pants include a dedicated pass pocket on the thigh for easy scanning at lift gates.
The Best Snow Bibs for Men and Women: A Gender-Specific Guide
Men’s and women’s bibs are designed with different body proportions in mind, and choosing the right gender-specific model ensures a better fit and more comfortable experience. Here is what to look for in each category.
Best Snow Bibs for Men
Men’s snow bibs typically feature a longer torso, wider shoulder straps, and a straighter cut through the hips. When shopping for men’s bibs, pay attention to the following:
- Torso length: This is the most critical measurement for bib fit. A bib that is too short will pull at the shoulders and restrict movement; one that is too long will bunch at the waist and create uncomfortable folds. Measure from your crotch to the top of your shoulder and compare it to the manufacturer’s size chart. Most men’s bibs are available in regular and tall sizes to accommodate different torso lengths.
- Shoulder strap design: Look for adjustable, padded shoulder straps that distribute weight evenly across your shoulders. Wide straps are more comfortable than narrow straps, especially when carrying a heavy pack. Some bibs feature a “Y-back” strap design that prevents straps from slipping off your shoulders during aggressive riding.
- Hip and thigh room: Men’s bibs should provide ample room in the hips and thighs for layering underneath. If you plan to wear impact shorts or thick base layer bottoms, size up or look for bibs with a relaxed fit through the lower body.
- Drop seat feature: A drop seat (also called a “butt flap”) is a zippered or snap-away panel at the back of the bib that allows you to lower the lower portion of the bib without removing the shoulder straps or your jacket. This is the single most important feature for male bib wearers, as it eliminates the restroom access problem that plagues traditional bib designs. Look for bibs with a full-length zipper drop seat for maximum convenience.
Popular men’s snow bibs include the Burton Reserve Bib, the 686 GLCR Hydra Thermagraph Bib, the Arc’teryx Sentinel AR Bib, and the Patagonia PowSlayer Bib. Each of these offers a different balance of warmth, waterproofing, and features at various price points.
Best Snow Bibs for Women
Women’s snow bibs are designed with a narrower shoulder span, a more contoured torso, and wider hips. These design differences are not merely cosmetic — they affect the fit, comfort, and performance of the garment. Here is what to look for:
- Contoured torso: Women’s bibs should follow the natural curves of the female body, with a narrower chest panel and a more defined waist. This contoured fit prevents the bib from bunching or pulling in uncomfortable ways and creates a more flattering silhouette.
- Adjustable suspender system: Women’s bibs should have a fully adjustable suspender system that accommodates different torso lengths and bust sizes. Look for bibs with multiple adjustment points on the straps — not just at the front, but also at the back where the straps cross. This allows you to fine-tune the fit to your specific body proportions.
- Hip and seat room: Women typically carry more weight in their hips and seat than men, and women’s bibs should accommodate this with a wider cut through the lower body. This is especially important for riders who wear impact shorts underneath, as the additional bulk requires extra room to prevent a tight, restrictive fit.
- Drop seat for women: While historically less common in women’s bibs, the drop seat feature is becoming increasingly available in women’s models. Brands like Burton, 686, and The North Face all offer women’s bibs with drop seat functionality. If restroom access is a concern, prioritize bibs with this feature.
- Style and color options: Women’s bibs are available in a wider range of colors, patterns, and style options than men’s. While style should not be the primary factor in your decision, there is nothing wrong with wanting gear that reflects your personal aesthetic. Most major brands offer their women’s bibs in multiple colorways, from classic black to bold patterns.
Popular women’s snow bibs include the Burton Reserve Bib (available in women’s sizing), the Volcom L Gore-Tex Bib, the Columbia Bugaboo IV Fleece Interchange Bib, and the REI Co-op Stormbolt GTX Bib. These options cover a range of budgets and performance levels.
How to Clean and Maintain Your Snow Bibs and Pants
Investing in quality snow outerwear is only worthwhile if you maintain it properly. Snow bibs and pants are exposed to harsh conditions — snow, mud, dirt, chairlift grime, and UV radiation — and without proper care, their waterproofing and breathability will degrade over time. Here is a complete maintenance guide.
Washing Your Snow Outerwear
Most modern snow bibs and pants can be machine washed, but there are specific guidelines you must follow to avoid damaging the waterproof membrane and DWR (Durable Water Repellent) coating:
- Empty all pockets and close all zippers and velcro closures before washing.
- Use a front-loading washing machine (not top-loading) if possible. Top-loading machines with agitators can damage the fabric and seams.
- Use a small amount of mild, liquid detergent. Avoid powder detergents (they can leave residue in the fabric pores), fabric softeners (they clog the breathable membrane), and bleach (it degrades the waterproof coating). Specific products like Nikwax Tech Wash or Grangers Performance Wash are formulated for technical outerwear.
- Wash on a gentle cycle with cold or warm water (check the garment’s care label for the recommended temperature). Hot water can damage the waterproof membrane and degrade the DWR coating.
- Rinse thoroughly. Residual detergent in the fabric will reduce breathability and may attract dirt. Run an extra rinse cycle if you are unsure whether all the soap has been removed.
- Tumble dry on low heat or air dry. Low heat helps reactivate the DWR coating. Air drying is the safest option if you are concerned about heat damage, but it takes longer and may not reactivate the DWR as effectively.
Reapplying DWR Coating
The DWR coating is a chemical treatment applied to the outer surface of your snow outerwear that causes water to bead up and roll off rather than soaking into the fabric. Over time, this coating wears off due to abrasion, dirt, UV exposure, and repeated washing. When the DWR wears off, the outer fabric will “wet out” — meaning it will absorb water and become heavy and cold, even though the waterproof membrane underneath is still functioning.
You can tell when the DWR has worn off by performing a simple test: sprinkle a few drops of water on the outer fabric. If the water beads up and rolls off, the DWR is still working. If the water spreads out and soaks into the fabric, the DWR needs to be reapplied.
To reapply DWR, wash your garment first (following the steps above), then while the garment is still damp, apply a spray-on or wash-in DWR treatment. Spray-on treatments (like Nikwax TX.Direct Spray-On) are applied directly to the outer fabric and provide more targeted protection. Wash-in treatments (like Nikwax TX.Direct Wash-In) are added to the washing machine during the wash cycle and provide more even coverage but may affect the breathability of the membrane. After applying the DWR treatment, tumble dry on low heat to activate the coating.
Never dry clean your snow outerwear — the chemicals used in dry cleaning can permanently damage the waterproof membrane. Never use bleach or fabric softener — they degrade the DWR coating and clog the membrane pores. Never iron your snow outerwear — the heat can melt the waterproof membrane. Never store your snow outerwear while wet — this promotes mold and mildew growth that can damage the fabric and create unpleasant odors.
Storage Tips for the Off-Season
At the end of the season, wash your bibs or pants following the guidelines above, reapply DWR if needed, and ensure they are completely dry before storing. Store them in a cool, dry place away from direct sunlight. Avoid compressing them into tight storage bags, as this can damage the waterproof membrane and DWR coating over time. Instead, hang them in a closet or store them loosely in a breathable garment bag. Some riders place a small sachet of cedar chips near their stored outerwear to prevent moth damage and keep the fabric smelling fresh.
How to Repair Snow Bibs and Pants: Extending the Life of Your Gear
Even the highest-quality snow outerwear will eventually need repairs. A seam may start to leak, a zipper may break, or a tear may appear from a nasty fall. Knowing how to perform basic repairs can save you hundreds of dollars and extend the life of your gear by several seasons.
Patching Tears and Holes
Small tears and holes (up to about 2 inches) can be repaired with iron-on or adhesive repair patches. Products like Gear Aid Tenacious Tape or McNett Seam Grip are designed specifically for repairing waterproof outerwear. For iron-on patches, apply the patch to the inside of the garment, place a piece of parchment paper over it, and press with a warm iron for 30-60 seconds. For adhesive patches, clean the area around the tear with rubbing alcohol, apply the patch, and press firmly for 60 seconds.
For larger tears or holes, you may need to sew the fabric together before applying a patch. Use a waterproof seam sealer (like Gear Aid Seam Grip) over the stitched area to restore waterproofing. For critical areas (seat, knees, shoulders), consider taking the garment to a professional repair shop that specializes in outdoor gear. Many brands, including Patagonia, The North Face, and REI, offer in-house repair services that can restore your gear to like-new condition.
Fixing Leaking Seams
If you notice water seeping through a seam, the seam tape has likely come loose. This is a common issue with older garments and can usually be repaired at home. Clean the area around the leaking seam with rubbing alcohol, apply seam sealant (like Gear Aid Seam Grip or McNett Seam Sure) along the entire length of the seam, and allow it to cure for 8-24 hours before wearing. For extensive seam failures, a professional repair may be necessary.
Replacing Broken Zippers
Broken zippers are one of the most common failures in snow outerwear. If a zipper slider has come off the track, you can often reattach it by carefully aligning the teeth and sliding the zipper pull back on. If the slider is worn or the teeth are damaged, the entire zipper may need to be replaced. This is a more complex repair that is usually best left to a professional seamstress or outdoor gear repair shop. However, if you are handy with a sewing machine, replacing a zipper is a manageable DIY project — replacement YKK zippers are widely available online.
The Environmental Impact of Snow Outerwear: Sustainability Considerations
As outdoor enthusiasts, we have a responsibility to consider the environmental impact of the gear we purchase. The snow outerwear industry, like much of the apparel industry, has a significant environmental footprint. Here is a look at the key sustainability issues and what you can do to minimize your impact.
The Environmental Cost of Waterproof Outerwear
Most waterproof snow outerwear uses synthetic materials — polyester, nylon, and polyurethane — derived from petroleum. The production of these materials generates greenhouse gas emissions, consumes water, and produces chemical waste. The DWR coatings applied to outerwear traditionally contained perfluorinated chemicals (PFCs or PFAS), which are highly effective at repelling water but are also persistent environmental pollutants that do not break down in nature.
The good news is that the industry is making significant progress in reducing its environmental impact. Many brands have transitioned to PFC-free DWR coatings, which are less effective than traditional PFC-based coatings but are much better for the environment. Gore-Tex, for example, has introduced PFC-free versions of its membranes, and brands like Patagonia, Picture Organic, and Picture Organic Clothing have committed to eliminating PFCs from their entire product line by 2025-2030.
Recycled and Sustainable Materials
Many brands are now incorporating recycled materials into their snow outerwear. Recycled polyester (made from post-consumer plastic bottles) reduces the demand for virgin petroleum and diverts plastic waste from landfills. Brands like Burton (with their “Responsibly Built” line), Picture Organic (with their entire product line), and Patagonia (with their recycled polyester and nylon programs) are leading the charge in sustainable snow outerwear.
Beyond recycled materials, some brands are exploring innovative sustainable fabrics. Bio-based nylon made from castor oil, organic cotton blends, and hemp-based textiles are all being used in snow outerwear with increasing frequency. While these materials may not yet match the performance of traditional synthetic materials in extreme conditions, they represent an important step toward a more sustainable outdoor industry.
What You Can Do as a Consumer
- Buy less, buy better: Invest in high-quality gear that will last multiple seasons rather than cheap gear that needs to be replaced annually. A $400 pair of bibs that lasts 10 seasons is more economical and more environmentally friendly than five pairs of $100 bibs that each last two seasons.
- Repair instead of replace: Follow the repair guidelines above to extend the life of your gear. Most tears, seam failures, and DWR degradation can be repaired at home for a fraction of the cost of new gear.
- Buy used: The secondhand market for snow outerwear is thriving. Sites like SidelineSwap, Geartrade, and local consignment shops offer quality used gear at significant discounts. Buying used keeps perfectly functional gear out of landfills and reduces the demand for new production.
- Recycle old gear: When your gear truly reaches the end of its life, do not throw it in the trash. Many brands offer take-back or recycling programs. Patagonia’s “Worn Wear” program, The North Face’s “Renewed” program, and Burton’s “Warranty and Repair” service all accept old gear for recycling or refurbishment.
- Choose brands with transparent sustainability practices: Look for brands that publish their environmental impact data, set measurable sustainability goals, and use third-party certifications (like bluesign, OEKO-TEX, or Fair Trade) to verify their claims.
The transition away from PFC-based DWR coatings is one of the most significant sustainability developments in the outdoor industry. PFCs (perfluorinated chemicals) are extremely effective at repelling water, oil, and dirt — but they persist in the environment for hundreds of years and have been linked to health concerns. The industry consensus is moving toward PFC-free alternatives, which are now available from most major brands. While PFC-free DWR coatings may require more frequent reapplication than their PFC-based predecessors, they represent a meaningful reduction in environmental impact.
Bibs vs. Pants for Snowmobiling and Other Winter Activities
While this guide focuses primarily on skiing and snowboarding, the bibs vs. pants debate extends to other winter activities as well. Snowmobiling, cross-country skiing, ice fishing, winter hiking, and snowshoeing all present unique demands that may tip the balance in favor of one style over the other.
Snowmobiling: Bibs Often Prevail
Snowmobiling presents some of the most demanding conditions for winter outerwear. Riders are exposed to extreme wind chill from the speed of travel, constant snow spray from the machine, and prolonged periods of sitting in deep snow. In these conditions, bibs provide a significant advantage over pants. The chest coverage blocks wind from entering through the waist gap, and the additional core insulation helps maintain body temperature during long rides in extreme cold.
Snowmobilers also benefit from the storage capacity of bibs. Long rides require carrying extra layers, tools, food, and emergency supplies, and bibs provide chest and kangaroo pockets that are accessible without removing your jacket. The suspender system of bibs also distributes the weight of these items more evenly than pants, reducing fatigue over long rides.
That said, some snowmobilers prefer pants for their ventilation advantages. Snowmobiling can be a high-output activity, especially when riding aggressively in deep powder, and the waist-level ventilation of pants helps prevent overheating. The choice ultimately comes down to personal preference and the specific conditions you ride in most frequently.
Cross-Country Skiing: Pants Generally Win
Cross-country skiing is a high-output, aerobic activity that generates enormous amounts of body heat. In this context, the breathability and ventilation of pants make them the superior choice for most cross-country skiers. Bibs, with their core coverage, can trap excessive heat during sustained aerobic effort, leading to overheating and excessive sweating — which, in turn, leads to cooling and potential hypothermia during rest periods.
Cross-country skiing also involves a greater range of upper-body movement than downhill skiing or snowboarding, and the suspender system of bibs can sometimes interfere with the arm swing motion. Pants, with their simpler design, do not have this limitation.
That said, some cross-country skiers prefer bibs for cold-weather sessions where warmth is the priority. A lightweight shell bib can provide additional core warmth without the bulk of insulation, and the wind protection of the chest panel is valuable during exposed ridge traverses or cold-weather outings.
Ice Fishing and Winter Camping: Bibs Are the Clear Winner
For stationary winter activities like ice fishing and winter camping, bibs are the obvious choice. These activities involve long periods of sitting or kneeling on ice or snow, and the extended coverage of bibs provides essential protection against the cold surface. The core insulation of bibs also helps maintain body temperature during extended periods of low activity, and the storage pockets are invaluable for carrying small tools, tackle, and supplies.
Winter Hiking and Snowshoeing: It Depends
Winter hiking and snowshoeing present a unique challenge because they combine high-output aerobic activity with exposure to deep snow and cold conditions. For casual snowshoeing on groomed trails in mild conditions, pants with good ventilation are usually sufficient. For backcountry winter hiking in deep snow and cold conditions, bibs provide superior protection against snow ingress and core warmth.
The key factor in this decision is how much snow exposure you expect. If you are breaking trail through knee-deep powder, bibs will keep you dramatically drier than pants. If you are following a groomed snowshoe trail with minimal snow exposure, the ventilation advantages of pants may outweigh the snow protection benefits of bibs.
Impact Shorts and Protective Gear: How They Interact with Bibs and Pants
Protective gear like impact shorts, knee pads, and spine protectors are increasingly popular among snowboarders and skiers. Understanding how this gear interacts with your outerwear choice is essential for comfort and performance.
Impact Shorts Under Bibs
Impact shorts (also called crash pants or padded shorts) are worn under your outerwear to protect your hips, tailbone, and thighs during falls. They typically feature EVA foam padding at the key impact zones and are worn like regular shorts over your base layer.
Under bibs, impact shorts fit naturally because the bib’s suspender system does not interfere with the waistband of the shorts. The bib fabric sits on top of the impact shorts, and the additional layering does not create the bunching or pressure points that can occur with pants. This is one of the less-discussed advantages of bibs for snowboarders who prioritize protection.
The main consideration when wearing impact shorts under bibs is sizing. The additional bulk of the shorts may require you to size up in your bibs or choose a model with a more relaxed fit through the hips and seat. Measure your hips with the impact shorts on to ensure an accurate fit.
Impact Shorts Under Pants
Under pants, impact shorts can create fit challenges. The waistband of the shorts adds bulk to your waist area, which can cause pants to feel tight or ride up during movement. This is exacerbated when you add a belt — the combination of impact short waistband, pant waistband, and belt can create uncomfortable pressure points around your midsection.
The solution is to choose pants with an adjustable waist system (velcro tabs or elastic panels) that can accommodate the extra bulk without a belt. Some pants also feature a higher rise (taller waistband) that sits above the impact short waistband, preventing the two from overlapping uncomfortably. If you regularly wear impact shorts, consider this when evaluating pants — try them on with your shorts to ensure a comfortable fit.
Knee Pads and Shin Guards
Some riders wear knee pads or shin guards for additional protection. These are typically worn under the outerwear and should not significantly affect your choice between bibs and pants. However, the knee area of pants and bibs should have enough room to accommodate knee pads without restricting movement. Look for outerwear with articulated knees and a relaxed fit through the lower leg to accommodate knee pads comfortably.
Understanding the Zip Tech Interface and Jacket-to-Pant Connectivity
One of the most innovative developments in snow outerwear is the jacket-to-pant interface system, popularized by Volcom’s Zip Tech technology. This system allows you to zip your jacket directly to your pants, creating a sealed system that mimics the snow protection of bibs while maintaining the convenience of separate garments.
How Zip Tech Works
Zip Tech uses a zipper system that connects the bottom hem of a compatible jacket to the waistband of compatible pants. When zipped together, the interface creates a continuous waterproof barrier from jacket to pants, preventing snow from entering through the waist gap. This effectively converts a jacket-and-pants combo into a one-piece suit (or a bib-like configuration) without the complexity of actual bibs.
The Zip Tech system is proprietary to Volcom, meaning you need both a Volcom jacket and Volcom pants with Zip Tech compatibility to use the interface. While this limits your jacket and pants options to Volcom’s product line, the benefit is significant: you get bib-like snow protection with pants-level convenience.
Other Jacket-to-Pant Interface Systems
While Volcom’s Zip Tech is the most well-known system, other brands offer similar jacket-to-pant connections:
- Burton’s Jacket-to-Pant Interface: Burton offers a compatible zipper system across many of their jackets and pants, though the specific zipper type varies by product line and model year.
- The North Face’s Clicker System: Some TNF jackets and pants feature a snap-in interface that connects the two garments without a full zipper.
- DC’s Pant-to-Jacket Interface: DC Shoes offers a zipper interface system across their snow outerwear line.
- 686’s Envelope-to-Pant Connection: 686 offers a unique interface system that creates a seal between jacket and pants without requiring a zipper.
If you choose pants but want bib-like protection on powder days, a jacket-to-pant interface system is an excellent compromise. It provides the snow protection you need without the inconvenience of bibs, and it can be disconnected when you want the freedom and ventilation of separate garments.
If you are torn between bibs and pants, consider a jacket-and-pants combo with an interface system. This gives you the snow protection of bibs for powder days, the ventilation and convenience of pants for warm days, and the flexibility to choose the best configuration for each day’s conditions. Many riders own both bibs and pants and choose between them based on the forecast, but an interface system allows you to achieve similar versatility with just one set of outerwear.
Temperature Regulation: How Bibs and Pants Affect Your Body Heat
Understanding how outerwear affects body temperature is essential for choosing between bibs and pants. Your body generates heat through metabolic processes, and the rate of heat generation depends on your activity level, the ambient temperature, and your individual physiology. The outerwear you wear determines how much of that heat is retained and how efficiently moisture (sweat) is removed from your body.
Core Temperature and Bib Coverage
Your core — the chest, abdomen, and lower back — is where your body concentrates its most vital organs. Maintaining core temperature is essential for comfort, performance, and safety. When your core cools down, your body redirects blood flow from your extremities (fingers, toes, face) to protect the core, leading to cold hands and feet even in relatively mild conditions.
Bibs provide an additional layer of insulation over your core, which helps maintain core temperature in cold conditions. The bib fabric creates a windproof and waterproof barrier across your chest and back, preventing convective heat loss (wind chill) and keeping your core dry. This is why many riders report feeling noticeably warmer in bibs compared to pants, even in the same conditions with the same layering.
However, this additional core coverage can be a liability in warm conditions. If your body generates more heat than it can dissipate, and the bib fabric traps that heat, your core temperature will rise. This leads to overheating, excessive sweating, and discomfort. The solution is to choose shell bibs (no insulation) in warm conditions and to layer appropriately to control your warmth.
Waist-Level Ventilation and Pants
Pants provide a natural ventilation point at the waist. The gap between the top of the pants and the bottom of the jacket allows warm air to escape, creating a chimney effect that draws cool air in through the pant vents and up through the waist. This natural ventilation makes pants inherently cooler than bibs, which is an advantage in warm conditions but a disadvantage in cold conditions.
The ventilation advantage of pants is amplified when riding aggressively. High-output riding generates enormous amounts of body heat, and the ability of pants to vent at the waist allows that heat to dissipate quickly. This is why many park riders and spring skiers prefer pants — the ventilation prevents overheating during high-output sessions.
In cold conditions, this ventilation can be a disadvantage. Warm air escaping from the waist gap also allows cold air to enter, creating a drafty feeling that can lower your perceived temperature. This is one of the primary reasons bibs feel warmer than pants in cold conditions — the bib fabric blocks this air exchange, creating a more consistent internal temperature.
Finding Your Personal Temperature Sweet Spot
Every rider has a different temperature preference, influenced by their metabolism, body composition, activity level, and personal comfort threshold. Some riders run warm and prefer the ventilation of pants; others run cold and appreciate the warmth of bibs. The best approach is to experiment with both options and pay attention to how your body responds.
A useful exercise is to ride the same run in the same conditions wearing bibs one day and pants the other. Note where you feel warm, cold, or comfortable, and use that information to guide your future outerwear choices. Over time, you will develop an intuitive understanding of your temperature preferences and be able to choose the right outerwear for any condition.
The Evolution of Snow Outerwear: From Wool Pants to Modern Bibs
Understanding the history of snow outerwear provides context for the current bibs vs. pants debate and highlights how far the industry has come in terms of materials, design, and performance.
The Early Days: Wool and Cotton
In the early days of skiing and snowboarding, outerwear was made from natural fibers like wool and cotton. These materials provided basic warmth but were heavy, slow to dry, and offered virtually no waterproofing. A day of riding in wet conditions meant wearing wet, heavy, cold clothing for the remainder of the day — or the remainder of the trip. Hypothermia was a genuine risk, and riders accepted wet clothing as an unavoidable part of the sport.
The earliest “snow pants” were simply wool trousers, sometimes treated with wax or oil to improve water resistance. These treatments were only marginally effective and required frequent reapplication. Bibs, in their earliest form, were borrowed from agricultural workwear — simple bib overalls made from heavy cotton duck or canvas. These early bibs were designed to keep farmers warm and dry during field work, and their crossover to snow sports was natural given the similar demands for warmth and protection.
The Synthetic Revolution: The 1970s and 1980s
The introduction of synthetic fabrics in the 1970s and 1980s transformed snow outerwear. Nylon, polyester, and eventually Gore-Tex provided waterproofing, breathability, and durability that natural fibers could not match. Snow pants and bibs became lighter, drier, and more comfortable, opening the sport to a wider audience.
During this period, bibs fell out of fashion among adult riders, becoming associated with children’s snowsuits and agricultural workwear. Pants became the dominant outerwear choice, and the bibs vs. pants debate was essentially settled in favor of pants. Bibs were seen as unfashionable, overly warm, and inconvenient — a relic of a bygone era.
The Bib Renaissance: The 2010s to Present
The 2010s saw a remarkable resurgence in bib popularity, driven by several factors. First, the growth of backcountry snowboarding and skiing created demand for outerwear that could handle deep snow and extreme conditions. Bibs, with their superior snow protection and core warmth, were a natural fit for backcountry use. Second, the influence of Japanese snowboarding culture — where bibs have always been popular — brought bibs back into mainstream snowboard fashion. Third, advances in bib design (including drop seats, better fit, and more stylish aesthetics) addressed many of the historical complaints about bibs.
Today, bibs are experiencing their highest level of popularity since the 1970s. Major brands offer extensive bib lines, professional riders regularly wear bibs, and the bibs vs. pants debate is more balanced than it has been in decades. The availability of high-quality options in both categories means that riders can choose based on their personal preferences and conditions rather than settling for whatever is available.
Regional Considerations: Choosing Bibs vs. Pants Based on Your Mountain
The mountain you ride on significantly influences whether bibs or pants are the better choice. Different regions have different snow conditions, temperatures, and riding cultures, and understanding these regional differences can help you make a more informed decision.
Pacific Northwest (Washington, Oregon, British Columbia)
The Pacific Northwest is known for its wet, heavy snow — affectionately called “Cascade Concrete” by locals. Temperatures at resort elevations often hover around or just above freezing, creating conditions where snow is wet and heavy rather than light and fluffy. In these conditions, bibs provide a significant advantage. The waterproof chest panel prevents wet snow from entering your layers, and the core insulation helps maintain warmth in the damp, cold conditions that are characteristic of the region.
However, the relatively mild temperatures of the Pacific Northwest (compared to, say, Colorado or Montana) mean that ventilation is also important. Shell bibs with large thigh vents are an excellent choice for this region, as they provide the snow protection of bibs without the excessive warmth of insulated models.
Rocky Mountains (Colorado, Utah, Wyoming, Montana)
The Rocky Mountains are known for cold, dry snow and wide temperature swings. Morning temperatures at high-altitude resorts can be well below zero, while afternoon temperatures at lower elevations can warm into the 40s or even 50s. In these conditions, the choice between bibs and pants depends largely on your temperature tolerance and the specific day’s conditions.
For cold mornings and storm days, insulated bibs are an excellent choice. The core insulation and snow protection keep you warm and dry during the coldest and most exposed conditions. For warm afternoons and spring conditions, pants with good ventilation are more comfortable. Many Rocky Mountain riders own both and choose between them based on the forecast — bibs for cold days, pants for warm days.
Lake Effect Regions (New York, Vermont, Michigan, Ontario)
Lake effect regions experience frequent snowfall, moderate cold, and variable conditions. Resorts in these areas tend to be smaller and lower in elevation, with less extreme temperature swings than the Rockies. In these conditions, pants are often the more practical choice. The moderate temperatures and frequent lodge access make the convenience of pants more valuable than the snow protection of bibs.
However, riders who venture into the backcountry in these regions or who ride during major storms may prefer bibs for the additional protection. The choice in lake effect regions is highly personal and depends on your specific riding habits and preferences.
European Alps (France, Switzerland, Austria, Italy)
The European Alps offer a unique combination of high-altitude riding, diverse terrain, and a culture that leans slightly more toward skiing than snowboarding. Conditions vary dramatically by region and elevation, from wet, mild conditions at lower resorts to cold, dry conditions at higher elevations. Bibs are increasingly popular among European riders, particularly those who ride off-piste or in the backcountry. The convenience of pants remains popular among resort-oriented riders.
Japan (Hokkaido, Nagano)
Japan is legendary for its deep, light powder — often called the best snow in the world. In these conditions, bibs are almost mandatory. The chest-deep snow that is common in Japanese powder days would overwhelm any pair of pants, and the consistent cold temperatures make the core warmth of bibs particularly valuable. Japanese snowboarding culture has always embraced bibs, and the style and design of Japanese-market bibs reflect this long history of bib use.
Snow Bibs and Pants for Kids: What Parents Need to Know
Choosing outerwear for children presents unique considerations that differ from adult gear selection. Kids are more sensitive to cold, less able to regulate their own temperature, and more likely to fall in deep snow. Here is what parents should know about bibs vs. pants for children.
Why Bibs Are Often the Better Choice for Kids
For young children (ages 3-10), bibs are generally the superior choice for several reasons. First, children fall more frequently than adults — they are still developing their balance and coordination, and falls in deep snow are inevitable. Bibs prevent snow from entering their clothing during these falls, keeping them dry and comfortable. A single snow-in-your-pants incident can ruin a child’s day and end the family’s outing early.
Second, children have difficulty maintaining a consistent body temperature. They generate heat during active play but cool down rapidly when sitting on a chairlift or resting. Bibs provide consistent core warmth that helps buffer these temperature swings. A child wearing bibs will stay warmer during long chairlift rides and less likely to overheat during active play than a child wearing a heavily insulated jacket over pants.
Third, children’s snow pants have a tendency to slide down during active play. Unlike adults, children often do not notice or care when their pants are sliding down, leading to exposed skin and cold discomfort. Bibs eliminate this problem entirely because they are supported by shoulder straps rather than a waistband.
For very young children (ages 2-5), a one-piece snowsuit may be the best option of all. One-piece suits provide complete coverage with no gaps, maximum warmth, and the simplest dressing process. They eliminate the bibs vs. pants debate entirely. Many parents find that one-piece suits for toddlers are easier to manage than two-piece systems, and the integrated design ensures that no snow can enter regardless of how many tumbles the little one takes.
Kids’ Outerwear Sizing Tips
Children grow quickly, and buying outerwear with room to grow is both economical and practical. Look for bibs and pants with adjustable waist straps, extendable leg cuffs, and adjustable shoulder straps that can accommodate growth over one or two seasons. Many kids’ bibs and pants feature “grow-with-me” systems that add 1-2 inches of length through adjustable hems and cuffs.
When sizing kids’ outerwear, prioritize chest and inseam measurements over age-based sizing. Children of the same age can vary dramatically in size, and the manufacturer’s size chart is more reliable than age-based recommendations. If your child is between sizes, size up — the extra room can be managed with base layers and rolled cuffs, while gear that is too small will be uncomfortable and restrictive.
Frequently Asked Questions: Advanced Bibs vs. Pants Topics
Do professional snowboarders wear bibs or pants?
The split among professional snowboarders is roughly even, with a slight edge toward bibs for riders who prioritize powder and backcountry. Many high-profile riders like Travis Rice and Kazu Kokubo are known for wearing bibs, while park and street-focused pros often prefer pants. The choice at the professional level is driven by personal preference, sponsorship obligations, and the specific conditions of each event or photo shoot.
Can you wear bibs with a backpack?
Yes, bibs work well with backpacks. The suspender system of bibs distributes the weight of the bib evenly across your shoulders, and a backpack sits naturally over the suspenders. Some riders find that the additional straps from the bib suspenders can create pressure points under the backpack straps, but this is easily managed by adjusting the bib straps to sit wider or narrower. For backcountry riding, bibs paired with a technical backpack is a popular combination that provides both snow protection and carry capacity.
Are snow bibs warmer than snow pants?
Generally yes, but with important caveats. Bibs cover your core (chest and back) in addition to your legs, providing an extra layer of fabric and insulation over the areas where your body concentrates heat. This additional coverage makes bibs noticeably warmer than pants in cold conditions. However, in warm conditions, this additional coverage can cause overheating. The warmth advantage of bibs is most pronounced in cold, windy conditions where the wind-blocking effect of the chest panel prevents convective heat loss.
How long do snow bibs and pants typically last?
With proper care and maintenance, quality snow bibs and pants should last 5-10 seasons of regular use. The waterproof membrane and DWR coating are typically the first components to degrade, but they can be restored through proper washing and DWR reapplication. Zippers and seams may need repair after several seasons, but these are generally straightforward fixes. Budget outerwear may last only 2-3 seasons, while premium gear from brands like Arc’teryx, Patagonia, and Burton can last a decade or more with proper care.
What is the difference between 2-layer and 3-layer construction?
A 2-layer (2L) construction consists of an outer face fabric bonded to a waterproof-breathable membrane. A separate mesh or fabric liner protects the membrane on the inside. 2L construction is lighter, more comfortable against the skin, and more affordable, but it is less durable than 3L construction. A 3-layer (3L) construction bonds the face fabric, membrane, and a lightweight inner liner into a single, unified fabric. 3L construction is more durable, more breathable, and more weather-resistant, but it is also stiffer, more expensive, and less comfortable against bare skin. For bibs, 3L construction is often preferred because the chest panel sits directly against your body and benefits from the unified structure. For pants, 2L construction is common and provides adequate performance at a lower price point.
Should I buy bibs or pants if I can only afford one?
If you can only invest in one piece of outerwear, the decision depends on your primary riding conditions and style. If you ride in cold, snowy conditions or spend time in the backcountry, invest in bibs — the snow protection and core warmth will serve you better in the most demanding conditions. If you ride primarily at resorts in mild to moderate conditions, invest in a quality pair of pants — the versatility, ventilation, and convenience will serve you well across the widest range of conditions. Either way, invest in the highest quality you can afford — a quality $300 pair of bibs or pants will outperform a budget $100 pair in every metric that matters.
Can you convert pants into bibs or vice versa?
Unfortunately, you cannot convert pants into bibs or bibs into pants — the fundamental construction is too different. However, as discussed above, jacket-to-pant interface systems (like Volcom’s Zip Tech) can provide bib-like snow protection with pants, giving you the best of both worlds in a sense. Some brands also offer removable suspender systems that attach to their pants, providing temporary bib-like support without the full bib construction. While not a true conversion, these accessories can bridge the gap between the two styles.
What is the best material for snow bibs and pants?
The best material depends on your priorities. Gore-Tex and eVent offer the best waterproof-breathable performance but at the highest price. Proprietary membranes like Burton DryRide, TNF DryVent, and Columbia Omni-Tech offer excellent performance at more accessible price points. For the outer face fabric, nylon is more durable than polyester, making it a better choice for riders who ride aggressively or frequently. For insulation, synthetic insulation (PrimaLoft, Thinsulate) is more practical than down because it maintains warmth when wet. For shell (uninsulated) outerwear, the membrane technology matters more than the face fabric, as both nylon and polyester face fabrics perform well when paired with quality membranes.
How do you put on snow bibs?
Putting on snow bibs is slightly more involved than putting on pants but becomes second nature after a few uses. Start by stepping into the bib legs one at a time, pulling them up to your waist. Then pull the bib chest panel up over your torso and slide your arms through the suspender straps one at a time. Adjust the suspender straps to the correct length — they should be tight enough to hold the bib securely but not so tight that they pull on your shoulders or restrict movement. Finally, adjust any waist or hem closures and zip up the front zipper. The entire process takes about 30 seconds once you are familiar with it.
Do you need a jacket with bibs?
Yes, you still need a jacket with bibs. Bibs do not replace a jacket — they are a lower-body garment that extends to the chest. You will need a jacket or shell for upper-body warmth and weather protection. However, because bibs provide core coverage, you can often get away with a lighter or shorter jacket than you would need with pants. A lightweight shell jacket over insulated bibs, for example, provides excellent warmth and weather protection without the bulk of a heavy insulated jacket.
The Complete Verdict: Bibs vs. Pants for Every Scenario
After exploring every aspect of the bibs vs. pants debate — from waterproof ratings and insulation to regional conditions and riding styles — here is our final, scenario-based recommendation:
| Scenario | Recommended Choice | Why |
|---|---|---|
| Deep Powder Days | Bibs | Maximum snow protection, core warmth, and no gaps for snow entry |
| Park Riding | Pants | Better ventilation, easier on/off, more natural fit with impact shorts |
| Backcountry Touring | Bibs (Shell) | Snow protection on the descent, breathability on the ascent, core warmth |
| Spring Skiing | Pants | Superior ventilation, lighter weight, easier temperature regulation |
| Resort Groomers (Cold) | Either (slight edge to Bibs) | Core warmth of bibs is valuable on cold chairlift rides |
| Resort Groomers (Warm) | Pants | Convenience, ventilation, and simplicity for casual resort riding |
| Snowmobiling | Bibs | Wind protection, core warmth, and snow spray protection |
| Cross-Country Skiing | Pants | Breathability for high-output aerobic activity |
| Ice Fishing / Winter Camping | Bibs | Core warmth and seated snow protection for stationary activities |
| Beginners | Pants (or Kids’ Bibs) | Simplicity and ease of use for those new to snow sports |
| Budget-Conscious Riders | Pants | Generally $50-$100 cheaper than comparable bibs |
| Cold Climate (Northern US, Canada) | Bibs | Maximum warmth and wind protection for consistently cold conditions |
| Mild Climate (California, Southeast US) | Pants | Ventilation for warmer conditions and resort-focused riding |
| Wet Snow (Pacific NW) | Bibs (High Waterproofing) | Chest panel prevents wet snow ingress in heavy, wet conditions |
| Dry Snow (Rockies, Japan) | Either (Bibs for Japan) | Both work in dry snow; bibs preferred in Japan’s deep powder |
Conclusion
The battle of Ski Bibs vs. Pants ultimately comes down to your riding environment and your tolerance for cold.
If you hate the cold, ride deep powder, or want a secure fit that never slips, get a bib. It is a game-changer for comfort on storm days.
If you overheat easily, mostly ride groomers, or want the easiest possible experience in the lodge restroom, stick with pants.
Whatever you choose, remember that staying dry is the key to having fun. Invest in quality waterproofing (15k or higher), keep your edges sharp, and enjoy the ride.


