
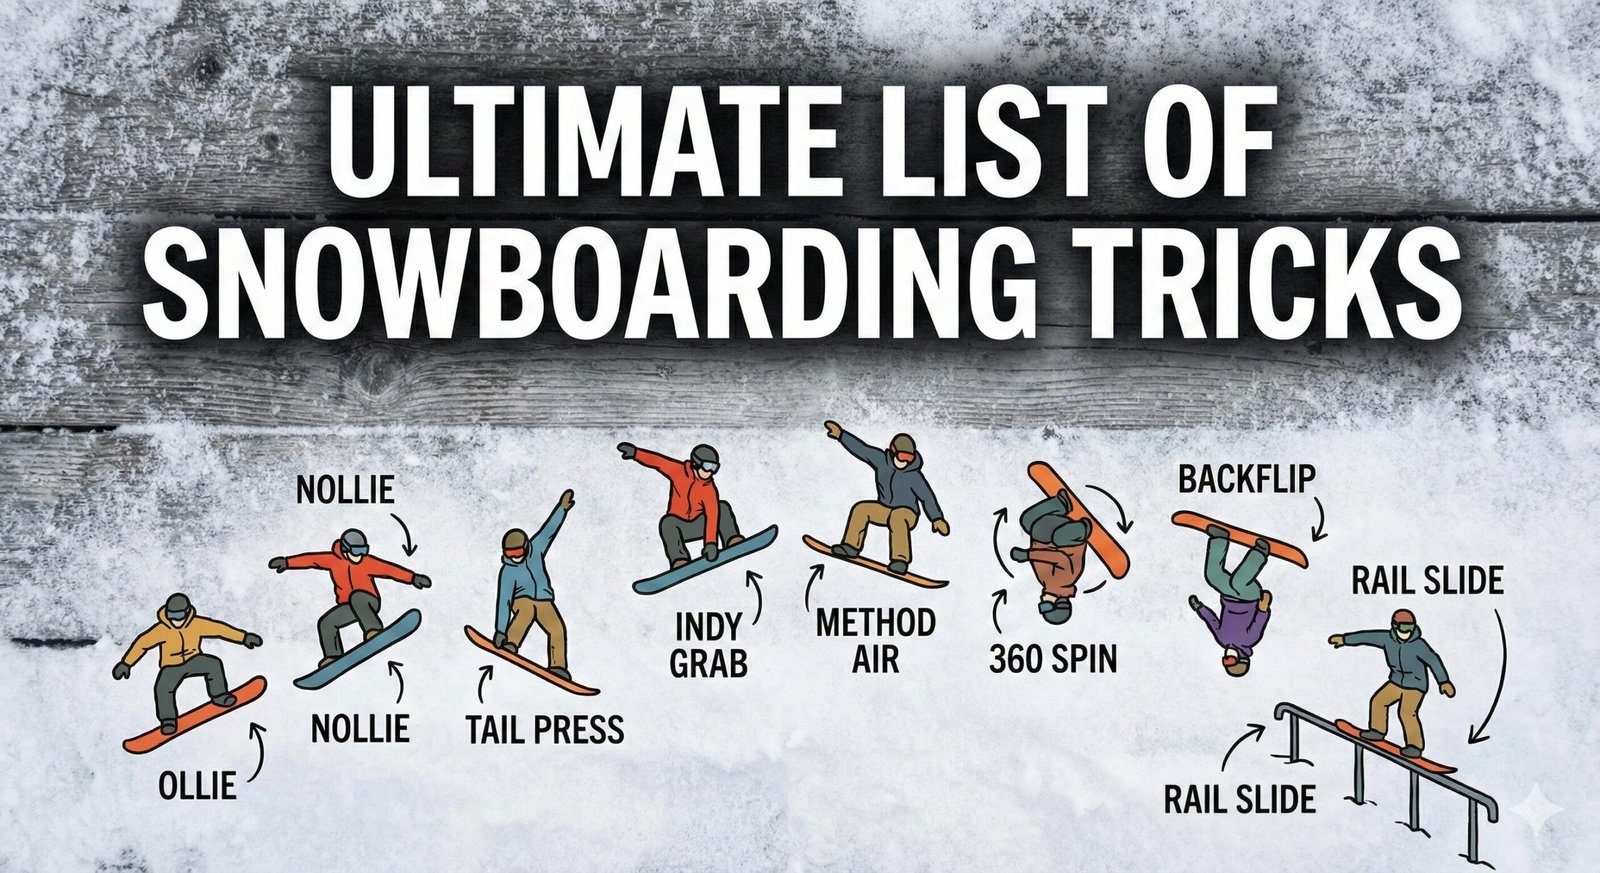
The Ultimate List of Snowboard Tricks: From Beginner Buttering to Pro Jumps
There is a defining moment in every snowboarder’s life. It’s that split second after you leave the lip of a jump or press your nose into the snow, where gravity seems to pause, and you realize: I’m actually doing it.
Snowboarding is more than just turning left and right. It is a canvas for creativity. Whether you want to master smooth flatland butters or boost huge airs in the park, learning tricks is why snowboarding is fun. But the progression ladder can be intimidating. Where do you start? What is a “Melon” grab? How do you spin without catching an edge?
In this comprehensive guide, we will break down the essential list of snowboard tricks, categorized by difficulty. We’ll cover the mechanics, the common mistakes, and the gear—like helmets and wrist guards—that keeps you safe while you learn.
Flatland/Buttering: Tricks performed on flat snow using body weight leverage (e.g., Nose Press, Tripod).
Jibbing: Sliding on non-snow surfaces like rails, boxes, or logs (e.g., 50-50, Boardslide).
Air/Kickers: Tricks performed in the air off jumps (e.g., 360s, Method Grab, Backflip).
Halfpipe: Tricks performed in a halfpipe or superpipe (e.g., McTwist, Frontside Air, McTwist).
Switch & Fakie: Tricks performed in your non-dominant stance or riding backward.
Cork & Rotations: Off-axis spins and corked rotations (e.g., Cork 720, Rodeo 540).
Table of Contents
- 1. The Fundamentals (Green Circle Tricks) Ollie, Nollie, Tail Press, Nose Press, Switch Riding, Falling Leaf, J-Turn
- 2. Intermediate Flatland & Jibbing (Blue Square Tricks) Tripod, Frontside 180, Backside 180, 50-50, Boardslide, Nose Press on Rails
- 3. Complete Guide to Snowboard Grabs Indy, Method, Melon, Mute, Stalefish, Seatbelt, Crail, Japan, Nosegrab, Tailgrab, Rocket, Roastbeef, Lien Air, and more
- 4. Spins & Rotations (Black Diamond Tricks) 180s, 360s, 540s, 720s, Switch spins, Pre-rotation, Spotting landings
- 5. Advanced Air & Jump Tricks Tamedog, Wildcat, Backside Air, Frontside Air, Crippler, Misty, Rodeo, Underflip
- 6. Advanced Jibbing & Rail Tricks Frontside Boardslide, Lipslide, Bluntslide, Pretzel, Switch 50-50, Front Board, Switch Boardslide
- 7. Complete Butter Trick Guide Nose Press, Tail Press, 180 Butter, 360 Butter, Switch Butters, Butter Combos
- 8. Halfpipe & Superpipe Tricks Frontside Air, Backside Air, McTwist, Alley-Oop, Double McTwist, Crippler
- 9. Cork & Off-Axis Tricks Cork 540, Cork 720, Cork 900, Double Cork 1080, Triple Cork 1440
- 10. Switch Riding & Switch Tricks Switch Ollie, Switch 180, Switch 360, Switch Backside 180, Fakie Ollie
- 11. Trick Progression Roadmap How to progress from beginner to advanced, weekly training plans, off-season training
- 12. Common Mistakes & How to Fix Them Catching edges, bad form, fear management, speed issues
- 13. The Mental Game of Snowboard Tricks Visualization, fear management, confidence building, dealing with crashes
- 14. Off-Season Training for Trick Progression Trampoline training, foam pits, balance boards, strength exercises
- 15. Safety First: Don’t Break Yourself Protective gear, how to fall safely, injury prevention, park etiquette
- 16. How to Ride a Terrain Park Like a Pro Park etiquette, feature progression, reading features, speed check
- 17. Top Gear to Fast-Track Your Progression Boards, boots, protective gear, training equipment
1. The Fundamentals (Green Circle Tricks) Beginner
Before you hit the big line in the park, you need to master board control. These tricks can be done on green runs or even flat areas. They teach you balance, flex, and edge control. Every single professional snowboarder started right here, and skipping these fundamentals is the fastest way to get hurt or plateau in your progression.
The fundamentals of freestyle snowboarding are built on four pillars: balance, board awareness, edge control, and body positioning. If you can master these four things on flat ground, every trick on this list becomes dramatically easier to learn.
The Ollie
The Ollie is the single most important trick in snowboarding. It is the foundation of almost every other trick on this list. An Ollie isn’t just a hop; it’s a snap. You use the tail of your board as a spring. Without a solid Ollie, you cannot jump onto rails, clear tabletops, or launch off natural features. For a deep dive into the mechanics, check out this guide from Red Bull on how to Ollie.
The key to a powerful Ollie is understanding the “loading” phase. Most beginners simply jump off both feet simultaneously, which gives them minimal height. A proper Ollie uses the stored energy in the board’s flex pattern. Think of your snowboard as a springboard — the more you load it, the more pop you get.
- Load: Shift your hips back over the tail while keeping your knees bent. Your weight should be approximately 70-80% on your back foot. The tail of the board should begin to flex downward.
- Snap: Jump explosively off your back foot while simultaneously pulling your front leg upward. This creates a “scissoring” motion that launches the board off the snow.
- Level: Once airborne, suck both knees up toward your chest to level the board. The board should come up to you — don’t reach down for it.
- Land: Extend your legs to absorb the landing impact. Land with equal weight on both feet, knees bent, and ride away clean.
Common Ollie Mistake: Leaning too far forward during the load phase. This kills your pop and sends you into the nose of the board instead of upward. Keep your shoulders over your back foot and resist the urge to lean forward.
Practice Tip: Start on flat ground at walking speed. Try to Ollie over small obstacles like gloves or bamboo poles laid flat on the snow. Progress to Ollieing over increasing sizes as your pop improves. Most riders can achieve a solid 1-2 foot Ollie within their first season of dedicated practice.
The Nollie
The Nollie (Nose Ollie) is the inverse of an Ollie. Instead of springing off the tail, you spring off the nose. It requires more commitment because you have to lean forward, which feels scary at first. Nollies are essential for initiating spins and pressing onto rails.
Where an Ollie shifts weight backward, a Nollie shifts weight forward. You load the nose of the board by leaning into it, then snap the tail off the snow. The motion is identical to an Ollie — just reversed. Nollies look incredibly stylish on flat ground and are the foundation for Nollie spins, Nollie flips, and Nollie butter tricks.
- Load: Shift your weight forward over the nose. Keep your back leg relatively straight and your front knee bent.
- Snap: Push down through the nose while lifting your back leg. The tail will pop off the snow.
- Level: Pull the tail up to match the nose height. The board should be level in the air.
- Land: Absorb with both knees equally.
Pro Tip: Nollies are physically harder than Ollies for most riders because we are naturally more comfortable leaning back than forward. Practice Nollies on both your regular and switch stance to build balanced board control.
Tail Press (Wheelie)
Often called a “butter,” the Tail Press involves shifting your weight entirely over your back foot while keeping the board straight. Your front leg should be straight, and the nose of the board should be off the snow. It looks effortless when done well, but it requires significant core strength and balance.
The Tail Press is more than just a party trick — it teaches you how to manipulate your board’s flex, which translates directly to pressing on rails and boxes. Every rail press you see professionals do on rails starts with the same weight distribution as a flat-ground Tail Press.
Pro Tip: Don’t just lean back; shift your hips laterally over the binding. If you are experiencing heel lift, tighten your boots, as loose boots make pressing impossible. Your core should be engaged and your shoulders should stay centered over the board.
Nose Press
The mirror image of a Tail Press. Shift your weight forward over the nose of the board, lift the tail off the snow, and hold the position. The Nose Press is arguably more useful than the Tail Press because it directly translates to Nollie-based tricks and front-foot-initiated rail slides.
Many riders find the Nose Press harder than the Tail Press because it requires you to trust leaning forward, which goes against your survival instincts. The key is committing your hips forward past your front knee and keeping your back leg relaxed.
Switch Riding
While not technically a “trick,” riding opposite to your natural stance is a prerequisite for 180s, landing jumps, and progressing to intermediate tricks. If you don’t know if you are Goofy or Regular, figure that out, and then practice riding the other way.
Switch riding is often the biggest barrier between intermediate and advanced riders. You cannot land Backside 180s, ride away from Frontside spins, or hit most park features properly without competent switch riding. Most instructors recommend spending at least 30% of your riding time going switch to build proficiency.
Practice Drill: On your next park day, ride the bunny hill switch for 15 minutes before hitting any features. Start with basic turns — toe-side to heel-side — and gradually increase speed as comfort builds. Within a few sessions, you’ll find that switch riding becomes almost as natural as your regular stance.
Falling Leaf
The Falling Leaf is a beginner exercise that teaches edge control on steep terrain without requiring you to make full turns. You slide back and forth across the slope, shifting weight from toe to heel edge, like a leaf falling from a tree. This is the foundation for understanding how to control your speed and direction on both edges.
While it may seem like a “baby” exercise, the Falling Leaf is actually the starting point for learning how to butter on steep terrain and is surprisingly useful for navigating narrow cat tracks and crowded slopes.
J-Turn
A J-Turn is a half-turn where you start riding straight, then carve up the hill in a J-shaped arc until you come to a stop. It teaches you how to initiate a turn from a straight line — the same motion used to set up for spins, jumps, and rail approaches. Practice J-Turns on both your toe and heel edges.
Before attempting any intermediate or advanced tricks, make sure you can comfortably: Ollie 18+ inches on flat ground, ride switch for 5+ minutes without falling, hold a Tail Press for 3+ seconds, and make controlled turns on blue-rated terrain. If any of these feel shaky, spend another session mastering them first. The progression will come faster when your foundation is solid.
2. Intermediate Flatland & Jibbing (Blue Square Tricks) Intermediate
Once you are comfortable with your edges, it’s time to add rotation and obstacles. These tricks require confidence and often benefit from a softer, “freestyle” board (check our camber vs rocker guide). At this stage, you should be able to link turns comfortably on blue runs, Ollie consistently, and ride switch with reasonable confidence.
The Tripod
A stylish butter trick where you look like a camera tripod. The Tripod is one of the most photogenic flatground tricks and looks incredible in photos and video. It combines balance, flexibility, and style into a single fluid motion.
- Setup: Ride at medium speed — too slow and you won’t have enough momentum; too fast and you’ll lose control.
- Lean: Crouch down and reach back with both hands to touch the snow near the tail. Your back hand should touch near the tail, and your front hand reaches further back.
- Balance: Shift weight to the tail and your hands, lifting the nose high into the air. The board should be at a 45-60 degree angle from the snow surface.
- Hold: Maintain the position for as long as your momentum carries you. The key is keeping your core tight and your weight distributed between the tail and your hands.
Style Tip: The best Tripods involve the rider looking completely relaxed. Try to keep your head up and your expression calm — this projects confidence and style. Adding a shifty or tweak at the peak of the Tripod elevates it from “trick” to “art.”
Frontside 180 (Flatground)
Spinning 180 degrees so you land in switch stance. “Frontside” means your chest faces forward (downhill) during the first 90 degrees of the spin. It is generally easier than backside for beginners because you can see your landing. The Frontside 180 is the gateway trick to all spinning — once you can do this comfortably, 360s, 540s, and beyond become logical progressions.
- Setup: Ride at comfortable speed on a gentle slope. Wind your shoulders slightly in the opposite direction of the spin.
- Initiate: As you Ollie, open your shoulders and chest downhill. Your lower body will follow your upper body’s rotation.
- Rotate: Keep your head turned in the direction of the spin. Spot the landing over your trailing shoulder.
- Land: Land switch with equal weight on both feet. Ride away in your opposite stance.
Common Mistake: Throwing your shoulders too aggressively. The rotation should come from your core, not from flailing your arms. Think of it as a smooth, controlled unwinding rather than a violent spin.
Backside 180 (Flatground)
The Backside 180 is the mirror of the Frontside 180. Your back faces downhill during the first 90 degrees of rotation. It is generally considered harder because you cannot see your landing during the first part of the spin — you have to trust that the rotation will carry you around. However, Backside 180s are arguably more stylish and are essential for park riding.
- Setup: Ride at comfortable speed. Slightly pre-wind your shoulders in the spin direction.
- Initiate: Ollie and throw your shoulders backside (chest faces uphill first). Your board will follow the rotation.
- Spot: Around 90 degrees, you will lose sight of the landing. Trust the rotation and keep your head turning.
- Land: Spot the landing over your leading shoulder and stomp it switch.
50-50 (Box or Rail)
The first jib trick you will learn. It involves riding straight over a box with your board parallel to the feature. The 50-50 teaches you how to approach, mount, slide, and dismount park features. It seems simple, but mastering the 50-50 with style and confidence is the key to all other rail tricks.
- Approach: Ride straight at the box at moderate speed, knees bent, weight centered. Line up with the feature early — don’t make last-second adjustments.
- Ollie: Pop slightly to get onto the feature. A small, controlled Ollie is all you need — you are not trying to clear the entire box.
- Slide: Keep your base flat! Do not use your edges, or you will slip out. Keep your knees bent and your core engaged. Look at the end of the feature, not at your feet.
- Exit: Pop off the end and land flat. Absorb the landing with your knees.
Critical Rule: NEVER edge on a metal rail. On boxes, light edge contact is acceptable, but on rails, any edge engagement will cause an immediate and painful slip-out. Flat base is the rule until you progress to advanced slides.
Backside Boardslide
You slide with your board perpendicular (90 degrees) to the rail. “Backside” means you approach the rail with it behind your heels. Ironically, a Backside Boardslide faces you forward down the hill, making it less scary than a Frontside Boardslide. This is the second jib trick most riders learn, and it teaches you the fundamental concept of sliding perpendicular to a feature.
- Approach: Ride parallel to the rail with the feature on your heel side.
- Initiate: Ollie and rotate your board 90 degrees so it is perpendicular to the rail.
- Slide: Land with the rail centered under your board between the bindings. Keep your weight directly over the rail — not leaning back, not leaning forward. Look at the end of the rail.
- Exit: Rotate your board back to your direction of travel and ride away clean.
Frontside Boardslide
The Frontside Boardslide is approached with the rail on your toe side. This means you face the rail as you slide, which is intimidating because you can see exactly how far you have to fall. However, the rotation is actually more natural, and many riders learn it alongside the Backside Boardslide.
The Frontside Boardslide is considered the harder of the two boardslides because you are sliding “blind” — your back is facing downhill. This requires more trust in your balance and your ability to spot the landing over your shoulder.
180 onto a Box
Once you are comfortable with 50-50s and flatground 180s, combining them is the logical next step. A 180 onto a box means you Ollie, rotate 180 degrees, and land on the box in a 50-50 position but riding switch. This teaches you how to spin onto features — a skill required for almost every advanced rail trick.
Ollie onto a Box
While the basic 50-50 involves riding onto a box, an Ollie onto a box means you approach from the side and pop onto the feature. This teaches you how to approach features from angles — essential for hitting rails at the correct approach angle in the park.
Follow this order when learning park features: Flat boxes → Down-flat-down boxes → Round boxes → Flat rails → Down rails → Kinked rails. Never skip ahead in this progression. Each feature teaches a specific skill that the next one builds upon. Riding a round rail before you’ve mastered flat boxes is a recipe for injury.
3. Complete Guide to Snowboard Grabs Intermediate to Advanced
Grabs are what give your airs style and substance. A jump without a grab is just a jump — a jump with a well-timed, tweaked grab is a statement. There are dozens of named grabs in snowboarding, each with its own history, technique, and style points. This section covers every major grab you need to know.
The Indy Grab
The classic. You grab the toe edge of your board, between the bindings, with your rear hand. It is stable and stylish and is the most common grab in snowboarding. The Indy Grab has been around since the early days of skateboarding and was adapted to snowboarding in the 1970s.
How to do it: As you leave the lip of the jump, reach down with your rear hand and grab the toe edge between your bindings. Pull the board up toward you. Avoid the “Tindy” (grabbing near the tail binding), which is considered bad style — always grab between the bindings.
The Method Air
The most iconic trick in snowboarding. It is essentially a backside air where you grab the heel edge with your front hand and tweak the board up behind your back. The Method Air was popularized by Craig Kelly in the 1980s and remains the gold standard for aerial style. A perfectly executed Method — where the board is tweaked 90+ degrees and the rider looks completely relaxed — is one of the most beautiful sights in action sports.
- Take off: Ride a backside air trajectory off the jump.
- Grab: Reach with your front hand to the heel edge between your bindings.
- Tweak: Pull the board up behind your back while extending your front leg. The board should be nearly vertical.
- Release: Bring the board back to center and land smoothly.
Style Note: The Method is not about height or rotation — it’s about the tweak. A small, tweaked Method on a 10-foot jump looks infinitely better than a flat, untweaked Method on a 50-foot jump. Focus on the tweak.
The Melon Grab
A Melon Grab is when you grab the heel edge of your board between your bindings with your front hand. It is essentially the front-hand version of the Indy and is one of the most common and comfortable grabs for most riders. The Melon is easy to hold and looks great with a slight tweak.
Melon vs. Method: Both use the front hand on the heel edge, but the Melon keeps the board flat and close to the body, while the Method involves tweaking the board behind the back. The Melon is more of a “comfort grab,” while the Method is a “style grab.”
The Mute Grab
Grab the toe edge between the bindings with your front hand. The Mute is the front-hand version of the Indy. It is a clean, compact grab that looks great on medium-sized jumps. The Mute is also the starting point for many advanced grabs, including the Mute Weddle and the Japan Air.
The Stalefish
Reach behind your rear leg with your rear hand and grab the heel edge between your bindings. This requires flexibility and commitment, but it is one of the most stylish grabs in snowboarding. The Stalefish was invented by Mark “Stale”Sandys and has been a staple of pro snowboard photography for decades.
Difficulty: The Stalefish is harder than it looks because reaching behind your rear leg requires you to twist your torso while maintaining air awareness. Practice the reach on flat ground before trying it in the air.
The Seatbelt Grab
Reach across your body with your front hand and grab the toe edge near the tail. It looks like you are buckling a seatbelt across your lap. The Seatbelt is an advanced grab that requires significant flexibility and air awareness. It is popularized by riders like Travis Rice and Mark McMorris.
The Crail Grab
Reach across your body with your rear hand and grab the nose of the board. This is a full cross-body grab that requires extreme flexibility and commitment. The Crail is considered one of the most stylish grabs in snowboarding and is a signature move of many pro riders.
The Japan Air
A grab where you reach behind your front leg with your front hand and grab the toe edge, pulling the board up into a compact ball. The Japan Air was invented in Japan (hence the name) and is one of the most unique and recognizable grabs in snowboarding. It requires the rider to be extremely flexible and compact in the air.
The Nosegrab
Grab the nose of the board with your front hand. This is a straightforward grab that can be tweaked in many ways — extending the back leg, pulling the nose down to the side, or combining it with a shifty. The Nosegrab is one of the first grabs most riders learn after the Indy because it is easy to reach.
The Tailgrab
Grab the tail of the board with your rear hand. Like the Nosegrab, it is simple but can be styled in countless ways. The Tailgrab is popular for backside airs where you are already facing the tail of the board.
The Rocket Air
Grab the nose with your front hand and the tail with your rear hand simultaneously, fully extending the board in front of you. It looks like you are launching a rocket. The Rocket Air is a high-commitment grab that requires you to extend fully while maintaining balance.
The Roastbeef Grab
Reach between your legs with your rear hand and grab the heel edge. This is a technical grab that requires you to crouch low in the air. The Roastbeef is less common than other grabs but is considered very stylish when executed well.
The Lien Air
Grab the nose with your front hand and lean back, pulling the board to the side. Named after skateboarder Neil Blender (Lien is Neil spelled backward), this grab has a unique backward-leaning aesthetic. The Lien Air is a classic grab that has been part of snowboarding since the sport’s early days.
The Weddle Grab
Also known as the “Mute Weddle,” this involves grabbing the toe edge with your front hand (like a Mute) and tweaking the board by extending your rear leg. Named after skateboarder Mark Weddle, this grab creates a unique aesthetic where the board is tweaked to one side.
Beginner Grabs: Indy, Nosegrab, Tailgrab
Intermediate Grabs: Melon, Mute, Method
Advanced Grabs: Stalefish, Japan, Crail, Seatbelt, Roastbeef, Rocket, Lien Air
Rule of thumb: Master each tier before moving to the next. A clean Indy is worth more than a sketchy Stalefish.
4. Spins & Rotations (Black Diamond Tricks) Advanced
Spinning is where snowboarding goes from “riding” to “flying.” A well-executed 360, 540, or 720 is one of the most thrilling experiences in action sports. But spinning also introduces serious risk — catching an edge mid-rotation or over-rotating can lead to severe injuries. This section covers the mechanics of spinning, from basic 180s to professional-level rotations.
How to Spin: The Fundamental Mechanics
Every spin in snowboarding follows the same fundamental principle: your upper body leads, your lower body follows. The rotation starts in your shoulders, transfers through your core, and finishes with your board. Think of your body as a whip — the handle (shoulders) moves first, and the tip (board) snaps around last.
- Pre-Rotation (Wind Up): As you approach the lip, turn your shoulders slightly opposite to the spin direction. This loads rotational energy in your core. The more pronounced your wind-up, the more potential rotation you generate.
- Release: As you leave the lip, snap your shoulders into the spin direction. This releases the stored energy and initiates the rotation. Timing is critical — releasing too early wastes the wind-up; releasing too late means you don’t have enough rotation.
- Axis Control: Once spinning, your body should be aligned with the axis of rotation. If you lean forward or backward, the spin goes off-axis (which can be intentional for cork tricks, but dangerous if unintended).
- Spotting: Look for your landing as early as possible. For 360s, spot the landing at 270 degrees. For 540s, spot at 450. The earlier you spot, the earlier you can prepare for landing.
- Landing: Stomp the landing with your board aligned with the direction of travel. Land with equal weight on both feet, knees bent.
Frontside 360
A full rotation with your chest facing downhill (frontside). The Frontside 360 is the first “real” spin most riders learn and is the gateway to all advanced rotations. It requires you to commit to a full 360-degree rotation and land switch — which means you need solid switch riding ability.
- Wind Up: As you approach the lip, turn your shoulders slightly backside (opposite to spin).
- Release: As you leave the lip, throw your shoulders frontside. Your board will follow.
- Spot: At 270 degrees, spot the landing over your trailing shoulder.
- Land: Complete the full rotation and stomp it. You should land riding in your normal stance.
Backside 360
A full rotation with your back facing downhill during the first 90 degrees. The Backside 360 is considered harder than the Frontside 360 because you cannot see your landing until late in the rotation. It requires more commitment, more trust, and better spatial awareness. However, many riders find Backside 360s more natural once they learn them because the rotation feels smoother.
Frontside 540
A one-and-a-half rotation (540 degrees). You leave the jump, spin 540 degrees, and land riding switch. The Frontside 540 requires significantly more wind-up and snap than a 360, and the landing is more challenging because you are landing blind — you cannot see the landing until the last moment.
Backside 540
The Backside 540 is one of the most iconic tricks in snowboarding. It requires the rider to spin 540 degrees while keeping their back to the landing for most of the rotation. This is a high-commitment trick that separates intermediate riders from advanced riders.
720 and Beyond
The 720 (two full rotations) is the first “pro-level” spin. It requires explosive power, perfect timing, and excellent spatial awareness. At this level, riders typically add grabs to their spins — a grab stabilizes the rotation and adds style.
Progressing beyond 720s (900s, 1080s, and beyond) requires professional coaching, perfect conditions, and significant air awareness. These tricks are typically performed only by competitive and professional riders on large jumps.
Switch Spins
Spinning in switch stance is a completely different skill. Switch spins require you to initiate the rotation from your non-dominant stance, which means your wind-up and snap are weaker and less coordinated. Most riders find switch spins 50% harder than regular spins — a Switch 360 feels about as hard as a regular 540.
Follow this progression and do not skip steps: Flat 180s → Jump 180s → Flat 360s → Jump 360s → Jump 540s → Jump 720s. Each rotation increment requires approximately 20-50 hours of dedicated practice. Budget your progression accordingly — rushing to 720s without mastering 360s is the fastest way to get injured.
5. Advanced Air & Jump Tricks Advanced
Taking it to the jumps requires speed and commitment. Safety is paramount here—ensure you have impact shorts for those inevitable heavy landings. This section covers tricks beyond basic spins — flips, off-axis rotations, and freestyle moves that define professional snowboarding.
Backside Air
The Backside Air is one of the oldest tricks in snowboarding. You approach the jump backside, pop off the lip, grab the board (usually a Method or Melon), and land. The Backside Air is the foundation for all backside tricks and remains one of the most stylish moves in the sport.
- Approach: Ride toward the jump with a slight backside angle.
- Pop: Ollie off the lip while turning your shoulders backside.
- Grab: Grab with a Method, Melon, or Stalefish.
- Tweak: Extend the board for style.
- Land: Spot the landing and stomp it.
Frontside Air
The Frontside Air is the frontside version of the Backside Air. You approach the jump frontside, pop, grab, and land. The Frontside Air is slightly harder than the Backside Air because the rotation is less natural for most riders, but it offers unique style opportunities.
Tamedog (Front Flip)
A Tamedog is a cartwheel-style front flip where you flip over the nose of the board. Unlike a traditional gymnastics front flip, you keep your alignment with the board’s direction of travel — it is more of a “rolling” motion than a “diving” motion. The Tamedog is one of the most impressive tricks in snowboarding and was invented by JP Walker in the early 2000s.
- Setup: Ride at moderate speed toward a medium-sized jump.
- Initiate: As you leave the lip, lean forward and throw your head and shoulders toward your front foot.
- Rotate: Your body and board will flip forward. Keep the board close to your body.
- Spot: Spot the landing by looking through your legs.
- Land: Extend your legs to absorb the landing.
Wildcat (Back Flip)
A Wildcat is the backflip version of the Tamedog. You flip backward over the tail of the board. The Wildcat is less scary than it sounds because you can see the sky and the landing throughout the rotation. It is one of the most commonly learned flip tricks in snowboarding.
Misty Flip
A Misty is a frontside 540 with a front flip component. It is essentially a “helicopter” motion where you rotate horizontally and vertically simultaneously. The Misty is an intermediate-to-advanced trick that bridges the gap between basic spins and cork tricks.
- Wind Up: Pre-rotate slightly backside.
- Initiate: Pop frontside while throwing your head and shoulders forward (like a front flip).
- Rotate: Your body will spin 540 degrees while flipping forward.
- Spot: Spot the landing over your trailing shoulder at approximately 360 degrees.
- Land: Absorb and ride away.
Rodeo Flip
A Rodeo is a backside spin combined with a backflip component. Think of it as a Wildcat that also rotates horizontally. The Rodeo is one of the most stylish tricks in snowboarding and is a signature move of many pro riders. A Rodeo 540 is the most common version and is considered a benchmark for advanced riders.
Underflip
An Underflip is a variation of a flip trick where you flip the board underneath you rather than flipping your body over the board. It is a highly technical trick that requires precise timing and board control. The Underflip is often combined with spins for complex combos.
Crippler
A Crippler is a front flip with a 180-degree rotation, typically performed in a halfpipe. The rider flips forward while spinning 180 degrees, landing fakie (riding backward). The Crippler is a signature halfpipe trick that has been performed in competition since the 1990s.
Warning: Flip Tricks Require Progression
Never attempt flip tricks (Tamedog, Wildcat, Backflip) without first mastering them on a trampoline or in a foam pit. These tricks carry significant risk of head and neck injuries when performed incorrectly. Invest in professional coaching and practice in controlled environments before attempting them on snow.
6. Advanced Jibbing & Rail Tricks Advanced
Once you’ve mastered the 50-50 and basic Boardslide, an entirely new world of rail tricks opens up. Advanced jibbing requires precise board control, confidence, and an understanding of how your board interacts with different feature shapes. Rails and boxes are unforgiving — unlike jumps, there is no “air time” to correct mistakes. You either lock in or you slip out.
Frontside Boardslide
Approaching with the rail on your toe side and sliding with the board perpendicular to the rail. The Frontside Boardslide is harder than the Backside Boardslide because you face the rail during the slide, which is psychologically intimidating. However, the rotation is more natural, and many riders find it more comfortable once they commit.
Lipslide
A Lipslide is essentially a Boardslide where you approach from the opposite side. In a Backside Lipslide, you approach the rail on your toe side, Ollie over the rail, and slide with your back to the direction of travel. Lipslides are harder than Boardslides because the rotation is inverted — you Ollie over the feature rather than approaching from the side.
Bluntslide
Slide with your board perpendicular to the rail, but with the tail (or nose) sliding on the rail rather than the center of the board. The Bluntslide is one of the hardest jib tricks because you are balancing on a very small contact patch. It requires incredible board control and balance. A Bluntslide on a down rail is considered one of the most difficult jib tricks in snowboarding.
Pretzel Spin
A Pretzel is when you spin one direction to get onto a rail and then spin the opposite direction to get off. For example, you spin frontside to boardslide, then spin backside to ride away. The “pretzel” name comes from the twisting motion. Pretzels are advanced tricks that require excellent board control and quick rotation.
Switch 50-50
Riding onto a feature in switch stance and sliding in a 50-50. This teaches you how to approach features from your non-dominant stance, which is essential for hitting features from different approach angles in the park. A Switch 50-50 on a flat rail is a great intermediate jib trick.
Front Board
Also called a “Front Board” or “Frontside Boardslide,” this involves sliding with your board perpendicular to the rail while your front faces the landing. The Front Board is a technical slide that requires you to balance on your heel edge while maintaining perpendicular alignment.
Switch Boardslide
A Boardslide performed in switch stance. This doubles the difficulty because you are sliding in your non-dominant stance. Switch Boardslides are a hallmark of professional riding — if you can hit a rail cleanly in switch, you have mastered fundamental jibbing.
Feeble and Smith Grinds
The Feeble Grind involves sliding on the tail (or nose) of the board with the other end hanging off the rail. The Smith Grind is similar but involves sliding on the nose with the tail hanging off. These are technical slides that require precise weight distribution and balance. They are named after skateboarding grind tricks and translate directly to rail riding.
Rainbow Rail
A Rainbow Rail is a curved rail that arcs up and over like a rainbow. Riding a Rainbow Rail combines a Boardslide with an arc-shaped trajectory. It is a fun, visually striking trick that looks great on video. The key to Rainbow Rails is maintaining consistent speed and balance throughout the arc.
50-50 → Boardslide → Frontside Boardslide → Lipslide → Bluntslide → Pretzel → Switch variations. Master each trick before progressing. A rider who can do clean 50-50s on every feature type is more skilled than one who can sketch through Bluntslides.
7. Complete Butter Trick Guide Intermediate
Buttering is the art of pressing and flexing your board on flat ground or gentle slopes. It is one of the most accessible and creative forms of freestyle snowboarding — you don’t need jumps or rails, just flat snow and a willingness to experiment. Buttering teaches you board control, balance, and how to manipulate your board’s flex — skills that translate directly to rail riding and advanced tricks.
Nose Press
Shift your weight forward over the nose of the board, lift the tail off the snow, and hold the position. The Nose Press is the most fundamental butter trick and the starting point for all nose-based butter combos. Hold the press as long as possible — style points come from duration and smoothness, not from height.
Nose Press Tips: Keep your core engaged and your weight directly over the nose. Many riders lean too far forward, causing the nose to dig into the snow. Instead, keep your hips centered and let the board’s flex do the work. Your back leg should be relaxed and slightly bent.
Tail Press
The mirror of the Nose Press. Shift weight to the tail, lift the nose, and hold. The Tail Press is generally easier than the Nose Press because riders are more comfortable leaning back. Use the Tail Press to build confidence before progressing to Nose Press variations.
180 Butter
While holding a Nose Press or Tail Press, initiate a 180-degree rotation using your shoulders. The 180 Butter teaches you how to combine pressing with spinning — a skill required for advanced butter combos. The key is initiating the spin from your upper body while maintaining the press with your lower body.
- Setup: Ride at medium speed and initiate a Tail Press.
- Rotate: Turn your shoulders in the direction of the spin while maintaining the press.
- Switch: As you rotate 180 degrees, you will transition from a Tail Press to a Nose Press (in switch).
- Ride Away: Release the press and ride away clean in switch stance.
360 Butter
Extend the 180 Butter to a full 360-degree rotation. The 360 Butter is one of the most stylish flatground tricks and is a staple of slopestyle competitions. The key is maintaining the press throughout the entire rotation — if you release the press too early, it becomes a regular 360 spin.
Switch Butters
All butter tricks can be performed in switch stance, which doubles the difficulty. Switch Butters teach you how to press and flex the board from your non-dominant stance, which is essential for switch rail tricks and switch jump approaches.
Butter Combinations
The real artistry of buttering comes from combining moves. Some popular butter combos include:
- Tail Press → 180 → Nose Press → 180 out: A flowing combo that links multiple butter positions.
- Nose Press → 360 → Tail Press → switch ride out: A full 360 butter that demonstrates complete board control.
- Switch Tail Press → Frontside 180 → Regular Nose Press: A combo that blends switch riding with buttering.
- Tripod → transition to Nose Press: Moving from a tripod position directly into a Nose Press for a seamless flow.
Bigspin Butter
A butter trick where you spin 360 degrees on the ground while the board spins 540 degrees. This advanced butter requires you to initiate the spin from the press and let the board rotate faster than your body. The Bigspin Butter is a high-style trick that looks incredible on flat ground.
Dedicate 20 minutes per park session to buttering. Start with 5 minutes of Nose Presses, 5 minutes of Tail Presses, 5 minutes of 180 Butters, and 5 minutes of free-form combos. Within a month of consistent practice, you will see dramatic improvement in your board control and balance.
8. Halfpipe & Superpipe Tricks Advanced
The halfpipe is snowboarding’s amphitheater. It is where the sport’s biggest moments happen — from Terje Haakonsen’s revolutionary runs to Chloe Kim’s Olympic gold. Halfpipe riding is a unique discipline that combines vertical air, technical tricks, and the rhythmic flow of wall-to-wall riding. The halfpipe rewards consistency, amplitude, and trick variety.
Halfpipe Basics: The Wall Ride
Before attempting any tricks, you need to understand how to ride a halfpipe. The wall ride involves riding up the wall, turning at the lip, and riding back down. This teaches you the fundamental motion of halfpipe riding — the “pumping” action that generates speed and amplitude. Without good wall riding, you cannot perform any halfpipe tricks.
- Approach: Enter the pipe with moderate speed, staying in the middle of the pipe.
- Pump: Bend your knees as you approach the wall, then extend as you ride up. This generates upward momentum.
- Turn: At the lip, rotate your shoulders to face back into the pipe.
- Descend: Ride back down the wall, bending your knees to absorb the transition.
Frontside Air
The most fundamental halfpipe trick. You ride up the wall, pop off the lip, and land back in the pipe while facing forward (frontside). The Frontside Air is the “Ollie” of the halfpipe — it is the foundation for all other halfpipe tricks. Focus on getting amplitude (height) before adding grabs or rotations.
Backside Air
The backside version of the Frontside Air. You pop off the lip while rotating backside (back to the landing). The Backside Air is slightly harder because you land blind, but it is considered more stylish. A Backside Air with a Method grab is one of the most classic halfpipe tricks in snowboarding.
McTwist
A McTwist is a backside 540 in the halfpipe with a grab (usually a Method or Indy). Named after Mike McEntire, the McTwist is one of the most iconic halfpipe tricks ever. It combines rotation, grab, and amplitude into a single fluid motion. The McTwist was revolutionary when it was first performed in the 1980s and remains a staple of halfpipe competitions.
- Approach: Ride up the wall with significant speed.
- Pop: Ollie off the lip while initiating backside rotation.
- Grab: At the peak, grab the board (Method or Indy).
- Rotate: Complete the full 540-degree rotation.
- Land: Spot the landing and ride back down the wall.
Alley-Oop
An Alley-Oop is a frontside spin in the halfpipe where you spin in the opposite direction of your approach. For example, if you approach the wall going left-to-right, you spin backside (right-to-left). This creates a unique visual effect where the rider appears to be spinning “against” the direction of travel. Alley-Oops are stylish and technically demanding.
Double McTwist
A McTwist with an additional 360-degree rotation — a full 900 in the halfpipe with a grab. The Double McTwist is one of the most difficult halfpipe tricks and is typically only performed by professional riders in competition. It requires enormous speed, precise timing, and flawless execution.
Double Cork
In the halfpipe, a Double Cork involves spinning and flipping simultaneously for two off-axis rotations. This is the cutting edge of halfpipe riding and is typically only seen in Olympic-level competition. The difficulty and risk associated with Double Corks make them the province of the world’s best riders.
Frontside 1080
Three full rotations in the halfpipe with a frontside approach. The Frontside 1080 is one of the most difficult tricks in halfpipe riding and was first landed by Shaun White in competition. It requires perfect speed, timing, and air awareness.
Phase 1: Wall rides and pumping (1-2 sessions)
Phase 2: Frontside and Backside Airs (2-4 sessions)
Phase 3: Frontside 540 / McTwist (5-10 sessions)
Phase 4: Alley-Oop, backside 540 (10-20 sessions)
Phase 5: Corks and Double Corks (professional coaching required)
9. Cork & Off-Axis Tricks Expert
Cork tricks are the pinnacle of snowboard aerials. Unlike regular spins where you rotate on a vertical axis, cork tricks involve rotating on a tilted (off-axis) axis, combining horizontal spin with vertical flip. The result is a visually stunning trick where the rider appears to be spinning and flipping simultaneously. Cork tricks are the most difficult tricks in snowboarding and are the defining moves of modern big air and slopestyle competitions.
Understanding Cork Mechanics
The key to cork tricks is the “tilt” — the angle at which you rotate. In a regular spin, your axis is perfectly vertical. In a cork, your axis tilts forward or backward, creating a combination of spin and flip. The more you tilt, the more “corked” the trick appears. Professional riders typically tilt 45-90 degrees off vertical.
Cork 540
The entry-level cork trick. A Cork 540 combines a backside 540 spin with a forward tilt, creating an off-axis rotation. This is the first cork most riders learn and is a benchmark trick for advanced riders. The Cork 540 requires significant air time and precise timing.
- Setup: Approach the jump with significant speed.
- Initiate: Pop off the lip and throw your shoulders backside while leaning forward.
- Tilt: As you rotate, tilt your axis forward. Your head should dip below the board at the peak.
- Spot: Spot the landing as you come around the rotation.
- Land: Level out and stomp the landing.
Cork 720
Two full rotations on a tilted axis. The Cork 720 is a professional-level trick that requires enormous air time and perfect spatial awareness. It is the signature trick of many Olympic and X Games athletes. The Cork 720 is typically performed with a grab (Indy or Melon) to add style and stability.
Cork 900
Two and a half rotations on a tilted axis. The Cork 900 is one of the most difficult tricks in snowboarding and has only been landed by a handful of riders. It requires a massive jump, perfect timing, and the ability to maintain orientation through 900 degrees of off-axis rotation.
Double Cork 1080
Three full rotations on a tilted axis. The Double Cork 1080 is the pinnacle of modern snowboarding and was first landed in competition at the X Games. It requires two complete off-axis rotations, making it exponentially more difficult than a single Cork. Only a handful of riders in history have landed this trick.
Triple Cork 1440
Four full rotations on a tilted axis. The Triple Cork 1440 is the most difficult trick ever landed on a snowboard. It was first landed by Mark McMorris in practice and represents the current frontier of snowboard trick progression. The Triple Cork requires a massive jump, perfect conditions, and years of dedicated training.
Rodeo 540
A Rodeo 540 is a backside 540 with a backflip component. Unlike a regular Cork, the Rodeo involves a more pronounced flip axis. The Rodeo is one of the most stylish cork tricks and is a signature move of many pro riders. It looks like the rider is doing a backflip while spinning.
Misty 720
A Misty 720 combines a frontside 720 spin with a front flip component. The Misty is the frontside version of the Rodeo and is equally difficult. It requires the rider to spin and flip simultaneously in a frontside direction, which is less natural than backside rotations for most riders.
Warning: Cork Tricks Require Professional Coaching
Cork tricks carry extreme risk of head, neck, and spine injuries. Never attempt cork tricks without: (1) professional coaching, (2) extensive trampoline and foam pit training, (3) perfect conditions, and (4) proper protective equipment including a certified helmet and spine protector. These tricks are the province of professional riders and should not be attempted by recreational riders.
10. Switch Riding & Switch Tricks Intermediate to Advanced
Switch riding — riding in your non-dominant stance — is the single most important skill for progression in snowboarding. Without switch ability, you cannot land frontside spins, ride halfpipe properly, or hit most park features. Many experts argue that switch riding is more important than learning any individual trick because it unlocks the ability to ride every feature from both directions.
Why Switch Riding Matters
Every major trick in snowboarding has a switch equivalent. A Frontside 180 is just a switch Backside 180. A Frontside Air in the halfpipe is just a switch Backside Air. When you ride switch, you effectively double your trick repertoire. Professional riders spend years perfecting their switch riding, and the best riders in the world can ride switch almost as well as their regular stance.
Switch Ollie
The foundation of all switch tricks. A Switch Ollie is performed by popping off the nose of the board (which is now your “tail” in switch). This requires you to load the nose with your weight — essentially doing a Nollie from your regular stance. Mastering the Switch Ollie is the first step in switch trick progression.
Switch 180
Spinning 180 degrees from switch stance. This is a key trick because it allows you to land in your regular stance, which means you can combine it with other tricks. Switch 180s are the building blocks for switch spins and switch jib tricks.
Switch 360
A full rotation from switch stance. Switch 360s are significantly harder than regular 360s because you are initiating the spin from your non-dominant stance. This requires more wind-up, more snap, and more spatial awareness. A clean Switch 360 is a benchmark trick for advanced riders.
Switch Backside 180
The Switch Backside 180 is one of the most useful tricks in snowboarding. Because it lands in your regular stance, it can be combined with almost anything. Switch Backside 180s are used by professional riders as “setup tricks” for rails, jumps, and halfpipe walls.
Fakie Riding
Fakie riding is similar to switch riding but involves riding backward with your weight shifted toward the tail. Fakie is used in halfpipe riding and for certain flatground tricks. The difference between fakie and switch is subtle: in fakie, your weight is on the “tail” (which was your nose in regular stance), while in switch, your weight distribution is normal for the reversed stance.
Switch Jibbing
Hit rails and boxes from switch stance. Switch 50-50s, Switch Boardslides, and Switch Presses are all essential skills for park riding. Being able to hit features from switch opens up an entirely new approach angle and allows you to hit features that are only accessible from one direction.
Week 1-2: Ride switch on green runs, focus on basic turns.
Week 3-4: Ride switch on blue runs, add speed and confidence.
Week 5-6: Practice Switch Ollies on flat ground.
Week 7-8: Add Switch 180s on flat ground and small jumps.
Week 9-12: Begin hitting small park features switch. Build to Switch 360s and Switch jibbing.
11. Trick Progression Roadmap All Levels
Progression in snowboarding is not random — it follows a logical sequence where each trick builds upon the skills learned from the previous one. This roadmap provides a structured path from beginner to expert, with estimated timelines based on consistent practice.
| Level | Tricks | Prerequisites | Est. Time |
|---|---|---|---|
| Beginner | Ollie, Nollie, Tail Press, Switch Riding | Comfortable on blue runs | 1-2 seasons |
| Intermediate | 180s, 50-50, Boardslide, Tripod, Nose Press | Solid Ollie, basic switch | 1-2 seasons |
| Advanced | 360s, Melon, Method, Front Board, Lipslide | Consistent 180s, rail confidence | 2-3 seasons |
| Expert | 540s, Corks, Bluntslide, McTwist | Clean 360s, advanced jibbing | 3-5 seasons |
| Pro | 720s+, Double Corks, Triple Corks | Years of dedicated training | 5+ seasons |
Important Note: These timelines are estimates based on consistent practice (30+ days per season). Riders who practice less frequently will take longer. There is no shortcut in snowboarding — every trick requires dedicated practice time on the snow.
Season-by-Season Progression Plan
Season 1: Build the Foundation
Your first season should focus entirely on board control. Master the Ollie, practice switch riding, learn Tail Presses and Nose Presses, and ride every type of terrain you can find. Resist the temptation to hit park features before your fundamentals are solid. The riders who progress fastest are those who spend their first season building an unshakeable foundation.
Season 2: Enter the Park
Now that you have solid fundamentals, start hitting park features. Begin with flat boxes (50-50s), progress to rails (Boardslides), and start learning 180s on flat ground and small jumps. This is also the season to learn the Tripod and basic butter tricks. Focus on consistency — a clean 50-50 every time is more valuable than a sketchy Boardslide once.
Season 3: Level Up
By season three, you should be comfortable with 180s, basic jibbing, and butter tricks. This is the season to learn 360s, Melon and Method grabs, and more advanced jib tricks (Front Board, Lipslide). Start practicing switch tricks more seriously and begin hitting medium-sized jumps.
Season 4+: Push the Limits
With three seasons of solid progression, you are ready for advanced tricks: 540s, Corks, Halfpipe riding, and advanced jibbing. This is also the season to invest in professional coaching if you haven’t already. A good coach can accelerate your progression by years and help you avoid bad habits that become ingrained over time.
12. Common Mistakes & How to Fix Them All Levels
Every snowboarder makes mistakes — it is a fundamental part of the learning process. But some mistakes are more common and more dangerous than others. This section identifies the most frequent errors riders make when learning tricks and provides actionable solutions for each one.
Catching an Edge
Catching an edge is the most common cause of injuries in snowboarding. It happens when the downhill edge of your board digs into the snow, causing an immediate and violent fall. Edge catches typically happen during: landing jumps, sliding on rails, and riding on flat terrain.
How to Prevent Edge Catches:
- Flat Base on Features: Never edge on rails or boxes. Keep your base flat.
- Land Flat: When landing jumps, try to land with your base flat against the snow rather than on an edge.
- Stay Balanced: Edge catches often happen when your weight is too far forward or backward. Keep your weight centered over the board.
- Keep Knees Bent: Bent knees lower your center of gravity and give you more control over edge pressure.
Leaning Back on Spins
When spinning off jumps, many riders lean back (toward the tail) during the rotation. This causes the spin to go off-axis and often results in landing on your back. The fix is to keep your weight centered over the board throughout the rotation. Focus on keeping your shoulders level and your core engaged.
Under-Rotating
Under-rotating a spin means you don’t complete the full rotation before landing. This is dangerous because it often results in landing with the board perpendicular to the direction of travel, which causes an immediate edge catch. The fix is more wind-up and a stronger snap. If you consistently under-rotate, you may also need more speed off the lip.
Throwing Arms Instead of Core
Many beginners try to spin by throwing their arms wildly. This creates erratic rotation and poor style. Spinning should come from your core and shoulders, not from flailing arms. Think of it as a smooth, controlled unwinding rather than a violent spin. Practice the rotation motion on flat ground before taking it to jumps.
Not Committing
The most dangerous mistake in snowboarding is partial commitment. When you start a trick but then try to bail halfway through, you put yourself in the worst possible position — you are committed enough to be in the air but not committed enough to land safely. Either commit fully to the trick or don’t start it at all.
Riding Too Slow
Many beginners approach features too slowly, thinking it will be safer. In reality, riding too slowly makes tricks harder because you have less momentum, less air time, and less stability. Speed is your friend — within reason. Find the minimum speed needed for each trick and gradually increase as your confidence grows.
Ignoring Switch Riding
The biggest progression killer is ignoring switch riding. Riders who only ride regular will never progress beyond a certain point because they cannot land frontside spins, ride halfpipe properly, or hit features from switch approaches. Dedicate 30% of your riding time to switch and your overall progression will accelerate dramatically.
Skipping the Fundamentals
The temptation to skip to advanced tricks is strong, but it is a guaranteed path to injury. Every advanced trick is built on fundamental skills — you cannot Cork 720 without a solid 360, and you cannot 360 without a solid 180. Respect the progression and master each step before moving on.
13. The Mental Game of Snowboard Tricks All Levels
Snowboarding is as much a mental sport as a physical one. The fear of falling, the anxiety of attempting a new trick, and the frustration of repeated failures can all derail your progression. Understanding and managing the mental aspect of trick progression is just as important as physical training.
Visualization
Visualization is the practice of mentally rehearsing a trick before you physically attempt it. Research in sports psychology consistently shows that visualization improves performance and reduces anxiety. Before attempting a new trick, close your eyes and mentally walk through every phase: the approach, the takeoff, the trick itself, and the landing. Make the visualization as detailed as possible — feel the board under your feet, hear the wind, see the landing.
Fear Management
Fear is a natural and healthy response to dangerous situations. The goal is not to eliminate fear but to manage it. The most effective strategy is incremental progression — break the trick into small, manageable steps and master each one before combining them. If you are afraid of Backside 180s, start with Frontside 180s (which are less scary because you can see the landing), then gradually work up.
Building Confidence
Confidence comes from successful repetition. Every time you land a trick cleanly, you build neural pathways that make the trick easier and less scary. The key is to accumulate “reps” — practice the same trick dozens of times until it becomes second nature. Confidence is not something you can force; it is something you build through consistent, successful practice.
Dealing with Crashes
Crashes are inevitable in snowboarding. The key is to process them constructively rather than destructively. After a crash: (1) Take a moment to assess whether you are injured. (2) If you are uninjured, get back on the feature and try again — ideally within the same run. (3) If you cannot immediately try again, visualize the trick successfully before your next attempt. (4) Never end a session on a crash if you can avoid it — the last memory of the session shapes your mental state for the next time.
The Plateau
Every rider hits plateaus — periods where no amount of practice seems to produce improvement. Plateaus are normal and temporary. They typically occur when your brain is consolidating skills before the next level of progression. The best strategy during a plateau is to: (1) Continue practicing consistently. (2) Focus on style and consistency rather than learning new tricks. (3) Try a different terrain or feature type. (4) Take a short break if frustration is overwhelming.
Goal Setting
Setting specific, achievable goals accelerates progression. Instead of “I want to learn more tricks,” set goals like “I will land 10 clean Backside 180s this session” or “I will hit the medium jump line three times per park day.” Goals provide direction and motivation, and achieving them builds confidence and momentum.
14. Off-Season Training for Trick Progression All Levels
The best snowboarders don’t stop training when the snow melts. Off-season training is essential for maintaining fitness, improving skills, and building the physical capacity needed for advanced tricks. Here are the most effective off-season training methods for snowboard trick progression.
Trampoline Training
Trampolines are the single best off-season training tool for snowboarders. They allow you to practice aerial awareness, rotation, and grab technique without the risk of snow. Many professional riders use trampolines to learn new tricks before attempting them on snow. A small backyard trampoline or a local trampoline park can dramatically accelerate your progression.
Trampoline Drills: Practice Ollies, grabs (Indy, Melon, Method), 180s, 360s, and even flips on the trampoline. Focus on body position and spatial awareness rather than height. The goal is to build muscle memory for the movements you will perform on snow.
Foam Pit Training
Foam pits allow you to attempt tricks at full speed with a soft landing. Many snowboard training facilities have foam pits with ramps that simulate snow jumps. Foam pit training is the safest way to learn flips, Corks, and other high-risk tricks. If you have access to a foam pit facility, use it regularly during the off-season.
Balance Boards
Balance boards like the Indo Board (featured in our gear section) build core strength, stabilizer muscles, and board control. They simulate the heel-toe balance required for snowboarding and are excellent for practicing weight shifts, presses, and spins. A balance board session of 15-20 minutes daily can significantly improve your on-snow performance.
Strength Training
Snowboarding requires a specific combination of strength: core stability, leg strength, and explosive power. Focus on exercises that build these qualities:
- Squats: Build leg strength for jumps and landings. Focus on deep, controlled squats with moderate weight.
- Deadlifts: Build posterior chain strength for Ollies and presses. Romanian deadlifts are particularly effective.
- Planks and Side Planks: Build core stability for spinning and balance. Hold for 60+ seconds.
- Box Jumps: Build explosive power for jumping. Start with low boxes and progress to higher ones.
- Lunges: Build single-leg strength and balance. Walking lunges and reverse lunges are both effective.
Yoga and Flexibility
Flexibility is crucial for snowboarding — particularly for grabs like the Stalefish and Japan, which require significant flexibility. Yoga also improves balance, body awareness, and mental focus. Many professional riders practice yoga regularly during the off-season and on-snow season.
Skateboarding
Skateboarding is the closest off-season activity to snowboarding. It builds board control, balance, and trick technique that translate directly to snow. Many snowboard tricks — including the Ollie, kickflip, and grind — originated in skateboarding. Spending time at a skatepark during the off-season maintains your board skills and allows you to experiment with tricks in a different environment.
Inline Skating
Inline skating is another excellent off-season activity for snowboarders. It builds balance, coordination, and leg strength while providing a similar sensation to snowboarding. Many freestyle skaters and snowboarders cross-train with inline skating during the off-season.
15. Safety First: Don’t Break Yourself
⚠️ The Learning Curve Hurts
Progression involves failure. When you catch an edge on a rail or knuckle a jump, the ground hits hard. Wrist injuries are the #1 snowboard injury. Always wear wrist guards when learning jib tricks.
Essential Protective Gear
The right protective gear can mean the difference between walking away from a crash and spending the season in a cast. Here is every piece of protective gear you should consider:
- Helmet: Non-negotiable. Modern snowboard helmets are lightweight, well-ventilated, and stylish. There is no excuse for riding without one. A quality snowboard helmet can save your life.
- Wrist Guards: The #1 injury for snowboarders is a wrist fracture. Wrist guards prevent fractures and sprains when you fall on your hands. Wear them when learning any new trick.
- Impact Shorts: Protect your tailbone, hips, and thighs during rail and jump crashes. D3O-equipped shorts harden on impact to absorb energy.
- Knee Pads: Essential for jibbing, where knee impacts on rails and boxes are common. Look for low-profile pads that fit under your pants.
- Back Protector / Spine Guard: Recommended for advanced riders hitting large jumps and halfpipe. A spine protector can prevent catastrophic back injuries.
- Elbow Pads: Often overlooked but useful for beginners who fall on their arms frequently.
How to Fall Safely
Learning to fall is one of the most important skills in snowboarding. A proper fall distributes impact across a larger area and avoids the instinct to catch yourself with your hands (which causes wrist injuries).
- Make a Fist: When falling forward, make a fist and land on your forearms, not your open hands. This prevents wrist hyperextension.
- Roll with It: If you are falling with momentum, try to roll rather than planting your arms. Rolling distributes the impact across your back and shoulders.
- Don’t Fight the Fall: Resist the urge to stiffen up. Stay relaxed and let your body absorb the impact naturally.
- Protect Your Head: Always tuck your chin and protect your head. A helmet helps, but good falling technique is your first line of defense.
- Get Up Quickly: The faster you get up after a crash, the less time you have to dwell on it mentally. Get up, assess, and try again.
Park Etiquette
The terrain park has its own rules and culture. Following park etiquette keeps you and other riders safe:
- Look Before You Drop: Always check that the landing zone is clear before dropping in. Collisions in the park are common and dangerous.
- Don’t Snake: Wait your turn. Don’t cut in front of other riders.
- Call Your Drop: On features with blind landings, call “dropping” before you go to alert other riders.
- Clear the Landing: If you crash in a landing zone, get out of the way as quickly as possible.
- Respect Progression: Don’t hit features that are beyond your skill level. This endangers you and others.
- Help Others: If you see someone injured, help them. The park community looks out for its own.
Knowing When to Stop
One of the most important safety skills is knowing when to stop for the day. Factors that should trigger a break include: fatigue (tired riders make mistakes and have slower reaction times), flat light (reduced visibility makes it hard to judge terrain), ice (icy conditions increase crash severity), and frustration (angry riders take unnecessary risks). Listen to your body and your mind — they will tell you when it’s time to call it a day.
16. How to Ride a Terrain Park Like a Pro Intermediate
The terrain park is where freestyle snowboarding comes to life. Understanding how to navigate a park — from reading features to choosing your line — is essential for safe and productive park riding. This section covers everything you need to know about terrain park riding.
Reading Park Features
Every park feature has a specific design and intended use. Understanding the feature helps you choose the right trick and the right speed:
- Flat Box: The simplest feature. Ride straight over it with a flat base. Perfect for 50-50s and learning balance.
- Down Box: A box that slopes downward. Requires slightly more speed than a flat box. The transition from flat to downhill requires you to adjust your balance forward.
- Down-Flat-Down Box: A box with a flat section between two down sections. This teaches you how to ride through transitions. The flat section requires you to shift weight back to center.
- Round Rail: A cylindrical rail. Harder than a box because the contact patch is smaller. Requires precise balance and flat base.
- Flat Rail: A flat-sided rail. Slightly more forgiving than round rails because the flat surface provides more stability.
- Kinked Rail: A rail with bends or angles. Extremely technical because you must adjust balance at each kink. Only attempt these after mastering flat rails.
- tabletop Jump: A jump with a flat top. The safest type of jump because you can ride over the top if you come up short. Perfect for learning spins.
- Step-Down Jump: A jump where the landing is lower than the takeoff. Requires more speed and commitment because you cannot ride over the top.
Speed Check
Speed management is the most important skill in park riding. Too slow and you won’t clear the knuckle of a jump. Too fast and you will overshoot the landing. Every feature requires a specific speed, and learning that speed is essential for safe park riding.
How to Check Speed: On your first run through a new park, ride each feature at moderate speed and observe the outcome. If you come up short, add speed. If you overshoot, reduce speed. After 2-3 runs, you will dial in the right speed for each feature.
Line Selection
Park lines are typically arranged in progression order — easier features first, harder features last. Follow this order and don’t skip ahead. A typical park line might progress: flat box → down box → small jump → medium jump → large jump → rail line. The progression order teaches specific skills at each stage.
Sessioning vs. Lapping
There are two approaches to park riding: sessioning and lapping. Sessioning means hitting the same feature repeatedly until you master a specific trick. Lapping means riding the entire park from top to bottom, hitting multiple features per run. Sessioning is better for learning new tricks; lapping is better for maintaining consistency and building stamina.
Park Flow and Awareness
Park riding requires constant awareness of other riders. Always look uphill before dropping in, and always look downhill before entering a feature. Watch for riders who may have crashed in landing zones. If you are learning a trick that requires multiple attempts, communicate with other riders about your intended line. The park is a shared space — respect others and they will respect you.
17. Top Gear to Fast-Track Your Progression
You can’t learn everything on the snow. Training at home or having the right safety gear can double your learning speed. Here are the top tools available on Amazon.

Indo Board Original
If you want to learn spins and balance without the bruising, start here. The Indo Board mimics the heel-toe balance required for snowboarding. Professional riders like Torah Bright and Chloe Kim have used balance boards as part of their training regimen.
Pros
- Safe indoor practice
- Builds stabilizer muscles
- Durable wood construction
- Mimics snowboard feel
- Portable and compact
Cons
- Roller can be fast on hardwood
- Pricey
- Steep learning curve

Leatt Impact Shorts
When you miss a rail or slip out on a jump, you land on your hip or tailbone. These shorts use D3O foam that hardens on impact to save your butt (literally). D3O technology is the same material used by military and motorcycle riders for impact protection.
Pros
- D3O technology
- Low profile fit
- Breathable material
- Can be worn under any snow pants
- Lightweight and flexible
Cons
- Can feel warm in spring
- Sizing runs snug
- Requires proper sizing
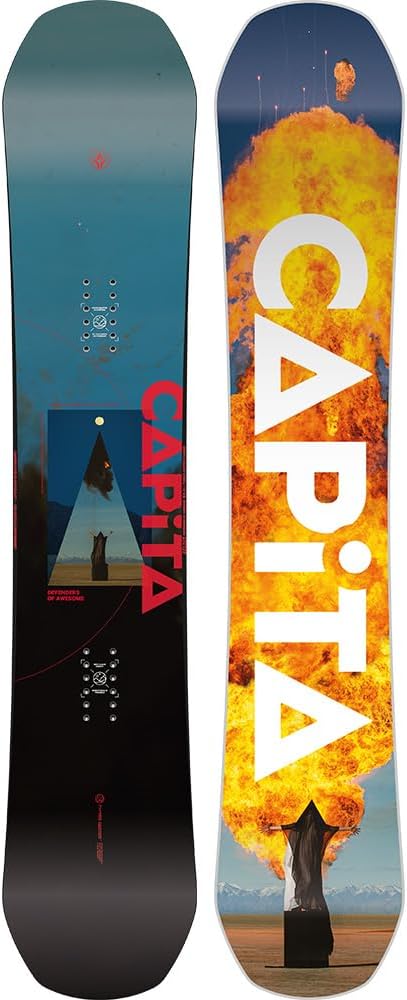
Capita Defenders of Awesome (DOA)
One of the most awarded park boards in history. It features a hybrid camber profile that gives you the pop of camber for jumps but the forgiveness of flat kicks for jibbing. The DOA has won Transworld Snowboarding’s Good Wood award multiple years running and is the board of choice for many professional park riders.
Pros
- Incredible pop
- Twin shape for switch riding
- Fast sintered base
- Multiple award winner
- Versatile camber profile
Cons
- Stiffer than a noodle jib board
- Topsheet chips if abused
- Higher price point
Choosing the Right Board for Tricks
Not all snowboards are created equal when it comes to freestyle riding. Here is what to look for in a trick-oriented board:
- Twin Shape: A twin-tip board rides the same in both directions, which is essential for switch tricks and landings. Avoid directional boards for park riding.
- Flex Rating: For jibbing and buttering, look for a softer flex (3-5 on a 10-point scale). For jumps and all-mountain freestyle, a medium flex (5-7) provides more pop and stability. Stiff boards (7+) are better for big jumps and high-speed riding.
- Camber Profile: Hybrid camber (camber between the feet, rocker at the tips) provides the best all-around freestyle performance. Full camber offers maximum pop but is less forgiving. Full rocker is the most forgiving but lacks pop.
- Length: For park riding, choose a board that comes up to your chin or nose. Shorter boards are more maneuverable for jibbing; longer boards provide more stability for jumps.
- Waist Width: Make sure the board’s waist width matches your boot size. Too narrow and your toes drag; too wide and the board feels sluggish.
Boot Selection for Park Riding
Your boots are the most important piece of equipment for trick riding. They determine how well you can feel the board, how much control you have, and how comfortable you are during long park sessions. Look for boots with a medium flex (5-7), good heel hold, and a comfortable fit. A boot that fits well will improve your board control and reduce fatigue. If you are experiencing heel lift, try new laces or insoles before buying new boots.
Binding Setup for Park Riding
Your binding setup affects how your board performs for different trick types:
- Stance Width: Most park riders use a stance width of 20-22 inches (50-56 cm). A slightly wider stance provides more stability for landings.
- Stance Angle: A duck stance (+15/-15 or +18/-6) is common for park riding because it allows comfortable riding in both regular and switch stances.
- Binding Position: Centered binding position is ideal for park riding because it provides equal performance in both directions. Setback bindings are better for powder and all-mountain riding.
- Binding Flex: Medium-flex bindings (5-7) provide the best balance of response and forgiveness for park riding. Stiff bindings are too responsive for jibbing; soft bindings lack the support needed for jumps.
Conclusion: The Path to Progression
Mastering this list of snowboard tricks won’t happen overnight. It takes seasons of dedication, plenty of falls, and a lot of patience. But the feeling of landing your first clean 360 or locking into a solid press makes every bruise worth it.
Snowboarding progression is a marathon, not a sprint. The riders who progress the fastest are not necessarily the most talented — they are the most consistent. They show up every session with a goal, they practice deliberately, and they embrace failure as a necessary part of learning. Whether you are working on your first Ollie or your first Cork 720, the principles are the same: build a solid foundation, progress incrementally, stay safe, and most importantly, have fun.
The tricks in this guide represent the full spectrum of snowboard freestyle — from the simplest Tail Press to the most complex Triple Cork. Not every rider will attempt every trick, and that is perfectly fine. The beauty of snowboarding is that you can choose your own path. Whether you want to be a butter artist, a rail specialist, a halfpipe specialist, or a big air rider, this guide provides the roadmap. Choose your path, commit to the progression, and enjoy the ride.
Remember to check your gear—ensure your boot laces are tight, your edges are tuned (learn how to remove rust), and your body is protected. Start small, visualize the movement, and most importantly, keep riding.
For the latest snowboard trick tutorials, gear reviews, and progression tips, bookmark this page and check back regularly. We update our guides with the latest tricks, gear, and training methods as the sport evolves. Snowboarding is a constantly progressing sport — new tricks are being invented every season, and this guide will grow along with the sport.


