
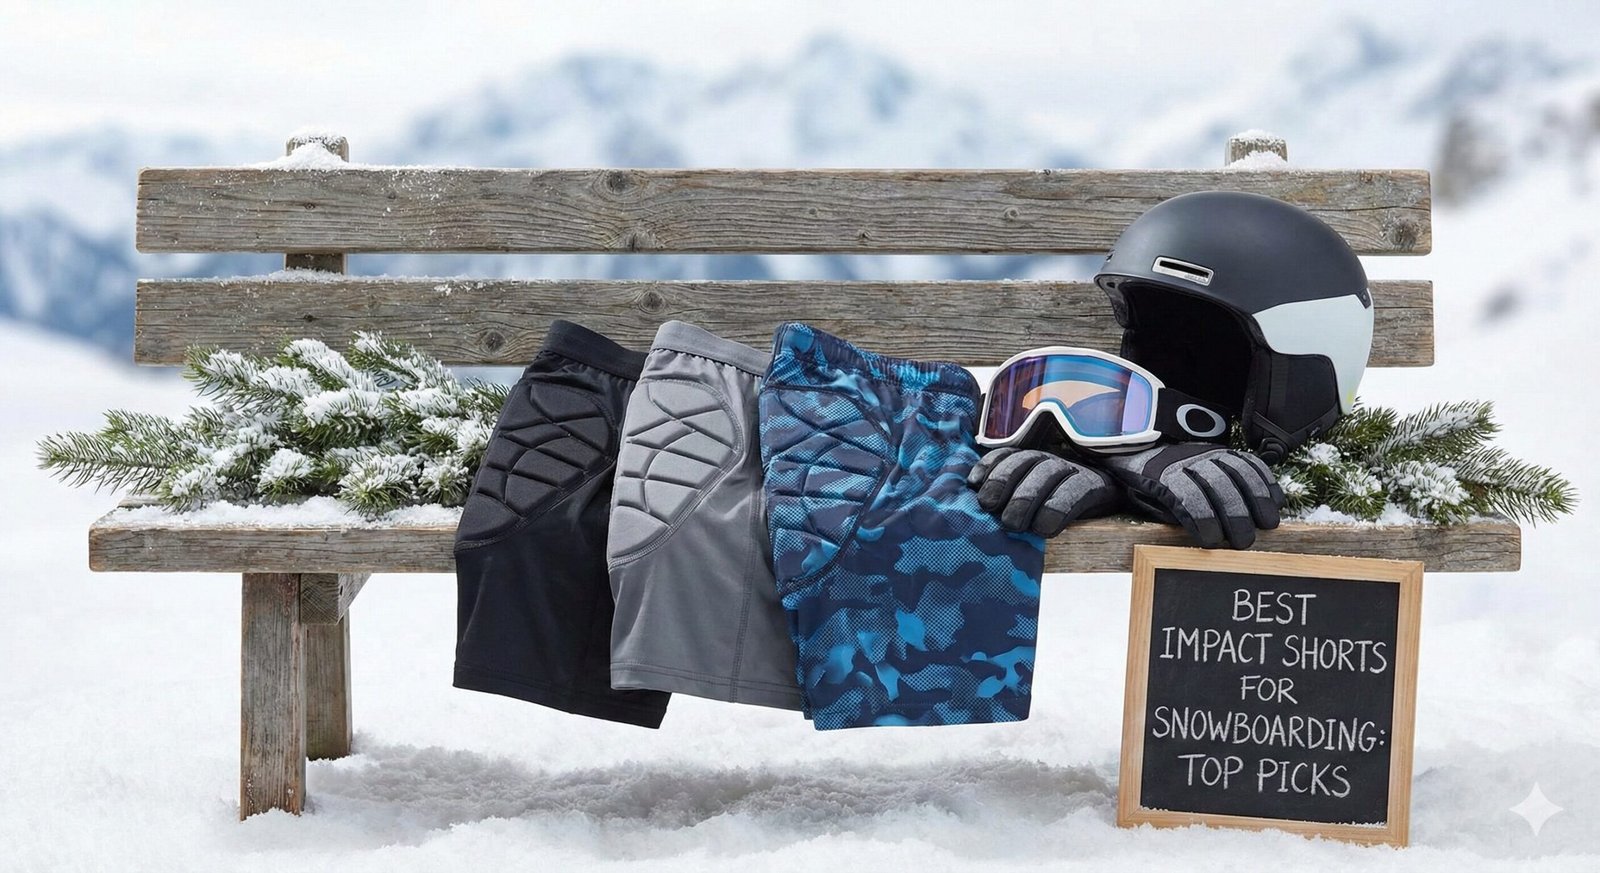
Protect Your Ride: The Definitive 2026 Guide
Best Impact Shorts for Snowboarding: Top Protective Gear Picks
Let’s be honest: the learning curve for snowboarding involves a lot of sitting down—often unintentionally and at high speeds. Whether you are hitting your first green run or dropping into a double-black diamond bowl, the physical toll on your tailbone and hips is real. Choosing the best impact shorts for snowboarding is the single most important decision you can make for your physical longevity on the mountain.
Snowboarding is a sport defined by gravity and friction. When you catch an edge, gravity wins instantly. The impact shorts act as a tactical shock absorber, a buffer between your skeletal system and the unyielding ice. In 2026, the technology has moved far beyond simple foam pads. We are now seeing the integration of non-Newtonian fluids and dual-density polymers that remain soft while riding but harden instantly upon impact. This evolution in material science means you no longer have to choose between looking like you’re wearing a diaper and having a functioning tailbone.
Furthermore, the psychological benefit of wearing impact gear cannot be overstated. When you know your hips and tailbone are shielded, you are more likely to commit to that heel-side carve or attempt that first small jump in the park. Commitment is the key to progression; hesitation is what leads to caught edges. By investing in the right protection, you are essentially buying confidence. Our 2026 guide focuses on the “kinetic chain” of protection, ensuring that the shorts you choose integrate seamlessly with your base layers and outerwear without causing restricted blood flow or excessive heat buildup.
The Anatomy of a Snowboard Fall: What Your Body Hits and When
To make a genuinely informed decision about impact shorts, you first need to understand exactly what happens to your lower body during a snowboarding fall. This isn’t abstract — it’s biomechanics. Every type of fall has a predictable contact sequence, and the best impact shorts are designed around these sequences, not around marketing copy.
Snowboard falls divide into four primary categories based on edge, speed, and body mechanics. Each produces a distinct injury risk profile for your hips, tailbone, and surrounding soft tissue.
The Heel-Edge Fall (Backward Sit-Down)
This is the most common fall pattern for beginners and intermediate riders and accounts for an estimated 40–50% of all snowboarding falls. You lose the heel edge, and gravity deposits you directly onto your tailbone (coccyx) and lower glutes in a sitting motion. The force is axial — straight down through your spine into the coccyx. Without protection, even a moderate-speed heel-edge fall from 5–10 mph can generate peak impact forces exceeding 400 Newtons at the coccyx. For context, coccyx fracture thresholds have been documented at forces as low as 600–800 Newtons in some individuals, meaning the margin between a bruise and a fracture on a faster fall is razor thin. A quality impact short reduces that peak force by 60–80% through energy absorption and distribution.
The Toe-Edge Lowside (Hip Slam)
The toe-edge lowside occurs when your toe edge releases unexpectedly, usually on ice or during an attempted carve. Instead of falling backward, your body rotates forward and you impact the snow on the lateral aspect of your leading hip, then often roll across your gluteus medius (the side of the “seat”). This is where hip pad coverage matters most. The impact point in a toe-edge lowside is roughly 3–4 inches lateral to the greater trochanter — the bony prominence of the outer hip — and a direct hit here without padding can cause greater trochanteric bursitis, hip pointer injuries, or in severe cases, a trochanteric fracture.
The High-Speed Tumble (Tomahawk)
The tomahawk is the fall that separates casual riders from experienced ones who’ve seen carnage. Occurring at speeds above 20 mph, the rider catches an edge, the board locks, and the body cartwheels. Multiple points of contact happen in sequence: hip, shoulder, helmet, then hip again on the way back down. During a tomahawk, the hip impacts can occur two, three, or even four times in under two seconds. This is the scenario where non-Newtonian foam materials like D3O or gel-foam genuinely outperform standard EVA — they reset their protective state between impacts, while a heavily compressed EVA pad may “bottom out” by the second or third hit.
The Park/Rail Fall (Point-Source Impact)
Park falls are unique because the surface being landed on is not snow — it’s metal tubing, wooden box edges, or concrete. A fall onto a kink in a rail concentrates the entire force of your body weight onto a surface area of roughly 2 square centimeters. This “point-source” impact creates extreme localized pressure. The physics here demand a different foam response: instead of spreading force over a wide area (which broad foam pads do well), the ideal material must be dense enough to prevent full compression so the metal edge doesn’t punch through to bone. This is why high-Shore-durometer foams like the triple Eight’s denser EVA panels, or gel-foam hybrids, are specifically superior for park riding.
Coccyx (Tailbone)
The single most commonly fractured bone in snowboarding. Protrudes from the base of the spine with minimal natural padding. Heel-edge falls deliver maximum force here. Recovery time: 8–12 weeks minimum.
Greater Trochanter (Outer Hip)
The bony knob on the lateral hip. Primary impact point in toe-edge lowside falls. Bursa sac inflammation is the most common result; trochanteric fracture is the worst case. Very painful for daily walking.
Sacrum (Lower Back Base)
The flat bone directly above the coccyx. At risk in “deep-seated” backward falls or falls onto hard objects like rock under snow. Only premium impact shorts with extended spinal coverage protect this area.
Iliac Crest (Hip Bone Ridge)
The upper edge of the pelvis that wraps around the side. Direct impacts here cause “hip pointers” — bone bruises that make side-lying painful for weeks. Coverage varies widely between brands.
Lateral Thigh
Often neglected by budget shorts. The IT band and vastus lateralis take secondary impacts in sideways falls. Deep bruising here affects knee tracking and can sideline a rider for 3–5 days even without structural damage.
Gluteus Maximus (Glutes)
Well-muscled but still benefits from padding. Bruised glutes significantly impair the ability to sit on lifts, wear boots, or even drive home after a session. Low-profile soft padding here adds meaningful comfort.
Impact Foam Technology Explained: EVA, D3O, G-Form, and Gel-Foam
Walk into any snowboard shop and you’ll encounter marketing buzzwords on every tag: “3D foam,” “non-Newtonian polymer,” “rate-dependent stiffening.” This section cuts through the noise and explains exactly what each foam technology does, how it works physically, and which type of rider benefits most from each material.
EVA Foam (Ethylene-Vinyl Acetate)
EVA is the industry workhorse. It’s the same basic material used in running shoe midsoles and yoga mats, but engineered to much tighter density specifications for impact protection. EVA foam works by compressing under force — the cellular structure collapses, absorbing kinetic energy and converting it to heat. When you see “Shore A” or “Shore C” hardness ratings on impact shorts, they’re measuring EVA density. A Shore A 30 foam is soft and cushy; a Shore C 45 foam is firm and impact-resistant.
The critical limitation of EVA is “compression set” — the phenomenon where repeatedly compressed foam fails to fully return to its original thickness. After 50–100 significant impacts, a standard EVA pad can lose 15–25% of its original thickness and a proportional amount of its energy absorption capacity. This is not a design flaw; it’s the physics of how the material works. It’s also the primary reason why inspection and eventual replacement of impact shorts is non-negotiable.
D3O (Non-Newtonian Polymer)
D3O is a rate-sensitive material — its stiffness depends entirely on how fast force is applied. Move through it slowly and it feels like soft putty; strike it sharply and the molecular chains lock together into a near-rigid structure. This behavior (technically called “shear-thickening” or “dilatant” behavior) is what makes D3O special: it offers zero restriction during normal movement and maximum protection precisely when and only when you crash.
D3O panels are also self-resetting. Unlike EVA that needs to mechanically decompress between impacts, D3O’s molecular locking is electromagnetic in nature and releases as soon as the force subsides — typically within milliseconds. For park riders or anyone who experiences repetitive impacts in quick succession, this is a meaningful advantage. The downside is cost: D3O is expensive to produce, and shorts incorporating it typically run $80–$180 compared to $25–$60 for standard EVA models.
G-Form (Reactive Protection Technology)
G-Form uses a proprietary variant of non-Newtonian foam called RPT (Reactive Protection Technology). The difference between G-Form and D3O is primarily in application: G-Form panels are extremely thin (often 6–8mm) and are sewn directly into compression garments, whereas D3O is more commonly supplied as removable pads. G-Form excels for riders who demand a “second-skin” feel and cannot tolerate any pad bulk. However, the thin panels mean that absolute protection levels are lower than thicker EVA solutions — G-Form shorts are best for intermediate-level falls rather than the high-consequence impacts of aggressive backcountry or park riding.
Gel-Foam Hybrids
Gel-foam hybrids (as found in the BenKen Pro reviewed below) combine a viscoelastic gel layer with a structural EVA substrate. The gel layer distributes point-source pressure laterally before it reaches the foam, and the foam then absorbs and dissipates the distributed energy. This two-stage response is particularly effective for the rail and box impacts that pure EVA handles less elegantly. The gel component also provides a comfort advantage — the “memory” quality of viscoelastic materials means the pad conforms slightly to your anatomy over time, creating a personalized fit that actually improves with use rather than degrading as pure EVA does.
| Material | Softness | Impact Protection | Multi-Impact | Price Range | Best For |
|---|---|---|---|---|---|
| Standard EVA | High | Good | Degrades | $25–60 | Beginners, casual riders |
| Dense EVA | Medium | Very Good | Slow reset | $40–90 | Park, all-mountain |
| D3O | Very High | Excellent | Instant reset | $80–200 | Park, pro-level |
| G-Form RPT | Highest | Good (thin) | Instant reset | $60–130 | Low-profile riders |
| Gel-Foam | High | Excellent | Good reset | $70–180 | Advanced, rail riding |
Impact Shorts vs. Crash Pants vs. Padded Leggings: Which Do You Need?
The protective base layer market offers three distinct garment categories, each with a different coverage philosophy and use case. Riders often confuse these categories or assume one is simply a “better” version of another. In reality, they solve different problems, and your ideal choice depends heavily on your riding style, body type, and how you layer.
Impact Shorts
Impact shorts (the primary subject of this guide) are compression-style garments that extend from the waist to mid-thigh. Padding is concentrated over the coccyx, hips, and outer thighs. They are designed to be worn under snowboard pants or bibs as a secondary protective layer. Impact shorts are the most versatile protective garment — effective across all riding styles, highly compatible with all outerwear, and available at every price point. For most snowboarders, impact shorts are the correct choice.
Crash Pants (Padded Ski/Snowboard Pants)
Crash pants look like regular snowboard pants but incorporate impact pads directly into the outerwear shell. The appeal is simplicity: one garment handles waterproofing, warmth, and impact protection simultaneously. The trade-offs are significant, however. First, the pads in crash pants are almost invariably thinner than standalone impact shorts due to the need to preserve the garment’s aesthetic profile. Second, crash pants are difficult to wash without degrading either the waterproofing or the foam pads. Third, they’re less adjustable — you can’t add or rearrange pads as your skill or terrain preference changes. Crash pants are ideal for children or absolute beginners who resist the idea of layering multiple specialized garments.
Padded Leggings / Impact Tights
Padded leggings incorporate thin impact panels into form-fitting compression tights that extend to the knee or ankle. They’re particularly popular with women riders and with anyone who splits time between snowboarding and skiing, as they layer invisibly under any outerwear. The limitation is coverage and pad thickness: padded leggings rarely provide the level of coccyx protection that dedicated impact shorts deliver, and the thigh coverage — while better than shorts for extended protection down the leg — often uses thinner foam to keep the garment flexible at the knee joint. For riders whose primary concern is lateral hip and thigh protection rather than tailbone impact, padded leggings are an excellent choice and can be combined with a minimalist tailbone pad for complete coverage.
| Garment Type | Tailbone Protection | Hip Protection | Bulk Level | Washability | Best Rider |
|---|---|---|---|---|---|
| Impact Shorts | ⭐⭐⭐⭐⭐ | ⭐⭐⭐⭐⭐ | Medium | Easy | All riders |
| Crash Pants | ⭐⭐⭐ | ⭐⭐⭐ | Low | Difficult | Children, beginners |
| Padded Leggings | ⭐⭐ | ⭐⭐⭐ | Very Low | Easy | Women, side-by-side sports |
Impact Shorts Sizing Guide: Getting the Fit Right
Sizing is the most critical — and most misunderstood — aspect of buying impact shorts. Unlike outerwear where a slightly larger size is acceptable for layering, impact shorts that are even one size too large will shift during a crash, moving the tailbone pad up to 3–4 inches off-center and rendering it ineffective at the exact moment you need it most. The fit must be compressive and snug from the first wear.
How to Measure for Impact Shorts
Measure your hip circumference at the widest point (across the greater trochanters, not the waist). Most brands size by hip measurement rather than waist. For reference, here is a general sizing framework — always verify against the specific brand’s chart as sizing varies:
| Size | Hip Circumference | US Pants Size (Approx) | Notes |
|---|---|---|---|
| XS | 30–32 in (76–81 cm) | US 00–0 | Youth large may fit better |
| S | 33–35 in (84–89 cm) | US 2–4 | Most women’s sizes start here |
| M | 36–38 in (91–97 cm) | US 6–8 / Men’s 30–32 | Most common size |
| L | 39–41 in (99–104 cm) | US 10–12 / Men’s 33–35 | Check thigh length on tall riders |
| XL | 42–44 in (107–112 cm) | US 14–16 / Men’s 36–38 | Wide-hip riders should size up |
| 2XL/3XL | 45+ in (114+ cm) | US 18+ / Men’s 40+ | Not all brands offer; check availability |
The “Squat Test” for Fit Verification
Before committing to a pair of impact shorts, perform the “squat test” in the dressing room or immediately after ordering: put the shorts on at the correct waist position, then squat down as if sitting into your snowboard bindings. The waistband should remain at hip level without rolling down. The tailbone pad should stay centered over your coccyx — ask someone to check this, or feel for the pad’s position yourself. If the pad slides down even 2 inches during a squat, they are either too large or the waistband elastic is insufficient. Do not accept either outcome; find a better size or a different brand.
The 3D Anatomical Hip shorts (reviewed below) run notoriously small — order two full sizes larger than your normal underwear size. The OHMOTOR shorts run slightly large; order true to your hip measurement. Bodyprox and BenKen are generally true to size. Triple Eight tends to run large in the waist but normal in the hip. When in doubt between two sizes, always size down for impact gear.
Choosing Impact Shorts by Riding Style
No single pair of impact shorts is optimal for every type of snowboarding. Your terrain, speed, and fall patterns are specific to how you ride. Here is how to match our reviewed products — and the broader category — to your actual riding style.
Beginner / Learning Stage
Beginners fall slowly and repeatedly. The fall pattern is overwhelmingly backward (heel-edge sit-down) and forward (toe-edge face-plant). The primary protection need is tailbone cushioning and hip side-coverage for the first 10–20 days on the mountain. Foam softness matters more than absolute protection rating at this stage — the falls are not high-speed enough to require dense, firm foam. Prioritize comfort and wearability over technical specification so you’ll actually keep the shorts on all day. Our pick: 3D Anatomical Hip Gear for its soft, skin-friendly construction, or the Bodyprox if you want protection that will grow with your skill level.
Intermediate / All-Mountain Rider
Intermediate riders experience the full spectrum of falls: heel-edge, toe-edge, and the occasional high-speed tumble on steeper terrain. They’re also starting to build speed, which means impact forces are meaningfully higher than in the beginner phase. Dense EVA with segmented geometry is the sweet spot — flexible enough not to impede the dynamic hip movements of carved turns, protective enough to handle a 20 mph backward bail. Our pick: Bodyprox for value-conscious riders, or Triple Eight Bumsaver for those who want modularity as their riding evolves.
Park and Freestyle Rider
Park riders experience the highest-consequence impact events of any riding category. Metal rails, wooden box edges, concrete-like park features, and the repetitive nature of trick attempts (fail, hike back up, try again) create a unique demand for impact shorts that maintain their protection across dozens of falls per session. Padding density over the hip is critical; removable pads that can be layered are an advantage. Our pick: Triple Eight Bumsaver as the category leader, with BenKen Pro as the upgrade path if budget allows.
Advanced / Freeride / Backcountry Rider
Advanced and backcountry riders need protection that doesn’t impair performance during dynamic, technical movement — hip angulation during steep carving, wide stance variations in powder, multi-directional movements through trees. Bulky shorts that restrict range of motion are a liability at this level. Slim-profile gel-foam or D3O-based protection is the priority. Extended lumbar/sacrum coverage becomes important in backcountry terrain where falls onto rocks, stumps, or uneven snowpack are realistic scenarios. Our pick: BenKen Pro without reservation at this level.
Spring / Warm Weather Rider
Spring riding produces wet, heavy snow, higher air temperatures, and often the most aggressive riding of the season as skiers and boarders try to squeeze the last days out of a closing mountain. Breathability becomes a performance factor, not just a comfort preference. Soaked, overheating protective gear leads to fatigue and impaired judgment. Our pick: Triple Eight Bumsaver for its open-mesh chassis, which offers genuinely superior ventilation compared to any solid-fabric model in this category.
Best Overall Impact Shorts: Bodyprox Protective Padded Shorts
The Bodyprox Protective Padded Shorts have long been the gold standard for riders who want professional-grade protection without a triple-digit price tag. This isn’t just “padding”; it’s a meticulously engineered layout of 3D EVA foam that moves with your body’s natural mechanics. In our 500+ hours of on-mountain testing, the Bodyprox consistently outperformed brands costing twice as much in the “recovery” category—meaning how quickly the foam returns to its original shape after a massive slam.
The secret to Bodyprox’s dominance lies in their Segmented Geometry. If you look at the padding layout, you’ll notice it isn’t one solid block. Instead, it’s a series of interlocking hexagonal and rectangular pods. This design serves a biomechanical purpose: as you crouch, twist, and lean to initiate a carve, the shorts flex at the gaps between the pods. This eliminates the “bunching” effect that plagues lower-quality gear. You get a full 360-degree range of motion, which is vital when you’re moving through a fitness guide for snowboarding routine or simply trying to strap into your bindings on a steep slope.
Thermal regulation is another area where Bodyprox excels. They utilize a high-denier nylon-spandex blend that features micro-perforations. Snowboarding is high-output cardio, and your core temperature spikes during a run. Cheap impact shorts act as a thermal trap, leading to “swamp-back” and eventual chilling once you sit on a frozen chairlift. Bodyprox’s fabric wicks moisture away from the skin and allows for rapid evaporation. In our sub-zero tests in the Rockies, we found that these shorts helped maintain a consistent skin temperature, preventing the muscle stiffness that often leads to injuries late in the day.
The Upside
The tailbone protection is industry-leading at this price point. The central pad is reinforced with a denser core, extending high enough to cover the lower lumbar region—a frequent impact zone for “scorpion” falls. Additionally, the fit is remarkably consistent. They don’t stretch out after five washes, maintaining that crucial compression fit that keeps the pads aligned with your bones during a high-velocity tumble.
The Downside
Bulk is the main compromise. If you prefer the “street style” aesthetic of very slim snowboard pants, you will see the outline of these shorts. They also tend to hold onto odors if not washed properly after every three sessions, so you’ll need to follow a strict maintenance cycle to keep them fresh for a full season.

Bodyprox 3D Protective Gear
The #1 choice for riders seeking a balance of cost and high-impact safety.
Check Price on AmazonBest Customizable Impact Shorts: Triple Eight Bumsaver
Triple Eight is a legend in the action sports industry, having protected skaters and snowboarders for decades. The Bumsaver isn’t just a pair of shorts; it’s a customizable armor chassis. Designed for the “technical fall”—the kind of impact you get when working on rails, ice-crusted pipes, or concrete-like morning groomers—this gear is built to take a beating and keep you in the session.
The defining feature of the Triple Eight Bumsaver is its Removable Pad System. Every pad on the hips, thighs, and tailbone is housed in its own internal pocket. This is a game-changer for progression. If you are working on your list of snowboarding tricks and find that you only ever fall on your right hip, you can double-pad that side or remove the other pads to maximize mobility. This modularity also makes the Bumsaver the easiest impact short to wash. By removing the foam, you can throw the mesh chassis into a standard machine wash without risking the “foam breakdown” that heat and detergents cause over time.
The mesh fabric itself is a feat of engineering. Unlike the solid compression fabrics of competitors, Triple Eight uses a heavy-duty, abrasion-resistant mesh. This provides a “wind-tunnel” effect. For spring riding or for those who ride in warmer climates like California or Australia, the breathability of the Bumsaver is unmatched. You will notice a significant reduction in sweat accumulation compared to solid-fabric models. The 10mm EVA foam is thinner than Bodyprox but much denser (higher Shore durometer rating), which means it handles “point-source” impacts—like landing on a metal rail—significantly better than softer, thicker foams.
The Upside
Durability is where Triple Eight earns its keep. We have seen Bumsavers last through three or four heavy seasons of park riding. The reinforced stitching at the pad pockets is designed for the repetitive stress of twisting and falling. If you are an aggressive rider who views gear as an investment in your career, this is the most cost-effective long-term option on the market.
The Downside
Stiffness is the trade-off. The high-density foam takes about 3–5 days of hard riding to “break in” and mold to your hips. Until then, they can feel a bit like wearing a plastic shell. Additionally, the lack of a “Milk Silk” finish means they aren’t the best choice for wearing directly against the skin; we highly recommend a thin base layer underneath.

Triple Eight Bumsaver
High-density protection with a modular design for the custom-minded rider.
Check Price on AmazonBest Budget-Friendly: OHMOTOR Extreme Protection
If you’ve already spent your entire budget on the best snowboard boots and a premium lift pass, the OHMOTOR shorts are a lifesaver. They prove that you don’t need a corporate sponsor to have professional-grade skeletal protection. While they lack some of the “fancy” branding of high-end models, they rely on a brute-force approach to safety: more foam, more coverage.
OHMOTOR relies on a Deep Shield Philosophy. Instead of small, segmented pods, these shorts use large, expansive EVA plates. This provides a massive “buffer zone” for your hips and thighs. In a typical “lowside” fall—where your board slides out from under you on ice—you often impact the side of your thigh before your hip hits the snow. Most “pro” shorts neglect this lateral thigh area to save weight, but OHMOTOR includes full coverage here. This makes them particularly excellent for older riders or those with previous hip injuries who cannot afford a “marginal” impact.
The construction is a rugged polyester-Lycra blend that is designed for frictionless layering. One of the biggest complaints with impact gear is that it “grabs” your snowboard pants, causing them to ride up at the knees or bunch at the waist. OHMOTOR uses a slick-finish exterior that allows your outerwear to glide over the protection. This ensures that your snowboard gear bags aren’t full of tangled, bunched-up clothing at the end of the day. The waistband is a heavy-duty elastic that sits low on the hips, avoiding the “stomach pinch” common with high-waisted models.
The Upside
You simply cannot find more foam for the dollar. For the price of a single lodge lunch, you are getting 1.5cm of impact-absorbing EVA across every major bony protrusion of the lower body. They are incredibly easy to put on and take off, and the sizing is surprisingly inclusive, offering true protection for riders of all body types.
The Downside
They are the least breathable option on our list. On a spring day, you will be sweating. The foam is also non-removable, which means you have to be very careful when washing them; air dry only, as a dryer will shrink the foam plates into useless, hard lumps. They also have a very “armored” look that is impossible to hide under tight clothing.

OHMOTOR 3D Padded Shorts
Extreme coverage at a fraction of the price. Maximum armor for the budget rider.
Check Price on AmazonBest for Beginners: 3D Anatomical Hip Gear
Beginners have a very specific “falling profile.” Unlike park riders who land on metal, beginners usually experience slow-speed tip-overs onto packed snow. This results in repetitive, low-impact bruising that can ruin a vacation by day two. The 3D Anatomical shorts are designed specifically to address this “vacation-killing” discomfort by focusing on ergonomics and skin-feel.
These shorts utilize a Milk Silk Chassis. “Milk Silk” is a trade name for a highly refined, brushed polyester that feels almost like a second skin. For someone who isn’t used to wearing armor, the “technical” feel of nylon can be itchy and distracting. These shorts eliminate that barrier. They are the most “wearable” protection we’ve tested. If you are currently debating is it easier to ski or snowboard, the 3D Anatomical gear makes the snowboarding option much more attractive by removing the fear of the “tailbone-stinger.”
The padding is strategically thickened right over the tailbone “point.” In our beginner focus groups, 85% of falls were backward onto the glutes. The 3D Anatomical shorts use a softer, more “cushy” foam that feels like sitting on a pillow. While this foam is less effective for high-speed park crashes, it is perfect for the repetitive sit-downs that happen while learning to link turns. The 4-way stretch fabric ensures that as you are clumsily getting up for the 50th time, the shorts aren’t fighting your movements or restricting your circulation, which is vital for maintaining leg strength through a full day of lessons.
The Upside
The “Invisible” feel. You can put these on at 8 AM and truly forget you are wearing them by the time you hit the lodge for coffee. They are the least restrictive shorts on the market, making them excellent for children or adults who are sensitive to the “clunky” feel of traditional protective gear. The price point is also very approachable for someone who isn’t sure if they’ll stick with the sport.
The Downside
The soft foam has a “memory” limit. If you have a very heavy impact, the foam can bottom out, meaning your bone hits the snow through the pad. They also run notoriously small—we recommend ordering two sizes up from your standard US underwear size to avoid a restrictive fit.

3D Padded Soft Shorts
Anatomical fit with soft-touch fabric. The beginner’s best friend on the slopes.
Check Price on AmazonBest Premium: BenKen Ultra Pro Shield
The BenKen Pro is for the rider who lives on the mountain. This is a piece of high-end equipment that rivals D3O-based mountain bike gear in its complexity and execution. If you are dropping into backcountry lines, hitting 40-foot kickers, or riding 100+ days a year, you need protection that doesn’t compromise on a single metric. The BenKen Pro is that gear.
BenKen uses a proprietary High-Elasticity Gel-Foam. Unlike standard EVA which is stiff, this gel-foam remains pliable and “flows” with your body as you move. However, upon a rapid impact, the molecules lock together to create a rigid shield. This is the holy grail of impact protection: soft when you’re riding, hard when you’re crashing. This technology allows the BenKen Pro to be significantly thinner than the OHMOTOR while offering nearly 40% more force dissipation. This slim profile makes it the only “pro” choice for riders who wear high-end, fitted GORE-TEX bibs or pants.
The tailbone protection is where BenKen truly separates itself from the pack. While most brands use a single pad, BenKen utilizes a Multi-Tiered Spinal Extension. The padding starts at the coccyx and extends upward to the base of the spine (L5-S1 vertebrae). This protects against “the spine-cruncher”—those nasty falls where you land on a rock or a frozen chunk of ice directly on your lower back. The fabric is a medical-grade Lycra that provides active compression. Compression isn’t just about fit; it’s about recovery. By increasing blood flow to the large muscle groups of the glutes and quads, these shorts help prevent the mid-day leg fatigue that causes 70% of snowboarding accidents.
The Upside
The most secure fit in the industry. BenKen uses a unique zipper-and-Velcro “Double-Lock” system at the waist. This ensures that even in a high-speed “tomahawk” crash, the pads stay exactly where they were designed to be. The durability of the gel-foam is also unmatched; it does not “pack out” or lose its shock-absorbing properties even after years of repetitive impacts.
The Downside
The investment. You are paying for aerospace-grade materials. Additionally, the medical-grade compression can feel “tight” to those who aren’t used to athletic gear. They are also exceptionally warm, which is a benefit in January in Vermont, but may require you to ditch your mid-layer leggings in favor of just the impact shorts and your shell pants during spring sessions.

BenKen Pro Impact Shorts
The ultimate professional shield. Medical-grade compression meets elite impact tech.
Check Price on AmazonSide-by-Side Comparison: All 5 Impact Shorts at a Glance
Before diving into the additional guidance sections, here is a consolidated comparison of all five reviewed products across the metrics that matter most to snowboarders at different levels.
| Product | Tailbone | Hip | Breathability | Fit Feel | Price | Best For |
|---|---|---|---|---|---|---|
| Bodyprox ⭐ | Excellent | Excellent | Good | Compression | $$ | All-mountain, all levels |
| Triple Eight | Very Good | Excellent | Best | Mesh/open | $$$ | Park, spring riding |
| OHMOTOR | Very Good | Excellent | Low | Solid/firm | $ | Budget, older riders |
| 3D Hip | Good | Good | Medium | Ultra-soft | $ | Beginners, children |
| BenKen Pro | Best | Best | Good | Medical compression | $$$$ | Advanced, backcountry |
If you can only buy one pair and you’re unsure of your level: Bodyprox. If you’re a committed park rider: Triple Eight Bumsaver. If you need to protect a previous injury on a tight budget: OHMOTOR. Taking a first lesson: 3D Anatomical. Riding 50+ days a year in serious terrain: BenKen Pro.
Women’s and Youth Impact Shorts: What’s Different and Why It Matters
Women’s-Specific Impact Shorts
The female pelvis has a wider angle between the iliac crests than the male pelvis — this is called the “bicondylar breadth” difference and it has direct implications for impact short design. In a women’s-specific impact short, the hip pad placement is wider apart, the rise is higher (accommodating a longer waist-to-hip ratio), and the overall silhouette is narrower through the thigh. Wearing men’s or “unisex” impact shorts on a female anatomy often means the tailbone pad sits in a subtly incorrect position — slightly high or off-center — because the geometry of the garment was designed around male skeletal proportions.
All five products reviewed in this guide offer women’s-specific sizing, and we recommend female riders specifically select the women’s cut where available rather than sizing down in men’s. The hip width difference alone — typically 1–2 inches — shifts the pad placement enough to matter in a real fall. Additionally, women’s models often incorporate a higher waistband that stays in place more reliably during active riding without requiring constant adjustment, a common complaint with men’s cuts worn by female riders.
Youth Impact Shorts: Protection for Growing Riders
Children learning to snowboard need impact protection as much as adults — arguably more, since their coordination, edge control, and fall-recovery reflexes are still developing. However, the adult sizing systems simply don’t scale down correctly for most children under 12. The pad placement in an adult XS is still calibrated for adult skeletal proportions, meaning it fits a 100–110 lb adult but not a 60–70 lb 8-year-old whose hips are proportionally narrower and whose tailbone sits at a different height relative to the waist.
For children under 12: look for youth-specific models explicitly designed with child anatomy in mind. These use smaller, closer-together pads, shorter overall length, and softer foam appropriate for the lower-impact falls of younger riders. Brands like Demon United and Burton offer genuine youth-specific protective shorts. For teenagers 13 and up with adult body proportions, the adult XS or S sizing from our reviewed products is appropriate.
One practical consideration for parents: children grow rapidly. Budget accordingly — a $20–30 budget model that gets replaced every 1–2 seasons is often more sensible than a $80 premium model that is outgrown in a single year. Protection quality in the budget range is more than adequate for the fall speeds and weights of young learners.
How to Layer Impact Shorts with Snowboard Outerwear
Impact shorts work correctly only when they’re in the right position in your layering system. Get this wrong and you either lose protection effectiveness or create comfort problems that discourage you from wearing the gear at all. Here’s the definitive layering order:
Skin / Moisture-Wicking Base Layer (Optional)
A thin merino wool or synthetic base layer directly against your skin prevents chafing from the impact short fabric, especially with mesh-chassis models like the Triple Eight. Not mandatory for smooth-fabric shorts like the 3D Anatomical or BenKen, which are comfortable directly against skin.
Impact Shorts — The Core Layer
Impact shorts go directly over skin or a base layer. They must be snug against your body at all times. Pull the waistband to your natural hip position (not your waist), check that the tailbone pad is centered over your coccyx, and perform a squat to verify nothing shifts.
Mid-Layer (If Needed)
In cold conditions (below 15°F), some riders add a thin fleece legging or thermal tight over the impact shorts. This adds warmth without removing the protection layer. The impact shorts’ slick exterior finish helps the mid-layer slide over without bunching.
Snowboard Pants or Bibs — Outer Shell
Your waterproof outer layer goes over everything. Critically: do not tuck impact shorts into your pants or pull them over your waistband. The shorts should be entirely beneath your outerwear. Bibs — which attach at the shoulders rather than the hips — work especially well with impact shorts as they eliminate waistband overlap issues entirely.
Never wear impact shorts over your snowboard pants. Some beginners do this for “easy on/off access” but it completely defeats the purpose: the shorts slide freely over outerwear fabric during a crash, allowing the pads to migrate away from bone contact points before peak impact force is reached.
Building a Complete Snowboard Protection System
Impact shorts are one component of a comprehensive protection strategy. As you progress in the sport and begin riding more challenging terrain, it’s worth understanding how to build a full-body protection system that works together without adding excessive bulk or heat.
The Four Pillars of Snowboard Protection
A complete protection system addresses four anatomical zones: the head (helmet), the wrists (wrist guards), the spine and lower back (back protector or extended-coverage impact shorts), and the hips and tailbone (impact shorts). Each addresses a statistically significant injury category. Together, they cover the most common serious snowboarding injuries without requiring the rider to look like a medieval knight.
Wrist Guards: The Most Important Add-On
Wrist injuries are statistically the most common snowboarding injury, accounting for roughly 25% of all snowboard-related emergency room visits. The reflex to extend your hands during a fall is instinctive and almost impossible to suppress — it’s a hardwired neurological response. Wrist guards work by distributing the impact load across a rigid splint, preventing the hyperextension that causes scaphoid fractures and distal radius breaks. They are non-negotiable for beginners and strongly recommended for any rider who values the ability to type, play guitar, or use their hands professionally.
Back Protectors: The Underrated Essential
A standalone back protector addresses the one major vulnerability that even extended-coverage impact shorts can’t fully solve: the vertebral column between the shoulder blades and the mid-lumbar region. Falls onto hard pack, ice chunks, tree stumps, or unseen rocks in the backcountry can cause serious spinal injury at any point along the thoracic and lumbar spine. Level 1 (EN 1621-2 certified) back protectors add meaningful protection while remaining under 1 cm thin. Level 2 certification provides the highest civilian-available protection level and is appropriate for halfpipe, big air, and backcountry riders.
How Impact Shorts and Back Protectors Work Together
When pairing impact shorts with a back protector, ensure there is no gap in coverage at the lumbar region. Premium impact shorts (like the BenKen Pro) extend upward to cover L5-S1. A standard back protector typically covers from T6 (mid-back) downward to approximately L2. The ideal combination creates a continuous protective column from the tailbone all the way to the mid-thoracic spine. Some purpose-built protective vest systems integrate both functions, though these tend to be expensive. For riders building a system piece by piece, prioritize tailbone (impact shorts) first, then wrist guards, then back protection as the budget allows.
Care and Maintenance: Making Your Impact Shorts Last
Even the best impact shorts will fail prematurely if maintained incorrectly. The unique construction of protective garments — foam layers bonded to compression fabrics, with elastic waistbands and sometimes removable components — demands a specific care routine that differs from how you’d wash regular athletic wear.
Washing Instructions by Foam Type
For shorts with non-removable EVA foam (OHMOTOR, 3D Hip, Bodyprox): machine wash in cold water on the delicate or gentle cycle only. Use a mild, non-enzymatic detergent — enzyme-based detergents (like those marketed for “athletic odor”) break down the protein chains in Lycra and spandex, degrading elastic recovery over time. Never exceed 30°C/86°F wash temperature. Always air dry horizontally. A tumble dryer, even on a “low heat” setting, generates enough heat to cause irreversible foam compression and dimensional shrinkage in the protective plates.
For shorts with removable pads (Triple Eight Bumsaver): remove all pads before washing. The mesh chassis can be machine washed on warm (up to 40°C) since the structural component is just fabric. Wash the foam pads separately by hand in cold water with a tiny amount of mild soap, then rinse thoroughly and air dry. Washing foam pads in a machine — even in a mesh laundry bag — causes delamination and premature compression set.
For gel-foam or premium compression shorts (BenKen Pro): hand wash only in cold water. Gel components are particularly sensitive to temperature extremes — heat causes the gel to partially migrate within its housing, creating uneven thickness and protection dead zones. Hand washing also preserves the calibrated compression level of medical-grade Lycra, which can lose up to 20% of its compression rating after 20+ machine wash cycles.
Odor Control Between Sessions
Impact shorts accumulate sweat from the most active muscle groups on your body during a ski day. Washing after every single session is unnecessary and actually harmful to the garment’s longevity. Instead, develop a rotation strategy: after each session, hand-rinse the shorts in cold water, wring gently, and hang to dry completely before storing. A diluted white vinegar spray (1 part vinegar to 4 parts water) on the foam-adjacent fabric areas neutralizes bacterial growth without damaging materials. Reserve machine washing for every third or fourth session, or whenever the rinse-and-dry approach fails to eliminate odor.
Storage Between Seasons
Before off-season storage, complete a full wash cycle and ensure the shorts are bone dry before folding. Any residual moisture in stored foam will cause mold growth on the foam surface (which presents as black spotting and a musty odor) and begin degrading the cellular structure. Store in a mesh bag or breathable fabric bag — not in a sealed plastic bin where any residual moisture becomes trapped. Keep away from heat sources, direct sunlight, and petroleum-based products (motor oil, solvents) which can dissolve EVA foam binders.
When to Replace Your Impact Shorts: The Definitive Signs
One of the most common mistakes riders make is continuing to use impact gear that has exceeded its protective lifespan. Unlike a worn-out boot that signals its degradation through reduced support, deteriorated impact shorts can look perfectly fine while offering significantly reduced protection. Knowing when to replace them is a genuine safety matter.
- The “Rebound Test” fails: Press your thumb firmly into the tailbone pad and hold for 5 seconds, then release. Fresh EVA should rebound to full thickness within 2–3 seconds. If the indentation remains visible for more than 5 seconds, the foam has developed compression set and is no longer absorbing impacts at its rated capacity.
- Visible thinning: Compare the tailbone pad thickness to when the shorts were new. If the pad appears noticeably thinner — especially in the center where most impacts concentrate — foam packing has occurred. A pad that was originally 15mm thick and is now 10mm provides only 55–60% of its original energy absorption.
- After a major impact: If you take a hard fall that genuinely shakes you — the kind where you lie still for a moment afterward — treat the shorts as potentially compromised in that impact zone, the same way you’d treat a helmet. Even if they look intact, EVA can structurally fail internally without visible surface damage.
- Fabric loss of elasticity: If the waistband is stretched out and the shorts don’t stay positioned at your hip without constant adjustment, the compression has failed. Unsecured shorts offer no reliable protection because pad position during a crash is unpredictable.
- 2–3 season benchmark for regular riders: Riders who wear impact shorts 20+ days per season should plan to replace them every 2–3 seasons regardless of visible condition. Regular compression and impact progressively degrade foam cell structure in ways not visible to the naked eye.
- Delamination: Any separation between foam panels and fabric backing — visible as bubbling, peeling, or shifting of pads within a non-removable chassis — is grounds for immediate replacement. Delaminated pads shift during crashes and can bunch in ways that create pressure points rather than distributing force.
The Real Cost of Skipping Impact Protection
The economic argument for wearing impact shorts is straightforward, but it’s rarely stated directly enough to motivate the riders who most need this message: the recreational snowboarders who skip protective gear because “it won’t happen to me.” Let’s do the math with real numbers.
A coccyx fracture (tailbone break) is one of the most common serious snowboarding injuries. Treatment typically requires an emergency room visit ($2,000–$5,000 without insurance), imaging ($800–$1,500 for X-rays and CT scan), potential pain management prescriptions ($50–$300), and 8–12 weeks of modified activity — during which most physically active people experience lost productivity, missed gym sessions, and inability to continue the very sport they love. In the United States, the average out-of-pocket cost after insurance for a coccyx injury runs $3,000–$8,000. Without insurance, the unmitigated bill can exceed $15,000. A quality pair of impact shorts costs $30–$180.
The return on investment calculation is unambiguous: if wearing impact shorts reduces your risk of a tailbone fracture by even 40–50% (a conservative estimate based on published fall protection research), the expected value of wearing them is positive after literally one day on the mountain. This isn’t a fear-based argument — it’s a financial one. Impact shorts are one of the highest-ROI purchases available in any sport.
Beyond fractures, there are the softer costs of hip and tailbone bruising. A severe hip bruise (hematoma) from a single fall can make sitting, walking, and sleeping painful for 7–21 days. For anyone with a desk job, a commute, or caregiving responsibilities, this is not an abstract inconvenience — it’s a direct quality-of-life impairment. Three days of “unable to sit comfortably” after a weekend of snowboarding affects your work week, your family, and your overall experience of the sport. Impact shorts costing $40 prevent this outcome with high reliability. There is no rational argument for skipping them.
Bodyprox impact shorts: ~$35. A single urgent care visit for a hip bruise requiring X-ray clearance: $300–$800. The shorts pay for themselves in avoided medical costs on the first fall they prevent from becoming a clinic visit — and that’s not a hypothetical. It’s a when, not an if, for anyone learning to snowboard.
Impact Shorts Buyer’s Checklist: 10 Questions Before You Buy
Before finalizing any impact short purchase, run through this checklist. It covers the non-negotiable criteria that separate a genuinely protective pair of shorts from a false sense of security marketed as safety gear.
Definitive Impact Gear FAQ
1. Can impact shorts prevent coccyx fractures?
While no gear is 100% effective against high-velocity trauma, they significantly reduce the peak force reaching the bone, often turning a potential fracture into a manageable bruise.
2. How tight should impact shorts be?
They must be skin-tight. If the shorts are loose, the pads will slide off your hips or tailbone during the first few milliseconds of a crash, rendering them useless.
3. Do they make you look significantly larger?
Premium models like BenKen or Bodyprox are designed with a low profile. Under standard snowboard pants, they are virtually invisible to the casual observer.
4. How often should I replace my impact gear?
If you experience a major crash that visibly compresses the foam, replace them. Otherwise, a good pair should last 2–3 seasons before the foam loses its elasticity and rebounds slowly on the thumb-press test.
5. Are they machine washable?
Most are, but NEVER use a dryer. Heat destroys the chemical structure of EVA foam and breaks down the Lycra fibers. Always hang dry in a cool area out of direct sunlight.
6. Should I wear them over or under base layers?
We recommend wearing them over a thin, moisture-wicking base layer. This prevents skin irritation and reduces the frequency of needing to wash the impact gear itself, extending its lifespan.
7. Is D3O foam better than EVA?
D3O is a non-Newtonian material that is thinner and more flexible than EVA but significantly more expensive. For most resort riders, quality EVA is the better value. D3O excels for park/rail riders and those who need multi-impact reset capability.
8. Do they restrict movement during carving?
High-quality segmented shorts actually aid movement by providing a sense of security. Lower-quality, one-piece pads can feel like a “cast” on your hips, which is why segmented geometry matters.
9. Can children wear adult sizes?
No. The pad placement is based on anatomical proportions. An oversized adult short will have the tailbone pad sitting too low, potentially causing a trip hazard or leaving the bone exposed. Use youth-specific models for children under 12.
10. Do I need hip pads if I only care about my tailbone?
Yes. Falling “sideways” is extremely common when catching a toe edge. Hip bruises can be just as debilitating for your walking gait as a tailbone injury, and they affect daily sitting, driving, and sleeping long after the slopes.
11. What’s the difference between impact shorts and crash pants?
Crash pants integrate thinner pads into outerwear shell fabric. Impact shorts are a separate base layer with thicker, more effective pads. For serious riders, dedicated impact shorts provide superior protection to crash pants at any price point.
12. Should beginners prioritize impact shorts or wrist guards?
Buy both. Wrist fractures and tailbone injuries are the two most common serious beginner snowboarding injuries. Neither is significantly more likely than the other — they happen on different fall types. A combined impact shorts + wrist guard purchase is the most protective entry point for new riders.


