
Untracked & Unbound: The Essential Guide to Backcountry Snowboarding
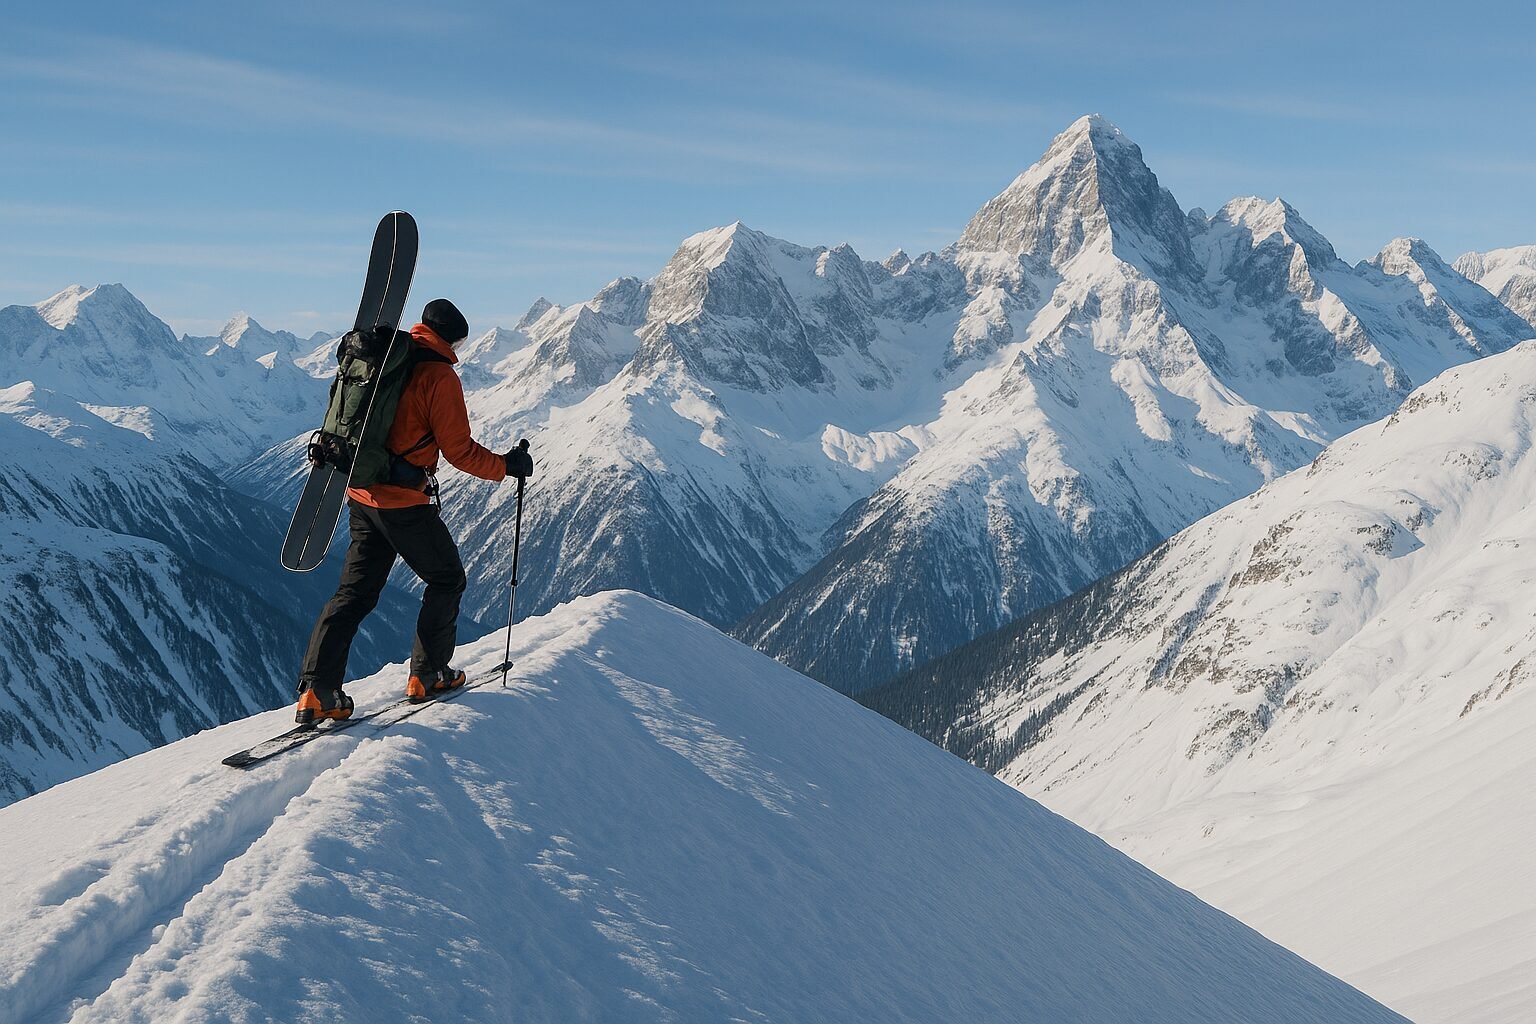
I remember the moment the allure of the backcountry truly took hold. I was standing at the top of a crowded resort run, looking out at a pristine, untouched bowl just beyond the ropes. The silence of that distant peak was a stark contrast to the chairlift buzz behind me. It represented freedom, challenge, and the ultimate powder turns. But I also felt a deep, primal sense of respect and fear. I knew that crossing that boundary wasn’t just a step into deeper snow; it was a step into a world where I was solely responsible for my own safety.
This guide is born from years of taking that step—and from the rigorous education, close calls, and incredible rewards that came with it. Backcountry snowboarding is not an extension of resort riding. It is an entirely different sport that uses snowboarding as its reward. It demands knowledge, fitness, humility, and the right gear. This is not a guide to your first backcountry tour. This is the guide to everything you must do before you even consider it. Let’s talk about how to earn your turns, and more importantly, how to come home to ride another day.
A NON-NEGOTIABLE WARNING
The backcountry is an uncontrolled, unpatrolled environment containing extreme hazards, including avalanches. People die in avalanches every year. This guide is for informational purposes only and is not a substitute for professional avalanche safety training. DO NOT enter the backcountry without the proper gear, knowledge, and partners. Your life depends on it.
THE REALITY CHECK: IS THE BACKCOUNTRY REALLY FOR YOU?
The images are intoxicating: perfect spines in Alaska, bottomless powder in Japan, serene ridgelines at sunset. But behind every one of those photos is a huge amount of unseen effort and expertise. Before you invest a dollar in gear, you need to honestly assess if you’re ready for the commitment.
1. Your Riding Ability: Expert In-Bounds First
You must be a highly proficient in-bounds snowboarder. This is the absolute minimum requirement. You need to be able to comfortably and confidently ride any black diamond run at a resort, in any snow condition—ice, heavy powder, crud, moguls. Why? Because in the backcountry, there are no grooming machines. You will encounter every type of snow imaginable, often on a single run, and you can’t have your snowboard skills be the weakest link when you also have to worry about avalanche danger and navigation.
If you’re still working on your carving or exploring your first blue runs, that’s fantastic! The resort is an amazing playground. Focus on mastering it. Our guide to the best snowboarding resorts for beginners can help you find the perfect place to hone your skills.
2. Your Fitness Level: It’s a Grind
The “earn your turns” mantra is no joke. The uphill is 90% of the effort. You need a strong cardiovascular base. Can you hike or run for several hours at a time? Backcountry tours often involve thousands of feet of vertical ascent while carrying a 20-30lb pack, often at high altitude. Start a training regimen of hiking, trail running, or cycling long before the snow flies.
3. The Investment: Time and Money
Backcountry snowboarding is not a cheap hobby. The essential safety gear alone will cost several hundred dollars, and a full splitboard setup can easily run over $1,500. More important than money is the time investment. A proper avalanche course is a multi-day commitment. You’ll spend hours planning tours, checking weather and avalanche forecasts, and practicing rescue skills. It is a lifestyle, not a casual weekend activity.
THE HOLY TRINITY: YOUR NON-NEGOTIABLE SAFETY GEAR
If you and every single person in your group do not have these three items and know how to use them, you should not be in the backcountry. End of story. This is your personal protective equipment (PPE) for avalanche terrain.
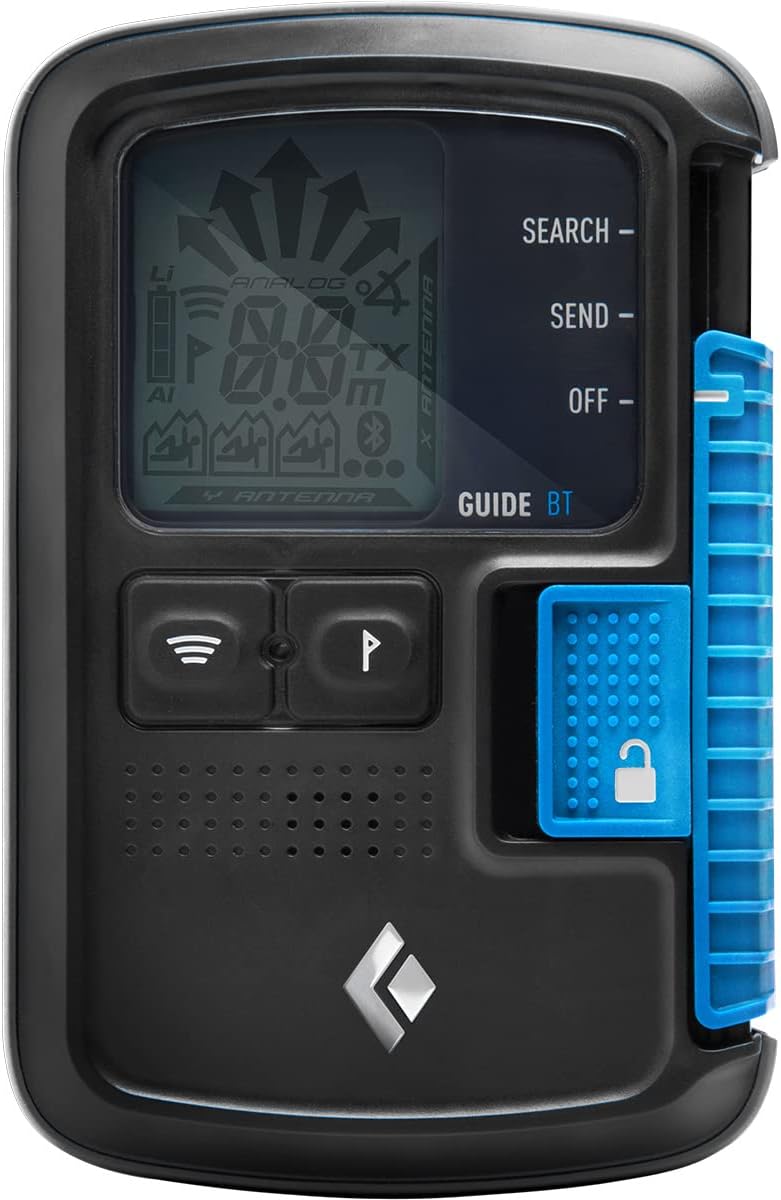
1. Avalanche Transceiver (Beacon)
This is an electronic device worn on your body that constantly transmits a radio signal. If you are buried in an avalanche, your partners switch their beacons to “search” mode to receive your signal and pinpoint your location. This is your lifeline. The Mammut Barryvox is a legend in the industry, known for its intuitive interface, huge range, and reliable signal processing, making it a top choice for both beginners and professionals.
Check Barryvox on Amazon
2. Avalanche Shovel
Finding a buried partner with a beacon is only half the battle. You have to dig them out, and avalanche debris sets up like concrete. A plastic shovel will break. You need a collapsible metal shovel. The Black Diamond Evac is a workhorse, featuring a durable aluminum blade, a telescoping shaft for leverage, and a “hoe mode” to efficiently move large amounts of snow. A toy shovel is not an option.
Check BD Evac on Amazon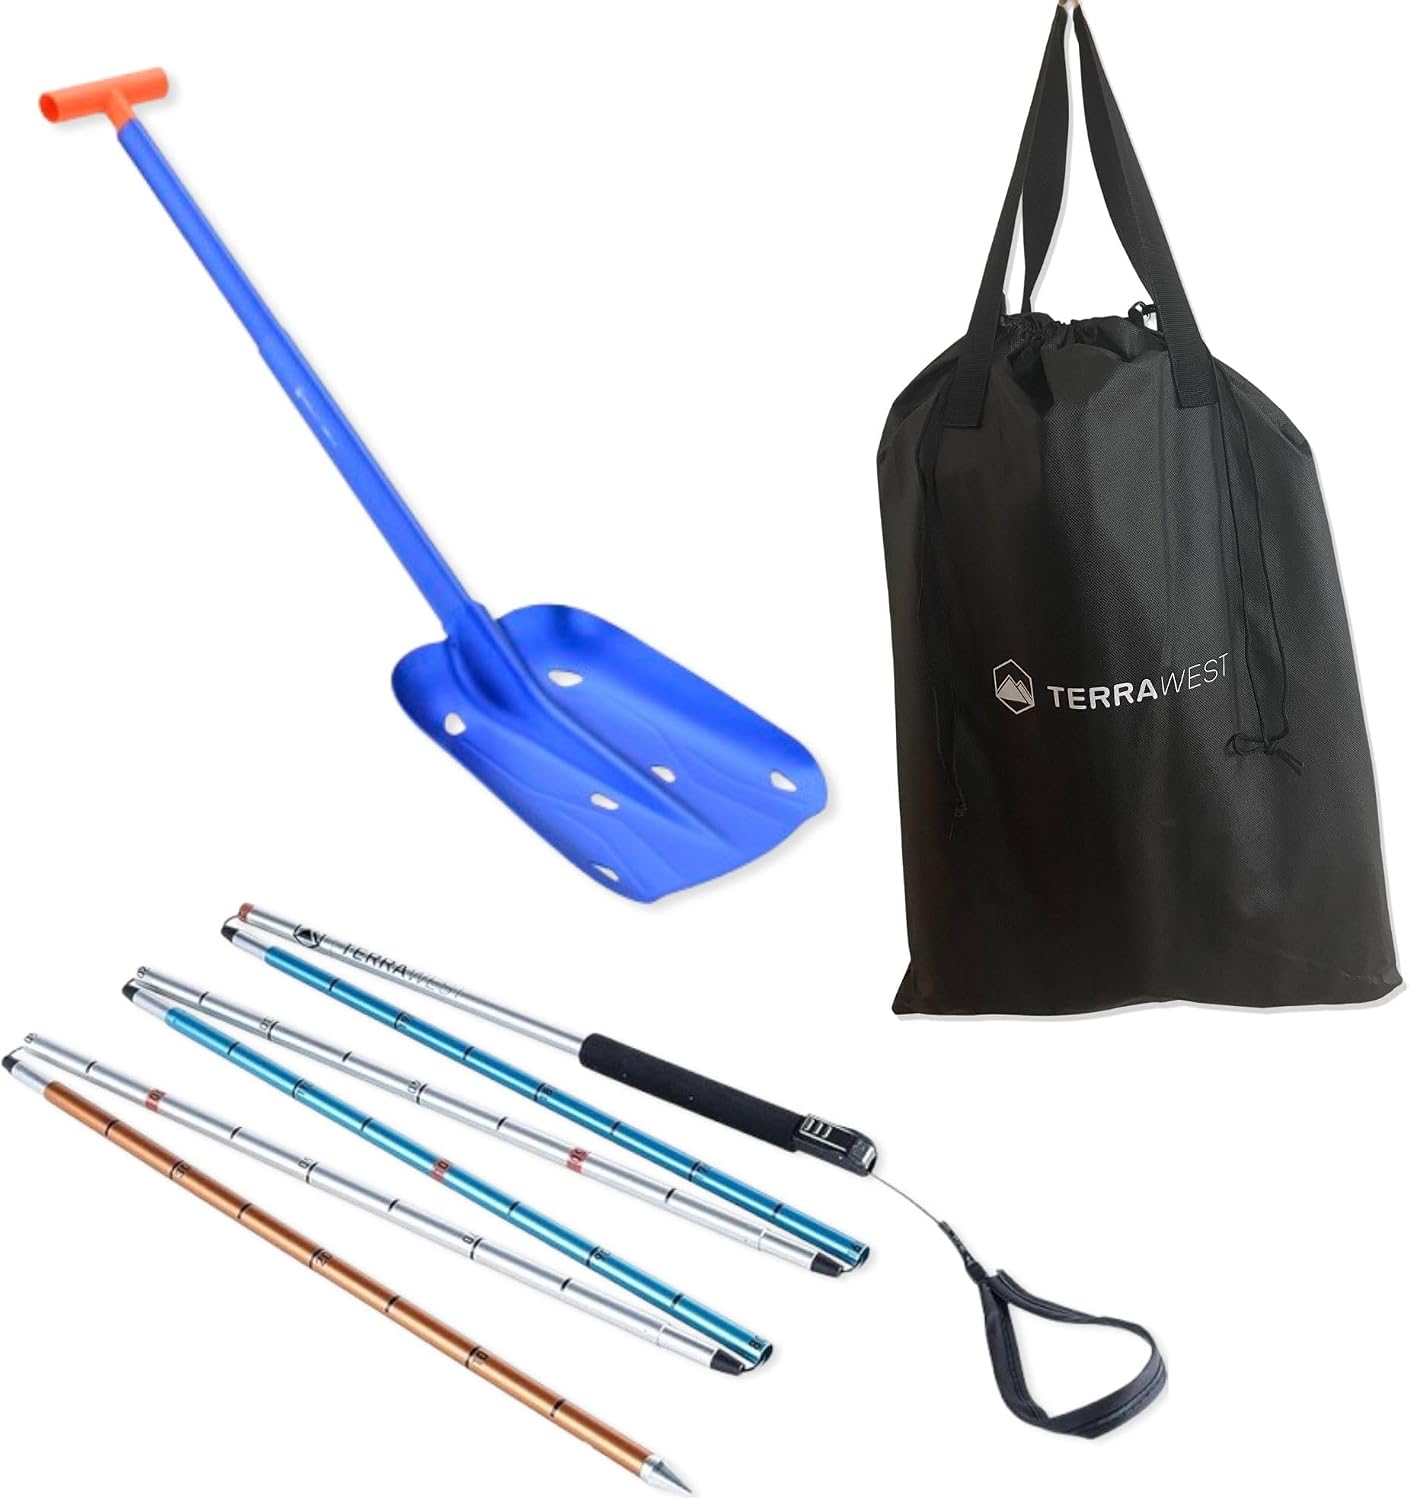
3. Avalanche Probe
Once your beacon gets you close, you use this collapsible pole to physically probe the snow and find the exact location of your buried partner before you start digging. Time is critical, and a probe saves vital seconds and energy. The BCA Stealth 270 is a popular choice for its fast deployment and sturdy construction. You cannot dig effectively without a probe strike.
Check BCA Stealth on AmazonSave Money with a Package
Many manufacturers, like Backcountry Access (BCA), offer packages that include a beacon, shovel, and probe. This is often the most economical way to get your essential safety kit and ensures all your gear is modern and compatible. It’s a great starting point for anyone serious about getting into the backcountry.
THE COMPLETE KIT: GEARING UP FOR THE UPHILL & DOWNHILL
Beyond the Holy Trinity, you’ll need specialized gear to travel through the mountains efficiently and ride safely.
The Uphill Machine: Splitboard, Bindings & Skins
A splitboard is a snowboard that splits in half to form two “skis,” allowing you to travel uphill. For the ascent, you attach removable skins to the bottom of each ski; their plush fabric grips the snow, preventing you from sliding backward. At the top, you remove the skins, reassemble the board, and you’re ready to ride down.
- Choosing a Splitboard: Look for a versatile, all-mountain shape for your first board. The Jones Solution is a perennial favorite and an industry benchmark for a reason—it’s reliable, performs well in all conditions, and is built to last.
- Splitboard Bindings: These are different from resort bindings. They are designed to pivot at the toe for efficient walking on the uphill and lock in solidly for the downhill. Spark R&D is the undisputed leader in this category.
- Skins: Make sure they are cut to fit your board’s shape. A mix of mohair (for glide) and nylon (for grip and durability) is ideal for most conditions.
Your Lifeline Pack: The Backcountry Backpack
You need a dedicated backcountry backpack (around 30-40 liters) with specific features:
- Dedicated Avalanche Tool Pocket: This allows instant access to your shovel and probe. You should not have to dig through your lunch and extra layers to get to your rescue gear.
- Board Carry System: An A-frame or vertical carry system is essential for “bootpacking” up steep sections where skinning isn’t possible.
- Airbag Compatibility: Many modern packs are compatible with avalanche airbag systems. These are expensive but are a proven technology that can help keep you on the surface of an avalanche, significantly increasing your chances of survival. The BCA Float series is a reliable and widely used airbag system.
Once you’ve got your gear, you need a way to get it to the trailhead. Check out our guide on the best snowboard bags for options that can handle a splitboard and all your extra equipment.

Jones Solution Splitboard
Often hailed as the ultimate all-terrain splitboard. The Solution is designed to handle any condition you’ll encounter out of bounds. Its directional freeride shape, Traction Tech edges for icy skin tracks, and durable construction make it a trusted partner for serious adventures. This is a board that will grow with you as your skills advance.
Check Jones Solution on Amazon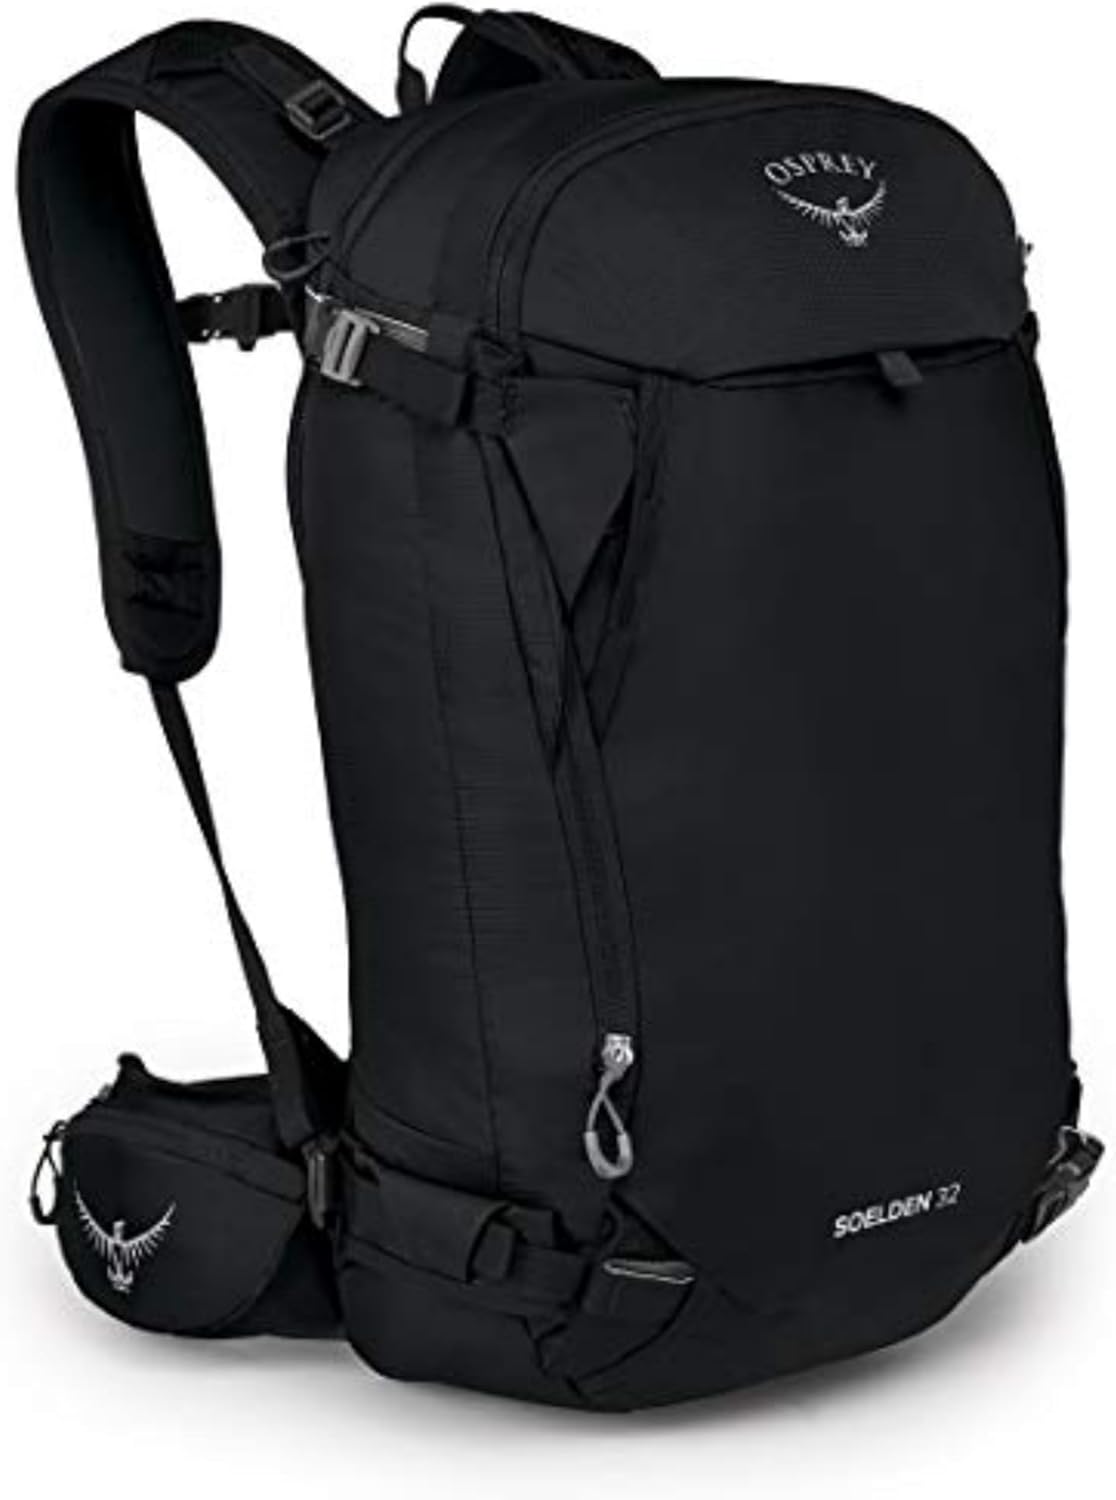
Osprey Soelden 32 Backpack
Osprey brings its legendary pack-building expertise to the snow. The Soelden 32 has everything you need: a dedicated and easy-to-access avy tool pocket, multiple board carry options, a helmet carry, and a supremely comfortable fit for long days on the skin track. It’s a thoughtfully designed pack built for safety and efficiency.
Check Osprey Soelden on AmazonEssential Accessories
Your resort kit needs some backcountry-specific upgrades.
- Boots: While you can use your resort boots, backcountry-specific boots with a “walk mode” dramatically improve comfort and efficiency on the uphill. Find options in our best snowboard boots guide.
- Helmet & Goggles: You’ll be sweating on the way up, so ventilation is critical. A lightweight, well-ventilated helmet and goggles with anti-fog technology are essential. See our guides for the best snowboard helmets and best snowboard goggles.
- Navigation: A GPS device or a phone with a mapping app like CalTopo or Gaia GPS is standard. Always carry a paper map and compass as a backup and know how to use them.
- Communication: Cell service is non-existent in most backcountry areas. A satellite messenger like a Garmin inReach allows you to send and receive texts and trigger an SOS in an emergency.
THE MOST IMPORTANT GEAR: KNOWLEDGE & TRAINING
You can own every piece of gear on this list, but without the knowledge to use it, it’s just dead weight in your pack. Your brain is your best tool.
Step 1: Take an AIARE 1 Course
This is not optional. AIARE (American Institute for Avalanche Research and Education) provides the standard for avalanche education in the U.S. An AIARE 1 is a 3-day course that combines classroom learning with field-based training. You will learn:
- How to understand avalanche forecasts and recognize avalanche terrain.
- The basics of snow science and how a stable snowpack forms (or doesn’t).
- How to plan a tour and make smart decisions as a group.
- How to perform a companion rescue. You will practice using your beacon, shovel, and probe in realistic scenarios until it becomes second nature.
Find a certified course provider in your area and sign up. Do it before you buy any other gear.
Step 2: Learn to Read the Forecast
Every day before you go out, you must check your local avalanche center’s forecast (e.g., the Colorado Avalanche Information Center for snowboarding in Colorado). You’ll learn to interpret the danger rating, understand the identified avalanche problems, and use that information to choose appropriate terrain for the day.
Finding Partners
Your AIARE course is the best place to find aspiring backcountry partners who are starting with the same foundational knowledge. You can also find mentorship through local chapters of the American Alpine Club or online groups, but always be cautious. Go out with new partners on very conservative terrain first to assess their skills and decision-making before committing to a major objective.
UNDERSTANDING THE AVALANCHE FORECAST: YOUR DAILY BIBLE
Checking the avalanche forecast isn’t a checkbox—it’s the single most important decision-making tool you have. Every morning before you leave the car, you and your partners should read the forecast together, discuss it, and agree on a plan that respects the day’s conditions. Here’s how to decode what you’re reading.
The Danger Scale: What the Numbers Really Mean
Avalanche danger is rated on a simple 1-to-5 scale, but each level carries specific terrain implications that most beginners underestimate:
- 1 – Low: Generally safe conditions. Natural avalanches are unlikely, and human-triggered avalanches are very unlikely. Even at low danger, steep terrain can produce isolated wind slabs, so stay alert.
- 2 – Moderate: Heightened conditions in specific terrain. Human-triggered avalanches are possible on steep slopes. This is the most common rating and where many accidents happen because riders become complacent. Be selective about terrain and avoid steep, open slopes with fresh wind deposits.
- 3 – Considerable: Dangerous conditions. Human-triggered avalanches are likely on many steep slopes. This is where experience and conservative terrain choices become critical. Stick to lower-angle terrain, stay out of avalanche paths, and recognize that even small avalanches can have serious consequences.
- 4 – High: Very dangerous conditions. Human-triggered avalanches are very likely. Travel in avalanche terrain is not recommended. Stay off steep slopes entirely. Most groups should turn around or choose extremely conservative, low-angle terrain.
- 5 – Extreme: Extraordinary conditions. Widespread avalanches are occurring. Do not travel in avalanche terrain. This rating is rare, but when it appears, the backcountry is effectively closed for recreational travel.
Identifying Avalanche Problems
The forecast doesn’t just give you a number—it identifies specific avalanche problems, which tell you the type, location, and likelihood of avalanches. The most common problems include:
- Storm Slab: Soft, cohesive layers of fresh snow deposited during a recent storm. These are often the easiest to identify and avoid—stay off steep, open slopes that have been loaded by recent snowfall. Storm slabs typically become more stable as the snowpack settles and bonds over a few days.
- Wind Slab: Hard, cohesive slabs formed when wind transports snow and deposits it on lee-side slopes. These are treacherous because they can be triggered from below or from a distance. Look for signs of wind loading: rounded pillows of snow, cornices along ridgelines, and a hollow or drum-like sound when you tap the snow surface.
- Persistent Weak Layer: This is the most dangerous and insidious problem. A buried weak layer of faceted or sugary snow can remain reactive for weeks or even months. It can be triggered from a distance, and the resulting avalanche can be enormous. The forecast will tell you the elevation bands and aspects where these layers are most problematic. When persistent slabs are listed, treat every steep slope as suspect until proven otherwise.
- Wet Slab: Occurs when water from rain or melting snow weakens the snowpack. These typically become more dangerous as the day warms up. If the forecast mentions wet slab danger, plan to be off steep terrain early in the day and watch for signs of warming: roller balls on the surface, pinwheeling snow at ridgelines, and heavy, saturated snow on your boots.
- Loose Wet: Unconsolidated, wet snow that releases from a single point and fans out as it moves downhill. While typically smaller than slab avalanches, they can still bury you in a terrain trap or carry you into trees and rocks. Avoid steep gullies and confined terrain when wet loose avalanches are listed.
Red Flag Warnings: When to Stay Home
Some conditions are so dangerous that they override everything else. These are your red flags, and if you observe any of them, you should seriously consider aborting your tour regardless of what the forecast says:
- Recent avalanche activity: If you see evidence of natural avalanches on similar terrain to what you plan to ride, the snowpack is telling you it’s unstable. Don’t test fate.
- Shooting cracks: When your weight causes cracks to shoot out from your board or skis across the snow surface, you are standing on an unstable slab. Back off immediately.
- Whumpfing sounds: A loud “whumpf” as you walk means you’ve collapsed a weak layer beneath you. This is a direct sign of snowpack instability and a strong indicator that avalanches are possible.
- Heavy snowfall or rapid warming: If it’s been snowing more than an inch per hour or temperatures are rising rapidly, the snowpack is being loaded faster than it can adjust. Wait for conditions to stabilize.
- Strong winds: High winds rapidly build wind slabs on lee slopes. If you can barely stand on a ridgeline, the leeward slopes below are being loaded aggressively.
SPLITBOARD TOURING TECHNIQUES: MASTERING THE UPHILL
The uphill is where you’ll spend the vast majority of your time in the backcountry, and efficiency here directly impacts how much energy you’ll have for the descent. Learning proper skinning technique early will save you hours of frustration and wasted energy over the course of a season.
Proper Skin Track Etiquette
The skin track is the uphill trail that your group creates as you ascend. Following good etiquette isn’t just polite—it’s a safety issue. A poorly built skin track can actually trigger avalanches on the slopes above and below it.
- Switch the lead every 10-15 minutes. The trailbreaker has the hardest job—breaking trail through fresh snow is exhausting. Rotate the lead so everyone shares the burden. The freshest legs should always be breaking trail.
- Maintain safe spacing. Keep at least 20-30 feet between each person on the skin track. If the slope is avalanche-prone, spread out even more. If one person triggers a slide, you don’t want to take out the entire group.
- Traverse at an appropriate angle. A general rule is to keep your skin track at roughly a 25-30 degree angle to the fall line. This is steep enough to gain elevation efficiently but shallow enough to prevent slipping backward. On steeper terrain, you’ll need to employ kick turns.
- Avoid terrain traps. Route your skin track away from gullies, cliff bands, and narrow chutes. If an avalanche occurs, these terrain features concentrate debris and increase burial depth.
- Stay off ridgecrest cornices. Cornices—those overhanging shelves of wind-deposited snow—are unstable and can collapse without warning, potentially pulling you off the ridge or triggering an avalanche on the slope below.
Kick Turns: Your Most Important Uphill Skill
A kick turn is the technique for changing direction 180 degrees on a steep skin track. It’s the splitboard equivalent of a switchback on a hiking trail, and mastering it is non-negotiable for navigating steep terrain. Here’s the process:
- Skin to a stop on a flat section. Make sure your weight is centered and balanced.
- Lift the tail of your downhill ski (the one closest to the fall line) and plant your pole firmly to maintain balance.
- Rotate the ski 180 degrees so it’s pointing in the opposite direction. Place it back on the snow with the skin gripping the surface.
- Shift your weight onto the new downhill ski and repeat the process with the other ski.
- Adjust your bindings if needed and continue skinning in the new direction.
Practice kick turns on gentle terrain before you need them in steep, exposed areas. They feel awkward at first but become second nature with repetition. The key is to keep your weight centered and your movements deliberate rather than rushed.
Heel Risers and Climbing Bars
Most splitboard bindings come equipped with heel risers or climbing bars—flip-up platforms under the heel that reduce the strain on your calves and Achilles tendons during steep ascents. Use them whenever the terrain steepens beyond about 20 degrees. They make a dramatic difference in comfort and efficiency. Some bindings, like those from Spark R&D, offer multiple riser heights so you can dial in the exact angle you need.
Side-Hilling on a Splitboard
Side-hilling—traversing across a slope rather than going straight up—is a fundamental backcountry skill. The key is to maintain a slight downhill lean with your knees bent and your weight over the downhill edge of your skins. If you lean uphill, you’ll lose traction and slide sideways. Keep your poles planted for balance, and look ahead to plan your line across the slope. On icy or hard-packed traverses, consider adding splitboard crampons (metal teeth that attach to your bindings) for extra grip.
The Transition: Tour Mode to Ride Mode
The transition is the process of converting your splitboard from uphill “tour mode” to downhill “ride mode” at the top of your objective. Doing this efficiently is crucial—you don’t want to stand around in the cold and wind losing body heat while fumbling with gear. Here’s the basic sequence:
- Find a safe, flat area away from cornices, steep slopes above, and cliff bands. This is where avalanche awareness meets practical efficiency—your transition spot matters.
- Remove your skins and stow them in your pack (folding them glue-to-glue to keep them clean and preserve the adhesive).
- Remove your bindings from tour mode and reattach them in ride mode on each board half.
- Join the two halves together using the hooks and clips. Make sure the interface is tight and secure—a loose connection will chatter and flex while riding.
- Adjust your boots from walk mode to ride mode if they have that feature, buckle up, and do a quick gear check before dropping in.
Time your first few transitions with a stopwatch. Experienced backcountry riders can complete a full transition in under two minutes. That speed comes from practice and having an organized pack system where everything has a designated spot.
THE LAYERING SYSTEM: DRESSING FOR EARNED TURNS
Backcountry clothing is a completely different game than resort riding. At the resort, you ride a chairlift up, so staying warm is the primary concern. In the backcountry, you’re generating enormous amounts of heat on the uphill, and then transitioning to sustained downhill riding where you cool rapidly. Your layering system needs to handle both extremes without overheating or freezing.
The Four-Layer System
Think of your backcountry clothing as four functional layers that you can add or remove throughout the day:
- Base Layer (Moisture Management): This sits against your skin and wicks sweat away from your body. Merino wool or synthetic fabrics are ideal—never cotton, which holds moisture and loses all insulating properties when wet. A lightweight merino base layer top and bottom is the gold standard for backcountry use.
- Mid Layer (Insulation): A fleece or lightweight synthetic insulated jacket provides warmth. On the uphill, you’ll often strip down to just your base layer plus a thin mid layer. The key is breathability—you want a fabric that traps some warmth but allows moisture vapor to escape. A grid fleece like Polartec Power Grid is a popular choice.
- Insulation Layer (Warmth on Demand): A puffy jacket—either down or synthetic—is what you’ll throw on during transitions, at the summit, or during long rest breaks. Down offers the best warmth-to-weight ratio but loses insulating ability when wet. Synthetic insulation like PrimaLoft performs better in wet conditions and dries faster. Keep this layer accessible in your pack, not buried at the bottom.
- Shell Layer (Wind & Weather Protection): A hardshell jacket and pants are your armor against wind, snow, and rain. In the backcountry, breathability is just as important as waterproofing. A membrane like Gore-Tex Pro or eVent provides both. Look for features like pit zips (underarm vents) that allow you to dump heat on the uphill without removing the shell. Your shell should always be the outermost layer when riding down.
Managing the Sweat Problem
The biggest clothing challenge in backcountry snowboarding is managing sweat. On a typical uphill skin, you’ll be working hard enough to generate significant perspiration, even in sub-freezing temperatures. If that moisture stays in your clothing, it will freeze when you stop moving, leading to rapid cooling and potential hypothermia. Here are the rules:
- Vent before you sweat. Open pit zips, dump your mid layer, or unzip your shell before you start overheating. Once you’re drenched, it’s too late.
- Layer down aggressively on the uphill. It should feel slightly chilly when you first start skinning. If you’re comfortable standing still, you’re overdressed for moving uphill.
- Transition quickly. At the top, put on your dry insulation layer and shell as fast as possible. The goal is to trap your body heat before you start cooling down.
- Carry dry layers for the descent. Some riders pack a dry base layer top specifically for the downhill. This small weight penalty can make a huge difference in comfort on long, cold descents.
Gloves, Mittens & Extremities
Your hands are your connection to the mountain, and cold hands can end a tour faster than anything else. The backcountry glove strategy is layered just like the rest of your body:
- Lightweight liner gloves for skinning uphill—breathable, touchscreen-compatible, and thin enough to operate zippers and buckles.
- Midweight gloves or mittens for riding down—warm, waterproof, and durable. Mittens are warmer than gloves because your fingers share heat, but gloves offer better dexterity.
- A warm, dry spare pair in a waterproof stuff sack in your pack. If your riding gloves get wet, you need a backup.
- Hand warmers are a cheap insurance policy. Toss a pair in your pocket for emergencies.
NAVIGATION & COMMUNICATION: FINDING YOUR WAY HOME
There are no trail markers, no signs, and no cell service in most backcountry terrain. Navigation is entirely your responsibility, and getting lost in the mountains in winter can quickly become life-threatening. Proper navigation skills and communication tools are as essential as your avalanche beacon.
GPS and Digital Mapping
Modern GPS technology has made backcountry navigation more accessible than ever, but it’s not foolproof. Here’s your digital navigation toolkit:
- GPS Watch or Handheld Device: A dedicated GPS unit like a Garmin Fenix or inReach Mini provides reliable positioning even when your phone dies. A watch with GPS navigation lets you follow a pre-planned route with turn-by-turn guidance.
- Mapping Apps: CalTopo, Gaia GPS, and OnX Backcountry are the gold standard for trip planning and navigation. Download your maps for offline use before you leave service. These apps allow you to create routes, mark waypoints, measure slope angles (critical for avalanche terrain assessment), and share your position with contacts at home.
- Paper Map and Compass: Technology fails. Batteries die. Screens crack. Always carry a topographic map of your area and a compass—and know how to use them. This is not optional old-school advice; it’s a lifesaving backup that every serious backcountry traveler carries.
Satellite Messengers: Your Emergency Lifeline
When you’re 20 miles from the nearest road with no cell service and someone gets hurt, a satellite messenger is the difference between a rescue and a tragedy. These devices use satellite networks to send text messages and SOS signals from anywhere on Earth:
- Garmin inReach Mini: The most popular choice among backcountry travelers. It allows two-way text messaging, GPS tracking that your family can follow in real-time, and a dedicated SOS button that connects you to GEOS, a 24/7 international rescue coordination center. The subscription plans start at around $15/month for casual users.
- Two-Way Radios: For communication within your group, a set of BCA Link radios or similar two-way radios lets you stay in contact when you’re spread out on the skin track or separated by terrain. They’re especially valuable in complex terrain where visual contact isn’t possible.
- Cell Signal Boosters: Some devices can boost weak cell signals, but in deep backcountry, there’s usually nothing to boost. Don’t rely on your phone for emergency communication.
Trip Planning and Communication Protocol
Before every backcountry trip, leave a detailed trip plan with someone who isn’t going. Include:
- Your planned route (with a map printout or shared GPS track)
- Expected departure and return times
- Names and contact information for all members of your group
- Your vehicle description and trailhead location
- A “panic time”—the time after which your contact should call for search and rescue if they haven’t heard from you
This simple step has saved countless lives. If something goes wrong and you can’t call for help, your trip plan is what initiates the search.
BACKCOUNTRY RIDING TECHNIQUE: EARNED TURNS, UNREAL CONDITIONS
After hours of uphill effort, the payoff is riding terrain that most people will never see. But backcountry snow is fundamentally different from resort snow. Understanding how to read and ride variable conditions is what separates a good day from a dangerous one.
Powder Technique for Splitboarders
Deep powder is the holy grail of backcountry snowboarding, and it requires a different technique than riding groomed runs:
- Weight back: In deep powder, shift your weight slightly toward the tail of the board. This keeps the nose up and prevents you from diving headfirst into the snow. Think of it as floating on top of the snow rather than cutting through it.
- Use your back foot as a rudder: In powder, your back foot plays a bigger role in steering than on groomed terrain. Subtle shifts in back-foot pressure help you initiate turns and maintain balance in deep snow.
- Stay centered over the board: While you lean back slightly, don’t overdo it. An extreme backseat position will fatigue your legs quickly and reduce your ability to absorb bumps and changes in snow depth.
- Look ahead, not down: In deep snow, your视线 should be focused 3-4 turns ahead. Looking at the snow immediately in front of you makes it harder to anticipate terrain changes and maintain your rhythm.
- Commit to your turns: Hesitation in deep powder leads to catching an edge and tomahawking. Make each turn with conviction and follow through completely.
Variable Snow: The Backcountry Reality
The truth is, pure bottomless powder is rare. Most backcountry days involve a mix of conditions—wind-affected snow, variable depth, firm patches, and areas of deep powder. Riding variable snow well is the hallmark of an experienced backcountry rider:
- Stay light on your feet: Keep your knees bent and your weight centered. This allows your legs to absorb changes in snow consistency without throwing you off balance.
- Read the snow: Look for color changes (darker snow is often denser or wind-affected), texture changes (smooth snow is usually wind-packed; choppy snow is often variable), and terrain features (depressions hold deeper snow; ridges are often scoured).
- Adjust your speed: Slow down in unknown or variable conditions. Speed is your enemy when you can’t see what’s beneath the surface. There’s no shame in making cautious turns in uncertain snow.
- Watch for obstacles: Unlike resort terrain, backcountry snow can hide rocks, stumps, creek beds, and tree wells. Stay alert, especially in early or late season when snow coverage may be thin.
Tree Riding in the Backcountry
Tree riding is one of the great joys of backcountry snowboarding. Trees provide shelter from wind, create natural powder stashes, and give you reference points in flat light. But backcountry trees are different from resort glades—they’re unmarked, unthinned, and often hide hazards:
- Watch for tree wells: The area around the base of a tree can contain a hidden void where snow has blown away from the trunk. Falling into a tree well head-first is a serious suffocation risk. Ride with a partner in trees and maintain visual contact.
- Keep your speed manageable: In tight trees, you need to be able to stop or change direction instantly. Ride at a speed that allows you to react to unexpected obstacles.
- Look at the spaces, not the trees: Your board goes where your eyes go. Focus on the gaps between trees rather than the trees themselves.
BACKCOUNTRY FITNESS & CONDITIONING: TRAIN FOR THE MOUNTAINS
Backcountry snowboarding is an endurance sport disguised as a powder day. The uphill demands sustained cardiovascular effort, leg strength, and core stability over many hours. Without proper conditioning, you’ll be too exhausted to enjoy the descent—or worse, too tired to make safe decisions when it matters most. Here’s how to train for the mountains.
Off-Season Training: Building Your Engine
The best backcountry riders train year-round. The off-season (spring, summer, fall) is when you build the aerobic base and muscular endurance that will carry you through the winter. Focus on these three areas:
- Cardiovascular Endurance: The foundation of backcountry fitness. Aim for 3-5 sessions per week of sustained aerobic activity: trail running, cycling, hiking with a weighted pack, rowing, or swimming. The key is duration over intensity—long, steady efforts that build your aerobic capacity. A good goal is to be able to sustain moderate effort for 4-6 hours.
- Leg Strength: Your legs are your engine on the uphill and your shock absorbers on the downhill. Squats, lunges, step-ups, deadlifts, and calf raises should be staples of your gym routine. Focus on muscular endurance (higher reps, moderate weight) rather than pure strength (low reps, heavy weight). Single-leg exercises are especially important because skinning and riding both require independent leg function.
- Core Stability: A strong core protects your lower back during long tours, improves balance on variable terrain, and enhances your riding. Planks, Russian twists, pallof presses, and dead bugs are excellent core exercises. Don’t neglect your obliques—they’re crucial for the rotational movements involved in kick turns and side-hilling.
Cardio Training for the Uphill
The uphill in backcountry snowboarding is essentially a long, sustained climb. Your training should mimic this demand:
- Stair climbing or incline treadmill: The closest indoor approximation to skinning uphill. Do 30-60 minute sessions at a moderate pace, ideally with a weighted pack (start with 10-15 lbs and work up to 25-30 lbs).
- Hiking with a pack: The best outdoor training. Find trails with sustained elevation gain and hike them with a loaded pack. Gradually increase distance and elevation as the season approaches.
- Interval training: Once or twice a week, add high-intensity intervals to improve your ability to handle steep sections and push through fatigue. A simple approach: alternate 3 minutes at a hard pace with 2 minutes at a moderate pace for 30-40 minutes.
- Altitude training: If you live at low elevation and ride at high altitude, consider using an altitude training mask or planning acclimatization days before your first big tour. Altitude reduces your body’s ability to oxygenate blood, and arriving already fatigued from the drive can make high-altitude touring dangerously exhausting.
Flexibility and Injury Prevention
Snowboarding is hard on joints, and the backcountry adds the stress of long uphill travel. A regular stretching and mobility routine can prevent injuries and keep you riding all season:
- Hip flexors and IT band: These get extremely tight from the repetitive motion of skinning. Foam roll them regularly and do targeted stretches.
- Calves and Achilles: Heel risers help, but the sustained uphill angle still loads these structures heavily. Calf stretches and eccentric calf exercises (lowering your heel off a step) are essential.
- Lower back: Carrying a loaded pack for hours stresses your lumbar spine. Core strengthening and regular back stretches help prevent the lower back pain that plagues many backcountry riders.
In-Season Maintenance
Once the snow flies, your riding itself becomes training—but it’s important to maintain your fitness throughout the season. One or two gym sessions per week, combined with your touring, will keep your engine running. Don’t wait until February to realize you’re out of shape.
GROUP DYNAMICS & DECISION-MAKING: THE HUMAN FACTOR
More backcountry accidents are caused by human error than by equipment failure. The way your group communicates, makes decisions, and manages social pressure has a direct impact on your safety. Understanding the psychology of risk in the backcountry is as important as knowing how to use your beacon.
Decision-Making Frameworks
Good decision-making in the backcountry requires a structured approach that removes emotion and ego from the equation. Here are two proven frameworks:
- The Aspirin Test: Before committing to any objective, ask yourself: “Would I take an aspirin for the headache this decision could cause?” If the answer is no—meaning the consequences of a wrong decision are too severe—reconsider the plan. It’s a simple gut-check that forces you to weigh consequences honestly.
- Identify the Anchors: An “anchor” is anything that biases your decision-making. Common anchors include: sunk cost (“we drove 4 hours to get here”), social pressure (“everyone else wants to do it”), summit fever (“we’re so close to the top”), and familiarity (“we’ve done this line before”). Recognizing these biases is the first step to overcoming them.
- The Rule of Two: If two members of your group are not comfortable with a plan, the group adjusts. No single person’s enthusiasm should override the collective comfort level. This rule prevents the loudest voice from dominating decisions.
Communication in the Field
Clear communication prevents misunderstandings that can lead to accidents. Establish these protocols before you leave the trailhead:
- Define decision points: Before starting the tour, identify specific locations where you’ll pause as a group to reassess conditions and the plan. This prevents the group from drifting into terrain that wasn’t part of the plan.
- Use clear, unambiguous language: “I’m not comfortable with this” is a complete statement. No one should have to justify their discomfort with terrain or conditions. The group should discuss concerns openly without judgment.
- Designate a trip leader: While decisions should be collaborative, having a designated leader who facilitates discussion and makes the final call prevents paralysis. The leader should be the most experienced and level-headed person in the group, not necessarily the most technically skilled rider.
- Establish turn-around times: Set a firm time by which you’ll start heading back, regardless of where you are. This prevents the dangerous tendency to push further because “we’re almost there.”
Managing Summit Fever and Ego
Summit fever—the irrational desire to reach the top regardless of conditions—is responsible for a disproportionate number of backcountry accidents. It’s amplified by social dynamics: no one wants to be the person who calls the turn-around. Combat this by:
- Normalizing turn-arounds: Celebrate smart decisions to turn back, not just summits. Frame turn-arounds as successes—you made a good decision, preserved your energy, and will ride another day.
- Pre-committing to criteria: Before you leave the car, agree on specific conditions that will cause a turn-around (e.g., “if danger rises to Considerable above treeline, we stay below treeline,” or “if we haven’t reached the ridge by noon, we turn around”). Having pre-agreed criteria removes the emotional component from in-the-moment decisions.
- Rotating leadership: If the same person always makes the call, group dynamics can become unhealthy. Rotating the leadership role distributes responsibility and encourages everyone to think critically about safety.
The Most Dangerous Phrase in the Backcountry
“It’ll probably be fine.” This phrase has preceded countless accidents. If you find yourself or your partners using it, stop and re-evaluate. “Probably” is not a safety standard. Base your decisions on facts, forecasts, and observations—not on hope.
SIDECOUNTRY VS. BACKCOUNTRY: KNOWING THE DIFFERENCE
The terms “sidecountry,” “slackcountry,” and “backcountry” are often used interchangeably, but they describe distinct types of terrain access with different implications for safety, rescue, and responsibility. Understanding these differences is essential for making informed decisions.
What Is Sidecountry?
Sidecountry (also called slackcountry) refers to backcountry terrain that is accessed directly from a resort—typically by ducking a rope, climbing over a fence, or hiking from a lift-served ridgeline. The key distinction is the access point: you use resort infrastructure to reach the terrain, but once you cross the boundary, you’re in uncontrolled, unpatrolled mountains.
Sidecountry is deceptively dangerous because the resort environment creates a false sense of security. You might have just ridden a groomed run with patrollers and rescue teams nearby, and now you’re in avalanche terrain with no safety net. The transition from “controlled” to “uncontrolled” can happen in seconds, and many riders cross that boundary without the gear, training, or mindset required for backcountry travel.
What Is True Backcountry?
True backcountry is terrain accessed entirely under your own power—no lifts, no resort infrastructure. You skin, hike, or snowmobile to your objective, and you are solely responsible for navigation, rescue, and safety from the moment you leave the trailhead. The physical separation from the resort tends to filter out casual participants, which is actually a safety advantage: most people in true backcountry terrain have at least some preparation.
Resort Gate Access
Many resorts now have formal “backcountry gates” that provide legal, designated access points to backcountry terrain. These gates are not an invitation—they’re a boundary marker. Once you pass through the gate, you’re responsible for your own safety. Some resorts require you to sign a waiver, carry specific gear, or complete a safety briefing before exiting through a gate. Respect these requirements.
The Golden Rule
Whether you’re accessing terrain from a resort gate, ducking a rope, or starting from a remote trailhead: if it’s not patrolled or avalanche-controlled, you need full backcountry safety gear and training. There are no shortcuts. The mountain doesn’t care how you got there.
GETTING INTO THE BACKCOUNTRY ON A BUDGET: COMPLETE SETUP GUIDE
Let’s address the elephant in the room: backcountry snowboarding is expensive. But it doesn’t have to break the bank. Here’s a realistic look at costs and strategies for building a complete setup at different budget levels.
The Budget Setup ($1,500 – $2,000)
This is the entry point for riders who are serious about the backcountry but need to watch their spending:
- Used Splitboard: $400-$600. Check local classifieds, gear swap events, and online forums. Last year’s model in good condition is a great way to save.
- Splitboard Bindings: $250-$350. Look for previous-season models on sale. Spark R&D and Union both offer solid options at lower price points.
- Climbing Skins: $100-$150. Trim-to-fit universal skins are cheaper than pre-cut and work well for most setups.
- Beacon, Shovel, Probe Package: $300-$400. A BCA or Mammut package deal is the most economical way to get all three essentials.
- Backpack: $100-$150. A basic 30-35L pack with an avy tool pocket. You don’t need airbag compatibility for your first season.
- Boots: Use your existing resort boots if they’re comfortable for walking. Upgrade later.
Total: approximately $1,150-$1,750 (plus tax). This gets you into the backcountry safely, and you can upgrade individual pieces as your commitment grows.
The Mid-Range Setup ($2,500 – $3,500)
This budget allows you to buy new gear that will last several seasons:
- New Splitboard: $700-$1,000. A mid-range all-mountain splitboard like the Jones Frontier or Weston Backwoods offers excellent performance for the price.
- Splitboard Bindings: $350-$500. Spark R&D Arc or Surge, or Union Expedition.
- Climbing Skins: $150-$180. Pre-cut skins matched to your board for optimal performance.
- Beacon, Shovel, Probe: $350-$450. A quality beacon like the BCA Tracker S with matching shovel and probe.
- Backpack: $150-$250. A well-designed pack with board carry and avy tool pocket.
- Splitboard Boots: $300-$400. Backcountry-specific boots with walk mode make a huge difference.
Total: approximately $2,000-$2,780 (plus tax). This is the sweet spot for most riders who are committed to the backcountry long-term.
The Premium Setup ($4,000+)
For riders who want the best performance and are ready to invest in top-tier gear:
- Premium Splitboard: $1,000-$1,350. Carbon construction, advanced shaping, and premium materials. Jones Solution, Cardiff Goat, or Weston Ridgeline.
- Premium Splitboard Bindings: $500-$650. Spark R&D Arc with Tesla T1 system, or Union Charger.
- Premium Climbing Skins: $170-$200. High-performance mohair/nylon blend skins.
- Premium Beacon: $350-$400. Mammut Barryvox or BCA Tracker S.
- Avalanche Airbag Pack: $500-$800. BCA Float or Ortovox avalanche airbag adds a significant layer of safety.
- Premium Splitboard Boots: $400-$550. Top-of-the-line boots with thermo-moldable liners and full walk mode.
- Satellite Messenger: $350-$400 (Garmin inReach Mini) plus $15-$50/month subscription.
Total: approximately $3,270-$4,350+ (plus tax and subscription). This setup gives you world-class gear that will perform at the highest level for years.
Money-Saving Tips
- Buy used gear strategically. Boots, bindings, and beacons can be found in excellent condition on used gear sites. Never buy a used avalanche beacon from an unknown source—always verify it works and has fresh batteries.
- Shop end-of-season sales. March and April are prime time for scoring deals on previous-season gear. Retailers need to clear inventory for next year’s models.
- Invest in safety gear first. If your budget is tight, buy the beacon, shovel, and probe first, then add the splitboard setup over time. Some retailers offer rental splitboard setups that let you try before you buy.
- Take the AIARE course before buying gear. The course will teach you what you actually need and prevent you from buying gear that doesn’t fit your style or terrain.
MULTI-DAY BACKCOUNTRY TRIPS: OVERNIGHT ADVENTURES
Once you’ve mastered single-day tours, multi-day backcountry trips represent the next frontier. Spending nights in the mountains opens up access to remote terrain, allows you to wait out bad weather, and provides an experience of self-sufficiency that day touring can’t match. But overnight backcountry trips add significant complexity and risk.
Essential Overnight Gear
In addition to your standard backcountry kit, you’ll need:
- Shelter: A lightweight 4-season tent or bivy sack. A bivy is lighter but less comfortable; a tent provides more protection and space. In deep snow, you’ll need to build a platform by compressing the snow with your skis or snowshoes before setting up.
- Sleeping System: A sleeping bag rated to at least -10°F (-23°C) and an insulated sleeping pad with an R-value of 5 or higher. The ground will leech heat rapidly, so a quality pad is as important as the bag itself.
- Cooking: A lightweight stove (canister or liquid fuel) for melting snow for water and cooking meals. In cold temperatures, liquid fuel stoves like the MSR WhisperLite perform better than canister stoves, which lose pressure as temperatures drop.
- Food: Calorie-dense, lightweight meals. Plan for 3,000-4,000 calories per day—your body burns enormous energy staying warm and active in the backcountry. Dehydrated meals, nuts, energy bars, cheese, and chocolate are staples.
- Water: You’ll need to melt snow for all your water. Plan for at least 3-4 liters per day, which means significant stove time each morning and evening. Stay ahead of dehydration—it’s a common and dangerous problem in cold, dry environments.
Route Planning for Multi-Day Trips
Multi-day trips require more careful planning than day tours:
- Plan for flexibility. Identify multiple camp options along your route so you can adapt to weather, snow conditions, and group fitness. Don’t commit to a single campsite that might be in avalanche terrain or exposed to high winds.
- Consider elevation. Lower camps are generally warmer and more sheltered. High camps offer better views and quicker access to alpine terrain but expose you to more extreme weather and avalanche risk.
- Check extended forecasts. A multi-day trip means you’re committing to multiple days of conditions. A storm that’s fine for a day tour can be dangerous for an overnight trip. Build in extra days for weather delays.
- Know your exit routes. Always have a plan for getting out quickly if conditions deteriorate or someone gets hurt. Identify bail-out options along your entire route.
Snow Shelter Construction
In extreme conditions or emergency situations, the ability to build a snow shelter can be lifesaving. The two main types are:
- Snow Trench: Dig a trench in deep snow, lay branches or your splitboard across the top, and cover with snow. This is faster to build than a quinzhee and provides good insulation from wind.
- Quinzhee: Pile snow into a mound, let it sinter (bond) for 1-2 hours, then hollow out the interior. A well-built quinzhee can maintain temperatures around 30°F (-1°C) even when it’s -30°F (-34°C) outside. The key is proper ventilation—always leave a small vent hole to prevent carbon monoxide buildup if you’re using a stove inside.
Emergency Overnight Protocol
If you’re forced to spend an unplanned night in the backcountry, prioritize: 1) Get out of the wind. 2) Insulate yourself from the ground. 3) Conserve energy. 4) Stay hydrated and fed if possible. 5) Activate your satellite messenger and communicate your situation. Do not continue traveling in the dark or when exhausted—this is when most accidents happen.
SPLITBOARD MOUNTAINEERING: ADVANCED SKILLS FOR TECHNICAL TERRAIN
Splitboard mountaineering represents the pinnacle of human-powered snowboarding. It combines the skills of alpine mountaineering with splitboarding to access terrain that’s unreachable by any other means—steep couloirs, glaciated peaks, and remote alpine lines. This is expert-level terrain that requires additional training, gear, and judgment beyond standard backcountry touring.
Essential Mountaineering Skills
- Crampon Technique: When skinning becomes impossible—on ice, rock, or extremely steep snow—you’ll need to remove your skins, lock your bindings into ride mode, and attach crampons to your boots. Front-pointing (kicking the front points of your crampons into the snow while facing the slope) is the fundamental technique for steep, icy terrain.
- Ice Axe Use: An ice axe is your third point of contact on steep, exposed terrain. Self-arrest—the technique of stopping a fall using your ice axe—is a critical safety skill that must be practiced extensively before you need it. Carry an ice axe anytime you’re above treeline on steep snow.
- Rope Skills: On glaciated terrain or above significant cliff bands, rope travel becomes necessary. You should know how to build snow anchors, set up rappels with your splitboard, and perform crevasse rescue. This requires formal mountaineering training beyond an AIARE course.
- Glacier Travel: Glaciers contain hidden crevasses that can be fatal if you fall into one. If you’re traveling on glaciated terrain, you need rope team travel skills, crevasse rescue knowledge, and the ability to identify potential crevasse zones (sagging snow bridges, tension cracks, and blue ice exposed through the snow).
Additional Mountaineering Gear
- Ice Axe: A lightweight mountaineering axe (50-70cm) for self-arrest and anchor building.
- Crampons: Lightweight steel or aluminum crampons compatible with your splitboard boots. Semi-automatic bindings work best for mountaineering.
- Rope: A 30-meter half rope or glacier rope for roped travel and rappelling.
- Hardware: Ice screws, snow pickets, slings, and carabiners for building anchors.
- Harness: A lightweight climbing harness that fits over your layers. Practice putting it on over your full touring kit.
Mountaineering Is a Separate Discipline
Splitboard mountaineering is not a natural extension of backcountry touring—it’s a separate discipline with its own risks, training requirements, and equipment. Take a formal mountaineering course, climb with experienced mentors, and build your skills progressively before attempting technical objectives. The mountains will wait for you to learn.
EMERGENCY PREPAREDNESS & BACKCOUNTRY FIRST AID
In the backcountry, you are your own first responder. Professional rescue can be hours away—if it can reach you at all. Carrying a first aid kit and knowing how to use it is a fundamental responsibility of backcountry travel.
Backcountry First Aid Kit
Your first aid kit should be compact, lightweight, and tailored to the specific injuries common in backcountry snowboarding:
- Trauma supplies: Gauze pads, medical tape, elastic bandages (ACE wrap), and a SAM splint for stabilizing fractures and sprains. Head injuries and limb fractures are the most common backcountry trauma.
- Blister treatment: Moleskin, Compeed, and athletic tape. Blisters can end a multi-day trip just as effectively as a broken bone.
- Pain management: Ibuprofen (anti-inflammatory) and acetaminophen (pain relief). Carry both—ibuprofen reduces swelling while acetaminophen manages pain.
- Hypothermia treatment: An emergency bivy sack or space blanket, plus chemical hand warmers. Getting a hypothermic patient warm and dry is your highest priority in a cold-weather emergency.
- Avalanche-specific: A small probe or collapsible pole for checking snow depth and stability in emergency situations.
Common Backcountry Injuries and Treatment
- Sprains and Strains: The most common injury. RICE protocol: Rest, Ice (snow), Compression (elastic bandage), Elevation. Assess whether the patient can walk out before committing to a lengthy rescue.
- Fractures: Immobilize with a SAM splint and padding. A lower-leg fracture may require a sled evacuation, which is complex and exhausting. Evacuate as quickly as safely possible.
- Hypothermia: Shivering, confusion, and loss of coordination are early signs. Stop, find shelter, add insulation, and give warm fluids if the patient is conscious. Severe hypothermia (loss of shivering, irrational behavior) requires immediate evacuation.
- Frostbite: Numb, white, or waxy skin on extremities. Do not rewarm frostbitten tissue if there’s any chance of refreezing—refreezing causes far more damage than staying frozen. Protect the area and evacuate.
- Avalanche burial: If a partner is buried, execute the rescue protocol immediately: beacon search, probe strike, rapid excavation. After extraction, assess ABCs (airway, breathing, circulation) and begin CPR if needed. Hypothermia management is critical even after successful rescue.
Emergency Communication Protocol
If someone is injured and evacuation is necessary:
- Activate your satellite messenger SOS or send a text message with your GPS coordinates, nature of injury, number of people, and current conditions.
- Stabilize the patient while waiting for rescue. Keep them warm, hydrated, and calm.
- Prepare for helicopter evacuation if possible. Clear a landing zone (flat area at least 100 feet in diameter), mark it with bright gear, and keep everyone away from the approach path.
- If self-evacuation is necessary, assess the patient’s ability to travel and the terrain between you and the trailhead. A controlled, slow evacuation is always better than a rushed, dangerous one.
ENVIRONMENTAL ETHICS: LEAVING NO TRACE IN WINTER
The backcountry is a privilege, not a right. As backcountry use increases, our collective responsibility to minimize our impact grows. The Leave No Trace principles apply to winter travel just as they do to summer hiking—but winter presents unique challenges.
Waste Management
- Pack out all trash. This includes food wrappers, banana peels, and apple cores. Organic waste decomposes extremely slowly in cold, dry environments and can persist for years. What you pack in, you pack out—no exceptions.
- Human waste: In most backcountry terrain, you can dig a cathole 6-8 inches deep in the snow. In very cold environments where digging is difficult, use a WAG bag (waste alleviation and gelling bag) and pack it out. Never leave human waste on the surface.
- Urine: Urinate on rocks or mineral soil, not on vegetation or in water sources. In deep snow, urine can persist for a long time and attract wildlife.
Wildlife Considerations
Winter is a critical survival period for many mountain animals. Your presence can have outsized impacts:
- Avoid wildlife habitat. Steer clear of known winter range areas, migration corridors, and denning sites. Elk, deer, and moose are especially vulnerable to disturbance in deep snow when their energy reserves are low.
- Keep dogs under control. If you bring your dog into the backcountry (and many areas prohibit dogs entirely), keep it leashed or under strict voice control. Dogs can chase wildlife, contaminate water sources, and trigger avalanches.
- Give wildlife space. If you encounter animals, give them a wide berth. stressed animals burn precious energy reserves that they need to survive the winter.
Protecting Fragile Terrain
- Stay on established skin tracks when they exist. Creating parallel tracks fragments the terrain and increases impact.
- Avoid sensitive alpine vegetation. Above treeline, alpine plants grow slowly and are easily damaged by ski and boot traffic. Stay on snow-covered terrain when possible.
- Respect closures and restrictions. Wildlife closures, wilderness boundaries, and private land exist for good reasons. Know the regulations for the area you’re visiting and follow them.
WOMEN’S BACKCOUNTRY SNOWBOARDING: GEAR, COMMUNITY & CONSIDERATIONS
Women are the fastest-growing demographic in backcountry snowboarding, and the industry is finally catching up with gear designed specifically for women’s bodies and riding styles. But beyond gear, women face unique challenges and opportunities in the backcountry that deserve attention.
Women’s-Specific Gear Considerations
- Splitboard Sizing: Women generally need shorter, narrower boards. A board that’s too long or too wide will be difficult to control on both the uphill and downhill. Look for boards specifically designed with women’s-specific flex patterns and sidecut radii.
- Binding Fit: Women’s bindings typically have shorter baseplates and straps designed for smaller feet and narrower calves. Proper fit is essential for efficient touring—ill-fitting bindings cause hotspots, blisters, and fatigue.
- Boot Fit: Women’s feet tend to have different proportions than men’s—narrower heels, lower volume forefeet, and different calf shapes. A properly fitted backcountry boot is critical for both uphill comfort and downhill performance.
- Layering: Women’s base layers, mid layers, and shells are cut differently to accommodate different body shapes. A well-fitting layering system is more efficient and more comfortable than trying to make men’s gear work.
Building Community
Finding backcountry partners is one of the biggest challenges for anyone entering the sport, and women often face additional barriers in male-dominated groups. Here’s how to build your community:
- Women’s-specific courses: Many AIARE course providers offer women-only courses. These provide a comfortable learning environment and are often the best place to meet like-minded partners.
- Local groups and organizations: Groups like SheShreds, Women of the backcountry, and local women’s outdoor clubs organize group tours, mentorship programs, and social events.
- Online communities: Facebook groups, Instagram communities, and forums like Teton Gravity Research have active women’s backcountry communities where you can find partners, ask questions, and share experiences.
Physical Considerations
Research shows that women may be more susceptible to certain injuries (like ACL tears) and may have different thermoregulation patterns than men. Training should address these differences:
- ACL prevention: Neuromuscular training exercises that improve knee stability—single-leg squats, lateral band walks, and jump-landing drills—can significantly reduce ACL injury risk.
- Core and hip strength: Women often benefit from targeted hip and glute strengthening, which improves stability and reduces the risk of overuse injuries during long tours.
- Cold management: Women may experience colder extremities due to differences in body fat distribution and circulation. Extra attention to hand and foot warmth is important.
COMMON MISTAKES & LESSONS FROM THE MOUNTAINS
Every backcountry rider makes mistakes. The difference between a learning experience and a tragedy is whether you recognize the error, learn from it, and share the lesson with others. Here are the most common mistakes that experienced riders see repeated season after season.
1. Skipping the Avalanche Course
The most dangerous mistake. No amount of YouTube videos, forum reading, or friend advice replaces a structured avalanche education course. The backcountry is not a place for self-taught safety. Invest in the course first.
2. Not Checking the Forecast
“We checked it yesterday” is not good enough. Avalanche conditions can change dramatically in a matter of hours. Check the forecast every single morning, and be willing to change your plan based on what you read.
3. Group Size Too Large
Groups of 5+ are exponentially harder to manage. Communication breaks down, decision-making becomes political, and the risk of triggering avalanches increases with more people on the slope. Keep your group to 3-4 people for the best balance of safety and efficiency.
4. Over-Relying on Technology
Your GPS can fail. Your phone can die. Your beacon can malfunction. Technology is a tool, not a replacement for judgment and basic skills. Always carry backup navigation, know how to use it, and trust your observations over your screen.
5. Ignoring the “Bail Criteria”
You set turn-around times and conditions at the trailhead, then abandoned them because “we’re so close” or “it looks better now.” Pre-committing to criteria is only useful if you actually follow them. The mountain will always be there tomorrow.
6. Riding Alone
Solo backcountry travel is one of the highest-risk activities in the sport. If you’re caught in an avalanche, buried, and alone, there’s no one to rescue you. If you get injured and can’t move, there’s no one to call for help. Never ride alone in the backcountry.
7. Neglecting Fitness
You can have the best gear in the world, but if you’re too exhausted to make good decisions or control your board on the descent, none of it matters. Physical fitness is safety equipment.
8. Poor Transitions
Fumbling through transitions wastes time, drains energy, and exposes you to cold and wind. Practice your transitions at home before you need them on a windy ridgeline. Organization and practice make transitions fast and efficient.
9. Not Carrying the Essentials
“I’ll just be out for a quick hour” is famous last words. Conditions change, people get lost, and emergencies happen when you least expect them. Always carry the full safety kit, extra food and water, navigation, and communication devices—no exceptions.
10. Ego Over Safety
The backcountry has no room for ego. The terrain doesn’t care about your Instagram following, your ski resort credentials, or your need to impress your partners. Humility is the most important trait in a backcountry rider. The best riders are the ones who consistently make conservative, smart decisions and come home safe every time.
INTERPRETING MOUNTAIN WEATHER: BEYOND THE AVALANCHE FORECAST
Mountain weather is notoriously unpredictable and can change with terrifying speed. Understanding basic weather patterns and learning to read the sky will help you make better decisions about when to go, where to go, and when to turn around.
Reading the Sky
- Cirrus clouds (high, wispy): Often the first sign of an approaching weather system. If cirrus clouds are increasing from the west, expect conditions to deteriorate within 12-24 hours.
- Altocumulus clouds (mid-level, patchy): Can indicate approaching precipitation. If they thicken and lower throughout the day, rain or snow is likely within hours.
- Cumulonimbus (thunderstorm clouds): Dark, towering clouds with an anvil-shaped top. In the backcountry, these bring lightning, heavy precipitation, and rapid temperature drops. If you see these building, get below treeline immediately.
- Clear skies with increasing wind: A bluebird day with rising wind often means a front is approaching. Wind can build dangerous wind slabs on lee slopes within hours, even without new snowfall.
Temperature and Its Effects
- Rapid warming: When temperatures rise quickly (especially above freezing), the snowpack weakens. Wet slab and loose wet avalanches become increasingly likely as the day progresses. Plan to be off steep terrain before warming reaches its peak.
- Temperature inversions: In valleys, cold air pools at the bottom while higher elevations are warmer. This can create deceptive conditions—you might leave the car in calm, cold air and encounter strong winds and unstable snow above treeline.
- Rapid cooling: A sudden temperature drop can strengthen the snowpack but can also create surface hoar (frost crystals) that becomes a buried weak layer when covered by subsequent snowfall. Note rapid cooling events in your mind—they’ll be relevant for weeks afterward.
Wind Patterns
Wind is the single fastest modifier of avalanche danger. It can build dangerous wind slabs in a matter of hours, even on days with no new snowfall. Pay attention to:
- Surface wind indicators: Flags, banners, and blowing snow at ridge level show you the direction and intensity of wind transport.
- Cornices: Large cornices on ridgelines indicate sustained wind loading. The slope below a cornice is often heavily loaded with wind-deposited snow.
- Snow texture: Smooth, rounded pillows of snow on lee slopes are wind-loaded. Scoured, hard snow on windward slopes tells you where that snow went.
SNOW SCIENCE BASICS: UNDERSTANDING WHAT’S BENEATH YOUR BOARD
You don’t need a PhD in snow science to ride safely in the backcountry, but understanding the basics of how snowpack forms and fails will dramatically improve your ability to assess terrain and make safe decisions. An AIARE 1 course will teach you these fundamentals in depth, but here’s an overview of what you need to know.
How a Stable Snowpack Forms
A stable snowpack develops through a process called sintering—the bonding of snow grains over time through temperature gradients and pressure. New snow crystals are angular and fragile, but as they settle and bond, they form a cohesive, strong layer. This process takes time, which is why freshly fallen snow is often the most dangerous.
Weak Layers: The Recipe for Avalanches
Avalanches occur when a strong, cohesive slab of snow sits on top of a weaker layer. The weak layer fails under stress (your weight, additional snowfall, or warming), and the slab slides away. Common weak layers include:
- Faceted snow (depth hoar): Large, cup-shaped crystals that form near the ground when temperature gradients are strong. These grains don’t bond well and create a persistent weak layer that can last all season.
- Surface hoar: Feathery frost crystals that form on the snow surface during cold, clear nights. When buried by subsequent snowfall, they create a notorious weak layer that can persist for weeks.
- Rounded grains (melt-freeze crusts): When the snow surface melts and refreezes, it creates a smooth crust. Fresh snow deposited on top of this crust may not bond well, creating a sliding surface.
Reading the Snow Surface
Even without digging a snow pit, you can learn a lot from the snow surface:
- Whumpfing sounds: As you skin or walk, listen for a loud “whumpf” as the snow collapses beneath you. This is a direct sign of a buried weak layer.
- Shooting cracks: When cracks shoot out from your board or skis, you’re standing on an unstable slab.
- Sound: Hard, hollow-sounding snow often indicates a slab sitting on a weak layer. Soft, mushy snow is usually more stable (though it may be wet).
- Snow depth variation: Watch for areas where snow depth changes rapidly. Thin spots over rocks or ground features can indicate weak zones in the snowpack.
BACKCOUNTRY PHOTOGRAPHY & FILM: CAPTURING YOUR ADVENTURES
There’s a unique beauty in backcountry terrain that begs to be captured. But photographing and filming in the backcountry comes with trade-offs: every ounce of camera gear is an ounce of safety gear you’re not carrying. Here’s how to balance the desire for content with the priority of safety.
The Weight vs. Quality Trade-Off
- Action cameras (GoPro, Insta360): The obvious choice for backcountry. They’re lightweight, mountable, and weather-resistant. A chest mount or helmet mount captures great POV footage without requiring you to stop and set up. Weight: 150-200g.
- Mirrorless cameras: For higher-quality stills and video, a mirrorless camera like a Sony a6400 or Fuji X-T5 offers excellent image quality in a relatively compact package. With a lightweight zoom lens, you can capture stunning landscape and action shots. Weight: 500-800g with lens.
- Drones: Drone footage of backcountry terrain is spectacular, but drones add weight, require batteries, and are restricted in many wilderness areas and national parks. Check regulations before you fly. Weight: 250-600g plus batteries.
Shooting Tips for the Backcountry
- Battery management: Cold kills batteries. Keep spare batteries warm in an inside pocket against your body. Carry at least two spares for a full day of shooting.
- Lens fog: Moving from cold exterior to a warm car or shelter will fog your lens instantly. Let your gear acclimate slowly before shooting.
- Shoot during transitions: The best light often occurs at dawn and dusk—exactly when you’re transitioning at the top or bottom of a tour. Use these moments for your best shots.
- Safety first, content second: Never compromise your safety for a shot. Don’t ride dangerous terrain because it looks good on camera. Don’t stop in an avalanche path to get the perfect angle. The mountain doesn’t care about your content calendar.
Backcountry FAQ: Common Questions
These terms refer to backcountry terrain that is accessed from a resort lift. While it’s easier to access, it is still the backcountry. It is not patrolled or controlled for avalanches. The same rules apply: you need the gear, training, and a partner. Some of the best snowboarding destinations, like Jackson Hole or many of the top European ski resorts, are famous for their lift-accessed backcountry.
You can, but it’s inefficient. You would need to carry the board on your back while you hike up in snowshoes. This is much more tiring and slower than using a splitboard. For very short hikes (“bootpacks”), it’s feasible, but for any real tour, a splitboard is the standard tool for the job.
An airbag system consists of a large, durable balloon packed into the backpack, connected to a trigger on the shoulder strap. If you are caught in an avalanche, you pull the trigger, and a canister of compressed air or a powerful fan inflates the balloon. Through a process called “inverse segregation,” the larger volume of the inflated bag helps you rise to the surface of the moving snow debris. It does not protect you from trauma from hitting rocks or trees, but it is a proven life-saving tool.
A complete backcountry setup (splitboard, bindings, skins, beacon, shovel, probe, pack) ranges from approximately $1,500 for a budget-conscious setup using used gear to $4,000+ for a premium new setup. Add $300-$500 for an AIARE 1 avalanche course. The ongoing costs are minimal—mainly gas to the trailhead and occasional gear maintenance. It’s a significant upfront investment, but the per-day cost drops dramatically over time compared to resort lift tickets.
Backcountry snowboarding involves inherent risks, including avalanches, hidden obstacles, and remote terrain with no rescue services. However, with proper education, gear, and decision-making, the risk can be managed significantly. The vast majority of avalanche accidents involve people who lack training, ignored forecasts, or made poor terrain decisions. Take an AIARE course, always check the forecast, ride with experienced partners, and practice conservative decision-making. The backcountry will always be dangerous—but it doesn’t have to be reckless.
Solo backcountry travel is strongly discouraged, especially for beginners. If you’re caught in an avalanche and buried, there’s no one to rescue you. If you’re injured and can’t move, there’s no one to call for help. Even experienced riders travel with partners. If you’re determined to ride solo, carry a satellite messenger, ride extremely conservative terrain, tell someone your exact plan and expected return time, and understand that you are accepting significantly higher risk.
For your first splitboard, prioritize versatility over specialization. An all-mountain freeride shape (like the Jones Solution or Weston Backwoods) will handle the widest range of conditions and terrain. Choose a length that matches your weight and riding style—typically the same length you’d ride in-bounds, or slightly longer for float in deep snow. Waist width should accommodate your boot size without excessive overhang. If possible, demo a few boards before committing, and buy from a shop that offers splitboard-specific advice.
The number of antennas in an avalanche beacon affects its search accuracy and speed. A 2-antenna beacon provides reliable signal processing for most recreational situations. A 3-antenna beacon offers improved fine-search accuracy and better performance in complex burial scenarios, such as multiple burials or deep burials. For most recreational backcountry riders, a quality 2-antenna beacon (like the BCA Tracker) is more than adequate. A 3-antenna beacon (like the Mammut Barryvox) provides an extra margin of precision. Either is infinitely better than no beacon at all.
Proper skin maintenance extends their life and ensures reliable grip on the uphill. After each use, shake off loose snow and let them dry completely before storing—never store wet skins, as this degrades the glue. If the glue gets dirty or loses stickiness, clean it with a skin-specific glue cleaner and re-apply skin glue as needed. At the end of the season, apply a storage wax to the plush side to protect the fibers and store them in a cool, dry place. Replace skins when the plush is worn thin or the glue can no longer hold reliably.
The best time depends on your region and objectives. In most areas, mid-winter (January-February) offers the deepest snowpack and most consistent conditions, but it’s also when avalanche danger is often highest. Late winter/early spring (March-April) is popular for longer days, more stable snowpack, and corn snow conditions. Early season (November-December) can offer great powder but thin coverage and persistent weak layers. Each period has trade-offs—match your timing to your skill level, objectives, and tolerance for different types of avalanche problems.
While you can use your regular resort boots for splitboarding, backcountry-specific boots with a “walk mode” dramatically improve uphill comfort and efficiency. Walk mode unlocks the boot cuff, allowing a greater range of motion for a natural walking stride. This reduces fatigue on long tours and makes kick turns much easier. Backcountry boots are also typically lighter than resort boots, which adds up over thousands of vertical feet of climbing. If you’re committed to backcountry riding, investing in dedicated splitboard boots is one of the best upgrades you can make.
Regular practice is essential. The International Snow Safety Association recommends conducting at least one full rescue practice per month during the winter season. Here’s how to practice: Bury a beacon (or use its companion search mode) in a known location, then practice a full search—switching to search mode, following the signal, performing the fine search, probing, and shoveling. Time yourself and aim to improve. Many local avalanche centers and ski patrol groups organize practice sessions and drills. Practice with your partners so everyone knows the protocol and can work together seamlessly under pressure.
“Earning your turns” refers to the backcountry philosophy of climbing uphill under your own power (usually on a splitboard with climbing skins) to access untracked terrain for the descent. It’s both a literal description of the activity and a cultural statement about the value of effort and self-reliance in mountain sports. The term embodies the idea that the journey uphill is part of the experience—not just an inconvenience between you and the powder. It also implies a deeper connection to the mountain, because you’ve invested physical effort to access the terrain rather than simply riding a chairlift.
A typical day tour takes 4-8 hours from trailhead to return, depending on elevation gain, distance, snow conditions, and group fitness. A general rule of thumb is 1 hour per 1,000 feet of vertical gain (roughly 300 meters per hour), though this varies significantly. A 3,000-foot tour with one run might take 4-5 hours, while a 5,000-foot day with multiple runs could take 8-10 hours. Start with shorter tours and work your way up as your fitness and efficiency improve. Always allow plenty of time for transitions, breaks, and the inevitable slowdown that comes with deep snow or steep terrain.
Riding in heavy rain is extremely dangerous in avalanche terrain. Rain rapidly destabilizes the snowpack by adding water weight and lubricating weak layers. Wet slab and loose wet avalanches become increasingly likely during and after rain events. If the forecast calls for rain, especially at higher elevations, strongly consider postponing your tour or choosing very conservative, low-angle terrain well away from avalanche paths. If you do get caught in rain during a tour, prioritize getting off steep terrain immediately and head for the safety of trees or low-angle slopes.
Start with a basic orienteering or map-and-compass course. Many outdoor education organizations and search and rescue groups offer these. Then practice regularly: take a paper map on every backcountry tour and navigate without GPS first. Supplement with digital tools—download CalTopo or Gaia GPS, learn to create routes, set waypoints, and read topographic maps on screen. Combine both approaches: use GPS for real-time positioning but rely on your map and compass as a backup. The more you practice, the more confident you’ll become in finding your way in any conditions.
A LIFELONG JOURNEY
Entering the backcountry is the beginning of a lifelong learning process. Every day in the mountains is a lesson. Start slow, choose conservative objectives, and never be afraid to turn back. The mountain will always be there tomorrow. The reward of standing on a silent peak, looking down at a line you earned with your own two feet, is one of the purest experiences in the world.
Do the work, get the education, respect the mountains, and you’ll unlock a lifetime of adventure.


Pingback: 7 Best Avalanche Shovels for Backcountry Riders