
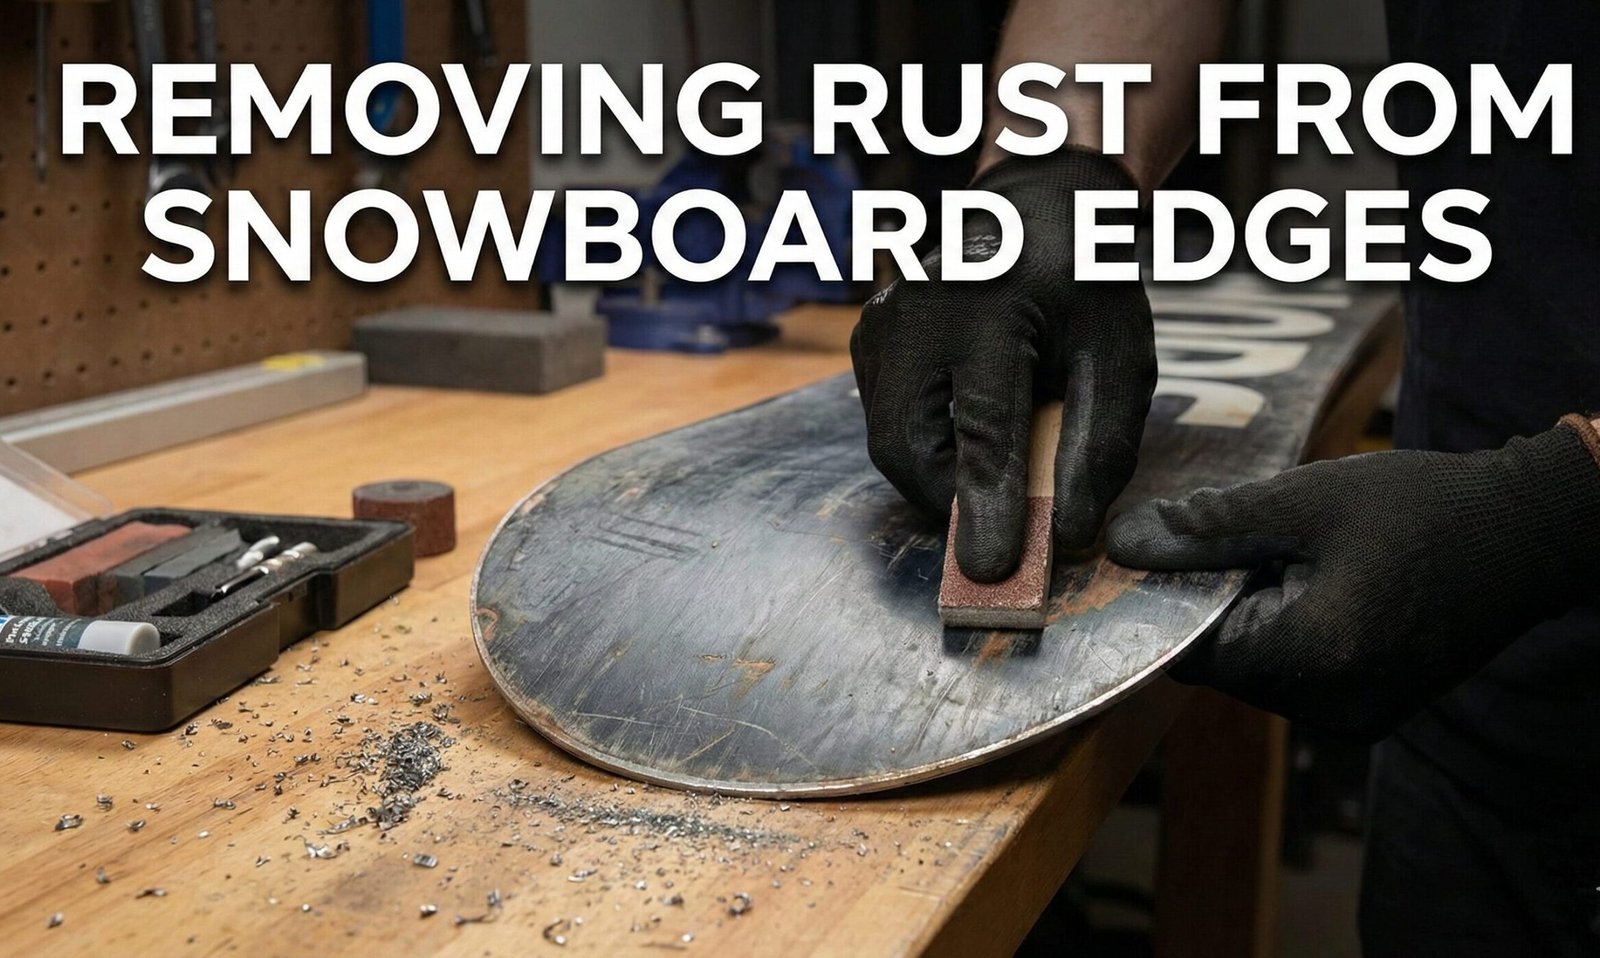
How to Remove Rust from Snowboard Edges: The Ultimate Maintenance Guide
You pull your board out of storage, excited for the first powder day of the season, only to find the shiny steel edges are covered in rough, orange oxidation. Panic sets in. Is the board ruined? Do you need to buy a new one?
Take a deep breath. Rust on snowboard edges is incredibly common, and in 90% of cases, it is purely cosmetic and easily removable. Whether you are prepping for a trip to snowboarding in Colorado or just hitting your local hill, riding with rusty edges can significantly impact your performance. Rust creates drag, prevents clean carving, and can eventually lead to pitting if left untreated.
Watch: Quick rust removal in action.
Table of Contents
- Why Does Rust Happen? The Science Behind Edge Corrosion
- Understanding Snowboard Edge Materials: Carbon Steel vs Stainless Steel
- Types of Rust on Snowboard Edges
- Tools of the Trade: Complete Edge Maintenance Toolkit
- Budget Edge Tuning Kits: From Entry-Level to Professional
- Step-by-Step Rust Removal Guide
- Advanced Rust Removal: Household Remedies and Chemical Solutions
- Snowboard Edge Bevel Angles: Complete Guide by Riding Style
- How to Detune Your Snowboard Edges
- Edge Inspection: How to Tell If Your Edges Need Sharpening
- The Thumbnail Test and Other Sharpness Checks
- Side Edge vs Base Edge Maintenance
- Fixing Nicks and Damage in Snowboard Edges
- Edge Maintenance for Different Riding Styles
- Climate-Specific Edge Care: Coastal, Desert, Humid, and Cold
- Seasonal Maintenance Calendar
- Preventing Rust: The Post-Ride Ritual
- Storage Solutions to Prevent Edge Rust
- Silica Gel Packs and Humidity Control for Board Storage
- Pre-Storage Wax for Edge Protection
- Edge Maintenance for Splitboards
- Edge Maintenance for Kids and Beginners
- Travel with Your Snowboard: Protecting Edges on Planes and Road Trips
- Professional vs DIY Edge Tuning: Cost Comparison and Decision Framework
- How Many Times Can You Sharpen Before Replacing Edges?
- Edge Material Science: Why Steel Edges Rust
- When Is the Edge Too Far Gone? Replacement Signs
- Common Edge Maintenance Mistakes
- Edge Maintenance for Different Snowboard Types
- Safety Considerations
- Complete FAQ: 30+ Questions Answered
- Conclusion
Why Does Rust Happen?
Steel edges rust due to a simple chemical reaction: Iron + Oxygen + Moisture = Iron Oxide (Rust). Snowboards are constantly exposed to snow (water). The problem usually occurs when we put our boards away wet.
It creates a rough surface that increases friction. If you’ve ever wondered why snowboarding is fun, it’s the smooth glide. Rust ruins that. It makes the board feel “catchy” and slow, which can be dangerous if you are navigating technical terrain or backcountry snowboarding.
The Chemistry of Rust on Steel Edges
Every snowboard edge is made of ferrous metal — meaning it contains iron. When iron is exposed to both oxygen and moisture simultaneously, an electrochemical reaction occurs. The iron atoms lose electrons (oxidation), and those electrons combine with oxygen and water molecules to form hydrated iron(III) oxide — what we see as rust.
This reaction is accelerated by several factors that are common in snowboarding environments:
- Salt: Road salt from parking lots, salt in coastal air, and even the mineral content in snow dramatically accelerate corrosion. Salt acts as an electrolyte, speeding up the electron transfer process. If you ride at coastal resorts or park near treated roads, your edges are at much higher risk.
- Temperature fluctuations: Moving from cold outdoor air to a warm car or heated lodge creates condensation on the metal surface. This thin layer of moisture is more than enough to trigger oxidation.
- Time: Even a wet board left overnight can develop surface rust. The longer moisture sits on the metal, the deeper the oxidation penetrates.
- pH levels: Snow in industrial areas or near roads tends to be slightly acidic due to dissolved pollutants. Acidic conditions dramatically accelerate the rusting process.
- Mechanical damage: Scratches, nicks, and burrs from rocks or hard snow create micro-abrasions in the metal surface where rust can take hold more easily. These damaged areas have more surface area exposed to the elements.
Why Some Boards Rust More Than Others
Not all snowboard edges are created equal. The amount of rust you see depends on several factors:
- Steel grade: Higher-quality boards often use hardened carbon steel edges that are more resistant to surface oxidation. Budget boards may use softer, less refined steel that rusts more readily.
- Edge finish: Some manufacturers apply a thin protective coating or use polished finishes that provide temporary rust resistance. These coatings wear off with use.
- Board construction: The way the edge is bonded to the board matters. Boards with edges that sit flush with the P-Tex base trap less moisture at the edge-base junction.
- Riding conditions: A board used exclusively on dry, cold powder will rust far less than one ridden in slush, rain, or coastal conditions.
Understanding Snowboard Edge Materials: Carbon Steel vs Stainless Steel
Before diving deeper into removal techniques, it helps to understand what your edges are actually made of. The vast majority of snowboard edges are manufactured from carbon steel — a ferrous alloy that offers an excellent balance of hardness, edge hold, and cost. However, not all carbon steel is the same, and a small number of manufacturers have experimented with stainless steel or composite edges.
Carbon Steel Edges (Standard)
Carbon steel is the industry standard for snowboard edges. It is favored because it is hard enough to hold a sharp edge for carving, durable enough to withstand rock impacts, and relatively inexpensive to manufacture. The trade-off is that carbon steel is highly susceptible to oxidation — it rusts when exposed to moisture and oxygen.
Most carbon steel edges contain between 0.6% and 1.0% carbon. Higher carbon content means a harder edge that holds its sharpness longer but is also more brittle and slightly more prone to rust. Lower carbon content produces a more ductile edge that resists cracking but dulls faster.
- Pros: Excellent edge hold, easy to sharpen, affordable, industry standard
- Cons: Rusts easily, requires regular maintenance, can corrode if neglected
Stainless Steel Edges (Premium)
A small number of premium snowboard manufacturers have experimented with stainless steel edges. Stainless steel contains chromium (at least 10.5%), which forms a thin, invisible oxide layer on the surface that prevents further corrosion. This makes stainless edges significantly more resistant to rust.
However, stainless steel edges are rare in snowboarding for several reasons. They are more expensive to manufacture, they are harder to sharpen with standard tools, and some riders report that they do not grip ice as aggressively as carbon steel. The chromium oxide layer that prevents rust also slightly reduces the edge’s ability to bite into hard surfaces.
- Pros: Highly resistant to rust, minimal maintenance needed, longer lifespan
- Cons: More expensive, harder to sharpen, slightly less aggressive grip, rare availability
Edge Hardness and Its Impact on Maintenance
Edge hardness is measured on the Rockwell C scale (HRC). Most snowboard edges fall in the range of 48–58 HRC. Harder edges (54+ HRC) hold their sharpness longer but are more prone to chipping. Softer edges (below 50 HRC) are easier to sharpen but dull more quickly.
| Hardness (HRC) | Edge Behavior | Maintenance Needs | Best For |
|---|---|---|---|
| 45–48 | Soft, bends before chipping, dulls quickly | Frequent sharpening needed | Beginners, park/jib riding |
| 48–52 | Medium hardness, good balance | Moderate maintenance | All-mountain riders |
| 52–55 | Hard, holds edge well, some chipping risk | Less frequent sharpening | Carving, hardpack riding |
| 55–58 | Very hard, excellent edge hold, brittle | Least sharpening, but careful handling | Race, ice, aggressive carving |
Types of Rust on Snowboard Edges
Not all rust is the same. Understanding what type of rust you are dealing with will help you choose the right removal technique and determine whether your edges need professional attention.
Surface Rust (Light Orange Rust)
Surface rust appears as a thin, powdery layer of orange or light brown discoloration on the edge surface. It feels slightly rough to the touch but has not eaten into the metal. This is by far the most common type of rust on snowboard edges and is almost always cosmetic.
Surface rust develops when a board is stored wet for a short period — overnight, a few days, or occasionally through a humid summer. The oxidation has only affected the outermost layer of the steel and has not penetrated the metal’s structure.
Removal difficulty: Easy. A gummy stone removes surface rust in seconds. This is the rust you see in 90% of cases.
Scale Rust (Medium Brown/Red Rust)
Scale rust is thicker and more pronounced than surface rust. It appears as a reddish-brown coating that may flake or scale off when touched. This type of rust indicates that the oxidation has penetrated deeper into the metal surface and has been developing for weeks or months.
Scale rust often develops on boards that were stored damp in a garage, shed, or storage unit through an entire off-season. While still removable with hand tools, it requires more effort and may leave behind minor pitting in the metal.
Removal difficulty: Moderate. Requires a diamond stone or fine file, followed by a gummy stone for polishing.
Deep Rust / Pitting Corrosion (Dark Brown/Black Rust)
Deep rust appears as dark brown or black discoloration with visible pits or craters in the metal surface. The pits are small holes where the rust has eaten through the metal. This type of corrosion is serious and can compromise the edge’s structural integrity.
Deep pitting typically results from prolonged neglect — a board stored wet for multiple seasons, exposure to road salt without cleaning, or a board that was ridden in coastal/saltwater conditions and never properly maintained afterward.
Removal difficulty: Difficult to impossible at home. Surface rust can be cleaned off, but the pits remain. In severe cases, the edge needs professional evaluation and may require replacement.
Edge Joint Rust
This is rust that develops specifically at the junction where the steel edge meets the P-Tex base. Moisture can become trapped in the tiny gap between the metal and the base material, creating a localized rust spot. Edge joint rust is particularly common on older boards where the adhesive bond has weakened.
This type of rust is harder to address because the gummy stone cannot easily reach into the joint. It may require careful use of a thin file or a chemical rust remover applied with a cotton swab.
| Rust Type | Appearance | Causes | Home Fixable? |
|---|---|---|---|
| Surface rust | Orange, powdery, thin layer | Storing board damp overnight/short-term | Yes — gummy stone |
| Scale rust | Reddish-brown, flaky, thick | Extended damp storage (weeks/months) | Yes — diamond stone + gummy stone |
| Deep/pitting rust | Dark brown/black, visible pits | Multi-season neglect, salt exposure | Partial — professional recommended |
| Edge joint rust | Rust at edge-base junction | Moisture trapped in edge gap, aging adhesive | Difficult — may need shop attention |
Tools of the Trade
Before you start scrubbing, you need the right tools. Do not use sandpaper from the hardware store; it is too abrasive and can damage the P-Tex base material adjacent to the edge.

Swix Gummy Stone
The “Eraser.” Soft, abrasive rubber that removes surface rust and deburrs edges without changing the bevel angle.
View on Amazon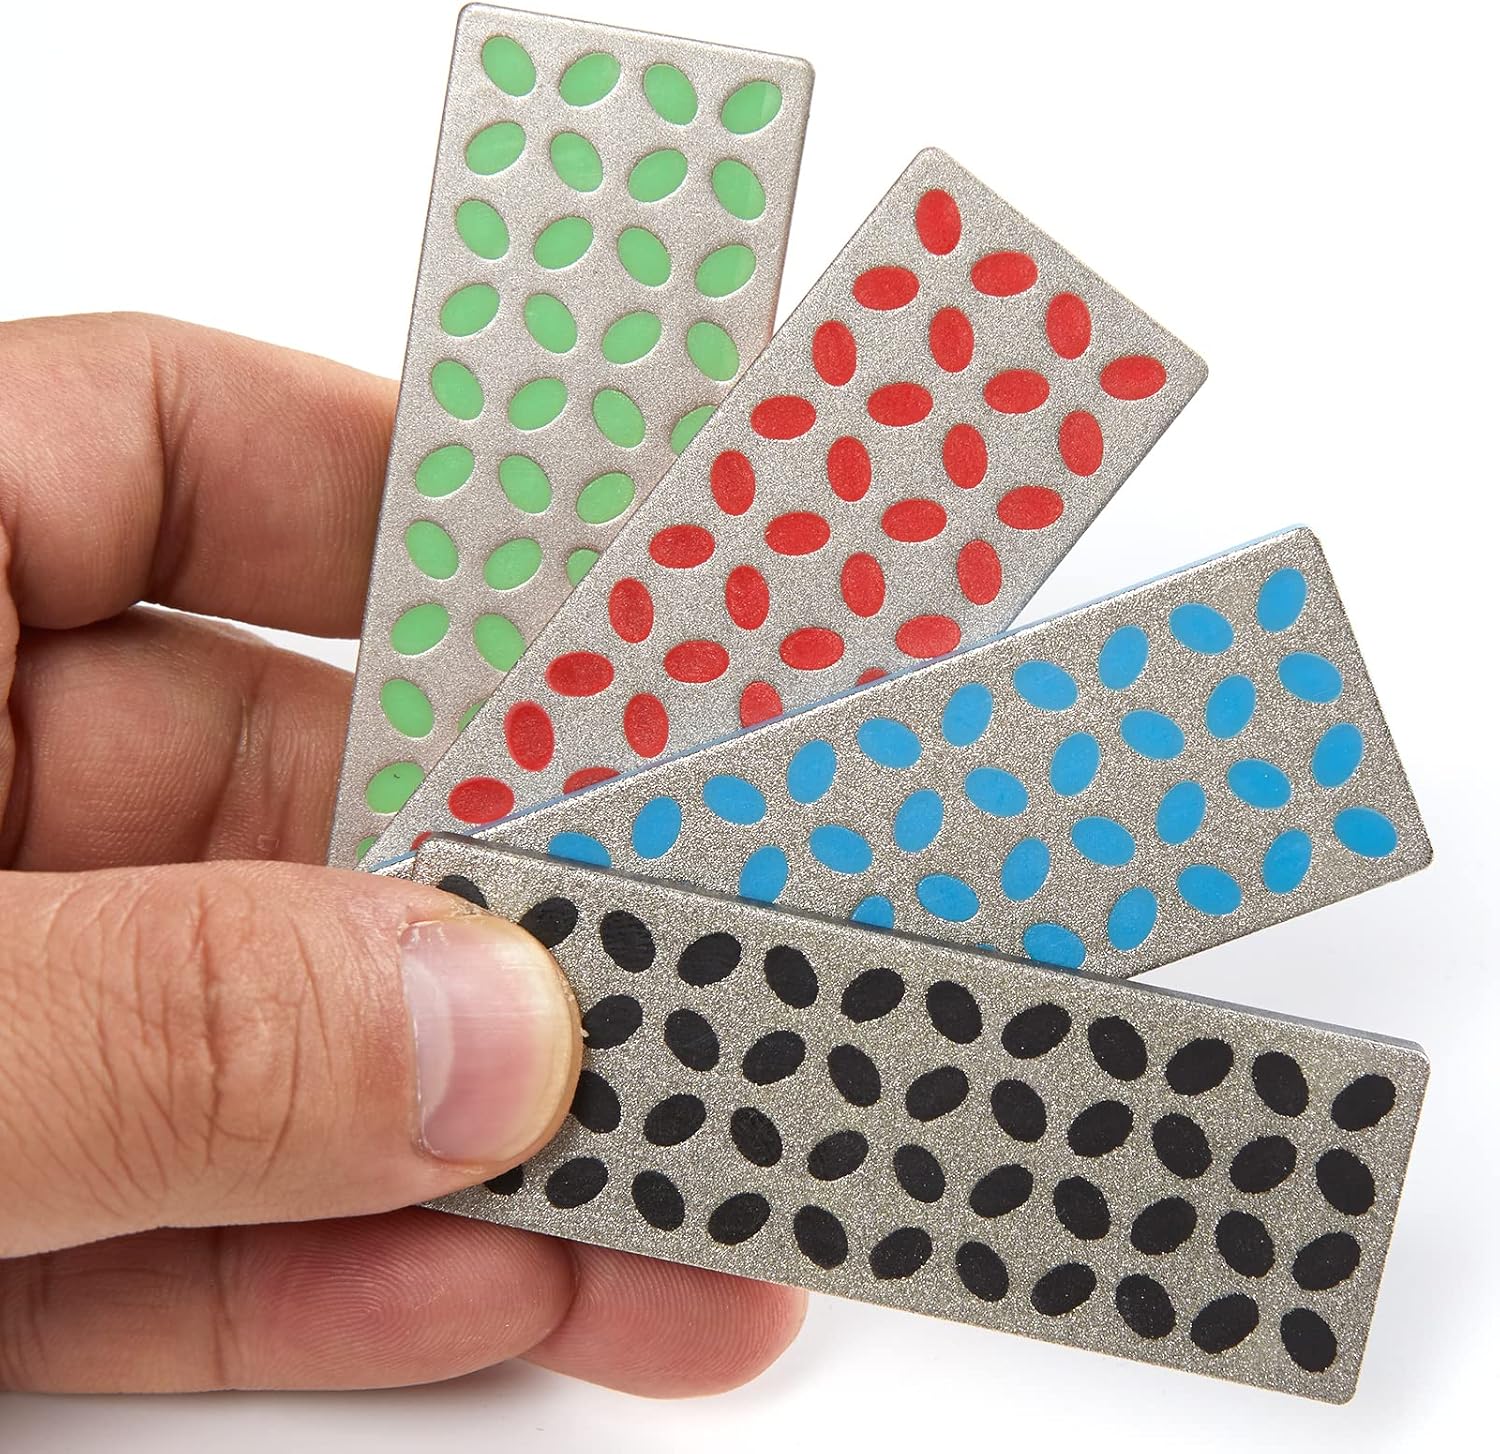
Diamond Stone File
Essential for harder rust and polishing. Unlike metal files, diamond stones cut cleanly and last forever.
View on Amazon
Demon Tuning Kit
Includes edge tuner, wax, iron, and stones. Perfect if you also want to learn how to wax at home.
View on AmazonDetailed Tool Breakdown
Gummy Stone (Rust Eraser)
The gummy stone is the single most important tool for any snowboard owner dealing with rust. It works on the same principle as a pencil eraser — the soft, abrasive rubber material picks up rust particles without removing significant amounts of the underlying metal.
Gummy stones come in different grits. A medium-grit stone (like the Swix) is the most versatile. Fine-grit stones are better for polishing and removing very light surface oxidation. Coarse-grit stones can tackle heavier rust but should be used sparingly as they remove more metal.
How long does a gummy stone last? A single Swix gummy stone can handle dozens of boards before it wears down significantly. Store it in a dry plastic bag between uses. The stone itself is water-soluble to some degree — leaving it in a puddle will cause it to dissolve over time.
Does the gummy stone change your edge angle? No. This is its primary advantage over metal files. The soft rubber conforms to the existing edge geometry without altering the bevel angle. This makes it safe for riders who are not comfortable with angle-specific filing.
Diamond Stone File
Diamond stones are coated with industrial diamond particles bonded to a metal or ceramic substrate. They cut more aggressively than gummy stones and are essential for removing scale rust, polishing edges after filing, and refining edge geometry.
Diamond stones come in various grits:
- Coarse (200 grit): For removing heavy rust and reshaping edges. Use sparingly.
- Medium (400 grit): The workhorse. Handles most rust removal and edge polishing tasks.
- Fine (600 grit): For final polishing and achieving a mirror-like edge finish.
- Extra fine (800+ grit): Competition-level finishing. Not necessary for most riders.
Maintenance: Clean your diamond stone with warm water and a nylon brush after each use. Metal particles can clog the diamond surface and reduce cutting efficiency. Store in a dry location.
Metal Edge File
A proper snowboard edge file is a precision tool with fine, single-cut teeth designed for hardened steel. It is used for sharpening dull edges and removing nicks or burrs. Standard hardware store files are not suitable — they have teeth designed for softer metals and will damage your snowboard edge.
Edge files come in two profiles:
- Flat file: For side edge work. Used with a file guide to maintain a consistent angle.
- Base file: For base edge work. Typically used in a tuner tool that holds the file at a precise angle.
Warning: Metal files remove material aggressively. If you are not using a file guide to control the angle, you can easily create uneven edges that cause catching. If you are not comfortable with files, stick to gummy stones and diamond stones.
Edge Tuner Tool
An edge tuner is a guided filing tool that holds your file or stone at a precise, adjustable angle. This eliminates the guesswork of freehand filing and ensures consistent edge geometry from tip to tail. Most edge tuners allow you to set angles between 85° and 90° (for side edges) and include a base edge angle setting.
Edge tuners are the bridge between DIY and professional results. If you plan to maintain your own edges regularly, investing in a quality edge tuner pays for itself quickly compared to shop visits.
Base Cleaner
After rust removal, you need to clean the board to remove metal filings, old wax residue, and rust particles. A proper base cleaner or citrus-based solvent is designed to dissolve contaminants without damaging the P-Tex base. Rubbing alcohol (isopropyl) also works in a pinch but evaporates quickly and may not dissolve wax residue as effectively.
Cotton Swabs and Steel Wool
Fine-grade steel wool (0000 grade) can be used for spot rust removal in hard-to-reach areas, such as the edges near bindings or in the tip/tail curves. Cotton swabs dipped in rust remover solution are useful for edge joint rust where stones cannot reach.
Budget Edge Tuning Kits: From Entry-Level to Professional
One of the most common questions riders ask is: “How much do I need to spend to maintain my own edges?” The answer depends on how deep you want to go. Here is a breakdown of three budget tiers.
Starter Kit — Under $25
For riders who just want to keep rust at bay.
- Gummy stone (Swix or equivalent)
- Microfiber cloth
- Small spray bottle
- Ziplock bag for storage
What you can do: Remove surface rust, deburr light nicks, maintain edges between seasons.
What you cannot do: Sharpen dull edges, adjust bevel angles, handle scale rust.
Intermediate Kit — $40–$80
For riders who want to do basic edge tuning at home.
- Gummy stone
- Diamond stone (medium grit)
- Edge tuner tool (adjustable angle)
- Flat edge file
- Base cleaner
- Microfiber cloths
What you can do: All of the above, plus sharpen dull edges, adjust bevel angles, handle scale rust, polish edges to a mirror finish.
What you cannot do: Full base grind, major base repair, heat waxing (though the Demon kit includes an iron).
Pro Kit — $100–$200+
For riders who want shop-quality results at home.
- Complete tuning kit (e.g., Demon Tuning Kit)
- Adjustable edge tuner
- Multiple diamond stones (coarse, medium, fine)
- Flat and base edge files
- Wax iron and wax
- Base cleaner and scraper
- Vises or board support
- P-Tex repair candles
What you can do: Everything. Full edge sharpening, waxing, base repair, detuning, and seasonal maintenance. This setup rivals what most shops offer.
For most riders, the intermediate kit ($40–$80) represents the sweet spot. It covers 95% of maintenance needs and pays for itself after 2–3 avoided shop visits. A typical edge tune at a shop costs $15–$25, so the kit pays for itself in one season.
Step-by-Step Rust Removal Guide
1. Preparation and Assessment
Secure your board. If you have a vise, great. If not, two stacks of books or a carpeted floor works. Retract your bindings to ensure the board is flat. While you are down there, check your snowboard boot laces and replace them if they look frayed.
Inspect the rust. Is it light orange (surface rust) or dark brown/black with pitted metal (deep corrosion)?
Assess the full length of both edges, paying particular attention to:
- The contact points (the areas just outside the bindings where the board flexes the most)
- The tip and tail sections where the edge curves upward
- The areas immediately adjacent to the binding mounting holes
- Any spots where the edge appears to be separating from the P-Tex base
2. The Gummy Stone Pass
For 90% of riders, the Gummy Stone is the MVP. It works exactly like a pencil eraser.
- Hold the stone flat against the edge.
- Rub back and forth with medium pressure over the rusty spots.
- You will see the rust disappear and the metal shine underneath.
- The gummy stone also removes “burrs” (nicks from rocks) which helps if you are learning how to carve on a snowboard cleanly.
Start at one end of the board (the nose) and work systematically toward the tail. This ensures you do not miss any sections. Use long, smooth strokes rather than short, choppy ones. Let the stone do the work — excessive pressure is unnecessary and can round off the edge profile.
3. Using a Diamond Stone (For Stubborn Rust)
If the gummy stone doesn’t cut it, step up to a diamond stone. Wet the stone slightly with water (or spitting on it works in a pinch). Run the stone along the edge in long, smooth strokes. Focus on the side edge and the base edge, keeping the stone flat to avoid rounding off your sharp corner.
When using a diamond stone, apply light to moderate pressure and use water as a lubricant. The water serves two purposes: it keeps the metal filings from clogging the diamond surface, and it provides a visual indicator — when the water turns grey/brown, you know the stone is cutting metal effectively.
4. Filing Nicks and Burrs
If you have visible nicks from rock impacts, a metal edge file is the correct tool. Place the file against the side of the edge at the existing bevel angle and push it across the nick in a single direction (do not saw back and forth). One or two passes is usually enough to smooth out a minor nick.
For deeper gouges, you may need to file more aggressively. Be aware that filing removes metal permanently. Every filing pass brings you closer to the edge’s service life limit.
5. Cleaning Up
Once the rust is gone, wipe the board down with a base cleaner or a damp cloth with a little rubbing alcohol. Metal filings are tiny, but they can get stuck in your wax.
Pay special attention to the areas around the bindings and the tip/tail curves where filings tend to accumulate. Use a dry cloth to remove any remaining moisture before proceeding to the next step.
6. The Sealant (Waxing)
You’ve exposed fresh raw metal. If you put the board away now, it will rust again immediately. You must seal the edge with wax. This is a great time to do a full hot wax. Read our guide on how often you should wax your snowboard to keep your schedule on track.
When waxing after rust removal, focus on getting a thin, even coat over the entire base, including the edges. The wax creates a moisture barrier that prevents the freshly exposed metal from oxidizing. Even a simple rub-on wax provides meaningful protection if you do not have access to an iron.
Advanced Rust Removal: Household Remedies and Chemical Solutions
While gummy stones and diamond stones are the preferred tools, there are situations where additional methods can help — especially for stubborn rust in hard-to-reach areas or when you do not have access to specialized tools.
White Vinegar
White vinegar contains acetic acid, which dissolves iron oxide. You can soak a cloth in white vinegar and wrap it around heavily rusted sections for 15–30 minutes. The acid will loosen the rust, making it easier to wipe away with a gummy stone afterward.
Caution: Do not leave vinegar on the edge for more than 30 minutes. The acid can begin to etch the metal if left too long, and it can also damage the adjacent P-Tex base. Always rinse thoroughly with water and dry completely after using vinegar.
Baking Soda Paste
Mix baking soda with water to form a thick paste. Apply the paste to rusted areas and let it sit for 15–20 minutes. Baking soda is a mild abrasive that can help lift surface rust without the aggressive cutting action of a file. Use a toothbrush or stiff nylon brush to work the paste into the metal, then wipe clean.
This method is particularly useful for edge joint rust where stones cannot reach. The paste can be pushed into the gap between the edge and the base, where it can work on rust in that tight space.
Aluminum Foil and Water
This is a surprisingly effective method for light surface rust. Crumple a piece of aluminum foil into a ball, dip it in water, and rub it over the rusted area. The aluminum reacts with the rust and transfers it from the steel edge to the foil. It works on the same principle as galvanic action.
While this method is gentler than mechanical abrasion, it is slow and only effective for the lightest surface rust. It is a good option if you have no tools at all and need a quick fix.
Chemical Rust Removers (CLR, Evapo-Rust)
Commercial rust removers like CLR (Calcium, Lime, Rust) or Evapo-Rust are formulated to dissolve iron oxide without harming the underlying metal. These products are effective for scale rust and edge joint rust.
To use: Apply the product to a cotton ball or small brush, dab it onto the rusted area, let it sit for the recommended time (usually 5–15 minutes), then wipe clean and rinse with water.
WD-40 — Should You Use It?
WD-40 is often mentioned in rust removal discussions, but its effectiveness on snowboard edges is debatable. WD-40 is primarily a water displacer and light lubricant, not a rust remover. It can help prevent future rust by displacing moisture, but it will not dissolve existing rust.
If you spray WD-40 on a rusty edge, it will make the rust look shinier and may loosen surface particles, but the underlying oxidation remains. For actual rust removal, a gummy stone is far more effective. WD-40 has a place in edge maintenance — spraying a light coat on clean, dry edges before storage can help prevent rust — but it is not a removal tool.
Snowboard Edge Bevel Angles: Complete Guide by Riding Style
Edge bevel refers to the angle at which the edge is sharpened relative to the base of the board. This angle determines how aggressively the edge bites into snow and ice. Understanding bevel angles is essential for maintaining your edges properly and optimizing your board for your riding style.
Understanding the Two Edges
Every snowboard edge has two distinct surfaces that are sharpened:
- Side edge (side bevel): The edge visible when you look at the board from the side. This is the primary cutting surface that engages when you are on your toe or heel edge.
- Base edge (base bevel): The edge visible when you look at the board from the bottom. This is the trailing edge that determines how easily the board initiates a turn.
Standard Bevel Angles
| Side Edge Angle | Base Edge Angle | Riding Style | Characteristics |
|---|---|---|---|
| 88° | 1° | Aggressive carving / Race | Maximum edge hold, fastest edge engagement, least forgiving. Best for hardpack and ice. Can cause catching if you are not precise. |
| 89° | 1° | All-mountain (advanced) | Strong edge hold with slight forgiveness. Good balance of grip and versatility. Suitable for riders who charge hard on varied terrain. |
| 90° | 0.5°–1° | All-mountain (intermediate) | The factory default for most boards. Neutral edge hold. Forgiving enough for intermediates while still providing adequate grip on groomers. |
| 90° | 1.5°–2° | Beginners / Park | Most forgiving edge geometry. Reduces catching. Less aggressive edge hold, which is ideal for learning or jibbing rails and boxes. |
| 91° | 2° | Park / Jib / Beginner | Maximum forgiveness. Edges are barely raised above the base. Ideal for rails and boxes where you do not want the edge catching. Not suitable for carving. |
How Bevel Affects Edge Hold on Ice
The relationship between bevel angle and ice grip is not linear. A sharper (lower) side angle does not always mean better ice performance. At 87° or lower, the edge becomes so aggressive that it can vibrate or chatter on ice rather than gripping smoothly. The sweet spot for most ice conditions is 88°–89° side edge with 1° base edge.
For icy conditions specifically (common at resorts in top European ski resorts and the Northeast US), a freshly sharpened 89°/1° setup typically outperforms more extreme angles.
Detuning: When and Why to Round Your Edges
Detuning is the process of deliberately dulling your edges, typically in the tip and tail sections of the board. The purpose is to reduce the chance of catching an edge during freestyle maneuvers, presses, and landings.
Most park riders detune the first 15–20 cm of edge at the nose and tail. This is done by running a gummy stone or file at a higher angle (92°+) along those sections. The contact points between the bindings are left sharp for carving.
How to Detune Your Snowboard Edges
Detuning is one of the most misunderstood aspects of snowboard maintenance. Many riders avoid it because they think dulling their edges is always bad. In reality, strategic detuning is essential for certain riding styles and can make your board safer and more enjoyable to ride.
Why Detune?
- Park and jib riding: Sharp edges catch on rails, boxes, and pipes. Detuned edges slide smoothly across features.
- Beginner riders: Full-sharp edges are unforgiving. Detuning reduces the likelihood of catching an edge during turns.
- Powder riding: In deep powder, razor-sharp edges are unnecessary and can make the board feel twitchy at speed.
- Butter tricks and presses: When you are flexing the board and sliding on the base, sharp contact points will dig in and catch.
How to Detune Step by Step
- Identify the zones: Mark (mentally or with tape) the areas you want to detune. Typically this is the first 15–25 cm from the tip and the last 15–25 cm from the tail.
- Hold the gummy stone at a higher angle: Instead of holding the stone flat against the edge (which would sharpen it), tilt it outward slightly — around 92°–95° — and run it along the edge in that zone. This rounds the edge profile slightly.
- Use light pressure: Detuning should be subtle. You are not trying to remove the edge entirely, just rounding the sharpest point.
- Check with your thumbnail: A properly detuned edge will not bite into your thumbnail. A sharp edge will catch it easily.
- Leave the contact points sharp: The area between and just outside the bindings should remain at your chosen bevel angle. Only the tip and tail are detuned.
Full Detune vs Partial Detune
A full detune rounds the entire edge from tip to tail. This is appropriate for dedicated park boards or boards used primarily for jibbing. It makes the board extremely forgiving but reduces all carving performance.
A partial detune (also called a “progressive detune”) only rounds the tip and tail zones while keeping the middle section sharp. This is the most common setup for all-mountain riders who also spend time in the park.
Edge Inspection: How to Tell If Your Edges Need Sharpening
Knowing when your edges need attention is just as important as knowing how to maintain them. Over-sharpening wastes metal and shortens edge life. Under-sharpening leads to poor performance and safety issues. Here is how to assess your edges accurately.
Visual Inspection
Run your eyes along the edge in good light. Look for:
- Shiny spots among dull areas: This indicates uneven wear. The shiny spots are still sharp; the dull spots need attention.
- Nicks or dents: Small bright spots where the edge has been impacted by a rock. These need filing to prevent catching.
- Rust: Any discoloration indicates oxidation that needs removal.
- Round or flattened edge profile: If the edge looks visibly rounded rather than having a defined corner, it needs sharpening.
The Touch Test
Carefully run your fingertip along the edge (be gentle — a sharp edge will cut you). You are feeling for:
- Burr: A raised ridge of metal that catches your finger. This means the edge was sharpened but not deburred, or it has a rock nick that needs filing.
- Smooth and glassy: If the edge feels slick and does not catch your finger at all, it is very dull.
- Consistent bite: A properly sharpened edge should have a consistent, slight catch along its entire length.
The Paper Test
Hold a piece of paper (regular printer paper works) against the edge at a slight angle. If the edge catches and cuts the paper, it is reasonably sharp. If the paper slides off without catching, the edge needs sharpening.
This test is more consistent than the thumbnail test because paper has a uniform thickness and the test does not depend on your thumbnail condition.
When to Sharpen vs When to Leave It
Here is a general guideline:
- Every 3–5 days of riding: Quick gummy stone pass to remove burrs and light oxidation.
- Every 10–15 days of riding: Full edge tune with file or diamond stone.
- After any rock hit: Immediate filing to smooth the nick before it catches and propagates.
- Start of each season: Full inspection, rust removal, sharpening, and wax.
- Before any competition or hard-pack riding: Fresh edge tune for maximum grip.
The Thumbnail Test and Other Sharpness Checks
The thumbnail test is the most commonly referenced method for checking edge sharpness. It is simple, requires no tools, and can be done anywhere.
How to Perform the Thumbnail Test
- Hold your board edge-up (bindings facing you).
- Place your thumbnail flat against the side of the edge.
- Gently try to slide your thumbnail along the edge.
- If the nail catches: The edge is sharp enough to ride.
- If the nail slides smoothly: The edge is dull and needs sharpening.
The test works because a properly sharpened edge has a microscopic “hook” that catches on surfaces. Your thumbnail is soft enough to feel this hook without being damaged.
Limitations of the Thumbnail Test
While useful, the thumbnail test has significant limitations:
- Inconsistency: Different people have different thumbnail hardness. Someone with soft nails may feel a catch that someone with hard nails does not.
- Not quantitative: The test tells you “sharp” or “dull” but nothing about how sharp. An edge at 89° and one at 88° may both pass the thumbnail test.
- Does not detect burrs: An edge with a significant burr may pass the thumbnail test because the burr catches the nail, even though the edge itself is dull.
- Safety risk: If you press too hard or the edge is very sharp, you can cut your thumbnail or finger.
For more accurate assessment, combine the thumbnail test with visual inspection and the paper test. Together, these three methods give you a reliable picture of your edge condition.
Side Edge vs Base Edge Maintenance
Many riders do not realize that a snowboard edge has two distinct surfaces that require separate maintenance approaches. Understanding the difference between side edge and base edge is key to proper tuning.
Side Edge
The side edge is the vertical surface of the edge that you see when looking at the board from the side. This is the primary cutting surface — it is the part of the edge that grips the snow during turns. Side edge maintenance involves filing or stoning at the side bevel angle (typically 88°–90°).
Side edges take the most abuse during riding. They are the first point of contact with ice, hard snow, and rocks. This is why most edge maintenance focuses on the side edge.
Base Edge
The base edge is the surface that is flush with (or slightly raised from) the P-Tex base. It is the trailing edge during a turn. The base edge angle determines how easily the board initiates turns — a higher base angle (more bevel) makes the board more forgiving, while a lower angle makes it more aggressive.
Base edge maintenance is less frequent than side edge work. Most riders sharpen the side edge 3–4 times for every base edge tune. The base edge typically only needs attention when:
- You are changing your overall bevel setup
- The base edge has developed nicks from rock impacts
- You notice the board is catching unexpectedly (often a sign of an inconsistent base edge)
Which Edge Should You Prioritize?
If you can only do one, prioritize the side edge. The side edge provides the majority of your edge hold. A board with a sharp side edge and a slightly worn base edge will still carve effectively. A board with a dull side edge and a fresh base edge will feel slippery on hard snow.
Fixing Nicks and Damage in Snowboard Edges
Rock nicks are one of the most common forms of edge damage. They occur when the steel edge strikes a rock, stump, or other hard object during riding. Even a small nick can cause the board to catch unexpectedly during a turn, which can lead to a fall.
Assessing Nick Severity
- Light nick: A small, shallow dent in the edge. The metal is displaced but not missing. The edge is still mostly smooth. These are common and easy to fix.
- Medium nick: A visible chunk of metal missing or significantly displaced. You can feel it with your fingernail. These need filing to prevent catching.
- Deep nick / crack: A large section of edge is damaged, or the edge has cracked. These may require professional assessment or edge replacement.
How to File a Nick
- Identify the exact location of the nick.
- Place your edge file against the side of the edge, matching the existing bevel angle.
- Push the file across the nick in a single direction (away from you). Do not saw back and forth — this can create a burr on the opposite side.
- Check your progress after each pass. You want the nick to be flush with the surrounding edge, not filed below it.
- Once the nick is smooth, follow up with a gummy stone or diamond stone to polish the filed area and blend it with the surrounding edge.
- Check for burrs on the base side and remove them with a light pass of the gummy stone.
Edge Crack: What to Do
A cracked edge is a serious structural issue. Unlike a nick, a crack means the metal has fractured and the edge may separate from the board during riding. Symptoms of a cracked edge include:
- Visible line or gap in the edge
- Edge feels loose or moves when pressed
- Clicking or popping sound when the board flexes
- Visible separation between the edge and P-Tex base
Do not ride a board with a cracked edge. Take it to a qualified repair shop immediately. In some cases, the crack can be repaired by welding or re-bonding the edge. In severe cases, the edge may need to be completely replaced — which is often more expensive than a new board.
Edge Maintenance for Different Riding Styles
Your riding style dramatically affects how your edges wear and what maintenance they need. A park rider and a carving specialist have very different edge requirements.
All-Mountain Riders
All-mountain riders encounter the widest variety of conditions and need edges that perform well everywhere. A 90°/1° setup is the standard factory default and works well for most all-mountain riding.
Maintenance schedule: Gummy stone every 3–5 days. Full edge tune every 10–15 days. Wax every 3–5 days. Inspect for rock nicks after every backcountry or off-piste session.
Carving / Groomer Specialists
Carving riders demand the most from their edges. They ride hard, fast, and on groomed runs where edge hold is critical. A sharper side angle (88°–89°) with a 1° base edge provides the aggressive bite needed for deep carving.
Maintenance schedule: Diamond stone polish every 2–3 days. Full file tune every 5–7 days. Wax every 2–3 days. Edge inspection before every session.
Park and Freestyle Riders
Park riders need a balance of edge hold for landings and forgiveness for jib features. A 90°–91° side edge with 1.5°–2° base edge, combined with tip/tail detuning, is the standard park setup.
Maintenance schedule: Gummy stone every 5–7 days (edges take less abuse from snow, but more from metal features). Full tune every 15–20 days. Watch for rail/box burrs that can snag on landings.
Powder and Backcountry Riders
Deep snow riding is the least demanding on edges. The soft snow does not dull edges quickly, and there are fewer rocks to cause nicks. A standard 90°/1° setup works well, and aggressive sharpening is unnecessary.
Maintenance schedule: Gummy stone every 7–10 days. Full tune at the start and end of the season. Focus your maintenance efforts on base wax for glide rather than edge sharpening.
Race and Speed Riders
Racing demands the sharpest possible edges with the most aggressive bevel. A typical race setup is 87°–88° side edge with 0.5°–1° base edge. These edges need frequent maintenance because they are so precisely tuned that even minor wear is noticeable.
Maintenance schedule: Edge touch-up before every run. Full file tune every 3–5 runs. Diamond stone polish after every session. Race edges are a consumable — expect to replace them more frequently.
Climate-Specific Edge Care: Coastal, Desert, Humid, and Cold
Where you ride has a significant impact on how quickly your edges rust and what kind of maintenance they need. Different climates present different challenges.
Coastal and Salt Air Environments
If you ride near the ocean — whether it is a coastal resort, a backcountry zone near the sea, or even just parking near the beach — salt air is your edges’ worst enemy. Salt is a powerful electrolyte that dramatically accelerates the rusting process. Boards exposed to salt air can develop surface rust within hours of their last ride.
Coastal maintenance strategy: Wipe edges dry immediately after every session. Apply a light coat of wax or edge protectant before storage. Consider a rust-inhibiting spray for long-term storage. Store in a dehumidified space if possible.
Humid and Tropical Climates
High humidity means moisture is always present in the air, even when it is not raining. Boards stored in humid environments — garages, sheds, or storage units in humid regions — are at elevated rust risk.
Humid climate strategy: Invest in a dehumidifier for your storage space, or use silica gel packs in your board bag. Ensure the board is completely dry before storage. Consider a thin coat of rust-preventive oil (like Camellia oil or a light machine oil) on the edges during off-season storage.
Desert and Dry Climates
Riders in dry, arid climates enjoy the lowest rust risk. Low humidity means moisture evaporates quickly from surfaces, giving rust less opportunity to form. However, desert conditions present other challenges: sand and fine grit can embed in the base and act as an abrasive, and extreme UV exposure can degrade wax and base materials.
Desert maintenance strategy: Focus less on rust prevention and more on base protection. UV-blocking wax or a board bag with UV protection helps prevent sun damage. Rinse sand off after desert riding sessions.
Cold and Alpine Climates
Very cold environments (below -15°C / 5°F) actually slow rust formation because the chemical reaction requires liquid water. However, cold-climate riders face the challenge of temperature-induced condensation: bringing a cold board into a warm car, lodge, or house creates instant condensation on the metal edges.
Cold climate strategy: The condensation problem is solved by drying the board before bringing it inside. Keep a towel in your car. When you get home, pull the board out and let it acclimate to room temperature slowly, or wipe it dry immediately. Do not leave a cold, wet board in a warm room without drying it.
Seasonal Maintenance Calendar
A structured maintenance schedule ensures your edges stay in top condition throughout the season. Here is a comprehensive calendar that covers all aspects of edge care.
Pre-Season (1–2 Weeks Before First Ride)
- Full inspection: Examine every inch of both edges for rust, nicks, cracks, and separation from the base.
- Rust removal: Use a gummy stone for surface rust, diamond stone for scale rust. Address any edge joint rust with a cotton swab approach.
- Edge sharpening: File or stone the edges to your preferred bevel angle. For most riders, this means touching up the side edge and checking the base edge.
- Burr removal: After sharpening, run a gummy stone lightly along the entire edge to remove any burrs from the filing process.
- Base inspection: While you have the board out, check the P-Tex base for damage and fill any gouges with P-Tex candles.
- Hot wax: Apply a fresh coat of temperature-appropriate wax. This seals the base and edges against moisture.
- Binding check: Tighten all binding screws and check that straps and ratchets are functioning properly.
- Helmet and goggles check: While you are prepping, inspect your helmet for cracks and your goggles for lens damage.
Mid-Season (Every 5–10 Riding Days)
- Gummy stone pass: Quick 5-minute session to remove burrs and light surface oxidation.
- Visual inspection: Check for new nicks from rocks or hard impacts.
- Wax check: If the base looks dry or white, it is time for a fresh coat. Read our guide on how often you should wax your snowboard.
- Binding retighten: Vibrations from riding can loosen binding screws over time.
Post-Ride (Every Session)
- Kick off snow: Before loading into the car.
- Wipe dry: Use an old towel to dry edges and bindings.
- Quick gummy stone (optional): If you noticed any roughness during the session, a 30-second touch-up prevents burrs from setting.
- Store properly: Do not zip the board into a bag while wet. Transport it uncovered or with the bag open.
End of Season (Last Ride of the Year)
- Full edge tune: Sharpen edges to your preferred angle. This is the last sharpening before months of storage.
- Rust removal: Address any rust that developed during the season.
- Storage wax: Apply a thick coat of warm-temperature wax but do not scrape it off. This wax layer seals the base and edges against moisture during storage. Scrape it off before your first ride next season.
- Clean bindings: Wipe down bindings, check for cracked straps or worn ratchets.
- Dry thoroughly: Ensure the board is completely dry before storage.
- Storage location: Choose a cool, dry, dark place. Avoid garages, attics, or sheds with temperature extremes.
Preventing Rust: The Post-Ride Ritual
Rust prevention starts the moment you leave the snow. The biggest mistake riders make is throwing a wet board into a bag. Moisture gets trapped in the fabric, creating a humid sauna for your edges.
- Kick the snow off: Before you even get to the car.
- Dry it: Keep an old towel in your car. Wipe the edges and bindings dry.
- Transport dry: Do not put a snowy board into one of the best snowboard bags and zip it up. If you use a roof rack, the road salt and spray are edge killers—wipe it down as soon as you get home.
- Storage: Store the board in a dry room, standing up or on a rack.
The Biggest Mistakes Riders Make
- Storing a wet board: This is the number one cause of off-season rust. Even a board that looks dry may have moisture trapped in the bindings, along the edge-base junction, or in the base structure itself.
- Using a car trunk: Car trunks trap moisture and temperature fluctuations cause condensation. If you must use a trunk, open it and air out the board as soon as you arrive home.
- Leaving the board in a ski bag after the last day: Many riders finish their season, zip the board into its bag, and forget about it for months. By the time they open it, the edges are covered in rust.
- Ignoring road salt: If you drive through salted roads to get to the resort, your board’s edges are exposed to salt spray, especially on a roof rack. Wipe the board down when you get home — do not wait.
- Storing near concrete: Concrete absorbs and releases moisture. Storing a snowboard on a concrete floor (especially in a garage) exposes it to moisture from below.
Storage Solutions to Prevent Edge Rust
Proper storage is the single most important factor in preventing off-season rust. The goal is to keep the board dry, in a stable temperature environment, and protected from moisture sources.
Best Storage Practices
- Vertical or horizontal rack: Store the board standing up against a wall, or on a horizontal rack that keeps it off the floor. Avoid leaning it at an angle where the edge contacts the wall.
- Room temperature: A bedroom, closet, or heated basement is ideal. Avoid garages, attics, sheds, and any space with temperature extremes or high humidity.
- Away from concrete: If you must store in a garage, place the board on a shelf, a piece of cardboard, or a foam pad to keep it off the concrete floor.
- Loose bag or no bag: Do not zip the board into a tight-fitting bag for long-term storage. A loose cloth cover or an open bag allows air circulation and prevents moisture buildup.
Board Bags for Storage
If you prefer to keep the board in a bag, choose one that is breathable. Padded board bags with mesh ventilation panels are designed for this purpose. Avoid airtight vinyl bags for long-term storage.
Before placing the board in the bag, ensure it is completely dry. Consider placing a desiccant (silica gel pack or even uncooked rice in a sock) inside the bag to absorb any residual moisture.
Silica Gel Packs and Humidity Control for Board Storage
For riders who must store their boards in humid environments — garages, basements, or storage units — controlling humidity around the board is critical. Silica gel packs are one of the most effective and affordable solutions.
How Silica Gel Works
Silica gel is a desiccant — a substance that absorbs moisture from the air. Each small packet contains millions of tiny pores that trap water molecules. A single packet can absorb several times its weight in moisture before becoming saturated.
Using Silica Gel for Board Storage
- In a board bag: Place 3–5 silica gel packets inside the bag, distributed along the length of the board. Replace them every 3–4 months or when they feel soft/damp.
- On a storage shelf: Place packets near (not on) the board edges. A small container or mesh bag works well.
- Rechargeable options: Some silica gel products are rechargeable — you can bake them in an oven at low temperature (120°C / 250°F for 2 hours) to drive off absorbed moisture and reuse them.
Other Humidity Control Options
- Dehumidifier: If you store boards in a garage or basement, a small dehumidifier can keep the entire space below the humidity threshold where rust forms (generally below 50% relative humidity).
- Charcoal briquettes: Activated charcoal absorbs moisture and odors. Place a few in an open container near your stored boards.
- Calcium chloride buckets: DampRid or similar products use calcium chloride to absorb moisture from the air. Effective for enclosed storage spaces.
Pre-Storage Wax for Edge Protection
Applying a thick coat of wax before long-term storage is one of the most effective rust prevention strategies. The wax creates a physical barrier between the metal edges and the surrounding air, preventing moisture from reaching the steel.
How to Apply Storage Wax
- Clean the base: Wipe the base with base cleaner to remove old wax, dirt, and debris. This ensures the new wax adheres properly.
- Melt warm-temperature wax: Use a warm-temperature wax (typically rated for 0°C to -7°C / 30°F to 20°F). Warm wax is softer and creates a thicker, more protective layer than cold wax.
- Apply generously: Drip the melted wax across the entire base in a zigzag pattern. Then use the iron to spread it into a thick, even coat. Do not be stingy — you want a visible layer of wax sitting on the surface.
- Cover the edges: Make sure the wax covers the edges as well as the base. The goal is to seal the metal completely.
- Do not scrape: This is the critical difference between a riding wax and a storage wax. Leave the thick wax layer on the board. It will protect the base and edges throughout the storage period.
- Scrape before next season: When you pull the board out for the first time, scrape off the storage wax with a plastic scraper and apply a fresh riding-tuned wax before hitting the slopes.
Edge Maintenance for Splitboards
Splitboards present unique edge maintenance challenges. When the board is separated into two ski-like halves for touring, the inside edges (the cut edges) are exposed in ways that normal snowboard edges are not.
The Splitboard Edge Challenge
When you split a board, the cut edge along the inside of each half is a raw, unfinished surface. This edge is not polished or beveled like the outer edges — it is simply the cut-through cross-section of the board. This raw edge is highly susceptible to rust because:
- It exposes the steel edge profile, fiberglass, and wood core directly to moisture.
- The cut surface is rough and has more surface area for oxidation to initiate.
- It is harder to dry because moisture can wick into the exposed core materials.
Splitboard-Specific Maintenance Tips
- Wax the cut edges: After each tour, apply a thin layer of rub-on wax to the cut edges before reassembling. This seals the exposed materials against moisture.
- Inspect the interface: Check that the clips, hooks, or pins that hold the two halves together are clean and dry. Rust on these components can make splitting and reassembling difficult.
- Store assembled when possible: If you are storing the board for more than a few days, reassemble it to reduce the exposed surface area.
- Treatment for the cut edge: Some splitboarders apply a thin coat of epoxy or edge sealant to the cut edge during the initial board build. This creates a permanent moisture barrier.
Edge Maintenance for Kids and Beginners
Beginners and young riders often have different edge maintenance needs than advanced riders. Understanding these differences helps parents and new riders make smart maintenance decisions.
Why Beginners Should Detune
Sharp edges are unforgiving. When a beginner catches an edge during a turn, a sharp edge bites harder and causes more violent falls. Detuning the edges — especially in the tip and tail — significantly reduces the severity of edge catches and makes the learning experience safer and more enjoyable.
A good setup for beginners is 90° side edge with 2° base edge and a full detune from tip to tail. This creates a board that slides and forgivingly initiates turns without aggressive biting.
Kids’ Board Maintenance
Children’s boards tend to see rough treatment — being dragged, dropped, and stored improperly. They also tend to sit in garages or closets for months between seasons. Check kids’ boards carefully at the start of each season for:
- Rust on edges (often more severe due to long storage periods)
- Loose binding screws (kids are hard on equipment)
- Cracked or worn straps
- Base damage from being dragged on pavement
For kids’ boards, a simple gummy stone session and a fresh coat of wax are usually all that is needed. Skip the files unless you are experienced — it is easy to over-file a small board.
Travel with Your Snowboard: Protecting Edges on Planes and Road Trips
Traveling with a snowboard exposes your edges to risks that you do not encounter at home. Airlines, road conditions, and unfamiliar storage environments can all damage your edges.
Flying with a Snowboard
When you check a snowboard as luggage, it goes through rough handling. The board may be dropped, stacked under heavy bags, or exposed to rain on the tarmac. To protect your edges during air travel:
- Use a padded board bag: A quality padded bag protects edges from impact and from rain during loading/unloading.
- Edge protectors: Plastic or rubber edge guards snap onto the edges and provide impact protection. They are inexpensive and can save you from rock-nick-level damage.
- Wrap the board: If you do not have a padded bag, wrap the board in clothing or bubble wrap before placing it in any bag.
- Check for damage on arrival: Inspect your edges immediately after collecting your board at baggage claim. Document any damage for airline claims.
Road Trip Edge Care
If you are driving to the resort, road conditions can damage your edges — especially if the board is on a roof rack. Road salt, gravel spray, and rain all contribute to edge corrosion and damage.
- Roof rack transport: Wipe the board down immediately upon arriving at your destination or returning home. Road salt left on edges accelerates rust dramatically.
- Inside the car: If possible, transport the board inside the vehicle. It is safer for the board and eliminates road spray exposure.
- Post-trip cleaning: After a road trip, do a full edge inspection and cleaning. The combination of road salt, moisture, and temperature changes can cause rust to develop overnight.
Professional vs DIY Edge Tuning: Cost Comparison and Decision Framework
Should you tune your own edges or take your board to a shop? The answer depends on your skill level, how often you ride, and how much you value precision.
What a Shop Edge Tune Includes
A typical professional edge tune at a snowboard shop includes:
- Side edge sharpening (filed to a specific angle)
- Base edge inspection and touch-up if needed
- Burr removal and edge polishing
- Base structure check (some shops include light base grinding)
- Quality inspection
Cost: $15–$30 for a basic edge tune. $30–$50 for a full tune with base work. $50–$80+ for a full stone grind and edge package.
What DIY Gives You
With a $40–$80 intermediate toolkit, you can perform:
- Edge sharpening with angle guides
- Rust removal with gummy and diamond stones
- Burr removal and deburring
- Basic edge inspection and assessment
Decision Framework
| Factor | DIY | Professional Shop |
|---|---|---|
| Cost per session | $0 (after initial toolkit investment) | $15–$30 |
| Quality of results | Good to excellent (with practice) | Excellent to perfect |
| Convenience | High — do it at home, anytime | Lower — must visit shop, may have wait times |
| Learning curve | Moderate — requires practice and study | None — they do the work |
| Risk of error | Some — over-filing, uneven bevel | Low — professional equipment and experience |
| Speed | 15–30 minutes | 15 minutes to 2 days (depending on shop backlog) |
| Tools needed | $40–$200 initial investment | None |
Recommendation: For riders who do 10+ days per season, DIY maintenance makes financial sense. The toolkit pays for itself in one season. For riders who do fewer than 5 days, or for precision work like race tuning, a professional shop is the better choice.
How Many Times Can You Sharpen Before Replacing Edges?
Every time you file or stone your edges, you remove a tiny amount of metal. Over time, this material removal adds up. Eventually, the edge becomes too thin to function properly and needs replacement.
Edge Material Removal Rates
- Gummy stone: Removes an insignificant amount of metal. You could use a gummy stone every day for years without meaningfully reducing edge thickness.
- Diamond stone (fine): Very minimal removal. Hundreds of passes before measurable thinning.
- Diamond stone (coarse): Moderate removal. Perhaps 50–100 passes before you notice the edge profile changing.
- Metal file: Aggressive removal. Each pass removes a visible amount of metal. File judiciously — perhaps 20–30 major filing sessions before the edge is noticeably thinner.
When to Replace Edges
Edge replacement is needed when:
- The edge is visibly thinner than when new (compare to an unworn section near the tip or tail).
- The edge no longer holds a sharp edge despite repeated sharpening.
- Large sections of edge have pitted or corroded beyond repair.
- The edge has cracked or is separating from the base.
- The edge profile has become so rounded that it no longer engages the snow properly.
For most recreational riders who do 20–30 days per season, edge replacement becomes a consideration after 3–5 years of regular use and maintenance. Riders who do more days, or who ride in rocky terrain, may need replacement sooner.
Edge Material Science: Why Steel Edges Rust
Understanding the material science behind rust helps you make informed decisions about maintenance and when to seek professional help.
The Iron Oxide Reaction
Steel is primarily iron (Fe) with small amounts of carbon and other elements. When iron is exposed to water (H₂O) and oxygen (O₂) simultaneously, an electrochemical reaction occurs:
4Fe + 3O₂ + 6H₂O → 4Fe(OH)₃ → 2Fe₂O₃·3H₂O
The product is hydrated iron(III) oxide — rust. Unlike the oxide layers on aluminum or titanium (which form a protective barrier), iron oxide is porous and flaky. It does not protect the underlying metal — instead, it allows moisture to continue reaching fresh metal beneath, causing the rust to deepen over time.
Why Snowboard Edges Are Vulnerable
Snowboard edges are particularly vulnerable to rust because:
- High surface-area-to-volume ratio: Edges are thin strips of metal with a large exposed surface relative to their volume. This means even small amounts of oxidation can affect a significant percentage of the edge material.
- Constant water exposure: Snowboarding literally involves riding on frozen water. Even “dry” snow contains moisture, and slush or wet conditions are even more corrosive.
- Mechanical abrasion: Riding constantly exposes the edge to abrasion from snow, ice, rocks, and rails. This removes any protective oxide layer that might form, always exposing fresh metal to moisture.
- Temperature cycling: Moving between cold outdoor conditions and warm indoor environments creates repeated condensation cycles.
How Manufacturers Combat Rust
While manufacturers cannot eliminate rust entirely (it is an inherent property of ferrous metals), they take several steps to minimize it:
- Edge coatings: Some manufacturers apply a thin protective coating (zinc, nickel, or polymer) to the edges at the factory. This coating wears off with riding but provides initial rust protection.
- Higher-quality steel: Premium boards use steel alloys with better corrosion resistance. The difference is noticeable — a high-end board often has edges that rust more slowly than a budget board.
- Edge bonding: The way the edge is bonded to the board matters. A tight, gap-free bond reduces the opportunity for moisture to sit at the edge-base junction.
When Is the Edge Too Far Gone? Replacement Signs
If the rust has eaten deep pits into the metal, or if the edge is cracked, a gummy stone won’t fix it. You might need a full “base grind” from a professional shop. In severe cases, the structural integrity of the edge might be compromised.
If your board is ancient and the edges are shot, it might be time to ask when is the best time to buy snowboarding gear. Late season sales are perfect for upgrading to a new deck, perhaps comparing Capita Mercury vs Jones Mountain Twin.
Warning Signs That Your Edge Needs Replacement
- Edge thinning: If the contact point edge is visibly thinner than the tip or tail edge, the metal is wearing away. Once the edge is too thin, it cannot hold a sharp profile and may snap under load.
- Widespread pitting: Isolated pits can be polished out, but if the entire edge surface is pitted, the structural integrity is compromised.
- Edge separation: If the edge is pulling away from the P-Tex base — visible as a gap or a raised edge — the bond has failed. This is a safety hazard and requires professional repair or board replacement.
- Cracks: Any visible crack in the edge is a disqualifying defect. Cracks propagate under the flex and impact of riding, and a cracked edge can fail suddenly.
- Consistent poor performance: If you sharpen the edge and it still does not hold, if the board feels slippery on every surface, or if the edge catches unpredictably despite proper bevel, the edge may be beyond saving.
Edge Replacement: What to Expect
Edge replacement is a specialized repair that involves removing the old edge, fitting a new steel edge strip, and re-bonding it to the board. It is labor-intensive and typically costs $50–$150, depending on the shop and the complexity of the board.
For many boards — especially older or mid-range models — the cost of edge replacement approaches or exceeds the board’s remaining value. In these cases, it makes more financial sense to invest in a new board.
Common Edge Maintenance Mistakes
Even well-intentioned riders make mistakes that can damage their edges or reduce their board’s lifespan. Here are the most common pitfalls and how to avoid them.
Mistake #1: Using Hardware Store Sandpaper
Sandpaper from a hardware store is designed for wood and paint, not hardened steel. It is too coarse for snowboard edges and will remove metal aggressively, creating an uneven surface. Worse, the grit particles can embed in the P-Tex base adjacent to the edge, causing damage. Always use tools designed specifically for snowboard or ski edge maintenance.
Mistake #2: Filing Without an Angle Guide
Freehand filing without an edge guide or tuner tool is the fastest way to ruin your edge geometry. Even experienced technicians use guides for consistency. Without a guide, you will inevitably create an uneven bevel — steeper in some spots, shallower in others — which causes the board to catch unpredictably during turns.
Mistake #3: Over-Sharpening
There is a temptation to make edges as sharp as possible. But overly sharp edges (below 87° side angle) can be counterproductive. They chatter on ice instead of gripping, they catch aggressively during transitions, and they wear out faster because there is less metal supporting the sharp angle. Match your edge angle to your riding style, not to “as sharp as possible.”
Mistake #4: Ignoring the Base Edge
Most riders focus exclusively on the side edge because it is the one they can see and feel. But the base edge plays a critical role in turn initiation. An inconsistent base edge — where some sections are more beveled than others — causes the board to turn unevenly and can lead to catching.
Mistake #5: Not Removing Burrs After Filing
Filing creates burrs — small ridges of displaced metal on the opposite side of the edge from where you filed. If you do not remove these burrs with a gummy stone or diamond stone, they will catch on snow and cause the board to feel “grabby” in unpredictable ways.
Mistake #6: Storing with Sharp Edges and No Protection
Leaving freshly sharpened edges uncovered during storage exposes them to moisture and physical damage. Either apply a storage wax, use edge guards, or store the board in a protective bag. Sharp edges left unprotected in a garage can also be a safety hazard — they can cut you when reaching for the board.
Mistake #7: Forgetting About Edge Joint Rust
The junction where the steel edge meets the P-Tex base is a moisture trap. Many riders focus on the visible side of the edge and miss the rust forming in this tiny gap. Inspect this area carefully during seasonal maintenance and address any rust with a cotton swab approach before it propagates under the base.
Mistake #8: Mixing Tools Between Skis and Snowboards
Ski edges and snowboard edges have different profiles, bevels, and material properties. While some tools are interchangeable (gummy stones, diamond stones), ski-specific files and edge guides may not produce the correct results on a snowboard. Use tools rated for snowboard use to ensure proper edge geometry.
Edge Maintenance for Different Snowboard Types
Different snowboard designs place different demands on edges. Here is how maintenance varies across the main snowboard categories.
Directional Boards
Directional boards (designed to be ridden primarily in one direction) typically have a longer nose and a shorter, stiffer tail. The edge geometry is optimized for forward riding, with aggressive sidecut for carving. These boards benefit from a sharper edge setup (88°–89° side edge) and more frequent maintenance, as they are often ridden hard on groomed terrain.
Twin-Tip Boards
Twin-tip boards are symmetrical — the nose and tail are identical. They are designed for riding switch (backwards) as well as forward. Edge maintenance on twin tips is simpler because the edge geometry is symmetrical. A 90°/1° setup with moderate detuning at both tips is the standard approach.
Freeride Boards
Freeride boards are designed for off-piste, backcountry, and variable terrain. They are typically stiffer and more aggressive than all-mountain boards. Edge maintenance for freeride boards should focus on durability — keep edges sharp but do not make them so aggressive that they catch in variable snow. Regular inspection for rock nicks is essential, as freeride terrain often involves hidden obstacles.
Park Boards
Park boards are softer, more flexible, and designed for jibbing, jumping, and tricks. Edge maintenance for park boards is different from other categories — you want edges that are functional but not aggressive. Heavy detuning is common, and many park riders keep their edges intentionally dull to prevent catching on rails and boxes.
Carving Boards
Carving-specific boards are stiff, narrow, and designed for maximum edge hold on groomed runs. These boards demand the sharpest edges and the most precise bevel angles. A carving board with a dull edge is essentially useless — the entire design philosophy depends on aggressive edge engagement. Maintenance frequency should be higher for carving boards than for any other type.
All-Mountain Boards
All-mountain boards are the jack-of-all-trades — designed to perform reasonably well in all conditions and terrain. Edge maintenance for all-mountain boards falls in the middle of the spectrum. A standard 90°/1° setup with periodic sharpening and rust removal is sufficient for most riders.
Safety Considerations
We often talk about helmets and impact shorts for safety, but edge maintenance is also a safety issue. Dull, rusty edges won’t grip on ice. If you are riding hard-pack or icy conditions (common in top European ski resorts), you rely on that sharp metal strip to keep you upright. A rusty edge is a slippery edge.
Edge-Related Safety Risks
- Loss of edge hold: Dull or rusty edges reduce your ability to stop, turn, and control speed. On ice, this can be dangerous — you may not be able to avoid obstacles or slow down for merges.
- Uneven edges: An edge that is sharp in some spots and dull in others causes unpredictable turning behavior. The board may grab unexpectedly in one turn and slip in the next, leading to loss of control.
- Edge catching: An improperly maintained edge — particularly one with a burr or an inconsistent bevel — can catch on snow unexpectedly, throwing you off balance. This is one of the most common causes of falls for intermediate riders.
- Edge separation: In extreme cases, a corroded edge can separate from the board during riding. This is rare but catastrophic — it can cause the board to become unrideable instantly.
When Not to Ride
Do not ride a board with:
- A cracked edge
- An edge that is visibly separating from the base
- Deep pitting that has compromised the edge’s structural integrity
- Edges so dull that the board slides sideways on groomed terrain without gripping
These conditions are not just performance issues — they are safety hazards. A quick visit to a repair shop can assess whether the board is safe to ride.
Edge Safety at Home
Sharp snowboard edges can cut you just as easily as they cut through snow. When working on your edges at home, take these precautions:
- Wear gloves when handling a freshly sharpened board.
- Be careful when reaching into a board bag or storage area — edges can be sharp even when rusted.
- Store boards with edge guards or in protective bags, especially in homes with small children.
- When carrying a board, keep the edges pointing away from your body.
Complete FAQ: 30+ Questions Answered
Can I ride with rusty snowboard edges?
Yes, you can ride with light surface rust — it is mostly cosmetic and will not cause immediate problems. However, rusty edges create drag and reduce your carving performance. If the rust is heavy or has caused pitting, the edge may not grip properly on hard snow or ice, which is a safety concern. Remove surface rust before riding whenever possible.
Is surface rust on snowboard edges dangerous to ride?
Light surface rust is not dangerous. It is purely cosmetic and will not affect the edge’s structural integrity. However, it does create additional friction and can make the board feel “draggy.” Remove it with a gummy stone for optimal performance.
Does WD-40 remove rust from snowboard edges?
WD-40 is a water displacer and light lubricant, not a rust remover. It will not dissolve existing rust. However, spraying a light coat on clean, dry edges can help prevent future rust by displacing moisture. For actual rust removal, use a gummy stone or diamond stone.
Rust eraser vs gummy stone for snowboards — which is better?
They are essentially the same thing. A “rust eraser” is a marketing term for a gummy stone or abrasive rubber block. Both work on the same principle — soft abrasive rubber that removes surface rust without damaging the edge. Brand names like Swix, Toko, and Demon all make effective gummy stones.
How do I remove deep rust from old snowboard edges?
Deep rust requires a diamond stone or fine metal file. Start with a medium-grit diamond stone and work along the edge in long, smooth strokes. If pitting is present, the pits will remain even after the rust is removed — this is metal that has been permanently lost. In cases of severe pitting, professional evaluation is recommended.
How to remove snowboard edge rust after sitting in the garage all summer?
Garage-stored boards often have scale rust (thicker, reddish-brown). Start with a gummy stone for light areas, then move to a medium-grit diamond stone for heavier rust. Finish with a fine-grit diamond stone or gummy stone for polishing. Clean the board with base cleaner, then apply a fresh coat of wax.
Best household items to remove snowboard rust?
White vinegar (soak for 15–30 minutes), baking soda paste (apply and scrub with a toothbrush), and aluminum foil dipped in water (rub gently) can all help with light surface rust. These are temporary solutions — a proper gummy stone is more effective and should be your go-to tool.
Snowboard edge corrosion vs rust — what is the difference?
Corrosion is the broader term for material degradation caused by chemical reactions with the environment. Rust is a specific type of corrosion that affects iron and iron-containing alloys (like steel). All rust is corrosion, but not all corrosion is rust. For snowboard edges, “rust” and “corrosion” are effectively the same thing.
How to fix a nick in a snowboard edge?
Place a metal edge file against the side of the edge at the existing bevel angle. Push the file across the nick in a single direction (one way, not sawing). Check progress after each pass. Once the nick is flush with the surrounding edge, follow up with a gummy stone to polish and remove any burrs.
Snowboard edge repair after hitting a rock?
After a rock hit, inspect the edge immediately. For light nicks, a single pass with a metal file smooths the damage. For deeper damage, file more aggressively but be aware you are removing edge material. Always deburr with a gummy stone after filing. If the edge has cracked or a large chunk is missing, seek professional assessment.
Side edge vs base edge — which should I prioritize?
Prioritize the side edge. The side edge provides the majority of your edge hold and is the primary cutting surface during turns. A sharp side edge with a worn base edge will still perform adequately. A dull side edge with a fresh base edge will feel slippery on hard snow.
How to tell if snowboard edges are too dull?
Use the thumbnail test (an edge that does not catch your thumbnail is dull), the paper test (an edge that cannot catch and cut paper needs sharpening), and visual inspection (a dull edge looks rounded and reflective rather than having a defined, matte corner). If the board slides sideways on groomed terrain without gripping, the edges are definitely too dull.
What is the best edge bevel for icy conditions?
For ice, a side edge of 88°–89° with a 1° base edge provides the best combination of grip and stability. Going sharper than 87° can cause chatter on ice. Freshly sharpened edges at 89°/1° typically outperform more extreme angles in real-world icy conditions.
How to detune snowboard edges for beginners?
Hold a gummy stone at a slightly higher angle (92°–95°) and run it along the tip and tail sections of the edge. Leave the contact points between the bindings sharp. A full detune from tip to tail is appropriate for absolute beginners who are learning basic turns and need maximum forgiveness.
Carving edge vs jib edge tuning — what is the difference?
Carving edges are sharpened to aggressive angles (88°–89°) for maximum grip on groomed snow. Jib edges are detuned (90°–91° or higher) with the tip and tail heavily rounded to prevent catching on rails and boxes. A carving setup prioritizes grip; a jib setup prioritizes forgiveness.
Best snowboard edge file guide angle recommendations?
For all-mountain riding: 90° side edge with 1° base edge. For aggressive carving: 88°–89° side edge with 1° base edge. For park/beginners: 90°–91° side edge with 1.5°–2° base edge. Start with the factory default (90°/1°) and adjust from there based on your experience.
How to store a snowboard to prevent edge rust?
Dry the board completely after every session. Store in a cool, dry, dark location (bedroom or closet). Do not store on a concrete floor. Apply storage wax (thick coat, do not scrape) before long-term storage. Use silica gel packs in the board bag. Avoid garages, sheds, and damp basements.
How often should I sharpen my snowboard edges?
Most riders should sharpen every 10–15 riding days. Carving specialists may sharpen every 3–5 days. A quick gummy stone pass every 3–5 days keeps edges clean between full tunes. Always sharpen at the start and end of each season.
Do you need a vise to tune snowboard edges at home?
A vise makes the work easier and more precise, but it is not required. You can prop the board across two stacks of books, lean it against a wall with the edge accessible, or lay it flat on a carpeted floor. If you plan to maintain edges regularly, a simple snowboard vise ($20–$40) is a worthwhile investment.
Diamond stone vs edge file for snowboard maintenance?
Diamond stones are better for polishing, removing light-to-moderate rust, and finishing work. Metal files are more aggressive and are used for sharpening dull edges, reshaping bevel angles, and removing nicks. Most riders benefit from owning both. The gummy stone handles the lightest work, the diamond stone handles the middle ground, and the file handles the heavy lifting.
Swix vs Toko edge tuning tools — which is better?
Both are excellent, reputable brands with decades of experience in winter sports maintenance. Swix tends to have wider availability and a broader product line. Toko is known for precision engineering and is popular among race technicians. For gummy stones and basic tools, the difference is negligible — choose based on price and availability. For precision edge tuners, test both if possible.
Snowboard edge maintenance for splitboards — what is different?
Splitboards have exposed cut edges along the inside of each half. These raw edges are more susceptible to rust because they expose the board’s internal materials. Apply wax to cut edges after each tour. Store the board assembled when possible. Consider applying epoxy or edge sealant to the cut edge during the initial build.
How to tell if snowboard edges need sharpening (thumbnail test explained)?
Place your thumbnail flat against the side of the edge and gently try to slide it along the edge. If the nail catches, the edge is sharp. If the nail slides freely, the edge is dull. This test is simple but has limitations — it cannot detect burrs, is inconsistent between individuals, and does not measure degree of sharpness. Combine with the paper test and visual inspection for best results.
Best snowboard bag to prevent moisture and rust during storage?
Look for breathable board bags with mesh ventilation panels. Avoid airtight vinyl bags for long-term storage. A padded bag protects against physical damage while allowing air circulation. Place silica gel packets inside the bag to absorb residual moisture. Ensure the board is completely dry before placing it in the bag.
Snowboard rental edge maintenance — do shops maintain edges?
Yes, rental shops maintain and sharpen edges as part of their regular fleet maintenance. However, rental boards may have very dull or heavily detuned edges to reduce liability and make them more forgiving for beginners. If you rent and want sharper edges, ask the shop if they can sharpen your specific rental board before your session.
Snowboard edge tune for slush vs ice conditions?
For slush: Standard 90°/1° setup works well. Slush is soft and forgiving — aggressive edge angles are unnecessary and can cause catching in heavy, wet snow. For ice: Sharpen to 88°–89° side edge with 1° base edge. Freshly sharpened edges are critical on ice. Some riders go to 87° for extreme ice conditions, but this can cause chatter.
Can I sandblast snowboard edges to remove rust?
Sandblasting is too aggressive for snowboard edges. It removes significant amounts of metal and can destroy the edge’s bevel geometry. It also damages the adjacent P-Tex base. Use proper snowboard maintenance tools — gummy stones, diamond stones, and files — for controlled, precise rust removal.
Rust on stainless steel snowboard edges?
Stainless steel edges are rust-resistant, not rust-proof. In extreme conditions — prolonged salt water exposure, highly acidic environments, or years of neglect — even stainless steel can develop surface corrosion. The chromium oxide layer that prevents rust can be compromised by prolonged exposure to harsh chemicals or mechanical abrasion.
Snowboard edges rusted through — when to replace?
If the edge has rusted so deeply that the metal is visibly thin, pitted, or cracked, it needs replacement. Signs of edge failure include: visible thinning compared to unworn sections, edge cracking, separation from the base, and inability to hold a sharp edge despite repeated sharpening. In many cases, edge replacement costs approach the value of the board.
Salt air and snowboard edge rust — coastal rider advice?
Coastal riders face the highest rust risk. Salt air is a powerful electrolyte that accelerates oxidation. Wipe edges dry after every session. Apply a light coat of wax or rust-preventive spray before storage. Consider a dehumidifier in your storage space. Inspect edges more frequently than inland riders — monthly during the off-season is recommended.
Flying with a snowboard — how to protect edges from airline damage?
Use a padded board bag with edge protectors. Wrap the board in clothing or bubble wrap if using an unpadded bag. Inspect edges immediately upon arrival at your destination. File a damage claim with the airline before leaving the airport if damage is found. Keep your boarding pass and baggage claim stub as documentation.
Budget snowboard edge tuning kit under $30 — is it possible?
Absolutely. A gummy stone ($8–$12), a microfiber cloth ($3), a spray bottle ($2), and a ziplock bag ($1) make a functional starter kit for under $20. This covers surface rust removal and light deburring. For more capability, add a basic edge file ($10–$15) for a total under $35.
Pre-storage wax for snowboard edge protection — how to apply?
Clean the base with base cleaner. Melt warm-temperature wax and drip it across the base in a zigzag pattern. Spread with the iron into a thick, even coat that covers the entire base and edges. Do not scrape — leave the wax on as a protective barrier. Scrape it off before your first ride next season.
Snowboard edge material types — carbon steel vs stainless steel?
Most snowboard edges are carbon steel (0.6%–1.0% carbon). It offers excellent edge hold, easy sharpening, and affordability, but rusts readily. Stainless steel edges (10.5%+ chromium) are rust-resistant but more expensive, harder to sharpen, and slightly less aggressive on ice. Carbon steel remains the industry standard.
Edge maintenance after a season — what should I do?
After your last ride: do a full edge tune (sharpen, remove nicks, deburr), clean the base, apply a thick storage wax (do not scrape), dry the board thoroughly, and store in a cool, dry location. Check bindings for wear. Inspect the base for damage and repair if needed. This ensures the board is ready for the next season.
Conclusion
Removing rust is one of the easiest and most satisfying DIY snowboard tasks. It costs very little, requires no power tools, and instantly improves your ride. Don’t let a little orange oxidation ruin your trip to the mountains.
Keep a gummy stone in your pocket or glove bag. It’s a small tool that makes a big difference. Now that your edges are sharp and clean, strap in, check your goggles, and enjoy the shred.
The key takeaways from this guide:
- Prevention is easier than cure. Dry your board after every ride, store it properly, and apply storage wax before off-season. This eliminates 90% of rust issues.
- A gummy stone is your best friend. For the vast majority of riders, a simple gummy stone handles all routine rust removal and deburring needs.
- Know your edge angles. Understanding bevel angles and matching them to your riding style optimizes performance and safety.
- Maintain regularly. A quick 5-minute session every few rides prevents problems from accumulating.
- Know when to seek help. Deep pitting, cracks, and edge separation require professional assessment. Do not ride a compromised board.
- Match your maintenance to your conditions. Coastal riders need more frequent attention than desert riders. Park riders need different edge geometry than carving specialists.
Your snowboard edges are the critical interface between you and the snow. Treat them well, and they will reward you with thousands of turns of clean, confident carving. Neglect them, and you will be fighting your board instead of riding it.
Now get out there and enjoy the mountain. Your edges are ready.


