
The Best Age to Teach a Child to Snowboard: A Parent’s Complete Guide
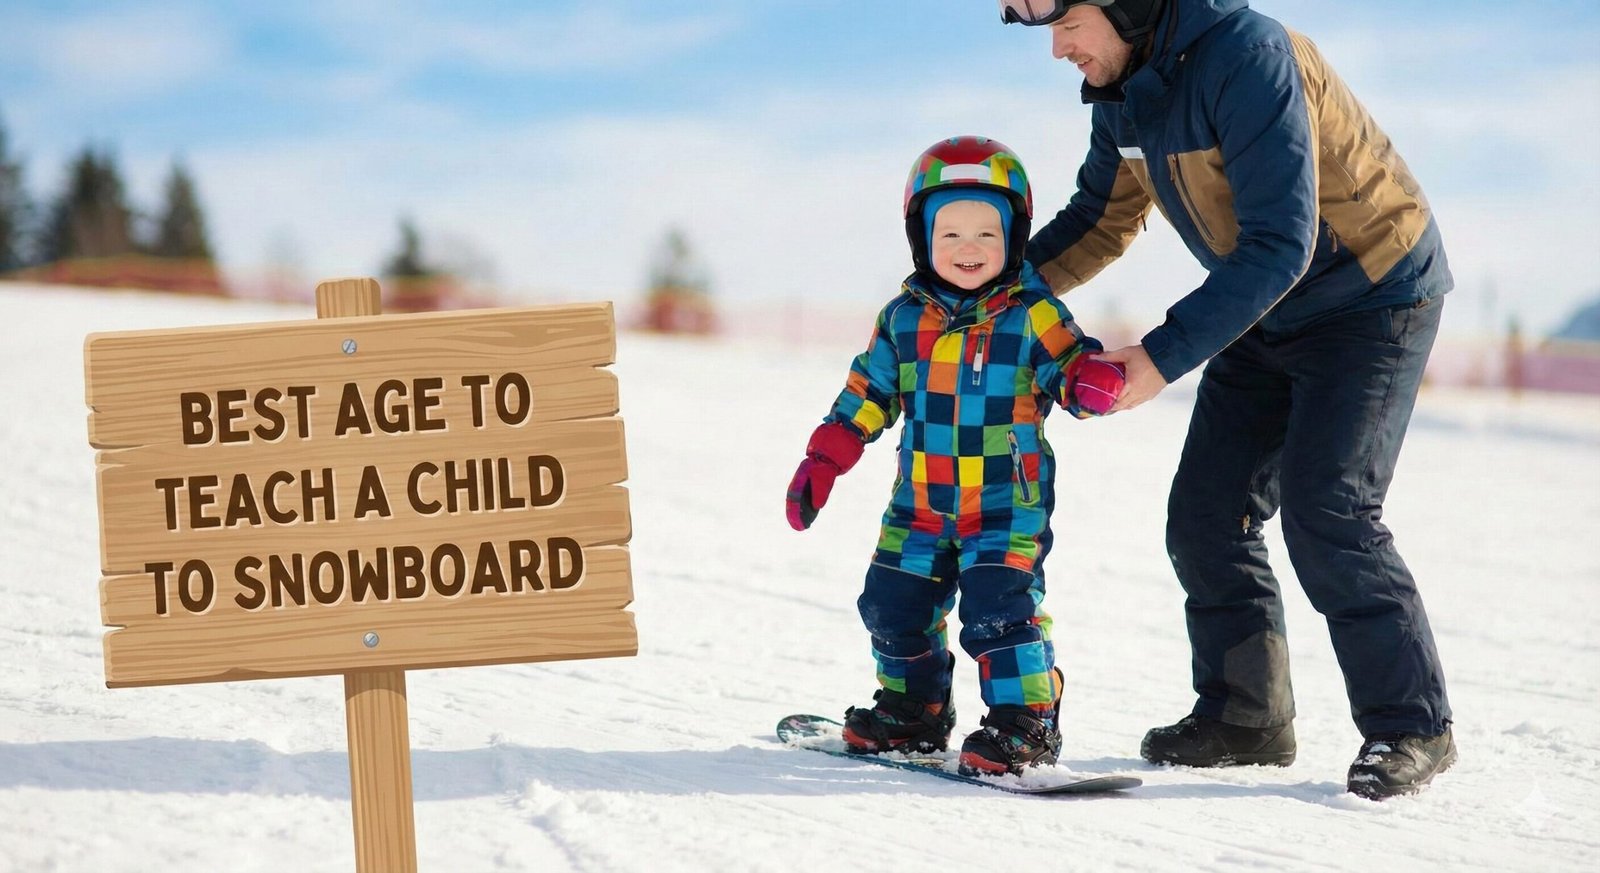
Is it ever “too early” to shred? We break down the developmental milestones, gear requirements, and teaching strategies to get your mini-shredder on snow safely.
Introduction: When to Start Snowboarding with Kids
For snowboarding parents, the dream is vivid: riding the chairlift with your little one, cruising down a blue run together, and sharing high-fives at the bottom. But when does that dream become a reality? Ask five different instructors, and you might get five different answers about the “magic number.”
Historically, the industry standard was clear: “Teach them to ski at 3, switch to snowboarding at 8.” The logic was that toddlers lacked the muscle development and center of gravity control required for standing sideways. But times have changed. With the advent of specialized kids’ gear (like Burton’s Riglet system) and reverse-camber technology, the barrier to entry has dropped significantly.
If you are wondering why snowboarding is fun for families, it’s because it builds resilience and outdoor appreciation. In this guide, we will explore the best age to start, how to assess your child’s readiness, and why the old “ski first” rule no longer applies.
The snowboarding industry has undergone a revolution in how it approaches young learners. In the 1990s and early 2000s, the conventional wisdom among ski schools was to refuse snowboard lessons for children under age 7 or 8. The reasoning was simple: young children’s legs were not strong enough to maintain the sideways stance, their boots were too soft to provide ankle support, and their cognitive development was not advanced enough to understand the complex biomechanics of turning a snowboard.
However, several key developments have changed this landscape dramatically. First, the introduction of reverse-camber (rocker) snowboards in the mid-2000s meant that boards no longer required aggressive edge engagement to initiate turns. Rocker boards naturally want to turn and resist catching an edge, making them far more forgiving for beginners of all ages. Second, the development of specialized children’s snowboard boots with proper ankle support and micro-adjustable closure systems (like BOA) meant that even the smallest feet could be properly fitted and supported. Third, the creation of purpose-built children’s snowboards with softer flex patterns, lighter cores, and catch-free edge technology made the physical demands of snowboarding much more accessible to young bodies.
The Burton Riglet system, introduced in the early 2010s, was perhaps the single most important innovation for young snowboarders. This system includes a handlebar that attaches to the nose of the board, allowing a parent or instructor to pull a child across flat terrain or gentle slopes. This seemingly simple addition meant that children as young as 2 or 3 could experience the sensation of sliding on snow without needing the strength or balance to control the board independently. It transformed snowboarding from a solo activity into a parent-child bonding experience from the very beginning.
Today, resorts across North America, Europe, and Asia offer snowboard lessons for children as young as 3. Some progressive ski schools even offer ” introduction to snow” programs for toddlers as young as 18 months, though these are primarily about getting comfortable with snow and gear rather than actual snowboarding. The result is a new generation of snowboarders who start younger, progress faster, and develop a lifelong passion for the sport earlier than ever before.
This comprehensive guide is designed to answer every question you might have about teaching your child to snowboard. Whether your child is 2 years old and you want to know if it’s too early, or they’re 12 and you’re wondering if it’s too late, this guide covers everything from gear selection to lesson planning, from safety considerations to long-term development. We’ve consulted with professional snowboard instructors, pediatric sports medicine doctors, and parents who have successfully raised young snowboarders to bring you the most complete resource available.
We’ll also address the common myths and misconceptions that have held parents back from introducing their children to snowboarding. The “ski first” myth, the “too young” myth, the “too dangerous” myth — we’ll examine each one with evidence and expert opinion to help you make the best decision for your family. And we’ll provide practical, actionable advice that you can implement immediately, whether you’re planning your first family trip to the mountains or looking to improve your teaching approach after a rough first season.
So grab a cup of coffee, settle in, and let’s explore everything you need to know about introducing your child to the incredible world of snowboarding. The mountains are calling, and your future shred partner might be closer to ready than you think.
The Three Stages of Readiness
There isn’t a single “perfect” age, but there are distinct developmental windows. Here is what you can expect at each stage.
The “Tow-Around” Phase (Ages 1–3)
Yes, you can put a 2-year-old on a board. No, they will not be linking turns. At this age, the goal is familiarity. It’s about getting them used to the feeling of sliding and wearing boots.
- Goal: Positive association with snow and gear.
- Technique: Pulling them around on a flat surface or living room carpet.
- Gear: Handlebar accessories (Riglet Reel) are essential here.
During this earliest phase, the emphasis should be entirely on making snow and the snowboard a positive, fun experience. Many parents make the mistake of trying to “teach” their toddler during this phase, which can create negative associations before the child has even had a chance to develop interest. Instead, think of this as the introduction phase. Your toddler might spend more time sitting on the board than standing on it, and that’s perfectly fine. The goal is for them to associate the snowboard with fun, playtime, and spending time with mom or dad.
At this age, children are still developing their gross motor skills. They can walk, but they don’t have the refined balance or coordination needed for independent snowboarding. Their center of gravity is higher relative to their body size, which means they fall more easily. Their attention spans are measured in minutes, not hours. And their ability to follow multi-step instructions is still developing. All of this is completely normal and should be factored into your expectations.
The Burton Riglet system is particularly valuable during this phase. The Riglet Reel is a retractable handle that attaches to the nose of the board, allowing you to pull your child across flat ground or very gentle slopes. This gives them the sensation of sliding — the core experience of snowboarding — without requiring them to do anything more than stand (or sit) on the board. Many toddlers initially prefer sitting on the board while being pulled, and this is perfectly acceptable. The goal is positive association, not technique.
You can also introduce snowboarding concepts during this phase without any snow at all. Let your child stand on the board on a carpeted floor at home. Let them wear the boots around the house to get used to the feeling. Watch snowboarding videos together and point out the riders. Read children’s books about snowboarding. All of these activities build familiarity and excitement for the real thing.
When you do take your toddler to the snow for the first time, keep the session extremely short — 20 to 30 minutes is plenty. Focus on getting them dressed in their gear, walking around in their boots, and perhaps sitting on the board while you pull them a short distance. If they cry or seem scared, that’s fine — stop immediately and try again another day. The key is to end every session on a positive note, even if that positive note is simply “we went to the mountain and had hot chocolate.”
Some parents worry that starting this early is pointless because the child won’t “learn” anything. This misses the point entirely. Early exposure is not about skill development; it’s about comfort, familiarity, and positive association. Children who are introduced to snow and snowboarding equipment at a very young age are far less likely to be afraid of the mountain environment when they’re ready for formal lessons. They’ve already experienced the cold, the wind, the strange boots, and the slippery surface. None of it is new or scary.
It’s also worth noting that not every toddler will be interested, and that’s perfectly fine. Some children love the snow from the moment they touch it. Others are uncomfortable with the cold or overwhelmed by the mountain environment. Don’t force it. If your child shows no interest at 2, try again at 3 or 4. There’s no deadline, and the worst thing you can do is create a negative association that takes years to overcome.
The “Golden Window” (Ages 3–6)
This is arguably the best age to start structured learning. Kids in this range have developed better gross motor skills. They can squat, jump, and follow basic instructions.
- Goal: Balance, straight-line sliding, and the “falling leaf.”
- Challenge: Attention spans are short. Lessons must be gamified.
- Gear: Rocker boards that prevent edge catches are mandatory.
The 3-6 age range represents what many professional snowboard instructors consider the ideal window for beginning snowboard instruction. There are several developmental reasons for this. By age 3, most children have mastered walking and running, which means they have the basic leg strength and balance needed to stand on a snowboard. By age 4, they can typically squat down and stand back up without using their hands — a critical skill for snowboarding, which requires constant knee flexion. By ages 5-6, they can follow multi-step instructions from a stranger (instructor), maintain focus for 30-45 minutes, and understand simple cause-and-effect relationships (“lean back to slow down”).
The cognitive development that occurs during this period is particularly important for snowboarding. Young children in this age range are developing what psychologists call “executive function” — the ability to plan, focus, remember instructions, and juggle multiple tasks. While a 3-year-old might struggle to remember which foot goes forward, a 5-year-old can typically understand and execute a sequence of actions: “stand sideways, bend your knees, look where you want to go, and lean.” This cognitive leap is what makes structured instruction possible.
Physically, children in the 3-6 age range are developing the muscle strength and coordination needed for snowboarding, but they’re still small enough that a fall from standing height is unlikely to cause serious injury. This is a crucial safety consideration. An adult who catches an edge and falls can easily break a wrist, tear a ligament, or suffer a concussion. A 4-year-old who falls from the same height typically bounces back with little more than a bruise and a momentary cry. This built-in resilience makes young children surprisingly well-suited to learning a sport that involves a lot of falling.
The “falling leaf” is the first real snowboarding skill that children in this age range typically master. This is the ability to slide sideways down a gentle slope, shifting weight from heel to toe to control direction. It’s not turning in the traditional sense, but it’s the foundation upon which all turning skills are built. A child who has mastered the falling leaf can control their speed and direction, which means they can safely navigate a beginner area without crashing into obstacles or other skiers.
One of the biggest challenges in this age range is attention span. Even the most motivated 4-year-old will typically lose focus after 30-45 minutes of snowboarding. This is not a sign of disinterest or lack of ability; it’s simply the developmental reality of young children. The solution is to keep sessions short and sweet. Multiple 30-minute sessions with hot chocolate breaks in between are far more effective than one long, exhausting session. Many ski schools have recognized this and offer “half-day” programs specifically designed for young children, with built-in breaks for snacks, drinks, and free play.
Gamification is essential for this age group. Children learn best through play, and the best snowboard instructors have a bag of tricks to make learning fun. Games like “red light, green light” (go when the instructor holds up green, stop when they hold up red), “follow the leader” (the instructor demonstrates a skill and the child copies), and “treasure hunts” (finding objects placed on the slope) keep children engaged and motivated. Some instructors use stuffed animals as props — the child’s job is to ride over to where the stuffed animal is “waiting” and give it a high-five.
The gear you choose for this age range is critically important. Rocker boards (also called reverse-camber boards) are not just recommended; they’re mandatory for young beginners. Unlike traditional camber boards, which have a slight upward curve in the middle and contact points at the tip and tail, rocker boards have a continuous upward curve from tip to tail. This means the board naturally wants to turn and is extremely resistant to catching an edge — the most common and most painful mistake in snowboarding. For a young child, catching an edge typically results in a hard fall to the ground, which can be painful enough to end the day or create a lasting fear of the sport.
The “Rapid Progression” Phase (Ages 7+)
If you wait until 7 or 8, the learning curve is much steeper (in a good way). A 7-year-old has the cognitive ability to understand “heel edge” vs. “toe edge” mechanics. They can progress from a bunny hill to a green run in a few days.
- Goal: Linking turns, speed control, and chairlift independence.
- Advantage: Muscle strength allows for proper edge engagement.
The 7+ age range is when snowboarding instruction becomes more similar to adult instruction. Children in this range have the physical strength, cognitive ability, and attention span to learn snowboarding in a more traditional, technique-focused manner. They can understand and execute more complex instructions, maintain focus for longer periods, and are physically strong enough to properly engage the board’s edges.
One of the biggest advantages of starting at this age is that children can progress much more quickly. A motivated 8-year-old can go from absolute beginner to linking turns on a green run in 2-3 days of instruction. This rapid progression is incredibly rewarding for both the child and the parent, and it’s a major reason why many families choose to start their children in snowboarding at this age rather than earlier.
The cognitive development of 7+ year olds allows for more technical instruction. They can understand the concept of “heel edge” and “toe edge” — the two fundamental positions in snowboarding. They can understand that turning is accomplished by shifting weight and changing edge angles. They can understand the relationship between speed and turning radius. All of these concepts are difficult or impossible for younger children to grasp, but they’re second nature to 7+ year olds.
Physically, 7+ year olds have developed the muscle strength needed for proper edge engagement. Snowboarding requires significant leg strength — particularly in the quadriceps, hamstrings, and calves — to maintain an athletic stance and control the board. Younger children often lack this strength, which means they ride with straight legs and rely on the board’s natural shape to turn. 7+ year olds can bend their knees, engage their edges, and generate the power needed for responsive turning.
Another significant advantage of starting at 7+ is independence. Children in this range can typically put on their own boots, carry their own board, and navigate the lift line without assistance. This means parents can enjoy their own skiing or snowboarding while their child is in lessons, rather than spending the entire day managing gear and logistics. Many resorts offer “kids’ clubs” or “youth programs” for this age range that provide full-day supervision, instruction, and lunch, giving parents a rare opportunity to ride together.
The main disadvantage of waiting until 7+ is that children may develop a fear of falling that doesn’t exist in younger children. Young children fall frequently and bounce back quickly; they don’t have the life experience to understand that a fall could result in a serious injury. Older children and adults, on the other hand, are more aware of the risks, which can create anxiety and hesitation. This fear can slow the learning process significantly, as the child becomes tentative and reluctant to commit to turns.

Recommended Starter Board: Burton Chopper / Chicklet
The industry standard for learning. Catch-free edges and a super soft flex make learning painless.
Check Price on AmazonAge-Based Readiness Comparison
| Factor | Ages 1-3 | Ages 3-6 | Ages 7+ |
|---|---|---|---|
| Gross Motor Skills | Walking, basic balance | Running, jumping, squatting | Full athletic coordination |
| Attention Span | 5-10 minutes | 30-45 minutes | 1-2 hours |
| Instruction Following | Single-step, with parent | Multi-step, from instructor | Complex sequences |
| Fear of Falling | None | Minimal | Moderate to high |
| Expected Skill Level | Sitting/standing on board | Falling leaf, basic sliding | Linking turns, green runs |
| Typical Lesson Duration | 15-30 minutes | 45-90 minutes | 2-4 hours |
| Parent Involvement | Constant | Moderate | Minimal (in group lessons) |
It’s Not Just a Number: Signs Your Child is Ready
Chronological age is just a guideline. Physical and emotional maturity matters more. Before booking a trip to one of the snowboarding resorts for beginners, look for these signs:
Checklist for Parents:
- Squat Strength: Can they squat down and stand back up without using their hands? Snowboarding requires constant knee flexion.
- Resilience: How do they handle falling? If a stumble on the playground leads to a meltdown, snowboarding might be tough. It involves a lot of falling.
- Instruction Following: Can they listen to a stranger (instructor) for 30 minutes?
- Shoe Size: Finding snowboard boots smaller than a toddler size 7-8 can be difficult (though brands are improving).
Physical Readiness Indicators
Beyond the basic checklist, there are several physical indicators that suggest your child is ready for snowboarding. The first is balance. Can your child stand on one foot for 5-10 seconds? Can they walk along a curb or low wall without losing balance? These activities require the same core stability and proprioception that snowboarding demands. If your child struggles with these activities, they may not be physically ready for snowboarding, regardless of their age.
The second physical indicator is leg strength. Snowboarding requires the rider to maintain a semi-squatted position for extended periods, which demands significant endurance from the quadriceps and gluteal muscles. A simple test is to have your child squat down and hold the position for 30 seconds. If they can do this without losing balance or complaining of fatigue, they likely have the leg strength needed for snowboarding. If they struggle, consider some pre-season conditioning — squats, lunges, and balance exercises — to build the necessary strength.
The third physical indicator is coordination. Snowboarding requires the simultaneous coordination of multiple body parts: the legs control the board’s edge angle, the hips control the body’s rotation, the arms provide balance, and the eyes focus on where the rider wants to go. Children who excel at activities that require whole-body coordination — such as gymnastics, martial arts, or dance — tend to pick up snowboarding more quickly than children who prefer activities that focus on specific muscle groups.
Emotional Readiness Indicators
Physical readiness is important, but emotional readiness is equally critical. A child who is physically capable of snowboarding but emotionally unprepared can have a negative experience that takes years to overcome. The key emotional indicators include:
Willingness to try new things: Snowboarding is an inherently uncomfortable activity, at least at first. The boots are stiff, the board is heavy, the snow is cold, and falling hurts (a little). Children who are naturally adventurous and willing to try new things tend to adapt to these discomforts more easily than children who prefer familiarity and routine.
Frustration tolerance: Learning to snowboard involves a lot of failure. You fall. You try again. You fall again. Children with low frustration tolerance may become upset after just a few falls, which can end the session prematurely. If your child tends to give up quickly when faced with a challenge, it may be worth working on frustration tolerance through other activities before introducing snowboarding.
Separation comfort: If your child is going to be in lessons with a professional instructor (which is recommended), they need to be comfortable being away from you for the duration of the lesson. Children with severe separation anxiety may not do well in group lessons, though private lessons with a parent present can be a good alternative.
Interest in snow sports: This may seem obvious, but it’s worth mentioning. Does your child show interest in skiing or snowboarding? Do they get excited when they see snow? Do they ask about the mountains? Children who are genuinely interested in snow sports are far more likely to have a positive experience than children who are being pushed into it by their parents.
The “Living Room Test”
Before spending money on gear and lift tickets, try the “living room test.” Place a snowboard (or a piece of cardboard cut to snowboard dimensions) on a carpeted floor. Have your child stand on it sideways (the snowboarding stance) and try to maintain balance while you gently push them from side to side. Watch how they respond. Do they find it fun? Do they maintain their balance? Do they get frustrated when they fall? This simple test can give you valuable insight into your child’s physical and emotional readiness for snowboarding.
You can also simulate snowboarding movements at home. Have your child squat down and stand up repeatedly. Have them shift their weight from heel to toe while standing. Have them practice looking over their shoulder (as they would when turning). These simple exercises not only build the physical skills needed for snowboarding but also give you a sense of your child’s coordination and willingness to practice.
Another useful indicator is how your child handles wearing snowboard boots. Snowboard boots are significantly stiffer and heavier than regular winter boots, and some children find them uncomfortable or restrictive. If your child complains about wearing snowboard boots during a simple walk around the house, they may not be ready for a full day of snowboarding in them. Consider having your child wear the boots for short periods at home, gradually increasing the duration, to build tolerance before hitting the slopes.
Important Warning
Never force a child to snowboard if they are genuinely afraid or uninterested. Creating a negative association with snow sports at a young age can take years to overcome, and may result in a child who refuses to participate in outdoor winter activities as a teenager and adult. The goal is to foster a love for the mountains, not to create a champion. If your child says no, respect that decision and try again later.
The Great Debate: Skiing vs. Snowboarding First
You will hear it from grandparents and old-school instructors: “Put them on skis first.” Is there truth to this?
Historically, yes. Skiing allows legs to move independently, which is natural for a walking toddler. Snowboarding locks the feet together, which can feel restrictive. However, modern teaching methods have leveled the playing field.
If your ultimate goal is to have a snowboarding family, start them on a snowboard. Transitioning from skiing to snowboarding later often means “unlearning” the forward-facing stance. Plus, learning how to stop heel lift and manage edges is better learned early.
For a deeper dive into the mechanics, read our comparison on is it easier to ski or snowboard.
The Case for Skiing First
The traditional argument for skiing first is based on biomechanics. When a toddler walks, their legs move independently — left leg forward, right leg forward, and so on. Skiing mimics this movement pattern, making it intuitively easier for young children to understand and execute. Snowboarding, by contrast, requires both feet to be fixed to a single board, which is a fundamentally different movement pattern than walking or running.
There’s also a practical argument: ski equipment is more readily available in smaller sizes. Snowboard boots for very young children (under size 5) can be difficult to find, while ski boots are available in much smaller sizes. Similarly, children’s skis are available in shorter lengths that are proportionally appropriate for young children, while even the shortest snowboard may be too long for a very small child.
Another argument in favor of skiing first is that skiing provides earlier access to the mountain. A child on skis can ride a chairlift and ski down a green run relatively quickly, while a child on a snowboard may spend several days on the bunny hill before they’re ready for the chairlift. This means that families who ski first can enjoy more of the mountain together, which can be an important factor for family vacations.
The Case for Snowboarding First
The argument for snowboarding first is equally compelling. If your family’s primary sport is snowboarding, starting on a snowboard avoids the “unlearning” problem. When a child learns to ski first, they develop muscle memory for forward-facing movement patterns. Switching to snowboarding later requires them to suppress these ingrained movements and develop new ones, which can be frustrating and counterproductive.
There’s also an argument that snowboarding is actually easier for young children in some ways. Because both feet are on the same board, there’s no need to coordinate two independent legs. The child simply stands sideways and shifts their weight to turn. Modern rocker boards are also very forgiving — they resist catching an edge, which is the primary source of pain and fear in snowboarding. A child on a rocker board can slide down a gentle slope without catching an edge, which builds confidence quickly.
From a practical standpoint, snowboarding requires less equipment than skiing. A snowboard, boots, and bindings are all that’s needed, while skiing requires skis, boots, poles (for older children), and bindings. This means less to carry, less to purchase, and less to maintain.
The Hybrid Approach
Some families take a hybrid approach: introduce both sports early and let the child choose. This has the advantage of exposing the child to both movement patterns and allowing them to gravitate toward the one that feels most natural. It also means that the family can enjoy both sports together, with parents skiing and the child snowboarding (or vice versa).
The hybrid approach does have some drawbacks, however. Learning two sports simultaneously can be confusing for young children, as the movement patterns are fundamentally different. It also requires purchasing two sets of equipment and potentially two sets of lessons, which can be expensive. And from a practical standpoint, it can be difficult to manage two different sports on the same mountain, particularly if the child is in lessons for one sport while a parent wants to participate in the other.
Ultimately, the decision of whether to start with skiing or snowboarding should be based on your family’s goals, your child’s interests, and your practical constraints. If snowboarding is your passion and you want to share it with your child, start with snowboarding. If skiing is more practical for your family situation, start with skiing. The most important thing is to get your child on the snow and having fun, regardless of what’s on their feet.
Essential Gear for Mini-Shredders
Nothing ruins a day faster than a cold, wet, or uncomfortable child. Do not skimp on the essentials.
1. The Helmet (Non-Negotiable)
Kids fall. A lot. A properly fitted helmet is critical. Look for MIPS technology if possible, as it protects against rotational forces. Check out our guide on MIPS snowboard helmet technology explained to understand why this matters.
A properly fitted helmet should sit level on the child’s head, covering the forehead without obstructing vision. There should be no more than two finger widths between the eyebrows and the helmet’s brim. The chin strap should be snug enough that you can fit only one finger between the strap and the chin. When the child shakes their head “no,” the helmet should not shift or wobble.
MIPS (Multi-directional Impact Protection System) is a technology that adds a low-friction layer inside the helmet, allowing the outer shell to rotate slightly relative to the head during an angled impact. This rotation helps reduce the rotational forces that can cause concussions and other brain injuries. While MIPS helmets are typically more expensive than standard helmets, the added protection is worth the investment, particularly for children who are learning to snowboard and will fall frequently.
When fitting a helmet, bring your child to a store that specializes in snow sports equipment. The staff can help you find the right size and adjust the fit properly. Many helmets have adjustable sizing systems (dials or pads) that allow you to fine-tune the fit as your child grows. This is a worthwhile investment, as children’s heads grow quickly and a helmet that fits perfectly today may be too small in a year.
2. Mittens over Gloves
Dexterity doesn’t matter for a 4-year-old; warmth does. Mittens keep fingers together, sharing body heat. This is a key reason why snowboarders wear mittens universally.
The warmth advantage of mittens is significant. In mittens, all five fingers share a common space, which means they generate and share heat collectively. In gloves, each finger is isolated in its own compartment, which reduces heat sharing and increases the surface area exposed to cold air. For young children, who have less body mass and less efficient circulation than adults, this difference can mean the difference between comfortable hands and painful, numb fingers.
When selecting mittens for your child, look for models with a waterproof outer shell, insulated lining, and a long cuff that extends well past the wrist. The long cuff is important because it creates a seal between the mitten and the jacket sleeve, preventing snow from getting inside. Some mittens have a gauntlet-style cuff with a drawstring that cinches around the jacket sleeve, providing an even better seal.
Another important feature is wrist leashes. These are straps that attach the mittens to the child’s jacket sleeves, preventing them from being lost when the child takes them off (which they will, frequently). Losing a mitten on the mountain means a cold, wet hand for the rest of the day, which can quickly end the session. Wrist leashes are a small investment that can save the day.
For very young children (under 3), consider mittens with built-in hand warmers or mittens that can be worn over a thin liner glove. The liner glove provides an extra layer of insulation and can be worn alone during breaks or while eating lunch. This layering approach allows you to adjust the warmth level based on conditions, which is particularly useful on days when the temperature fluctuates throughout the day.
3. Boots and Bindings
Ensure boots fit correctly. If they are too big, the child will claw their toes for grip, leading to cramping. Velcro or BOA lacing systems are lifesavers for parents’ sanity compared to traditional laces. (See: BOA vs speed lace).
Properly fitting snowboard boots are perhaps the most important piece of gear for a child’s comfort and performance. Boots that are too big cause the child to curl their toes to grip the sole, which leads to cramping and fatigue. Boots that are too small cause pain and pressure points, which can make the experience miserable. The ideal fit is snug but not painful, with the toes lightly touching the front of the boot when standing upright and pulling back slightly when the knees are bent (the snowboarding stance).
BOA lacing systems are particularly valuable for children’s boots. Traditional laces require a level of dexterity that most young children don’t have, which means the parent must tie and retie the boots multiple times throughout the day. BOA systems use a dial that tightens or loosens the lacing with a simple twist, making it easy for children to adjust their own boots. Some boots use Velcro straps instead of laces, which are also easy for children to operate independently.
When trying on boots, have your child wear the same type of socks they’ll wear while snowboarding — typically a single pair of wool or synthetic ski socks. Avoid cotton socks, as they absorb moisture and lose insulation when wet. The sock should fit smoothly, without wrinkles or bunching, as any folds can create pressure points inside the boot.
For bindings, look for models with a single-strap or two-strap design that’s easy for small hands to operate. Some bindings have ratchet straps that can be tightened by hand, while others use clip-in systems that are even easier. The binding should hold the boot securely without pinching or restricting blood flow. Check that the binding’s size is appropriate for the boot — a binding that’s too large won’t hold the boot securely, while one that’s too small won’t accommodate the boot at all.
4. Protection
For kids 7 and older who are starting to ride harder, consider wrist guards and even impact shorts to cushion the inevitable butt-checks.
Wrist guards are one of the most important pieces of safety equipment for snowboarding, particularly for beginners of all ages. When a snowboarder falls, the natural instinct is to reach out with the hands to break the fall, which puts enormous stress on the wrists. Wrist guards distribute this force across a wider area and include a rigid splint that prevents the wrist from bending backward, dramatically reducing the risk of fractures and sprains.
For young children (under 7), wrist guards may not be practical because they’re difficult to find in very small sizes, and young children may find them uncomfortable or restrictive. In this case, the best approach is to teach children to fall correctly — tucking the chin, relaxing the body, and landing on the buttocks or back rather than reaching out with the hands. This is easier said than done, but it’s a skill that can be practiced on soft surfaces at home before hitting the slopes.
Impact shorts (also called crash pants) are padded shorts that protect the tailbone, hips, and thighs from the impact of falls. They’re particularly valuable for snowboarding, as the most common fall is onto the buttocks, which can be painful on hard-packed snow. Impact shorts are available in a range of thicknesses, from thin padding that can be worn under snow pants to thicker padding that provides more protection. For children, thinner models are usually sufficient, as children have more natural padding (in the form of body fat) than adults.
Back protectors are another option for children who are riding more aggressively or in terrain parks. These rigid or semi-rigid protectors cover the spine and ribs, providing protection against impacts from falls or collisions. While they’re not necessary for beginners on gentle slopes, they’re worth considering for children who are progressing quickly and riding more challenging terrain.
For very young children (under 5), the most important form of protection is supervision. No amount of protective equipment can substitute for a parent or instructor who is watching the child, controlling their speed, and helping them avoid obstacles. At this age, the best safety equipment is an attentive adult.

Safety Pick: Giro Crue MIPS Kids Helmet
Top-tier protection with a low-profile design that kids won’t complain about wearing.
Check Price on Amazon5. The Snowboard
Choosing the right snowboard for your child is one of the most important decisions you’ll make. The wrong board can make learning frustrating and physically demanding, while the right board can make the experience enjoyable and accelerate progress. The key factors to consider are size, flex, and camber profile.
Size: A child’s snowboard should generally reach somewhere between their chin and nose when stood upright on its tail. A board that’s too long will be difficult to control, while a board that’s too short will lack stability at speed. See our detailed sizing guide in the next section for specific recommendations.
Flex: Children need soft-flexing boards. A soft flex means the board is easier to turn, more forgiving of mistakes, and requires less physical effort to control. A stiff board, which might be appropriate for an adult rider, will be nearly impossible for a small child to bend and control. Look for boards with a flex rating of 1-3 on a scale of 10.
Camber Profile: As mentioned earlier, rocker (reverse camber) boards are the best choice for children. Rocker boards are forgiving, easy to turn, and resistant to catching an edge. Some children’s boards combine rocker with flat sections under the feet for added stability, which is an excellent compromise for progressing riders.
6. Outerwear
Snow pants (bibs are preferred over pants for young children because they stay up better and keep snow out) and a waterproof jacket are essential. Look for fully taped seams and a waterproof rating of at least 10,000mm. Bibs with adjustable shoulder straps are particularly useful because they can be adjusted as the child grows, extending the useful life of the garment.
The fit of outerwear is important. It should be loose enough to allow a full range of motion but not so baggy that it gets caught on chairlifts or drags on the ground. A good rule of thumb is to look for outerwear that’s designed specifically for snow sports, as these garments are cut to accommodate the movements and positions of skiing and snowboarding.
Layering is key to keeping children warm and comfortable. A moisture-wicking base layer (top and bottom), an insulating mid-layer (fleece or down), and a waterproof outer layer provide the flexibility to adjust to changing conditions. On warmer days, the mid-layer can be removed; on colder days, an additional mid-layer can be added. This layering system is far more effective than a single heavy jacket, which can be too warm on mild days and insufficient on cold days.
Teaching Tips: How to Survive Day 1
You’ve got the gear, you’ve got the kid. Now what? Here is how to teach without tears.
Keep it Fun (and Short)
For a 4-year-old, a “session” might be 45 minutes. That is fine. If they are cold or hungry, stop immediately. Hot chocolate is a valid part of the curriculum.
The single most important rule when teaching children to snowboard is to keep it fun. Children who are having fun will naturally want to continue and will associate snowboarding with positive feelings. Children who are not having fun will resist, cry, and develop negative associations that can take years to overcome. Fun is not a luxury; it’s the foundation of the entire learning process.
What does “fun” look like for a 4-year-old snowboarder? It might look nothing like what you imagine. It might be sitting on the board and being pulled around like a sled. It might be lying on the stomach and sliding down a gentle slope headfirst. It might be making snow angels or having a snowball fight. All of these activities build familiarity with snow and the snowboarding environment, and all of them contribute to a positive association with the mountain.
If your child wants to stop after 20 minutes, let them stop. If they want to take a break to play in the snow, let them play. If they want to go inside and have hot chocolate, go inside and have hot chocolate. The mountain will be there tomorrow. The lesson can continue later. What matters is that the child leaves the mountain with a positive feeling, even if that feeling is “I had fun playing in the snow” rather than “I learned to snowboard.”
Use a Leash/Tether
A snowboard leash or harness allows you to control their speed from behind while they get the feeling of sliding. Wondering about safety cords? Read what are snowboard leashes for.
A snowboard harness with a leash is one of the most valuable tools for teaching young children to snowboard. The harness fits around the child’s torso (similar to a backpack), and the leash attaches to the back of the harness. The parent or instructor holds the other end of the leash and walks behind the child, controlling their speed and direction. This allows the child to experience the sensation of sliding down a slope without the risk of gaining too much speed or losing control.
The harness approach is particularly effective for children ages 3-5 who have the balance to stand on the board but not the strength or coordination to control it independently. With the harness, the child can focus on maintaining balance and getting the feel of the board sliding on snow, while the parent manages speed and safety. As the child’s confidence and skills develop, the parent can gradually give more slack in the leash, allowing the child to slide faster and more independently.
When using a harness and leash, it’s important to position yourself correctly. Stand directly behind the child, slightly uphill, with the leash held in both hands. Walk or slide behind the child as they descend, maintaining a consistent tension on the leash. If the child starts to go too fast, pull back gently on the leash to slow them down. If they start to fall, let the leash go slack and let them fall naturally — trying to prevent a fall by pulling on the leash can actually make the fall worse.
Some children resist the harness because they want to be “independent.” This is a natural desire and should be encouraged. Once the child has mastered the basic feeling of sliding with the harness, you can begin removing it for short sections, allowing them to slide a few feet on their own before catching up with the harness again. This gradual transition from supported to independent riding builds confidence and skills simultaneously.
The “Magic Carpet” is Your Friend
Avoid the chairlift initially. The Magic Carpet (conveyor belt lift) is far less intimidating. Spend your first few days there.
The Magic Carpet is a conveyor belt lift that transports riders up a gentle slope while they remain standing on their board (or skis). It’s the most beginner-friendly lift system available, and it’s the ideal tool for young children learning to snowboard. Unlike a chairlift, which requires the child to sit down, ride up, and stand up — all while managing their snowboard — the Magic Carpet simply carries them up the hill while they stand in place.
The psychological advantage of the Magic Carpet is significant. Chairlifts can be intimidating for young children, particularly those who are afraid of heights or have never ridden one before. The thought of sitting on a narrow bench 10 feet above the ground while balancing a snowboard can be overwhelming. The Magic Carpet eliminates this anxiety entirely, allowing the child to focus on snowboarding rather than worrying about the lift.
Most beginner areas at ski resorts have a Magic Carpet that services a gentle, wide slope — the perfect learning environment. The slope is typically groomed smooth, with no obstacles or other riders, and the grade is gentle enough that even a child without any snowboarding skills can slide down safely. This controlled environment is ideal for building skills and confidence.
When your child is ready for the chairlift (typically after they can link turns and control their speed on a green run), introduce it gradually. Start with a short, slow chairlift that services an easy green run. Walk through the process: “We’ll slide up to the line, wait our turn, sit down when the chair comes, ride up, and stand up when we see the sign.” Practice sitting down and standing up at home before hitting the resort. And ride the chairlift with your child the first several times, providing guidance and reassurance.
Invest in Lessons
Parents often struggle to teach their own kids due to the emotional dynamic. A professional instructor makes it a game. Read our analysis: are snowboard lessons worth it? The answer is almost always yes for children.
Professional snowboard instruction for children is one of the best investments a parent can make. Instructors are trained in child development, teaching techniques, and safety protocols that most parents simply don’t have. They know how to make learning fun, how to manage frustration, and how to keep children safe on the mountain. And perhaps most importantly, they provide an objective, patient presence that most parents cannot maintain when teaching their own children.
The parent-child dynamic can be a significant obstacle to learning. Parents are emotionally invested in their child’s progress, which can lead to frustration when progress is slow. Children, in turn, may become defiant or anxious when being taught by a parent, as the parent-child relationship carries expectations and dynamics that don’t exist with a stranger. A professional instructor eliminates these dynamics, creating a neutral, supportive environment where the child can learn at their own pace.
Most ski resorts offer group lessons for children, which are both affordable and effective. Group lessons typically have a maximum student-to-instructor ratio of 6:1 or 8:1, ensuring that each child receives individual attention. The group setting also provides social motivation — children often work harder and have more fun when they see other children their age learning the same skills.
Private lessons are more expensive but offer several advantages: more individualized instruction, faster progress, and the ability to schedule lessons at times that work best for your family. Private lessons are particularly valuable for children who are struggling in group settings, have special needs, or are exceptionally advanced for their age.
The Hot Chocolate Rule
This may be the most important tip in this entire guide: establish the “hot chocolate rule” early. The hot chocolate rule states that when the child says they want to stop and have hot chocolate, you stop immediately and go have hot chocolate. No questions, no negotiations, no “just one more run.” The hot chocolate rule accomplishes several things: it respects the child’s autonomy and feelings, it ensures that every session ends on a positive note, and it creates a positive association with the end of the day (hot chocolate and warm cookies are rewards, not punishments for quitting).
The hot chocolate rule also serves a practical purpose. Young children often don’t recognize or can’t articulate the physical signals of cold, hunger, or fatigue. By the time they say “I’m cold” or “I’m tired,” they may already be hypothermic or exhausted. The hot chocolate rule encourages frequent breaks, which prevents these problems from developing in the first place.
Make the First Day About Gear, Not Snowboarding
For very young children (under 4), consider making the first day entirely about getting used to the gear and the mountain environment, with no expectation of snowboarding at all. Put on the boots, walk around in them, put on the helmet, carry the board around, ride the Magic Carpet up and down a few times. If the child ends up sitting on the board and sliding a few feet, that’s great. If they don’t, that’s also fine. The goal is familiarity and comfort, not skill development.
Some parents find it helpful to do a “gear day” before the first day on the mountain. Put on all the gear at home and practice walking around, sitting down, standing up, and falling (onto a soft surface like a bed or couch). This pre-familiarization can significantly reduce the anxiety and discomfort of the first day on the mountain, as the child already knows how the gear feels and moves.
Kids Snowboard Sizing Guide
Choosing the right size snowboard for your child is critical for their comfort, safety, and progression. A board that’s too long will be difficult to control and may cause frustration, while a board that’s too short will lack stability and may feel “twitchy” at speed.
The most common method for sizing a child’s snowboard is the chin-to-nose method. When the child stands the board upright on its tail, the nose of the board should reach somewhere between their chin and their nose. A board that reaches the chin is easier to control and better for beginners, while a board that reaches the nose provides more stability at speed and is better for progressing riders.
However, the chin-to-nose method is just a guideline. Other factors that influence board size include the child’s weight, riding style, and the type of terrain they’ll be riding. Heavier children may need a slightly longer board to provide adequate surface area for float, while lighter children may need a shorter board for easier control. Children who plan to ride in the terrain park may prefer a shorter board for easier spinning and maneuvering, while children who plan to ride on groomed runs may prefer a longer board for stability.
| Child’s Height | Recommended Board Length | Approximate Age Range |
|---|---|---|
| 3’0″ – 3’4″ (91-102 cm) | 80-90 cm | 3-5 years |
| 3’4″ – 3’8″ (102-112 cm) | 90-100 cm | 4-6 years |
| 3’8″ – 4’0″ (112-122 cm) | 100-110 cm | 5-7 years |
| 4’0″ – 4’4″ (122-132 cm) | 110-120 cm | 7-9 years |
| 4’4″ – 4’8″ (132-142 cm) | 120-130 cm | 9-11 years |
| 4’8″ – 5’0″ (142-152 cm) | 130-140 cm | 11-13 years |
Sizing Note
These are general guidelines. Always consult with a professional at a snowboard shop to ensure the best fit for your child. Factors such as weight, boot size, and riding ability can all influence the ideal board size.
Understanding Board Width
In addition to length, board width is an important consideration. Children’s snowboards are typically available in regular width and wide width. The correct width depends on the child’s boot size. A general rule is that the toes and heels of the boots should hang over the edge of the board by about 1-2 centimeters when the board is viewed from the tip or tail. If the boots hang over too much, the board is too narrow; if they don’t hang over at all, the board is too wide.
Most children’s snowboards are designed to accommodate the boot sizes typically associated with their target age range, so width is less of a concern than length for most families. However, if your child has particularly large or small feet for their age, it’s worth consulting with a professional to ensure the board width is appropriate.
Growth Considerations
Children grow quickly, and a board that fits perfectly this year may be too small next year. There are several strategies for managing this. The first is to buy a board that’s slightly larger than the child currently needs, allowing room for growth. The downside is that a board that’s too large can be difficult for a child to control, which can slow their progress and create frustration. The second strategy is to buy a used board and sell it when the child outgrows it, then buy a new (or used) board in the appropriate size. This is often the most practical approach, as it ensures the child always has a properly sized board without the expense of buying new every year.
Some manufacturers offer “grow-with-me” boards that have adjustable bindings or inserts that allow the binding position to be changed as the child grows. These boards can extend the useful life of the board by a year or more, though they may not be as precise as a properly sized board and binding combination.
Lesson Progression: What to Teach and When
Understanding the natural progression of snowboarding skills helps you set realistic expectations and focus on the right skills at the right time.
Phase 1: Comfort and Familiarity (Day 1-2)
The first phase is all about getting comfortable with the gear and the mountain environment. Key skills include:
- Walking in snowboard boots on flat terrain
- Strapping into the board while sitting down
- Standing up on the board from a seated position
- Sliding a few feet on flat ground
- Getting comfortable with being pulled on the board (using a harness or Riglet system)
- Standing on the board while being pulled up a gentle slope on the Magic Carpet
- Sliding down a very gentle slope (with or without a harness)
Don’t expect much more than this in the first day or two. The goal is positive association and comfort, not skill development. If your child ends the first day having slid 10 feet on their own and is asking to do it again tomorrow, you’ve had a huge success.
Phase 2: Balance and Basic Sliding (Day 3-5)
Once the child is comfortable with the gear and the feeling of sliding, the focus shifts to balance and basic sliding skills. Key skills include:
- Standing on the board with knees bent and arms out for balance
- Sliding straight down a gentle slope without falling
- Stopping by sitting down (the “butt stop”)
- Sliding on the heel edge (the beginning of the falling leaf)
- Sliding on the toe edge (usually harder for beginners)
- Basic weight shifting from heel to toe
The “falling leaf” is the cornerstone skill of this phase. The falling leaf is the ability to slide sideways down a slope, shifting weight from one foot to the other to control direction. It’s called the falling leaf because the rider’s path down the slope resembles a leaf falling from a tree — a gentle, side-to-side descent. A child who has mastered the falling leaf can control their speed and direction on gentle slopes, which is a major milestone.
To teach the falling leaf, start on a very gentle slope. Have the child stand on the board in the heel edge position (facing downhill). Ask them to shift their weight to the right foot, which will cause the board to slide to the left. Then ask them to shift their weight to the left foot, which will cause the board to slide to the right. With practice, the child will develop a natural rhythm of shifting weight from side to side, creating the characteristic side-to-side descent of the falling leaf.
Phase 3: Edge Control and Turning (Week 2-4)
Once the child has mastered the falling leaf on both the heel and toe edges, the focus shifts to edge control and basic turning. Key skills include:
- Transitioning from heel edge to toe edge (and vice versa)
- Basic J-turns (turning from one edge to the other in a J-shaped path)
- Linking two turns together (the beginning of S-turns)
- Speed control through turning
- Navigating around obstacles on the slope
Turning is the most complex skill in snowboarding and the one that takes the longest to master. A basic turn involves a sequence of actions: initiate the turn by shifting weight to the new edge, allow the board to rotate across the fall line, complete the turn by bringing the board back to the original edge, and then transition to the next turn. This sequence requires coordination, balance, and timing that many children take weeks or months to develop.
Be patient during this phase. Turning is frustrating for children because it requires them to do multiple things simultaneously. Break the turn down into individual steps and practice each step separately before combining them. Use games and visualization to make the learning process more engaging. For example, imagine the turn is a “C” shape drawn in the snow, or imagine the rider is a clock hand moving from 12 to 3 (for a right turn) or from 12 to 9 (for a left turn).
Phase 4: Linking Turns and Building Confidence (Month 2-6)
Once the child can execute basic turns, the focus shifts to linking turns smoothly and building confidence on more challenging terrain. Key skills include:
- Linking heel-to-toe and toe-to-heel turns in a continuous S-shaped path
- Controlling speed through turn shape (larger turns = slower speed)
- Riding on green runs with confidence
- Getting on and off the chairlift independently
- Navigating around other skiers and riders
- Basic stopping techniques (both heel-side and toe-side stops)
This phase is where the child transitions from “learning to snowboard” to “snowboarding.” They can navigate the mountain independently, choose their own lines, and ride with confidence on beginner terrain. This is an incredibly rewarding phase for both the child and the parent, as the child’s skills and confidence grow rapidly.
The key to success in this phase is repetition. The more turns the child makes, the more natural and automatic they become. Encourage the child to focus on smooth, controlled turns rather than speed. Use courses or gates (even makeshift ones with sticks or poles) to give the child a target for their turns, which helps develop precision and control.
Phase 5: Intermediate Skills and Terrain Expansion (Year 1-2)
Once the child is confidently linking turns on green runs, they’re ready to begin exploring more challenging terrain and developing intermediate skills. Key skills include:
- Riding on blue runs with confidence
- Carving turns (using the board’s edge to create a clean, arcing path)
- Speed control at higher speeds
- Riding in varied conditions (crud, powder, ice)
- Basic freestyle skills (ollies, small jumps, rails)
- Riding the chairlift with confidence in all weather conditions
Intermediate skills require more strength, coordination, and confidence than beginner skills. Children in this phase are typically older (8+) and have the physical development needed for more aggressive riding. The key to success is gradually increasing the challenge level while maintaining a focus on fun and safety. Don’t push the child into terrain that’s too difficult too quickly; instead, build skills incrementally and celebrate each new milestone.
Child Snowboarding Safety Guide
Safety is the top priority when teaching children to snowboard. While snowboarding is generally a safe sport for children (with fewer injuries per participant than many common childhood activities like cycling or football), there are important safety considerations that parents must understand and address.
Helmet Use
Every child who snowboards should wear a helmet, every time, without exception. This is not negotiable. Children’s brains are still developing, and a head injury can have long-lasting consequences that extend far beyond the immediate injury. A properly fitted helmet reduces the risk of serious head injury by 35-50%, according to research published in the New England Journal of Medicine.
The most common argument against helmet use is that it’s uncomfortable or makes the child too hot. Modern snowboard helmets are designed with ventilation systems that allow air to flow through the helmet, keeping the head cool and comfortable. The weight of a children’s helmet is typically 300-400 grams — roughly the weight of a baseball — which is barely noticeable. And the peace of mind that comes from knowing your child’s head is protected is worth any minor discomfort.
Weather Awareness
Children are more vulnerable to cold-related injuries than adults because they have a higher surface-area-to-mass ratio (meaning they lose heat faster) and because they may not recognize or communicate the early signs of hypothermia or frostbite. Parents must be vigilant about monitoring their child’s condition and taking action at the first sign of trouble.
The key indicators of cold-related distress include: shivering (an early sign of hypothermia), pale or gray skin (a sign of frostbite), clumsiness or loss of coordination (a sign of hypothermia), and confusion or disorientation (a late sign of hypothermia). If you observe any of these signs, immediately take the child indoors, remove wet clothing, and warm them gradually with blankets, warm drinks, and skin-to-skin contact if necessary.
To prevent cold-related injuries, dress your child in layers that can be adjusted as conditions change. Start with a moisture-wicking base layer, add an insulating mid-layer, and top with a waterproof outer layer. Cover all exposed skin with mittens, a neck gaiter or balaclava, and a hat (under the helmet). Apply sunscreen to any exposed skin, as UV radiation is intensified by reflection off snow. And take frequent breaks indoors to warm up and hydrate.
Hydration and Nutrition
Dehydration is a common and often overlooked risk in snowboarding. The combination of physical exertion, dry mountain air, and cold temperatures causes the body to lose water through respiration and perspiration at a rate that most people don’t notice. Children are particularly susceptible because they’re less likely to recognize or respond to thirst signals when they’re focused on snowboarding.
Encourage your child to drink water regularly throughout the day, even if they don’t say they’re thirsty. A good rule of thumb is to offer water every 30-45 minutes during active snowboarding. Avoid sugary drinks and caffeine, which can contribute to dehydration. Pack plenty of water bottles and keep them accessible in a backpack or in the child’s jacket pocket.
Nutrition is equally important. Snowboarding is physically demanding, and children need adequate fuel to maintain their energy and focus. Pack high-energy, easy-to-eat snacks like trail mix, energy bars, fruit, and cheese sticks. Offer snacks every 60-90 minutes throughout the day. Avoid heavy meals that can cause sluggishness, and save the big meal for after the day on the slopes.
Collision Prevention
Collisions with other skiers, snowboarders, trees, and obstacles are the most common cause of serious snowboarding injuries. Teaching children to be aware of their surroundings and to follow the Skier’s Responsibility Code is essential for preventing collisions.
The Skier’s Responsibility Code includes several rules that are particularly relevant for children: always stay in control (which means being able to stop or avoid other people or objects), people ahead of you have the right of way (which means don’t ride directly behind or above another person), and stop only where you are visible from above and where you are not obstructing the trail (which means don’t stop in the middle of a run or just below a blind spot).
Teach your child to look uphill before starting downhill or merging onto a trail. Teach them to use hand signals when turning or stopping. Teach them to stay to the side of the trail when resting, not in the middle. And teach them to avoid stopping in blind spots, such as just below a roller or around a corner. These simple habits can prevent most collisions.
Emergency Preparedness
Before heading to the mountain, make sure your child knows what to do if they get separated from you. Establish a meeting point (such as the base lodge or a specific landmark) and make sure your child knows how to get there. Make sure your child knows their full name, your full name, and your phone number. Consider writing this information on a card and placing it in the child’s jacket pocket.
Teach your child to identify ski patrol members (they wear red jackets with white crosses) and to approach them if they need help. Teach them to stay put if they get lost, rather than wandering around looking for you. And make sure your child has a way to contact you — either a cell phone (for older children) or a simple walkie-talkie.
Weather and Conditions: Keeping Kids Warm and Happy
Understanding mountain weather patterns and how they affect your child’s comfort and safety is essential for successful family snowboarding trips. Mountain weather can change rapidly, and being prepared for a range of conditions is key to keeping your child comfortable and happy throughout the day.
Temperature Considerations
Children are more sensitive to cold than adults, and the temperature on the mountain is typically 10-15 degrees colder than at the base area due to the elevation difference. A day that starts at 30°F (-1°C) at the base may feel like 20°F (-7°C) at the summit, and wind chill can make it feel even colder.
The key to keeping children warm is layering. A three-layer system provides the best balance of warmth, moisture management, and versatility. The base layer (worn next to the skin) should be made of moisture-wicking material (merino wool or synthetic) to pull sweat away from the body. The mid-layer (insulating layer) should provide warmth without bulk — fleece or down are excellent choices. The outer layer (shell) should be waterproof and windproof to protect against snow, rain, and wind.
Extremities (hands, feet, face) are most vulnerable to cold and require special attention. Mittens are warmer than gloves (as discussed earlier), and hand warmers can provide extra warmth on very cold days. Warm, moisture-wicking socks (wool or synthetic, not cotton) keep feet comfortable, and toe warmers can be a lifesaver for children with cold-prone feet. A neck gaiter or balaclava protects the face from wind and cold, and can be pulled up over the nose and cheeks on particularly cold or windy days.
Wind Protection
Wind is often more problematic than cold temperatures, as it dramatically accelerates heat loss from the body. Wind chill can make a 20°F (-7°C) day feel like 0°F (-18°C) or colder. Children, with their smaller body mass and higher surface-area-to-mass ratio, are particularly vulnerable to wind chill.
To protect against wind, make sure your child’s outer layer is windproof. A windproof jacket and pants block wind from penetrating the clothing, preserving the warm air trapped by the insulating layers underneath. A helmet with a built-in chin guard or a balaclava provides wind protection for the face and neck. Goggles protect the eyes and surrounding skin from wind and snow.
On particularly windy days, consider adjusting your plans. Wind-exposed areas (ridges, peaks, open bowls) will be much colder than sheltered areas (tree runs, lower slopes). Choose runs that are protected from the wind, and take more frequent breaks indoors to warm up.
Sun Protection
Sun protection is often overlooked in winter, but UV radiation is a significant concern at mountain elevations. The sun’s rays are more intense at higher elevations, and snow reflects up to 80% of UV radiation, effectively doubling the exposure. Children’s skin is more sensitive to UV radiation than adult skin, making sun protection particularly important.
Apply a broad-spectrum sunscreen (SPF 30 or higher) to all exposed skin, including the face, ears, and neck. Reapply every 2 hours, or more frequently if the child is sweating or if the sunscreen has been wiped off by goggles or a neck gaiter. Lip balm with SPF protects the lips from sun and wind damage.
Goggles serve double duty as sun protection and eye protection. Look for goggles with UV-blocking lenses that filter out 100% of UVA and UVB radiation. Tinted lenses reduce glare from the snow, making it easier for the child to see and navigate the terrain.
Rain and Wet Snow
Rain and wet snow can quickly make a day on the mountain miserable, particularly for children. Wet clothing loses its insulating properties and can lead to rapid heat loss. Waterproof outerwear is essential, but even the best waterproof gear can eventually become saturated in heavy rain or wet snow.
If rain or wet snow is in the forecast, make sure your child’s outerwear has fully taped seams and a waterproof rating of at least 10,000mm. Consider adding a waterproof shell over the child’s jacket and pants for extra protection. Pack extra socks, mittens, and a base layer in a waterproof bag, so you can change the child if they get wet. And be prepared to cut the day short if conditions become too wet or cold.
Best Resorts for Teaching Kids to Snowboard
Choosing the right resort can make or break your family’s snowboarding experience. Not all resorts are created equal when it comes to teaching children, and the best resort for an advanced rider may not be the best resort for a beginner child.
What to Look for in a Family-Friendly Resort
- Dedicated learning area: A separate, fenced-off area for beginners with gentle slopes, a Magic Carpet lift, and no through traffic from advanced riders. This provides a safe, controlled environment for learning.
- Quality ski/snowboard school: Look for resorts with certified instructors who specialize in teaching children. Check reviews from other parents and ask about instructor-to-student ratios.
- Childcare facilities: For families with children of different ages, on-site childcare is essential. This allows parents to take turns riding while the younger child is supervised and cared for.
- Kid-friendly amenities: Look for resorts with family restrooms, warming huts, indoor play areas, and restaurants with children’s menus. These amenities make the day more comfortable and convenient for families.
- Ease of access: Resorts with convenient parking, short walks to the lifts, and minimal stairs or obstacles are easier to navigate with young children and gear.
- Gentle terrain: Resorts with a good progression of terrain — from gentle beginner slopes to easy green runs to intermediate blue runs — allow children to advance at their own pace without being thrown into terrain that’s too difficult.
North American Resorts Known for Families
Several North American resorts are consistently rated as top choices for families teaching children to snowboard. These resorts invest heavily in their children’s programs, maintain excellent beginner terrain, and offer a wide range of family-friendly amenities. When researching resorts, look for those with dedicated children’s learning centers, progression parks (small terrain parks designed for beginners), and family-friendly dining options.
Resorts in the western United States tend to have more consistent snow conditions and more beginner-friendly terrain than eastern resorts, though there are excellent family resorts in both regions. Western resorts also tend to have more spacious learning areas, which can be less intimidating for young children. Eastern resorts, on the other hand, are often more convenient for families in the eastern United States and may be less expensive than their western counterparts.
When choosing a resort, consider the overall experience, not just the terrain. A resort with a charming village, good restaurants, and non-skiing activities (like tubing, ice skating, or swimming) provides more options for families who want to do more than just snowboard. These activities can be valuable alternatives on days when the child is tired, the weather is bad, or the family wants a break from the slopes.
International Options
For families willing to travel, several international resorts are particularly well-suited for teaching children to snowboard. European resorts often have excellent children’s programs, with multi-day instruction that includes lunch and supervision. Japanese resorts are known for their deep powder and unique cultural experience. And resorts in the Southern Hemisphere (Australia, New Zealand, South America) offer the opportunity to snowboard during the Northern Hemisphere’s summer, allowing children to practice year-round.
Common Mistakes Parents Make Teaching Kids to Snowboard
Even well-intentioned parents can undermine their child’s progress by making common mistakes. Understanding these pitfalls can help you avoid them and create a more positive learning experience.
Mistake #1: Pushing Too Hard, Too Fast
The most common mistake parents make is expecting too much too soon. They want their child to be linking turns by the end of day one, riding green runs by day two, and tackling blue runs by day three. This unrealistic timeline leads to frustration for both the child and the parent, and can create negative associations that take months to overcome.
Every child learns at their own pace, and snowboarding is a complex skill that takes time to develop. Some children pick it up quickly; others need weeks or months of practice. Pushing a child beyond their readiness level not only slows their progress (because they’re too stressed or tired to learn effectively) but can also create lasting fear or anxiety around the sport.
Mistake #2: Comparing to Other Kids
Children develop at different rates, and comparing your child’s progress to other children’s progress is counterproductive and potentially damaging. A child who sees their peers progressing faster may become discouraged and lose confidence, which can actually slow their progress. Focus on your child’s individual progress and celebrate their unique achievements, no matter how small they may seem.
Mistake #3: Neglecting Warm-Up and Cool-Down
Just like adults, children benefit from warming up before physical activity and cooling down afterward. A simple warm-up routine — jumping jacks, squats, leg swings — prepares the muscles and joints for the demands of snowboarding and reduces the risk of injury. A cool-down routine — stretching, walking, gentle movements — helps the muscles recover and reduces soreness the next day.
Mistake #4: Ignoring Fatigue
Children fatigue faster than adults, and tired children are more prone to injury and more likely to have meltdowns. Watch for signs of fatigue: slowed reaction time, decreased coordination, irritability, and loss of enthusiasm. When you see these signs, take a break. Pushing a tired child to continue is counterproductive and can ruin the day.
Mistake #5: Forgetting to Hydrate and Fuel
Children are less likely than adults to recognize and respond to thirst and hunger signals, particularly when they’re focused on snowboarding. Make sure to offer water and snacks regularly throughout the day, even if the child doesn’t ask for them. A well-hydrated, well-fed child is a happier, more focused child.
Mistake #6: Not Enough Sunscreen
As discussed in the weather section, UV radiation is a significant concern at mountain elevations. Children’s skin is more sensitive to UV radiation, and the combination of high elevation and snow reflection dramatically increases exposure. Apply sunscreen generously and reapply frequently.
Mistake #7: Dressing Too Warmly
It may seem counterintuitive, but overdressing is a common problem. If a child is dressed too warmly, they’ll sweat excessively, which can lead to damp clothing and rapid heat loss. Dress in layers that can be adjusted as conditions change, and check your child regularly for signs of overheating (sweating, flushed face, complaints of being too hot).
Mistake #8: Using the Wrong Gear
Using gear that’s too big, too small, or inappropriate for the child’s skill level can make learning significantly harder. A board that’s too long is difficult to control; a board that’s too short lacks stability. Boots that don’t fit properly cause pain and discomfort. Take the time to get properly fitted gear, and don’t hesitate to ask for help from knowledgeable staff at a snowboard shop.
Mistake #9: Teaching Your Own Child (Without Professional Help)
While it’s certainly possible to teach your own child to snowboard, the parent-child dynamic can create significant obstacles. Parents may become frustrated when progress is slow, and children may become defiant or anxious when being taught by a parent. A professional instructor can eliminate these dynamics and provide a more effective learning environment. Even if you plan to do most of the teaching yourself, a few professional lessons early on can set the foundation for a positive experience.
Mistake #10: Forgetting to Have Fun
The most important mistake to avoid is forgetting that snowboarding should be fun. If the child isn’t enjoying the experience, nothing else matters. Keep the days short, the snacks plentiful, the encouragement frequent, and the pressure low. The goal is to foster a love for the mountains, not to create a champion. If the child is having fun, everything else will follow.
Snowboarding Fitness and Conditioning for Kids
While children don’t need to train like professional athletes, a basic level of fitness can make the snowboarding experience more enjoyable and reduce the risk of injury. Simple exercises that build balance, coordination, and leg strength can significantly improve a child’s snowboarding ability.
Balance Exercises
Snowboarding requires excellent balance, and children who practice balance exercises before hitting the slopes tend to progress more quickly. Simple balance exercises include: standing on one foot (try to hold for 10-30 seconds), walking along a curb or low wall, standing on a balance board or wobble board, and doing yoga poses like tree pose or warrior III.
Balance exercises can be incorporated into daily routines without any special equipment. Have your child stand on one foot while brushing their teeth. Have them walk along a crack in the sidewalk on the way to school. Have them practice yoga poses during family exercise time. These small, consistent practices build the proprioception and core stability that snowboarding demands.
Leg Strengthening Exercises
Snowboarding requires significant leg strength, particularly in the quadriceps, hamstrings, and calves. Simple exercises that build leg strength include: squats (bodyweight squats are sufficient for most children), lunges (walking lunges or stationary lunges), calf raises (standing on the edge of a step and raising up on the toes), and wall sits (leaning against a wall in a squatted position).
Make leg strengthening exercises fun by turning them into games. Have your child do “squat races” (who can do the most squats in 30 seconds), “lunge walks” (who can lunge the farthest), or “wall sit challenges” (who can hold the wall sit the longest). These competitive games motivate children to work harder and make exercise more enjoyable.
Coordination Exercises
Snowboarding requires the coordination of multiple body parts simultaneously. Exercises that improve whole-body coordination include: jumping rope, catching and throwing a ball, riding a bicycle, and playing sports like soccer or basketball. These activities develop the hand-eye (or foot-eye) coordination and spatial awareness that snowboarding demands.
For younger children (3-5), simpler coordination exercises are more appropriate. Walking on a line drawn on the ground, stepping over small obstacles, and playing games like “Simon Says” (which requires following multi-step instructions while moving) all help develop the coordination skills that snowboarding requires.
Pre-Season Conditioning
If your child is new to snowboarding or hasn’t been active during the off-season, consider a 2-4 week conditioning program before the first day on the slopes. This program should include 3-4 sessions per week of 20-30 minutes, focusing on balance, leg strength, and coordination exercises. The goal is not to create an athlete but to prepare the body for the physical demands of snowboarding and reduce the risk of early-season injuries and soreness.
Nutrition and Hydration on the Mountain
Proper nutrition and hydration are essential for maintaining energy, focus, and comfort during a day of snowboarding. Children are particularly susceptible to dehydration and energy depletion because of their smaller body size and higher metabolic rate.
Pre-Ride Nutrition
A good breakfast is essential for a day on the slopes. The ideal pre-ride meal includes a balance of complex carbohydrates (for sustained energy), protein (for muscle repair and satiety), and healthy fats (for long-term energy). Examples include oatmeal with fruit and nuts, whole-grain toast with peanut butter and banana, or scrambled eggs with whole-wheat toast and avocado.
Avoid sugary cereals, pastries, and candy for breakfast. These foods provide a quick burst of energy followed by a crash, which can leave the child feeling tired and irritable by mid-morning. Complex carbohydrates, on the other hand, provide a steady release of energy that lasts throughout the morning.
On-Mountain Snacking
Plan to offer snacks every 60-90 minutes throughout the day. Pack a variety of easy-to-eat, high-energy snacks: trail mix, energy bars, fruit (apples, bananas, oranges), cheese sticks, crackers, and dried fruit. Avoid heavy, greasy foods that can cause sluggishness, and avoid sugary snacks that cause energy spikes and crashes.
Snack timing is important. Offer a snack before the child becomes hungry, as children may not recognize or communicate hunger signals when they’re focused on snowboarding. A regular snacking schedule maintains energy levels and prevents the mid-morning or mid-afternoon crash that can ruin a day on the slopes.
Hydration Strategies
Dehydration is a common and often overlooked risk in snowboarding. The combination of physical exertion, dry mountain air, and cold temperatures causes the body to lose water through respiration and perspiration at a rate that most people don’t notice. Children are particularly susceptible because they’re less likely to recognize or respond to thirst signals.
Encourage your child to drink water regularly throughout the day, even if they don’t say they’re thirsty. A good rule of thumb is to offer water every 30-45 minutes during active snowboarding. Pack water bottles in an insulated container to prevent them from freezing, and keep them accessible in a backpack or jacket pocket. Avoid sugary drinks and caffeine, which can contribute to dehydration.
Warm drinks are particularly valuable on cold days. Hot chocolate, warm apple cider, or warm water with honey and lemon provide hydration and warmth simultaneously. Many resorts have warming huts or lodges where warm drinks are available, which can serve as both a hydration opportunity and a warm-up break.
Post-Ride Recovery
After a day on the slopes, the body needs to recover. A good post-ride meal should include protein (for muscle repair), carbohydrates (to replenish glycogen stores), and fluids (to rehydrate). Examples include pasta with meat sauce, grilled chicken with rice and vegetables, or a hearty soup with bread. Encourage the child to drink plenty of fluids throughout the evening, as rehydration can take several hours after a day of exertion.
Kid-Friendly Snowboard Terminology Glossary
Teaching your child snowboard terminology helps them communicate with instructors and other riders, and makes the learning process more engaging. Here’s a kid-friendly glossary of essential snowboard terms:
| Term | Kid-Friendly Definition |
|---|---|
| Fall Line | The path a ball would roll straight down the hill. It’s the fastest way down! |
| Heel Edge | The side of the board your heels are on. You use this edge to slow down when facing downhill. |
| Toe Edge | The side of the board your toes are on. You use this edge to slow down when facing uphill. |
| Falling Leaf | Sliding down the hill side-to-side, like a leaf falling from a tree. |
| Regular | Standing on the board with your left foot forward. |
| Goofy | Standing on the board with your right foot forward. |
| Carving | Making smooth, clean turns using the board’s edge, like drawing a line in the snow. |
| Sideslip | Sliding sideways down the hill without turning, like the falling leaf. |
| Skidding | Turning by pushing the board sideways rather than riding on the edge. |
| Edge Catch | When the edge of the board digs into the snow unexpectedly, causing a fall. Ouch! |
| Rocker | A board shape where the middle touches the snow and the tip and tail curve up. Good for beginners! |
| Camber | A board shape where the middle curves up and the tip and tail touch the snow. Good for speed. |
| Magic Carpet | A conveyor belt lift that carries you up the beginner hill. The easiest lift to use! |
| Chairlift | The seat that carries you up the mountain. You sit down, ride up, and stand up at the top. |
| Bunny Hill | The easiest slope at the resort, designed for beginners. Very gentle and wide! |
| Green Run | An easy slope for people who are learning to turn. A step up from the bunny hill. |
| Blue Run | A medium-difficulty slope for people who can already turn. A bit steeper than green. |
| Powder | Fresh, fluffy snow that hasn’t been ridden on. It’s like riding on clouds! |
| Ice | Hard-packed snow that’s slippery. Not fun to fall on! |
| Groomed | Snow that has been smoothed by a machine. Nice and even for riding! |
Budget-Friendly Snowboarding: Saving Money on Kids’ Gear
Snowboarding can be expensive, but there are many ways to save money without compromising safety or quality. Here are the most effective strategies for budget-conscious families.
Buy Used Gear
Children outgrow gear quickly, which means there’s a large market of gently used equipment. Online marketplaces, consignment shops, and local snowboard groups are excellent sources for used boards, boots, and outerwear. When buying used, inspect the equipment carefully for damage, excessive wear, or safety concerns. A used board in good condition is perfectly safe and functional, even if it has some cosmetic scratches.
The most important piece of equipment to buy new is the helmet. Helmets are designed to absorb impact in a single crash, after which their protective capacity is compromised. A used helmet may have been in a previous crash that you can’t see, which means it may not provide adequate protection. Always buy a new helmet.
End-of-Season Sales
The best time to buy snowboard gear is at the end of the season (March-April in the Northern Hemisphere). Retailers are clearing out inventory to make room for spring and summer products, and discounts of 30-50% are common. Buy gear slightly larger than the child currently needs, and they’ll be ready for the next season.
Hand-Me-Downs and Gear Swaps
If you have friends or family members with older children who snowboard, ask about hand-me-downs. Many families have gear that their children have outgrown and would be happy to pass along. Community gear swaps — events where families buy, sell, and trade used gear — are also excellent resources. Check with local ski shops, community centers, or parent groups for upcoming gear swap events.
Rental vs. Purchase
For children who are just starting out, renting gear may be more cost-effective than purchasing. Rental shops offer all the equipment needed — board, boots, and bindings — for a daily or multi-day fee. This is particularly advantageous for very young children who may only use the gear for a few days before outgrowing it. As the child’s interest and commitment become clear, you can transition to purchasing gear.
Multi-Season Gear
Some gear — particularly outerwear — can be used for multiple seasons if it’s purchased in a larger size. A jacket or pair of bibs that’s slightly too big can be worn for 2-3 seasons, making the per-season cost very reasonable. Look for adjustable features like extendable cuffs, adjustable waistbands, and removable liners that extend the useful life of the garment.
Season Passes, Lift Tickets, and Discount Programs
Lift tickets and season passes are a significant expense for snowboarding families. Understanding the various options and discount programs can save you hundreds or even thousands of dollars per season.
Season Passes vs. Day Tickets
If you plan to snowboard more than 5-6 days per season, a season pass is typically more cost-effective than purchasing individual day tickets. Many resorts offer season passes at prices equivalent to 4-6 day tickets, making them a good value for frequent riders. Some resorts offer family season passes or multi-resort passes that provide access to several mountains for a single price.
Kids’ Programs and Free Skiing/Riding
Many resorts offer free or heavily discounted lift tickets for children under a certain age (typically 5-6 and under). Some resorts also offer free lessons or discounted equipment rental for young children. Check the resort’s website or call their ticket office to inquire about children’s programs and pricing.
Multi-Resort Passes
Multi-resort passes like the Epic Pass, Ikon Pass, and Mountain Collective provide access to multiple resorts across the country (and sometimes internationally) for a single price. These passes can be an excellent value for families who travel to different resorts or who live within driving distance of multiple mountains. Many multi-resort passes offer discounted or free passes for children, making them particularly attractive for families.
Lift Ticket Discounts
Several programs offer discounted lift tickets for families. Military discounts, AAA discounts, and corporate discounts are widely available. Some resorts offer discounts for purchasing tickets in advance online, or for purchasing multi-day packages. Loyalty programs and reward credit cards may also offer discounts or cash back on lift ticket purchases.
The Mental Game: Building Confidence and Resilience
Snowboarding is as much a mental sport as a physical one. Building confidence and resilience in your child is just as important as teaching them to turn or stop. Children who develop a positive mental approach to snowboarding are more likely to stick with the sport and enjoy it for a lifetime.
Building Confidence
Confidence comes from mastery — from successfully completing a skill and knowing that you can do it again. The key to building confidence is to start with easy tasks and gradually increase the difficulty as the child’s skills improve. Each successful completion builds a foundation of confidence that supports the next challenge.
Praise effort, not just results. A child who tries hard but doesn’t succeed deserves as much praise as a child who succeeds easily. This teaches the child that effort is valuable in itself, and that failure is not something to be ashamed of. “You tried so hard on that turn! I can see you’re working on keeping your knees bent. Let’s try it again” is much more effective than “You fell down again.”
Set small, achievable goals. Instead of “learn to snowboard,” try “stand on the board for 10 seconds without falling” or “slide 20 feet without sitting down.” Each small goal achieved builds confidence and momentum. Write down the goals and check them off as they’re accomplished — children love the satisfaction of checking items off a list.
Managing Fear
Fear is a natural and healthy response to danger, but it can become counterproductive when it prevents a child from trying new things or progressing. The key to managing fear is to acknowledge it, validate it, and help the child work through it.
Never dismiss a child’s fear. Saying “there’s nothing to be scared of” or “big kids don’t get scared” invalidates the child’s feelings and can damage trust. Instead, acknowledge the fear: “I can see you’re scared. That’s okay. Being scared means you’re trying something new. Let’s figure out how to make it less scary.”
Break scary tasks into smaller steps. If the child is afraid of the chairlift, start by riding the Magic Carpet and looking at the chairlift from below. Then walk to the chairlift line and watch other people ride it. Then stand in the line and ride the chairlift with the parent. Each step brings the child closer to the goal while allowing them to build confidence gradually.
Dealing with Frustration
Frustration is inevitable when learning to snowboard. Children will fall, they will struggle, and they will have days when nothing seems to work. Teaching children to manage frustration is a life skill that extends far beyond snowboarding.
Normalize frustration. Let the child know that everyone gets frustrated when they’re learning something new, and that frustration is a sign that they’re challenging themselves. Share your own experiences with frustration: “When I was learning to snowboard, I fell down so many times I lost count. But I kept trying, and eventually I got better.”
Take breaks when frustration builds. A frustrated child cannot learn effectively, and pushing through frustration often makes the situation worse. Take a break, have a snack, play in the snow, or go inside for hot chocolate. Come back to the challenge when the child has calmed down and is ready to try again.
The Power of Positive Self-Talk
Teaching children to use positive self-talk — talking to themselves in a kind, encouraging way — is one of the most valuable skills you can give them. Instead of “I can’t do this,” encourage them to say “I’m trying my best” or “I’ll get better with practice.” Positive self-talk reduces anxiety, builds confidence, and helps children persist through challenges.
Model positive self-talk yourself. When you fall or make a mistake, narrate your own positive self-talk out loud: “Oops, I fell down. That’s okay, I’ll get up and try again. No big deal.” Children learn by watching, and seeing a parent respond positively to setbacks teaches them to do the same.
Teaching Multiple Kids to Snowboard at Once
Teaching two or more children to snowboard simultaneously presents unique challenges and opportunities. Different ages, different skill levels, and different personalities all factor into the equation. Here’s how to manage the chaos and make it work.
Group Dynamics
The biggest challenge of teaching multiple children is that they develop at different rates. One child may pick up snowboarding quickly while the other struggles. One may be fearless while the other is cautious. One may have the patience for a full day while the other is done after 30 minutes. These differences can create jealousy, frustration, and conflict if not managed carefully.
The key is to celebrate each child’s individual progress and avoid comparisons. Instead of “Your brother is already turning, why can’t you?” try “You’re doing great with your balance! Let’s work on your turns next.” Each child should feel that their efforts are valued and that their progress is being recognized.
Practical Strategies
If the children are close in age and skill level, they can often learn together with the same instruction. If they’re at different levels, consider splitting the day: one child in a morning lesson while the other plays or spends time with a parent, then switch in the afternoon. This ensures that each child receives instruction appropriate for their level without being held back or overwhelmed.
For families with children of very different ages (e.g., a 4-year-old and a 10-year-old), separate instruction is almost always necessary. The 4-year-old needs short sessions with lots of breaks and games, while the 10-year-old may be ready for a full day of instruction and independent riding. Trying to accommodate both in the same session is a recipe for frustration for everyone.
Enlist help when possible. If grandparents, aunts, uncles, or family friends are available to help, assign one adult to each child. This allows each child to receive individual attention and prevents the “herding cats” problem that often arises when one adult is responsible for multiple children on the mountain.
Adaptive Snowboarding for Children with Special Needs
Snowboarding is an inclusive sport that can be enjoyed by children of all abilities. Adaptive snowboarding programs use specialized equipment and instruction techniques to make snowboarding accessible to children with physical, cognitive, or developmental disabilities.
Adaptive Equipment
Adaptive snowboarding equipment includes specialized boards, bindings, and support devices designed to accommodate a wide range of physical abilities. Sit-snowboards (similar to mono-skis) allow riders who cannot stand to snowboard in a seated position. outriggers (hand-held mini-skis) provide balance and support for riders with limited lower-body function. Tether systems allow instructors or parents to control a rider’s speed and direction from behind.
Many adaptive programs also use modified teaching techniques that break snowboarding skills into smaller, more manageable steps. Visual aids, physical prompts, and specialized communication techniques help children with cognitive or developmental disabilities understand and execute snowboarding movements.
Programs and Resources
Several organizations specialize in adaptive snowboarding for children with special needs. These organizations typically offer lessons, equipment, and support at reduced or no cost, and they employ instructors who are specifically trained in adaptive instruction. Check with your local ski resort or search online for adaptive snowboarding programs in your area.
The benefits of adaptive snowboarding extend beyond the physical activity itself. Snowboarding provides children with special needs an opportunity to experience the outdoors, develop confidence, build social connections, and achieve goals they may not have thought possible. For many families, adaptive snowboarding is a transformative experience that opens up a whole new world of possibilities.
Teens and Older Beginners: It’s Never Too Late
If you’re reading this guide and thinking, “My child is 13 and hasn’t started snowboarding yet — is it too late?” the answer is a resounding no. While starting young has advantages, there’s no age limit on learning to snowboard, and teens and older beginners can actually progress very quickly.
Advantages of Starting as a Teen
Teenagers have several advantages over younger children when learning to snowboard. They have greater physical strength, better coordination, longer attention spans, and the ability to understand and execute complex instructions. They can also communicate more effectively with instructors, which leads to more targeted and efficient instruction.
Teens are also more likely to be self-motivated, which is a significant advantage in any learning process. A teenager who wants to learn to snowboard will practice more diligently, take feedback more constructively, and persist through challenges more effectively than a child who is being pushed into it by their parents.
Challenges for Teen Beginners
The main challenge for teen beginners is fear. Teens are more aware of the risks involved in snowboarding, which can create anxiety and hesitation. They may also be self-conscious about being a beginner while their peers are riding confidently. These psychological barriers can be more difficult to overcome than physical challenges.
The best approach for teen beginners is to provide a supportive, non-judgmental environment. Enroll them in a beginner lesson with other teens (many resorts offer teen-specific programs) so they’re learning with peers. Emphasize progress over perfection, and celebrate small victories. And be patient — teens may progress quickly once they overcome their initial fear, but getting past that fear can take time.
Kids and Snowboard Parks: When to Start
Terrain parks — areas with jumps, rails, boxes, and other features — are exciting for kids, but they also present significant risks. Understanding when and how to introduce your child to the park is important for their safety and development.
Prerequisites for Park Riding
Before entering a terrain park, a child should be able to: link turns confidently on blue runs, control their speed in all conditions, stop quickly and reliably, and ride switch (with the opposite foot forward) comfortably. These skills provide the foundation for safe park riding.
A child who cannot consistently link turns or control their speed is not ready for the park, regardless of how enthusiastic they may be. Entering the park without these skills puts the child at risk of serious injury and can also endanger other park users.
Starting Small
Most resorts have a “progression park” or “bunny park” with small, low features designed specifically for beginners. These features — small boxes, low rails, and tiny jumps — allow children to learn park skills in a controlled, low-risk environment. Start here, and only progress to larger features when the child has mastered the small ones.
Teach your child to “scope” features before riding them. This means looking at the feature from multiple angles, observing how other riders are using it, and assessing whether it’s within their ability level. A child who learns to scope features develops good judgment that will serve them well throughout their snowboarding career.
Safety Equipment for Park Riding
Children who ride in terrain parks should wear additional protective equipment beyond a standard helmet. Wrist guards protect against wrist injuries from rail and box falls. Impact shorts cushion the tailbone and hips. Back protectors provide spine protection from hard impacts. And a full-face helmet (or at least a helmet with a chin guard) protects against facial injuries from rail and box contact.
Make sure your child understands that park riding is a privilege that comes with responsibility. They must follow the park rules (one person on a feature at a time, call their drop, clear the landing area), respect other riders, and ride within their ability level. A child who rides recklessly in the park not only puts themselves at risk but also endangers others.
Backcountry Snowboarding with Kids: Safety Considerations
Backcountry snowboarding — riding outside of resort boundaries in unpatrolled, uncontrolled terrain — is an advanced activity that requires specialized knowledge, equipment, and judgment. While it can be a rewarding family activity for experienced riders, it requires careful planning and preparation.
When Is It Appropriate?
Backcountry snowboarding with children is appropriate only when the children are experienced riders with strong skills, good judgment, and the physical fitness needed for backcountry travel. Most experts recommend waiting until children are at least 12-14 years old before introducing them to backcountry riding, and even then, only in gentle, low-risk terrain with experienced adult supervision.
Essential Safety Equipment
Backcountry snowboarding requires specialized safety equipment that is not needed at a resort. This includes avalanche transceivers (beacons), probes, and shovels for every member of the party, regardless of age. Children must be trained in the use of this equipment and must understand the basic principles of avalanche safety.
Additional equipment includes first aid kits, emergency communication devices (satellite messengers or two-way radios), extra food and water, emergency shelter (bivy sacks or space blankets), and appropriate clothing for extended exposure to the elements. The weight of this equipment can be significant for young children, which is another reason to wait until they’re older and stronger before venturing into the backcountry.
Education and Training
Before taking children into the backcountry, all members of the party should complete an avalanche safety course. These courses cover avalanche formation, terrain assessment, rescue techniques, and decision-making. Many organizations offer avalanche courses specifically designed for families, which can be a valuable learning experience for both parents and children.
Children should also be trained in basic wilderness first aid, navigation (map and compass), and emergency communication. These skills are essential for safe backcountry travel and provide a foundation for lifelong outdoor adventure.
From Beginner to Competitor: Youth Snowboard Racing
For children who develop a passion for snowboarding, competitive racing offers a structured path for skill development and achievement. Youth snowboard racing programs are available at many resorts and provide instruction, training, and competition opportunities for riders of all levels.
Introduction to Racing
Most youth racing programs accept children as young as 5-6 years old. At this age, the focus is on fun and skill development rather than competition. Children learn basic racing techniques — carving, speed control, and course navigation — through games and drills. As they progress, they participate in informal races with other program members, building confidence and competitive skills in a supportive environment.
Competitive Pathways
For children who are interested in more serious competition, there are several pathways available. Local race leagues provide regular competition opportunities at a low cost and with minimal travel. Regional and national competitions offer higher levels of competition and the opportunity to be noticed by college recruiters and national team coaches. And for the most talented and dedicated riders, the Olympic path is a possibility, though it requires years of training and sacrifice.
The key to success in competitive snowboarding is to keep it fun. Children who enjoy the sport and are intrinsically motivated will perform better and stick with it longer than children who are driven by external pressure. Encourage your child to set their own goals, celebrate their own progress, and define their own success. Whether they become an Olympic champion or a recreational rider who enjoys weekend trips with friends, the important thing is that they develop a lifelong love for snowboarding.
Travel Tips: Flying with Snowboard Gear and Kids
Taking a snowboarding family vacation by air requires careful planning and preparation. From managing luggage to keeping kids comfortable during the flight, there are many details to consider.
Packing Snowboard Gear
Most airlines allow you to check snowboard equipment (board, boots, and bindings) as a single oversized bag, though additional fees may apply. Use a padded snowboard bag to protect the equipment during transit. Remove bindings from the board if possible, as this reduces the bag’s profile and makes it easier to handle. Pack clothing and soft items around the board for extra padding.
Consider shipping your gear to your destination in advance. Several companies specialize in shipping snowboard equipment to ski resorts, and the cost is often comparable to airline checked bag fees. This eliminates the hassle of checking oversized bags and ensures that your gear arrives at the resort before you do.
In-Flight Comfort for Kids
Long flights with children require preparation. Pack snacks, drinks, entertainment (tablets, books, coloring supplies), and comfort items (blankets, pillows, stuffed animals). Choose seats strategically — bulkhead seats offer more legroom, while window seats provide a view and a place to lean. Dress children in comfortable layers, as cabin temperatures can vary.
If your child is prone to ear pain during takeoff and landing, bring chewing gum or a sippy cup with a drink. The sucking and swallowing motion helps equalize pressure in the ears. For very young children, a pacifier or bottle can serve the same purpose.
At the Destination
Once you arrive at your destination, you’ll need to transport your gear and your children to the resort. Many resorts offer shuttle services from nearby airports, which can be more convenient than renting a car and navigating mountain roads. If you do rent a car, make sure it has adequate cargo space for snowboard equipment and that you’re comfortable driving in potentially snowy conditions.
Consider shipping gear directly to your resort in advance. Many resorts will accept shipped packages and hold them for your arrival. This eliminates the need to carry gear through the airport and on public transportation, and ensures that your equipment is waiting for you when you arrive.
Snowboarding Technology and How It Helps Kids Learn
Advances in snowboarding technology have made the sport more accessible and enjoyable for children. From board design to protective equipment, technology plays a crucial role in helping kids learn to snowboard safely and effectively.
Board Technology
Modern children’s snowboards incorporate several technological advances that make learning easier. Rocker profiles (reverse camber) reduce edge catches and make turning easier. Softer flex patterns require less physical effort to control. Lighter cores reduce fatigue and make the board easier for small children to handle. And catch-free edge technology (such as Burton’s “Easy Bevel”) dramatically reduces the frequency and severity of edge-catch falls.
Some manufacturers have introduced “smart boards” with embedded sensors that track the rider’s movements and provide real-time feedback through a smartphone app. While these are primarily marketed at adult riders, the data they provide can be valuable for understanding a child’s riding habits and identifying areas for improvement.
Boot Technology
Children’s snowboard boots have benefited from advances in materials and closure systems. Thermo-moldable liners conform to the child’s foot shape, providing a custom fit that improves comfort and control. BOA closure systems allow micro-adjustable fit with a simple twist of a dial, making it easy for children to tighten or loosen their boots independently. And improved insulation materials (such as Thinsulate and PrimaLoft) provide warmth without bulk, keeping little feet warm and comfortable.
Protective Equipment
MIPS technology in helmets provides enhanced protection against rotational forces, which are the primary cause of concussions in snow sports. Impact shorts with D3O padding (a material that’s soft and flexible during normal use but hardens on impact) provide protection without restricting movement. And wrist guards with anatomically designed splints distribute impact force across a wider area, reducing the risk of fractures and sprains.
Communication Devices
Walkie-talkies and two-way radios allow parents and children to communicate on the mountain without cell phone service. Some advanced models include GPS tracking, which allows parents to monitor their child’s location in real time. For older children who have their own smartphones, GPS tracking apps provide similar functionality.
Summer Training: Off-Season Snowboarding Prep for Kids
The snowboarding season doesn’t last forever, but that doesn’t mean your child’s development has to stop. Off-season training helps maintain skills, build fitness, and keep the excitement alive for the next season.
Skateboarding
Skateboarding is one of the best off-season activities for young snowboarders. The balance, coordination, and board control skills developed through skateboarding translate directly to snowboarding. Skateboarding also develops the ankle strength and flexibility needed for snowboard boot comfort and control. Many professional snowboarders credit their skateboarding background as a key factor in their development.
Trampoline Training
Trampolines develop air awareness, balance, and body control — skills that are valuable for snowboarding, particularly in the terrain park. Simple trampoline exercises like jumping, spinning, and landing in different positions help children develop the spatial awareness and body control needed for aerial maneuvers. Always prioritize safety: use a trampoline with safety padding and a net enclosure, and supervise children at all times.
Surfing and Wakeboarding
Surfing and wakeboarding share many fundamental skills with snowboarding: balance, edge control, and weight shifting. These board sports develop the same muscle groups and movement patterns as snowboarding, making them excellent cross-training activities. Even stand-up paddleboarding (SUP) provides valuable balance and core stability training.
Fitness Training
Off-season fitness training should focus on the physical attributes that snowboarding demands: balance, leg strength, core stability, and cardiovascular endurance. A balanced program that includes a mix of aerobic exercise (running, swimming, cycling), strength training (squats, lunges, core exercises), and flexibility work (yoga, stretching) will prepare the child’s body for the demands of the upcoming season.
Visualization and Mental Training
The off-season is also a good time for mental training. Watching snowboarding videos, studying techniques, and visualizing skills can keep the mental aspects of snowboarding sharp. Some children benefit from keeping a snowboarding journal, where they record their goals, progress, and observations from the previous season. This practice builds self-awareness and goal-setting skills that serve them well both on and off the mountain.
First Aid and Emergency Preparedness on the Mountain
Accidents happen, and being prepared to respond to injuries and emergencies is an essential part of responsible parenting on the mountain. Knowing basic first aid and having the right supplies on hand can make the difference between a minor inconvenience and a serious problem.
Basic First Aid Kit
Every family should carry a basic first aid kit on the mountain. Essential items include adhesive bandages (various sizes), gauze pads and medical tape, antiseptic wipes, antibiotic ointment, pain reliever (acetaminophen or ibuprofen, in child-appropriate doses), hand warmers, emergency blanket, whistle, and a small flashlight. Pack these items in a waterproof bag that’s easily accessible in a jacket pocket or backpack.
Common Injuries
The most common snowboarding injuries in children are wrist fractures, ankle sprains, and bruises. Wrist fractures typically occur when the child falls on an outstretched hand, which is why wrist guards are recommended for children 7 and older. Ankle sprains can occur when the boot is too loose or when the child catches an edge. Bruises are inevitable and usually minor.
More serious injuries — including concussions, knee ligament tears, and spinal injuries — are rare in young children but can occur. If your child hits their head, watch for signs of concussion: headache, dizziness, confusion, nausea, or loss of consciousness. If any of these signs are present, remove the child from the slopes immediately and seek medical attention. Do not allow the child to return to activity until they have been cleared by a medical professional.
When to Call for Help
Ski patrol is available at every resort to respond to injuries and emergencies. If your child is injured, stay calm, keep them warm and comfortable, and call for ski patrol. Most resorts have emergency phone numbers posted at lift stations and patrol shacks, or you can ask any resort employee for assistance. Ski patrol members are trained in first aid and emergency response and can provide immediate care and transport to a medical facility if needed.
Building a Snowboarding Community with Your Kids
Snowboarding is more fun with friends, and building a community of fellow snowboarding families can enhance your child’s experience and deepen their love for the sport.
Local Snowboarding Groups
Many communities have local snowboarding groups or clubs that organize group trips, social events, and races. These groups provide an opportunity for your child to meet other young snowboarders, make friends, and develop a sense of belonging. Check with your local ski resort, snowboard shop, or community center for information about local groups.
Snowboard Team Programs
Many resorts offer snowboard team programs for children and teens. These programs provide structured instruction, training, and competition opportunities in a supportive group environment. Team programs also provide social connections and mentorship opportunities that can be valuable for a child’s development both on and off the mountain.
Online Communities
Online forums, social media groups, and video-sharing platforms provide opportunities for young snowboarders to connect with others who share their passion. These communities can be a source of inspiration, information, and friendship for children who live in areas with limited snowboarding opportunities. As always, monitor your child’s online activity and ensure that their participation in online communities is safe and positive.
Family Traditions
Creating family traditions around snowboarding can deepen the bond between family members and create lasting memories. Family traditions might include an annual trip to a favorite resort, a “first day of season” celebration, or a post-ride hot chocolate ritual. These traditions give children something to look forward to and create a sense of continuity and identity around the sport.
Long-Term Development: From Beginner to Lifetime Rider
The goal of introducing your child to snowboarding is not to create a professional athlete (though that’s certainly a possibility for some). The goal is to foster a lifelong love for the outdoors, physical activity, and the mountain environment. Here’s how to support your child’s development over the long term.
Setting Realistic Expectations
Every child develops at their own pace, and comparing your child’s progress to other children’s progress is counterproductive. Some children will progress quickly through the skill levels; others will take longer. Some children will develop a passion for racing; others will prefer freestyle riding; others will simply enjoy cruising with friends. All of these paths are valid, and the most important thing is that the child is enjoying the experience.
Providing Opportunities
As your child’s interest and skills develop, provide opportunities for them to expand their horizons. This might mean enrolling them in more advanced lessons, taking them to new resorts, introducing them to different types of riding (backcountry, park, racing), or connecting them with mentors and role models. The key is to match the opportunity to the child’s interest and readiness level, not to force them into a path that doesn’t align with their goals.
Balancing Snowboarding with Other Activities
While it’s great for children to develop a passion for snowboarding, it’s also important for them to have a balanced life that includes other activities, interests, and relationships. Encourage your child to participate in other sports, pursue other interests, and maintain friendships outside of the snowboarding community. A well-rounded child is a happier, healthier child, and they’re more likely to maintain their interest in snowboarding over the long term.
Celebrating Milestones
Every milestone in a child’s snowboarding journey is worth celebrating. The first time they stand on the board. The first time they slide 10 feet. The first time they link turns. The first time they ride the chairlift alone. The first time they ride a blue run. Each of these milestones represents progress, effort, and courage, and celebrating them reinforces the child’s sense of achievement and motivation.
Celebrations don’t need to be extravagant. A high-five at the bottom of the run, a hot chocolate with whipped cream, a special sticker on their helmet, or a phone call to grandparents to share the news are all meaningful ways to acknowledge achievement. The key is to be specific and genuine: “I’m so proud of you for linking those two turns! I could see how hard you were concentrating, and it really paid off.”
Teaching Environmental Responsibility on the Mountain
The mountains are a precious natural resource, and teaching children to respect and protect the environment is an important part of the snowboarding experience. Environmental stewardship can be woven into every aspect of a family’s time on the mountain.
Leave No Trace
Teach your child the Leave No Trace principles: take only pictures, leave only footprints, and pack out all trash. Make sure your child understands that the mountain is a shared resource and that everyone has a responsibility to keep it clean and beautiful. Carry a small trash bag and pick up any litter you find on the slopes, even if it’s not yours.
Respect Wildlife
Mountain environments are home to a variety of wildlife, including deer, elk, birds of prey, and small mammals. Teach your child to observe wildlife from a distance, to never feed wild animals, and to stay on marked trails to minimize habitat disturbance. These lessons extend beyond snowboarding and build a lifelong respect for nature.
Energy Conservation
Snowmaking, lift operations, and lodge heating all consume significant energy. Teach your child about energy conservation by turning off lights when leaving a room, recycling where facilities are available, and choosing resorts that demonstrate environmental responsibility through sustainable practices.
Climate Change Awareness
Climate change threatens the future of snowboarding by reducing snowfall, shortening seasons, and increasing the frequency of warm, wet conditions that are unsuitable for riding. Teaching children about climate change and its impact on the mountains they love can motivate them to become advocates for environmental protection. This is a sensitive topic that should be approached in age-appropriate ways, focusing on solutions and empowerment rather than fear and doom.
Kids Snowboard Gear Maintenance and Care
Proper maintenance of snowboard gear extends its useful life, maintains its performance, and saves money. Teaching children to care for their equipment is also a valuable life lesson in responsibility and respect for possessions.
Board Maintenance
After each day on the slopes, wipe down the base of the board with a dry cloth to remove snow and moisture. Store the board in a cool, dry place away from direct sunlight, which can damage the base and bindings. At the beginning of each season, have the board professionally tuned — this includes waxing the base, sharpening the edges, and checking for damage.
Teach your child to avoid riding over rocks, stairs, or other hard surfaces that can damage the base or edges. And teach them to store their board properly after each session, rather than leaving it in the trunk of the car or leaning against a wall where it can be damaged.
Boot Care
After each use, remove the insoles from the boots and allow them to dry separately. Open the boots fully to allow air circulation, and store them in a cool, dry place. Avoid placing boots near a heater or in direct sunlight, as excessive heat can damage the materials and adhesives.
If the boots become wet inside, stuff them with newspaper or a towel to absorb the moisture, and allow them to dry overnight. Remove the liner from the shell (if possible) to speed drying. At the end of the season, clean the boots with a damp cloth and store them in a breathable bag or box.
Outerwear Care
Follow the manufacturer’s care instructions for washing and drying snowboard outerwear. Most outerwear can be machine washed in cold water with a mild detergent. Avoid fabric softeners, which can damage the waterproof coating. Dry on low heat or hang dry. Reapply DWR (durable water repellent) coating periodically to maintain waterproofing.
Binding Maintenance
Check binding screws and hardware at the beginning of each season and tighten as needed. Inspect straps and ratchets for wear or damage, and replace as necessary. Clean bindings with a damp cloth and allow them to dry before storing. If the binding has adjustable highbacks or ankle straps, check the settings at the beginning of each season to ensure they’re appropriate for the child’s current boot size and riding style.
Photographing Your Kids Snowboarding
Capturing your child’s snowboarding moments preserves memories and provides motivation and inspiration. Here are some tips for taking great photos and videos of your young rider.
Camera and Equipment
A waterproof camera or camera housing is essential for shooting in snowy conditions. Action cameras (like GoPro or similar brands) are excellent for capturing on-board footage and point-of-view shots. For still photos, a camera with a fast shutter speed (1/1000 or faster) will freeze the action and capture crisp images of your child in motion.
Keep spare batteries warm in an inside pocket, as cold temperatures drain batteries quickly. Bring extra memory cards, as you’ll likely take more photos than you expect. And consider bringing a small tripod or monopod for stability, particularly when shooting in low-light conditions (early morning or late afternoon).
Shooting Tips
Position yourself where you can see your child’s face, not just the back of their helmet. Shoot from a low angle to make the action look more dramatic and to capture the mountain backdrop. Use continuous shooting mode (burst mode) to capture multiple frames in quick succession, increasing your chances of getting the perfect shot.
Don’t just photograph the action. Some of the best photos capture the quiet moments: putting on boots, riding the Magic Carpet, sipping hot chocolate, or gazing at the mountain from the lodge. These candid moments tell the story of the day and capture the emotions that make snowboarding special.
Video Tips
If you’re shooting video, use a stabilizer (gimbal or steady-cam) to reduce camera shake. Keep videos short — 30 seconds to 2 minutes is ideal for sharing on social media. Include context: a shot of the resort sign, the chairlift ride up, and the run down tells a complete story. And don’t forget to capture audio — the sound of the board on snow, the child’s laughter, and the ambient mountain sounds add depth and atmosphere to your videos.
Snowboarding Insurance and What Parents Need to Know
Understanding insurance coverage for snowboarding injuries is an important aspect of responsible parenting on the mountain. While most injuries are minor, it’s good to be prepared for the unexpected.
Health Insurance
Make sure your child’s health insurance is current and provides adequate coverage for injuries that may occur while snowboarding. Review your policy to understand coverage limits, deductibles, and any exclusions that may apply to sports injuries. If your policy has limitations, consider purchasing supplemental coverage for the duration of your trip.
Travel Insurance
If you’re traveling to snowboard, travel insurance can provide coverage for trip cancellation, medical emergencies, and equipment loss or damage. This is particularly valuable for families who are investing significant money in a vacation. Read the policy carefully to understand what is and isn’t covered, and make sure the coverage limits are adequate for your needs.
Equipment Insurance
Snowboard equipment is expensive, and damage or theft can be a significant financial setback. Some homeowner’s or renter’s insurance policies cover snowboard equipment, but coverage limits may be low and deductibles may be high. Consider purchasing a separate equipment insurance policy or a rider on your existing policy if you have expensive gear.
Resort Liability
When you purchase a lift ticket, you typically sign a liability waiver that releases the resort from responsibility for injuries that occur on the mountain. This doesn’t mean the resort is never liable — if the resort was negligent in maintaining the terrain or lifts, they may still be held responsible. But it does mean that you assume the primary risk for injuries that occur during normal snowboarding activity.
Understanding these insurance considerations helps you make informed decisions about coverage and ensures that your family is protected in case of an unexpected injury or emergency.
Frequently Asked Questions
Is 3 years old too young to snowboard?
No, 3 is not too young thanks to modern equipment like the Burton Riglet system. While they won’t be carving down mountains, children at this age can learn balance, sliding, and getting comfortable with the gear.
Should a child learn to ski before snowboarding?
This is an outdated myth. While skiing was historically easier for toddlers due to leg independence, modern soft-flex snowboards and rocker profiles make learning to ride sideways just as accessible for young children. Start with what they want to do.
How do I know if my child is Goofy or Regular?
Watch them slide on a hardwood floor in socks. Which foot do they put forward naturally? That is likely their lead foot. You can read more in our goofy vs regular snowboard guide.
How long should a snowboarding lesson be for a 5-year-old?
Keep it short. For ages 3-6, focused attention spans rarely last longer than 45 minutes to an hour. It is better to have multiple short sessions with hot chocolate breaks than one long, exhausting lesson.
Can a 2-year-old snowboard?
A 2-year-old can be introduced to snowboarding through the Riglet system, where they ride on the board while being pulled by a parent. At this age, the focus is on fun and familiarity, not skill development. Some children love it; others are not interested yet. Both are fine.
Is snowboarding dangerous for kids?
Snowboarding carries a risk of injury, as does any physical activity. However, with proper equipment (especially a helmet), appropriate terrain, and professional instruction, snowboarding is a relatively safe sport for children. The most common injuries are minor bruises and scrapes. Serious injuries are rare when safety precautions are followed.
How much does it cost to get a kid started in snowboarding?
Costs vary widely depending on whether you buy new or used gear, rent equipment, and purchase lesson packages. A rough estimate for a first-season setup (board, boots, bindings, helmet, outerwear) ranges from $300-800 for used gear to $800-2000+ for new. Lift tickets and lessons add additional costs. Many resorts offer discounted kids’ packages that bundle lessons, rental gear, and lift tickets.
How long does it take a child to learn to snowboard?
This varies enormously by age, athletic ability, and frequency of practice. A motivated 8-year-old might link turns in 2-3 days. A 4-year-old might take several weeks of weekend sessions to reach the same level. The key is patience and consistent practice, not speed of progression.
Should my child wear wrist guards?
For children 7 and older, wrist guards are highly recommended. They significantly reduce the risk of wrist fractures, which are the most common serious snowboarding injury. For younger children, wrist guards can be difficult to fit and may be uncomfortable. Instead, teach young children to fall safely by tucking and rolling rather than reaching out with their hands.
What age can kids start snowboard racing?
Many resorts offer introductory racing programs for children as young as 5-6. At this age, the focus is on fun and skill development rather than competition. More serious competitive racing typically begins around age 8-10, when children have the skills and maturity to handle a competitive environment.
Is it better to buy or rent snowboard gear for kids?
For children who are just starting out, renting is often more practical and cost-effective. Children outgrow gear quickly, and renting allows you to always have properly sized equipment. Once your child is committed to the sport and has stopped growing rapidly (usually around age 10-12), purchasing gear makes more sense.
Can children snowboard in powder?
Absolutely! Many young riders love powder snow. The key is to use a wider board that provides more float, and to teach the child to lean back slightly to keep the nose of the board above the snow. Powder is actually more forgiving than groomed snow in some ways, as falls are softer and edge catches are less common.
How do I keep my child motivated to keep snowboarding?
Motivation comes from fun, progress, and social connection. Keep sessions short and enjoyable, celebrate progress (no matter how small), and provide opportunities for your child to ride with friends. Avoid pressuring your child or comparing them to others. Let them set their own pace and define their own goals.
What’s the best snowboard brand for kids?
Several brands make excellent children’s snowboards, including Burton, K2, Ride, Rossignol, and Salomon. The “best” brand depends on your child’s size, skill level, and riding style. Visit a local snowboard shop and ask for recommendations based on your child’s specific needs.
Final Thoughts: Starting Your Family’s Snowboarding Journey
The “best” age to teach a child to snowboard is simply the age when they are excited to try it. Whether that is 3 years old in the living room or 10 years old on the mountain, the goal is to foster a love for winter.
Don’t pressure them. Keep the days short, the snacks plentiful, and the gear warm. Before you know it, you won’t be teaching them; you’ll be trying to keep up with them.
Remember that every child’s journey is unique. Some will take to snowboarding naturally, while others will need more time and encouragement. Some will become competitive racers or park riders, while others will simply enjoy cruising with family and friends. All of these paths are valid, and the most important thing is that your child develops a positive relationship with the sport and the mountain environment.
As you embark on this journey, keep the following principles in mind:
- Safety first, always. Helmets are non-negotiable. Proper gear is essential. Professional instruction is recommended.
- Fun is the foundation. If the child isn’t having fun, nothing else matters. Keep it light, keep it short, keep it positive.
- Patience is a virtue. Learning to snowboard takes time. Celebrate small victories and don’t compare your child to others.
- Progress, not perfection. Every child develops at their own pace. The goal is lifelong enjoyment, not Olympic glory.
- The mountain is a classroom. Snowboarding teaches resilience, courage, patience, and appreciation for nature. These lessons extend far beyond the slopes.
The mountains are calling, and your future shred partner is waiting. Whether it’s today, next season, or a few years from now, the adventure is worth the wait. And when that day comes — when you’re standing at the top of a run, watching your child drop in with a grin on their face — you’ll know that every cold finger, every early morning, and every hot chocolate break was worth it.
Ready to gear up? Check out when is the best time to buy snowboarding gear to save money on kids’ equipment that they will inevitably outgrow next season.
Start the journey today.
Shop Kids’ Snowboard Gear on Amazon


