
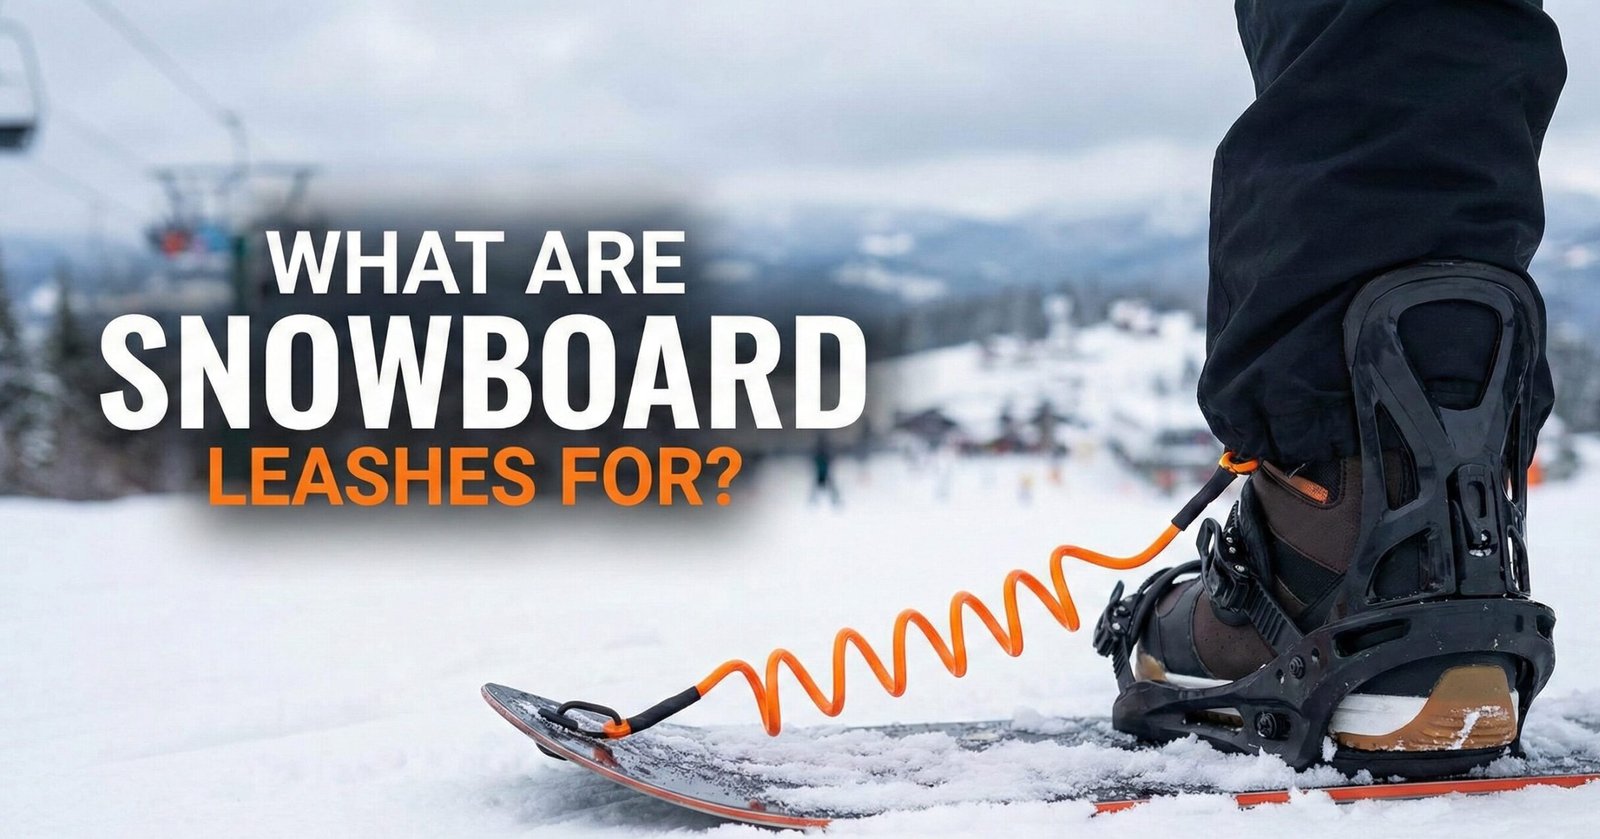
What Are Snowboard Leashes For? The Ultimate Safety Guide
Imagine standing at the top of a steep, groomed run. You bend down to strap in, and your gloves fumble with the buckle. Suddenly, your board slips from your hand. In an instant, it transforms from a piece of sporting equipment into a 15-pound missile, accelerating to 40mph down the slope, heading straight for a crowded lift line.
This nightmare scenario is exactly what a snowboard leash is designed to prevent. While often considered a relic of the 90s, leashes are making a major comeback due to modern binding technologies like Burton Step Ons. Whether you are wondering when is the best time to buy snowboarding gear or simply checking the safety rules for your next trip, understanding this simple accessory is crucial.
A snowboard leash is a retention device (usually a strap, coil, or clip) that tethers your front boot to your snowboard binding. Its primary purpose is to prevent a “runaway board” if the board detaches from your foot or slips out of your hands while strapping in. It is the snowboard equivalent of the “brake” found on skis.
The Physics of the “Runaway Missile”
To understand why leashes exist, we have to look at why snowboarding differs from skiing in terms of mechanics. Skis have mechanical brakes: two prongs that snap down into the snow when the boot releases, stopping the ski instantly. Snowboards do not.
A snowboard has a large, flat, waxed surface area (a sintered or extruded base) designed for maximum glide. If a board gets loose on a 30-degree slope, gravity takes over. Without a leash, there is nothing to stop it until it hits a tree, a building, or tragically, another person. This is one reason why snowboarding is dangerous if proper safety protocols aren’t followed.
How Fast Can a Runaway Snowboard Go?
Physics tells us that an uncontrolled snowboard on a steep slope will accelerate rapidly. A typical snowboard weighs between 6 and 15 pounds depending on length and construction. On a 30-degree slope with a waxed base, a loose board can reach speeds of 30 to 45 miles per hour within seconds. On steeper terrain—like a black diamond or double black run—that speed can exceed 50 miles per hour. At those velocities, the board carries enough kinetic energy to cause serious injury or even death on impact.
The aerodynamic profile of a snowboard also contributes to the problem. Unlike a round object that might roll unpredictably, a flat board tends to glide in a straight line, making it surprisingly accurate as a projectile. It will follow the fall line of the slope with terrifying precision. In crowded areas near lift lines, beginner zones, and terrain parks, this creates an extreme hazard for bystanders who have no warning and no way to dodge a silent, fast-moving board.
Why Snowboards Lack Built-In Brakes
You might wonder why manufacturers don’t simply add brakes to snowboards the way they exist on ski bindings. The answer comes down to design philosophy and physics. Snowboard bindings are designed to hold your boot firmly in place throughout the entire ride. Unlike ski bindings, which release under torque to prevent knee injuries, snowboard bindings are meant to stay locked. The highback, ankle strap, and toe strap work together to transfer every ounce of your body weight directly to the board’s edge.
Adding a brake mechanism would require a fundamental redesign of the binding interface. It would add weight, complexity, and potential failure points to a system that is valued for its simplicity and reliability. For these reasons, the snowboard industry has chosen to address the runaway board problem through education, resort rules, and the simple retention device we call a leash.
Do Resorts Still Require Leashes? (The Legal Reality)
This is a common point of confusion. If you read the fine print on the back of your lift ticket at major resorts in Colorado or Europe, you will often see a clause stating that a “retention device” is required.
The Reality:
For traditional strap bindings, lifties rarely enforce this rule anymore. The logic is that your foot is strapped in so securely that the board is unlikely to pop off. However, legally, the rule stands. If your board *does* run away and injure someone, the lack of a leash could be a major liability factor against you.
The Exception (Step-On Bindings):
With the explosion of step-in systems like the Burton Step On or Nidecker Supermatic, leashes are mandatory again. Because there are no straps to manually tighten, if the mechanism fails (rare) or you miss the engagement point while stepping in, the board is loose. These systems almost always ship with a leash included.
Resort Liability Laws: What You Need to Know
Every ski resort in North America operates under what is known as the “Inherent Risk Doctrine.” This legal framework, adopted by most states with skiing, holds that participants accept certain risks inherent to the sport—including falling, collisions with other skiers, and variations in terrain. However, this doctrine has limits. If a resort can demonstrate that you failed to use available safety equipment—such as a leash—and that failure contributed to an accident, you may be found liable for damages.
In practical terms, this means that if your board runs away and injures a child in the lift line, and you were not using a leash, the injured party’s attorney will argue that you were negligent. The resort may also pursue you for damages to their infrastructure or for the cost of emergency response. In extreme cases, riders have faced criminal charges for runaway boards that caused serious injuries.
International resorts often have stricter enforcement. In many European resorts, particularly in Austria, Switzerland, and France, lift operators will check for leashes before allowing you to load certain chairlifts. Japan’s resorts have their own set of safety protocols, and while leash enforcement varies, the cultural expectation is that riders take full responsibility for their equipment at all times.
State-by-State Regulations in the United States
Snowboard leash requirements vary significantly across U.S. states. Colorado, one of the most popular snowboarding destinations, includes leash requirements in its Ski Safety Act but leaves enforcement to individual resorts. Utah takes a similar approach, with the Utah Ski Safety Act referencing retention devices but not mandating specific types. California’s resorts tend to focus more on rider responsibility in general, with leash requirements buried in the terms and conditions of lift tickets.
States like Vermont and New Hampshire, home to many East Coast resorts, tend to have more explicit language about retention devices in their safety codes. Vermont’s ski safety regulations specifically mention that “all snowboarders shall use a device to prevent runaway equipment.” This language makes it clear that not using a leash in Vermont could result in a citation, not just a verbal warning.
In the Pacific Northwest, Washington and Oregon resorts generally follow the lead of larger resorts in their region, which tend to enforce leash use for step-in bindings while being more relaxed about traditional strap setups. However, the legal requirement remains on the books in most jurisdictions, meaning you could technically be cited at any time.
Types of Snowboard Leashes
Not all leashes are created equal. Depending on your setup and style (perhaps you rock baggy snowboard pants vs tight gear), you might prefer one over the other.
| Type | Description | Best For |
|---|---|---|
| Leg Strap (Long) | A long webbing strap that wraps around your calf/lower leg. | Beginners & Rentals. Impossible to miss. |
| Boot Clip (Short) | A short tether that clips to a D-ring or laces on your boot. | Step-On Users & Advanced Riders. Low profile. |
| Coil Leash | A retractable phone-cord style wire. | Kids. Keeps the cord from dragging in the snow. |
Leg Strap Leashes: The Traditional Standard
Leg strap leashes are the oldest and most recognizable type of snowboard leash. They consist of a length of nylon webbing, typically 18 to 30 inches long, with a clip or buckle on one end and an attachment point on the other. The strap wraps around your lower leg, just above the boot, and connects to the binding’s heel cup or a dedicated D-ring.
The primary advantage of leg strap leashes is their universality. They work with any boot, any binding, and any lacing system. You don’t need special D-rings on your boots or specific attachment points on your bindings. The strap simply wraps around whatever is available and clips securely. This makes them the go-to choice for rental shops, beginners, and riders who want a no-fuss solution.
The downside is that leg straps can feel bulky, especially if you wear slim-fitting pants or prefer a minimalist setup. The excess webbing can sometimes flap around or get caught on tree branches in gladed terrain. Some riders also find that leg straps interfere with the range of motion needed for certain freestyle tricks, particularly those involving deep knee bends or board grabs near the binding area.
Boot Clip Leashes: The Modern Solution
Boot clip leashes represent the evolution of the snowboard leash. Instead of wrapping around your leg, these compact tethers clip directly to a D-ring or fabric loop on your boot. The other end attaches to the binding, creating a short, direct connection between boot and board.
Boot clip leashes are particularly popular among step-in binding users, including Burton Step On, Nidecker Supermatic, and Flow hybrid systems. These bindings often come with dedicated attachment points specifically designed for leash clips, making installation straightforward and secure. The low-profile design means the leash is virtually invisible once clipped in, which appeals to riders who care about aesthetics.
The limitation of boot clip leashes is compatibility. Not all boots have D-rings or fabric loops in the right location. If your boots lack a proper attachment point, you may need to use a leg strap instead or invest in boots specifically designed for step-in systems. Additionally, boot clip leashes tend to be shorter than leg straps, which means they provide less slack and may feel restrictive if you’re used to having more freedom of movement.
Coil Leashes: The Kid-Friendly Option
Coil leashes use a retractable, spring-loaded design similar to a phone cord or keychain reel. When not under tension, the coil retracts to a compact size, keeping the leash off the snow and out of the way. When tension is applied—such as when the board starts to move away—the coil extends, providing the necessary tether length before spring tension brings it back.
The retraction feature makes coil leashes especially popular for children’s snowboard setups. Kids tend to let go of their boards more frequently, and the self-retracting design means the leash doesn’t drag in the snow and become a tripping hazard. The coil also provides a satisfying tactile feedback that reminds kids the leash is connected, which can help reinforce good safety habits.
For adults, coil leashes offer a middle ground between the bulk of a leg strap and the specificity of a boot clip. However, the spring mechanism can wear out over time, especially in extreme cold. If the spring loses tension, the coil no longer retracts properly, and the leash becomes just another dangling strap. Regular inspection and replacement of aging coil leashes is important for maintaining their effectiveness.
Custom and Specialty Leashes
Beyond the three main categories, there are several specialty leash designs that cater to specific needs. Splitboard-specific leashes, for example, are designed to work with the unique binding interface of a splitboard in touring mode. These leashes typically attach to the touring bracket and allow the board to be retained while the rider is skinning uphill, preventing the board from sliding away during transitions.
Racing leashes are another specialty category. These are designed to be as light and low-drag as possible, often using thin Dyneema cord instead of nylon webbing. The attachment points are positioned to minimize any interference with the rider’s aerodynamic profile, which matters when you’re racing against the clock at speeds exceeding 60 miles per hour.
Some riders also opt for DIY leash solutions, using paracord, climbing slings, or even repurposed lanyards. While these can work in a pinch, they lack the tested reliability of purpose-built snowboard leashes. A climbing carabiner might seem like a solid attachment point, but it can also scratch your binding, rattle during riding, and may not meet the load requirements for stopping a runaway board on steep terrain.
How to Install and Use a Leash
Proper installation ensures the leash doesn’t interfere with your riding. You don’t want it getting caught in your bindings or scratching your board.
Step 1: Anchor to the Binding
Find a solid anchor point on your front binding. Usually, this is the heel cup or the chassis loop. Do not attach it to a removable part like a strap. Loop the leash through itself (girth hitch) to secure it.
Step 2: Connect to the Boot
This depends on your boot type:
- Standard Laces: Clip the leash to the lowest crossed lace section. Check how long your laces are to ensure you have a good grab point.
- BOA Systems: If you use BOA boots, do NOT clip the leash to the BOA cable. It can snap the cable. Look for a dedicated metal D-ring on the boot (common on Burton boots) or clip it to the gaiter hook of your pants (less secure).
Step 3: Test the Connection
Before you head out onto the snow, always test your leash connection. With your boot fully strapped into the binding, give the leash a firm tug in multiple directions. The connection should feel solid with no slack or play. Walk a few steps with your board and verify that the leash doesn’t catch on anything, restrict your movement, or make unusual noises.
Pay special attention to the range of motion of your front ankle. The leash should allow full dorsiflexion and plantarflexion—the motions you use when turning—without pulling tight or binding. If you feel any restriction, reposition the attachment point or try a different leash configuration. A leash that fights against your natural movement will not only annoy you but could also affect your riding performance.
Step 4: Check Before Every Run
Make it a habit to visually inspect your leash connection every time you strap in. Look for signs of wear on the webbing, cracks in the plastic clips, and fraying at attachment points. Cold weather can make plastic brittle, and a clip that worked perfectly at the start of the season may snap under load mid-season. A quick visual check takes five seconds and can prevent a runaway board situation.
Why Leashes are Critical for Kids
If you are taking your little ones to resorts for beginners, put a leash on their board. Kids have less grip strength and are easily distracted.
When they sit down to strap in, they often let go of the board. A leash prevents that board from sliding down the bunny hill. It also helps parents pull the child across flat sections—you can gently tug the leash (if it’s sturdy) to give them momentum.
Teaching Kids About Leash Safety
The best time to introduce leash safety is at home, before you even arrive at the resort. Sit down with your child and show them the leash, explain what it does, and let them practice clipping and unclipping it. Making the leash part of the pre-ride ritual—like putting on a helmet or adjusting goggles—helps build a safety mindset that will serve them for years.
At the resort, make the leash part of the strap-in process every single time. Don’t skip it on easy runs or when you’re just going on the magic carpet. Consistency is key. If children see that the leash is optional, they’ll treat it as optional, and that’s when accidents happen. By making the leash non-negotiable, you’re teaching responsibility alongside safety.
For very young riders (ages 3-6), consider using a coil leash with a colorful design. Many manufacturers make leashes with cartoon characters or bright colors that appeal to kids. This turns the leash from a boring safety device into something they actually want to use. Some resorts even have leash-check programs where kids can earn stickers for remembering their leashes, reinforcing the habit through positive reinforcement.
Age-Appropriate Leash Selection
Different ages require different leash approaches. For toddlers and very young children (3-5 years), a simple Velcro leg strap works best because it’s impossible for them to undo accidentally and doesn’t require fine motor skills to operate. The strap should be snug but not tight, positioned just above the boot where it won’t interfere with the binding straps.
For children ages 6-10, a boot clip leash with a simple push-button release is appropriate. At this age, kids can understand the concept of clipping in and clipping out, and the push-button mechanism is easy enough for their developing motor skills. Make sure the attachment point is within their reach so they can manage the leash independently.
For pre-teens and teenagers (11+), they’re likely ready for the same leash setup you use. However, don’t assume they’ll use it without supervision. Teenagers, in particular, may feel that leashes are uncool or unnecessary. This is where education comes in—show them videos of runaway board incidents, explain the liability risks, and emphasize that even professional riders use leashes in certain situations.
The Safety Debate: Can a Leash Hurt You?
⚠️ The “Windmill” Effect
There is a counter-argument that leashes can be dangerous in an avalanche. If you are backcountry snowboarding, having a board permanently attached to you can drag you under the snow (the anchor effect). Most backcountry experts recommend not wearing a leash in avalanche terrain for this reason.
However, for resort riding, the safety benefits to *others* outweigh the minor risks to yourself. It prevents the board from hitting other people. Just ensure you are wearing a helmet and impact shorts to protect yourself from your own gear during a tumble.
When NOT to Wear a Leash
While leashes are generally safe and recommended for resort riding, there are specific situations where wearing a leash can actually be more dangerous than not wearing one. Understanding these scenarios is critical for making informed safety decisions.
Avalanche Terrain: As mentioned above, the avalanche risk is the most serious concern. In an avalanche, you need to be able to separate from your equipment as quickly as possible. A leash tethers you to a heavy board that can act as an anchor, dragging you deeper into the snow. Backcountry riders and anyone riding in avalanche-prone terrain should remove their leash before dropping in.
Tree Wells: Tree wells are areas of loose, unconsolidated snow around the base of trees. If you fall into a tree well, a leash can prevent you from separating from your board, which can complicate self-rescue or rescue by others. The board may also pin you against the tree trunk, making it harder to extract yourself.
Deep Powder with Risk of Submersion: In very deep powder (5+ feet), there’s a risk of becoming fully submerged after a fall. If your board is leashed, it can twist and pull you in an awkward direction, potentially contributing to snow immersion suffocation (SIS). In these conditions, the benefit of retaining the board is outweighed by the risk of entanglement.
Freestyle Terrain Park (Advanced Riders): Some advanced freestyle riders choose not to wear leashes in terrain parks, particularly when performing complex aerial maneuvers or rail tricks. The reasoning is that a leash could potentially catch on park features during a bail, causing the rider to be pulled in an unexpected direction. However, this is a personal choice that comes with the understanding that the board could run away after a failed trick.
The “Leash Caught on Something” Scenario
One legitimate concern about leashes is the possibility of the leash catching on a fixed object—a tree branch, a lift tower, a fence post—and yanking the rider off balance. While this scenario is rare, it’s not impossible, especially in gladed terrain or near resort infrastructure.
The risk can be minimized by choosing the right leash length and attachment method. A leash that’s too long provides more opportunity for snagging, while one that’s too short can restrict movement and potentially cause a fall. The ideal leash length allows full range of motion while keeping the tether as short as practical—typically 12 to 18 inches of slack when the boot is fully engaged in the binding.
Coil leashes offer some advantage here because they retract when not under tension, keeping the excess leash close to the boot and binding rather than dangling freely. This reduces the chance of the leash catching on external objects, though it doesn’t eliminate the risk entirely.
Step-On Bindings: A Special Case
If you own Burton Step On bindings, you must use a leash. The system relies on you stepping your boot into the binding without straps. If you have snow buildup on your sole (check heel lift guides for cleaning tips) and the cleat doesn’t engage, the board is effectively loose.
Burton Step On boots have a small fabric loop near the ankle specifically designed for the leash clip. Always clip in *before* you step onto the snow.
How Burton Step On Bindings Work
To understand why leashes are essential for Step On systems, it helps to understand how the binding mechanism works. Unlike traditional strap bindings that use ratcheting straps to physically clamp your boot to the board, Step On bindings use a three-point engagement system. Two toe cleats on the boot click into corresponding hooks on the binding’s toe ramp, and a heel cleat snaps into a latch on the heel cup.
This system is remarkably secure once fully engaged. Burton has tested the Step On system to withstand forces well beyond what a rider would experience in normal riding conditions. The engagement points are designed to be “positive” connections—they lock in place with a satisfying click and won’t release under normal riding forces.
However, the risk comes during the transition from “not engaged” to “fully engaged.” If you step onto the board and the cleats don’t fully click in—due to snow buildup, ice on the sole, or improper alignment—the board isn’t connected to your foot. In this moment, if the board starts to slide, there’s nothing holding it back except the leash. This is why Burton includes a leash with every Step On system and why experienced riders treat the leash as a non-negotiable part of the setup.
Step-On Leash Installation: A Detailed Guide
Burton’s Step On leash system is straightforward but has some nuances worth understanding. The leash consists of a short cord with a plastic clip on one end and a fabric loop on the other. The fabric loop threads through the heel cup of the binding, creating a secure anchor point. The plastic clip then attaches to the fabric loop on the boot, typically located on the inner ankle area.
The installation process should be done once at the beginning of the season and checked periodically throughout. Start by threading the fabric loop end through the designated slot in the heel cup. Pull it through until the loop is flush against the binding, then thread the clip end through the loop and pull tight. This creates a girth hitch that won’t slip or loosen under normal conditions.
Once the binding end is secure, clip the other end to the boot’s fabric loop. The connection should be snug but not tight—you want enough slack to allow full ankle movement but not so much that the leash can catch on anything. Burton recommends approximately 2-3 inches of slack when the boot is fully engaged in the binding.
Other Step-In Systems and Their Leash Requirements
Burton Step On isn’t the only step-in system on the market, and each has its own leash considerations. The Nidecker Supermatic uses a hybrid system with a traditional strap that you crank down manually, but it also has a quick-entry mode that works similarly to a step-in. For the quick-entry mode, a leash is recommended as a backup.
Flow bindings, which use a reclining highback for quick entry, have been around longer than Step On systems. While Flow bindings do secure the boot with straps once the highback is locked down, the entry process creates a moment where the boot isn’t fully secured. Most Flow bindings have a dedicated leash attachment point, and using a leash is recommended, especially for riders who frequently use the quick-entry feature.
The K2 Clicker system, which was popular in the late 1990s and early 2000s before being discontinued, used toe and heel cleats similar to Burton Step On. While these bindings are no longer manufactured, many riders still use them on vintage setups. If you’re riding Clickers, finding a compatible leash may require some creativity, as K2 no longer produces the official leash accessory.
Leash Materials and Construction Quality
Not all leashes are built the same, and understanding materials can help you make a smarter purchase. The webbing, clips, and stitching all play a role in how well your leash performs under stress and how long it lasts.
Webbing Materials
The most common leash webbing material is nylon, which offers a good balance of strength, flexibility, and cost. Nylon webbing rated at 1,000 pounds or higher is standard for quality leashes. It resists abrasion, handles cold temperatures reasonably well, and maintains its flexibility even when wet.
Polyester webbing is another option that offers superior UV resistance and slightly less stretch than nylon. For riders who store their gear in sunny garages or spend a lot of time at high-altitude resorts where UV exposure is intense, polyester may offer better long-term durability. However, polyester can feel stiffer in cold weather, which some riders find less comfortable.
Dyneema or Spectra cord, used in specialty racing leashes, offers the highest strength-to-weight ratio. These materials are incredibly strong for their diameter, allowing leash designs that are thinner and lighter than nylon equivalents. The downside is cost—Dyneema cord leashes typically cost two to three times more than standard nylon options.
Clip and Hardware Quality
The clip is often the weakest link in a leash system. Cheap plastic clips can crack in cold weather, lose their spring tension, or fail under load. Quality leashes use injection-molded clips made from cold-resistant polymers like acetal or nylon 6/6, which maintain their strength and flexibility at temperatures down to -40 degrees Fahrenheit.
Metal clips, while stronger, add weight and can scratch bindings. They’re more common in rental and competition leashes where durability and security outweigh concerns about weight and aesthetics. Spring-loaded clips offer the most secure connection but can ice up in wet conditions, making them harder to operate with gloved hands.
Stitching and Construction
The stitching on a snowboard leash might seem like a minor detail, but it’s critical for safety. A leash that separates at the stitching point under load is worse than no leash at all—it gives a false sense of security while providing no actual protection. Quality leashes use box-stitch or bar-tack patterns at stress points, distributing load across multiple thread lines rather than relying on a single seam.
UV-resistant thread is important for leashes that will be exposed to sunlight. Standard polyester thread degrades under UV exposure, which can weaken the stitching over a season of riding. Nylon thread is more UV-resistant but can absorb water and stretch when wet. The best leashes use a bonded nylon thread that combines UV resistance with low stretch.
Leash Sizing and Fit Guide
Choosing the right leash size is important for both safety and comfort. A leash that’s too long will dangle and potentially catch on objects, while one that’s too short will restrict your movement and potentially cause falls.
| Rider Weight | Boot Size | Recommended Leash Length | Type |
|---|---|---|---|
| Under 100 lbs | Youth (1-5) | 10-14 inches | Coil or short boot clip |
| 100-150 lbs | 6-9 | 14-18 inches | Boot clip or short leg strap |
| 150-200 lbs | 9-12 | 18-22 inches | Standard leg strap or boot clip |
| 200+ lbs | 12+ | 22-26 inches | Long leg strap or extended boot clip |
These measurements refer to the total length of the leash when fully extended, from anchor point to clip. The actual slack when installed should be approximately 2-4 inches, allowing for full ankle movement without excessive dangling.
Adjusting Leash Length
Most leg strap leashes are adjustable, using either a buckle or a simple loop-through design. To adjust, loosen the strap, position it around your leg or boot, and tighten until you have the recommended amount of slack. Too loose, and the leash may catch on objects or allow the board to gain momentum before the leash engages. Too tight, and it restricts movement and may cause pressure points or chafing.
For boot clip leashes, length adjustment is usually accomplished by repositioning the clip on the boot’s attachment point or by choosing a leash with an adjustable cord. Some premium leashes feature a sliding adjuster that allows fine-tuning of the length without untying or unclipping anything.
Coil leashes typically come in a fixed length, but the retractable design provides some natural adjustment. The key is to choose a coil that, when fully retracted, keeps the leash close to the boot, and when fully extended, provides enough length for the board to move without pulling the boot out of the binding.
Leash Compatibility with Different Binding Brands
Not all bindings are created equal when it comes to leash compatibility. Understanding which bindings work with which leash types can save you from frustration and potential safety issues.
Burton Bindings
Burton, as the largest snowboard binding manufacturer, has the most standardized approach to leash attachment. Most Burton bindings include a dedicated D-ring or fabric loop on the heel cup specifically for leash attachment. This is true for both their traditional strap bindings (Custom, Cartel, Missed) and their Step On system. If you’re riding Burton bindings with Burton boots, leash installation is typically straightforward.
Union Bindings
Union bindings take a slightly different approach. Rather than a dedicated D-ring, Union uses the binding’s heel cup frame as the attachment point. You loop the leash through the heel cup frame using a girth hitch, which provides a secure anchor. Union bindings are generally compatible with most leash types, though boot clip leashes work best due to the heel cup’s profile.
Ride Bindings
Ride bindings often include a small metal ring on the baseplate that serves as a leash attachment point. This ring is positioned to keep the leash out of the way while still providing a solid anchor. Ride’s A-6 and A-9 bindings are particularly well-suited for boot clip leashes, as the attachment point aligns naturally with the boot’s D-ring location.
Flow Bindings
Flow bindings require special consideration because of their reclining highback design. The highback moves through a large range of motion during entry and exit, which can pinch or catch a leash if it’s not positioned correctly. Flow recommends attaching the leash to the baseplate rather than the highback, and using a shorter leash to minimize the risk of entanglement during the reclining action.
Stratton and K2 Bindings
K2 bindings, including their popular Formula and Maysis models, typically use the heel cup as the leash anchor point, similar to Union. Stratton bindings, though less common, follow a similar approach. Both brands are compatible with standard leash types, though boot clip leashes tend to work better than leg straps due to the heel cup geometry.
How Leashes Affect Different Riding Styles
Your riding style influences which type of leash is best for you and even whether you should wear one at all. Different disciplines place different demands on equipment, and leashes are no exception.
All-Mountain Riding
All-mountain riders who spend their day exploring the entire resort—from groomers to trees to the occasional terrain park—are best served by a low-profile boot clip leash. This type provides security without restricting the wide range of movements that all-mountain riding demands. A leg strap works too, but may feel bulky during quick transitions between different terrain types.
Freestyle and Park Riding
Freestyle riders who spend most of their time in terrain parks have a nuanced relationship with leashes. On one hand, the risk of a board running away after a failed trick is real, especially on features like halfpipes and large kickers where the board can gain significant momentum. On the other hand, a leash can potentially catch on rails, boxes, or other park features during a bail.
The compromise most freestyle riders reach is using a short, low-profile boot clip leash that provides minimal dangling material. This reduces the risk of catching on features while still providing some retention. Some parks even require leashes for safety, particularly on larger features where a runaway board could travel a long distance before coming to rest.
Freeride and Backcountry
Freeride riders who venture off-piste into uncontrolled terrain face the most complex leash decisions. In-bounds freeride terrain—like the side-country accessed through resort gates—typically still warrants a leash because the terrain, while challenging, is still patrolled and other riders may be present.
True backcountry riding, however, is a different story. As discussed in the safety section, the avalanche risk in the backcountry makes leashes potentially dangerous. Most experienced backcountry riders remove their leashes before entering avalanche terrain. The exception is the uphill skinning portion of a splitboard tour, where a leash (specifically designed for splitboard touring) prevents the board from sliding away during transitions on steep terrain.
Racing and Speed Events
Giant slalom and downhill snowboard racers have specific leash requirements dictated by competition rules. Most racing organizations require a leash as a safety measure, but the leash must meet specific criteria: it must be strong enough to retain the board at racing speeds, short enough to not interfere with aerodynamics, and positioned to avoid catching on gates. Racing leashes are typically custom-made or selected from specialty manufacturers that cater to competitive snowboarders.
Splitboarding
Splitboarders have unique leash needs because their equipment transitions between touring mode (skinning uphill with the board split into two ski-like halves) and riding mode (the two halves joined back into a snowboard). During the transition process, there’s a moment where the board halves are separate and neither is attached to the rider’s feet.
Splitboard-specific leashes are designed to work in both modes. In touring mode, the leash attaches to the touring bracket and provides retention while skinning. During transitions, the leash keeps one half of the board from sliding away while you’re working with the other. In riding mode, the leash functions like a standard snowboard leash, connecting the boot to the binding.
Common Leash Mistakes and How to Avoid Them
Even with the best leash and proper installation, mistakes happen. Here are the most common errors riders make with leashes and how to avoid them.
Before the first day of every season, remove your leash from storage, inspect every component—webbing, clips, stitching, hardware—and test the clip mechanism. Replace anything that shows wear, cracking, or loss of tension. A $15 replacement leash is much cheaper than the liability of a runaway board.
Mistake 1: Not Using a Leash at All
The most common mistake is simply not using a leash. Many experienced riders view leashes as unnecessary, relying on their strap bindings to keep the board attached. While strap bindings are generally secure, they’re not infallible. A loose ratchet, a broken strap, or a moment of inattention during strap-in can result in a loose board. The few seconds it takes to clip in a leash is cheap insurance against a potentially serious incident.
Mistake 2: Attaching to the Wrong Part of the Binding
Attaching the leash to a removable part of the binding—like a strap or a highback adjustment mechanism—defeats the purpose. If that part fails or detaches, the leash goes with it. Always anchor to a permanent structural element of the binding, such as the heel cup, baseplate, or chassis frame.
Mistake 3: Using a Damaged Leash
Webbing that’s frayed, clips that are cracked, and stitching that’s unraveling all compromise the leash’s ability to hold under load. Inspect your leash regularly and replace it at the first sign of damage. Cold weather accelerates wear on plastic components, so pay extra attention to clips and buckles mid-season.
Mistake 4: Leaving Too Much Slack
A leash with excessive slack allows the board to gain momentum before the leash engages. This increases the force on the leash and the rider’s leg, potentially causing the leash to break or the rider to be pulled off balance. Aim for 2-4 inches of slack when the boot is fully engaged in the binding.
Mistake 5: Forgetting to Clip In After Breaks
After a lunch break, a rest at the lodge, or any time you remove your boot from the binding, remember to re-clip the leash before heading back out. Many runaway board incidents happen because riders forgot to re-attach their leash after a break. Make it part of your strap-in ritual: boot in, strap tight, clip leash, check connection, ride.
Mistake 6: Using the Wrong Leash Type for Step-In Bindings
If you use step-in bindings, you need a leash designed for that system. Using a generic leg strap with a Step On binding may not provide the correct attachment geometry, leaving gaps in the retention system. Always use the manufacturer-recommended leash for step-in systems.
Leash Care, Maintenance, and Storage
Leashes are low maintenance, but they can wear out. Check the plastic clips for cracks, especially if you ride in extreme cold. A broken leash is useless. When packing your gear into your snowboard bag, unclip the leash so it doesn’t get crushed by the board edge, which could sever the webbing.
Also, ensure your board edges aren’t sharp enough near the binding to slice the leash. Keep your edges tuned but safe—learn how to remove rust properly.
End-of-Season Care
At the end of each season, give your leash a thorough cleaning and inspection. Wash the webbing with mild soap and warm water to remove dirt, salt, and grime that can degrade the fibers over time. Rinse thoroughly and allow to air dry completely before storing.
Inspect the clips for cracks, the stitching for loose threads, and the webbing for fraying. If everything looks good, store the leash in a cool, dry place away from direct sunlight. Avoid storing leashes in plastic bags, which can trap moisture and promote mold or mildew growth. A breathable mesh bag or a hook in your gear closet works perfectly.
If you notice any damage during your end-of-season inspection, don’t plan to “fix it next season.” Replace the leash now while it’s fresh in your mind. Waiting until next season means you’ll likely forget about the damage, and the compromised leash will fail when you need it most.
Mid-Season Maintenance
During the season, a quick inspection every few days of riding is sufficient. Look for fraying at attachment points, check that clips still snap securely, and verify that any adjustable buckles hold their position. If you ride in particularly wet or salty conditions (like East Coast resorts that use heavy salt for ice control), rinse your leash with fresh water at the end of each day to prevent corrosion and fiber degradation.
For coil leashes, pay attention to the spring mechanism. If the coil starts to sag or fails to retract fully, the spring is losing tension and the leash should be replaced. A sagging coil leash drags in the snow, collects ice, and may not provide adequate retention in an emergency.
Leash Alternatives and Workarounds
While purpose-built snowboard leashes are always the best choice, there are situations where riders find themselves without a proper leash. Here are some temporary alternatives that can work in a pinch, along with their limitations.
The Gaiter Hook Method
Many snowboard pants have gaiter hooks—small metal or plastic hooks on the inner ankle that attach to the boot to keep snow out. In a pinch, you can use a gaiter hook as a makeshift leash attachment point. Clip a carabiner or tie a short length of cord between the gaiter hook and the binding’s heel cup. This isn’t as secure as a proper leash, but it provides some retention in an emergency.
The Lace-Through Method
If your boots have traditional laces (not BOA), you can thread a short length of paracord through the lowest lace cross and tie it to the binding. This creates a direct connection between boot and board without requiring any special hardware. The knot should be tight enough to not slip but loose enough to untie with cold fingers.
The Zip Tie Solution
Industrial zip ties can serve as an emergency leash, though they’re a one-use solution. Thread a zip tie through the binding’s heel cup and around the boot’s ankle area, then pull it tight. The zip tie provides a secure connection but cannot be adjusted or easily removed. You’ll need to cut it off with a knife or scissors when you’re done.
Zip tie leashes are popular at rental shops for temporary use, particularly when a renter forgets their leash and a proper replacement isn’t available. The downside is that zip ties can crack in extreme cold, and they leave no room for adjustment. They’re a temporary fix, not a permanent solution.
What NOT to Use as a Leash
Some improvised leash ideas are genuinely dangerous and should be avoided. Never use your goggle strap as a leash—the elastic will stretch and snap, potentially hitting you in the face. Never use a lift ticket lanyard—they’re designed to break away under low force for safety and won’t hold a runaway board. And never use duct tape to tape your boot to the board—it won’t hold under any meaningful load and leaves a sticky residue that’s a pain to clean.
Professional Rider Perspectives on Leashes
What do the pros think about leashes? The answer varies by discipline and personal preference, but there are some common themes.
Resort Patrol and Safety Professionals
Ski patrol members and resort safety professionals are nearly unanimous in their support of leashes. They’ve seen the aftermath of runaway board incidents—damaged equipment, injured bystanders, and the legal fallout. Most patrol members wear leashes themselves and recommend them to every rider they encounter. As one veteran patroller put it: “I’ve pulled too many boards out of trees and off of buildings to ever ride without a leash.”
Competition Riders
Competitive snowboarders in disciplines like slopestyle, big air, and halfpipe often skip leashes during competition runs. The reasoning is that at the professional level, the risk of a board slipping away during a run is negligible—these riders have spent thousands of hours perfecting their strap-in technique. However, during practice and warm-up, many pros do use leashes, particularly when trying new tricks where the risk of a fall is higher.
Backcountry Guides
Backcountry guides have perhaps the most nuanced view on leashes. They recognize the value of board retention but also understand the avalanche implications. Most guides carry a leash in their pack for use during uphill travel and transitions, then remove it before descending avalanche-prone terrain. This approach provides the best of both worlds: retention when the risk is low and freedom when the risk is high.
Freestyle Coaches
Freestyle coaches who teach at terrain parks have mixed opinions. Some require their students to use leashes as a safety measure, particularly in busy parks where a runaway board could hit other riders. Others allow students to skip leashes in exchange for emphasizing board control and proper falling technique. The consensus is that leashes are valuable for less experienced riders but become optional as skill and awareness increase.
The History of Snowboard Leashes
Understanding the history of snowboard leashes provides context for why they exist and why the rules around them have evolved.
The 1970s and 1980s: Early Days
In the earliest days of snowboarding, when pioneers like Jake Burton and Tom Sims were still experimenting with board designs, there was no concept of a snowboard leash. Bindings were rudimentary—often just rubber straps or basic cable systems—and the idea of preventing a runaway board was secondary to the challenge of simply making the equipment work.
As snowboarding grew in popularity through the 1980s, resorts began to grapple with the safety implications of a sport where equipment could easily become detached from the rider. The first “leashes” were improvised solutions—bits of rope or cord tied between boot and binding. These were crude but effective, and they planted the seed for purpose-built retention devices.
The 1990s: The Golden Age of Leashes
The 1990s were the heyday of snowboard leashes. As resorts began allowing snowboarders, leash requirements were among the first safety rules implemented. During this era, nearly every resort in North America and Europe required a leash, and lift operators would check for them before allowing riders to load chairlifts.
The leash designs of the 1990s were simple: a nylon strap with a Velcro closure that wrapped around the rider’s leg. They were bulky, often uncomfortable, and frequently interfered with riding. But they were effective at preventing runaway boards, and the requirement saved countless injuries.
However, the 1990s also saw the beginning of the backlash against leashes. As snowboarding matured and binding technology improved, riders increasingly viewed leashes as unnecessary. Strap bindings became more secure, highbacks became more responsive, and the risk of a board slipping away during normal riding decreased dramatically. Riders began pushing back against what they saw as an outdated requirement.
The 2000s and 2010s: The Decline
By the early 2000s, most resorts had quietly dropped their leash requirements for traditional strap bindings. The logic was sound: modern bindings were secure enough that the risk of a board detaching was minimal, and the annoyance of wearing a leash outweighed the marginal safety benefit. Leashes faded from view, becoming relics that only rental shops and the most safety-conscious riders bothered with.
During this period, leash manufacturers struggled to stay relevant. Some pivoted to other products, while others focused on the niche market of step-in bindings (which were making a comeback in various forms). The leash became a punchline—a symbol of the overly cautious “Mom” approach to snowboarding safety.
The 2020s: The Renaissance
The release of Burton Step On in 2017 changed everything. Suddenly, there was a binding system where leashes weren’t just recommended—they were essential. Burton included a leash with every Step On system, and the company’s marketing emphasized the importance of using it. Other step-in systems followed suit, and leashes experienced a renaissance.
Modern leash designs are far more refined than their 1990s ancestors. They’re lighter, lower-profile, and more comfortable. The materials are better, the clips are more reliable, and the attachment methods are more varied. Today’s leashes are purpose-built tools, not afterthoughts, and they serve a genuine safety function in an era of increasingly sophisticated binding technology.
Environmental Conditions and Leash Performance
Different weather and snow conditions affect leash performance in ways that riders should understand.
Extreme Cold
Temperatures below -10 degrees Fahrenheit (-23 degrees Celsius) can make plastic clips brittle and nylon webbing stiff. In extreme cold, always check your leash clip for cracks before use. If the clip feels unusually rigid or makes a creaking sound when you flex it, it may be compromised. Nylon webbing also becomes stiffer in extreme cold, which can make it harder to tie knots or thread through attachment points.
Wet Conditions
Wet leashes aren’t dangerous per se, but they can be uncomfortable and slightly heavier than dry ones. More importantly, wet webbing can freeze as temperatures drop, creating an ice-coated leash that’s stiff and difficult to work with. If your leash gets wet during the day, shake it out and allow it to dry before storing it for the night. Frozen leashes can also form ice dams around clips and buckles, making them difficult to operate.
Icy Conditions
Ice can build up on leash components, particularly around spring-loaded clips and coil mechanisms. This ice buildup can prevent the clip from closing properly or prevent the coil from retracting. Periodically check your leash for ice buildup, especially during freeze-thaw cycles when temperatures hover around the freezing point. A quick tap to knock ice off the clip can prevent a malfunction.
Salt and Chemical Exposure
Many resorts use salt and chemical de-icers on walkways and lift lines. These chemicals can accelerate corrosion on metal leash components and degrade nylon webbing over time. If you’ve been walking through salted areas, rinse your leash with fresh water at the end of the day. This simple step can significantly extend the life of your leash.
Frequently Asked Questions About Snowboard Leashes
Q: Are snowboard leashes required by law?
A: In most U.S. states, the law requires a “retention device” for snowboarders, though enforcement varies by resort. Some states like Vermont have explicit language requiring leashes, while others leave it to individual resorts. Internationally, many European and Japanese resorts actively enforce leash requirements. Check the specific regulations for the resort you’re visiting.
Q: Can I use a ski brake as a snowboard leash?
A: No. Ski brakes are designed to deploy from ski bindings when the boot releases. They are integral to the ski binding system and cannot be adapted to work with snowboard bindings. Snowboard leashes serve a different function—retaining the board to the boot rather than stopping it after separation.
Q: How much does a snowboard leash cost?
A: Snowboard leashes typically cost between $8 and $25, depending on the type and brand. Basic leg straps are on the lower end, while specialty coil leashes and boot clip leashes from premium brands can cost more. Considering the potential liability costs of a runaway board incident, a leash is one of the best investments in snowboarding safety.
Q: Do I need a leash if I use traditional strap bindings?
A: While strap bindings are generally secure, using a leash is still recommended. Strap failures, loose ratchets, and moments of inattention during strap-in can all result in a loose board. A leash provides an extra layer of safety that’s worth the minimal inconvenience.
Q: Can a leash affect my riding performance?
A: When properly installed and adjusted, a leash should have no noticeable effect on riding performance. The key is proper installation—ensuring the leash doesn’t restrict ankle movement, catch on features, or create drag. If you notice any interference, reposition the attachment point or try a different leash type.
Q: How often should I replace my snowboard leash?
A: A quality leash should last 3-5 seasons with proper care. Replace it sooner if you notice fraying webbing, cracked clips, loose stitching, or loss of spring tension in coil models. Inspect your leash at the start of every season and consider replacing it every 2-3 seasons as a precaution.
Q: Can I make my own snowboard leash?
A: While you can improvise a leash in an emergency using paracord or other materials, a purpose-built snowboard leash is always recommended. DIY solutions lack the tested strength, reliable clips, and appropriate length of commercial leashes. The small cost savings aren’t worth the potential safety compromise.
Q: Do snowboard instructors use leashes?
A: Many snowboard instructors use leashes, particularly those who teach beginners. The reasoning is practical: instructors spend a lot of time helping students strap in and out, and having a leash means the board doesn’t slide away during these transitions. Some instructors also use leashes as teaching tools, demonstrating proper safety habits to their students.
Q: Are there leashes specifically designed for women?
A: While there are no leashes marketed exclusively to women, some manufacturers offer shorter leash lengths and slimmer profiles that may be more comfortable for riders with smaller frames or narrower legs. The functionality is identical to unisex leashes—the difference is primarily in sizing and aesthetics.
Q: Can a leash damage my snowboard?
A: When properly installed, a leash should not damage your snowboard. However, if the leash attachment point is positioned near the board’s edge, there’s a small risk of the leash rubbing against the edge and causing wear. Ensure the leash is positioned away from the board’s edges and doesn’t create friction against the top sheet or base.
Q: Do I need different leashes for my different boards?
A: In most cases, a single leash will work with all your boards, as long as the bindings are compatible. The attachment points on the binding are what matter, not the board itself. If you ride multiple setups with different binding types, you may need different leash styles, but the leash itself can often be transferred between boards.
Q: What happens if my leash breaks while riding?
A: If your leash breaks during a fall, you’ll likely not notice until you try to strap back in. At that point, you’ll need to either find the broken leash pieces and assess whether they’re still usable, or switch to a backup leash. Always carry a spare leash in your pack, especially on backcountry trips where help isn’t readily available.
Q: Should I wear a leash when skating on flat terrain?
A: Yes. Skating—pushing with one foot while the other remains strapped in—is one of the most common scenarios for losing a board. When you unstrap your back foot to push, the board is only held by the front binding. If you hit a bump or lose balance, the board can slip away. A leash prevents this during skating.
The Best Snowboard Leashes Compared: Detailed Reviews
Choosing the right leash can be overwhelming with so many options available. Here’s a detailed comparison of the most popular leashes on the market, broken down by features, pros, and cons.

Burton Cord Leash
The standard for Step-On users. Simple, durable, and connects easily to the dedicated loop on Burton boots. It’s low profile and virtually indestructible.
View on Amazon
Dakine Leg Leash
The classic style. This wraps around your lower leg, making it compatible with ANY boot, regardless of lacing system. Perfect for rentals or beginners.
View on Amazon
LINGVUM Coil Leash
A stylish coil option that retracts to stay out of the way but stretches when you need it. Great for preventing drag when skating.
View on AmazonBurton Cord Leash: In-Depth Review
The Burton Cord Leash is purpose-built for Burton Step On bindings, and it excels at that specific task. The leash consists of a durable nylon cord with a metal clip on one end and a fabric loop on the other. The fabric loop threads through the heel cup of the binding, creating a secure anchor point that won’t slip or detach under normal conditions.
The metal clip attaches to a fabric loop located on the inner ankle of Burton Step On boots. This attachment point is specifically designed for the leash clip, ensuring a secure connection that won’t interfere with the Step On engagement mechanism. The clip’s spring tension is calibrated to provide a firm hold without being difficult to operate with gloved hands.
The cord length is optimized for Step On bindings—short enough to prevent excessive dangling but long enough to allow full ankle movement. Burton designed this leash to be as unobtrusive as possible, and they’ve largely succeeded. Once installed and clipped in, the leash is barely noticeable during riding.
Pros: Perfect fit for Burton Step On, durable construction, low profile, easy to install.
Cons: Only compatible with Burton Step On boots and bindings, metal clip can be cold to touch in extreme weather.
Dakine Leg Leash: In-Depth Review
The Dakine Leg Leash represents the classic approach to snowboard leash design. It’s a straightforward nylon webbing strap with a Velcro closure and a metal clip. The strap wraps around your lower leg, just above the boot, and clips to the binding’s heel cup.
Dakine has been making snowboard accessories for decades, and their experience shows in the leash’s construction. The webbing is thick and durable, rated for loads well beyond what a runaway board would generate. The Velcro closure is wide and secure, providing a snug fit without pinching or discomfort. The metal clip is chrome-plated for corrosion resistance and features a spring-loaded gate that opens easily with one hand.
The leg strap design means this leash works with virtually any boot and binding combination. You don’t need special D-rings or attachment points—the strap simply wraps around whatever is available. This universality makes it the go-to choice for rental shops, beginners, and riders who want a simple, reliable solution.
Pros: Universal compatibility, durable construction, affordable, easy to use.
Cons: Bulkier than boot clip leashes, excess webbing can flap, may interfere with slim-fitting pants.
Lingvum Coil Leash: In-Depth Review
The Lingvum Coil Leash offers a unique retractable design that sets it apart from traditional strap and clip leashes. The coil mechanism uses a spring-loaded reel that retracts the leash when not under tension, keeping it compact and out of the way. When tension is applied—such as when the board starts to move away—the coil extends to provide the necessary tether length.
The retraction feature is particularly useful for preventing the leash from dragging in the snow, which can cause ice buildup and add weight. It also reduces the chance of the leash catching on objects, as the coiled design keeps the excess material close to the boot and binding.
The Lingvum leash is available in multiple colors and designs, including options that appeal to younger riders. The coil housing is made from impact-resistant plastic, and the cord is constructed from a durable polymer that maintains flexibility in cold temperatures. The clip at the end is a standard spring-loaded design that works with most binding attachment points.
Pros: Retracting design prevents drag, available in fun colors, works with most bindings, compact storage.
Cons: Spring mechanism can wear out over time, less durable than nylon webbing, fixed length may not suit all riders.
How to Choose the Right Snowboard Leash: A Buying Guide
With so many options available, choosing the right leash comes down to matching the leash to your specific needs. Here’s a decision framework to help you make the best choice.
Step 1: Identify Your Binding Type
Your binding type is the single most important factor in choosing a leash. If you use Burton Step On, Nidecker Supermatic, or another step-in system, use the manufacturer’s recommended leash. These systems have specific attachment points and leash requirements that generic leashes may not accommodate.
For traditional strap bindings, you have more flexibility. Leg straps, boot clips, and coil leashes all work with strap bindings, so your choice comes down to personal preference and riding style.
Step 2: Consider Your Boot Type
Boots with BOA lacing systems require special consideration. You cannot clip a leash to the BOA cable—it can damage the cable and cause the lacing system to fail. Look for boots with dedicated D-rings or fabric loops specifically designed for leash attachment. If your BOA boots don’t have these features, a leg strap that wraps around the ankle area is your best option.
Traditional lace boots offer more attachment options, as you can clip the leash to the crossed lace section. However, ensure the lace is strong enough to hold the leash under load. Thin, worn laces may not provide adequate security.
Step 3: Match the Leash to Your Riding Style
As discussed in the riding styles section, different disciplines benefit from different leash types. All-mountain riders are well-served by boot clip leashes, freestyle riders may prefer low-profile options, and backcountry riders need splitboard-compatible leashes for touring.
Step 4: Check Reviews and Ratings
Before purchasing, read reviews from other riders who use the same binding and boot combination. Online forums, Reddit’s r/snowboarding, and manufacturer websites are good sources of real-world feedback. Pay attention to comments about durability, ease of use, and any compatibility issues.
Step 5: Consider Budget
Snowboard leashes are generally affordable, with most options falling in the $10-$25 range. Premium options from top brands may cost more, but they typically offer better materials and construction. Given the safety function of the leash, it’s worth investing in a quality product rather than the cheapest option available.
The Future of Snowboard Leashes
As snowboard technology continues to evolve, so too will leash design and requirements. Several trends suggest that leashes will become increasingly important in the coming years.
Smart Bindings and IoT Integration
The snowboard industry is exploring “smart” bindings that incorporate sensors and electronic components. Some prototype designs include sensors that detect whether the binding is fully engaged and alert the rider if it’s not. While these systems are still in development, they could eventually complement or even replace traditional leashes by providing electronic retention verification.
Improved Materials
Advances in materials science are producing stronger, lighter, and more durable leash components. Graphene-infused webbing, self-healing polymers, and advanced alloys are all being explored for use in snowboard accessories. These materials could produce leashes that are virtually indestructible while being lighter and more comfortable than current options.
Regulatory Trends
As step-in binding systems become more popular, resort regulations around leashes are likely to tighten. We may see a return to the universal leash requirements of the 1990s, enforced more consistently than before. Riders who get in the habit of using a leash now will be ahead of the curve when these regulations take effect.
Integration with Binding Design
Some binding manufacturers are exploring integrated leash systems that are built into the binding itself. These designs would eliminate the need for a separate leash accessory, incorporating a retractable tether into the heel cup or baseplate. While no production binding has yet included this feature, patent filings suggest that several manufacturers are working on the concept.
Conclusion: Is It Worth It?
For the sake of $10 to $15, a snowboard leash provides peace of mind. It stops your board from becoming a weapon, keeps you compliant with resort rules, and is essential for modern step-in systems.
Don’t be the rider chasing their board down the mountain while everyone on the chairlift heckles you. Strap up, clip in, and focus on having fun rather than worrying about a runaway board.
A snowboard leash is a simple, inexpensive safety device that prevents runaway boards and protects both you and others on the mountain. Whether you ride traditional strap bindings or modern step-in systems, using a leash is a smart choice that demonstrates responsibility and awareness. The small inconvenience of clipping in is vastly outweighed by the safety benefits—and the potential liability costs of not having one. Make it part of your ritual, teach it to your kids, and ride with confidence knowing that your board stays where it belongs: attached to your feet.


