
Snowboard Fall Safety: The Complete Guide to Falling Without Getting Hurt
Every snowboarder falls. From first-timers barely making it across the green run to seasoned pros launching off backcountry cliffs, falling is not a failure — it is a fundamental feature of the sport. The critical difference between a bruise and a broken wrist, between shaking it off and being carted off in a sled, is almost entirely determined by three factors: technique, timing, and the protective gear covering your body when gravity wins the argument.
This guide goes deep — far deeper than the standard “bend your knees” advice — into the biomechanics of snowboard falls, the psychological reflexes that work against you mid-crash, and exactly how to train your body to fall smartly before you hit the slope. We also review the protective gear landscape comprehensively, covering helmets, wrist guards, impact shorts, back protectors, and knee pads, with honest analysis of what actually works versus what looks good in a product photo. Whether you are preparing for your first lesson or returning from an injury and wanting to ride more safely, this is the resource you need.
Why Falls Happen — and When to Expect Them
Understanding the root causes of snowboard falls transforms them from random bad luck into predictable, manageable events. Snowboarding demands constant edge-to-edge weight transfer while both feet are locked to a single platform — a fundamentally different balance challenge than skiing, where each leg operates independently. This is why the snowboard learning curve is steeper in the first two days but accelerates dramatically once the body internalizes the mechanics.
Falls cluster around a handful of predictable triggers. The most common is edge catch — when the uphill edge of the board catches the snow while traversing or transitioning between turns. On a heelside traverse, catching the toe edge sends you instantly forward. On a toeside traverse, catching the heel edge snaps you backward. Both happen faster than conscious reaction time, which is why building automatic physical responses through practice is far more valuable than relying on in-the-moment decision making.
Speed mismatch with terrain is the second major trigger. Riders often carry momentum into a section — a sudden pitch change, an icy patch, an unexpected mogul — that exceeds their current skill level. The body senses impending loss of control and stiffens, which is exactly the wrong response. Stiffness transfers impact directly to joints rather than distributing it through muscle and movement.
Fatigue-related falls form the third significant cluster. Research in sports medicine consistently shows injury rates spike in the afternoon session as muscular endurance drops. Core strength — the foundation of balance on a snowboard — degrades over a long day, and riders begin compensating with poor posture and late weight transfers. Building your core strength specifically for snowboarding before the season dramatically extends your safe riding window each day.
Park riding introduces its own fall triggers: improperly absorbed landings on jumps (particularly back-heavy or nose-heavy), mistimed rail approach angles, and half-pipe lip catches. These falls carry higher energy and often more awkward body positions, making protective gear even more critical. Understanding trick progression methodology helps riders systematically build the skill base that reduces park fall rates.
Fig 1 — Primary fall trigger categories based on sports medicine research across recreational snowboarders
Injury Statistics Every Rider Should Know
Numbers put the risk in proper perspective. Snowboarding carries a non-trivial injury rate — typically cited between 2 and 4 injuries per 1,000 skier-days — but that figure obscures significant variation based on experience level, protective gear usage, and riding style. Beginners sustain roughly three times the injury rate of intermediate riders, and the injury distribution is heavily skewed toward a predictable set of body parts.
Upper extremity injuries dominate the picture. Wrist and forearm fractures alone account for approximately 25 to 30 percent of all snowboard-related injuries treated in hospital emergency departments. This statistic has driven considerable research into fall reflex modification and wrist guard design. When a rider falls and instinctively extends their arms to catch themselves — a deeply wired protective reflex — the forces generated by even a moderate-speed fall can far exceed the structural limits of wrist bones.
| Injury Type | % of Total Injuries | Most At-Risk Group | Prevention Gear |
|---|---|---|---|
| Wrist/Forearm Fractures | 25–30% | Beginners, female riders | Wrist guards with splints |
| Shoulder Injuries | 12–15% | All experience levels | Technique modification |
| Head/Concussion | 10–14% | Park riders, speed riders | MIPS-rated helmet |
| Knee (ACL/MCL) | 8–12% | Advanced / off-piste riders | Knee braces, technique |
| Coccyx / Tailbone | 8–10% | Beginners | Impact shorts with tailbone pad |
| Ankle Injuries | 5–8% | Soft boot / step-on riders | Stiff boots, ankle support |
| Spinal Injuries | 3–6% | Jump / backcountry riders | Back protector / airbag vest |
Head injuries deserve particular attention because of their potential severity. While they represent a smaller percentage of total injuries, concussions and traumatic brain injuries carry disproportionate long-term consequences. Helmet adoption rates in snowboarding have improved dramatically over the past decade, and the data consistently shows that helmet use reduces the risk of head injury by approximately 35 to 60 percent, with the highest protective effect in the most common impact scenarios. Modern MIPS technology — discussed in depth in the helmet rotation force analysis — adds a second layer of protection against the rotational forces responsible for many concussions.
One underappreciated statistic: riders who wear wrist guards sustain wrist fractures at approximately one-sixth the rate of unprotected riders. No other single piece of safety equipment produces a comparable reduction in injury probability for the specific body part it protects. The evidence base for wrist guard effectiveness is stronger and more consistent than for nearly any other protective gear in snowboarding.
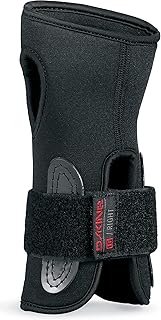
Pro-Tec IPS Adult Wrist Guards
Dual-strap design with rigid palmar splint — the single most effective injury-prevention piece a snowboarder can own.
View on Amazon →Body Mechanics of a Safe Fall
Safe falling is a learnable physical skill, not an innate talent. Judo practitioners, gymnasts, stuntpeople, and martial artists all train fall technique extensively, and the principles transfer directly to snowboarding. The fundamental goal is identical across all disciplines: spread the impact force over the largest possible surface area, over the longest possible time duration, avoiding rigid structures like outstretched wrists, locked elbows, and rigid spinal columns.
Force equals mass times deceleration. When you fall, you are decelerating from your riding speed to zero. The faster you were moving, and the shorter the time that deceleration takes, the higher the peak force on your body. This is why powder falls hurt so much less than hard-pack falls at the same speed — the compressible snow extends your deceleration time from milliseconds to tenths of seconds, dramatically reducing peak force. Every safe fall technique is essentially a method for artificially extending deceleration time and redistributing forces to durable body parts.
The Three Core Principles
Tuck, don’t extend. The most damaging instinct in any fall is extending your arms to catch yourself. This concentrates enormous force on the small bones and ligaments of the wrist and elbow. Instead, train yourself to tuck your arms into your body as contact approaches. Let forearms and shoulders absorb impact rather than the mechanical disadvantage of an outstretched hand.
Round, don’t stiffen. A rigid spine and locked core transmit forces directly between impact point and vulnerable structures. A rounded back — chin tucked, core engaged, slight forward flex at the hips — converts the body into a partial spring, using muscular tension to absorb kinetic energy. This is the same principle used in vehicle crumple zones: controlled deformation saves what’s inside.
Roll, don’t stop. Once you are going down, momentum is working against you. Instead of fighting it by bracing, redirect it by rolling. A diagonal roll distributes impact across the shoulder, the side of the torso, the hip, and the thigh — each absorbing a portion of the total energy. A dead-stop impact concentrates all of that energy in one location at one moment.
Fig 2 — Rounded/tucked position (left) distributes forces safely. Extended-arm bracing (right) concentrates force at the wrist, causing fractures.
Training Your Fall Reflex
The challenge is that fall reflexes operate below conscious awareness. The instinctive arm-extension response is hardwired from early childhood and activates before any deliberate thought can intervene. This is why simply knowing the correct technique is insufficient — you must physically practice it until the new response becomes automatic.
Effective fall reflex training begins off the snow. Practice on a gymnastics mat or padded surface: start from a kneeling position and fall forward deliberately, training your arms to tuck and your forearms to absorb rather than your palms. Escalate to falls from standing. When these feel automatic, take them to a gentle slope at very low speed, deliberately practicing controlled falls in both directions. This is the approach used in professional snowboard instruction — and it is far more effective than waiting for real falls to teach you.
If you are investing in snowboard lessons, ask your instructor to include explicit fall technique in your first session. Most curricula skip it entirely, which is a missed opportunity — fall technique instruction pays dividends for every subsequent day on the mountain.
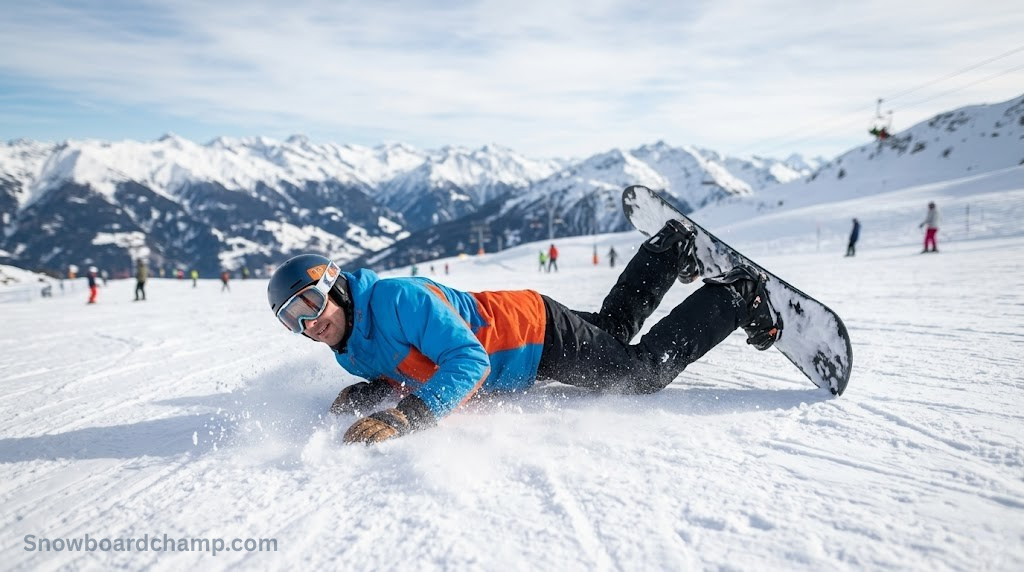
Mastering Toeside Falls: Forward-Facing Impacts
Toeside falls are the forward-facing wipeouts that happen when your toeside edge catches, when you over-rotate on a turn, or when speed gets the better of your balance on a downhill traverse. They are statistically the most dangerous category of fall for beginner riders because the natural instinct — throw your hands out to stop the face-plant — is precisely the mechanism that produces wrist fractures.
Recognize the Fall Before It Happens
The moment you feel your weight shift forward past the point of recovery, commit to the fall rather than fighting it. Attempting to recover from a committed forward fall by stiffening is almost always worse than letting it happen safely. Relax your shoulders instantly — tension is your enemy at this moment.
Fig 3 — The tipping-point moment: once past recovery, commit immediately rather than fight
Tuck Your Chin to Your Chest
This is the most critical single action in a toeside fall. Chin to chest prevents two catastrophic outcomes: face contact with the snow and hyperextension of the cervical spine. Your neck is a fragile pivot point — protect it first. This motion also naturally initiates the rounded-back posture that distributes impact effectively across your upper body.
Fig 4 — Chin-tuck reflex: the single most important action in a toeside fall
Make Fists — Contact with Forearms First
Form loose fists with both hands rather than open palms. This protects your fingers from bending backward and, critically, shifts your instinctive reach to use forearms rather than palms as the primary contact surface. Forearms are far more durable — protected by thick muscle bellies on both sides — than the complex arrangement of small bones in the wrist. Aim to contact the snow with the outer forearm, between the elbow and wrist, rolling the impact up toward the elbow as your body continues forward.
Curl and Roll — Don’t Stop Dead
As forearm contact is made, allow your body to curl forward in a C-shape, rolling the contact area across the shoulder and transferring momentum laterally rather than stopping it abruptly. This rolling motion is the key to safe forward falls: it converts a sudden stop (high force) into a distributed slide (much lower peak force). Let your padded shoulders and the side of your torso complete the roll. Do not fight the momentum — ride it.
Fig 5 — Toeside roll sequence: forearm → shoulder → hip, each absorbing a portion of the total impact energy
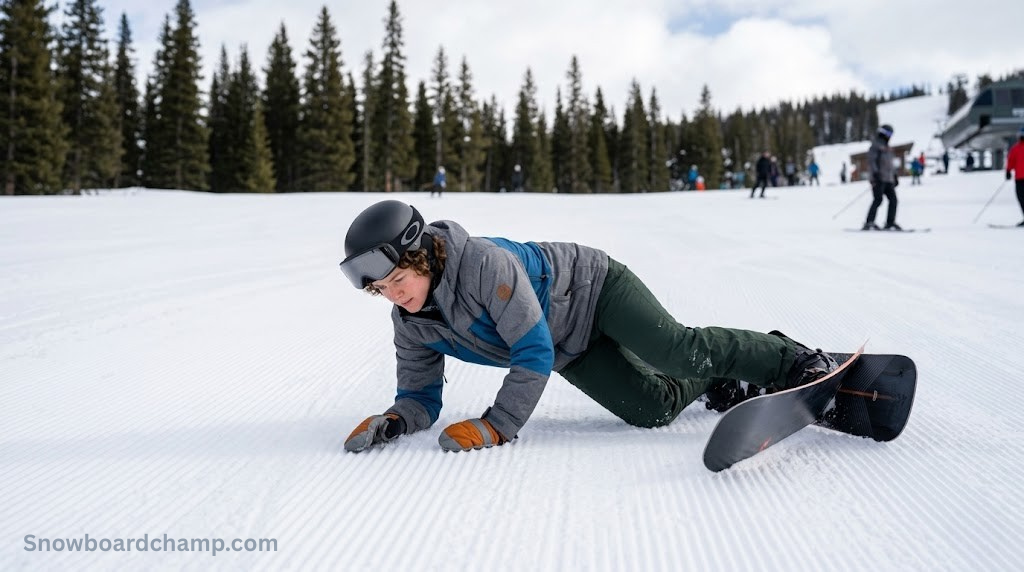
Mastering Heelside Falls: The Backward Slam
Heelside falls — backward falls onto the tailbone, back, and head — are the other major fall category and are particularly punishing without protective gear. They happen when the heelside edge catches during a toeside traverse, when a rider sits back too far, or when loss of balance sends weight backward faster than the board can compensate. The name “sitter” makes them sound mild, but an uncontrolled backward fall at moderate speed can produce tailbone fractures, spinal compression, and concussions if the back of the head makes contact with hard snow.
Fig 6 — Heelside fall sequence: the moment balance is lost backward, tuck chin, round back, and land on padded impact shorts
The key technique differences for heelside falls compared to toeside are subtle but important. Tucking the chin becomes even more critical because the back of the head is now the lead impact point if anything goes wrong. The hands should be kept close to the chest — avoid reaching backward, which causes the same wrist injury risk as reaching forward in a toeside fall. Core engagement is paramount: a tight, rounded lower back position distributes the impact across the entire lumbar region rather than loading one vertebra.
This is where impact shorts with high-density tailbone padding make their biggest contribution. A proper tailbone pad — made from D3O, EVA foam, or similar energy-absorbing materials — transforms what would otherwise be a concentrated, painful coccyx impact into a distributed, survivable compression. Riders who have experienced tailbone bruising without impact shorts almost universally adopt them afterward.
For riders dealing with recurring heelside falls during the learning phase, a technique adjustment to stance and positioning often helps more than pure fall training. Riding with too much forward lean can trigger habitual heelside catches; checking your stance setup and forward lean settings on your bindings may reduce the frequency of heelside edge catches significantly.

Demon Flex-Force Pro Impact Shorts
Multi-zone D3O protection covering tailbone, hips, and thighs — the best defense against heelside slam injuries.
View on Amazon →High-Speed and Hard-Pack Falls: A Different Beast
Falling at speed on hard-pack or ice requires an entirely different mental framework from the gentler tumbles of beginner slopes. At 30 mph (roughly 48 km/h) — a speed many intermediate riders regularly reach on steeper runs — the kinetic energy involved is substantial enough that even perfect technique cannot prevent all injury. The goal at speed shifts from “fall safely” to “minimize impact velocity before contact.”
The first and most important tool in high-speed fall management is pre-fall deceleration. The moment you sense impending loss of control, begin a controlled check — a quick edge-set and weight-forward motion that sheds speed while you still have board contact with the snow. Losing even 10 mph before contact dramatically reduces the forces involved. This is a reflexive skill that develops with experience but can be taught and practiced deliberately.
When a high-speed fall becomes unavoidable, resist the urge to tighten into a ball. While tucking is correct at low speeds, a very tight tuck at high speed on hard-pack can increase rotational energy, causing you to spin or tumble instead of sliding. Instead, aim for a controlled slide: get your body into a slight diagonal, leading with the padded portions of your outer thigh and hip, and let friction do the work of decelerating you across the snow surface. Keep your arms pressed against your body — the temptation to brake with outstretched hands is overwhelming but catastrophic.
Helmet quality matters enormously in high-speed scenarios. The rotational forces in a high-speed head impact are fundamentally different from those at low speed, and this is precisely where MIPS technology earns its cost premium. For a detailed technical breakdown, see the MIPS technology explainer. Riders regularly riding steep, fast terrain should seriously consider helmets with integrated MIPS or equivalent rotational energy management systems.
| Speed | Fall Type | Primary Technique | Critical Gear |
|---|---|---|---|
| < 10 mph (learning) | Controlled tumble | Tuck, round, roll | Wrist guards, impact shorts |
| 10–20 mph (moderate) | Mixed roll/slide | Pre-decel + forearm lead | Full protective set + helmet |
| 20–35 mph (fast) | Controlled slide | Diagonal slide, arms in | MIPS helmet essential |
| > 35 mph (very fast) | High-energy slide/tumble | Maximum pre-decel priority | Back protector + airbag vest |
The particular danger of icy hard-pack is that the coefficient of friction is dramatically lower than on powder or groomed snow, so slides continue much longer and may carry you into hazards — trees, lift towers, rocks, other riders. Situational awareness before a potential fall — knowing what’s downhill from your position — is a pre-emptive safety measure that becomes critical at high speed and on steeper terrain. If you are riding challenging terrain, reviewing the backcountry safety protocol applies important principles about terrain assessment that transfer to any aggressive riding scenario.
Fig 7 — High-speed controlled slide: diagonal body, arms in, lead with padded outer hip and thigh
Essential Protective Gear: The Complete Overview
Technique and gear are complementary, not substitutes. The best technique in the world cannot prevent all injuries in all falls, and the best gear cannot substitute for poor technique at speed. The riders with the lowest injury rates combine trained fall reflexes with appropriately selected protective equipment. This section surveys the complete protective gear landscape with honest assessment of what each item protects against, how well it works, and who most needs it.
One important framing note: protective gear must be worn consistently to be effective. Many riders own wrist guards, impact shorts, or helmets that sit in their bag on powder days because the gear feels too hot, too restrictive, or too inconvenient. Gear design has improved dramatically in recent years — modern impact shorts are as comfortable as cycling shorts, and modern helmets are lighter and better ventilated than versions from even five years ago. Comfortable gear gets worn; worn gear protects. Prioritize fit and comfort alongside protection ratings when selecting any protective equipment.
✓ What Protective Gear Prevents
- Wrist and forearm fractures (guards)
- Concussions and TBI (helmet)
- Tailbone/coccyx fractures (impact shorts)
- Hip pointer and contusion injuries
- Spinal compression (back protector)
- Knee ligament tears (knee braces)
✗ What Protective Gear Cannot Prevent
- Catastrophic high-energy impacts
- Deep muscle contusions at speed
- Falls from collisions with other riders
- Shoulder separations (no current guard)
- Ankle injuries in soft bindings
- Falls due to fatigue or skill gaps
The recommended minimum protective kit varies by experience level and riding style. Beginners have the highest injury rates and the least developed fall technique — they benefit most from comprehensive protection. Advanced park and backcountry riders face different risks than groomed-run riders and should adjust their gear selection accordingly.
| Gear Item | Beginner | Intermediate | Park Rider | Backcountry |
|---|---|---|---|---|
| Helmet | Essential ✓ | Essential ✓ | Essential ✓ | Essential ✓ |
| Wrist Guards | Essential ✓ | Recommended ◐ | Recommended ◐ | Optional ◐ |
| Impact Shorts | Essential ✓ | Essential ✓ | Essential ✓ | Recommended ◐ |
| Knee Pads | Optional ◐ | Optional ◐ | Recommended ✓ | Optional ◐ |
| Back Protector | Lower priority ✗ | Optional ◐ | Recommended ✓ | Essential ✓ |
| Avalanche Airbag | N/A ✗ | N/A ✗ | N/A ✗ | Essential ✓ |
If you are considering the full gear investment from scratch, reviewing the true cost analysis of snowboarding gear helps put protective equipment spending in context. A comprehensive protective kit typically costs between $150 and $400 — a fraction of a single emergency room visit, and orders of magnitude less than lost time from a serious injury.
Helmets Deep Dive: Not All Protection Is Equal
The helmet conversation in snowboarding has evolved significantly. The baseline question — “should I wear a helmet?” — has been definitively answered by both the data and the cultural shift in the sport: yes, always, regardless of experience level or terrain. The more useful conversation now centers on which helmet provides genuinely better protection and what to look for beyond the marketing claims.
Certification Standards
Snowboard helmets should carry at minimum one of the following certifications: ASTM F2040 (U.S. standard), CE EN 1077 (European standard), or the newer CE EN 16027 for dual certification covering both ski/snowboard and urban cycling impacts. These standards test helmets against specific impact velocities and force transmission thresholds. A helmet without certification is not tested safety equipment — it is decorative headwear and should not be worn on the mountain.
Beyond baseline certification, the MIPS (Multi-directional Impact Protection System) liner is the most evidence-backed additional safety feature currently available. In oblique impacts — the angled collisions responsible for most real-world concussions — MIPS-equipped helmets allow the outer shell to rotate approximately 10–15mm relative to the liner, reducing the rotational acceleration transferred to the brain. The comprehensive rotational force and MIPS analysis demonstrates why this matters in practical snowboard fall scenarios.
Fit Is the Most Important Specification
No protection technology compensates for a poorly fitting helmet. A helmet that sits too high on the forehead, rocks forward and backward under pressure, or sits askew on impact cannot transfer energy correctly to the EPS liner. Proper fit means: the helmet sits level, covering the forehead to within two finger-widths of the eyebrows; straps form a V-shape below and in front of the ears; the buckle sits under the chin with no more than two finger-widths of space.
When to Replace Your Helmet
Any helmet that has sustained a significant impact should be replaced, even if the damage is invisible to the eye. EPS foam — the energy-absorbing liner — works by permanently deforming under impact. Once compressed, it cannot absorb energy at the same rate in subsequent impacts. Most manufacturers recommend replacing helmets every 3 to 5 seasons of regular use even without significant impacts, as EPS foam degrades over time.
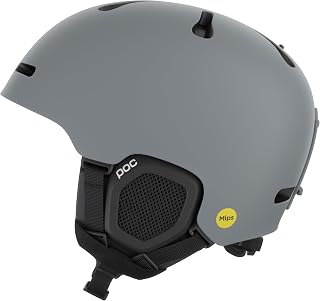
Smith Vantage MIPS Snowboard Helmet
Koroyd® construction, MIPS rotational protection, 22 vents — the benchmark in snowboard helmet safety and breathability.
View on Amazon →For goggles, which pair critically with helmets to ensure the helmet sits correctly (helmet-first goggle fit testing), see the photometric VLT and spectral contrast goggle analysis. A goggle that pushes your helmet backward is a silent safety hazard many riders don’t consider.
Wrist & Arm Protection: The Evidence-Based Case
No protective gear for snowboarding has a stronger evidence base for effectiveness than wrist guards. Multiple independent studies — conducted across different populations, countries, and time periods — have consistently found that wrist guard use reduces wrist fracture rates by 75 to 85 percent. This is not a marginal benefit. It is one of the most dramatic risk reductions achievable through any single piece of equipment in any action sport.
Understanding why wrist guards work helps riders choose the right type. The primary mechanism of protection is mechanical splinting: a rigid palmar splint limits wrist dorsiflexion (backward bending) beyond the safe range of motion. When an extended arm contacts the snow and the body’s weight loads the wrist, the splint distributes the bending force across the forearm rather than concentrating it at the wrist joint. Secondary protection comes from padding that absorbs and spreads contact forces across a larger surface area.
Types of Wrist Guards
Hard-splint wrist guards provide the highest level of protection and are most appropriate for beginners and park riders. They feel stiffer and take a run or two to get used to but provide structural protection that soft guards cannot match.
Glove-integrated wrist guards incorporate shorter, more flexible splints into a glove design. The protection level is lower than dedicated hard-splint guards but the convenience factor drives higher compliance — riders actually wear them. For intermediate and advanced riders who resist wearing separate guards, integrated glove guards are a significant upgrade over no protection.
Soft wrist supports provide compression and proprioceptive feedback but minimal splint protection. They are appropriate for riders recovering from mild sprains who need support without the bulk of hard guards, but should not be considered fall protection.
If your riding style makes standard wrist guards uncomfortable or impractical, layering your hand and arm protection appropriately can still make a meaningful difference. Pair whatever guard you will consistently wear with proper gloves that cover the guard perimeter.

Dakine Wristguard Gloves
Hard-splint wrist guards built into a full snowboard glove — maximum compliance, maximum protection, no separate gear to forget.
View on Amazon →The debate between mittens and gloves is relevant to wrist protection: see the thermal conductivity and efficiency comparison for a technical look at warmth trade-offs. When it comes to wrist guard integration, gloves have a clear advantage over mittens, which is one factor worth considering in the overall decision.
Impact Shorts and Spine Protection: The Lower Body Defense
Impact shorts occupy an interesting space in snowboard protective gear: they are consistently underrated by beginners who don’t yet understand how much their tailbones are about to suffer, and consistently loved by experienced riders who learned the hard way. The learning phase of snowboarding involves repeated heelside falls directly onto the tailbone — often dozens of times in a single beginner session. Without padding, this quickly produces bruising and soreness that makes subsequent sessions far less enjoyable and, in more serious cases, can result in coccyx fractures requiring weeks of recovery.
Modern impact shorts have evolved far beyond early padded shorts that felt like wearing a diaper. Current designs use thin-profile D3O or EPS foam pads that flex with body movement, providing targeted protection to the tailbone, hips, and thighs without adding significant bulk under pants. Most riders cannot feel the difference in mobility between padded and unpadded shorts after a few minutes of riding. The gear you forget you are wearing is the gear you will wear consistently.
What to Look for in Impact Shorts
Tailbone protection is non-negotiable — look for a dedicated coccyx pad with meaningful thickness (at minimum 10mm of energy-absorbing material, ideally 15mm or more for the tailbone zone). Hip pads protect against the second most common heelside impact point and are worth the marginal size increase. Thigh pads are valuable for park riders but lower priority for general mountain riding.
Material quality matters enormously. Cheap EVA foam compresses and retains its compressed shape over time, losing protection after repeated impacts. D3O remains soft and flexible until impacted, then stiffens to absorb energy — this means it provides better protection over a longer product life. Viscoelastic foams fall between these extremes, offering good protection at moderate cost.
The comprehensive impact shorts kinetic energy dissipation review provides detailed material testing data if you want to compare specific models before purchase.
Back Protectors
Back protectors become increasingly important as riding progresses from groomed runs to the park and backcountry. Jump landings that go wrong — back-heavy landings that compress the lumbar spine — represent one of the most medically serious snowboard injury mechanisms. A certified back protector (CE Level 1 or Level 2, with Level 2 providing superior protection) distributes the impact of spinal loading across a wider surface area and provides the spine with mechanical support during the deceleration phase of a high-energy landing.
For those exploring the backcountry, the protective gear equation changes again — avalanche airbags, transceivers, probes, and shovels become the primary safety priority over impact protection. The backcountry snowpack stratigraphy and geometry guide provides essential context on the distinct risk landscape of off-piste riding.

POC Spine VPD 2.0 Back Protector
CE Level 2 certified, VPD material (soft until impact), contoured for snowboard body mechanics — park and backcountry essential.
View on Amazon →Knee Protection
Knee injuries in snowboarding often involve ACL and MCL tears rather than contact injuries, which means knee braces and pads serve different purposes. Soft knee pads protect against the contact injuries of park riding — direct knee-to-rail contact or knee-to-snow landings. Prophylactic knee braces support ligamentous stability during aggressive edge-to-edge movements but are better suited for riders with pre-existing knee instability than as universal protection.
The best snowboard knee pads review breaks down the difference between impact protection and ligamentous support in detail. Understanding what kind of protection you need for your riding style prevents spending money on the wrong type of knee protection.
After the Fall: Self-Assessment and When to Stop
What you do in the minutes immediately following a significant fall is nearly as important as how the fall itself was handled. Adrenaline is a powerful analgesic — it can mask pain signals from serious injuries for fifteen to thirty minutes, causing riders to attempt to continue riding on structures that should be rested or immobilized. Training yourself to pause and assess after any significant fall is one of the most important safety habits a snowboarder can develop.
The Post-Fall Protocol
Stop. Breathe. Establish Safety.
The first priority after any fall is to get clear of the fall line to avoid being hit by other riders, then to stop and breathe. Even an apparently minor fall can cause adrenaline-masked injuries. Resist the immediate urge to pop up and continue riding until you have briefly assessed your status.
Systematic Body Check
Work methodically from head to foot. Check for: any headache, dizziness, visual disturbance, or confusion (possible concussion); neck pain or stiffness; shoulder pain or difficulty raising the arm; wrist pain, deformity, or swelling; lower back pain; knee pain or instability; ankle pain. If you find significant pain in any location, do not assume you can “ride it off.”
Continue, Rest, or Seek Help
Continue riding only if the self-assessment reveals no significant pain and your cognitive status is completely normal. Rest at the lodge if there is mild discomfort and see how it develops over 30 minutes. Seek immediate medical assistance if you experience any of the following: any head symptoms whatsoever, inability to bear weight, deformity of any joint, numbness or tingling in any limb, or significant swelling appearing within minutes of the fall.
The RICE Protocol for Soft Tissue Injuries
For sprains, strains, and contusions that do not require emergency attention, the RICE protocol provides the standard first-response framework: Rest the injured area immediately; Ice to reduce inflammation and pain within the first 24–48 hours (20 minutes on, 20 minutes off); Compression to limit swelling; and Elevation to reduce fluid accumulation. Most resort medical centers have ice packs and basic first aid available.
For riders dealing with recurring injuries or looking to build a systematic approach to injury prevention across the season, the complete injury prevention guide provides pre-season conditioning protocols, in-season maintenance, and recovery strategies that reduce cumulative injury risk over a full riding season.
Knowing When to Call It a Day
One of the most important and consistently undervalued safety decisions in snowboarding is simply stopping before fatigue compromises your control. The temptation to squeeze in one more run — especially when you have a day pass and feel the pressure to get maximum value — is one of the most predictable contributors to late-day injuries. Tired bodies make poor decisions, react slowly, and fall poorly. The day where you stop riding at 2 PM in good form is a safer and more productive riding day than the one where you push through until 4 PM and take a hard fall you could have avoided.

G-Form Pro-X3 Knee Pads
Rate-dependent SmartFlex technology — soft and flexible when moving, rigid on impact. The benchmark in low-profile knee protection.
View on Amazon →Frequently Asked Questions
Ride More, Hurt Less: The Takeaway
Falling is not the enemy — falling badly is. Every principle in this guide points toward the same destination: a rider who understands the mechanics of falls, has trained appropriate physical responses, and is protected by the right gear for their riding style. That rider doesn’t stop falling — snowboarding’s physics guarantee that everyone falls — but they fall smartly, get up quickly, and ride for decades without the injuries that cut other riders’ seasons short.
Start with the basics: a certified helmet, wrist guards, and impact shorts. Add technique training — deliberate, slow-speed fall practice — before you build speed. Progress your protective gear as your terrain and ambitions expand. And always stop before fatigue compromises the judgment and coordination that keep falls survivable.
Explore Full Injury Prevention Guide →


