
Why Do My Feet Hurt When I Snowboard? The Ultimate Guide to Pain-Free Riding
You’ve waited all week for fresh powder. You strap in, catch the first lift, and by the third turn of your second run, it hits: that agonizing, burning sensation in your arches, or perhaps a sharp pinch on your pinky toe. If you’ve ever wondered, “Why do my feet hurt when I snowboard?” you are far from alone. In fact, foot pain is the single most common complaint among riders of all skill levels.
Snowboarding foot pain isn’t just an annoyance; it’s a performance killer. When your feet hurt, your technique suffers. You stop leaning into your edges, your weight distribution gets messy, and you start making “panic turns” to avoid further discomfort. Understanding the mechanics of your foot inside a snowboard boot is the first step toward a pain-free season.
This is the most comprehensive guide to snowboard foot pain on the internet. Whether you are a beginner riding rental boots for the first time or a seasoned park rat with six seasons under your belt, the information here will help you diagnose, treat, and permanently eliminate the pain that’s been robbing you of your best days on the mountain.
Common Types of Snowboarding Foot Pain
Not all foot pain is created equal. To fix the problem, you first need to identify the “flavor” of agony you’re experiencing:
Arch Cramping
Often described as a “burning” or “seizing” in the middle of the foot. Usually caused by muscle fatigue or lack of support. Worsens on cat-tracks and flat runs.
Top of Foot Pressure
A dull ache or numbness on the dorsal part of the foot. Frequently linked to over-tightened laces or binding straps pressing on tendons.
Heel Ache
Sharp pain in the back of the foot, often resulting from friction or the heel lifting inside the boot during toeside turns.
Toe Bang
When your toes repeatedly smash into the front of the boot, common during heavy carving or in boots that are too large.
Pinky Toe Squeeze
Sharp lateral pressure on the fifth toe, indicating the boot is too narrow or that you have a wider foot than the boot’s last accommodates.
Ball of Foot Burn
Hot, burning sensation under the metatarsal heads. Often related to rigid insoles concentrating pressure at a single point under the forefoot.
Identifying which of these you experience—and when during your ride it appears—is diagnostic gold. Pain that starts immediately suggests a structural fit problem. Pain that develops after an hour points more toward fatigue, circulation, or technique issues. Pain only on certain turns (heelside vs. toeside) narrows the problem to stance geometry or heel retention.
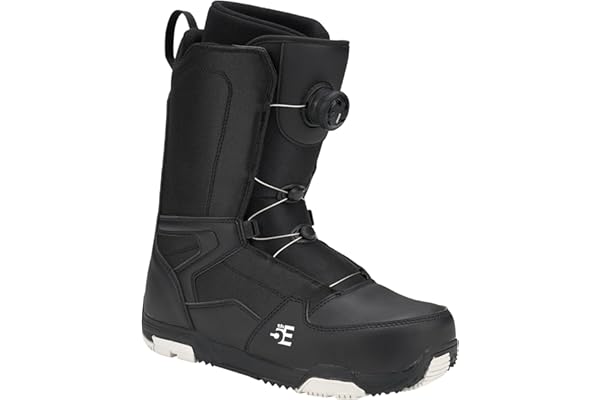
Upgrade Your Comfort: Top-Rated Snowboard Boots
If your current boots are causing agony, it might be time for a pair designed with modern ergonomics and heat-moldable liners.
View Best Snowboard BootsPoor Boot Fit: The #1 Cause
The snowboard boot is the most critical piece of gear you own. While a fancy board looks cool, a poorly fitting boot will ruin your day faster than a core shot. Most riders suffer from pain because they treat snowboard boots like sneakers. Snowboard boots need to be snug—very snug—but never restrictive.
When there is extra space in your boot, your foot moves. Every time you move your foot inside the boot before the boot moves the binding, you are losing energy and creating friction. This “slop” forces your smaller foot muscles to work overtime just to stabilize yourself, leading to massive cramping.
The physics are straightforward. A snowboard boot is a lever system. Your foot is the input, and the board is the output. Any play between input and lever means delayed response, lost energy, and compensatory muscle effort. The tighter that mechanical connection—within comfortable limits—the less work your feet have to do.
💡 Pro Tip: The Fingernail Test
Put on your boot and buckle up to your normal riding tension. Try to slide your fingernail between the back of your heel and the boot collar. If you can fit more than your fingernail, the boot likely has too much volume for your foot. This means your heel is lifting on every toeside turn, silently destroying your technique and exhausting your calf muscles.
Incorrect Boot Size or Width
Here is a hard truth: roughly 60% of snowboarders are riding in boots that are at least a half-size too large. Why? Because when you try them on in the shop, a larger boot feels “comfortable” like a slipper. However, on the mountain, that extra room leads to heel lift and toe bang.
The Shell Fit Test
To check if your size is right, remove the liner from the boot. Put your foot in the empty shell and slide your toes until they touch the front. If you can fit more than two fingers behind your heel, the shell is too big. Ideally, you want a “one-finger” fit for performance riding.
Understanding Boot Lasts and Foot Width
Beyond length, boot width—known in the industry as the “last”—is equally critical. Boots are typically built on lasts ranging from narrow (95–97mm) to wide (102–106mm). If you have a wide foot jammed into a narrow last, no amount of buckle adjustment will prevent lateral compression of the metatarsals, which leads directly to numbness and burning in the ball of the foot.
Measure your foot width at the widest point (usually across the ball) while standing barefoot on a sheet of paper. Trace the outline and measure. Compare that to the manufacturer’s last specifications, which are usually available on their website or by calling the shop. This single measurement has saved more riders from seasons of pain than any other single piece of advice in this guide.
Foot Volume: The Hidden Variable
Two feet with identical length and width measurements can feel completely different in the same boot because of volume—the three-dimensional space your foot occupies. A high-instep foot will feel choked in a low-volume boot even if the length and width are perfect. Conversely, a low-volume foot in a high-volume boot will have so much room that the liner shifts around regardless of how tightly you close the lacing system.
High-volume boots typically have more material above the instep and more padding in the ankle cuff area. Brands like Burton and Salomon have started to label boots as “standard volume” versus “low volume” to help consumers self-select. If you have thin ankles and a low arch, always try the low-volume version of a boot first.
| Foot Type | Likely Problem in Standard Boots | What to Look For |
|---|---|---|
| Wide forefoot / narrow heel | Lateral squeeze + heel lift simultaneously | Wide last boot with J-bar heel inserts |
| High instep / high arch | Pressure on top of foot, arch collapse | High-volume boot + custom orthotic |
| Low arch / flat foot | Arch burn, ankle roll, loss of edge feel | Supportive aftermarket insole, medium-stiff flex |
| Narrow/slender foot | Heel and ankle slop, toe bang | Low-volume boot, go half-size down |
| Wide overall / duck foot | Pinky toe compression, bunion aggravation | Wide-last specialist boots (e.g. Ride Lasso) |
Heel Lift and Pressure Points
Heel lift occurs when your heel rises off the footbed during a toeside turn. To compensate, riders often over-tighten their bindings, which creates a new problem: pressure points. These sharp pains usually occur on the ankle bone or the top of the foot where the binding strap sits.
If you find yourself constantly cranking down your budget snowboard bindings to stop your heel from moving, the problem is your boot volume, not the binding tightness.
How Heel Lift Leads to Calf Cramps
Every time your heel rises 3–5mm inside the boot—an amount almost too small to feel consciously—your gastrocnemius and soleus muscles fire to pull it back down. Multiply this by hundreds of turns over a full day on the mountain and you have the recipe for debilitating calf cramps by run four. Many riders mistake this calf fatigue for being “out of shape” when in reality a properly fitting boot would have prevented every single contraction.
J-Bar Inserts: The Budget Fix
If your boot fits perfectly in every other dimension except heel hold, J-bar foam inserts are a $10–20 solution that many boot fitters swear by. You place them along the inner heel pocket of the liner, reducing the available volume in that zone and locking your heel down without affecting the forefoot fit. Most boot-fitting shops carry them and can apply them in under ten minutes.
Boots Too Tight or Too Loose: Finding the Sweet Spot
This seems obvious, but the nuance is important. A boot should be tighter in the lower zone (around the ankle and heel) and have slightly more room in the upper cuff (around the shin). The goal is total heel and ankle lockdown with free shin flex. Many riders do the opposite: they crank the upper strap to control their board and leave the lower zone loose, which is exactly backwards from what works.
⚠️ Warning: Signs Your Boot Is Too Tight
Cold feet within 20 minutes of strapping in (circulation cutoff), white or bluish toes after a run, tingling or numb sensation across the top of the foot, and a headache-like ache across the forefoot are all signs you are over-tightening. Ease the lower zone first, then re-evaluate. Tight does not mean painful.
The ideal buckle tension: you should be able to take a single sheet of paper and slide it between the boot tongue and your shin. If you can’t, it’s too tight. If you can slide a pencil, it’s too loose. This is a rough but practical test that any rider can do while sitting on a bench at the base lodge.

Responsive Control: Pro-Level Bindings
Better bindings distribute pressure more evenly across the foot, reducing hot spots and improving edge-to-edge response.
Check Burton Cartel X ReviewBinding Setup and Stance Issues
Sometimes the pain isn’t in the boot—it’s in the geometry of how you stand on the board. If your binding angles are too aggressive or your stance is too wide, it puts lateral pressure on your feet. This often manifests as pain on the outside of the foot or the knees.
Consider trying a “duck stance” (e.g., +15 / -15) to allow your body to move more naturally. If you are unsure of your orientation, check out our guide on goofy vs regular snowboard stances to ensure you’re set up for success.
Stance Width and Foot Fatigue
Stance width—the distance between your two bindings—directly affects how much lateral stress your feet absorb. A stance that is too wide forces a splayed-hip position that puts unusual torsional stress on the ankle joints. A stance too narrow makes the board feel unstable, causing the feet to clench in compensation.
The starting point for stance width is shoulder width, measured from the outside of each shoulder. Set your bindings to place your feet at that exact distance. From there, adjust by 1cm increments over several sessions until the board feels balanced without feeling like you’re doing the splits.
Binding Angles: The Degree That Changes Everything
Your binding angle is the number of degrees your foot is turned relative to the board’s centerline. At zero degrees, your foot points straight across the board. At +15 degrees (front foot), your front toes point slightly toward the nose. At -15 degrees (back foot in duck stance), your back toes point toward the tail.
When your binding angles fight your natural knee-over-toe alignment, your ankle is forced into a constant subtle rotation. This creates a twisting motion inside the boot that causes friction blisters, metatarsal pain, and over time, aggravates existing joint issues. The easiest way to find your natural angle: stand on flat ground, close your eyes, and march in place for 10–15 steps. When you stop, look down at your feet. The angle your toes point is your natural stance angle. Use those numbers as your starting point.
Highback Rotation
An often-overlooked binding adjustment is highback rotation—tilting the highback forward so it angles toward the heel edge. When the highback is straight vertical (zero rotation), there is a gap between it and your calf during heelside turns that your calf muscles have to bridge through muscular effort. Rotating the highback forward 2–5 degrees so it rests against your calf during normal stance eliminates this gap and dramatically reduces calf fatigue over the course of a day.
Cold Feet vs. Painful Feet: Understanding the Difference
Riders frequently conflate cold feet with painful feet, but the causes and solutions are different. Cold feet in snowboard boots almost always trace back to one of three causes: over-tightening cutting off circulation, poor-quality socks retaining moisture, or a boot that is simply too large (creating an air gap around the foot that convects body heat away).
Painful feet from cold (as opposed to mechanical pain) typically feel like a deep, dull ache in the toes and forefoot after prolonged exposure, rather than a sharp, localized sensation. If your feet feel cold within the first 15 minutes of a run, that’s a fit issue, not a temperature issue. A properly fitted boot creates a “sock” around your foot that your body heat warms quickly and retains efficiently. If your boots are the right size, you should never need foot warmers on a standard ski day.
Chemical toe warmers are a last resort, not a strategy. They mask the symptom (cold feet) while doing nothing about the cause (poor boot fit), and over-relying on them can lead to burns if placed against thin skin.
Lack of Proper Footbeds or Insoles
Most stock snowboard boot insoles are essentially “packaging foam.” They provide zero arch support. When you lean into a turn, your arch collapses, the foot elongates, and the muscles on the bottom of your foot stretch painfully. This is the primary cause of “boot bang” and arch burn.
Switching to a supportive, aftermarket footbed can be a total game-changer. It holds your foot in a “neutral” position, preventing the collapse and keeping your foot from sliding forward into the toe box.
Types of Aftermarket Footbeds
Not all insoles are equal, and the difference between a $20 drugstore insert and a $120 custom-fit snowboard footbed is significant. Here’s how to navigate the options:
| Insole Type | Support Level | Best For | Price Range |
|---|---|---|---|
| Stock OEM foam | Minimal | First-time riders testing the sport | Included |
| Superfeet Green/Blue | Medium-High | Most riders with normal arches | $40–$60 |
| Sidas 3D Winter | High, heat-moldable | Riders with specific arch heights | $60–$90 |
| Remind Insoles | Sport-specific snowboard | Riders wanting lateral edge feel | $50–$80 |
| Custom orthotics | Maximum, individual | Chronic foot issues, flat feet, plantar fasciitis | $200–$500 |
How to Tell If You Need an Insole
Stand barefoot on a wet tile floor and step away. Look at the footprint. If you see the full outline of your foot—heel, arch, and forefoot all connected—you have a flat or low arch that will almost certainly collapse under snowboarding loads without support. If you see only the heel and forefoot with a gap in the middle, you have a normal to high arch. High arches are more rigid but can create pressure concentration under the metatarsal heads, which also benefits from an insole with a metatarsal pad.
Over-Tightening BOA or Lace Systems
We see it every day: a rider experiences a little bit of movement, so they crank their BOA or speed lace system until their foot turns purple. This cuts off circulation and compresses nerves. If your feet feel cold or numb, but not necessarily “sharp” pain, you are likely over-tightening. Tighten the lower zone of your boot just enough to be snug, and keep the upper zone tight for support.
BOA Systems: Zone-Specific Tightening
Modern dual-zone BOA systems (like the BOA Fit System used by Burton, Salomon, and others) have two separate dials—one controlling the upper cuff and one controlling the lower foot zone. These are not meant to be cranked to maximum. The recommended technique is to tighten the lower dial first until you feel firm contact around the heel and ankle without pinching, then tighten the upper dial to about 70–80% tension for shin support. The upper dial should never be so tight that it prevents your shin from flexing forward when you bend your knees.
Traditional Lace Systems
Traditional lacing gives you more granular control but also more opportunity to make mistakes. The most common error is tightening the lace uniformly from bottom to top. Instead, use this technique: lace firmly across the forefoot, moderately through the midfoot, and firmly again across the ankle and lower shin. This creates a heel-lock zone without compressing the sensitive dorsal tendons across the top of your foot. Tie off with a double overhand knot rather than a bow to prevent loosening during runs.

Stay Protected on the Slopes
Foot pain makes you more likely to fall. Ensure you have the right protection when your technique fails due to fatigue.
Best Impact Shorts GuideRiding Technique and Muscle Fatigue
Newer riders often suffer from “the claw.” This is when you subconsciously scrunch your toes to try and “grip” the board during turns. Your toes cannot grip a snowboard. This tension travels through the metatarsals and causes the entire foot to cramp. Focus on keeping your toes flat and relaxed, letting the boot and bindings do the work.
Additionally, if you haven’t been doing your off-season prep, your feet simply might not be conditioned for the lateral stresses of snowboarding. Our fitness guide for snowboarding can help you build the necessary foot and calf strength.
Weight Distribution and Foot Pain
Riding with too much weight on your back foot—a common beginner defensive posture called “sitting in the backseat”—creates asymmetric loading on your feet. Your back foot takes nearly all the load while your front foot floats, causing the back foot to fatigue rapidly and the front boot to feel loose and sloppy. The fix is to practice riding with your hips over the centerline of the board, shoulders facing downhill. This equalizes the load between both feet and distributes the riding stress correctly across both legs.
The Break-In Period: What to Expect
Even a perfectly fitted snowboard boot will feel slightly uncomfortable on day one. The liner material, whether foam, gel, or heat-moldable memory foam, needs time to compress and conform to the unique shape of your foot. This process typically takes 3–5 full days of riding, after which the boot should feel almost custom-made.
The break-in discomfort is qualitatively different from fit-problem pain. Break-in discomfort feels like general “newness”—a mild awareness that the boot is there, with possible slight tightness that loosens as the session goes on. Fit-problem pain is specific, sharp, and typically worsens rather than improves as the day progresses.
Accelerating the Break-In Process
If you want to speed up the process, wear your new boots around the house for 30–60 minute sessions before your first ride. Walk up and down stairs. Practice squatting into a snowboard stance. The combination of body heat and movement begins to compress the liner material and starts shaping it to your foot before you even hit the mountain. Some riders even sleep in their liners (removed from the shell) for a night to accelerate this process.
Heat-moldable liners can be placed in a boot oven at your local shop for 10–15 minutes, then worn while they cool to create an almost-custom fit right out of the box. This is particularly valuable for riders with unusual foot shapes, such as a prominent navicular bone, a wide ball of foot with a narrow heel, or a bony ankle protrusion.
Foot Anatomy and Why Snowboarding Stresses It Uniquely
To truly understand snowboard foot pain, it helps to have a basic map of what’s actually inside your boot. The foot contains 26 bones, 33 joints, and over 100 muscles, tendons, and ligaments. During snowboarding, this complex structure is subjected to forces that everyday walking never produces: sustained lateral edge pressure, repeated sudden deceleration, vibration transmitted from the snow surface, and prolonged immobilization in a fixed stance angle.
The Plantar Fascia: The Arch’s Primary Tension Cable
The plantar fascia is a thick band of connective tissue that runs along the bottom of your foot, from the heel bone (calcaneus) to the base of each toe. Its job is to maintain the arch shape under load, acting like a bowstring on a bow. When you snowboard, every edge change places a rotational load on the foot that the plantar fascia must resist. Without adequate arch support, the fascia stretches beyond its elastic limit, causing micro-tears at the heel attachment—the same mechanism as plantar fasciitis. In snowboarding, this manifests as that first-step-out-of-bed heel pain the morning after a big riding day.
The Peroneal Tendons: The Lateral Stabilizers
Running along the outside of your ankle, the peroneal tendons (peroneus longus and peroneus brevis) are critical for resisting ankle inversion—the rolling-outward motion that would otherwise happen every time you initiate a heelside turn. These tendons are under constant eccentric loading during riding, which is why peroneal tendinopathy is one of the more common overuse injuries among intermediate-to-advanced snowboarders. Lateral ankle pain that presents as a dull ache along the outside of the ankle and the lower leg below the fibula is typically peroneal tendon irritation rather than a boot problem.
The Tibialis Anterior: Your Toeside Hero
For every toeside turn, the tibialis anterior—a muscle running down the front of the shin—fires to pull your toes up (dorsiflexion) and create pressure on the toeside edge. When boot flex is too stiff for a rider’s strength level, this muscle has to generate enormous force just to flex the boot, leading to shin and instep pain during or after toeside turns. This is one reason beginner-to-intermediate riders should not be in stiff boots even if they feel “more responsive” in the shop.
Medical Conditions That Worsen Snowboard Foot Pain
For some riders, standard boot-fitting advice isn’t enough because an underlying medical condition is amplifying what would otherwise be manageable discomfort. Knowing whether a pre-existing condition is at play allows you to seek the right intervention rather than endlessly chasing the “perfect boot” that doesn’t exist for your situation.
Plantar Fasciitis
If you experience sharp heel pain specifically during the first few minutes of riding or after sitting on the lift, plantar fasciitis may be involved. The condition involves chronic inflammation at the heel attachment of the plantar fascia and is aggravated by prolonged standing, sudden loading after rest, and any shoe or boot with inadequate arch support. For snowboarding purposes, a firm orthotic with a deep heel cup and generous arch support is the first-line intervention. Stretch the calf and plantar fascia every morning before putting on your boots.
Morton’s Neuroma
A neuroma is a thickening of nerve tissue, most commonly between the third and fourth metatarsal heads. It produces a sharp, burning, or electric-shock sensation in the ball of the foot and toes—often described as “feeling like you’re standing on a marble.” Lateral compression from a narrow boot last is the primary aggravating factor in snowboarding. A wide-last boot with a metatarsal pad insole to spread the forefoot is the mechanical solution; injection therapy or surgery may be required for severe cases.
Bunions (Hallux Valgus)
A bunion is a bony prominence at the base of the big toe caused by the big toe drifting laterally toward the other toes. The prominence creates a pressure point against the medial inner wall of any boot. Riders with bunions should prioritize boots with soft, pliant medial walls and should avoid any boot with a rigid shell that creates a hard contact point directly over the bunion. Some boot fitters can punch out the shell at that point using a heat gun and a ball-and-ring tool to create a small relief zone without compromising the boot’s structural integrity.
Raynaud’s Phenomenon
Raynaud’s causes extreme vasoconstriction of the small blood vessels in the extremities in response to cold or stress, turning the toes white and then blue before eventually recovering to a painful red as blood returns. Riders with Raynaud’s should prioritize wider, higher-volume boots (to avoid any circulatory compression), battery-heated insoles, and merino wool socks with documented warmth ratings. Managing the underlying condition with a physician is important before attempting cold-weather sports.
Diabetes and Peripheral Neuropathy
Riders managing diabetes should be especially vigilant about foot pain and pressure points because peripheral neuropathy can reduce sensation, making it possible to develop blisters, pressure sores, or circulation-related injuries without feeling them during the ride. A daily foot inspection before and after riding is essential. Boot fit should prioritize no pressure points whatsoever over performance snugness, and any rider with significant neuropathy should consult a podiatrist before snowboarding.
Snowboard Boot Liner Technology: A Deep Dive
The liner is the single most important component inside your snowboard boot, and yet most riders never think about it separately from the outer shell. Understanding liner technology gives you a massive advantage when shopping for boots or troubleshooting fit problems.
Foam Liners: The Baseline
Entry-level boots use single-density foam liners. They provide basic cushioning and insulation but pack out quickly—often within just 2–3 days of riding—leaving behind increased volume and sloppiness that the rider tries to compensate for by over-tightening. If you’re in a foam liner that’s packed out, it’s time for either a replacement liner or a new boot.
Thermoformable Liners
Mid-range and premium boots use heat-moldable liners that contain materials (typically EVA foam, thermoformable foam, or proprietary blends) that soften with heat and re-harden in the shape of your foot. The shop process involves placing the boot in a oven at around 70–80°C for a set period, then having you put it on and walk around while it cools. The result is a liner shaped to your unique foot, which eliminates virtually all mechanical pressure points before you even hit the mountain. If your current boots have thermoformable liners but you’ve never had them heat-molded, this is the single best free upgrade available to you (most shops will do it at no charge if you bought the boots there).
Intuition Liners: The Aftermarket Standard
Intuition liners are widely regarded as the best aftermarket liner upgrade available for snowboard boots. Made from a proprietary closed-cell foam called Liteform, they are heat-moldable at lower temperatures than most OEM liners and provide significantly better energy transfer and warmth. They are compatible with most major boot shells and are a go-to upgrade for riders who love their boot shell but want dramatically improved fit and performance. Expect to spend $100–$200 for the liner, plus a small fitting fee at a shop.
Liner Thickness and Warmth Ratings
Liner thickness is a direct trade-off between warmth and precision fit. A thicker liner provides more insulation but occupies more volume, which can make a medium-volume boot feel like a low-volume boot. A thinner liner provides more precise energy transfer and a tighter fit feel, but may leave cold-weather riders wishing for more warmth. As a rule: if you ski/snowboard primarily in temperatures below -10°C, prioritize warmth; if you ride in mild to moderate conditions (above -5°C), prioritize fit precision with a thinner liner.
The Science of Snowboard Socks
No guide to snowboard foot pain would be complete without a thorough discussion of socks, because choosing the wrong sock type is one of the most common self-sabotaging mistakes riders make. The sock is the interface between skin and boot—and if that interface is wrong, nothing else matters.
Why Thick Socks Are the Enemy
The logic of “thicker sock = warmer, more cushioned foot” is intuitive but backwards. Here’s why: thick socks compress the liner, reducing its padding effectiveness and disrupting the custom shape created by heat molding. They bunch up under the arch and at the toe joints, creating pressure points in exactly the locations most sensitive to compression. They reduce circulation by occupying volume that should be occupied by blood flow. And paradoxically, they often lead to colder feet, because compressed, moisture-absorbing cotton or synthetic socks conduct heat away from the skin more efficiently than thin, wicking wool.
What to Wear Instead
The unanimous recommendation from professional boot fitters and competitive riders alike: a single pair of merino wool snowboard-specific socks with a thickness rating of “mid” or “light.” Merino wool regulates temperature in both directions (warm when cold, cooling when warm), wicks moisture away from the skin, resists odor, and maintains its loft under compression better than synthetic alternatives. Brands like Darn Tough, Smartwool, Stance, and Farm to Feet make snowboard-specific versions with cushioning exactly where boot pressure concentrates.
The One-Sock Rule
Never wear two pairs of socks while snowboarding. This creates a shear layer between the two socks that allows friction blisters to develop, as each sock moves slightly relative to the other rather than both moving as one unit with the liner. If your feet are cold enough that you feel the urge to double-up socks, the correct solution is a heated insole, a warmer liner, or a more tightly fitted boot—not a second sock.
Sock Height and Calf Pain
Choose a snowboard sock that extends above your boot cuff—typically an “over-the-calf” or “knee-high” height. A sock that ends in the middle of your calf creates a compression band exactly where the boot cuff ends, cutting off circulation and creating a pressure mark that becomes increasingly uncomfortable over the course of the day. Knee-high socks distribute any pressure across a much longer surface area.
Custom Boot Fitting: Is It Worth It?
Professional boot fitting is one of the most undervalued investments in snowboarding. For a service that typically costs $50–$150 (often credited toward a boot purchase), a certified boot fitter can diagnose and solve problems that riders have been suffering through for years. Here’s what a professional boot fitting session involves and why it’s worth the price.
What Happens During a Professional Boot Fitting
Foot Scanning / Measurement
Most modern fitting services begin with a computerized pressure scan or manual measurement of your foot length, width, arch height, and volume. Some shops use Brannock devices; more advanced facilities use pressure-mapping technology to see exactly where your foot loads while standing in a simulated snowboard stance.
Problem History Interview
A good fitter will ask you a detailed history of your pain: where does it occur, when does it start, does it correlate to specific turns or terrain, what boots have you tried before. This history is diagnostic gold that narrows the solution before you even try on a single boot.
Shell Fit Assessment
The fitter will remove the liner from multiple boot shells and have you step into the bare shell to assess the structural fit of the boot around your foot. This eliminates the liner as a confounding variable and gives the most accurate read on whether the shell geometry matches your foot.
Liner Selection and Heat Molding
Once the shell is chosen, the fitter selects the appropriate liner and heat-molds it to your foot in the boot oven. This typically takes 15–30 minutes including cooling time.
Insole Recommendation
Based on your arch scan and pressure map, the fitter recommends an appropriate aftermarket insole, which may be heat-molded on a separate insole oven if it’s a thermoformable type.
Punch-Out and Modifications
If any spots are already identified as potential pressure points (bunion locations, navicular bone, bony ankle protrusion), the fitter can punch out or stretch the shell and liner at those specific points using specialized tools and a heat gun. This is standard practice, not a sign of a defective boot.
How to Find a Certified Boot Fitter
Look for shops that employ SBFA (Snowboard Boot Fitting Association) certified technicians or shops with a clearly dedicated boot-fitting area separate from the general retail floor. The presence of a boot oven, a shell storage system with multiple sizes of the same model, and a pressure-mapping device are all signs of a shop that takes fitting seriously. Avoid buying boots based solely on online price; the fitting service at a specialty shop is often worth more than the price difference between shop and online retail.
Foot Pain in Young Riders: Special Considerations
Children and teenagers experience snowboard foot pain differently than adults for several important reasons. First, their feet are still growing, which means that a boot that fits perfectly in November can be uncomfortably tight by February. Second, growing feet have softer bone and cartilage structures that are more susceptible to compression injuries. Third, young riders are less likely to articulate their pain accurately—they may simply say their “feet hurt” without being able to describe the specific location or character of the pain.
Sizing Growing Feet
Unlike adults, where we recommend going as small as you can comfortably manage, for children it’s acceptable to have slightly more room to account for growth over the season—but not more than half a size extra. Check the shell fit every 4–6 weeks during the riding season. When a child’s toes are consistently pressing hard against the front of the shell with no room to pull back into stance, it’s time to size up.
Boot Flex for Young Riders
Children should always be in the softest flex available for their size. A stiff boot on a young rider creates forces that their developing tendons, ligaments, and growth plates are not equipped to handle safely. Soft-flex boots also encourage the development of proper technique, since the rider can feel the board’s feedback more clearly and make micro-adjustments without fighting the boot.
Rental Boots: Managing the Risk
Rental boots present a particular challenge for young riders because they are often old, badly packed-out, and available in limited sizes. If your child is going to the mountain more than twice per season, renting is almost certainly more expensive in terms of pain and suffering—if not money—than investing in a reasonably-priced entry-level boot. Even a $100–$150 kids’ snowboard boot purchased at the end of last season on sale will provide dramatically better fit and support than the typical rental option.
Women-Specific Fit Issues in Snowboard Boots
Women’s snowboard boots are not simply smaller men’s boots with different colors, though some lower-tier products are built that way. The anatomical differences between a typical female and male foot are significant and relevant to fit and pain prevention.
Anatomical Differences
Women tend to have a proportionally narrower heel relative to their forefoot width, a lower calf muscle mass (meaning less natural padding around the calf-to-cuff interface), a higher Q-angle at the knee (the angle between the hip, knee, and foot), and a more prominent medial ankle bone (medial malleolus) in many individuals. These differences combine to make the standard men’s-last boot a frequent source of heel slop, lateral ankle pressure, and forefoot width discomfort for women.
Women-Specific Boot Construction
True women’s-specific boots address these differences with a narrower heel pocket, softer flex tuned to average female leg strength, a shorter and lower cuff to accommodate different calf geometry, and insoles shaped for a narrower arch. Brands like Burton, Salomon, DC, and ThirtyTwo all produce genuine women’s-specific constructions (not just color-swapped men’s models) across their price ranges. Ask specifically about construction when shopping—the salesperson should be able to tell you definitively whether the last and shell geometry are women’s-specific or unisex.
Forefoot Discomfort and Women’s Boots
Women are more susceptible to Morton’s neuroma and metatarsalgia (general forefoot pain) than men due to the anatomical structures described above being slightly more compressed in typical footwear environments. A women’s snowboard boot with a wider forefoot and a metatarsal pad insole is the standard prescription for persistent forefoot burning in female riders.
Off-Season Foot Care for Snowboarders
The work you do between seasons has a direct impact on how your feet feel once you strap in again in November. Most riders do nothing for their boots or their feet during the off-season, then wonder why they’re back to square one with pain every fall. Here’s how to maintain both your equipment and your body during the months off the mountain.
Boot Storage and Care
After your last run of the season, dry your boots completely before storing them. This means removing the liners from the shells, opening all lacing systems fully, and storing them in a warm, dry place (not a car trunk or damp basement) for 24–48 hours. Once fully dry, store the shells and liners separately in a breathable bag or box. Never store boots in a compressed state (laces tightened, liners inside); this permanently compresses the foam and accelerates pack-out.
Apply a leather conditioner or synthetic boot treatment to the outer shell if it’s showing signs of cracking or stiffening. Replace your insoles every 50–75 days of riding, as they lose their supportive properties faster than the rest of the boot. Inspect the BOA wires or lace eyelets for any fraying or damage and address before next season.
Foot Health Between Seasons
Use the off-season to address any nagging foot conditions with a podiatrist or physical therapist. If plantar fasciitis was a recurring problem, a course of physical therapy focused on posterior chain flexibility and intrinsic foot strengthening can reduce the likelihood of recurrence. If bunions or neuromas were causing issues, the off-season is the right time for medical intervention if conservative measures aren’t managing them.
Daily foot care routines—keeping nails trimmed short and square (not curved, which can lead to ingrown nails from boot pressure), moisturizing cracked heels, and maintaining general skin integrity—all contribute to a more comfortable riding experience when the season arrives.
Strengthening Exercises for Pain-Free Snowboarding
No amount of gear optimization eliminates the need for foot and lower-leg strength. The foot is asked to perform stabilization tasks during snowboarding that it never encounters in daily life, and building the specific muscles involved is one of the most effective long-term strategies for pain prevention.
Intrinsic Foot Strengthening
The intrinsic muscles of the foot—the small muscles originating and inserting within the foot itself rather than crossing the ankle from the lower leg—are critical for maintaining arch integrity under dynamic snowboarding loads. The most effective exercise for these muscles is the “short foot” exercise: while sitting or standing, try to shorten your foot by drawing the ball of your foot toward your heel without curling your toes. Hold for 3–5 seconds, release, repeat 10–15 times each foot daily. After 4–6 weeks of consistent practice, most riders report a measurable improvement in arch endurance.
Calf and Achilles Strengthening
Eccentric calf raises are the gold standard for Achilles tendon strength and calf muscle endurance. Stand on a stair with the balls of your feet on the edge and your heels hanging off. Rise onto your toes using both legs, then lower on a single leg over a slow 3-second count. Three sets of 12 repetitions per side, 3x per week, produces significant improvements in calf endurance within 6–8 weeks—directly translating to fewer cramps and more riding stamina on the mountain.
Single-Leg Balance and Proprioception
Snowboarding is fundamentally a balance sport, and the proprioceptive nerve endings in your ankle joints and foot arches are your feedback system. Balance training on a single leg on an unstable surface (a foam pad, a BOSU ball, or even a folded blanket) trains these nerves to respond faster and more accurately, which reduces the corrective muscular effort your foot makes during every run. Aim for 2–3 minutes per leg daily of single-leg balance, progressively adding challenge by closing your eyes or adding upper body movements.
Ankle Mobility Work
Tight ankle dorsiflexion (the ability to bend your ankle so your toes come toward your shin) is both a cause of technique problems and a risk factor for knee and foot pain in snowboarding. A simple test: kneel in front of a wall with your kneecap 5cm from the wall and try to touch your knee to the wall without your heel leaving the ground. If you can’t, your dorsiflexion is restricted. Work on this with daily calf stretches (both straight-leg and bent-knee variations to target both the gastrocnemius and soleus) and ankle mobility drills such as half-kneeling ankle rocks.
- Short foot exercises: 10–15 reps, both feet, daily
- Eccentric calf raises: 3 × 12 per leg, 3x/week
- Single-leg balance: 2 min per leg, daily
- Ankle dorsiflexion stretch: 60 seconds per leg, twice daily
- Toe spreads and towel scrunches: 2 min daily for intrinsic strength
- Foot rolling on lacrosse ball: 90 seconds per foot, pre-ride warm-up
How to Prevent Foot Pain While Snowboarding
- Heat Molding: Most modern liners can be heat-molded to the shape of your foot. This creates a custom pocket and eliminates “hot spots” before you even hit the snow.
- Thin Socks: Counter-intuitively, thick socks cause more pain. They bunch up, create pressure points, and actually make your feet colder by reducing circulation. Wear one pair of thin, merino wool snowboard-specific socks.
- Dynamic Warm-up: Roll your feet over a lacrosse ball or a frozen water bottle before you head out to loosen the plantar fascia.
- Professional Fitting: Invest in a boot fitting session at a specialist shop at least once. The personalized assessment pays for itself in a single pain-free riding day.
- Aftermarket Insoles: Replace your stock insoles with a quality footbed matched to your arch type before your first ride of the season.
- Off-Season Strengthening: Build foot and calf strength during the off-season so your muscles are ready for the unique demands of snowboarding from the first day.
- Break New Boots In Gradually: For the first 2–3 days in new boots, stick to familiar terrain and stop when fatigue begins rather than pushing through. Breaking in boots on a hard day compounds the discomfort.
Quick Fixes You Can Try on the Mountain
If you’re already on the mountain and the pain is starting, don’t just “power through it.” Try these:
- Unstrap on the Lift: Give your feet a 5-minute break from the binding pressure on every chairlift ride. Simply release your back foot from the binding while seated—your front foot will be buckled in as normal for the lift. This 5-minute decompression break repeated every run adds up to significant relief over the course of a day.
- The Toe Tap: If your toes are numb, wiggle them vigorously while sitting on the lift to restore blood flow. If they remain numb after vigorous movement, loosen your boot immediately—you are likely cutting off circulation.
- Micro-Adjust: Loosen your boots by 10% before your next run. Often, just a tiny bit of released pressure is all the nerves need to stop firing pain signals. Start with the upper zone and assess before touching the lower zone.
- Shift Your Weight: If arch pain is developing, consciously practice riding with slightly more weight on your heels for a run or two. This reduces the load on the plantar fascia and gives the arch muscles a brief rest.
- Sock Adjustment: If you suspect a sock bunching issue, pull your sock taut from the top of the boot before tightening. Smooth out any wrinkles or folds at the arch and heel before closing the boot—even a 2mm fabric fold creates a localized pressure point that becomes very painful over hours.
🏔️ When to See a Medical Professional
If you experience any of the following, stop riding and seek medical attention: sudden sharp pain following an impact or awkward landing (possible stress fracture), swelling in the foot or ankle that doesn’t resolve within 24 hours, numbness that doesn’t resolve after removing boots and warming up, or pain severe enough that you can’t walk normally. Pushing through genuine injury rarely ends well and often converts a short recovery into a season-ending one.
Snowboarding Foot Pain FAQ
Should my toes touch the end of my snowboard boots?
Yes. When standing straight, your toes should lightly graze the end. When you sink into a “snowboard stance” (knees bent), your toes should pull back slightly from the front.
Is it normal for my feet to hurt for the first few days of the season?
A mild ache from muscle fatigue is normal as your “snowboarding muscles” wake up. However, sharp, stabbing pain or total numbness is a sign of a fit issue.
Do BOA boots cause more pressure points than laces?
Not necessarily. However, BOA systems are so easy to tighten that riders often over-crank them without realizing it, leading to pinched nerves.
How long do snowboard boots take to break in?
Typically 3 to 5 full days of riding. If they still hurt after 10 days, the fit is likely wrong.
Why do my arches burn specifically on the cat-track?
Cat-tracks require constant small edge adjustments which fatigue the arch muscles. This is a classic sign of needing better insoles.
Can binding angles cause foot pain?
Absolutely. If your angles are “fighting” your natural knee and ankle alignment, it forces your feet to twist inside the boots.
Should I wear two pairs of socks to stop my heel from lifting?
No! This will cut off circulation and lead to more pain. Use J-bars or foam inserts to narrow the heel pocket instead.
Does boot stiffness affect pain?
Yes. A boot that is too stiff for a beginner will be unforgiving, while a boot that is too soft for an expert will force them to over-tighten to get response.
Why do my feet hurt more on powder days than groomer days?
Powder riding requires more lateral ankle effort to keep the board afloat and control speed, activating the peroneal tendons and tibialis anterior more intensively. If you only hurt on powder days, lateral ankle and shin strengthening during the off-season is your best solution.
Can plantar fasciitis be managed enough to ride?
Yes, with the right footbed and careful warm-up. A firm orthotic with a deep heel cup significantly reduces plantar fascia load during riding. Stretch the fascia and calves thoroughly every morning before putting boots on, and ice your heels after riding. Consult a podiatrist if the condition is severe.
Why do my feet hurt more in afternoon than morning sessions?
Cumulative fatigue is one factor, but another is that feet swell throughout the day (by up to a half-size in high-activity situations). A boot that fits perfectly in the morning can become uncomfortably tight by afternoon. If afternoon pain is a consistent issue, try buying your boots in the afternoon when your feet are at their daily maximum volume.
Is it worth buying expensive snowboard boots to avoid pain?
Not necessarily. A $200 boot that fits your foot correctly will cause far less pain than a $600 boot in the wrong last or volume. Fit is the variable that matters most. That said, more expensive boots typically use better liner materials that hold their shape longer and more advanced shell construction that distributes pressure more evenly—both genuine pain-prevention benefits if the fit is already correct.
What is “boot bang” and how do I fix it?
Boot bang is the term for toe impact against the front of the boot during aggressive carved turns. It happens because the boot is too large (toes slide forward), the arch is collapsing and elongating the foot, or the lacing is insufficiently tight in the forefoot zone. Fix the root cause with a proper shell fit, a supportive insole, and appropriate lacing tension across the forefoot.
How do I know if I need a custom orthotic versus an aftermarket insole?
Try a quality aftermarket insole first. If your pain resolves or significantly improves within 2–3 riding days, the insole was the solution. If pain persists, particularly if it’s localized and consistent, a custom orthotic from a podiatrist is the next step. Custom orthotics are prescribed for structural foot issues that a generic insole cannot address.
Final Thoughts
Snowboarding is supposed to be about freedom and fun, not endurance and agony. By taking the time to understand your boot fit, stance, and technique, you can eliminate foot pain and focus on what really matters: the next turn. Don’t settle for “good enough” gear; your feet are the foundation of your riding.
The hierarchy of intervention is clear: start with fit (shell fit, last width, volume), then address the liner (heat molding, aftermarket upgrade), then the insole (arch support matched to your foot type), then the sock (thin, merino, single layer), then technique (relaxed toes, balanced stance, correct weight distribution), and finally conditioning (intrinsic strength, calf endurance, ankle mobility). Work through these systematically rather than randomly, and you will find the source of your pain quickly.
Remember, if you’ve tried everything and the pain persists, go see a professional boot fitter. They are the “doctors” of the snowboarding world and can perform “surgery” on your boot liners to make them fit like a second skin. And if a medical condition is the underlying cause, a sports podiatrist with snowboard or ski experience is worth every penny. You have many seasons of riding ahead of you—invest in your feet, and they will carry you down every mountain you ever want to ride.


