
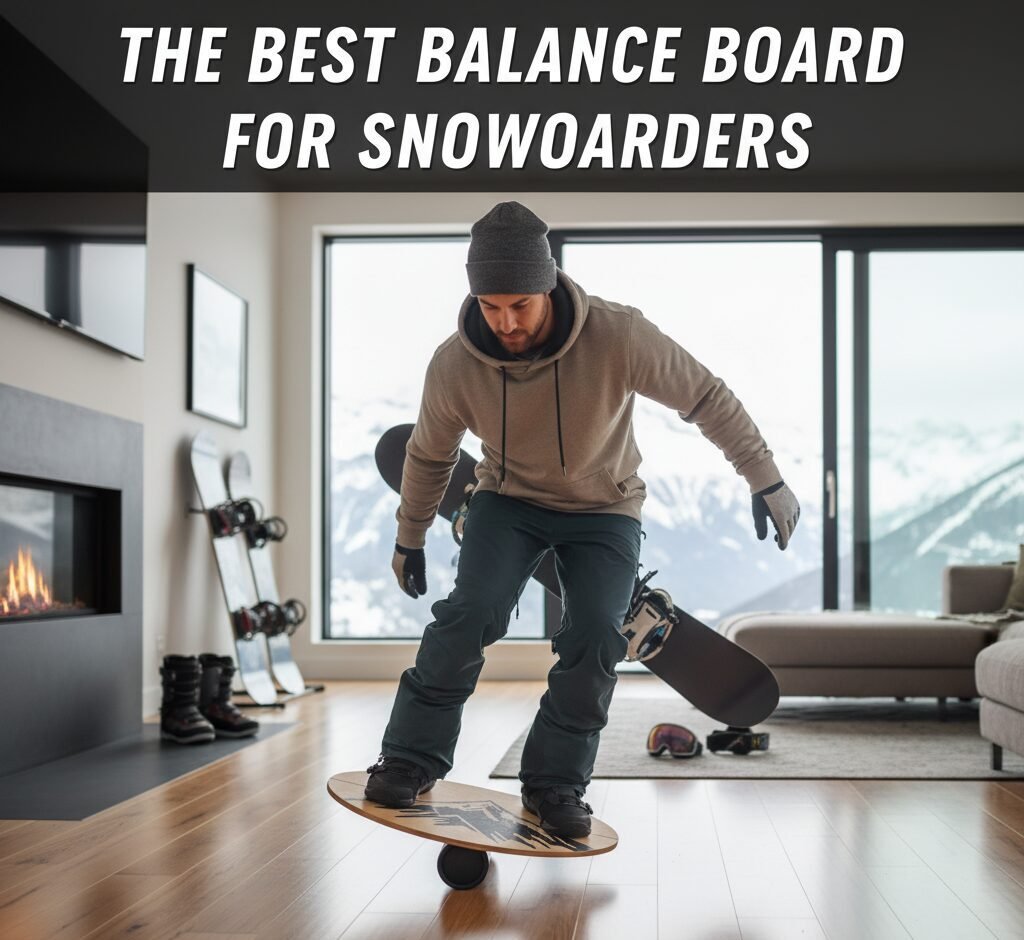
The Best Balance Board for Snowboarders: Off-Season Mastery of Edge and Core
Snowboarding demands a highly specialized form of athleticism known as dynamic balance. It’s not the static balance required to stand on one leg; it’s the continuous, reactive ability to correct micro-movements while moving at speed and under rotational strain. When the snow melts, the best way to maintain and enhance this crucial skill is through a dedicated balance board.
Whether you’re a weekend warrior who manages a handful of trips each season or a dedicated rider chasing powder from Colorado to Hokkaido, the off-season represents both a challenge and an opportunity. Without regular time on snow, your proprioceptive systems begin to degrade. Research from the International Journal of Sports Physiology and Performance indicates that balance-specific abilities can decline by as much as 15-20% within just eight weeks of inactivity. A balance board reverses that decline, keeping your neuromuscular pathways sharp and your stabilizer muscles conditioned so that your first run of the season feels as confident as your last run of the previous one.
This comprehensive guide goes far beyond a simple product review. We’ll cover the biomechanics of snowboard balance, provide a deep-dive into every major balance board type on the market, deliver complete training programs ranging from absolute beginner to advanced freestyle, and arm you with the knowledge to make a purchasing decision that matches your specific riding style and goals. By the time you finish reading, you’ll have everything you need to build a world-class off-season training regimen from the comfort of your living room.
Article Key Highlights
- Kinetic Chain Integration: How boards simulate real ankle/knee/hip alignment.
- Proprioceptive Overload: Training your nervous system to react to ice and death-cookies.
- Injury Mitigation: Strengthening the lateral ligaments to prevent “snowboarder’s ankle.”
- Hardware Analysis: Why tapered rollers are superior for carving mechanics.
Chapter 1: The Science of Snowboard Balance
Effective training requires understanding precisely which types of balance snowboarding demands. A general fitness board only targets 20% of your needs. Snowboarding requires proficiency in four key domains, all of which are covered in depth in our full fitness guide for snowboarding.
1. Lateral Balance and Edge Geometry
Intermediate and advanced riders spend 90% of their time on an edge. When you are balancing on a roller, you are training your body to find a center of gravity over a narrow, moving point. This directly translates to the pressure control required to maintain an edge during a high-speed carve. Without this training, riders often experience “chatter”—where the board skips across the snow—because their stabilizer muscles are too weak to hold the isometric tension.
The lateral balance training that a balance board provides targets several key muscle groups that are essential for snowboarding. The peroneal muscles, which run along the outside of your lower leg, are responsible for eversion—the outward rolling motion of your foot. These muscles are crucial for maintaining heel-side edge pressure and preventing ankle injuries. The tibialis anterior, located on the front of your shin, controls dorsiflexion and helps you maintain proper stance alignment. When you rock side to side on a balance board, both of these muscle groups are constantly firing to keep you stable, building the neuromuscular pathways that will serve you on the mountain.
Additionally, the gluteus medius—one of the most undertrained muscles in snowboarders—plays a critical role in lateral stability. This muscle, located on the outside of your hip, prevents your knee from caving inward during turns. Weak gluteus medius muscles are a leading cause of knee injuries in snowboarding, and balance board training directly targets this weakness. By maintaining a slightly crouched position on the board, you engage the gluteus medius isometrically, building the endurance it needs to protect your knees throughout a full day of riding.
2. Fore/Aft Stability and Vibration Dampening
The “backseat driving” phenomenon is a result of poor fore/aft balance. A balance board forces you to keep your weight centered over the “bolts.” By moving weight towards the nose (to initiate a turn) or the tail (to butter or land a jump), you are teaching your CNS to manage pressure distribution. This is essential for navigating the variable conditions often found when snowboarding in Colorado.
Fore/aft stability is perhaps the most critical skill for intermediate riders looking to advance to expert terrain. When your weight shifts too far back, you lose the ability to steer with your front foot, which means you can’t initiate turns effectively. On steep terrain, this can be catastrophic—backseat riders tend to skid their turns rather than carve, leading to speed control issues and increased fatigue. A balance board with a forward-backward rocking motion trains your body to recognize and correct fore/aft imbalances in real time.
Vibration dampening is another crucial aspect of fore/aft balance that many riders overlook. At high speeds, your snowboard transmits vibrations from the snow surface through your boots and into your legs. If your stabilizer muscles are not properly conditioned, these vibrations can cause fatigue, loss of control, and even injury. The micro-corrections you make on a balance board strengthen the deep stabilizer muscles that absorb these vibrations, allowing you to maintain control at higher speeds and on rougher terrain.
3. Rotational Balance and Upper-Lower Body Separation
One of the most advanced aspects of snowboard balance is rotational control. When you spin in the air, perform a butter, or navigate a mogul field, your upper body and lower body must work independently while maintaining overall balance. This “upper-lower body separation” is what separates good riders from great ones.
Rotational balance training on a balance board involves twists, pivots, and rotational movements that challenge your core to stabilize your spine while your hips and legs move independently. This type of training directly translates to improved spin tricks, better mogul technique, and more fluid carving. The oblique muscles, transverse abdominis, and multifidus muscles all play crucial roles in rotational stability, and balance board training effectively targets all three.
Research published in the Journal of Sports Science & Medicine has shown that athletes who incorporate rotational balance training into their routines demonstrate 23% better performance in activities requiring multi-directional stability. For snowboarders, this means smoother transitions between turns, more controlled spin takeoffs and landings, and better overall board control in challenging conditions.
4. Reactive Balance and Proprioception
Proprioception—your body’s ability to sense its position in space—is the foundation of snowboarding balance. When you hit a patch of ice or an unexpected bump, your body must react instantaneously to maintain balance. This reactive ability is trained through unpredictable balance challenges, which is why balance boards with narrow rollers or free-rotation systems are so valuable for snowboarders.
The proprioceptive training that balance boards provide works by constantly challenging your nervous system to process balance information and generate appropriate motor responses. Every micro-correction you make on the board strengthens the neural pathways between your proprioceptors (sensory receptors in your muscles, joints, and tendons) and your central nervous system. Over time, this results in faster reaction times, better spatial awareness, and more automatic balance corrections—all of which are essential for safe, confident snowboarding.
Studies have shown that proprioceptive training can reduce the risk of ankle sprains by up to 36% and knee injuries by up to 28%. For snowboarders, who are particularly susceptible to these types of injuries, this represents a significant safety benefit that extends beyond pure performance enhancement.
Chapter 2: The Best Balance Boards (Top 5 Technical Reviews)

Revbalance 101 v2
The Revbalance 101 v2 is arguably the best starting point for year-round conditioning. Its magnetic stop system can be adjusted instantly, allowing beginners to start with minimal roll distance. It features a high-grip Dura-soft top that allows you to train barefoot, which is vital for strengthening the intrinsic muscles of the foot, often a cause of pain discussed in why do my feet hurt when i snowboard.
What sets the Revbalance 101 v2 apart from competitors in its price range is the thoughtfulness of its engineering. The deck measures 31.5 inches in length by 8 inches in width—dimensions that closely mimic the stance width of a snowboard. The magnetic stop system is genuinely innovative: rather than using fixed pegs or rubber bumpers that you have to physically move, the magnets allow you to slide the stops inward or outward along a track in seconds. This means you can start with a very narrow range of motion during your first session and progressively increase it as your balance improves, all without stopping your workout.
The roller is a standard cylindrical hardwood design with a rubber outer sleeve that provides grip on hard floors while preventing scratches. The rubber also serves to dampen noise, making this one of the quietest balance boards available—a genuine consideration if you live in an apartment or plan to use it while watching television. The Dura-soft top surface uses a textured rubber grip that provides excellent traction even when your feet are sweaty, and it’s comfortable enough for extended barefoot training sessions.
Vew-Do Flow Balance Board
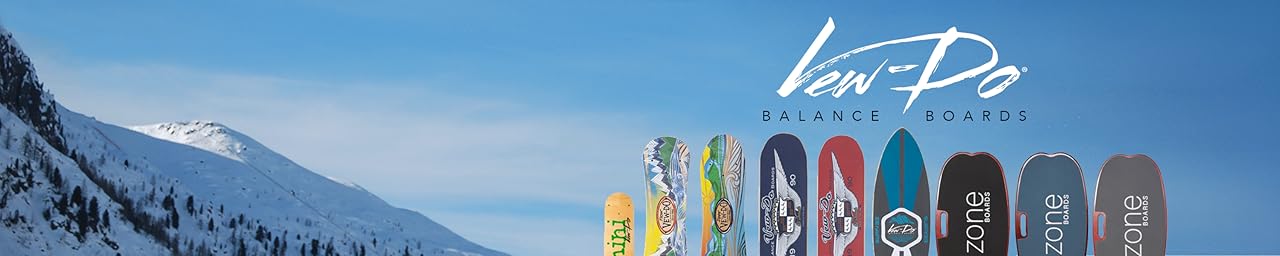
This is the most “snowboard-feeling” board on the market. Developed by instructors, the Vew-Do Flow utilizes a tapered wooden roller. This hourglass shape allows the board to tilt up to 45 degrees without slipping, perfectly mimicking the angle of a deep toeside or heelside carve (how to carve on a snowboard).
The Vew-Do Flow has a legitimate pedigree in the snowboard industry. The company was founded by snowboard instructors who wanted a training tool that accurately replicated the feeling of being on edge. The tapered roller is the centerpiece of this design. Unlike a standard cylindrical roller that tends to slip out from under the board when you push it to extreme angles, the hourglass-shaped roller cradles the deck and allows you to lean hard into turns without the board shooting out sideways. The track system—two wooden rails that run along the floor and keep the roller contained—adds an extra layer of safety, particularly important when you’re pushing your balance limits.
The deck itself is constructed from laminated maple, the same material used in skateboard and snowboard construction. This gives it a natural flex that feels familiar underfoot. At 38 inches long, it’s longer than most balance boards, which provides a more stable platform for wider snowboard stances. The traction surface uses a grip tape similar to skateboard grip tape, which provides excellent hold but can be abrasive on bare feet—most riders use thin socks or water shoes.

Revbalance Core 32
Designed for park rats. The Core 32 is a high-performance trick board with high kick-tails. This is where you practice the upper/lower body separation needed for spins. It’s built to withstand the impact of ollies and shuvits. Pair this with best impact shorts if you’re practicing on hard surfaces.
The Core 32 represents Revbalance’s entry into the freestyle-specific market, and it’s a well-executed one. The twin-tip shape with pronounced kick-tails allows for ollie practice, nollie drills, and shuvit training that you simply cannot do on a standard roller board. The deck is slightly wider than the 101 v2, measuring 10 inches across, which provides more surface area for landing tricks. The concave profile—a subtle inward curve from edge to edge—gives your feet better board feel and control during rotational movements.
The roller on the Core 32 is a lightweight hollow design that allows for faster movement and quicker transitions. This makes the board more responsive but also less forgiving—you need solid fundamental balance before attempting tricks on this setup. The lack of safety stops is intentional; freestyle riders need complete freedom of movement, but it does mean that the board can shoot out unpredictably if you lose your balance. We strongly recommend using this board on a carpeted surface or placing a wall behind you during early sessions.

Yes4All Premium Trainer
For those questioning how expensive is snowboarding, this board proves that training doesn’t have to be. It’s a rock-solid, no-frills entry point that provides foundational core work and balance for beginner resorts.
The Yes4All Premium Trainer proves that you don’t need to spend a fortune to get meaningful balance training. At roughly a third of the price of premium options, this board delivers the fundamental balance challenge that snowboarders need without any unnecessary frills. The deck is constructed from solid wood with a non-slip surface, and the included roller is a durable PVC pipe with end caps that prevent it from rolling off your exercise area.
While it lacks the magnetic stop system of the Revbalance or the tapered roller of the Vew-Do, the Yes4All makes up for it with sheer durability and simplicity. There’s nothing to break, nothing to adjust, and nothing to think about—you step on and start training. This simplicity is actually a feature for riders who want to focus purely on their balance without fiddling with equipment. The included non-slip pad underneath the roller protects hard floors and provides a consistent training surface regardless of what type of flooring you have.

Whirly Board 360
The Whirly Board uses half-spheres to allow for 360-degree rotation. This is the ultimate tool for practicing “butters”—shifting weight to the nose or tail and spinning on a flat base. It simulates the fluid, surfy feeling that makes snowboarding fun.
The Whirly Board takes a fundamentally different approach to balance training than roller-based boards. Instead of a single axis of movement, the three-sphere design allows the deck to tilt and rotate in any direction simultaneously. This creates a balance challenge that is much closer to the free-form movements of surfing, snowboarding, and skateboarding than a traditional roller board can provide. For snowboarders specifically, this makes it an exceptional tool for training butter tricks, nose presses, tail presses, and any freestyle maneuver that requires weight transfer to an extremity of the board.
The spheres are made from a high-density polymer that provides consistent friction against the deck without wearing down over time. The deck itself is a compact 24-inch design that’s easy to store and transport. Despite its smaller footprint, it provides a surprisingly challenging balance experience due to the multi-directional instability. Many riders find that the Whirly Board is more mentally engaging than a roller board because you’re managing balance in three dimensions rather than one, which keeps your nervous system more actively engaged during each session.
Chapter 3: Complete Beginner’s Guide to Balance Board Training
If you’ve never stepped on a balance board before, the prospect can feel intimidating. You’ve seen videos of people performing incredible tricks and transitions, and you might worry that you’ll embarrass yourself or—worse—injure yourself. The reality is that balance board training is entirely scalable to your current ability level, and with the right approach, you can go from zero experience to confident carving simulation in just a few weeks.
Choosing Your Starting Board
For absolute beginners, we recommend starting with either the Revbalance 101 v2 or the Yes4All Premium Trainer. Both offer the stability and safety features that new riders need while they develop their fundamental balance. Avoid tapered roller boards or free-rotation boards for your first balance board—these advanced designs require a baseline level of balance that beginners simply don’t have yet, and attempting to use them too early can lead to frustration or injury.
The key feature to look for in a beginner board is an adjustable stop system. The magnetic stops on the Revbalance 101 v2 are ideal because they allow you to start with a very limited range of motion—perhaps just two or three inches of roll—and gradually increase it as your balance improves. If your board doesn’t have adjustable stops, you can improvise by placing foam blocks or rolled towels on either side of the roller to limit its travel distance.
Your First Session: What to Expect
Set up your balance board on a carpeted surface for your first few sessions. Carpet provides additional friction that slows the roller’s movement, giving you more time to react to balance shifts. Place the board near a wall or sturdy piece of furniture that you can reach out and grab if needed. Clear the area around you of any objects that could cause injury if you fall, and consider placing a yoga mat or soft rug on either side of the board as a landing zone.
Start by simply standing on the board with both feet centered over the roller. Don’t try to balance yet—just get used to the feel of the board moving under your feet. Shift your weight slowly from left to right, allowing the board to rock gently. Focus on keeping your knees slightly bent and your core engaged. Your first goal is simply to maintain a standing position for 30 seconds without touching the ground.
Most beginners experience a strong shaking sensation in their legs during the first few sessions. This is completely normal—it’s your nervous system rapidly creating new neural pathways to manage the unfamiliar balance challenge. The shaking typically decreases significantly within the first week as your body adapts. Don’t interpret the shaking as a sign that something is wrong; it’s actually a sign that your body is learning.
The Progressive Learning Path
Week 1: Static Balance. Your only goal for the first week is to stand on the board without moving for increasing periods of time. Start with 10-second holds and work up to 60-second holds. Keep the roller centered and the board level. Use the wall or furniture for support as needed, but try to rely on it less with each session.
Week 2: Controlled Rocking. Once you can hold a static balance for 60 seconds, begin practicing slow, controlled rocking from side to side. Focus on making the movement as smooth as possible—no jerky motions or sudden shifts. Aim for 20 complete rock cycles (left to right and back) without the board touching the ground. This is where you’ll start to feel your ankle stabilizer muscles working.
Week 3: Weight Shifting. Begin practicing deliberate weight shifts to the nose and tail of the board (fore/aft movement). Start with small shifts and gradually increase the distance. This simulates the pressure control needed for initiating turns on a snowboard. Pair this with lateral rocking for a more comprehensive balance challenge.
Week 4: Dynamic Movements. Introduce small hops, pivots, and more dynamic movements. Start with simple heel-to-toe pivots (turning your body 180 degrees while maintaining balance) and progress to small ollie attempts. This is where the balance board starts to feel like a true snowboard simulation rather than just a balance exercise.
Common Beginner Mistakes
The most common mistake beginners make is locking their knees. Straight legs transfer all the balance work to your ankles and reduce your ability to make micro-corrections. Always keep a slight bend in your knees—it activates your quadriceps and glutes, which are your primary balance stabilizers.
Another frequent error is looking down at your feet. This shifts your head forward and disrupts your center of gravity. Instead, focus your gaze on a point at eye level on the wall in front of you. This helps maintain proper spinal alignment and gives your vestibular system (the balance system in your inner ear) a stable reference point.
Finally, many beginners try to progress too quickly. Balance is a skill that develops through consistent, patient practice. Attempting advanced movements before your foundation is solid leads to frustration and increases injury risk. Follow the progressive learning path above and resist the temptation to skip ahead.
Chapter 4: Advanced Training Regimens
To truly get value from your balance board, you must simulate the isometric and eccentric demands of the mountain. Your quads aren’t just pushing; they are resisting gravity. This is why snowboarding is the best winter sport—it requires total physical presence.
The Carving Master Routine
- Heel-to-Toe Rocking (3 sets of 20): Focus on slow, controlled transitions. Do not let the board touch the floor. The key here is tempo—you should be able to complete each full cycle in approximately 3 seconds. Rushing through these defeats the purpose; the slow speed is what forces your stabilizer muscles to maintain constant tension.
- The Deep Crouch Hold (3 sets of 45 seconds): Lower your center of gravity until your quads burn. This builds the stamina needed for long runs at top European ski resorts. Keep your back straight and your chest up—don’t round forward, as this shifts your center of gravity and reduces the effectiveness of the exercise.
- Single-Leg Holds (3 sets of 20 seconds per leg): Lift one foot off the board and balance on the other. This is extremely challenging and builds the unilateral strength that’s essential for butter tricks and one-footed maneuvers. Start with the stop system engaged to limit the range of motion.
- Lateral Hop Progressions (3 sets of 10): While maintaining balance, perform small lateral hops, shifting the board slightly to each side. This builds explosive reactive balance—the same skill you need to recover from unexpected bumps on the mountain.
The Freestyle Power Routine
For riders focused on park and freestyle, the balance board is an invaluable tool for developing the specific strength patterns needed for aerial maneuvers. This routine targets the explosive power and rotational control required for spins, grabs, and rail tricks.
- Ollie Simulation (3 sets of 15): On a freestyle-specific board, practice the ollie motion—loading the tail and springing upward. Focus on the snap timing rather than height. The goal is to develop the same muscle memory you’ll use on snow.
- Nollie Drills (3 sets of 10): The opposite of an ollie—loading the nose and popping from the front. This is a critical skill for switch riding and nose-based freestyle tricks.
- 180-Degree Pivots (3 sets of 10 per direction): Start facing forward, pivot 180 degrees to face backward, then pivot back. Focus on keeping your upper body quiet while your lower body does the work. This simulates the body separation needed for spin tricks.
- Press Holds (3 sets of 15 seconds per end): Shift all your weight to the nose or tail and hold the press position. This builds the specific isometric strength needed for nose and tail presses on snow.
- Rotational Hops (3 sets of 8 per direction): Combine the pivot motion with a small hop, rotating the board 180 degrees while airborne. This is the foundational movement for all spinning tricks.
The Endurance Builder
Snowboarding is an endurance sport as much as a balance sport. A full day on the mountain can involve 6-8 hours of continuous physical activity. This routine builds the muscular endurance that allows you to ride strong from first chair to last.
30-Minute Endurance Circuit
Perform each exercise for 60 seconds with 15 seconds of rest between exercises. Complete the full circuit 3 times with 2 minutes rest between rounds.
- Steady-state balance hold (both feet, centered)
- Continuous heel-to-toe rocking
- Mini squat holds (quarter squat, maintaining balance)
- Single-leg balance (right foot)
- Single-leg balance (left foot)
- Lateral weight shifts (full board travel)
- Fore/aft weight shifts (nose to tail)
- Deep squat hold (maintaining balance)
- Recovery hold (standing tall, centering yourself)
Chapter 5: Understanding Balance Board Types
Not all balance boards are created equal, and understanding the differences between types is crucial for selecting the right tool for your specific training goals. Each type of balance board creates a different balance challenge, and the best choice depends on what aspect of snowboarding you want to improve.
Roller Boards
Roller boards consist of a flat deck that rests on top of a cylindrical (or sometimes tapered) roller. The deck moves laterally along the roller, creating a side-to-side rocking motion. This is the most common type of balance board and the most directly applicable to snowboarding because it simulates the edge-to-edge transitions that are fundamental to carving.
Within the roller board category, there are several sub-variations. Cylindrical roller boards use a straight cylinder, which provides a consistent balance challenge across the full range of motion. Tapered roller boards use an hourglass-shaped roller that allows the deck to tilt at more extreme angles without slipping. Hemi-sphere boards use half-spheres instead of cylinders, allowing for multi-directional movement that combines lateral rocking with fore/aft instability.
For snowboarders, roller boards are generally the best choice because they most accurately replicate the primary balance challenge of snowboarding: maintaining edge control. The lateral movement of a roller board directly trains the same muscle groups and neural pathways that you use when transitioning from a heelside to a toeside turn. If you can only own one balance board, make it a roller board.
Rocker Boards
Rocker boards (also called wobble boards or balance discs) have a convex base that allows the board to tilt in any direction but doesn’t provide the lateral travel of a roller board. These are excellent for general balance training and rehabilitation, but they’re less specific to snowboarding because they don’t replicate the linear edge-to-edge movement pattern.
The primary advantage of a rocker board is its simplicity—there’s no separate roller to manage, and the board can’t shoot out from under you the way a roller board can. This makes rocker boards a good choice for very young children, elderly individuals, or people recovering from serious injuries who need a gentler introduction to balance training. However, for dedicated snowboarders looking for sport-specific training, a rocker board is a secondary tool at best.
360-Degree Rotation Boards
Boards like the Whirly Board use spheres or multi-axis mechanisms to allow the deck to rotate freely in any direction. These are the most challenging type of balance board and provide the most comprehensive balance training. However, they’re also the least specific to snowboarding because snowboard balance is primarily a two-dimensional challenge (lateral and fore/aft) rather than a three-dimensional one.
The best use case for 360-degree boards in snowboard training is freestyle preparation. If you spend a lot of time riding switch, doing butters, or performing rotational tricks, a 360-degree board will develop the multi-directional balance awareness that these maneuvers require. However, it should complement rather than replace a traditional roller board in your training setup.
Indo Board vs. Traditional Balance Boards
The Indo Board is perhaps the most recognized balance board brand globally, having been developed in the 1990s specifically for surf training. It uses a wooden deck on a cylindrical roller with an optional balance cushion for added instability. While it’s an excellent general balance tool, it has some limitations for snowboarders specifically.
The Indo Board’s deck is wider and shorter than most snowboard-specific balance boards, which means the stance feel is different. Additionally, the roller doesn’t allow for the extreme tilt angles that tapered rollers provide, limiting its ability to simulate deep carving. That said, the Indo Board’s build quality is exceptional, and it’s a perfectly valid choice for riders who want a balance board that can serve multiple purposes (surf training, general fitness, rehabilitation) rather than being specialized for snowboarding.
| Feature | Roller Board | Rocker Board | 360° Board | Indo Board |
|---|---|---|---|---|
| Lateral Balance | Excellent | Good | Good | Very Good |
| Fore/Aft Balance | Good | Good | Good | Good |
| Rotational Training | Fair | Good | Excellent | Fair |
| Carving Simulation | Excellent | Fair | Fair | Good |
| Freestyle Training | Good | Fair | Excellent | Fair |
| Beginner Friendly | Good | Excellent | Fair | Good |
| Snowboard Specificity | Excellent | Fair | Good | Good |
Chapter 6: Complete Balance Board Exercise Library
This library contains every exercise you need to build a comprehensive snowboard-specific training program. Each exercise is categorized by difficulty level and tagged with the primary snowboard skill it develops. Use this library as a reference when building your own custom training routines.
Beginner Exercises
Static Balance Hold
Sets/Duration: 3 x 30-60 seconds
Muscles Worked: Core, ankle stabilizers, tibialis anterior
Snowboard Skill: Foundational stance stability
Stand centered on the board with both feet shoulder-width apart. Keep knees slightly bent and focus on a point at eye level. Hold the position without letting the board move. Progress by increasing duration, then by closing your eyes for the final 10 seconds of each hold.
Controlled Side-to-Side Rock
Sets/Reps: 3 x 15 full cycles
Muscles Worked: Peroneals, gluteus medius, obliques
Snowboard Skill: Edge transition mechanics
Slowly rock the board from left to right, allowing the edge to approach the ground without touching it. The key is control—the slower you go, the more your muscles are working. Each full cycle (left-center-right-center-left) counts as one rep.
Knee Bend Progression
Sets/Reps: 3 x 10 bends
Muscles Worked: Quadriceps, glutes, core
Snowboard Skill: Dynamic stance depth
While maintaining static balance, slowly lower into a quarter squat, then return to standing. Focus on keeping your weight centered throughout the movement. As you progress, increase the depth of the squat to a half squat and eventually a full squat.
Weight Shift Practice
Sets/Reps: 3 x 10 shifts per direction
Muscles Worked: Hip flexors, hamstrings, core
Snowboard Skill: Fore/aft pressure control
While balanced on the board, shift your weight slightly toward the nose, then toward the tail. Start with very small movements and gradually increase the distance. This simulates the weight transfer needed for turn initiation and completion.
Intermediate Exercises
Single-Leg Balance
Sets/Duration: 3 x 20 seconds per leg
Muscles Worked: Full unilateral posterior chain, ankle stabilizers
Snowboard Skill: Unilateral balance for butters and presses
Lift one foot off the board and balance on the other. This dramatically increases the balance challenge and develops the unilateral strength needed for nose and tail presses. Keep the standing leg slightly bent and use your arms for balance.
180-Degree Pivot
Sets/Reps: 3 x 8 per direction
Muscles Worked: Obliques, hip rotators, core
Snowboard Skill: Spin takeoff and switch riding
From a centered position, rotate your body 180 degrees while keeping the board on the roller. Pause in the switch position for 2 seconds, then rotate back. Focus on initiating the rotation from your hips, not your shoulders.
Squat Hold with Rocking
Sets/Duration: 3 x 30 seconds
Muscles Worked: Quadriceps, glutes, core, ankles
Snowboard Skill: Endurance carving
Lower into a half squat and hold the position while performing slow side-to-side rocks. This combines isometric quad work with dynamic balance, closely simulating the demands of a long carve or sustained mogul run.
Lateral Hops
Sets/Reps: 3 x 10 hops
Muscles Worked: Calves, quads, reactive stabilizers
Snowboard Skill: Recovering from unexpected terrain
While balanced, perform small lateral hops, shifting the board slightly to each side. Land softly and regain control before the next hop. This builds the reactive balance needed to recover from bumps and unexpected terrain changes.
Advanced Exercises
Ollie Simulation
Sets/Reps: 3 x 12
Muscles Worked: Calves, hip extensors, core
Snowboard Skill: Aerial maneuver foundation
On a freestyle board, practice the ollie motion by loading the tail and springing upward. Focus on the timing of the pop and the snap of the ankle. Start with minimal height and increase gradually. Land softly and regain balance before the next rep.
360-Degree Spin
Sets/Reps: 3 x 6 per direction
Muscles Worked: Full rotational chain, reactive stabilizers
Snowboard Skill: Backside and frontside 360s
Combine the 180-degree pivot with momentum to complete a full 360-degree rotation. This requires precise timing, core strength, and the ability to maintain balance through rapid rotational movement. Start on a board with stops engaged and progress to no stops as your confidence builds.
Shuvit Practice
Sets/Reps: 3 x 10 per direction
Muscles Worked: Hip rotators, calves, core
Snowboard Skill: Board rotation tricks
Using a freestyle board, practice the shuvit motion—kicking the board 180 degrees beneath you while your body remains stationary. This develops the hip snap and board awareness needed for pop shuvits, big spins, and similar tricks on snow.
Deep Press Hold
Sets/Duration: 3 x 20 seconds per end
Muscles Worked: Single-leg posterior chain, core, ankle stabilizers
Snowboard Skill: Extended nose/tail presses
Shift all your weight to the extreme nose or tail of the board, holding the press position while maintaining balance. This builds the specific isometric strength needed for sustained press tricks on snow. The deeper the press, the more challenging and snowboard-specific the exercise becomes.
Chapter 7: Complete Training Programs
The following programs are designed to take you from complete beginner to advanced balance board proficiency over the course of 12 weeks. Each program is structured around three sessions per week, with each session lasting 15-30 minutes. You can perform these sessions any time of day, but many riders find that morning sessions are most effective because your neuromuscular system is fresh and receptive to learning.
Weeks 1-4: Foundation Phase
Session A (Monday)
- Static balance hold: 3 x 30 seconds
- Controlled side-to-side rock: 3 x 10 cycles
- Knee bend progression (quarter squat): 3 x 8 reps
- Weight shift practice: 3 x 8 shifts per direction
Session B (Wednesday)
- Static balance hold: 3 x 40 seconds
- Controlled side-to-side rock: 3 x 12 cycles
- Knee bend progression (half squat): 3 x 8 reps
- Fore/aft weight shifts: 3 x 10 shifts
Session C (Friday)
- Static balance hold: 3 x 50 seconds
- Controlled side-to-side rock: 3 x 15 cycles
- Full squat progression: 3 x 6 reps
- Combined lateral + fore/aft movement: 3 x 8 cycles
Weeks 5-8: Development Phase
Session A (Monday)
- Single-leg balance: 3 x 15 seconds per leg
- 180-degree pivots: 3 x 6 per direction
- Squat hold with rocking: 3 x 20 seconds
- Lateral hops: 3 x 8 hops
Session B (Wednesday)
- Static balance (eyes closed, final 10 sec): 3 x 45 seconds
- Continuous rocking with squats: 3 x 10 cycles
- Single-leg balance with weight shifts: 3 x 10 seconds per leg
- 180-degree pivots: 3 x 8 per direction
Session C (Friday)
- Endurance circuit: 2 full rounds of the 30-minute circuit
- 180-degree pivots: 3 x 10 per direction
- Squat hold with rocking: 3 x 30 seconds
- Lateral hops with directional changes: 3 x 10 hops
Weeks 9-12: Performance Phase
Session A (Monday) – Freestyle Focus
- Ollie simulation: 3 x 12 reps
- Shuvit practice: 3 x 8 per direction
- 360-degree spin attempts: 3 x 4 per direction
- Deep press holds: 3 x 15 seconds per end
Session B (Wednesday) – Carving Focus
- Deep squat hold with maximal rocking: 3 x 30 seconds
- Single-leg balance with full range: 3 x 20 seconds per leg
- Lateral hop chains: 3 x 12 continuous hops
- Endurance circuit: 3 full rounds
Session C (Friday) – Mixed Challenge
- Eyes-closed balance hold: 3 x 20 seconds
- Full rotational chain: 360 spin into press hold: 3 x 4 per direction
- Ollie to 180 pivot: 3 x 6 per direction
- Max-duration squat hold with rocking: 2 x 45 seconds
Chapter 8: Injury Prevention and Rehabilitation
Snowboarding carries a significant injury risk, particularly for the ankles, knees, and wrists. According to research published in the British Journal of Sports Medicine, snowboarding injury rates range from 2 to 8 injuries per 1,000 snowboard-days, with ankle sprains, wrist fractures, and ACL tears being the most common. Balance board training is one of the most effective tools for reducing your injury risk, both by strengthening vulnerable areas and by improving the proprioceptive awareness that helps you avoid dangerous situations in the first place.
Snowboarder’s Ankle: Prevention and Recovery
“Snowboarder’s ankle” is a colloquial term for fractures of the lateral process of the talus bone, which is unique to snowboarding and often misdiagnosed as a simple ankle sprain. While a balance board can’t prevent every possible ankle injury (a high-energy fall can break anything), it can significantly strengthen the stabilizing structures around the ankle to reduce the risk of sprains and provide better protection for the talus.
Balance board exercises that target ankle stability include single-leg holds, lateral rocking, and progressive balance challenges with reduced visual input (closing your eyes). These exercises strengthen the peroneal tendons, which run along the outside of the ankle and are the primary defense against inversion sprains—the most common type of ankle injury in snowboarding.
Knee Injury Prevention
ACL (anterior cruciate ligament) tears are among the most devastating injuries in snowboarding. They typically occur when a rider catches an edge and the knee is forced into a valgus (inward) position under load. Balance board training helps prevent ACL injuries by strengthening the muscles that control knee alignment—particularly the gluteus medius and the VMO (vastus medialis obliquus), which is the teardrop-shaped muscle on the inside of your knee just above the kneecap.
The exercises most effective for ACL prevention on a balance board are squats with lateral rocking, single-leg balance holds, and deep squat holds. These exercises train the knee to maintain proper alignment under dynamic load, which is exactly what’s needed to prevent the valgus collapse that causes ACL tears. A study in the American Journal of Sports Medicine found that neuromuscular training programs that included balance board work reduced ACL injury rates by 52% in female athletes.
Wrist and Upper Body Protection
Wrist fractures are the most common snowboarding injury overall, particularly among beginners who instinctively put their hands out when they fall. While balance board training primarily targets lower body and core stability, the core strengthening benefits indirectly protect your wrists by improving your overall body control. A stronger core means better balance, which means fewer falls, which means fewer outstretched hand injuries.
Additionally, the improved body awareness that comes from balance board training helps you learn to fall correctly—tucking your arms in and rolling with the fall rather than extending your hands. This is a skill that many experienced riders take for granted, but it’s something that can be deliberately practiced and improved through balance board work.
Balance Board Rehabilitation Protocols
Balance boards are widely used in clinical rehabilitation settings, and with good reason. The progressive, scalable nature of balance training makes it ideal for athletes recovering from injuries who need to rebuild their balance and proprioception in a controlled environment.
Phase 1 (Acute Recovery): Begin with a rocker board or balance disc on the floor. These provide gentle, multi-directional instability without the lateral travel of a roller board. Perform seated balance exercises first (sitting on the board and maintaining stability), then progress to kneeling and eventually standing.
Phase 2 (Early Rehabilitation): Once weight-bearing is comfortable, progress to a roller board with the stops set to maximum restriction. Perform static balance holds for increasing durations, starting with 10 seconds and progressing to 60 seconds. Focus on maintaining proper alignment and avoiding compensatory patterns.
Phase 3 (Late Rehabilitation): Gradually reduce the stop restrictions and introduce dynamic movements (controlled rocking, weight shifts). Add single-leg work and more challenging balance positions. The goal is to restore balance to pre-injury levels or better.
Phase 4 (Return to Sport): Full-range balance board work including advanced exercises, plyometrics, and sport-specific movements. This phase should overlap with the return-to-snow progression to ensure that the balance improvements transfer to the mountain.
Chapter 9: Balance Board vs. Other Training Tools
Balance boards are not the only option for improving balance and proprioception. Several other training tools can complement or, in some cases, substitute for balance board work. Understanding the strengths and limitations of each option will help you build the most effective training setup for your specific needs.
Balance Board vs. Bosu Ball
The Bosu Ball (Both Sides Utilized) is a half-sphere inflatable device that provides a cushioned, unstable surface for standing exercises. It’s popular in gyms and physical therapy clinics, and many snowboarders wonder whether a Bosu Ball can replace a balance board.
The short answer is: not entirely. While a Bosu Ball does provide a balance challenge, it’s fundamentally different from a balance board in two important ways. First, the Bosu Ball provides static instability—the dome deforms under your weight but doesn’t travel laterally. This means it doesn’t replicate the edge-to-edge transition that’s central to snowboarding. Second, the soft surface absorbs energy, reducing the proprioceptive feedback that your feet receive. A balance board, with its hard deck and rolling contact, provides much sharper proprioceptive input that more closely mimics the feel of a snowboard on hard snow.
However, the Bosu Ball has its own advantages. It’s safer for beginners and rehabilitation patients because it can’t shoot out from under you. It also allows for exercises that a balance board can’t replicate, such as squats with an unstable base (standing on the dome) or push-ups with an unstable hand position. The ideal setup for many snowboarders includes both a balance board for sport-specific training and a Bosu Ball for complementary exercises.
Balance Board vs. Slackline
Slacklining—balancing on a flat webbing tensioned between two anchor points—has gained popularity as a balance training tool, and it offers some unique benefits that a balance board can’t match. The dynamic, oscillating nature of a slackline creates a balance challenge that’s more chaotic and unpredictable than a balance board, which makes it excellent for developing reactive balance.
The primary drawback of slacklining for snowboard training is practical: it requires two sturdy anchor points (typically trees) and a significant amount of outdoor space. It’s also weather-dependent and season-limited in many climates. Additionally, slacklining doesn’t provide the same edge-specific training that a balance board does—the linear, side-to-side movement of a roller board is much more directly applicable to snowboarding than the multi-directional oscillation of a slackline.
If you have access to outdoor space and enjoy the novelty, slacklining is a fantastic complementary training tool. But it shouldn’t be your primary balance training device if snowboard performance is your goal.
Balance Board vs. Wobble Cushion / Stability Disc
A wobble cushion (also called a stability disc or balance cushion) is an inflatable disc that provides a mild instability challenge. It’s the simplest and most affordable balance training tool available, and it has legitimate uses in snowboard training—but they’re limited.
The best use for a wobble cushion is as a progression tool for absolute beginners or rehabilitation patients. By placing the cushion on the floor and standing on it, you can introduce a mild balance challenge without the intimidating lateral travel of a roller board. Some riders also use wobble cushions placed on top of a balance board to add an extra layer of instability, but this is an advanced technique that should only be attempted after you’ve mastered the balance board on its own.
For dedicated snowboard training, a wobble cushion is no substitute for a proper balance board. The challenge it provides is too mild and too static to produce the neuromuscular adaptations that snowboarders need. Think of it as a stepping stone, not a destination.
Balance Board vs. BOSU vs. Slackline: Quick Comparison
| Feature | Balance Board | Bosu Ball | Slackline | Wobble Cushion |
|---|---|---|---|---|
| Snowboard Specificity | Excellent | Fair | Good | Poor |
| Portability | Good | Good | Fair | Excellent |
| Safety | Good (with stops) | Excellent | Fair | Excellent |
| Proprioceptive Feedback | Excellent | Fair | Good | Fair |
| Price Range | $50-$300 | $50-$150 | $30-$100 | $10-$30 |
Chapter 10: Complete Muscle Group Analysis
Understanding exactly which muscles a balance board activates helps you design training programs that target your specific weaknesses. Balance board training is unique in that it activates both the large, primary movement muscles and the small, deep stabilizer muscles simultaneously—a combination that’s difficult to achieve with traditional gym exercises.
Lower Leg Muscles
Peroneus Longus and Brevis: These muscles run along the outside of your lower leg and control eversion of the foot. They are the primary stabilizers against ankle inversion (rolling your ankle outward), which is the mechanism behind most ankle sprains. Balance board training activates these muscles intensely during every lateral rocking motion, building both their strength and their endurance.
Tibialis Anterior: Located on the front of your shin, this muscle controls dorsiflexion (pulling your toes toward your shin). It’s essential for maintaining proper stance alignment on a snowboard and for absorbing impact during landings. The tibialis anterior is activated during every fore/aft weight shift on a balance board.
Gastrocnemius and Soleus (Calves): Your calf muscles are activated during every moment you spend on a balance board, as they control plantar flexion and help manage the constant micro-adjustments needed to maintain balance. The soleus, in particular, is an endurance muscle that benefits greatly from the sustained isometric work that balance board training provides.
Thigh and Hip Muscles
Quadriceps: The four muscles on the front of your thigh are the primary shock absorbers for your body weight. During balance board squats and deep holds, they work isometrically to maintain your stance height against gravity. The VMO (vastus medialis obliquus) is particularly important for knee stability and is specifically targeted by the slightly bent-knee position that balance board training requires.
Hamstrings: These muscles on the back of your thigh work eccentrically during balance board movements to control knee flexion and maintain posterior stability. They’re also activated during fore/aft weight shifts, particularly when you shift weight toward the tail of the board.
Gluteus Medius: Perhaps the most important muscle for snowboarders, the gluteus medius controls hip abduction and prevents the knee from caving inward during lateral movements. Weak gluteus medius muscles are a leading cause of ACL injuries and IT band syndrome. Balance board training activates this muscle constantly during lateral rocking, making it one of the most effective gluteus medius strengthening exercises available.
Gluteus Maximus: The largest muscle in your body is activated during squats and deep holds on the balance board. While it’s not the primary target of most balance board exercises, it provides essential power and stability during dynamic movements.
Core Muscles
Transverse Abdominis: This deep core muscle wraps around your spine like a corset and provides the foundational stability that allows all other core muscles to function effectively. Balance board training activates the transverse abdominis as an anticipatory stabilizer—it fires before you move to prepare your spine for the load.
Internal and External Obliques: These muscles control rotation of the trunk and are essential for the upper-lower body separation that advanced snowboarding requires. They’re activated during every twist, pivot, and rotational movement on the balance board.
Erector Spinae: These muscles run along your spine and maintain upright posture. The slight forward lean that most balance board exercises require places a sustained isometric load on the erector spinae, building the endurance needed to maintain a strong riding stance throughout a full day on the mountain.
Multifidus: These small, deep muscles connect adjacent vertebrae and provide segmental spinal stability. They’re activated by the micro-rotations and balance corrections that occur during every moment on a balance board. Weak multifidus muscles are associated with chronic low back pain, making balance board training a valuable tool for back health as well as snowboard performance.
Chapter 11: Balance Board Surface and Flooring Guide
The surface you train on has a significant impact on the difficulty and safety of your balance board sessions. Different surfaces change the friction between the roller and the floor, which affects how quickly the board moves and how much control you have over it. Understanding these differences allows you to use surface selection as a training variable—choosing easier surfaces when you’re learning and harder surfaces as you advance.
Carpet
Carpet is the easiest surface for balance board training because it provides the most friction. The carpet fibers grip the roller and slow its movement, giving you more time to react to balance shifts. This makes carpet ideal for beginners and for practicing new, challenging exercises. The main downside is that carpet can cause the roller to “stick” rather than roll smoothly, which creates an uneven training experience.
Low-pile commercial carpet is the best option—it provides enough friction to slow the roller without creating excessive sticking. High-pile shag carpet should be avoided because the fibers can wrap around the roller and cause it to bind.
Hardwood
Hardwood floors provide a smooth, consistent rolling surface that allows the balance board to move freely. This creates a more challenging balance experience than carpet because the roller can move more quickly and with less resistance. Hardwood is the preferred training surface for intermediate and advanced riders who want a responsive, realistic balance challenge.
The main concern with hardwood floors is damage. Balance board rollers can scratch or dent hardwood, particularly softer species like pine or maple. Always use a protective mat or rug underneath the roller, and consider using a rubber-sleeved roller rather than a bare wooden one. Some riders place a thin yoga mat under the roller to provide both floor protection and a consistent rolling surface.
Tile and Concrete
Tile and concrete provide the lowest friction of any common flooring surface, making them the most challenging training environments. The roller moves very quickly on these surfaces, which can be dangerous for beginners but provides an excellent challenge for advanced riders looking to simulate the low-friction feel of icy conditions.
Safety is a significant concern on hard surfaces. A fall on tile or concrete can cause serious injury, particularly to the wrists, hips, and head. Always use a crash mat or thick rug on either side of the board when training on hard surfaces, and consider wearing protective gear (wrist guards, helmet) during your first few sessions on these surfaces.
Outdoor Surfaces
Training outdoors on grass, dirt, or pavement can add variety to your balance board sessions, but it introduces variables that don’t exist indoors. Grass and dirt provide uneven, inconsistent friction that changes with moisture and surface conditions. Pavement is similar to concrete but may have cracks, slopes, or debris that affect the roller’s movement.
Outdoor training is best reserved for experienced riders who have already mastered indoor balance board work and want to add an extra layer of unpredictability to their training. The uneven surfaces can actually be beneficial for developing reactive balance, similar to the variable conditions you encounter on the mountain.
Chapter 12: Safety Equipment and Injury Prevention
While balance board training is generally safe when performed correctly, the risk of injury increases as you progress to more advanced exercises and faster roller speeds. Investing in appropriate safety equipment is a smart move that allows you to push your limits with confidence, knowing that a fall won’t result in a serious injury.
Wrist Guards
Wrist guards are the single most important piece of safety equipment for balance board training. When you lose your balance, the natural human response is to extend your hands to break the fall, which puts enormous stress on the wrist bones and ligaments. Wrist guards distribute this impact across a larger area and prevent the wrist from hyperextending, dramatically reducing the risk of fractures and sprains.
Look for wrist guards that have a rigid splint on both the front and back of the wrist. Soft fabric braces don’t provide adequate impact protection for balance board use. Skate-style wrist guards are ideal because they’re designed for exactly this type of fall protection.
Helmets
A helmet may seem like overkill for indoor balance board training, but it’s a wise precaution if you’re practicing advanced tricks on hard surfaces. A fall from a balance board can result in your head striking a wall, furniture, or the floor, and even a low-speed impact can cause a concussion. Skate-style helmets are lightweight and well-ventilated enough to wear comfortably during indoor training sessions.
Knee Pads
Knee pads are particularly useful during the learning phase when falls are more frequent. They also protect your knees during floor-based exercises that complement your balance board training, such as lunges, planks, and yoga poses. Thin, flexible knee pads that allow a full range of motion are preferable to bulky pads that restrict movement.
Crash Mats
A crash mat or thick exercise mat placed on either side of the balance board provides a cushioned landing zone for falls. This is especially important when training on hard surfaces like tile or concrete. A yoga mat is too thin to provide meaningful impact protection—look for a mat that’s at least 1.5 inches thick, ideally with a non-slip bottom to prevent it from sliding during a fall.
Footwear Considerations
The question of what to wear on your feet while balance board training is more nuanced than it might appear. Training barefoot maximizes proprioceptive feedback and strengthens the intrinsic muscles of your feet, which is beneficial for long-term balance development. However, barefoot training provides less grip on the board’s surface and exposes your feet to abrasion from grip tape.
Thin-soled shoes like Vibram FiveFingers or minimalist training shoes offer a good compromise—they allow significant proprioceptive feedback while providing grip and protection. Snowboard boots can be used to simulate the exact feeling of being on the mountain, but they reduce proprioceptive feedback significantly due to their thick soles. We recommend alternating between barefoot/thin-soled sessions and occasional boot sessions to get the best of both worlds.
Chapter 13: Common Balance Board Mistakes and How to Fix Them
Even with the best equipment and the most well-designed training program, progress can be derailed by common mistakes that reduce the effectiveness of your training or increase your injury risk. This chapter identifies the most frequent errors and provides clear corrections to keep your training on track.
Mistake 1: Training with Locked Knees
This is by far the most common mistake among new balance board users. Straight legs feel more stable initially because they create a rigid, pillar-like structure, but they actually reduce your balance capacity by eliminating the shock absorption and micro-correction capabilities of your knee joint. When your knees are locked, all balance corrections must come from your ankles alone, which fatigues them quickly and limits your training duration.
The Fix: Maintain a slight bend in your knees at all times—roughly 15-20 degrees of flexion. This “athletic stance” activates your quadriceps and glutes, distributes the balance load across multiple joints, and allows for much smoother, more controlled movements. If you find that your legs are straightening unconsciously, it’s a sign that your quad endurance needs improvement—add wall sits and bodyweight squats to your training regimen.
Mistake 2: Looking Down at Your Feet
Watching your feet on the board seems logical—it helps you understand where the board is relative to the roller. But it actually disrupts your balance by shifting your head forward, which moves your center of gravity in front of your base of support. Additionally, your visual system is receiving conflicting information: your feet are moving, but the board appears stationary relative to your field of vision, which confuses your vestibular system.
The Fix: Fix your gaze on a point at eye level on the wall in front of you, approximately 6-8 feet away. This provides a stable visual reference that helps your vestibular system maintain orientation. As your balance improves, practice closing your eyes for short periods during your sessions—this removes visual input entirely and forces your proprioceptive system to handle all balance duties, which dramatically accelerates balance development.
Mistake 3: Progressing Too Quickly
The balance board learning curve is steep but rewarding, and many riders become overconfident after a few successful sessions. They skip ahead to advanced exercises before their foundation is solid, leading to frustration, falls, and potential injury. Balance is a neurological skill as much as a physical one, and neural adaptations take time to consolidate.
The Fix: Follow the progressive training programs outlined in Chapter 7. Don’t advance to the next phase until you can comfortably perform all exercises in the current phase with good form. A useful benchmark is the “conversation test”—if you can hold a balance position while having a conversation without losing focus, you’re ready to progress. If you’re too focused on balancing to talk, stay at the current level a bit longer.
Mistake 4: Ignoring Fore/Aft Balance
Most balance board users naturally gravitate toward lateral (side-to-side) exercises because the roller’s movement makes this the most obvious challenge. However, neglecting fore/aft (nose-to-tail) balance creates a significant gap in your training that will manifest as backseat riding on the mountain.
The Fix: Dedicate at least 30% of each training session to fore/aft exercises. This includes weight shifts toward the nose and tail, front-to-back rocking (if your board supports it), and exercises that challenge your balance in the sagittal plane. If you’re using a roller board with a cylindrical roller, you can create a fore/aft challenge by angling your feet slightly diagonal on the deck.
Mistake 5: Training Without a Purpose
Stepping on a balance board and “just balancing” for a few minutes is better than nothing, but it’s a far cry from optimal training. Without specific goals, you tend to stay in your comfort zone, performing the same movements at the same intensity without progressive overload. Balance, like any physical skill, requires deliberate practice with clear objectives.
The Fix: Before each session, define 2-3 specific goals. “I will hold a single-leg balance for 20 seconds,” “I will complete 12 controlled rocks without the board touching the ground,” or “I will perform 8 ollie simulations with clean form.” Record your results in a training log to track progress and identify areas that need more attention.
Mistake 6: Neglecting the Opposite Side
Most snowboarders have a dominant direction—they’re more comfortable turning one way than the other. On a balance board, this manifests as a tendency to favor one direction during rocking and pivoting exercises. Over time, this reinforces the asymmetry rather than correcting it.
The Fix: Always perform equal repetitions in both directions. If you notice that one direction is significantly harder than the other, start with the harder side and perform extra reps there. Balance your training to ensure both sides receive equal work—your riding will benefit from the symmetry.
Chapter 14: How to Build Your Own DIY Balance Board
While commercial balance boards are well-engineered and ready to use out of the box, building your own can be a rewarding project that saves money and allows you to customize the design to your specific needs. A DIY balance board can be built for as little as $20-30 in materials, compared to $100-300 for a commercial equivalent.
Materials Needed
- Deck: A piece of 3/4-inch plywood, cut to approximately 30″ x 8″ (or your preferred dimensions). Baltic birch plywood is ideal because it’s strong, smooth, and resistant to splitting. Standard construction-grade plywood works but has a rougher surface.
- Roller: A cardboard concrete form tube (Sonotube), 6″ or 8″ in diameter and at least 12″ long. These are available at any hardware store and provide a strong, lightweight roller. Alternatively, a section of PVC pipe (4″ or 6″ diameter) works well for a narrower roller.
- Grip: Adhesive-backed grip tape (skateboard grip tape is perfect) or a sheet of rubber shelf liner.
- Finishing: Sandpaper (120 and 220 grit), wood sealant or polyurethane, and optional edge banding or rubber edge trim.
- Optional stops: Two pieces of 2×4 lumber, approximately 10″ long, to serve as travel limiters on either side of the roller.
Step-by-Step Build Instructions
- Cut the deck: Using a jigsaw or circular saw, cut the plywood to your desired dimensions. A 30″ x 8″ deck works well for most riders, but you can adjust the length to match your snowboard stance width. Round the corners with a jigsaw and sand all edges smooth to prevent splinters.
- Sand the deck: Start with 120-grit sandpaper to smooth any rough spots, then follow with 220-grit for a fine finish. Pay particular attention to the edges and corners—you’ll be falling against these eventually, and sharp edges are dangerous.
- Seal the wood: Apply two coats of polyurethane or wood sealant to protect the plywood from moisture and wear. Allow each coat to dry completely before applying the next. This step is essential for longevity—an unsealed plywood deck will delaminate quickly with regular use.
- Apply grip surface: Once the sealant is fully cured, apply grip tape to the top surface of the deck. Cut the grip tape slightly smaller than the deck dimensions so it doesn’t overhang the edges. Press firmly to ensure full adhesion, then use a razor blade to trim any excess.
- Prepare the roller: If using a cardboard Sonotube, wrap it with several layers of duct tape for added strength and moisture resistance. Cut the tube to the same width as your deck (8″) or slightly wider. PVC pipe requires no modification—just cut it to length and sand the cut edges smooth.
- Add optional stops: If you want safety stops, attach the 2×4 blocks to the floor on either side of the roller using double-sided tape or by screwing them into a plywood base plate. The stops should be positioned so they limit the deck’s travel to your desired range. As your balance improves, move the stops further apart or remove them entirely.
Chapter 15: Balance Board Training for Other Board Sports
While this guide is focused on snowboarders, balance board training is valuable for athletes in virtually every board sport. If you’re a multi-sport athlete or if you’re looking for additional motivation to maintain your off-season training, understanding how balance board work translates to other disciplines can keep you engaged throughout the year.
Surfing
Balance boards were originally developed for surf training, and the crossover between surfing and balance board work is arguably even stronger than the snowboarding crossover. Surfing requires constant balance adjustments on an unstable, moving surface—exactly what a balance board provides. The 360-degree rotation boards like the Whirly Board are particularly valuable for surfers because they replicate the multi-directional instability of riding a wave.
Key surf-specific balance board exercises include deep crouch holds (simulating the low center of gravity needed for barrel riding), rotational pivots (mimicking the body movements needed for cutbacks and snap turns), and single-leg balance work (preparing for the one-footed maneuvers that are becoming increasingly common in high-performance surfing). Many professional surfers include balance board work in their daily training routines, and some of the best balance boards on the market were originally designed for the surfing community.
Skateboarding
Skateboarding and balance board training share many common elements, particularly in the areas of rotational balance and ollie mechanics. The freestyle-specific balance board exercises outlined in this guide—ollie simulations, shuvit practice, and 360-degree spins—directly translate to skateboard trick performance. The balance board provides a safe, controlled environment for learning these movements before attempting them on a skateboard at speed.
For skateboarders who ride transition (ramps, bowls, half-pipes), balance board training develops the fore/aft balance and deep squat strength needed for pumping and carving concrete. The endurance builder routine described in Chapter 4 is particularly valuable for transition skaters who need to maintain intensity through long runs.
Wakeboarding and Kiteboarding
Wakeboarding and kiteboarding both require the ability to maintain balance while being pulled by an external force—a dynamic that’s difficult to simulate in a gym setting. However, a balance board can develop many of the supporting physical qualities needed for these sports. The lateral balance and edge control skills developed through roller board training translate directly to carving behind a boat or maintaining an edge while kiteboarding in strong winds.
The single-leg balance exercises are particularly relevant for wakeboarders and kiteboarders because these sports often involve unweighting one foot during tricks and transitions. Deep squat holds build the quad and glute strength needed to absorb hard landings—a critical skill when you’re launching off kickers and hitting sliders at high speed.
Mountain Biking
Mountain bikers benefit from balance board training in ways that might not be immediately obvious. While a bicycle provides inherent stability through its gyroscopic effect, the balance demands of technical trail riding—navigating rock gardens, riding skinny ledges, and maintaining control through high-speed berms—require the same type of dynamic balance that a balance board develops. The proprioceptive improvements from balance board work translate directly to faster reaction times and better body position on the bike.
Chapter 16: Balance Board Training for Kids and Youth Athletes
Children and teenagers are in a critical period for neuromuscular development, and balance training during these years can have lifelong benefits. Research in pediatric sports science has shown that children who participate in balance-focused activities develop better coordination, faster reaction times, and lower injury rates throughout their athletic careers. For young snowboarders, balance board training is not just beneficial—it’s essential for building the foundational movement patterns that will serve them on the mountain for decades.
Age-Appropriate Guidelines
Ages 5-8: At this age, the focus should be on fun and exploration rather than structured training. Use a rocker board or balance disc rather than a roller board, as these provide a gentler balance challenge that’s less intimidating for young children. Games like “statue” (hold a balance position as long as possible), “airplane” (extend arms to the sides while balancing), and “red light, green light” (start and stop on command) make balance training enjoyable. Sessions should be short—5 to 10 minutes maximum—and always supervised.
Ages 9-12: Children in this age range have the coordination and attention span for more structured balance board training. A roller board with the stops set to maximum restriction is appropriate. Focus on the beginner exercises outlined in Chapter 6, with an emphasis on static holds and controlled rocking. Sessions can extend to 15 minutes, and children can train 2-3 times per week. Avoid advanced exercises like ollies and spins until the child has demonstrated consistent mastery of the fundamentals.
Ages 13-17: Teenagers can follow most of the training programs outlined in Chapter 7, with some modifications. The Foundation Phase (weeks 1-4) should be extended to 6 weeks for teenagers who are new to balance board training. The Development Phase can begin once the teenager can consistently hold a single-leg balance for 15 seconds. Advanced exercises like ollie simulations and 360-degree spins should only be attempted after at least 8 weeks of consistent training and only under supervision.
Safety Considerations for Young Riders
Children should always use a balance board with safety stops engaged until they demonstrate consistent control over a period of at least 4 weeks. Crash mats should be placed on either side of the board regardless of the child’s skill level. Wrist guards are strongly recommended for all young riders, as children are more likely to instinctively extend their hands during a fall.
Adult supervision is mandatory for children under 12 and strongly recommended for teenagers. The supervising adult should be positioned within arm’s reach during the first few sessions and should gradually increase the distance as the child demonstrates competence. Never allow children to use a balance board near stairs, hard furniture edges, or other hazards that could cause serious injury during a fall.
Chapter 17: Balance Board Training for Yoga and Pilates Practitioners
Yoga and Pilates practitioners represent a growing demographic of balance board users, and for good reason. Both disciplines emphasize core strength, body awareness, and controlled movement—all of which are enhanced by balance board training. The synergy between these practices is significant: yoga and Pilates build the foundational strength and flexibility that make balance board training safer and more effective, while balance board work develops the dynamic balance and proprioceptive skills that elevate yoga and Pilates performance.
Yoga Crossover Benefits
Many yoga poses require the ability to balance on one leg while maintaining a stable, aligned posture—skills that are directly developed by balance board training. Standing poses like Tree Pose (Vrksasana), Warrior III (Virabhadrasana III), and Half Moon (Ardha Chandrasana) all benefit from the improved proprioception and ankle stability that balance board work provides. Practitioners who incorporate balance board training often report that these challenging poses feel more stable and less effortful after just a few weeks of consistent practice.
Balance board training also enhances the “root lock” (Mula Bandha) engagement that’s central to yoga practice. The constant need to stabilize your core on an unstable surface naturally activates the deep pelvic floor and lower abdominal muscles that form the foundation of Mula Bandha. Many yoga teachers have noted that students who balance board regularly demonstrate better overall body awareness and more refined alignment in their poses.
Pilates Integration
Pilates focuses heavily on core strength and spinal stability, and balance board training complements these goals perfectly. The transverse abdominis and multifidus muscles that are emphasized in Pilates are the same deep stabilizer muscles that are activated during balance board work. Combining Pilates mat work with balance board sessions creates a comprehensive core training program that addresses both static and dynamic stability.
For Pilates practitioners, the balance board serves as a natural progression from the Reformer and other Pilates apparatus. The instability of the balance board challenges your core in ways that a stable floor cannot, forcing deeper muscle activation and faster neuromuscular responses. Many Pilates instructors now incorporate balance board exercises into their group classes as a way to add variety and increase the difficulty level for advanced students.
Recommended Integration Schedule
For practitioners who want to combine balance board training with yoga or Pilates, we recommend the following weekly schedule:
- Monday: Balance board session (20-30 minutes)
- Tuesday: Yoga or Pilates class
- Wednesday: Balance board session (20-30 minutes)
- Thursday: Yoga or Pilates class
- Friday: Balance board session (20-30 minutes)
- Saturday: Longer yoga or Pilates practice (45-60 minutes)
- Sunday: Rest or gentle movement
Chapter 18: Advanced Balance Board Tricks and Progressions
Once you’ve mastered the foundational exercises and training programs, the balance board opens up a world of advanced tricks and challenges that push your balance to its absolute limits. These advanced movements not only build impressive balance skills but also develop the specific neuromuscular patterns needed for the most demanding snowboard maneuvers. This chapter covers the most challenging balance board tricks, with detailed progression pathways that take you from basic competency to expert-level execution.
The Ollie to 180 Pivot
This compound movement combines the ollie simulation with a 180-degree body rotation, requiring explosive power, precise timing, and exceptional balance recovery. It directly simulates the takeoff of a backside 180—one of the most fundamental spin tricks in snowboarding.
Progression: First, master the ollie simulation on its own (3 sets of 12 with clean form). Then, practice the 180-degree pivot separately until it feels effortless (3 sets of 10 per direction). Finally, combine the two movements: ollie, rotate 180 degrees at the apex of the pop, and land in switch position. Start with the stops engaged and progress to no stops as your control improves. Aim for 6 clean repetitions per direction before advancing.
The Shuvit to Press
This combination takes the basic shuvit and adds a press hold on the landing, requiring you to catch the board in an off-center position and hold it there. This is excellent preparation for tricks like tail-press 270s and nose-press to regular landings on snow.
Progression: Begin with standard shuvit practice (3 sets of 10 per direction). Once you can consistently land the shuvit in a balanced position, start adding a 5-second press hold after each landing. Gradually increase the hold duration to 15 seconds and the press depth to maximum. This exercise is extremely demanding and should only be attempted on a freestyle-specific balance board with no safety stops.
The Balance Board Handstand
For athletes with strong upper body control, performing a handstand on a balance board is the ultimate demonstration of total body balance. While it doesn’t directly simulate snowboarding, it develops exceptional core strength, shoulder stability, and spatial awareness that transfer to every aspect of your riding.
Progression: Begin with handstand practice on the floor until you can hold a freestanding handstand for 10 seconds. Then, practice handstands on a stable elevated surface (like a low bench) to get used to the height. Finally, attempt the handstand on the balance board—start with a wider deck and a wider roller for maximum stability. Always have a spotter during early attempts.
The Eyes-Closed Challenge Series
Removing visual input during balance board training forces your proprioceptive and vestibular systems to handle 100% of the balance workload. This dramatically accelerates balance development and creates training adaptations that are immediately transferable to snowboarding, where variable visibility (flat light, fog, snow) can compromise your visual balance cues.
Progression: Start by closing your eyes for the last 10 seconds of a static balance hold. Gradually extend the eyes-closed duration to 20 seconds, then 30 seconds. Once you can hold a static balance with eyes closed for 30 seconds, progress to eyes-closed rocking. Finally, attempt eyes-closed pivots—this is extremely challenging and represents an elite level of balance proficiency.
The Deep Squat Hold Challenge
This is the ultimate test of lower body endurance and balance. Lower into a full squat (thighs parallel to the ground or below) and hold the position while performing continuous side-to-side rocking. The quad burn is intense, and the balance challenge is amplified by the low center of gravity.
Progression: Begin with 15-second holds in a half squat with gentle rocking. Add 5 seconds per session until you reach 30 seconds. Then, increase the squat depth to three-quarters and repeat the progression. The final goal is a 45-second hold in a full squat with maximal rocking—a feat that will make your quads scream but will translate directly to the sustained deep stance needed for aggressive carving and mogul riding.
Chapter 19: Mental Training and Visualization on the Balance Board
Balance is as much a mental skill as a physical one. Your brain processes balance information through multiple systems—visual, vestibular, and proprioceptive—and the integration of these systems determines your balance capacity. Training your mental approach to balance can be just as valuable as training your muscles, and the balance board provides an ideal platform for developing these cognitive skills.
Visualization Techniques
Mental visualization—imagining yourself performing a specific movement before you physically execute it—is one of the most well-researched performance enhancement techniques in sports science. Studies have shown that mental rehearsal activates the same neural pathways as physical practice, meaning that visualization can supplement your physical training to accelerate skill development.
On the balance board, visualization can be practiced during rest periods between sets. Close your eyes and imagine yourself performing the next exercise with perfect form—feel the balance corrections, see the board moving beneath your feet, sense the muscle activation patterns. Research from the University of Chicago found that athletes who combined physical practice with mental rehearsal improved performance by 13.5% more than those who relied on physical practice alone.
Focus and Attention Training
Balance board training naturally demands focused attention—your brain must constantly process balance information and generate appropriate motor responses. This makes balance board work an excellent form of attention training that can improve your focus in other areas of life as well as on the mountain.
Advanced riders can deliberately increase the attentional demands of their balance board sessions by adding cognitive tasks. For example, try counting backwards from 100 by 7s while maintaining a balance hold, or reciting the alphabet in reverse while performing controlled rocking. These dual-task challenges force your brain to allocate balance processing to automatic (subconscious) systems, which is exactly the level of automaticity that’s needed for confident snowboarding in challenging conditions.
Confidence Building
Fear and hesitation are performance killers in snowboarding. When you doubt your ability to make a turn or land a trick, your body tenses up, your movements become jerky, and your risk of injury increases. Balance board training builds confidence by providing a safe environment to test your limits and experience recovery from balance challenges.
Every time you save yourself from falling on a balance board, your brain registers the experience as evidence of your balance capability. Over time, these accumulated experiences create a deep sense of confidence in your balance abilities that transfers directly to the mountain. Riders who balance board regularly report feeling more confident in challenging conditions—icy terrain, deep powder, steep chutes—because they trust their body’s ability to maintain balance under pressure.
Stress Inoculation
Balance board training with added challenges—eyes closed, single leg, deep squats, cognitive tasks—creates a controlled stress response that trains your nervous system to maintain performance under pressure. This is known as “stress inoculation,” and it’s one of the most valuable benefits of balance board training for competitive athletes.
When you train under challenging conditions on a balance board, your sympathetic nervous system (the “fight or flight” response) activates, releasing adrenaline and increasing your heart rate. By repeatedly exposing yourself to this stress response in a safe environment, you teach your body to maintain fine motor control even when your stress hormones are elevated. This directly translates to better performance in high-pressure situations on the mountain—a competitive run, a challenging line choice, or an unexpected hazard.
Chapter 20: Seasonal Training Calendar for Snowboarders
The key to arriving on the mountain in peak condition is a structured training calendar that progressively builds your balance and fitness throughout the off-season. The following calendar provides a month-by-month framework that balances balance board training with other physical preparation activities, ensuring that you peak at exactly the right time—when the snow starts falling.
April-May: Recovery and Assessment
The first two months after the season ends are for recovery and baseline assessment. Your body needs time to heal from the accumulated fatigue of the season, and your training volume should be low. Focus on mobility work, gentle yoga, and light cardiovascular exercise (cycling, swimming). Introduce balance board training in the last two weeks of May, starting with the beginner exercises outlined in Chapter 6. This is also a good time to get a physical assessment to identify any weaknesses or imbalances that need to be addressed before the next season.
June-July: Foundation Building
This is where the real work begins. Follow the Foundation Phase training program from Chapter 7, performing 3 balance board sessions per week. Supplement these sessions with strength training (squats, deadlifts, lunges) and cardiovascular conditioning. The goal during this phase is to build a solid foundation of balance, strength, and endurance that will support the more intensive training that follows. Don’t rush through this phase—it’s the foundation that everything else is built on.
August-September: Development and Intensity
By late summer, your balance should be well-developed enough to handle the more challenging exercises in the Development Phase. Follow the week 5-8 program from Chapter 7, and increase the intensity of your strength training. This is also a good time to start adding sport-specific activities—skateboarding, trail running, or mountain biking—to develop the dynamic movement patterns that complement balance board training. The goal during this phase is to peak your fitness and balance simultaneously.
October-November: Performance and Sport-Specific Preparation
The final two months before the season are for performance refinement. Follow the Performance Phase program from Chapter 7, with an emphasis on sport-specific exercises and advanced tricks. Reduce your overall training volume slightly to allow your body to recover and arrive at the first snowfall feeling fresh rather than fatigued. This is also the time to address any remaining weaknesses—if your single-leg balance is lagging, dedicate extra sessions to it. If your quad endurance needs work, add extra squat hold sets.
Chapter 21: Complete Balance Board Buying Guide
Choosing the right balance board is a personal decision that depends on your experience level, training goals, available space, and budget. This comprehensive buying guide breaks down every factor you should consider to make a decision you’ll be happy with for years to come.
Deck Size and Shape
The deck is the platform you stand on, and its dimensions directly affect the balance challenge and training versatility. Longer decks (32-38 inches) provide a more stable platform and more room for foot placement, making them better for carving simulation and riders with wide stances. Shorter decks (24-30 inches) are more maneuverable and better for tricks and rotational movements. Wider decks (9-11 inches) provide more lateral stability, while narrower decks (7-8 inches) increase the balance challenge by reducing your base of support.
Deck shape also matters. Twin-tip shapes (symmetrical nose and tail) are ideal for freestyle riders who practice switch riding and rotational tricks. Directional shapes (with a defined nose and tail) feel more like a snowboard and are better for carving simulation. Concave decks (with an inward curve from edge to edge) provide better board feel and control during dynamic movements.
Roller Type and Size
The roller determines the type and difficulty of the balance challenge. Cylindrical rollers provide a consistent, predictable challenge that’s easy to understand and progress. Tapered rollers allow more extreme tilt angles and are better for simulating deep carving. Narrow rollers (3-4 inches) are more challenging than wide rollers (6-8 inches) because they provide a smaller base of support. If you’re a beginner, start with a wider roller and progress to narrower options as your balance improves.
Safety Features
Safety features are particularly important for beginners and for riders who plan to practice advanced tricks. Magnetic or adjustable stops limit the roller’s travel distance, preventing the board from shooting out unexpectedly. Track systems contain the roller within a fixed path, providing an additional layer of safety. Non-slip deck surfaces prevent your feet from sliding off during dynamic movements. Consider these features essential rather than optional, especially during your first 6 months of training.
Weight Capacity
Most commercial balance boards support between 250 and 350 pounds, but it’s worth checking the manufacturer’s specifications before purchasing. If you’re near the upper end of a board’s weight capacity, look for a more robust option—heavier riders place more stress on the roller and deck, and a board that’s rated for your weight will last longer and perform better. The Revbalance 101 v2, for example, is rated for 350 pounds, making it suitable for virtually any rider.
Budget Considerations
Balance boards range from $20 (basic DIY or budget models) to $400+ (premium professional models). The price difference typically reflects build quality, materials, adjustability, and brand reputation. For most riders, the sweet spot is $80-$200, where you’ll find well-built boards with good adjustability and durable construction. The Yes4All Premium Trainer (under $50) is an excellent entry point, while the Revbalance 101 v2 ($120-150) offers the best balance of features and quality for most riders. Premium options like the Vew-Do Flow ($200-300) are justified for dedicated riders who want the best possible carving simulation.
Chapter 22: Nutrition and Recovery for Balance Training
Physical training is only half the equation—your body needs proper nutrition and recovery to adapt to the demands of balance board work and produce meaningful improvements. This chapter covers the nutritional and recovery strategies that will maximize the benefits of your training program.
Pre-Training Nutrition
Eating the right foods before a balance board session ensures that your muscles have the fuel they need for optimal performance. A light meal 60-90 minutes before training should include both carbohydrates (for energy) and a moderate amount of protein (for muscle support). Good options include a banana with almond butter, Greek yogurt with berries, or a small bowl of oatmeal with honey. Avoid heavy, high-fat meals that can cause sluggishness, and stay well-hydrated—dehydration impairs proprioception and reaction time.
Post-Training Recovery
After a balance board session, your muscles need nutrients to repair and adapt. Consuming a combination of protein and carbohydrates within 30-60 minutes of training optimizes recovery. A protein shake with a banana, chocolate milk, or a chicken sandwich are all effective options. The protein provides the building blocks for muscle repair, while the carbohydrates replenish the glycogen stores that were depleted during training.
Sleep and Balance
Sleep is perhaps the most underappreciated factor in balance training effectiveness. During deep sleep, your brain consolidates the motor learning that occurred during your training sessions, converting short-term neural adaptations into permanent skill improvements. Research from Stanford University found that athletes who extended their sleep to 10 hours per night showed significant improvements in balance, reaction time, and sprint performance. Aim for 7-9 hours of quality sleep per night, and consider a brief nap (20-30 minutes) after particularly intense balance board sessions.
Active Recovery
Between balance board sessions, active recovery practices help maintain blood flow to your muscles and accelerate the removal of metabolic waste products. Light walking, gentle yoga, foam rolling, and swimming are all excellent active recovery options. Avoid complete inactivity between sessions—gentle movement is far more beneficial than sitting on the couch, even if the movement is very low intensity.
Hydration
Even mild dehydration (as little as 2% body weight loss) can impair balance, reaction time, and cognitive function—all of which are essential for effective balance board training. Drink water consistently throughout the day, and increase your intake on training days. A good rule of thumb is to drink half your body weight in ounces of water daily (e.g., a 180-pound person should drink 90 ounces). Add electrolytes during particularly long or intense sessions, especially in hot weather.
Chapter 23: Storage, Portability, and Travel Tips
One of the practical advantages of balance board training is that it requires minimal space and equipment. However, proper storage and transportation practices will extend the life of your board and ensure that it’s ready when you need it.
Indoor Storage
The ideal storage location for a balance board is a dry, temperature-controlled space away from direct sunlight. UV exposure can degrade grip tape and cause wooden decks to warp over time. Moisture is the enemy of wooden balance boards—prolonged exposure to humidity can cause delamination, warping, and mold growth. Store your board vertically against a wall or horizontally on a shelf, with the roller stored separately to prevent unnecessary pressure on the deck.
If you live in a small apartment, consider a balance board that can double as a decorative element. Several manufacturers produce balance boards with attractive wood grain finishes that look good leaning against a wall. The key is to make the board visible and accessible—if it’s buried in a closet, you’re less likely to use it regularly.
Transportation
Most balance boards are lightweight enough to carry by hand, but if you’re traveling with yours, invest in a padded carrying bag or wrap the board in a towel to protect the grip tape and deck during transport. The roller can be secured to the board with a velcro strap or bungee cord to prevent it from rolling around in your vehicle.
For air travel, check the board’s dimensions against your airline’s checked baggage requirements. Most balance boards fit within standard checked baggage dimensions, but oversized boards may require special handling. Some riders ship their balance boards to their destination in advance rather than dealing with the hassle of airport logistics.
Outdoor Storage Considerations
If you must store your balance board in a garage, shed, or other non-climate-controlled space, take steps to protect it from the elements. Cover the board with a tarp or plastic sheet to prevent moisture exposure, and store it off the ground to avoid contact with standing water. Inspect the board regularly for signs of moisture damage, and apply a fresh coat of sealant annually if it’s stored in a humid environment.
Chapter 24: Balance Board Applications in Physiotherapy
Balance boards have been a staple of physiotherapy clinics for decades, and their use continues to expand as research demonstrates their effectiveness for a wide range of conditions. Understanding how balance boards are used in clinical settings can help you appreciate the depth of their benefits and inform your own training approach.
Post-Surgical Rehabilitation
Balance boards are commonly used in rehabilitation following knee surgery (ACL reconstruction, meniscus repair), ankle surgery, and hip replacement. The progressive nature of balance training allows therapists to start with very gentle challenges (rocker board standing) and gradually increase the difficulty as the patient recovers. This graduated approach builds confidence while systematically strengthening the structures around the surgical site.
For ACL reconstruction patients specifically, balance board training typically begins 6-8 weeks post-surgery and continues throughout the rehabilitation process. Early exercises focus on static balance and weight shifting, while later exercises include single-leg work, squats, and eventually plyometrics. The goal is to restore balance to pre-injury levels (or better) before returning to sport, and research shows that patients who include balance board training in their rehabilitation recover faster and have lower re-injury rates.
Chronic Ankle Instability
Chronic ankle instability (CAI) is a common condition that affects up to 40% of people who sprain their ankle. It’s characterized by a recurring “giving way” sensation that limits activity and increases the risk of re-injury. Balance board training is the gold standard treatment for CAI, and numerous studies have demonstrated its effectiveness for restoring ankle stability and reducing recurrent sprain rates.
The typical CAI rehabilitation protocol involves 3 balance board sessions per week for 8-12 weeks, progressing from bilateral stance (both feet on the board) to single-leg stance, and from static holds to dynamic movements. Improvements are usually noticeable within 4-6 weeks, with full recovery typically achieved by 12 weeks. Many physiotherapists recommend ongoing balance board maintenance training indefinitely to prevent recurrence.
Neurological Rehabilitation
Balance boards are also used in rehabilitation for neurological conditions that affect balance and coordination, including stroke recovery, Parkinson’s disease, and multiple sclerosis. In these applications, the balance board serves as a tool for retraining the nervous system to process balance information and generate appropriate motor responses. The repetitive, progressive nature of balance board training promotes neuroplasticity—the brain’s ability to form new neural connections—which is essential for recovery from neurological injury.
It’s important to note that balance board use in neurological rehabilitation should always be guided by a qualified physiotherapist, as the progression must be carefully tailored to the individual’s condition and capabilities. The principles are the same as for musculoskeletal rehabilitation—start gentle, progress gradually, and focus on quality of movement—but the clinical oversight is essential for safety.
Geriatric Balance Training
Falls are a leading cause of injury and death among older adults, and balance decline is a primary risk factor for falls. Balance board training can significantly improve balance and reduce fall risk in older adults, even those in their 70s and 80s. A study published in the Journal of Geriatric Physical Therapy found that balance board training reduced fall incidence by 35% in community-dwelling older adults over a 12-month period.
For older adults, the approach must be conservative and carefully supervised. Start with a rocker board or balance disc rather than a roller board, as these provide a gentler balance challenge. Always use a support (wall, chair, or handrail) during initial sessions, and progress very gradually. The goal is not athletic performance but rather the maintenance of functional balance for daily activities—getting up from a chair, walking on uneven surfaces, and navigating stairs.
Chapter 25: Professional Athlete Insights and Expert Tips
To complement the scientific and practical information in this guide, we’ve gathered insights from professional snowboarders, coaches, and sports scientists who use balance board training as a core component of their preparation. Their perspectives provide valuable context for how balance board training fits into a complete athletic development program.
What the Pros Say
Professional snowboarders universally recognize the value of balance board training, but their approaches vary widely based on their discipline and personal preferences. Freestyle riders tend to favor 360-degree rotation boards and emphasize trick-specific exercises, while alpine racers prefer tapered roller boards that simulate deep carving angles. Big mountain riders often use a combination of both, recognizing that their discipline demands both carving precision and freestyle versatility.
A common theme among professional riders is the emphasis on consistency over intensity. Most pros balance board for 15-20 minutes per day rather than doing occasional long sessions. This daily practice maintains the neuromuscular pathways that keep their balance sharp throughout the off-season, and it aligns with the motor learning research that shows distributed practice (frequent, short sessions) produces better long-term retention than massed practice (infrequent, long sessions).
Several professional coaches emphasize the importance of training the weak side. “Most riders have a dominant direction—they’re more comfortable spinning one way or turning one way,” notes one national team coach. “On the balance board, we make them do everything in both directions, starting with the weak side. It’s uncomfortable, but it’s how you eliminate the asymmetries that limit your riding.”
Integration with Gym Training
The most effective training programs integrate balance board work with traditional strength and conditioning. Balance board sessions are typically performed either as a warm-up (10-15 minutes of light balance work before a strength session) or as a separate training session on non-lifting days. The key is to avoid performing balance board training immediately before heavy leg workouts, as the neuromuscular fatigue from balance work can compromise your lifting form and increase injury risk.
A well-designed weekly schedule might include: balance board training on Monday, Wednesday, and Friday (20-30 minutes per session), strength training on Tuesday and Thursday (45-60 minutes per session), and active recovery (yoga, swimming, cycling) on Saturday and Sunday. This schedule provides adequate balance training volume while allowing sufficient recovery between sessions.
Common Questions from Athletes
“Can balance board training replace time on snow?” No. Balance board training maintains and enhances the physical qualities needed for snowboarding, but it cannot replace the experience of riding on actual snow. The visual input, terrain variety, and social elements of snowboarding are unique and irreplaceable. Think of balance board training as maintenance—it keeps the engine running so that when you do get on snow, you can perform at your best from day one.
“How long before I see results on the mountain?” Most riders notice improvements within 4-6 weeks of consistent balance board training. The improvements are most apparent in reduced fatigue (you’ll feel less leg burn at the end of a ski day), better edge control (fewer instances of chatter or catching edges), and improved confidence in challenging conditions. The proprioceptive improvements from balance board training are particularly noticeable when you encounter ice or unexpected terrain changes—your body reacts faster and more effectively.
“Is balance board training worth it if I only ride a few days per year?” Absolutely. In fact, balance board training may be even more important for occasional riders than for daily riders. Occasional riders are more prone to injury because their bodies aren’t conditioned for the specific demands of snowboarding. 15 minutes of daily balance board training can dramatically reduce your injury risk and increase your enjoyment during the limited time you have on snow. The return on investment—in terms of both safety and performance—is exceptional.
“Should I balance board on rest days from the gym?” Balance board training on rest days is an excellent use of time, as it provides a different type of physical stimulus than strength training. The balance and proprioceptive challenges of the balance board don’t tax the same energy systems as heavy lifting, so you can perform balance work on rest days without compromising your gym recovery. In fact, light balance board work on rest days can serve as active recovery, promoting blood flow and reducing muscle soreness.
Chapter 26: Balance Board Accessories and Add-Ons
While a basic balance board and roller are all you need to start training, several accessories can enhance your experience, improve safety, and extend the versatility of your setup. This chapter covers the most useful accessories and explains when they’re worth the investment.
Protective Flooring
A balance board training mat is a specialized mat that protects your floor from roller damage while providing a consistent training surface. These mats are typically made from dense rubber or PVC and are sized to accommodate the full travel distance of the balance board. They’re particularly valuable for hardwood and tile floors, where roller scratches and dents can be expensive to repair. Some training mats also feature alignment markers that help you center the board and roller consistently.
Roller Upgrades
Many balance board manufacturers sell replacement or upgrade rollers that allow you to customize the difficulty of your training. A narrower roller increases the balance challenge, while a wider roller provides more stability. Tapered rollers can be added to boards that originally came with cylindrical rollers (if the deck is compatible), providing a more realistic carving simulation. Some manufacturers also offer foam-covered rollers that provide a quieter, smoother rolling experience on hard floors.
Balance Cushions and Discs
Placing a balance cushion or wobble disc on top of the balance board deck adds an extra layer of instability that makes every exercise significantly more challenging. This is an advanced technique that should only be attempted after you’ve mastered the balance board on its own. The additional instability primarily targets the small stabilizer muscles in your feet and ankles, providing a training stimulus that’s difficult to achieve through other means.
Resistance Bands
Resistance bands attached to the balance board or your body can add strength training elements to your balance work. For example, a band anchored at floor level and held in your hands while balancing adds an upper body pulling challenge, while a band around your knees during squats forces your gluteus medius to work harder to prevent knee valgus. These combined balance-and-strength exercises are time-efficient and highly effective for developing the integrated fitness that snowboarding demands.
Timer and Tracking Apps
A simple interval timer (or a smartphone app) allows you to time your balance holds and rest periods precisely, ensuring consistent training volume across sessions. For more detailed tracking, several apps are designed specifically for balance board training, allowing you to log exercises, track progress, and follow pre-built training programs. While not essential, these tools help maintain the structured approach that produces the best results.
Chapter 27: The History and Evolution of Balance Boards
The balance board has a surprisingly rich history that predates modern board sports by centuries. Understanding this history provides context for why balance boards are so effective and how they’ve evolved to meet the specific needs of different athletic communities.
Ancient Origins
The earliest known balance training devices date back to ancient Greece, where athletes used rocker boards to improve their stability for wrestling and other combat sports. Roman gladiators used similar devices to develop the balance and coordination needed for arena combat. These early devices were simple—a flat board resting on a rounded stone or log—but the underlying principle was identical to modern balance boards: create an unstable surface and force the body to adapt.
In Japan, balance training has been an integral part of martial arts conditioning for centuries. The “rocker board” (bokuseki-ita) was used by samurai to develop the stable, grounded stance needed for sword fighting. These boards were often decorated with family crests and were considered both training tools and works of art.
The Surfing Connection
Modern balance boards as we know them today emerged in the surfing community in the 1930s and 1940s. Surfers recognized that balance board training could maintain their wave-riding skills during flat spells, and the first commercial balance boards were marketed specifically to surfers. The original designs were simple wooden boards on wooden rollers, and they were often handmade by the surfers themselves.
The surfing connection was formalized in the 1970s and 1980s when companies like Indo Board began producing commercial balance boards designed specifically for surf training. These products brought balance board training from the fringe to the mainstream and established the balance board as a legitimate athletic training tool.
The Snowboarding Crossover
Snowboarders adopted balance boards in the 1990s as the sport grew in popularity and the need for off-season training became apparent. Early snowboard-specific balance boards were adaptations of surf-oriented designs, but they quickly evolved to address the unique demands of snowboarding—particularly the emphasis on lateral (edge-to-edge) balance that’s less critical in surfing.
The development of tapered rollers by companies like Vew-Do marked a turning point in snowboard-specific balance board design. These hourglass-shaped rollers allowed for more extreme tilt angles and more realistic carving simulation, making the balance board a genuinely useful training tool rather than a generic fitness device. Today, the balance board market includes options specifically designed for carving, freestyle, and all-around snowboard training.
The Modern Era
Today’s balance boards benefit from decades of design refinement and materials science. Magnetic stop systems, precision-machined rollers, ergonomic deck shapes, and advanced grip surfaces have transformed the balance board from a simple wooden plank into a sophisticated training instrument. The integration of technology—including balance tracking apps and connected training platforms—is pushing the boundaries of what balance board training can achieve.
The COVID-19 pandemic accelerated the adoption of home fitness equipment, and balance boards saw a significant surge in popularity as people sought effective training tools that didn’t require a gym membership or large amounts of space. This trend has continued, with balance board sales remaining elevated well beyond the pandemic period as more people discover the unique benefits of balance training.
Chapter 28: Weight Limits, Sizing, and Rider-Specific Considerations
Finding the right balance board isn’t just about features and price—it’s also about matching the board to your body size and weight. A board that’s too small for your frame will feel cramped and unstable, while a board that’s rated below your weight may fail prematurely or provide an inconsistent training experience.
Deck Length Guidelines
Your ideal deck length depends primarily on your height and snowboard stance width. As a general guideline, riders under 5’6″ should look for decks in the 24-28 inch range, riders between 5’6″ and 6’0″ should consider 28-32 inch decks, and riders over 6’0″ should opt for 32-38 inch decks. These are guidelines, not rules—a rider with an unusually wide or narrow stance may need to adjust accordingly.
The most important measurement is the distance between your feet on the balance board. This should closely match your snowboard stance width (the distance between your binding inserts). If the deck is too short for your stance, your feet will overhang the edges, reducing stability and increasing the risk of catching an edge on the roller. If the deck is too long, the extra material adds weight without providing additional benefit.
Weight Capacity Considerations
Balance board weight ratings refer to the maximum static weight the board can support. For active use (bouncing, hopping, dynamic movements), you should choose a board rated for at least 50 pounds more than your body weight. This safety margin accounts for the dynamic forces generated during exercise, which can momentarily exceed your static body weight by 1.5-2x during hops and landings.
If you’re a heavier rider (over 220 pounds), prioritize boards with reinforced decks and robust rollers. The Revbalance 101 v2 (rated for 350 pounds) and the Vew-Do Flow are both good options for heavier riders. Avoid budget boards with thin plywood decks and plastic rollers, as these may flex or crack under higher loads.
Foot Size Considerations
Riders with larger feet (size 12+) should look for wider decks (9+ inches) that provide adequate surface area for their foot placement. Standard 7-8 inch decks may feel cramped for riders with large feet, which can compromise balance and increase the risk of foot-related injuries. Some manufacturers offer “wide” versions of their standard boards specifically designed for riders with larger feet.
Special Considerations for Women
Women-specific balance board considerations include typically narrower stances and lighter body weights. While there’s no need to buy a “women’s” balance board (balance boards are not gendered in their design), women should pay attention to deck width and weight capacity to ensure a good fit. A narrower deck (7-8 inches) with a lower weight rating (200-250 pounds) is often ideal for female riders. The Yes4All Premium Trainer and the Revbalance 101 v2 both work well for female riders.
Chapter 29: Troubleshooting Common Balance Board Issues
Even with the best equipment and training approach, you may occasionally encounter issues that affect your balance board experience. This troubleshooting guide addresses the most common problems and provides practical solutions.
Board Feels Too Easy
If your balance board sessions feel too easy, you’re not getting an adequate training stimulus. Several adjustments can increase the difficulty: narrow the stop distance, use a narrower roller, switch to a harder floor surface, close your eyes during exercises, or add single-leg and dynamic elements to your routine. If none of these adjustments provide enough challenge, it may be time to upgrade to a more advanced board type (tapered roller or 360-degree rotation).
Board Slides Across the Floor
If the roller slides across the floor rather than the board rocking on the roller, you’re probably training on a surface that’s too smooth or the roller’s rubber sleeve is worn. Place a non-slip mat or yoga mat underneath the roller to provide additional friction. If the roller’s rubber sleeve is cracked or worn, replace it—most manufacturers sell replacement sleeves.
Deck Creaks or Flexes Excessively
A creaking or flexing deck usually indicates that the wood is weakening, either from age, moisture exposure, or repeated heavy use. If the deck is less than a year old and hasn’t been exposed to moisture, contact the manufacturer—it may be covered under warranty. For older decks, inspect the wood for cracks, delamination, or soft spots. If any of these are present, replace the deck immediately—a failing deck can collapse without warning, leading to serious injury.
Roller Doesn’t Roll Smoothly
A roller that sticks, jumps, or rolls unevenly may have a worn surface, a bent core, or debris caught between the roller and the deck. Inspect the roller for visible damage, and clean the contact surfaces with a damp cloth. If the roller is cardboard-based and shows signs of crushing or deformation, replace it immediately. Wooden and PVC rollers are more durable but can still develop flat spots from extended use in the same position.
Grip Tape Wears Quickly
Balance board grip tape is designed to be consumable—it wears down with use and needs to be replaced periodically. If your grip tape is wearing out unusually quickly, it may be because you’re wearing shoes with particularly aggressive treads or training on an abrasive surface. Consider training barefoot or with thin-soled shoes to extend grip tape life, and keep a roll of replacement grip tape on hand for quick swaps.
Pain in Feet or Ankles
Mild discomfort in the feet and ankles is normal during the first few weeks of balance board training as your body adapts to the new demands. However, sharp pain, persistent soreness, or swelling are warning signs that something is wrong. Common causes include training too aggressively, using a board that’s too narrow for your feet, or training on a surface that’s too hard. Reduce the intensity of your training, switch to a softer surface, and consider training barefoot to allow your feet to adapt more naturally. If pain persists, consult a physiotherapist.
Chapter 30: Frequently Asked Questions
Yes, but it is actually easier on carpet because it provides more friction. For a real snowboarding challenge, use a thin yoga mat on a hard floor to simulate “icy” conditions.
You can, but training barefoot is better for proprioception. It strengthens the arches of your feet, which can help if you’re worried about how long are snowboard boot laces or fit issues.
15 minutes of dedicated, high-focus training is better than an hour of mindless balancing. Focus on specific drills like 180-degree pivots.
Absolutely. Catching an edge usually happens because your stabilizers are tired. Balance boards build the endurance needed to stay “stacked” over your board late in the day.
It’s arguably *more* important for you. Weekend warriors are more prone to injury because their bodies aren’t conditioned. 10 days of riding can be ruined by one day of sore legs.
A roller board moves horizontally, while a rocker board just tilts. Snowboarders need the horizontal movement of a roller board to simulate side-to-side edge engagement.
If you are practicing advanced tricks like ollies on a hard floor, a best snowboard helmet is a smart safety precaution until you master the bail.
Yes! Balance training is excellent for youth development. Just ensure they use a board with safety stops like the Revbalance 101.
Backcountry requires reacting to hidden rocks and crust. The “Sphere” boards are incredible for this kind of “chaos training.”
Keep the wooden roller free of grit. If you wax your snowboard, you know the importance of a clean base (why wax your snowboard)—the same applies to your balance roller for a smooth glide.
Balance board training burns approximately 150-250 calories per 30-minute session, depending on your body weight, intensity, and the specific exercises performed. While it’s not a high-calorie-burning activity compared to cardio exercises, the neuromuscular and proprioceptive benefits far outweigh the caloric expenditure. Balance board training should be viewed as skill development rather than calorie burning.
Yes, daily balance board training is not only safe but recommended. The neuromuscular adaptations from balance training respond well to frequent practice, and daily sessions of 15-20 minutes produce better long-term results than longer sessions performed fewer times per week. Listen to your body—if you feel unusually fatigued or sore, take a rest day. But in general, daily practice is ideal.
The Revbalance 101 v2 is our top recommendation for complete beginners. Its magnetic stop system allows you to start with a very limited range of motion and gradually increase it as your balance improves. The safety stops, durable construction, and quiet operation make it the most forgiving and user-friendly option for riders who are just starting their balance board journey.
Most riders notice improvements in their balance within 2-3 weeks of consistent training, with significant improvements appearing by 6-8 weeks. The proprioceptive adaptations from balance training are among the fastest neuromuscular adaptations the body can make, so progress is typically rapid. However, maintaining these improvements requires ongoing training—balance abilities decline within 2-3 weeks of inactivity.
Yes, balance board training is one of the best cross-training activities for surfers. The balance, core strength, and proprioceptive improvements from balance board work transfer directly to wave riding. In fact, balance boards were originally developed for surf training, and many surfers consider them an essential part of their preparation. The 360-degree rotation boards are particularly valuable for surfers because they replicate the multi-directional instability of riding a wave.
While balance board training does burn calories (approximately 150-250 per 30-minute session), it’s not the most efficient tool for weight loss on its own. However, it’s an excellent complement to a weight loss program that includes strength training and cardiovascular exercise. Balance board training helps maintain muscle mass during caloric restriction, improves body composition, and develops the functional fitness that makes other exercise activities more effective and enjoyable.
It depends on the specific knee condition and its severity. Balance board training can be beneficial for many knee conditions because it strengthens the stabilizer muscles that support the knee joint. However, conditions that involve acute inflammation, instability, or structural damage may be aggravated by balance board training. Always consult your physiotherapist or orthopedic specialist before beginning balance board training with a pre-existing knee condition.
For beginners, carpet is the best surface because it provides additional friction that slows the roller and gives you more time to react. Intermediate and advanced riders should train on hardwood or tile, which provide a faster, more challenging rolling experience. Avoid training on very slippery surfaces (polished marble, wet tile) as the roller can move too quickly for safe control. Always use a protective mat under the roller on hard floors.
While it’s tempting to multitask during balance board sessions, doing so significantly reduces the effectiveness of your training. Balance training requires focused attention to produce the neuromuscular adaptations that benefit snowboarding. “Mindless balancing” while watching TV provides some benefit, but it’s far less effective than a dedicated, focused session. If you must watch TV while balancing, save it for the easier exercises (static holds, gentle rocking) rather than the challenging ones.
You’re ready to remove the safety stops when you can consistently perform all your current exercises with the stops at their widest setting without the board touching the ground or the stops engaging. As a general benchmark, if you can perform 15 controlled rocks, 10 single-leg holds of 15 seconds each, and 8 pivots per direction without using the stops for support, you’re ready to remove them entirely. Always make this transition gradually—widen the stop distance first, then remove one stop, then the other.
By investing in a quality balance board and dedicating just 15 minutes a day, you will arrive on the slopes ready to carve, spin, and dominate. Protect your gear with the best snowboard bags when traveling to best snowboarding destinations. Visit snowboardbible.com for more guides.


