
What Is a Splitboard? The Ultimate Guide to Backcountry Freedom
Imagine standing at the top of a pristine, snow-covered peak. There are no lift lines, no crowds, and no tracked-out snow. Just you, the mountains, and silence. This is the allure of backcountry snowboarding. But getting there used to require snowshoes (which are heavy and slow) or a helicopter (which is expensive). Enter the Splitboard.
If you have ever asked why snowboarding is better than skiing, the splitboard is the ultimate equalizer. It gives snowboarders the uphill mobility of skiers without sacrificing the downhill soul of surfing the snow. But how does it actually work?
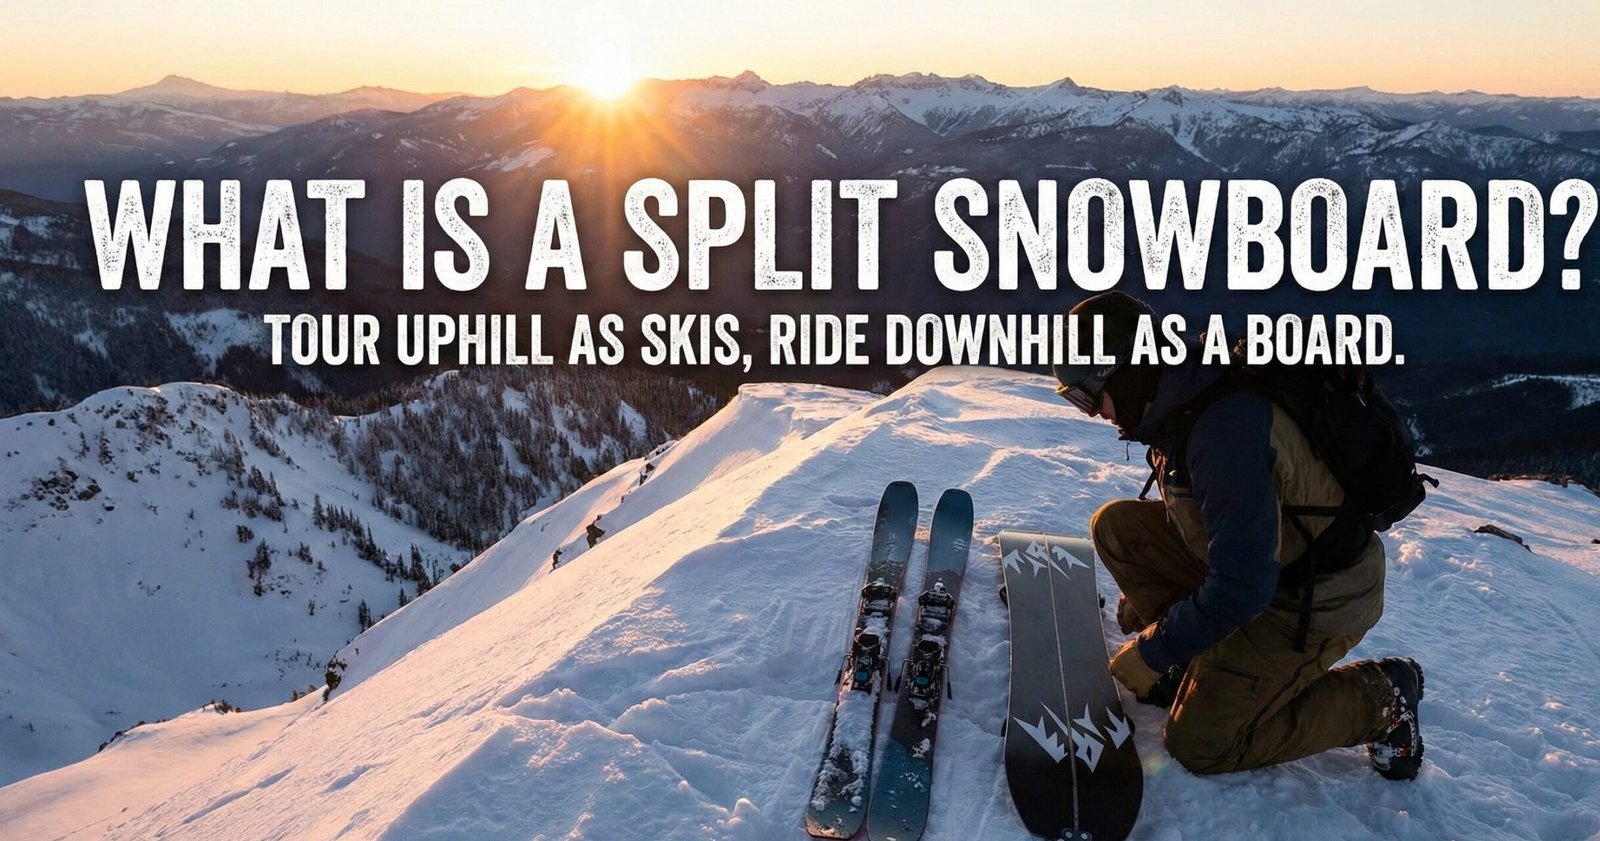
A Splitboard is a snowboard that can be separated longitudinally into two halves. When split, the halves function like cross-country skis, allowing the rider to climb uphill using traction “skins.” At the top, the two halves are clipped back together to form a solid snowboard for the ride down. It is the essential tool for human-powered backcountry access.
A Brief History of the Splitboard
The splitboard was invented by Brett Hobbs in the late 1990s. Before Hobbs, backcountry snowboarders were forced to strap a solid board to their backpack and trudge uphill on snowshoes. It was exhausting, inefficient, and dangerous—heavy packs shifted balance on steep, icy terrain. Hobbs’s concept was deceptively simple: cut a snowboard in half lengthwise, add touring hardware, and let the rider climb on the board itself.
Early splitboards were crude. Riders literally took a jigsaw to their boards and bolted on homemade hardware. The ride downhill was terrible because the board lacked structural integrity, the clips rattled, and the edges did not align. For the first several years, splitboarding was a niche pursuit tolerated only by the most dedicated riders who valued access over performance.
The breakthrough came in the mid-2000s when Voile began manufacturing purpose-built splitboards and touring hardware. Their systems replaced homemade hacks with engineered solutions: precision-cut boards with factory-installed hooks, reliable clip mechanisms, and dedicated binding interfaces. Suddenly, splitboarding went from “DIY experiment” to “legitimate sport.”
The real explosion happened when Jeremy Jones, one of big mountain snowboarding’s most respected figures, launched Jones Snowboards in 2009. Jones was obsessed with earning his turns in the backcountry. He partnered with the best engineers and used his decades of professional experience to create splitboards that performed almost identically to solid boards downhill. His “Deeper” film series showcased splitboarding in remote Alaskan terrain, igniting mainstream interest.
Today, splitboarding is one of the fastest-growing segments of the snow sports industry. Nearly every major manufacturer—Burton, K2, Rossignol, GNU, Capita, Rome, Salomon, Amplid—offers splitboard models. The hardware has evolved dramatically: lightweight carbon construction, precision-machined interfaces, and revolutionary binding systems like the Spark R&D Arc/ Surge and Union Explorer have closed the performance gap between splitboards and solid boards to a remarkable degree.
The community has grown too. Online forums, social media groups, and local backcountry communities offer mentorship and information sharing. Avalanche education courses are more accessible than ever. Splitboard-specific guided tours and camps have proliferated. What was once a fringe activity practiced by a handful of hardcore pioneers is now a fully developed discipline with its own culture, technology, and competitive scene.
Understanding this history matters because it informs the equipment you buy today. Every clip, bracket, and binding system exists because someone solved a specific problem that previous generations of riders endured. When you strap on a modern splitboard, you are benefiting from two decades of relentless innovation driven by riders who refused to accept the limitations of conventional equipment.
The Anatomy of a Splitboard
At first glance, it looks like a normal snowboard with a line down the middle. However, the engineering involved is specific. Most splitboards utilize a directional shape rather than a twin shape, as they are designed primarily for powder and variable terrain.
The system relies on four main components:
- The Split: The board is cut from tip to tail.
- Clips and Hooks: Located at the nose and tail (and often the middle) to hold the board tightly together in ride mode.
- Touring Brackets: Metal hinges on the board where you attach your bindings in “ski mode” to allow your heel to lift while walking.
- Pucks/Interface: The mounting system that slides your bindings onto the board for “ride mode.”
Understanding the Split Line and Hooks
The split line is the seam that runs from the tip of the board to the tail. On modern splitboards, this seam is cut with precision machinery that ensures a tight, gap-free fit when the board is in ride mode. The quality of this cut directly impacts how the board feels downhill. A poorly cut split will feel loose, chatter at speed, and allow snow to pack into the seam, creating drag.
Most splitboards use two primary clip systems at the nose and tail: hooks (simple hooks that pull the halves together) and clips (lever-activated mechanisms that clamp the halves tight). The best systems use both—a hook at one end and a clip at the other—to create opposing forces that pull the board into a solid, unified shape. Some manufacturers have introduced pin-based systems that use locking pins instead of hooks, which can be faster to operate but are more susceptible to icing.
A critical detail that many beginners overlook is the tip and tail clips. These small components at the very ends of each half prevent the halves from shifting laterally during the descent. Without them, the board would feel “loose” under your feet, as if the two halves could slide apart. High-quality tip and tail clips use spring-loaded mechanisms or tension screws to maintain a tight connection even after hundreds of transitions.
The middle of the board sometimes features an additional stabilizer clip or hook that provides extra rigidity at the widest point of the board. This is particularly important for wider boards, where the natural flex of the two halves can cause a noticeable gap at the waist when riding in variable snow. Stabilizer clips solve this by pulling the halves together at the point of maximum stress.
Touring Brackets and the Pivot Point
The touring bracket is the metal piece mounted on each half of the board that serves as the pivot point for your heel during uphill travel. This is where the magic of splitboarding happens—your binding attaches to the touring bracket in “tour mode,” and the bracket allows your heel to rise freely with each step while the toe remains connected to the board.
The placement of the touring bracket is a precise engineering decision. It must be positioned exactly at the balance point of the boot on the board half. If it is too far forward, your heel will drag; too far back, and the nose of the board half will lift off the snow, reducing your skin contact and traction. Most modern splitboards have the touring bracket position optimized for the most common boot sizes, but riders with very small or very large feet may need to adjust their mounting position.
The quality of the touring bracket pivot affects how smooth your uphill stride feels. Cheaper brackets can develop play over time, causing a “wobble” in each step that wastes energy and makes traversing on firm snow more difficult. Premium brackets from manufacturers like Spark R&D and Karakoram use precision-machined bearings that maintain tight tolerances even after thousands of steps.
Pucks and Ride Mode Interface
The pucks (also called the interface or the ride-mode mounting system) are the components that connect your bindings to the board in ride mode. They are mounted on each half of the board in the correct stance width and angle, and your bindings slide onto them when you transition from tour mode to ride mode.
Puck systems come in two main varieties: slide-on and pin-lock. Slide-on systems use a rail that your binding slides onto from the tail of the board, while pin-lock systems use pins that drop through holes in the binding and pucks. Slide-on systems are generally faster to use but can develop play over time, while pin-lock systems are more precise but slightly slower to operate.
The pucks also determine your stance angle on the board. Unlike resort bindings, which use universal disc mounting to allow any angle, splitboard pucks are often fixed at specific angles (typically +15/-9 or +21/-6 for a directional stance). Some newer pucks allow angle adjustment, but this is still relatively rare. When choosing a splitboard, make sure the default puck angles match your preferred riding stance.
A subtle but important feature of good pucks is the toe ramp. Some puck systems include a built-in toe ramp that lifts the front of the binding slightly, providing better leverage for heel-side turns. This is particularly useful on wider boards where the extra width can reduce the effective leverage of your binding.
How It Works: The Transition
The process of switching from “Tour Mode” (uphill) to “Ride Mode” (downhill) is called the transition. It is a ritual every backcountry rider must master. The transition typically takes experienced riders two to four minutes. Beginners often take ten to fifteen minutes, especially in cold or windy conditions when dexterity is reduced.
1. Going Up (Tour Mode)
You unlock the clips, separate the board halves, and swap your bindings to the touring brackets. Crucially, you apply Climbing Skins to the base. These are strips of fabric with sticky glue on one side and directional hairs on the other. The hairs grip the snow so you do not slide backward, but glide forward easily.
Walking uphill is a workout. If you have not checked our fitness guide for snowboarding, you will feel the burn quickly. You will also use collapsible poles, similar to ski poles, for balance and leverage.
Setting Up Tour Mode: Step by Step
Here is the detailed process for transitioning to tour mode at the start of a day or after a downhill run:
- Stomp off snow: Before removing your boards or changing modes, stomp your boots to remove loose snow from your bindings and boot soles. Snow packed into your binding mechanism will freeze and make transitions difficult later.
- Release the ride-mode clips: Unclip the nose and tail clips (and any stabilizer clips) that hold the board together. Each system is different, so practice this at home until it is muscle memory.
- Separate the halves: Gently pull the two halves apart. If snow has packed into the split line, a gentle twist will usually break it free. Do not force the halves apart if they are stuck—use your gloved hand to clear the seam first.
- Apply skins: Peel the skin from the tail of the board half toward the nose. Press firmly to ensure full adhesion. The skin’s tail clip hooks under the tail of the board, and the nose clip stretches over the nose. Make sure the skin covers the entire base except for the metal edges.
- Mount touring brackets: If your bindings are not permanently mounted to the touring brackets, you need to remove the bindings from the pucks and reattach them to the touring brackets. Some systems (like the Spark R&D Arc) allow you to leave the bindings attached to an adapter that pivots between pucks and touring brackets without removing them entirely.
- Check your heel riser: Most touring bindings have a heel riser (also called a climbing bar) that props your heel up on steep terrain. Flip it down for flat terrain, up for moderate inclines, and to the highest setting for steep skin tracks. Starting uphill with the riser in the wrong position will waste energy.
2. Going Down (Ride Mode)
Once you reach the summit, you peel off the skins, clip the board halves back together, and slide your bindings onto the pucks. Suddenly, you have a snowboard again. While it might not feel exactly like a solid resort board (it can be slightly heavier), modern technology has made them incredibly responsive.
Setting Up Ride Mode: Step by Step
- Find a flat, sheltered spot: Do not attempt transitions on steep, exposed terrain. Wind will blow snow onto your skins and make them useless. Find a flat area or a sheltered spot behind a tree or ridge.
- Remove bindings from touring brackets: Release the touring brackets and remove your bindings. Set them aside in the snow (binding-down to prevent snow from packing into the mechanism).
- Peel off the skins: Start at the nose and peel the skin toward the tail in one smooth motion. Fold the skin glue-to-glue immediately to prevent debris from sticking to the adhesive. Stuff the folded skins inside your jacket or a dedicated skin bag to keep them warm.
- Assemble the board: Place the two halves side by side on the snow, aligning the split line. Engage the hooks and clips, starting with the nose and working toward the tail. Pull each clip tight before moving to the next one.
- Mount bindings to pucks: Slide or lock your bindings onto the pucks. Make sure they are fully engaged and that the lever or pin is locked. Give them a firm tug to verify they are secure.
- Stow your poles: Collapse your poles and stow them in or on your pack. Some riders use a pole carry strap on their pack that allows quick access in case you need them for balance on a flat section.
- Strap in and ride: You are ready for the descent. Take a breath, assess the conditions, and drop in.
Common Transition Mistakes
Even experienced splitboarders make transition mistakes. The most common errors include:
- Not clearing snow from the clips: Snow packs into clips and prevents a tight seal. Always brush off the clip area before engaging.
- Folding skins wrong: If you fold skins glue-side-out, they collect dirt, pine needles, and debris that reduce adhesion. Always fold glue-to-glue.
- Rushing the assembly: A half-engaged clip can pop open during a turn, causing a catastrophic separation at speed. Double-check every clip before dropping in.
- Ignoring the seam: If snow is packed into the split line, the board will not flex uniformly. Clear the seam completely before assembling.
- Forgetting to lock bindings: Some binding systems require you to manually lock a lever or pin. Skipping this step can release your binding mid-turn.
3. Mastering the Heel Risers
Heel risers (also called climbing bars or kickstands) are small flip-down platforms on your touring brackets that elevate your heel while climbing. They are one of the most underutilized features on a splitboard setup, and understanding when to use them will save you enormous amounts of energy.
On flat terrain, keep the risers down. Your foot should be parallel to the board half for maximum skin contact and efficiency. On moderate inclines (roughly 10-20 degrees), flip the risers to the low position. This reduces the strain on your calf muscles and allows you to maintain a more natural walking motion. On steep terrain (20-35 degrees), use the high position. This brings your heel up significantly, reducing the angle between your boot and the board and making each step far less exhausting.
The most advanced riser systems, like those from Spark R&D, offer multiple height positions and can be flipped with the tip of your pole without removing your gloves. Cheaper systems may have only one riser position, which forces you to adapt your climbing style to the terrain rather than adapting the equipment to your needs.
4. Switchback Technique and Kick Turns
When the skin track gets steep, you will need to make switchbacks (also called kick turns) to gain elevation without losing control. A kick turn is the splitboard equivalent of a ski switchback—it involves stopping, rotating one board half 180 degrees while keeping the other planted, and continuing uphill in the new direction.
The technique requires practice. Here is the basic sequence: stop on a firm section of the skin track, plant your pole uphill for balance, unweight one foot by pressing into the opposite pole, and swing that foot up and around in a wide arc until it faces the opposite direction. Place it down, transfer your weight, and repeat with the other foot. The entire maneuver should take less than five seconds once you have practiced it.
The key to efficient kick turns is terrain selection. Always make your turns on flat sections of the skin track, not on steep sections. Look ahead and plan your turns before you reach the steep part. Practice on gentle terrain before attempting kick turns in avalanche terrain.
Climbing Skins: The Unsung Hero
Climbing skins are arguably the most important accessory in a splitboarder’s kit. Without them, you simply cannot go uphill. They are strips of material with directional nylon or mohair fibers on the bottom (which grip snow) and a sticky adhesive on the top (which adheres to your board’s base). When you walk uphill, the fibers grip the snow to prevent backward sliding, but they lie flat when pushed forward, allowing a smooth glide.
Mohair vs. Nylon vs. Hybrid Skins
Skins are made from three primary materials:
- Mohair (100%): Made from the hair of Angora goats. Mohair skins offer the best glide, meaning less energy expenditure on each stride. They are lighter and more packable than nylon. However, they are less durable and provide slightly less grip on steep, icy terrain. Mohair is the choice for experienced splitboarders who prioritize efficiency and glide.
- Nylon (100%): Nylon skins are more durable and provide better grip than mohair. They are the better choice for riders who traverse rocky terrain, ride in variable conditions, or are heavier riders who need maximum traction. The trade-off is reduced glide and slightly more weight.
- Hybrid (50/50 or 70/30): Hybrid skins blend mohair and nylon fibers to balance glide and grip. They are the most popular choice for all-around splitboarding. A 70/30 mohair-nylon blend provides most of the glide benefits of pure mohair with significantly improved durability.
Skin Adhesive: Glue That Survives the Cold
The adhesive on climbing skins must function in extreme cold, sometimes as low as minus 30 degrees Fahrenheit. Modern skin adhesives use either hot-melt glue (which must be reapplied periodically using an iron) or permanent glue (which lasts the lifetime of the skin but can be reactivated by laying the skins in the sun or using a hair dryer).
The glue’s performance degrades over time, especially if dirt, pine needles, or snow get trapped in the adhesive. To extend the life of your skins: always fold them glue-to-glue after use, store them in a warm place (inside your jacket or a dedicated skin bag), and clean the adhesive periodically with skin-specific solvent. Never touch the glue with bare hands, as the oils from your skin reduce adhesion.
When skins lose their grip, they can be “re-glued” by applying a fresh coat of adhesive with an iron. This process costs about $15-20 in materials and extends the life of a $100-150 pair of skins by another season or two. If you ride frequently (50+ days per year), expect to re-glue or replace your skins every one to two seasons.
Cutting and Fitting Skins
Most modern climbing skins are sold as rectangular sheets that you cut to fit your specific board shape. The cutting process is straightforward but requires care: lay the skin on a flat surface adhesive-side-up, place your board half on top, trace the outline with a marker, and cut along the line with sharp scissors. Leave about 3-5mm of margin around the edges—the skin should cover the base completely but should not wrap around the edges, as this interferes with the transition between the two board halves.
Some manufacturers offer pre-cut skins for popular splitboard models. These are more expensive but save time and ensure a perfect fit. If your board model is available with pre-cut skins, they are worth the premium, especially if you do not have experience cutting skins yourself.
Skin Care and Storage
Climbing skins require regular maintenance to perform at their best. After each use, shake off loose snow and allow them to dry completely before folding. Stowing wet skins in a bag for hours promotes mold growth and degrades the adhesive. If your skins get wet during a tour (from creek crossings or rain), dry them as soon as possible by laying them flat in a warm area or draping them over a heater.
At the end of the season, clean the adhesive with skin solvent and apply a thin layer of storage wax (or leave the factory glue intact). Store the skins in a cool, dry place away from direct sunlight. UV exposure degrades both the fabric and the adhesive over time. Many riders store their skins in the original box or a breathable cloth bag.
Pros and Cons of Splitboarding
| Feature | Splitboard | Snowshoes + Solid Board |
|---|---|---|
| Efficiency | High (Gliding stride) | Low (Lifting weight with every step) |
| Weight on Back | Minimal (Board is on feet) | Heavy (Board strapped to pack) |
| Cost | High ($1000+ for setup) | Low (Just buy snowshoes) |
| Complexity | High (Requires transition skills) | Low (Strap and go) |
| Ride Feel | 90% of a solid board | 100% of a solid board |
Advantages of Splitboarding Over Other Backcountry Methods
The single greatest advantage of splitboarding over snowshoeing is efficiency. A splitboarder glides uphill using a skiing-like motion, covering far more ground per unit of energy than a snowshoer who must lift their entire body weight with every step. On a long approach (more than 2,000 vertical feet), this difference is enormous. Snowshoers frequently report arriving at the summit exhausted, while splitboarders arrive with enough energy to enjoy the descent fully.
The second major advantage is weight distribution. When snowshoeing, you carry your snowboard on your backpack, which shifts your center of gravity backward and creates strain on your shoulders and lower back. A splitboard distributes its weight across your feet, keeping your center of gravity low and natural. This is particularly important on steep, technical terrain where balance is critical.
Splitboarding also offers faster transitions. While both snowshoers and splitboarders must change equipment between uphill and downhill modes, the splitboard transition is typically faster because the board stays on your feet. Snowshoers must remove their snowshoes, stow them on their pack, strap on their board, and adjust their bindings—a process that can take five to ten minutes in cold, windy conditions.
When Snowshoes Are Still the Better Choice
Splitboarding is not always the best option. In very flat terrain (groomed snowshoe trails, low-angle meadows), snowshoes can actually be faster because the splitboard’s gliding stride works best on uphill terrain with moderate to steep grades. In extremely icy conditions, some riders find that crampons attached to snowshoes provide better traction than climbing skins on a splitboard. And for riders who only occasionally venture into the backcountry, the cost of a full splitboard setup may not justify the investment compared to a $200 pair of snowshoes and a board they already own.
Essential Gear: It’s Not Just the Board
If you have looked into how expensive snowboarding is, brace yourself. Splitboarding adds another layer of cost because it requires specialized gear. You cannot simply use your standard budget bindings; you need split-specific bindings.

Jones Frontier Splitboard
A legendary all-terrain splitboard. Designed by Jeremy Jones, it offers the perfect balance of float in powder and grip on icy skin tracks.
View on Amazon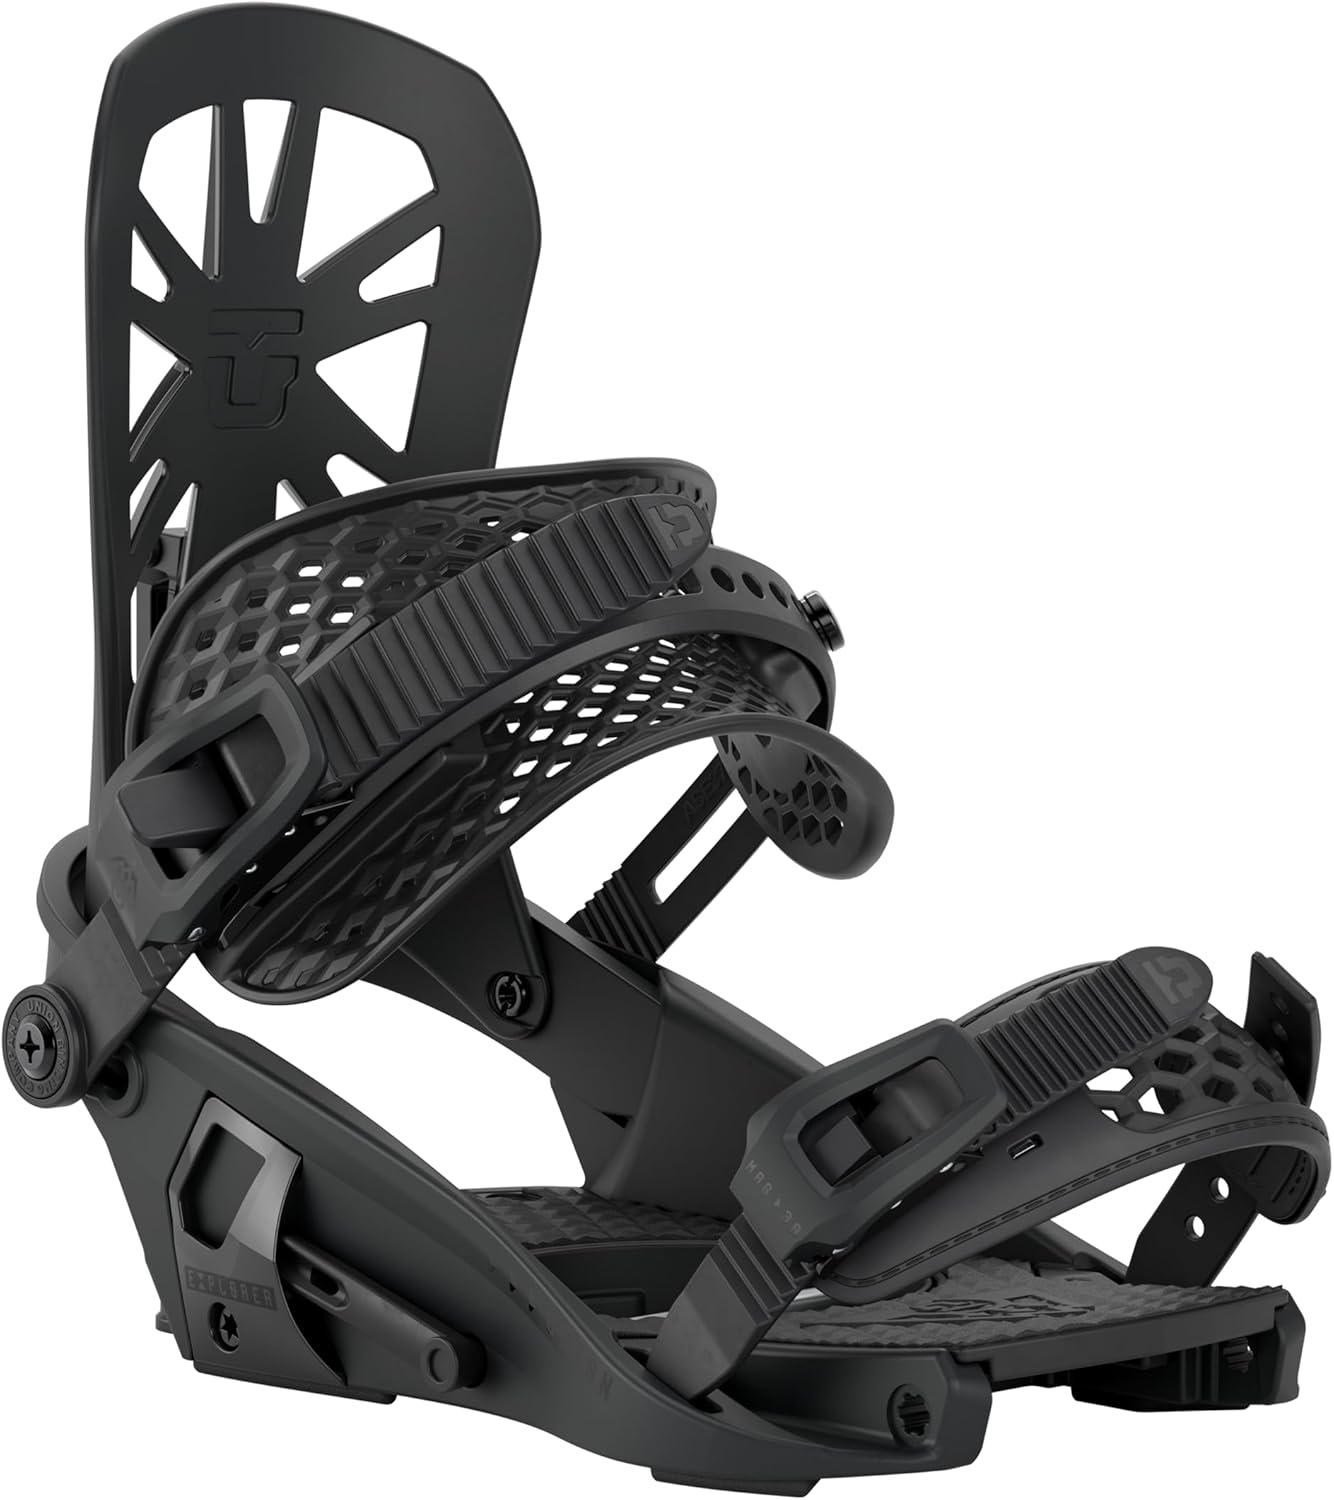
Union Explorer Bindings
These bindings provide a “solid board” ride feel. They pivot for touring and lock down tight for the descent.
View on Amazon
Climbing Skins
Essential for traction. These are pre-cut for many boards and offer a mix of mohair and nylon for glide and grip.
View on AmazonSplitboard Bindings: The Critical Link
Splitboard bindings are the most complex and important component of your setup. Unlike resort bindings, which simply bolt to a disc on the board, splitboard bindings must serve two functions: they must act as a touring hinge (allowing your heel to lift freely while climbing) and as a solid downhill binding (locking securely to the board for the descent).
There are two main categories of splitboard bindings:
Plastic/Composite Hybrid Bindings
These bindings use a plastic or composite baseplate with a pivoting mechanism built into the binding itself. The binding is permanently mounted to the touring bracket, and a flip lever switches between tour mode (heel free) and ride mode (heel locked). Examples include the Voile Light Rail and the Union Expedition. The advantage is simplicity—you do not need to remove the binding during transitions. The disadvantage is added weight and a less direct connection to the board in ride mode.
Aluminum/Pin-Based Bindings
These bindings use a two-piece system: a lightweight aluminum binding that you strap into for the descent, and a separate interface (like the Spark R&D Tesla T1 system) that handles the touring and ride-mode connection. The binding slides or pins onto the interface during transitions. The advantage is lighter weight and a more direct, solid board feel. The disadvantage is that transitions take slightly longer because you must attach and detach the binding from the interface.
Traditional Bindings with Pucks
The simplest and most affordable approach uses standard resort bindings with a dedicated splitboard puck system. The bindings mount to the pucks for ride mode and to the touring brackets for tour mode. You physically move the entire binding between the two systems during each transition. This approach is the cheapest but requires the most time during transitions and adds the most weight.
Splitboard Boots: What Makes Them Different?
You can use regular snowboard boots for splitboarding, but purpose-built splitboard boots offer specific advantages that make the uphill significantly more enjoyable. The key differences include:
- Walk mode: Many splitboard boots have a “walk mode” that unlocks the boot’s cuff, allowing more ankle articulation while climbing. This makes the stride feel more natural and reduces calf fatigue. When you transition to ride mode, you lock the cuff back down for downhill stiffness.
- Lighter weight: Splitboard boots are designed to minimize weight without sacrificing downhill performance. Every gram matters when you are taking thousands of steps uphill. Premium splitboard boots from brands like ThirtyTwo, Deeluxe, and Scarpa can be 200-400 grams lighter per boot than their resort equivalents.
- Better grip: The soles of splitboard boots are designed to grip both the binding platform (for touring) and snow/ice (for bootpacking). Vibram or similar rubber compounds provide traction on rock and ice, which is essential when you remove your boards to scramble up a rocky ridge.
- Walk-compatible soles: Splitboard boot soles are shaped to fit the specific binding interface, ensuring maximum contact with the touring platform. Resort boots with bulky, rockered soles may not sit flat on the touring bracket, reducing stability and efficiency.
Poles: An Overlooked Essential
Collapsible poles are not optional for splitboarding—they are essential for balance, rhythm, and leverage while climbing. The best splitboard poles are lightweight (under 250 grams each), collapsible to fit inside or on your pack for the descent, and made from carbon fiber or aluminum. Adjustable-length poles allow you to set the correct length for flat terrain (shorter) and steep terrain (longer). A good rule of thumb: your poles should reach your armpits when standing on flat ground.
Many splitboard-specific poles, like those from G3 and Black Diamond, feature ergonomic grips with extended foam sections that allow you to choke up on the pole without adjusting the length. This is useful on steep traverses where you need to hold the pole higher than normal.
Backcountry Backpacks
You need a specialized backpack for splitboarding. A good backcountry pack should be 30-40 liters, with dedicated compartments for your shovel, probe, and first aid kit. It should have external carry straps for your poles and ice axe, and it should fit snugly against your back without bouncing during the uphill climb.
The most important feature is the avalanche airbag. An avalanche airbag pack (like the Osprey Sopris or BCA Float) contains an inflatable balloon that deploys when you pull a trigger, keeping you on the surface of an avalanche. While not mandatory, an airbag significantly increases your survival odds in an avalanche. They are expensive ($500-800 for the pack alone, plus the airbag mechanism), but many riders consider them non-negotiable.
The Safety Reality Check
Danger: Backcountry Risk
This is the most important section of this guide. Splitboarding takes you out of the controlled resort environment. There is no ski patrol. You are entering avalanche terrain.
Before you buy a splitboard, you must invest in avalanche education (AIARE 1 course). You also need to carry a beacon, shovel, and probe at all times. Carrying them is not enough; you must know how to use them. This inherent risk is why snowboarding is dangerous if not respected.
Furthermore, gear failure in the backcountry is serious. Knowing field repair is vital. Can you fix a broken clip? Do you know how long your boot laces are in case you need to use one as a tourniquet or a strap repair?
The Avalanche Safety Trifecta: Beacon, Probe, Shovel
Every backcountry traveler must carry three items at all times:
- Avalanche Transceiver (Beacon): A radio device worn on your body that transmits a signal. In the event of a burial, other members of your party switch their beacons to “search” mode and follow the signal to locate the buried victim. Modern beacons are digital, with three antennas for superior range and accuracy. The Mammut Barryvox, BCA Tracker, and Ortovox Diract are among the top-rated models. Practice with your beacon regularly—at least once per season in a controlled environment. Speed matters in a burial: the survival rate drops dramatically after 15 minutes.
- Avalanche Probe: A collapsible aluminum pole (typically 240-320cm) that you use to pinpoint the exact location and depth of a buried victim after the beacon search narrows the area. The probe must be long enough to reach a victim buried under several feet of dense snow. Practice probing in a controlled setting to develop the technique of probing in a spiral pattern from the beacon’s final signal.
- Avalanche Shovel: A sturdy, metal-bladed shovel designed for digging through compacted avalanche debris. Plastic shovels are useless in avalanche conditions. The blade should be large enough to move significant volumes of snow but compact enough to pack in your backpack. The digging process is exhausting—avalanche debris can be as hard as concrete. Team digging (multiple people shoveling in a V-shaped conveyor pattern) is far more efficient than solo digging.
Understanding Avalanche Terrain
Avalanches occur on slopes between 30 and 45 degrees, with the most dangerous being slopes around 38 degrees. This is the angle at which snow slabs are most likely to release. Before entering any backcountry terrain, you must:
- Check the avalanche forecast: Your local avalanche center (such as the Avalanche Center in the US or Avalanche Canada) issues daily assessments of snowpack stability and avalanche danger. These forecasts rate the danger from 1 to 5 and describe the specific avalanche problems (wind slabs, persistent weak layers, wet loose avalanches) present that day.
- Read the terrain: Identify terrain traps (gullies, cliffs, dense trees) that would worsen the consequences of an avalanche. Choose safe routes that minimize exposure to avalanche slopes. Look for terrain with anchor points (trees, rocks, ridgelines) that help stabilize the snowpack.
- Make conservative decisions: The backcountry does not forgive poor judgment. If the avalanche danger is elevated, choose lower-angle terrain. If the snowpack is unstable, turn around. There is always another day.
- Travel one at a time: When crossing a potentially dangerous slope, cross one person at a time while others watch from a safe spot. This minimizes the number of people exposed in the event of a slide.
AIARE and Avalanche Education Courses
The American Institute for Avalanche Research and Education (AIARE) offers a standardized curriculum for avalanche education in the United States. The courses are:
- AIARE 1 (Avalanche Level 1): A three-day course covering snowpack observation, avalanche terrain identification, route planning, and companion rescue. This is the minimum recommended education for any backcountry traveler. Expect to spend $400-600 for the course.
- AIARE 2 (Avalanche Level 2): A four-day course that goes deeper into snowpack analysis, avalanche forecasting, and decision-making in complex terrain. Recommended for riders who plan to travel in alpine or glaciated terrain.
- AIARE 3 (Avalanche Level 3): An advanced professional course for guides, ski patrol, and avalanche forecasters. Not necessary for recreational splitboarders unless you plan to work in the avalanche industry.
Beyond formal courses, practice companion rescue regularly. Many local avalanche centers offer free or low-cost rescue practice days where you can practice beacon searches, probing, and digging in a controlled environment. The skills you learn in an AIARE course decay quickly without practice—schedule a practice session at least once per season.
Emergency Preparedness and First Aid
In addition to avalanche gear, carry a backcountry first aid kit that includes:
- A lightweight emergency bivy or space blanket (hypothermia is a leading cause of backcountry fatalities)
- A compact first aid kit with bandages, antiseptic, athletic tape, and pain relievers
- A multi-tool or knife for gear repair
- A fire starter (lighter or waterproof matches)
- A headlamp with extra batteries (days are short in winter)
- A whistle (three blasts is the universal distress signal)
- A fully charged cell phone in a waterproof case (but do not rely on cell service in the backcountry)
- A satellite communicator (like the Garmin inReach) for emergency messaging and SOS when you are beyond cell range
Tell someone your trip plan before you leave: where you are going, what route you plan to take, and when you expect to return. If you do not check in by the agreed-upon time, they should contact search and rescue. This simple step has saved countless lives.
How to Choose the Right Splitboard Size
Choosing the right splitboard size involves the same principles as choosing a resort snowboard, with a few backcountry-specific considerations. The most important factor is your weight. A board that is too small will sink in powder (the primary terrain you will encounter in the backcountry); a board that is too long will be difficult to control in tight trees or on steep, technical terrain.
For backcountry use, most riders choose a splitboard that comes up to their nose or chin when stood on end. This is slightly longer than a typical all-mountain resort board because backcountry riders encounter deep, untracked snow that requires more surface area for float. However, if you are a lighter rider or primarily ride low-angle powder, a shorter board will be easier to maneuver.
Splitboard Sizing by Rider Weight
| Rider Weight (lbs) | Rider Weight (kg) | Recommended Board Length | Recommended Board Width |
|---|---|---|---|
| 100-130 | 45-59 | 152-156 cm | 24.5-25.0 cm |
| 130-150 | 59-68 | 156-159 cm | 25.0-25.5 cm |
| 150-170 | 68-77 | 159-162 cm | 25.5-26.0 cm |
| 170-190 | 77-86 | 162-165 cm | 26.0-26.5 cm |
| 190-210 | 86-95 | 165-168 cm | 26.5-27.0 cm |
| 210+ | 95+ | 168-172 cm | 27.0+ cm |
Width Considerations for Splitboards
Splitboard width matters for two reasons: foot size and powder float. If your boots overhang the edge of the board, your toes or heels will drag in the snow during turns, causing falls. If the board is too narrow for your boots, you lose the leverage needed for responsive edge control.
A general rule: your boots should extend no more than 1-2cm beyond the edge of the board on either side. If you wear boots larger than US men’s 11 (EU 44), look for splitboards with a waist width of 26.5cm or wider. Many manufacturers now offer “wide” versions of their splitboards specifically for riders with larger feet.
For powder float, wider boards are generally better because they provide more surface area. However, wider boards are heavier and more difficult to maneuver in tight trees. The sweet spot for most riders is a waist width between 25.5cm and 27cm, which provides enough float for most conditions without sacrificing agility.
Splitboard Camber Profiles: Rocker, Camber, and Hybrid
The camber profile (the shape of the board when viewed from the side) significantly affects how a splitboard performs both uphill and downhill. Understanding the different profiles helps you choose a board that matches your riding style and terrain.
Full Camber
A full camber board arches upward in the middle, with the contact points at the tip and tail touching the snow. In ride mode, full camber provides excellent edge hold, powerful turns, and a “springy” feel that launches you out of turns. However, in the backcountry, full camber can be unforgiving in variable snow and less forgiving if your technique is not perfect. Full camber splitboards are the choice of experienced riders who prioritize downhill performance and ride primarily on firm snow.
Full Rocker (Reverse Camber)
A full rocker board curves upward from the center, with only the middle of the base touching the snow. Rocker provides maximum float in powder, is very forgiving of technique errors, and is easy to press and butter. However, it offers less edge hold on firm snow and can feel “washy” at speed. Full rocker splitboards are popular among powder-focused riders who prioritize float over edge hold.
Hybrid Profiles
Most modern splitboards use hybrid camber profiles that combine elements of both camber and rocker. The most common hybrids include:
- Camber-Rocker-Camber: Camber underfoot for edge hold, rocker in the nose and tail for float. This is the most popular splitboard profile because it provides the best of both worlds: responsive turning on firm snow and effortless float in powder.
- Rocker-Camber-Rocker: Rocker in the nose and tail with camber between the bindings. This provides good float while maintaining edge hold. It is slightly less aggressive than camber-rocker-camber.
- 3D/Status profiles: Some manufacturers use 3D shaping in the nose and tail (curving upward from the base) combined with traditional camber between the feet. This provides maximum float with excellent edge hold.
How Camber Affects Uphill Performance
The camber profile also affects how the board performs in tour mode. A cambered board will flex differently when split in half, and the base contact with the snow changes. Most riders find that rocker or hybrid profiles provide slightly better skin traction because the larger flat base area increases the skin’s contact with the snow. Full camber splitboards can be slightly more difficult to kick-turn on flat terrain because the tip and tail may drag.
Splitboard Brands and Manufacturers
The splitboard market has grown enormously since the early days. Today, nearly every major snowboard manufacturer produces at least one splitboard model. Here is an overview of the major brands and what they offer:
Jones Snowboards
Founded by big mountain legend Jeremy Jones, Jones Snowboards is the most influential splitboard manufacturer in the world. The company’s splitboard lineup includes the Frontier (all-terrain), the Solution (aggressive freeride), the Explorer (versatile all-mountain), and the Mind Expander (powder-focused with a unique surf-inspired shape). Jones splitboards are known for their exceptional downhill performance, innovative shapes, and premium construction. The company also produces its own climbing skins and splitboard-specific hardware.
Spark R&D
Spark R&D is a splitboard-only company based in Salt Lake City, Utah. They do not make boards—instead, they specialize exclusively in splitboard hardware, including the industry-leading Arc and Surge binding systems. Spark R&D bindings are widely considered the gold standard for splitboard-specific bindings. Their precision engineering, lightweight construction, and smooth transitions set them apart from every competitor. If you are serious about splitboarding, Spark R&D hardware is worth the investment.
Voile
Voile is the company that first brought splitboarding to the mainstream. They manufacture both splitboards and touring hardware, and their Light Rail binding system remains a popular budget-friendly option. Voile splitboards are known for their durability, versatility, and straightforward design. They are not the lightest or the most innovative, but they are reliable and proven.
Burton
Burton, the world’s largest snowboard manufacturer, entered the splitboard market with their Kimoto and Splish models. Burton splitboards use their proprietary Karakoram hardware and are designed to integrate seamlessly with Burton’s resort binding ecosystem. The advantage of a Burton splitboard is the wide range of accessories and the global support network. The disadvantage is that Burton splitboards tend to be heavier and more expensive than specialist brands.
K2
K2 offers several splitboard models, including the popular Excavator and Aspect series. K2 splitboards are known for their accessibility—they are reasonably priced, well-constructed, and available in a wide range of sizes. K2 also produces the Standard Split and Farout Split, which cater to different riding styles.
Amplid
Amplid is a German manufacturer known for pushing the boundaries of splitboard design. Their Surfreq and Pantera models feature innovative construction techniques, including carbon stringers and honeycomb cores, that reduce weight while maintaining stiffness. Amplid splitboards are premium-priced but offer exceptional performance for riders who demand the best.
Capita
Capita’s Spring Break splitboard series offers a range of shapes designed for specific conditions: the Spring Break Powder Racer for deep powder, the Spring Break Storm Chaser for variable conditions, and the Spring Break Split for all-terrain versatility. Capita splitboards are known for their playful feel and creative shapes.
Rossignol
Rossignol’s splitboard lineup includes the Sawbird and Afterclimb series. Rossignol splitboards are well-priced and offer solid all-around performance. They are a good choice for riders who want to try splitboarding without making a massive financial commitment.
Splitboard Weight: Why It Matters
Weight is one of the most discussed topics in splitboarding, and for good reason. Every gram you carry uphill costs you energy. Over the course of a full day of touring—climbing 3,000-5,000 vertical feet over 4-6 hours—small weight differences add up significantly.
Where the Weight Is
The typical splitboard setup weighs between 6 and 9 kilograms (13-20 pounds) total, distributed as follows:
- Board: 3.0-4.5 kg (6.5-10 lbs) — The board itself is the heaviest single component. Weight varies based on size, construction, and materials. Carbon-constructed boards are the lightest.
- Bindings: 1.2-2.5 kg (2.6-5.5 lbs) — Splitboard-specific bindings range from ultra-light (Spark R&D Arc at ~730g per binding) to heavier hybrid systems (Union Expedition at ~1,100g per binding).
- Skins: 0.4-0.7 kg (0.9-1.5 lbs) — Skins are relatively light, but they add bulk.
- Boots: 1.5-2.5 kg (3.3-5.5 lbs) — Splitboard-specific boots can save 200-400g per pair compared to resort boots.
- Poles: 0.3-0.5 kg (0.7-1.1 lbs) — Carbon poles are lighter than aluminum.
Lightweight vs. Durable: The Trade-Off
The quest for lighter gear always involves trade-offs. Carbon-constructed boards are lighter but more expensive and less durable in rock impacts. Ultralight bindings sacrifice some downhill stiffness for weight savings. Thin-soled boots are lighter but offer less protection and warmth.
For most recreational splitboarders, a setup in the 6.5-7.5 kg range provides the best balance of weight, performance, and durability. Only the most weight-conscious riders (who tour 100+ days per year or are preparing for multi-day expeditions) should consider the ultra-light end of the spectrum.
Backcountry Touring Techniques
Efficient uphill travel is the skill that separates enjoyable splitboarding from exhausting suffering. The basics are simple—walk uphill on your board halves with skins attached—but mastering the technique requires attention to body position, stride mechanics, and terrain management.
The Gliding Stride
The splitboard stride is similar to a cross-country skiing stride. Push off one foot while gliding forward on the other, then transfer your weight and repeat. The key is to keep your weight centered over the board half at all times, maintaining full skin contact with the snow. Leaning too far forward or backward reduces traction and wastes energy.
On flat terrain, use a long, smooth stride with minimal heel lift. On moderate inclines, shorten your stride and increase your cadence. On steep terrain, use a “herringbone” pattern (spreading the board halves into a V-shape with the tips apart and the tails together) for maximum traction. The herringbone is less efficient than the gliding stride but prevents backward sliding on steep slopes.
Pace Management
One of the most common mistakes for new splitboarders is starting too fast. The excitement of a backcountry day, combined with fresh snow and good conditions, can push you to exert yourself early. But backcountry touring is a marathon, not a sprint. If you reach the first ridge exhausted and drenched in sweat, you have two problems: you still have thousands of vertical feet to climb, and your wet clothing will freeze when you stop moving, leading to hypothermia risk.
A good rule: maintain a pace where you can hold a conversation. If you are breathing too hard to talk, slow down. The mountains will still be there in an hour. Your energy will not.
Route Finding and Navigation
The backcountry has no marked trails, no signs, and no trail maps. Route finding is a critical skill that improves with experience. Start with simple, low-angle terrain in areas with clear landmarks (ridgelines, drainages, treelines). As your skills improve, you can tackle more complex terrain with multiple route options.
Essential navigation tools include:
- Topographic maps: USGS or CalTopo maps printed on waterproof paper or loaded on a GPS device. Topo maps show contour lines that reveal terrain steepness, drainage patterns, and route options.
- GPS device or phone app: Apps like CalTopo, Gaia GPS, and Avenza Maps provide detailed backcountry maps with GPS tracking. Always carry a backup battery and a waterproof case.
- Compass: A simple compass is the ultimate backup when electronics fail. Learn to read a topo map with a compass before venturing into unfamiliar terrain.
- Local knowledge: Talk to local riders, visit local shops, and check online forums for route recommendations. The most valuable navigation tool is local knowledge about snow conditions, approach routes, and terrain hazards.
Weather and Conditions: Reading the Backcountry
Unlike resorts, the backcountry offers no weather updates, no snow reports, and no grooming. You must read the conditions yourself, interpret the weather, and make decisions based on what you observe.
Reading Snow Conditions
The snowpack in the backcountry varies dramatically from one aspect (direction a slope faces) to another. North-facing slopes tend to hold cold, stable snow; south-facing slopes warm up in the sun and can develop wet avalanche conditions. Wind-loaded slopes (leeward of prevailing winds) accumulate deep, unstable wind slabs; wind-scoured slopes are often scoured down to ice or hardpack.
Before committing to a route, observe the snowpack for signs of instability: recent avalanche activity (cracks shooting out from your board, “whumpfing” sounds as the snow collapses, heavy slab layers sitting on weak faceted snow). These are red flags that indicate dangerous conditions.
Temperature and Wind
Temperature affects both snow conditions and your personal safety. In extreme cold (below minus 15 degrees Fahrenheit), your equipment becomes brittle, your adhesive skins may lose grip, and your extremities are at risk of frostbite. In warm conditions (above freezing), the snow becomes wet and heavy, increasing avalanche risk and reducing glide efficiency.
Wind is the most underrated hazard in the backcountry. Wind chill can make a 20-degree day feel like minus 20, and sustained winds make it nearly impossible to maintain balance on exposed ridgelines. Always check wind forecasts before heading out, and choose routes that minimize exposure to strong winds.
Visibility and Whiteouts
Whiteout conditions—when snow, clouds, and flat light eliminate all visual reference points—are extremely dangerous in the backcountry. In a whiteout, you cannot see terrain features, slope angles, or obstacles. Navigation becomes purely GPS-based, and even experienced riders can become disoriented within minutes.
If you encounter a whiteout, stop. Find a safe location (below treeline if possible, away from avalanche terrain), wait for conditions to improve, and if necessary, retreat the way you came. Pushing through a whiteout is one of the leading causes of backcountry accidents.
Physical Fitness for Splitboarding
Splitboarding is physically demanding. Climbing 3,000-5,000 vertical feet on a splitboard is comparable to running a half-marathon in terms of energy expenditure. Riders who are not physically fit will struggle to enjoy the uphill and may not have enough energy for safe decision-making during the descent.
Cardiovascular Fitness
The most important fitness component for splitboarding is cardiovascular endurance. You need a strong aerobic base to sustain 4-6 hours of moderate-intensity effort at altitude. Activities that build this base include:
- Running or jogging: 3-4 sessions per week, building to 30-60 minutes per session.
- Cycling: Excellent low-impact cardio that builds leg endurance.
- Stair climbing or hiking: The most specific training for splitboarding because it mimics the uphill motion. Hike with a loaded backpack for added specificity.
- Rowing: Builds both cardiovascular fitness and upper body strength for pole use.
Strength Training
While cardio is king, strength training supports your splitboarding performance and reduces injury risk. Focus on:
- Leg strength: Squats, lunges, and step-ups build the quadriceps and glutes that power your uphill stride.
- Core strength: Planks, dead bugs, and pallof presses build the core stability needed for balance on variable terrain.
- Upper body: Rows, pull-ups, and shoulder presses support pole use and pack carrying.
- Balance and proprioception: Single-leg exercises (single-leg deadlifts, single-leg squats) improve balance on uneven terrain.
Altitude Acclimatization
Many of the best splitboard terrain is at high altitude (8,000-14,000 feet / 2,400-4,200 meters). Altitude reduces your aerobic capacity by 10-30%, meaning you will climb slower and tire faster than at sea level. If you live at low altitude and plan to splitboard at high altitude, allow 1-2 days for acclimatization before attempting strenuous tours.
What to Wear: Splitboard Layering
Splitboarding is a high-output aerobic activity followed by a cold descent. Layering is key. You do not want thick insulation while climbing; you will overheat. Breathability is king.
- Pants: Look for baggy snowboard pants with large vents (zippers) to dump heat.
- Gloves: Many splitboarders bring two pairs: thin gloves for the uphill and warm mittens for the downhill. See our debate on mittens vs gloves.
- Packs: You need a specialized backpack to carry your shovel, probe, and poles. Check our list of best snowboard bags for backcountry specific options.
The Layering System: A Detailed Breakdown
A proper splitboarding layering system consists of four layers, each serving a specific purpose:
Base Layer (Next to Skin)
The base layer manages moisture by wicking sweat away from your skin. Avoid cotton at all costs—it absorbs moisture, loses its insulating properties when wet, and takes forever to dry. Merino wool or synthetic (polyester, nylon) materials are the standard. Merino wool is naturally odor-resistant and regulates temperature better than synthetics, but it is more expensive and less durable. Synthetics are cheaper, more durable, and dry faster. Many riders use a merino-synthetic blend for the best of both worlds.
Mid Layer (Insulation)
The mid layer provides insulation. For splitboarding, keep this thin—a lightweight fleece or a thin synthetic insulated jacket is sufficient. You generate significant heat while climbing, and a thick mid layer will cause you to sweat excessively. Some riders skip the mid layer entirely during the uphill and add it only for the descent.
Outer Layer (Shell)
The outer layer is your protection from wind and precipitation. A lightweight, waterproof, breathable shell jacket and pants are essential. Look for fabrics with high breathability ratings (10,000-20,000g/m²/24hr or higher) and large pit zips for ventilation. GORE-TEX is the gold standard, but there are many excellent proprietary fabrics (eVent, Dermizax, NeoShell) that offer comparable performance at lower prices.
Insulation Layer (Summit or Descent)
Carry a lightweight insulated jacket (down or synthetic) in your pack for the summit. When you stop climbing, your body temperature drops rapidly, and you need to add insulation before you start shivering. Down jackets are lighter and more compressible but lose their insulating properties when wet; synthetic insulation is heavier but maintains warmth even when damp. For backcountry use where weight matters, a high-quality 800-fill down jacket with a waterproof shell is the best choice.
Sun Protection at Altitude
At high altitude, UV radiation is significantly more intense than at sea level. The snow reflects up to 80% of UV rays, doubling your exposure. Sunburn is a constant threat, even on cloudy days. Carry a high-SPF sunscreen (50+), apply it generously to all exposed skin, and reapply every two hours. Wear a lightweight neck gaiter or balaclava to protect your face, and consider glacier glasses or sunglasses with side shields for eye protection.
Splitboard Maintenance: Caring for Two Halves
A splitboard has twice the edges of a normal board. That means you have four edges to de-burr and sharpen. Understanding how to remove rust from snowboard edges is crucial because rusty inside edges will not join together cleanly.
Waxing is also different. You need to be careful not to gum up the clips with wax. Review our guide on how to wax a snowboard at home, but pay special attention to the split line. Also, since you are earning your turns, you want maximum glide. A well-maintained sintered base will save you energy on the flats.
Waxing for Maximum Glide
Waxing a splitboard is slightly different from waxing a resort board. The primary difference is that you must avoid getting wax on the clips, hooks, and touring bracket mounting points. Wax in these areas can gum up the mechanisms and make transitions difficult. Apply wax to the base between the edges, and use a small brush to clean any excess from the clip area while the wax is still warm.
For cold conditions (below 20 degrees Fahrenheit / minus 7 degrees Celsius), use a cold-temperature wax that remains hard and fast. For warm conditions (above 32 degrees Fahrenheit / 0 degrees Celsius), use a warm wax that provides maximum glide in wet snow. For all-around use, a universal wax works well in most conditions. Many experienced riders apply a base layer of temperature-specific wax and then top it with a universal or all-temperature wax for versatility.
Because splitboarders expend energy on the uphill, maximizing glide is a priority. A well-waxed board glides 20-30% better than a dry base, which translates to less energy per stride and more energy for the descent. Wax before every tour day for maximum performance.
Edge Maintenance
The inside edges of a splitboard (the edges along the split line) require special attention. These edges must align perfectly when the board is assembled, and any burrs or rust will prevent a clean connection. After each tour, inspect the inside edges for damage. Use a fine file or gummy stone to remove burrs and light rust. For heavy rust, use a coarser file followed by a fine stone to restore the edge.
The outside edges (the same edges you would tune on a resort board) should be sharpened periodically using the same technique as a normal board. However, many splitboard riders keep their outside edges slightly detuned (less sharp) to prevent the edges from catching unexpectedly in variable backcountry snow. A slightly detuned edge is more forgiving and reduces the likelihood of catching an edge on hidden rocks or ice patches.
Hardware Inspection
Before each tour, inspect your touring hardware for signs of wear or damage. Check the touring bracket bolts for tightness, inspect the clips for cracks or deformation, and verify that the pucks are securely mounted. Replace any worn or damaged components immediately. A failed clip in the backcountry can end your day or, worse, cause a dangerous separation during the descent.
Splitboard Packing List: What to Bring
Having the right gear in your pack can mean the difference between a great day and a survival situation. Here is a comprehensive packing list for a typical backcountry splitboard day:
- Avalanche transceiver (worn on body)
- Avalanche probe (in pack)
- Avalanche shovel (in pack)
- Backcountry first aid kit
- Emergency bivy or space blanket
- Headlamp with extra batteries
- Whistle
- Fire starter (lighter)
- Skins (pre-attached or in skin bag)
- Collapsible poles
- Skin wax / skin glue cleaner
- Multi-tool for hardware adjustments
- Insulated jacket (carried in pack)
- Extra mid layer (fleece or thin puffy)
- Backup gloves / mittens
- Goggles and sunglasses
- Balaclava or neck gaiter
- Sunscreen (SPF 50+)
- Helmet (carried on pack during ascent)
- Water (minimum 1.5 liters, more for long tours)
- High-energy snacks (bars, nuts, dried fruit)
- Thermos with warm drink (optional but morale-boosting)
- Topographic map (waterproof)
- GPS device or phone with backcountry maps
- Compass
- Satellite communicator (Garmin inReach or similar)
- Phone (waterproof case)
- Backup battery
Backcountry Etiquette and Leave No Trace
The backcountry is a shared resource. Responsible splitboarders follow Leave No Trace principles and respect other backcountry users:
- Pack out all trash: This includes food wrappers, used skin glue, and any other waste. If you carried it in, carry it out.
- Respect wildlife: Winter is a stressful time for animals. Give wildlife a wide berth and avoid areas where animals are resting or feeding.
- Minimize impact: Stick to established skin tracks when possible. Cutting new tracks through sensitive vegetation damages the habitat.
- Respect other users: Share the skin track with skiers and snowshoers. Yield to uphill travelers on narrow tracks. Communicate your presence and intentions clearly.
- Control your dogs: If you bring a dog, keep it under control and pick up after it. Dogs can trigger avalanches and disturb wildlife.
- Respect private property: Many backcountry access points cross private land. Respect posted boundaries and do not trespass.
Splitboarding in Different Regions
Splitboarding terrain varies dramatically by region. Here is an overview of what to expect in some of the world’s most popular splitboarding destinations:
Western North America (Colorado, Utah, Wyoming, British Columbia, Alaska)
The western US and Canada offer world-class splitboarding terrain. Colorado’s San Juan Mountains feature steep, technical terrain with deep powder. Utah’s Wasatch Range provides easy access to incredible backcountry from Salt Lake City. Wyoming’s Tetons offer alpine terrain with significant avalanche risk. British Columbia is the spiritual home of heli- and cat-snowboarding, with vast wilderness areas accessible only by human power. Alaska offers the most extreme terrain on the planet, with massive vertical drops, glacier travel, and remote wilderness requiring self-sufficiency.
The European Alps
The Alps offer a unique splitboarding experience with extensive hut systems that allow multi-day tours without carrying camping gear. The European approach to backcountry is more established than in North America, with well-maintained skin tracks, marked routes, and alpine huts serving meals and providing beds. However, the Alps also have significant avalanche risk, particularly in the French, Swiss, and Italian ranges. Always check the local avalanche bulletin (available from national weather services) and carry full rescue gear.
Japan
Japan’s backcountry scene has exploded in recent years, driven by the country’s legendary powder snow. Hokkaido (particularly the Niseko and Furano regions) receives some of the deepest, driest powder on Earth. Splitboarding in Japan offers a unique cultural experience combined with incredible snow quality. However, many popular areas require specific permits, and avalanche education standards vary.
New Zealand
New Zealand offers excellent splitboarding terrain on both the North and South Islands. The Southern Alps provide steep, alpine terrain with reliable snowfall. New Zealand’s backcountry community is welcoming and well-organized, with excellent avalanche education programs through Mountain Safety Council.
Cost Breakdown: How Much Does Splitboarding Cost?
Splitboarding is an investment. Here is a realistic cost breakdown for a complete new setup:
| Item | Budget Option | Mid-Range | Premium |
|---|---|---|---|
| Splitboard | $500-700 | $700-1,000 | $1,000-1,500 |
| Bindings | $300-500 | $500-700 | $700-900 |
| Climbing Skins | $120-160 | $160-200 | $200-250 |
| Poles | $50-80 | $80-150 | $150-250 |
| Beacon | $250-350 | $350-450 | $450-600 |
| Probe | $30-50 | $50-80 | $80-120 |
| Shovel | $30-50 | $50-70 | $70-100 |
| Backpack | $100-200 | $200-350 | $350-800 (with airbag) |
| Avalanche Course | $400-600 (AIARE 1) | ||
| TOTAL | ~$1,380 | ~$2,160 | ~$4,520+ |
These costs do not include splitboard boots ($300-600), clothing ($200-500 for a complete layering system), or ongoing costs like wax, skin glue, and avalanche course refresher fees. The total investment for a first-time splitboarder is realistically $2,000-5,000, depending on the quality of equipment chosen.
If you are not ready to invest in a full setup, many mountain towns offer splitboard rental packages that include the board, bindings, skins, poles, and sometimes even a beacon, probe, and shovel. Rental rates typically range from $75-150 per day, making it possible to try splitboarding before committing to a purchase.
Common Splitboard Problems and Troubleshooting
Even with the best equipment, splitboarders encounter problems. Here are the most common issues and how to resolve them:
Skins Not Sticking
Skin adhesion problems are the most common frustration in splitboarding. If your skins are not sticking to the base, the most likely causes are: cold temperature (glue stiffens in extreme cold—warm the skins inside your jacket before applying), dirty base (wax residue, dirt, and pine needles reduce adhesion—clean the base with skin solvent), or old adhesive (glue degrades over time—re-glue or replace the skins).
Clips Not Engaging
If your board halves will not clip together tightly, check for snow packed in the clip mechanism. Brush it out with a gloved hand or use a multi-tool to clear the mechanism. If the clips still will not engage, check for bent or damaged hardware. A bent clip can sometimes be straightened in the field with pliers, but a cracked clip must be replaced before the next descent.
Binding Wobble
If your bindings feel loose or wobbly in ride mode, the pucks may need tightening. Use a multi-tool to tighten the puck mounting screws. If the pucks are tight but the binding still wobbles, check for wear in the binding-to-puck interface. Some systems develop play over time and may need new inserts or adapter plates.
Skin Snow Buildup
In warm conditions, snow can clump on the bottom of your skins, forming heavy balls that make each step harder. To prevent this, apply skin wax (a spray-on wax designed specifically for climbing skins) before your tour. Skin wax reduces snow adhesion and keeps the base of the skin clean. Reapply as needed throughout the day.
Touring Bracket Play
If your touring bracket develops a wobble, the pivot bolt may need tightening or the bushings may need replacement. Carry a spare set of bushings and a multi-tool for field repairs. A worn touring bracket increases fatigue because each step wastes energy on lateral movement instead of forward motion.
Progression: From Resort Snowboarder to Backcountry Rider
Transitioning from resort snowboarding to backcountry splitboarding is a journey that requires new skills, new knowledge, and a new mindset. Here is a recommended progression path:
Phase 1: Build Your Resort Skills
Before venturing into the backcountry, you should be a confident intermediate-to-advanced resort rider. You should be able to: ride all groomed terrain comfortably, handle variable snow conditions (crud, ice, powder), navigate steep terrain with confidence, and ride safely in trees and tight spaces. If you are still learning how to carve, master that first. The backcountry demands confident riding skills because there is no groomed terrain and no easy way down.
Phase 2: Take an Avalanche Course
Before you buy any backcountry gear, take an AIARE 1 course. This will give you the foundational knowledge of avalanche safety, terrain assessment, and companion rescue. You do not need a splitboard to take the course—instructors provide beacons, probes, and shovels. The course is as much about decision-making as it is about technical skills.
Phase 3: Rent and Practice
Rent a splitboard setup and practice the transition from tour mode to ride mode in a controlled environment (a flat, gentle slope near the resort). Practice skinning uphill on easy terrain. Practice kick turns. Practice the descent. Do this multiple times before heading into true backcountry terrain. The goal is to make the mechanical aspects of splitboarding second nature so you can focus on terrain, weather, and safety decisions.
Phase 4: Guided Tour
For your first true backcountry experience, hire a certified guide. A guide provides local knowledge, avalanche expertise, and rescue skills that dramatically reduce your risk. Many guiding companies offer “intro to backcountry” packages that include gear, instruction, and a safe introduction to touring and downhill riding in avalanche terrain. Expect to pay $300-600 per person for a full-day guided tour.
Phase 5: Independent Backcountry Riding
After several guided tours and continued practice, you are ready to venture into the backcountry independently—but only with experienced partners who have strong avalanche education and rescue skills. Start with low-angle, low-consequence terrain and gradually increase the difficulty as your skills and judgment develop.
Splitboard Repair Kit: Field Maintenance
Carrying a compact repair kit for backcountry emergencies is essential. Here is what your kit should contain:
- Multi-tool: A compact multi-tool (like the Leatherman Signal or Victorinox Swiss Tool) handles most hardware repairs in the field.
- Zip ties: Extra-strong zip ties can temporarily fix broken clips, straps, and other hardware. Carry at least five in various sizes.
- Duct tape: Wrap a few feet of duct tape around your multi-tool or pole shaft. Duct tape fixes everything from delaminating bases to torn gloves.
- Skin repair tape: Specialized tape for repairing tears or holes in climbing skins.
- Replacement clips and screws: Carry a spare set of nose/tail clips and the screws to mount them. These are small, lightweight, and can save your day.
- P-Tex candle: A small P-Tex stick for base repairs. If you gouge your base on a rock, a quick melt-in repair can prevent water damage until you can get a proper repair at home.
- File or gummy stone: For removing burrs from edges in the field. A burr on your inside edge can prevent the board halves from joining properly.
Flying with a Splitboard
One of the advantages of a splitboard over a solid snowboard for travel is that the two halves are shorter and narrower, making them easier to fit in standard luggage. Many splitboarders pack their board halves in a padded board bag along with their boots and bindings, checking it as standard luggage. This avoids the oversized/overweight fees that solid snowboards often incur.
However, there are important considerations for flying with a splitboard:
- Declare your climbing skins: Climbing skins contain adhesive that may appear suspicious to airport security scanners. Inform the TSA agent that you are carrying climbing skins (show them if necessary) to avoid delays.
- Pack bindings separately: Remove the bindings from the board and pack them in your carry-on bag. This reduces the weight of the checked bag and protects the most expensive component from damage.
- Protect your edges: Wrap the inside edges of the board halves in bubble wrap or cloth to prevent them from damaging other items in the bag or being damaged themselves.
- Check weight limits: A splitboard setup with boots, bindings, and accessories can exceed standard checked bag weight limits (50 lbs / 23 kg). Weigh your bag before heading to the airport and remove non-essential items if necessary.
Splitboard Insurance and Liability
Standard travel insurance and health insurance may not cover backcountry activities. Many policies explicitly exclude “off-piste” or “backcountry” travel, which means that if you are injured while splitboarding in the backcountry, your medical costs may not be covered.
Before your first backcountry trip, check your insurance policy carefully. If backcountry travel is excluded, consider purchasing a supplemental policy from a provider that specializes in adventure sports. Organizations like the American Alpine Club and Global Rescue offer membership-based rescue and insurance services that cover backcountry travel.
In the United States, helicopter rescue is not free. A medical evacuation helicopter can cost $30,000-100,000+ depending on the location and complexity of the rescue. Having rescue insurance is not just recommended—it is essential.
The Environmental Impact of Splitboarding
Splitboarding is often marketed as an environmentally friendly alternative to resort skiing or heli-boarding, and in many ways it is. Human-powered backcountry travel produces zero emissions, requires no infrastructure (lifts, lodges, groomers), and has a minimal physical footprint on the landscape.
However, splitboarding is not without environmental impact. Increased backcountry traffic can disturb wildlife during the critical winter months. Compaction from skin tracks can damage fragile alpine vegetation. The manufacturing of snowboarding equipment involves synthetic materials, metals, and chemicals that have environmental costs.
Responsible splitboarders minimize their impact by: sticking to established skin tracks, avoiding sensitive wildlife areas, packing out all trash, choosing equipment from manufacturers with strong environmental practices, and supporting local conservation efforts.
Splitboard Waxing: A Complete Guide
Waxing is one of the most impactful maintenance activities for splitboarders. A well-waxed board glides dramatically better, which means less energy per stride on the uphill and faster, smoother turns on the downhill. Here is a complete guide to splitboard waxing:
Why Waxing Matters More for Splitboarders
Resort snowboarders can afford to ride with a dry base because chairlifts provide most of the uphill travel. Splitboarders cannot. Every stride on the uphill is powered by human energy, and a dry, unwaxed base creates significantly more friction than a waxed base. Over the course of a day with thousands of strides, the energy difference is enormous. Waxing your splitboard before every tour is not optional—it is a performance necessity.
Temperature-Specific Wax Selection
Snowboard wax is formulated for specific temperature ranges:
- Cold wax (below 20°F / -7°C): Hard wax that resists suction in very cold, dry snow. Provides maximum glide in frigid conditions.
- Warm wax (above 32°F / 0°C): Soft wax that prevents the base from becoming waterlogged in wet, heavy snow. Essential for spring touring.
- Universal wax (all temperatures): A compromise wax that performs adequately across a wide temperature range. Convenient but not optimal in extreme conditions.
- Graphite wax: Contains graphite particles that reduce static friction on hardpack and man-made snow. Useful for riders who splitboard near resort boundaries.
- Fluorinated wax: The highest-performance wax, offering maximum water repellency and glide. However, fluorinated waxes are being phased out due to environmental concerns (PFAS contamination). Check local regulations before purchasing.
Hot Wax vs. Rub-On Wax
Hot wax involves melting wax with an iron and letting it soak into the base’s pores. It provides the best glide and longest-lasting results but requires an iron, work space, and 15-30 minutes of preparation. This is the recommended method for regular splitboarders.
Rub-on wax involves rubbing a wax bar directly onto the base and buffing it in with a cork or cloth. It is faster and more portable but provides significantly less glide improvement and wears off quickly. Rub-on wax is a good option for emergency touch-ups in the backcountry but should not be your primary waxing method.
Waxing the Splitboard: Special Considerations
When waxing a splitboard, take these additional steps:
- Remove the clips and hardware: If possible, remove the nose, tail, and stabilizer clips before waxing. This prevents wax from gumming up the clip mechanisms.
- Avoid the split line: Apply wax only to the base surface between the edges. Do not wax the inside edges or the split line, as wax here will prevent the board halves from joining cleanly.
- Wax each half separately: Lay each half base-up on a waxing stand and wax as you would a normal board.
- Reinstall hardware: After scraping and buffing, reinstall the clips and verify that they engage correctly. If wax has accumulated in the clip area, clean it with a cloth and solvent.
Splitboarding for Women
Splitboarding is for everyone, and the market has responded with an increasing number of women-specific splitboard products. Women-specific splitboards are designed with narrower waists, shorter lengths, and lighter constructions that better suit the average female rider’s body proportions and weight. Popular women-specific models include the Jones Airheart Split, the Roxy XOXO Split, and the K2 Minx Split.
Women-specific splitboard boots and bindings are also available, featuring narrower lasts, lower cuff heights, and lighter-weight materials. Brands like ThirtyTwo, Deeluxe, and Spark R&D offer women-specific models that provide the same performance as men’s products in a more appropriately sized package.
Beyond equipment, women-specific backcountry education and mentorship programs have grown in recent years. Organizations like She Shred’s, Chicks Climbing and Skiing, and local women’s backcountry groups provide supportive, women-only environments for learning backcountry skills. These programs address the unique social and cultural barriers that women face in the backcountry and help build a more inclusive community.
Frequently Asked Questions About Splitboards
Can I use my regular snowboard bindings on a splitboard?
No. Splitboard bindings are specifically designed to work with splitboard touring hardware. Regular snowboard bindings cannot attach to touring brackets or splitboard pucks. You must purchase splitboard-specific bindings or a compatibility kit that adapts your existing bindings (though this is generally not recommended for performance or safety reasons).
How long do climbing skins last?
With proper care, climbing skins last 50-100 days of use before the adhesive needs reapplication or the fabric loses its grip. Factors that shorten skin life include frequent use on rocky terrain, exposure to tree sap and pine needles, improper storage (wet or dirty), and UV exposure. Re-gluing extends the life of the fabric by another season or two.
Is splitboarding harder than skiing in the backcountry?
The uphill is generally more efficient on a splitboard than on snowshoes but slightly less efficient than on backcountry skis (because skis have a wider platform and a more natural gliding stride). The downhill is a matter of personal preference and skill—some riders find splitboarding more natural because they already snowboard, while skiers may find the learning curve for splitboard descents steeper. The transition from tour mode to ride mode is typically faster on a splitboard than converting from ski mode to ski descent.
Can I rent splitboard equipment before buying?
Yes. Many mountain towns and backcountry shops offer splitboard rental packages that include the board, bindings, skins, poles, and sometimes beacon, probe, and shovel. Rental rates typically range from $75-150 per day. This is an excellent way to try splitboarding before investing in a full setup.
How many transitions per day can I expect?
A typical backcountry day involves 2-4 transitions (from tour mode to ride mode and back). Some riders who do laps (climbing and descending the same line multiple times) may do 6-10 transitions in a day. The more efficient you become at transitions, the less time you spend standing around in the cold and the more runs you can fit in.
Do I need a splitboard if I only go into the backcountry once or twice per year?
Probably not. If you only venture into the backcountry occasionally, renting splitboard equipment or using snowshoes with your existing board is more cost-effective. A full splitboard setup costs $2,000-5,000, which takes many days of use to justify. Rent for the first few times, and if you find yourself going regularly, then invest in your own setup.
What is the difference between a splitboard and a solid board?
A splitboard is cut longitudinally into two halves, with touring hardware that allows the halves to function as climbing skis. A solid board is a single, undivided piece. The splitboard’s main disadvantage is the slight loss of downhill performance due to the split line and hardware. The main advantage is human-powered uphill access without snowshoes. A solid board cannot be used for uphill travel without being carried on a backpack.
How does a splitboard feel compared to a solid board on the descent?
Modern splitboards feel about 85-95% as good as a solid board on the descent. The slight loss comes from added weight (from touring hardware), a subtle flex difference at the split line, and the mechanical connections (clips, pucks) that add a small amount of play. Premium splitboards with advanced hardware minimize this difference to the point where most riders cannot tell the difference in normal conditions. In very choppy or icy conditions, the difference is more noticeable.
Can I convert my existing snowboard into a splitboard?
Some companies offer “splitboard conversion kits” that cut an existing board in half and add touring hardware. This is significantly cheaper than buying a purpose-built splitboard ($200-400 for the conversion versus $500-1,500 for a new splitboard). However, converted boards typically perform worse than purpose-built splitboards because the original board was not designed to be split—the core profile, flex pattern, and edge alignment may not be optimal. Conversion is a reasonable option for experimenting with splitboarding on a budget, but serious riders should invest in a purpose-built splitboard.
What is the best splitboard for beginners?
Beginners should look for a mid-length (156-162cm), moderate-width splitboard with a hybrid camber profile (camber underfoot, rocker in the nose). This provides a forgiving platform that floats well in powder while maintaining edge hold on firm snow. Popular beginner-friendly options include the Jones Frontier, Voile Objective, and K2 Standard Split. Pair it with a user-friendly binding system like the Voile Light Rail or Union Expedition that simplifies transitions.
Building a Splitboard Community
One of the most rewarding aspects of splitboarding is the community. Unlike resort riding, where strangers share chairlifts but rarely connect, splitboarding fosters deep bonds. The shared experience of earning turns—suffering uphill, making critical safety decisions together, and sharing the exhilaration of an untracked descent—creates connections that last a lifetime.
Online communities like the r/Splitboarding subreddit, the Splitboard.com forums, and Facebook groups like “Splitboard Nation” offer advice, trip reports, and gear reviews. Local groups often organize group tours, beacon practice sessions, and social events. Joining a local splitboard community is one of the fastest ways to learn, improve, and stay safe.
Many mountain towns have dedicated splitboard shops that serve as community hubs. These shops offer gear demos, avalanche courses, waxing workshops, and group events. Building a relationship with your local splitboard shop connects you to the local knowledge that is invaluable for safe backcountry travel.
Is Splitboarding Right For You?
If you are frustrated by lift lines, if you want to find untracked powder, and if you are willing to put in the physical effort, splitboarding is the holy grail. It opens up a world of terrain that 99% of riders never see.
However, if you are still learning how to carve or struggling with foot pain on groomers, stick to the resort for now. Master the basics, build your fitness, and then earn your turns.
For more deep dives into the culture of earning your turns, check out Nonstop Snow’s journal on what is splitboarding.


Pingback: How Many Calories Does Snowboarding Burn?